
'93 600 Fighter project


Thread Starter
|
July 2011 ROTM
Joined: May 2010
Posts: 223
Likes: 8
From: Hampton Roads, VA
okay,
got a small update here.. but alot of pictures.
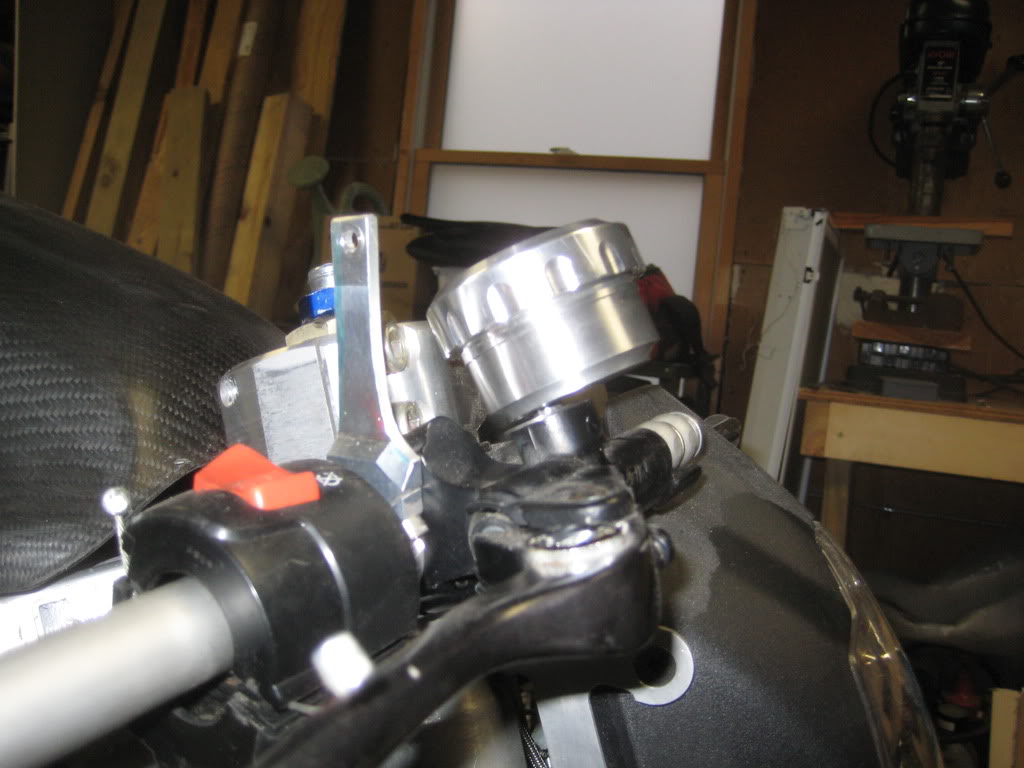
first off, SEBSPEED decided to make me unsatisfied with my brake reservoirs, so an integrated version is being finalized... to eliminate all the hoses and clamps and crap.
using the stock hose adapter as a template
IMG_2580.jpg?t=1296502613
And... there you go
IMG_2583.jpg?t=1296503309
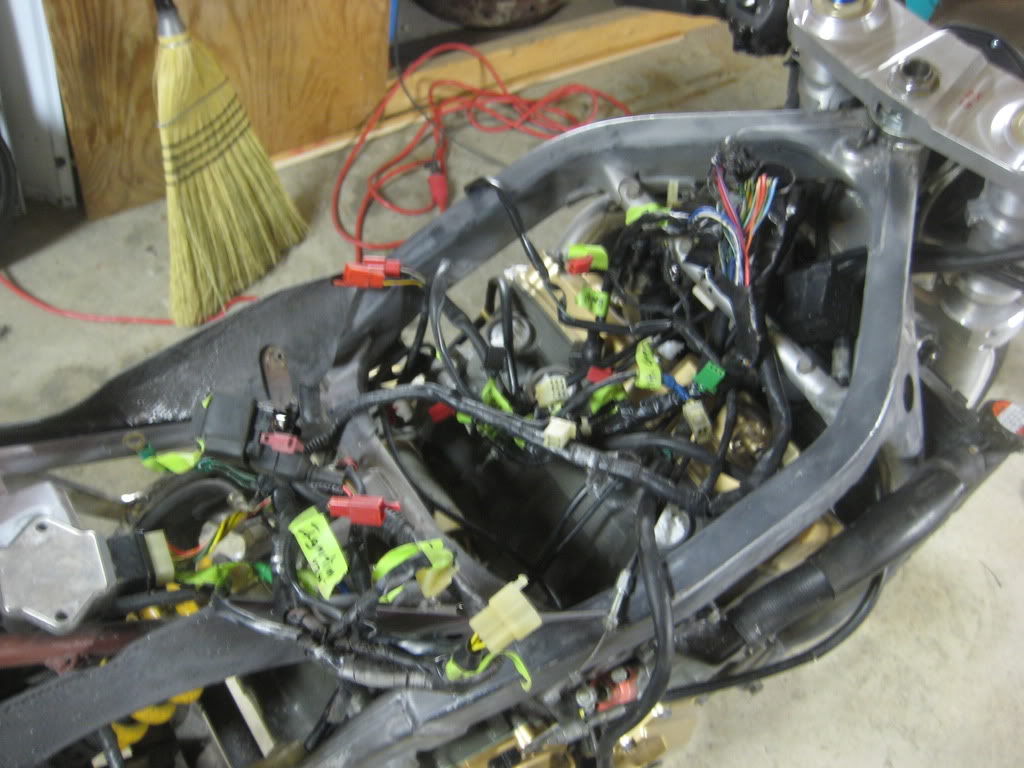
i also started playing around with the wiring..
IMG_2584.jpg?t=1296503378
and right now photobucket's website is having some script issues.. so i will wait to post the carburator update..
got a small update here.. but alot of pictures.
first off, SEBSPEED decided to make me unsatisfied with my brake reservoirs, so an integrated version is being finalized... to eliminate all the hoses and clamps and crap.
using the stock hose adapter as a template
IMG_2580.jpg?t=1296502613
And... there you go
IMG_2583.jpg?t=1296503309
i also started playing around with the wiring..
IMG_2584.jpg?t=1296503378
and right now photobucket's website is having some script issues.. so i will wait to post the carburator update..

Member
Joined: Mar 2009
Posts: 64
Likes: 1
From: I live in C.rapids, Ia
oh how i envy you. I wish I had a machine shop at my disposal again. those were the days, friend those were the days. I traded in the machine shop for the paint booth, so not to say im screwed but Im still jealous.
Thread Starter
|
July 2011 ROTM
Joined: May 2010
Posts: 223
Likes: 8
From: Hampton Roads, VA
hey that's a pretty good trade... i would trade you here in a month or so... *laughs* did you change jobs?
okay....
here we go. it was friday night... and my wife had a bunch of girls over to watch a girly movie and have tea and stuff... so, i had to go out and work in the garage all evening. i fake cried a little and got some food out of the deal... :LolLolLolLol:
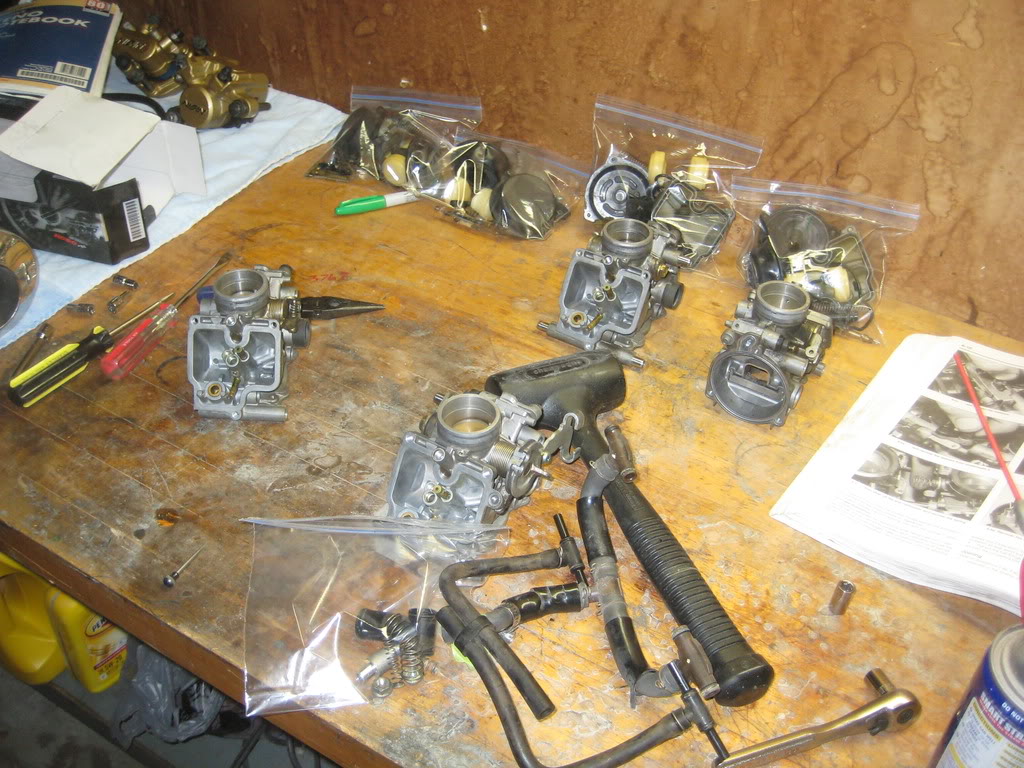
anyway... after playing around with the wiring and stuff and realizing i couldn't really do a whole lot without having the carbs in... i decided to tackle them. I have just been putting it off.
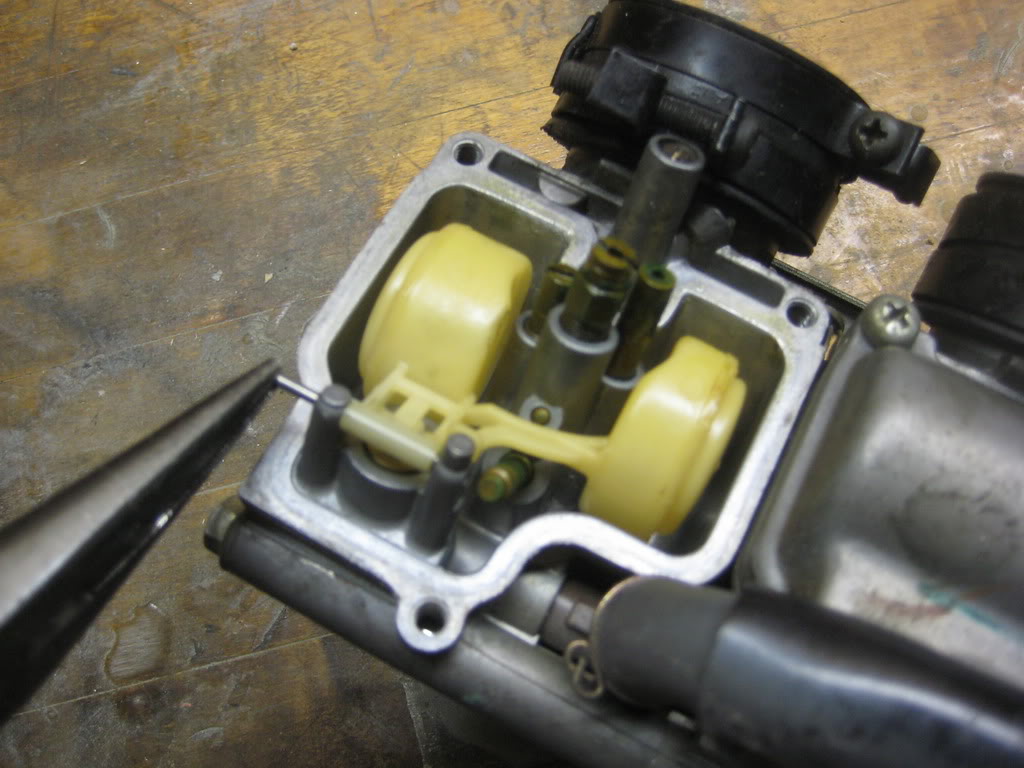
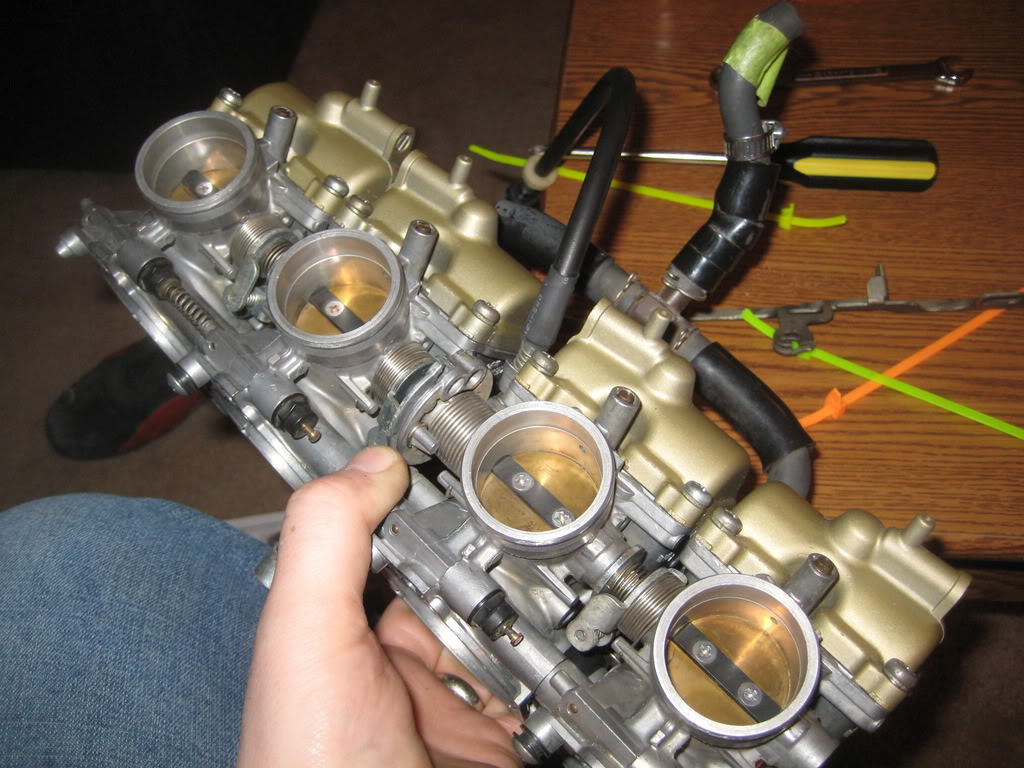
here is the intimidating beast.... i have it cornered.
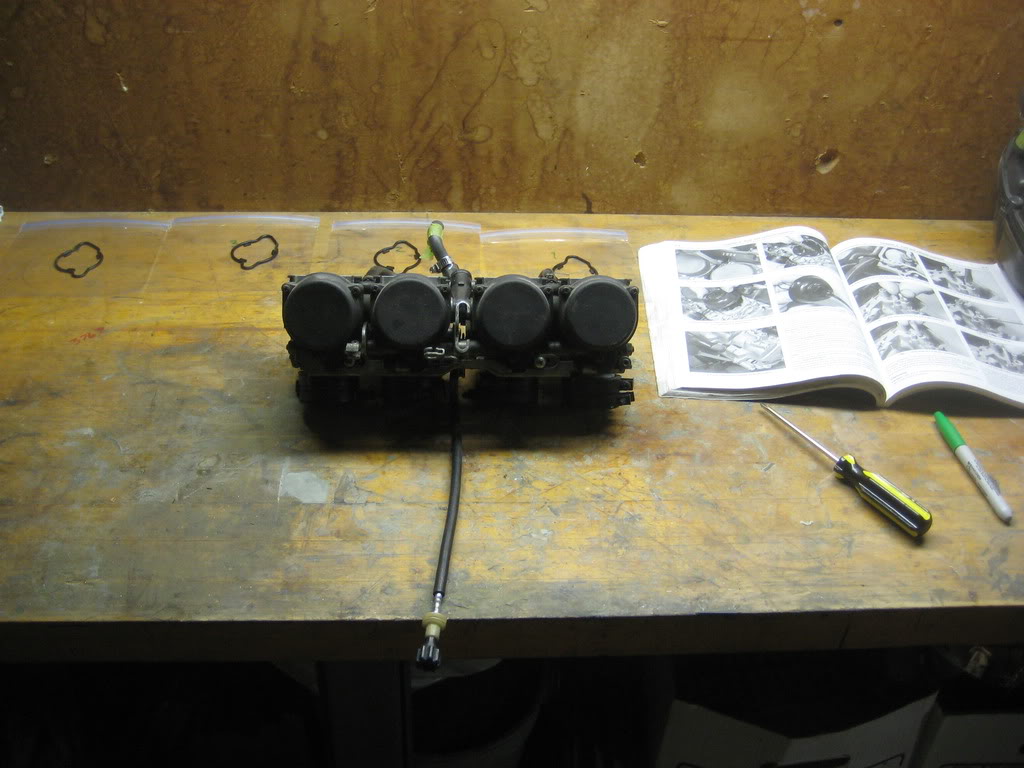
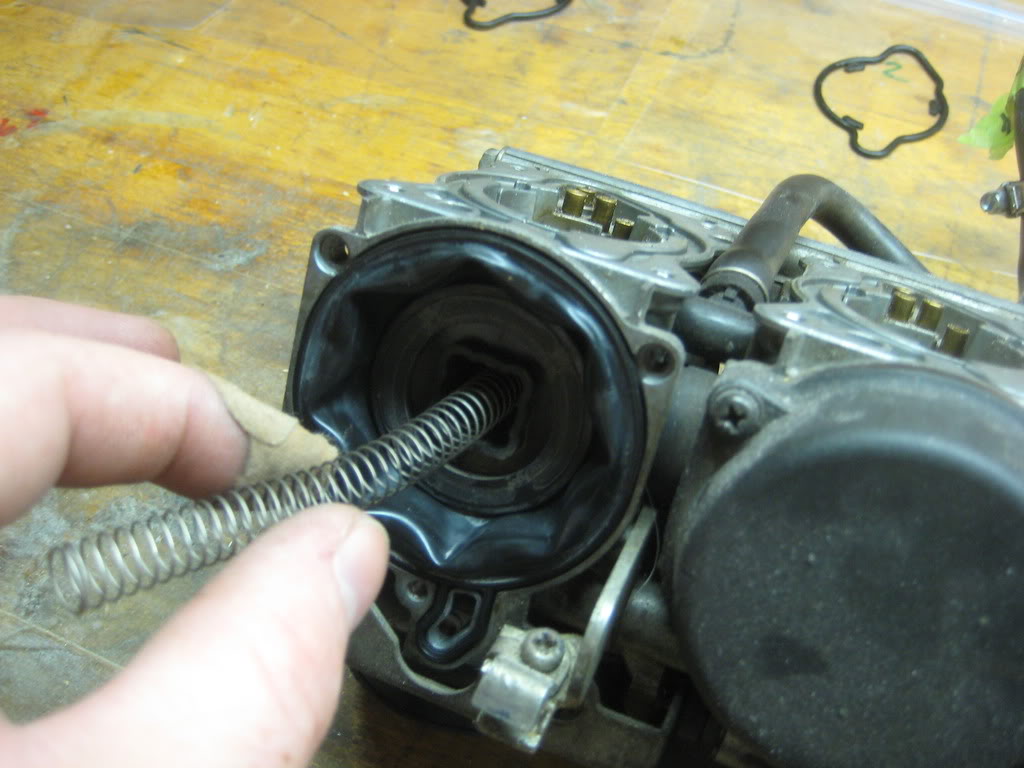
taking the cap of, and removing the spring and diaphragm. gotta be careful cause it has sat out and is pretty delicate to begin with.
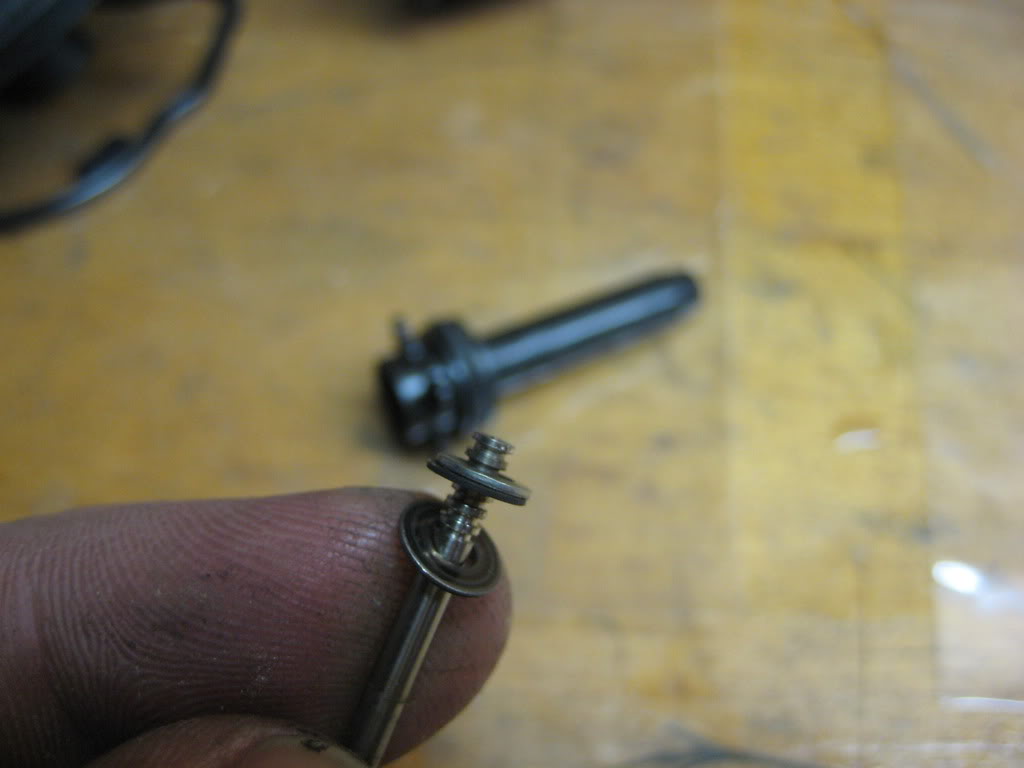
the needle and washers... gotta keep track of all the innards
is this it's bladder?
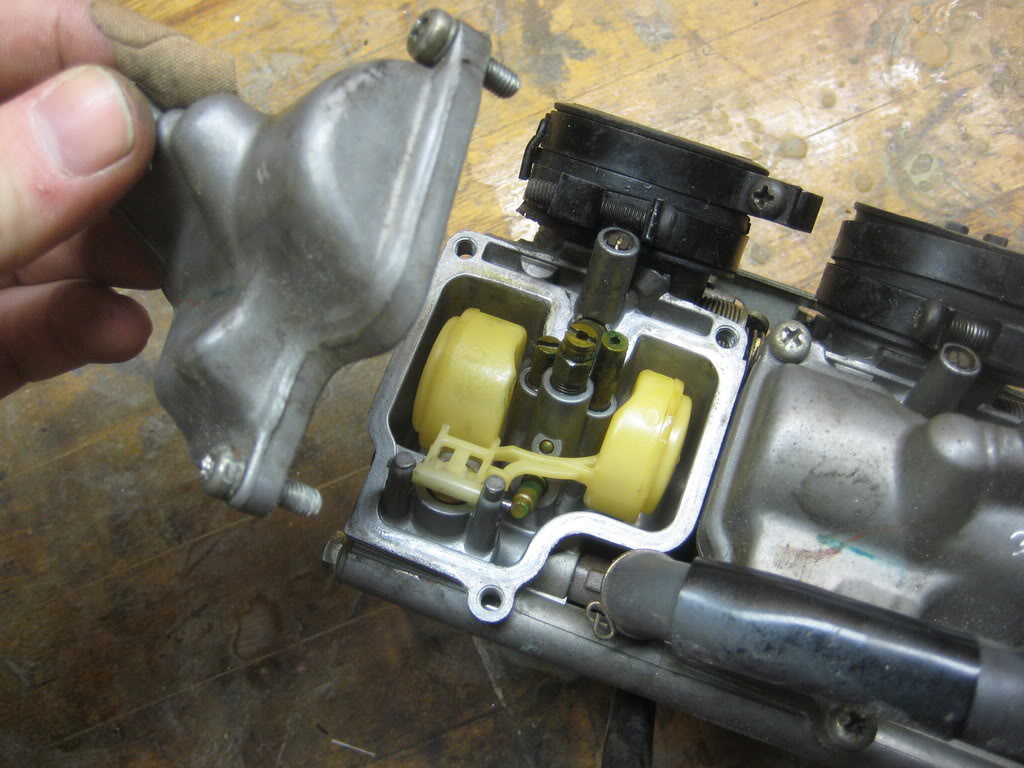
removing the float pin...
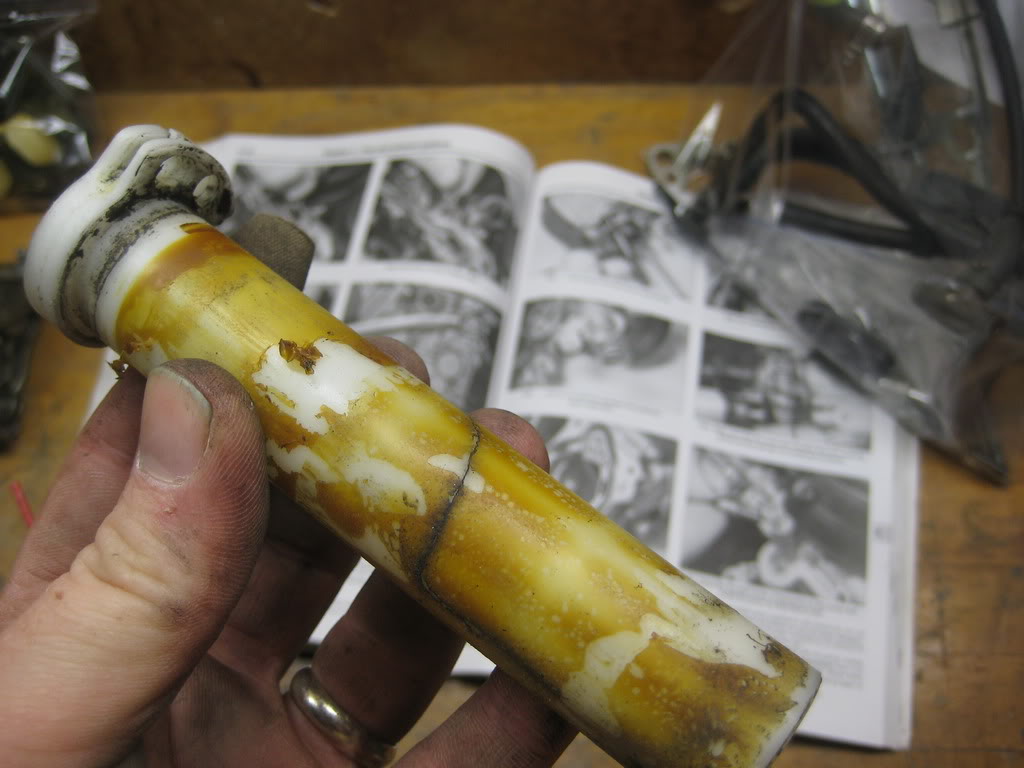
and... this is the state of the jets... corroded on top...
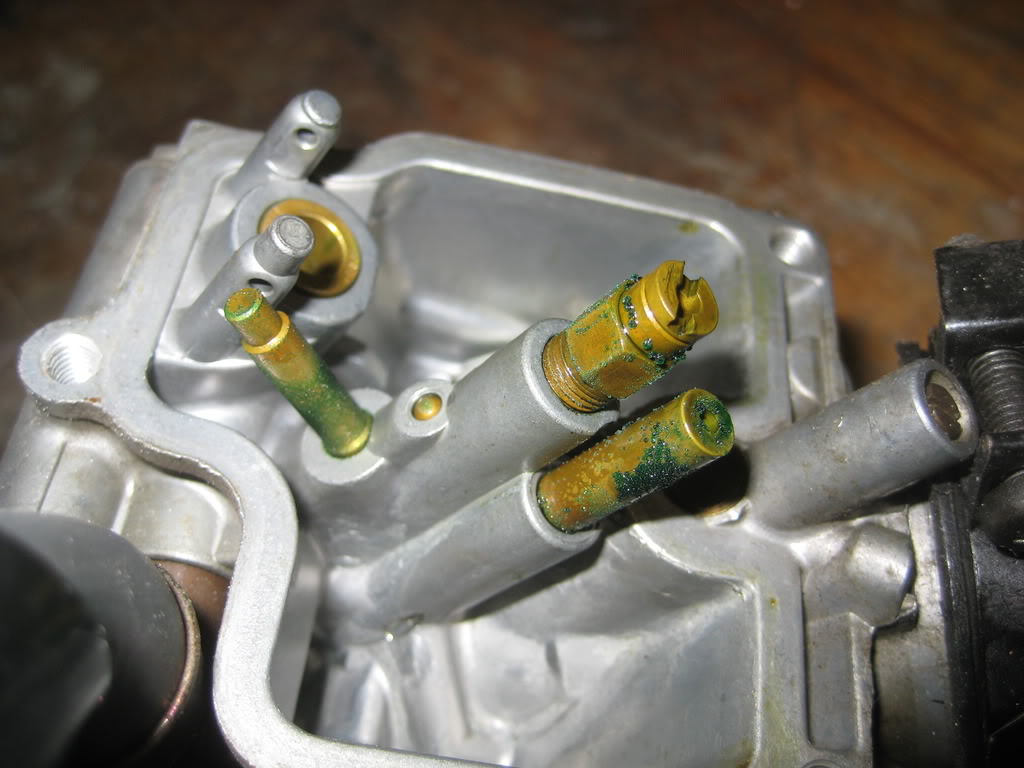
but the orifaces are pretty much clear.

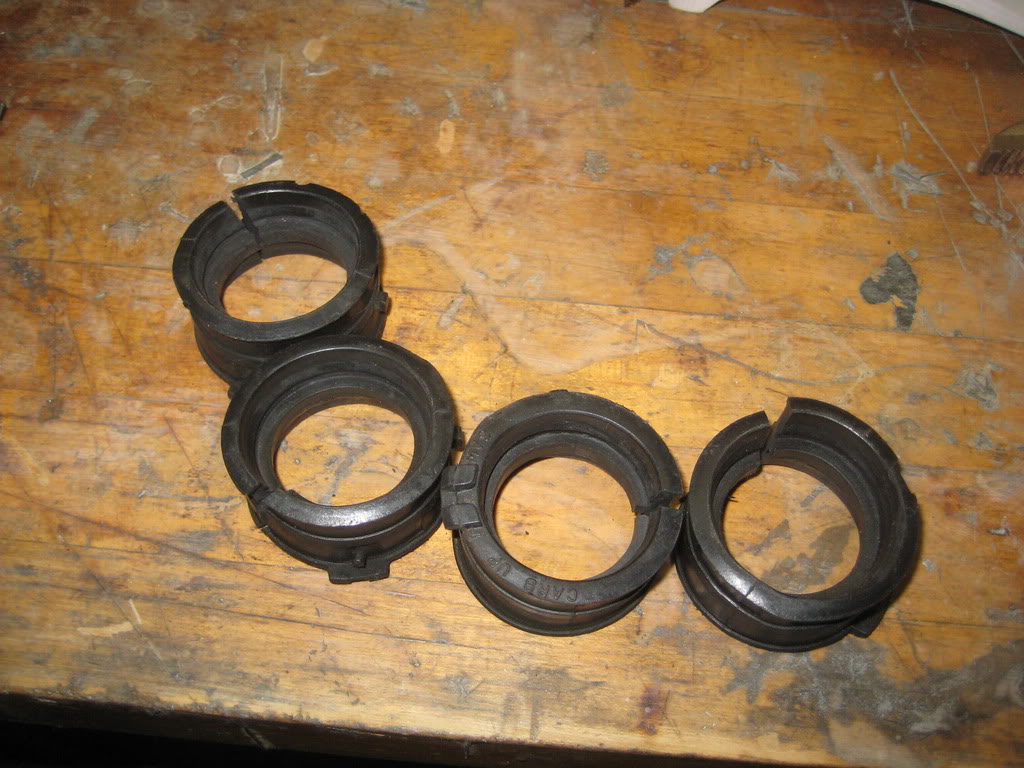
it was at this point that i decided to remove the carb boots... only to find out that they had turned into a weird rubber rock. so i had to cut them off.. new ones from Japan are in the mail.
removed all the jets and needles.
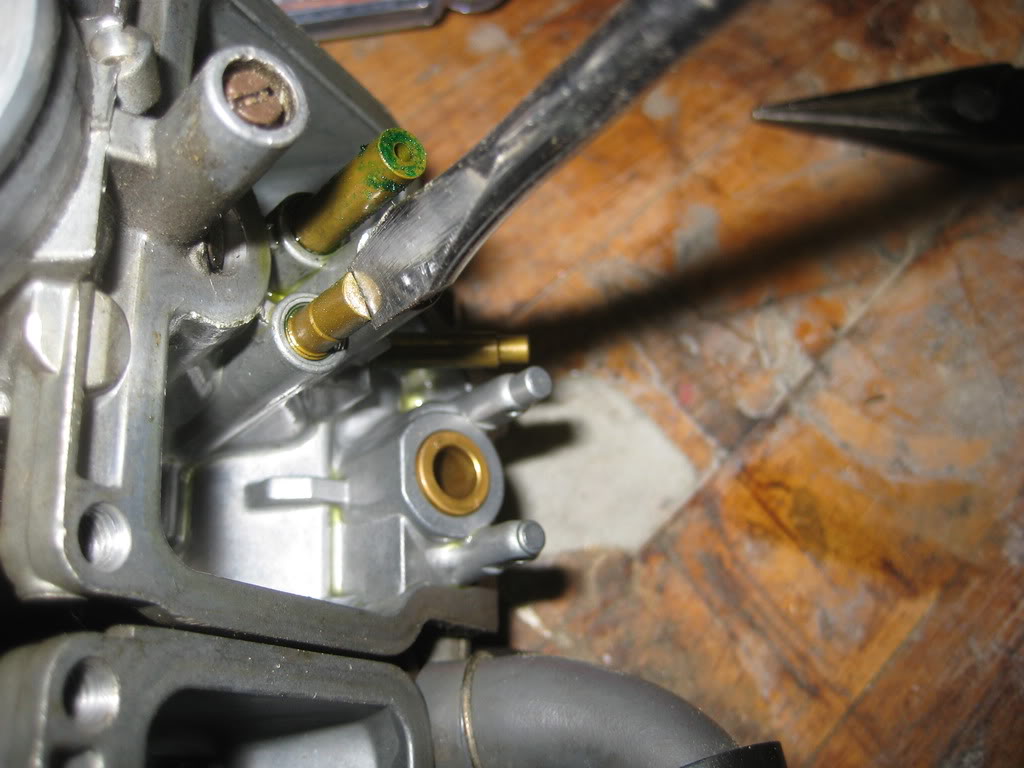
and the carbs are as stripped as you can get them without taking them apart...

but... to get them clean.. you need to take them apart. gotta keep track of everything. all the little washer o-rings and everything. plus which springs go where.
I soaked the carb bodies in pine sol overnight then scrubbed them out relally relaly good saurday morning. did the same for all the jets and needles. then blew everything out with compressed air. gonna do it one more time with carb cleaner to make sure... but i am waiting on a gasket set to put it together.
I did so a little detail work, and put the carbs back together. i also replaced all the screws (almost all of them were stripped) with socket or hex head screws.
I also found out (good timing) that the throttle tube is completely shot. so a new one of those will show up with the gasket set. now i just need the exhaust welded...
i will show sequences assembly (if you want) when i put it back together if you want.. or i will stop if you are tired of macro pictures.
thanks yall!
~Chris

Senior Member
Joined: May 2010
Posts: 1,753
Likes: 3
From: West Monroe,Louisiana
pic are our friend. So far this thread is turning into every how-to article for F2 rebuilding and modifying all in one place.
I'm already nominating you for 2011 CBRF bike of the year.
I'm already nominating you for 2011 CBRF bike of the year.
Thread Starter
|
July 2011 ROTM
Joined: May 2010
Posts: 223
Likes: 8
From: Hampton Roads, VA
thanks for the vote of confidence. it really does spur me on. when i see it makes my day.
thanks!
~Chris
Thread Starter
|
July 2011 ROTM
Joined: May 2010
Posts: 223
Likes: 8
From: Hampton Roads, VA
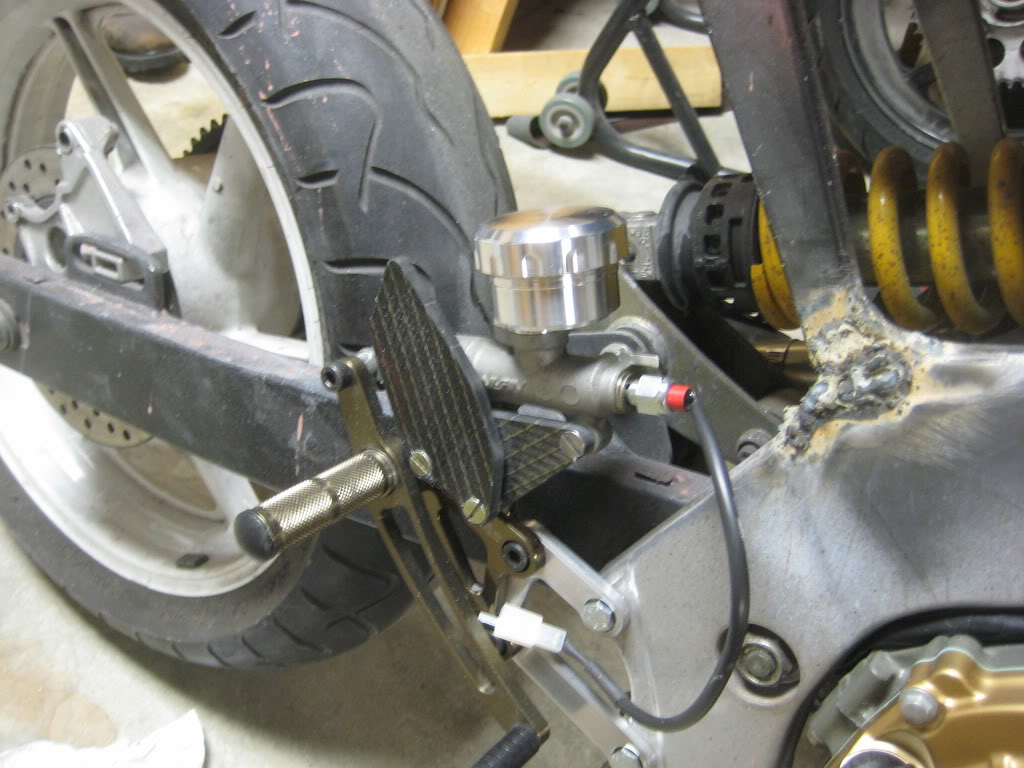
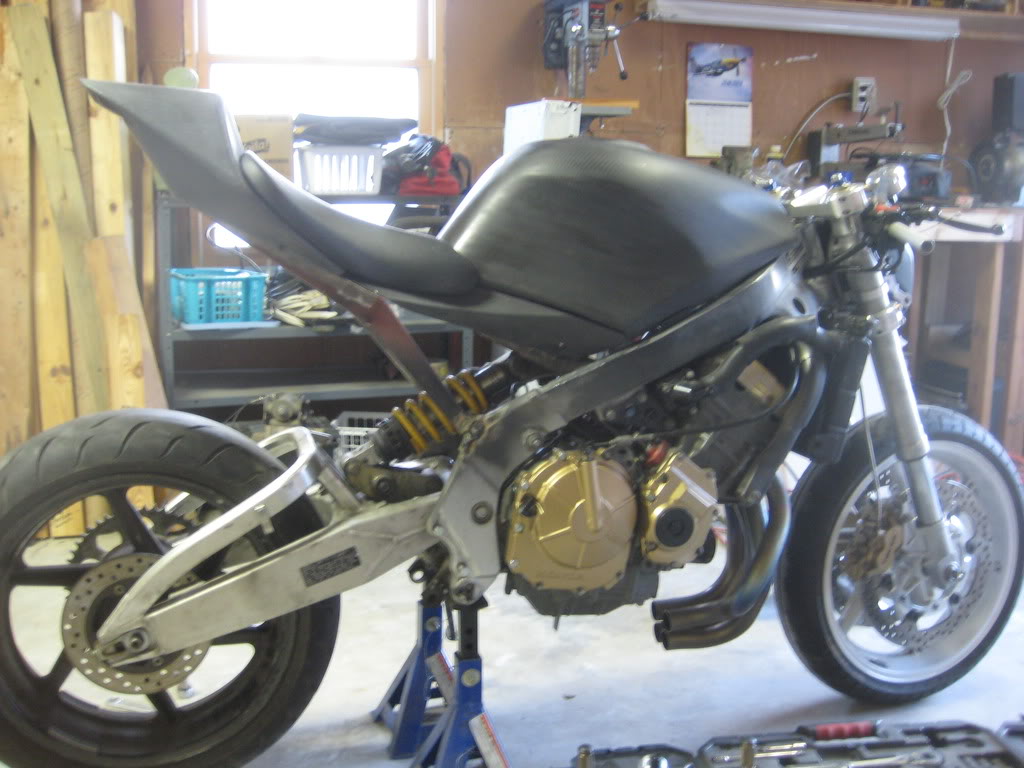
okay.... so i got the swinger back from the welders. they did a really awesome job. the plugs held the fillers in place and kept spatter out of the tube.

So, all i had to do was take a skim-cut to cut it to size.

and it fits! i still need the bearings (but they have been ordered) and i need to make some bushings, but that shouldn't be hard.
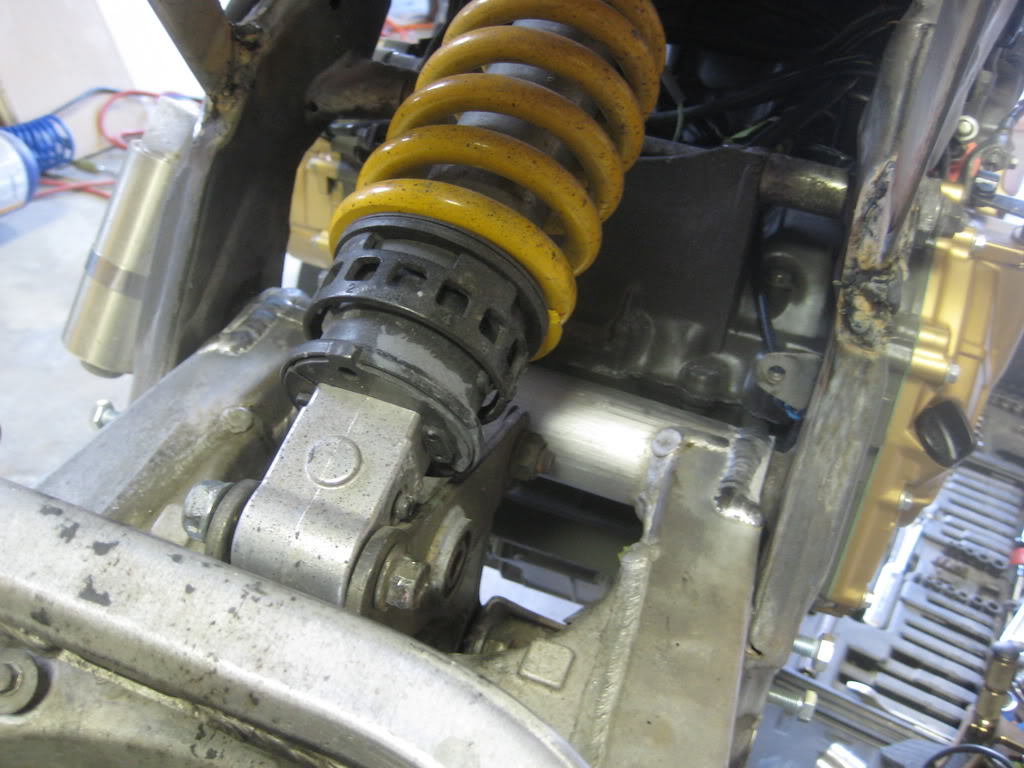
Location of the pivot point... allows me to keep the stock linkage. you think this is gonna be a problem?
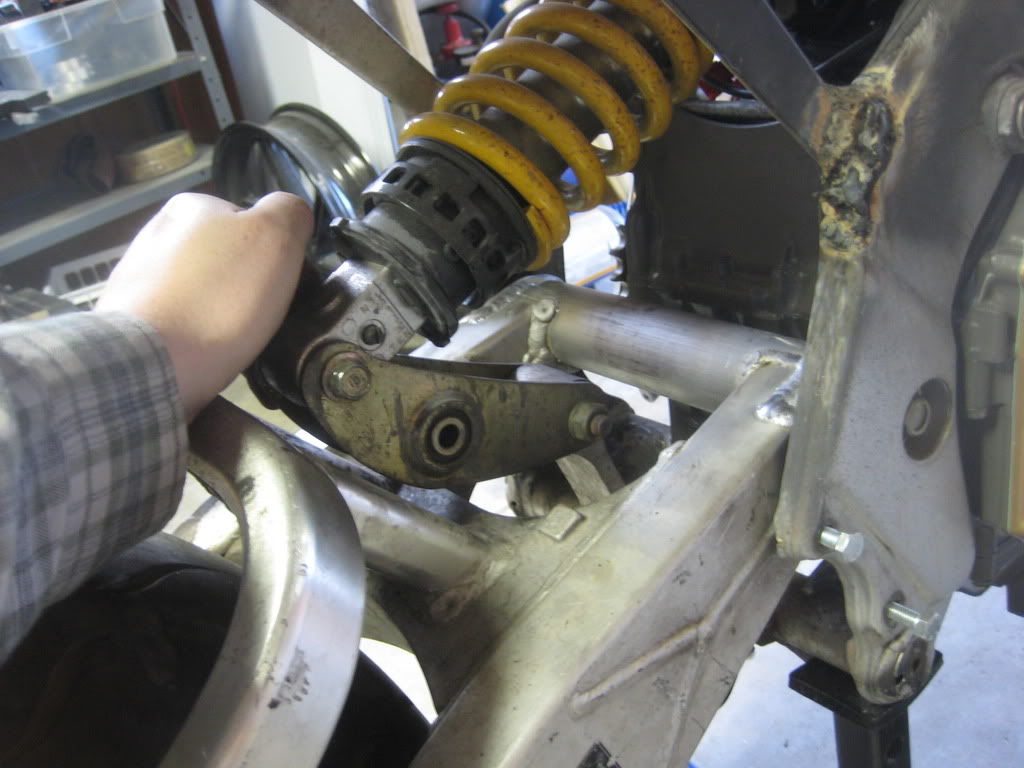
and... from the side...
I am also working on an integrated from reservoir

More to come soon!
thanks
~Chris
So, all i had to do was take a skim-cut to cut it to size.
and it fits! i still need the bearings (but they have been ordered) and i need to make some bushings, but that shouldn't be hard.
Location of the pivot point... allows me to keep the stock linkage. you think this is gonna be a problem?
and... from the side...
I am also working on an integrated from reservoir
More to come soon!
thanks
~Chris
Member
Joined: Mar 2009
Posts: 64
Likes: 1
From: I live in C.rapids, Ia
[quote=knifemaker87;1009806]]
hey that's a pretty good trade... i would trade you here in a month or so... *laughs* did you change jobs?
Yup, worked in a machine shop through my senior year and tech school and almost stayed there but the allure of far away places and exotic women moved me away. and by far away places I mean Iowa, and exotic women I mean my wonderful wife, but thats too boring. Now Im a Painter in a body shop.
Love what your doing to the bike... im building mine up as well but compared to yours mine will be nothing more than some body work and a fancy paint job.
Keep up the good work