
'93 600 Fighter project

Senior Member
Joined: May 2010
Posts: 1,753
Likes: 3
From: West Monroe,Louisiana
It is kinda nice. he lives about an hours away, and we actually both made knives which is how i got in touch with him, but we both detoured into vehicle modification.. i have a little 110v mig so my steel welding is okay but like you said not show quality.
I made my own clip-ons so i am gonna go with those, the easiest way to put a riser bar on the tripple would prolly be to drill it. but if you could get it welded after that it would be super strong. you gonna run drag bars?
I made my own clip-ons so i am gonna go with those, the easiest way to put a riser bar on the tripple would prolly be to drill it. but if you could get it welded after that it would be super strong. you gonna run drag bars?
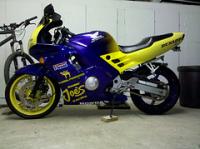
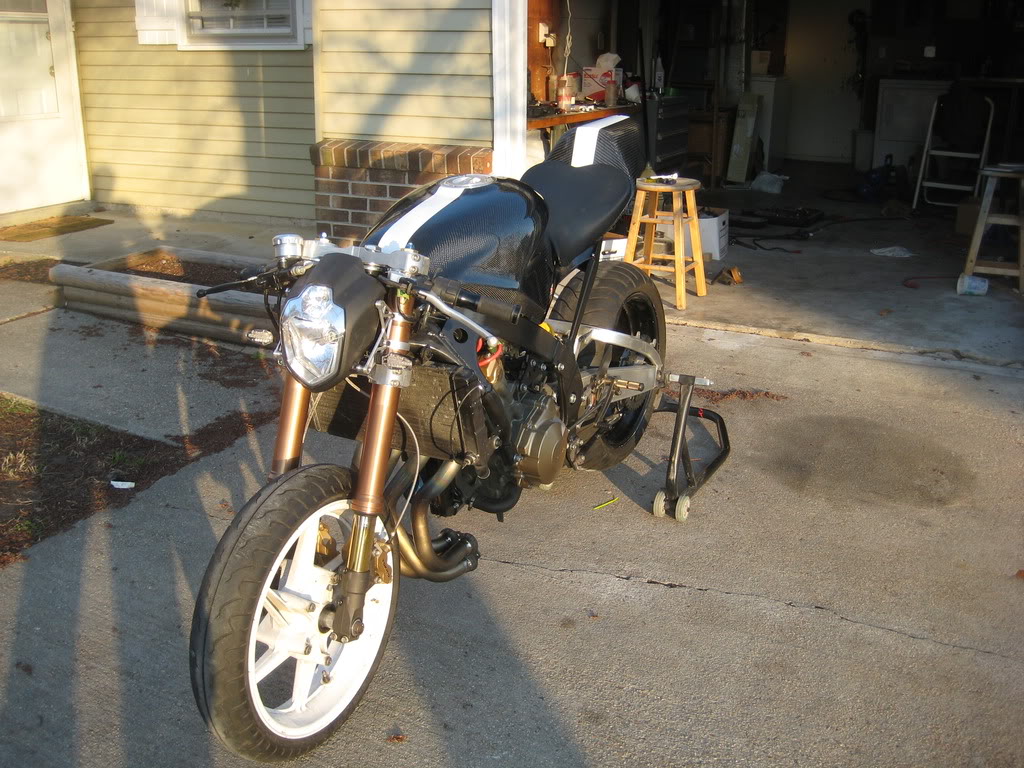
Unknown - I'm putting my old F2 forks a street tracker project , looking for an overall stance something like this:


Thread Starter
|
July 2011 ROTM
Joined: May 2010
Posts: 223
Likes: 8
From: Hampton Roads, VA
thanks man! I reappciate the encouragement, but you shouldn't beat yourself up. this is kinda what i have been doing since i was 10 or so; building crap.
you know how most people have lives? i built stuff.
also i have a small update. much smaller than anticipated. the welder had an employee die on monday.. so no welding happened. i am hoping that we can make it work today.
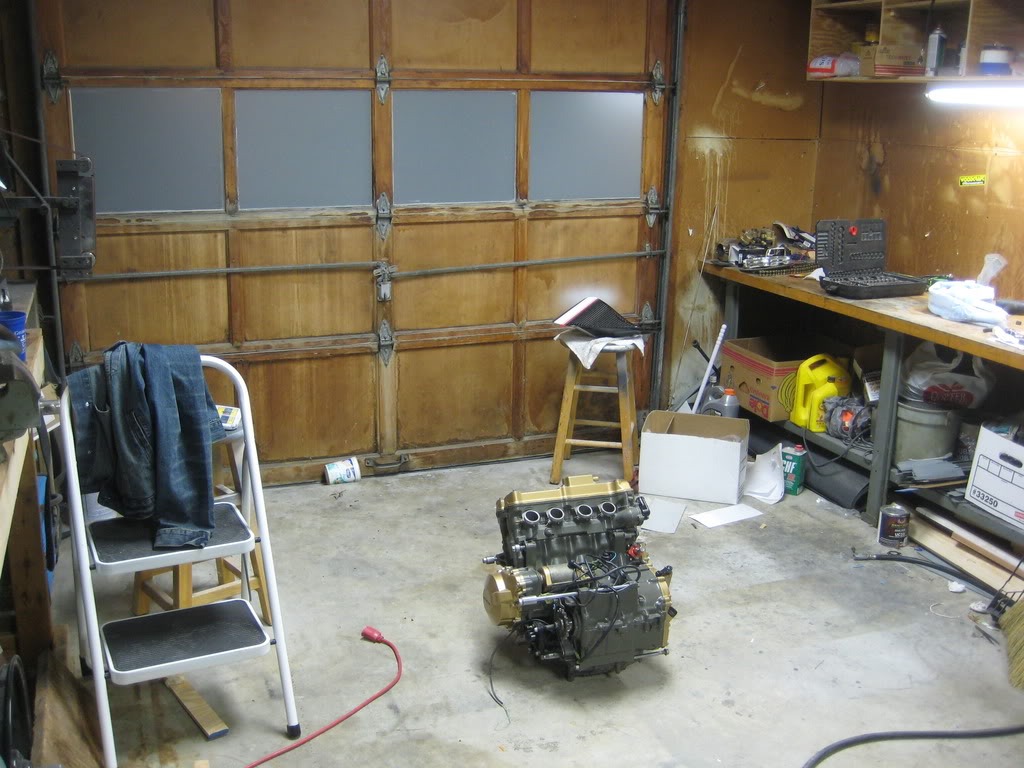
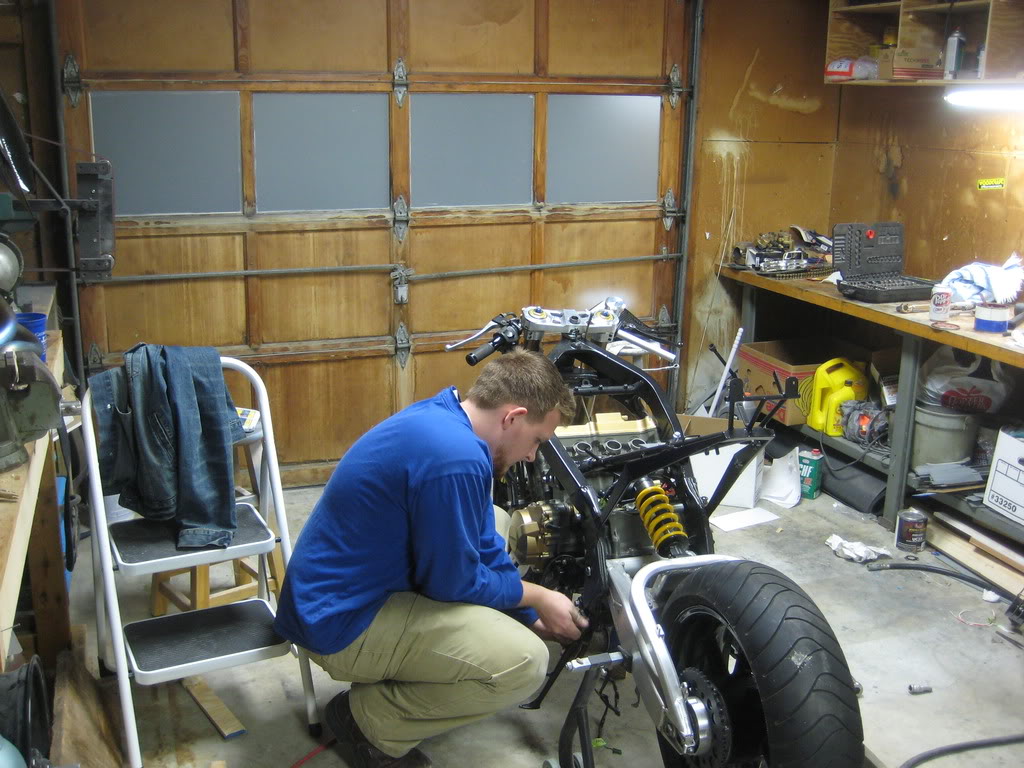
and with no frame, and the head still "tied up" there wasnt a whole lot i could do. i did get to play with some of my new parts though...
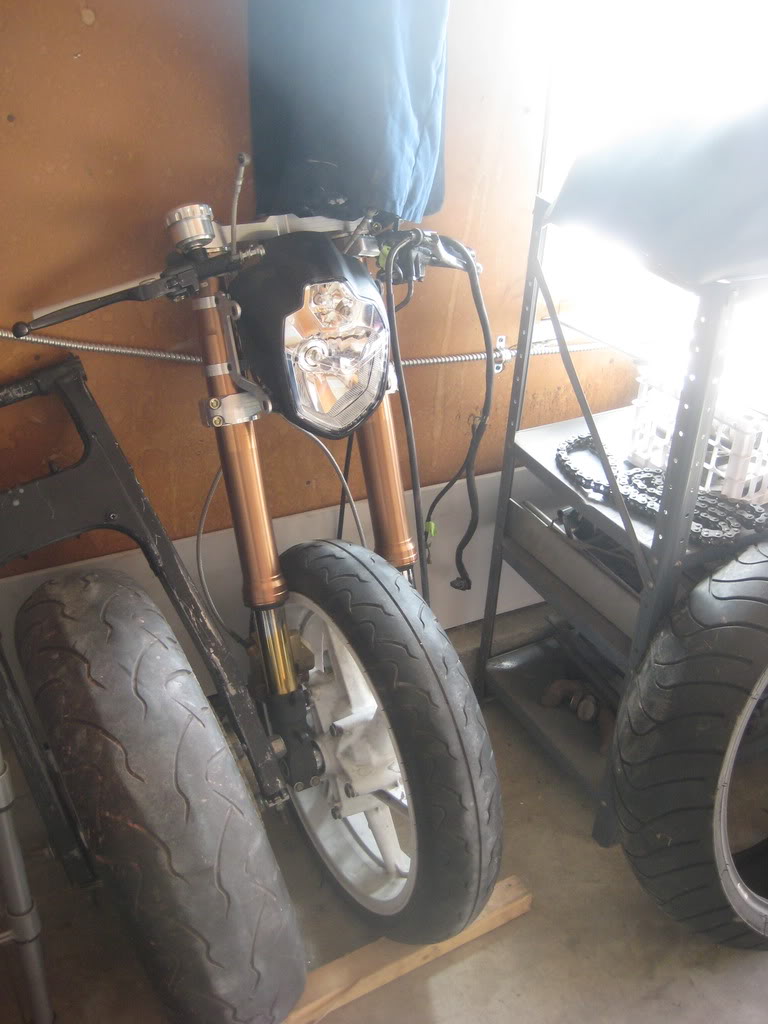
My new front-end 02 gsxr 1000
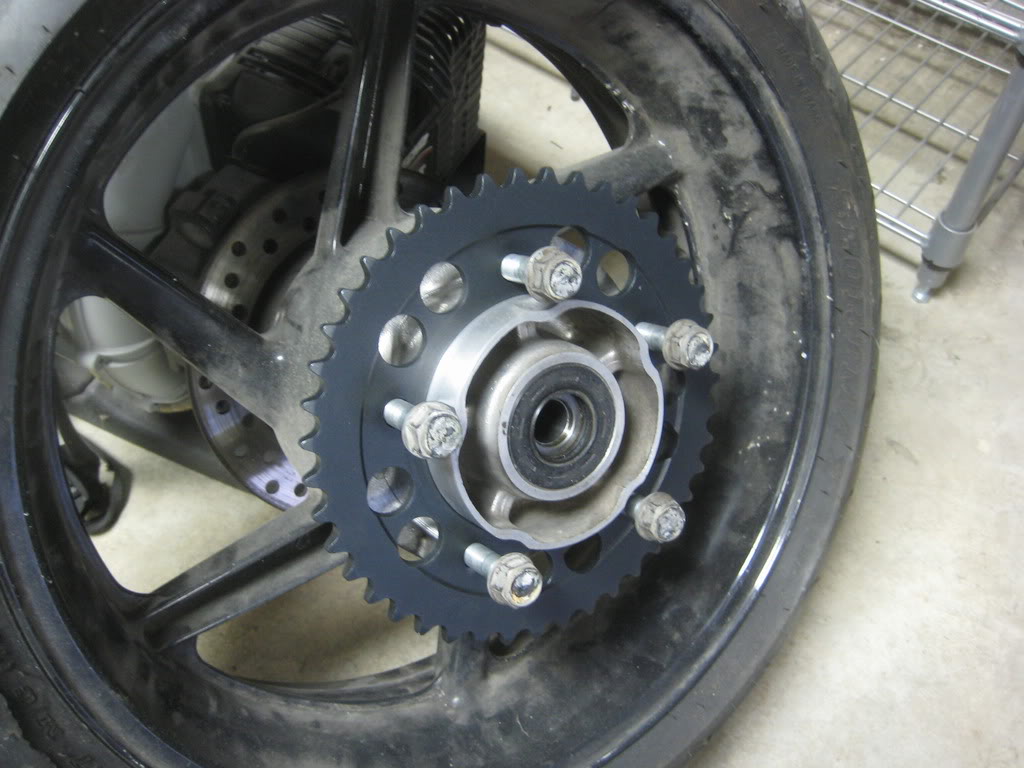
new rear sprocket. the front sprocket (from the same kit) doesnt fit?! talking to the vendor
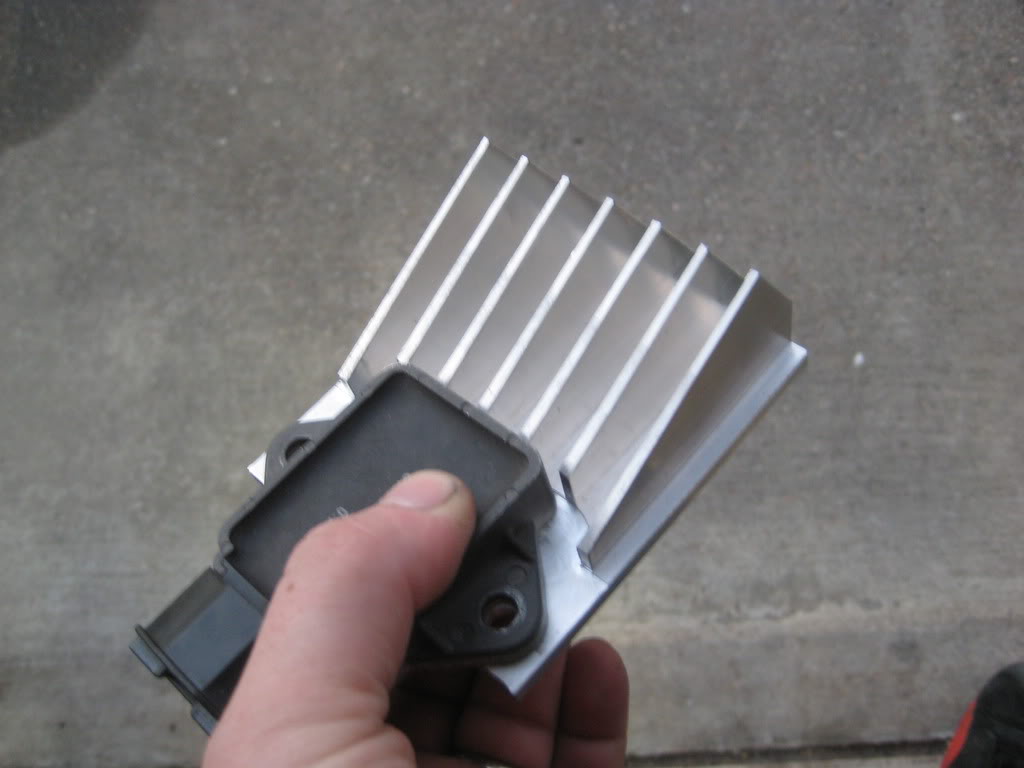
And... i made a heat-sink for my R/R. i am gonna make another one, so if anyone wants this one, $20 and it is theirs. it will bolt up to the stock R/R on any cbr f2or f3.. or any R/R with a 6 cm bolt pattern.
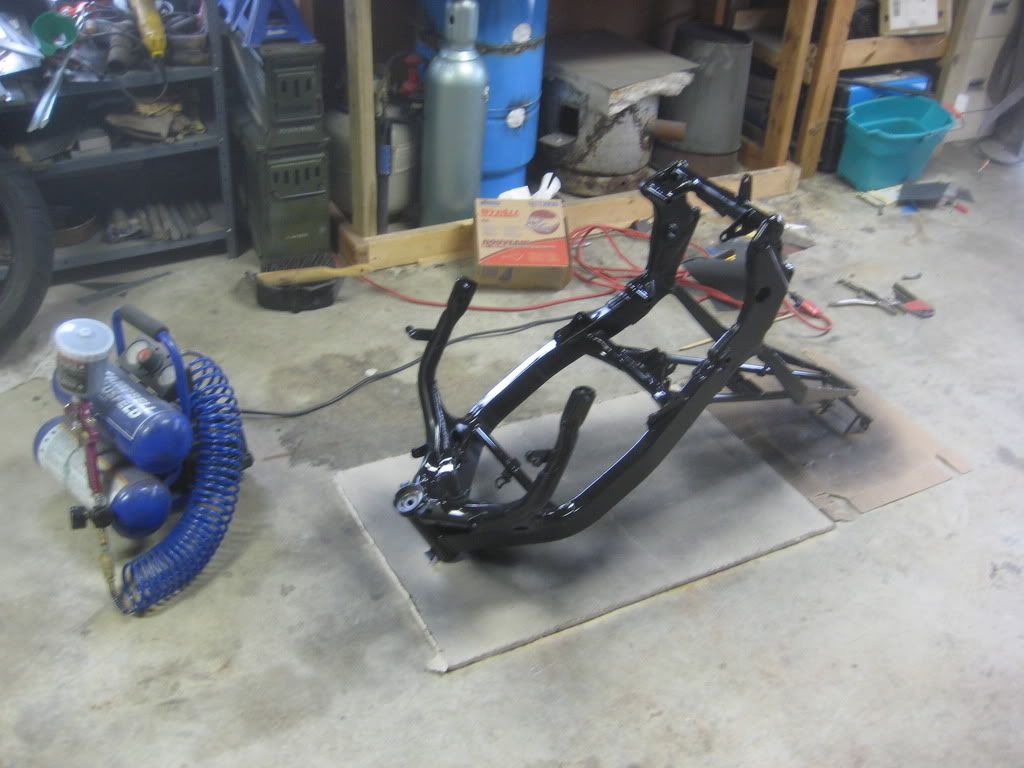
the frame turned out really nice. gonna get it home today, and will get more pictures then.
thanks!
~Chris

Thread Starter
|
July 2011 ROTM
Joined: May 2010
Posts: 223
Likes: 8
From: Hampton Roads, VA
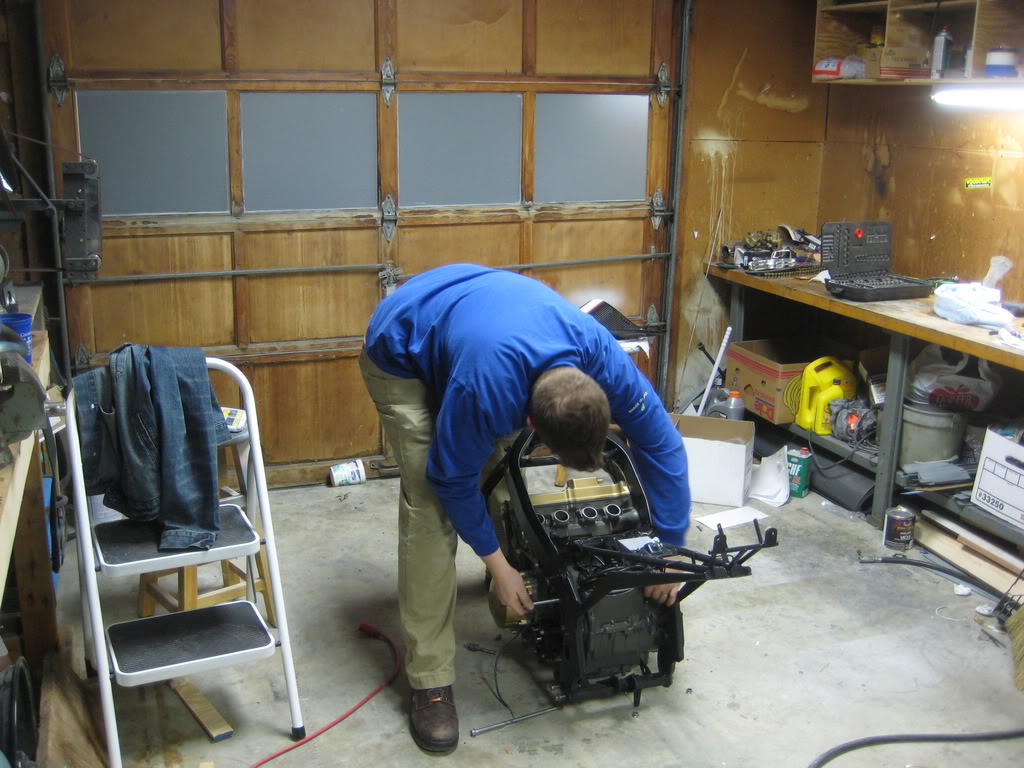
I got the frame home, and realized.. horror of horrors, there were some light areas of paint because of how it was hung. not really a big deal.. but worth touching up now rather than when it is rusting and the whole bike is assembled. plus. it wasn't perfect.
so..

welder still has to call me back...
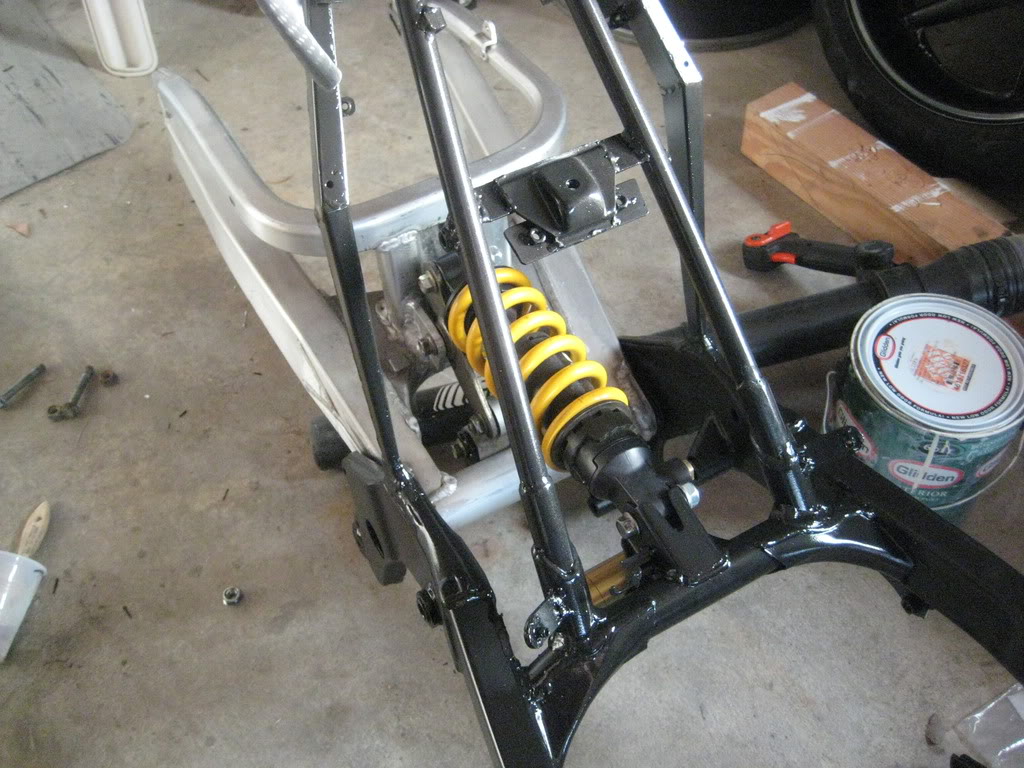
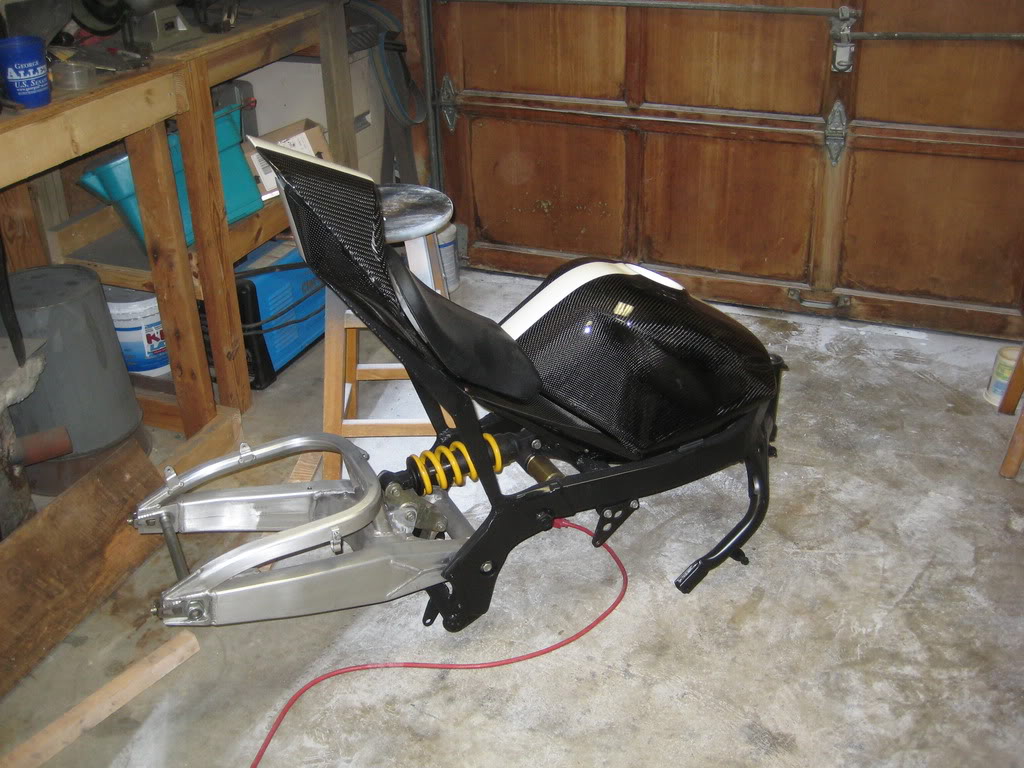
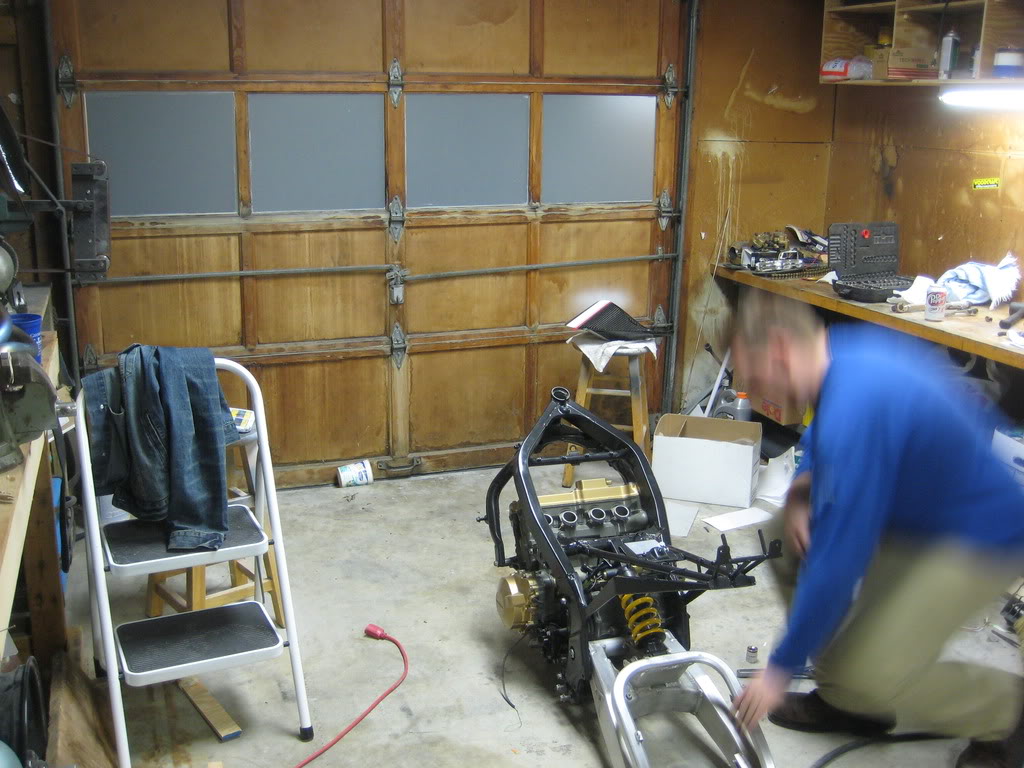
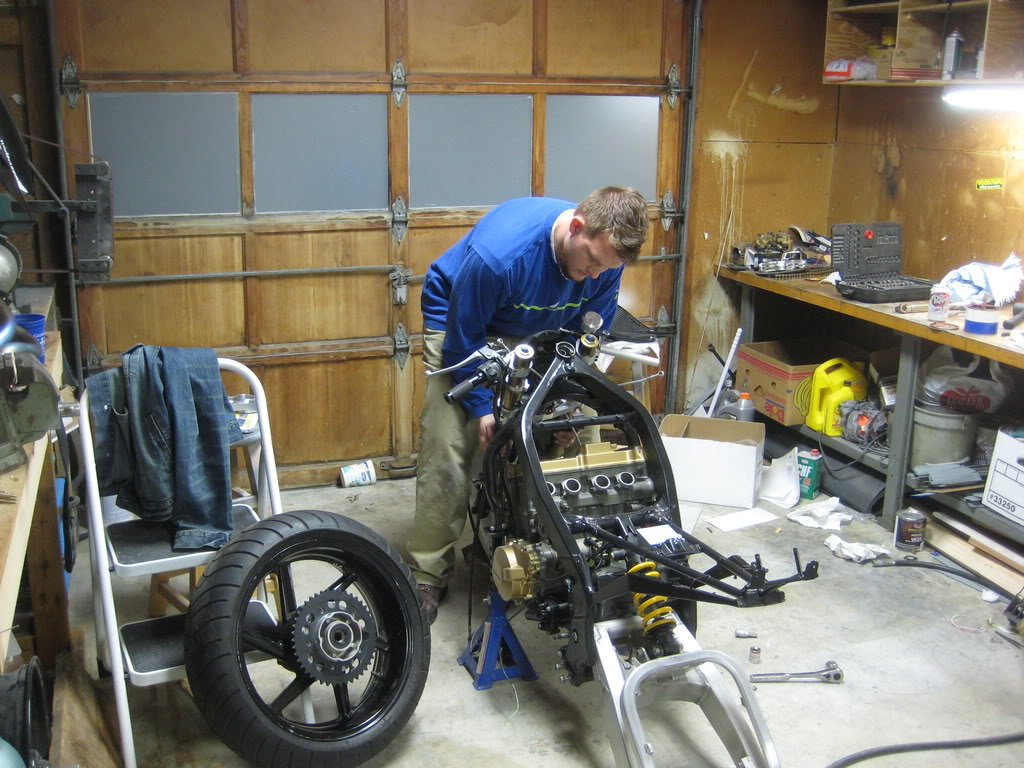
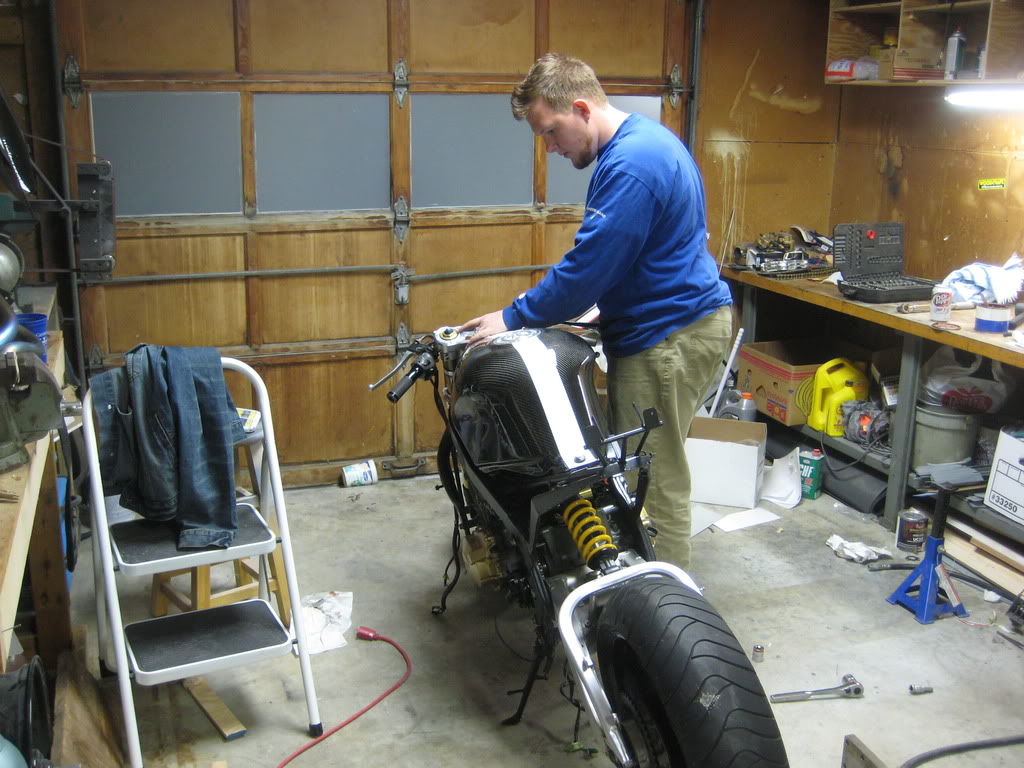
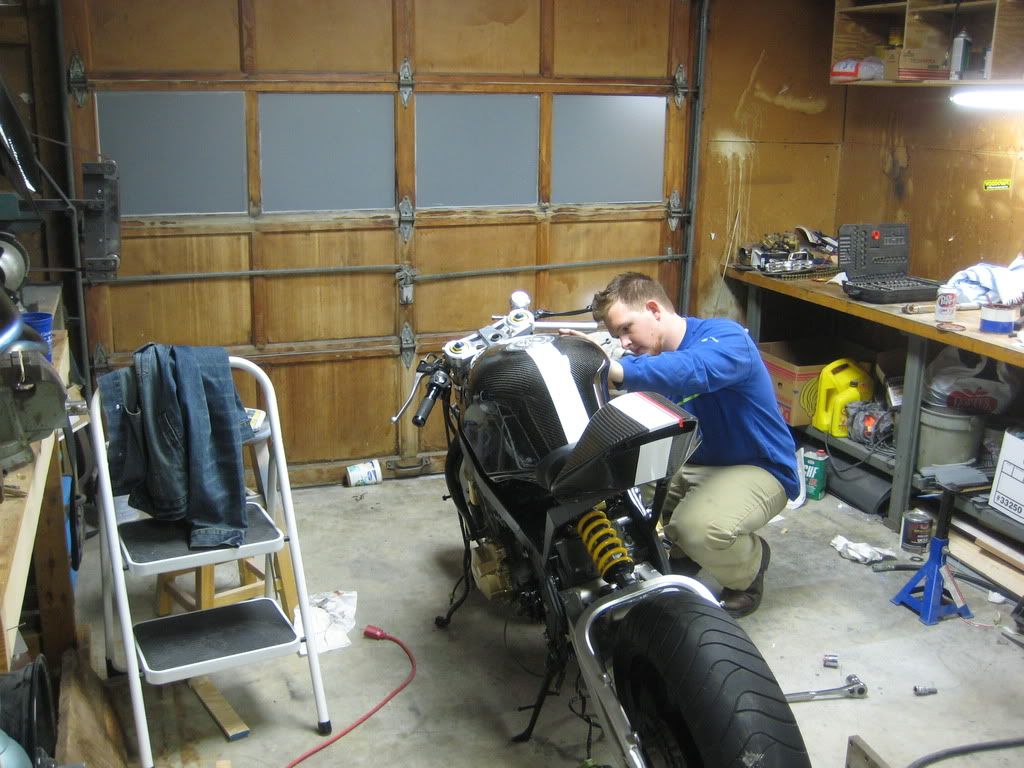
almost all of the prep is done. things are ready to bolt on. everything up to this point has been a mock-up (except with the engine.. that was for real) tested the swinger and shock.
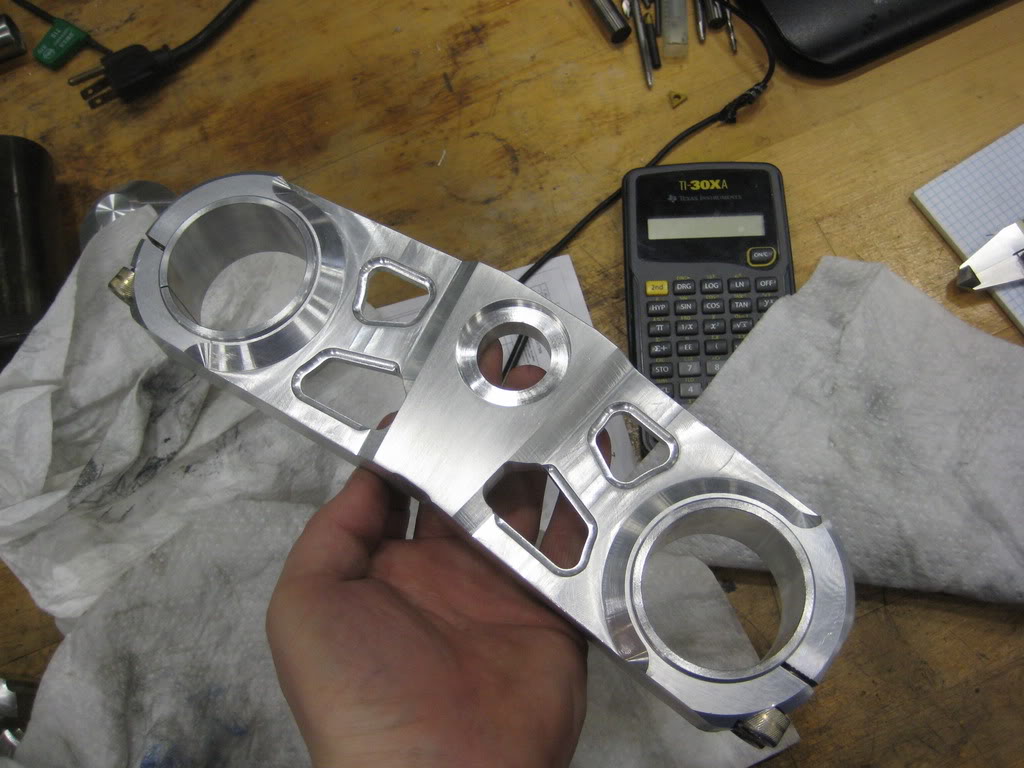
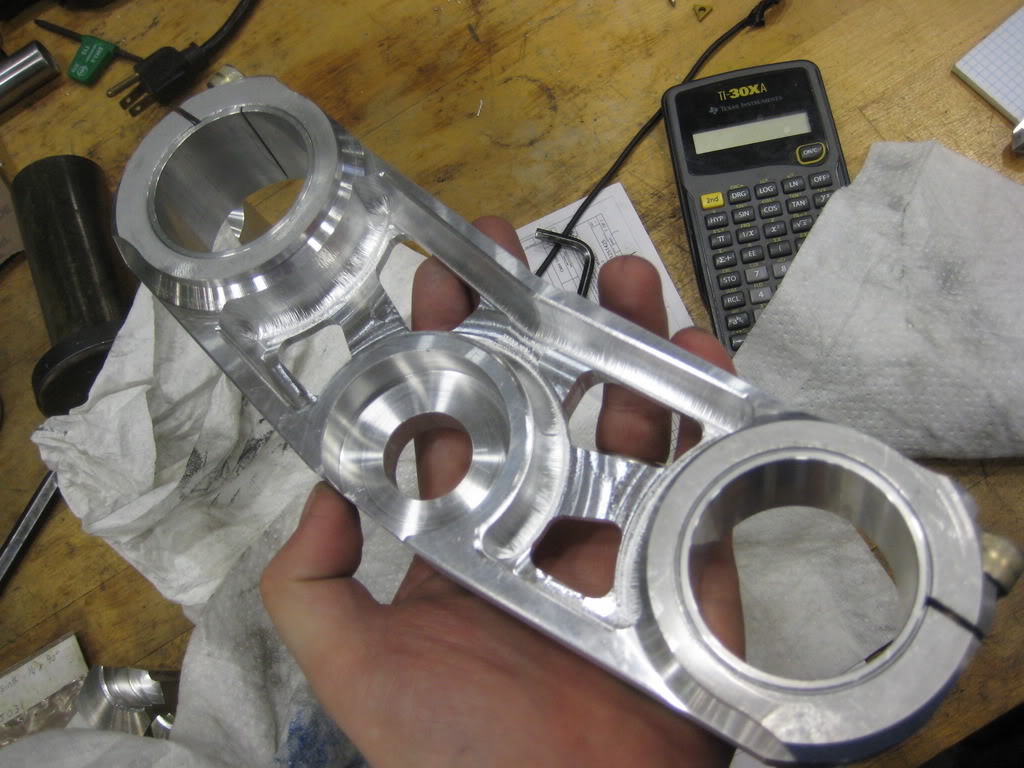
and... i did a little bling work on the top triple
I was told that the header should be available for pick-up today (hopefully it will) and once i have it back i can finish the engine and proceed with putting the bike back together.
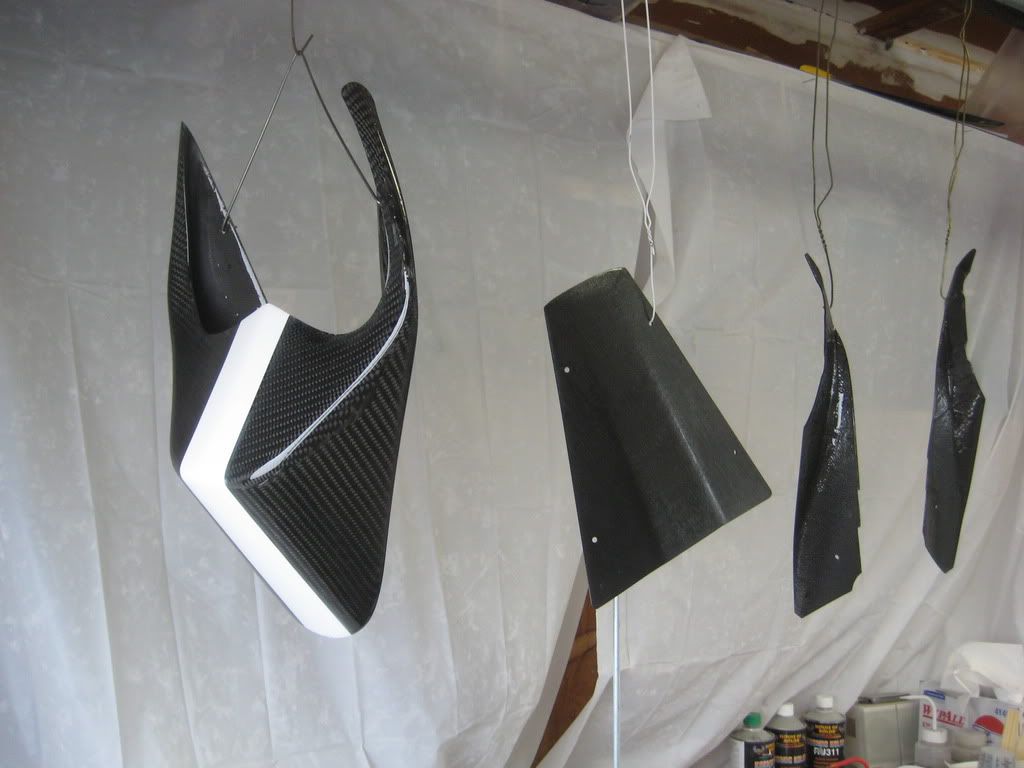
So.. instead of sitting around and doing nothing.. i decided to paint all the body-work except for the front fender, cause it needs a bit more fitting.
i kinda like it with the orange. masking for the white stripe.
so..
welder still has to call me back...
almost all of the prep is done. things are ready to bolt on. everything up to this point has been a mock-up (except with the engine.. that was for real) tested the swinger and shock.
and... i did a little bling work on the top triple
I was told that the header should be available for pick-up today (hopefully it will) and once i have it back i can finish the engine and proceed with putting the bike back together.
So.. instead of sitting around and doing nothing.. i decided to paint all the body-work except for the front fender, cause it needs a bit more fitting.
i kinda like it with the orange. masking for the white stripe.
Thread Starter
|
July 2011 ROTM
Joined: May 2010
Posts: 223
Likes: 8
From: Hampton Roads, VA
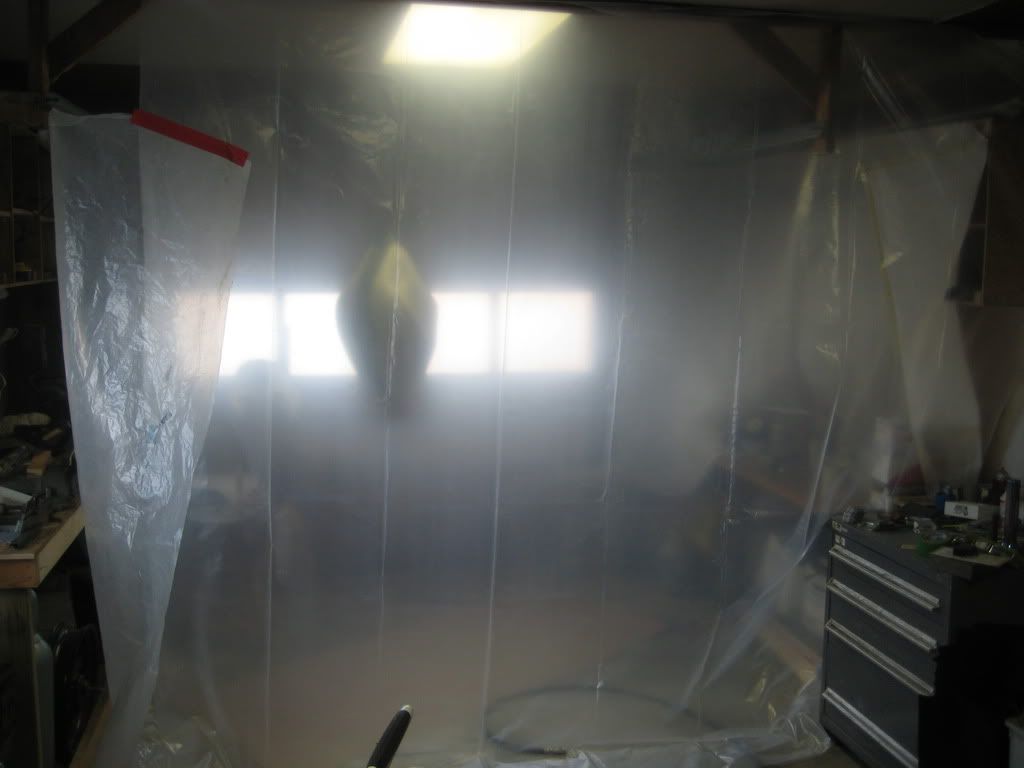
The paint room got filled, but i already have everything masked up, so instead of ripping all that off and waiting till wed to paint, i got some poly sheeting and rigged up my garage. I borrowed a air compressor from a local SVer (THANKS BEN!) and put a heater out in the garage to get it up to about 70.
then i put some hooks in the rafters, and got everything set up.
also i wanted to paint the bottom of the tank in black, but it worked out better to just do it all one color...but i did need to cover up the red.
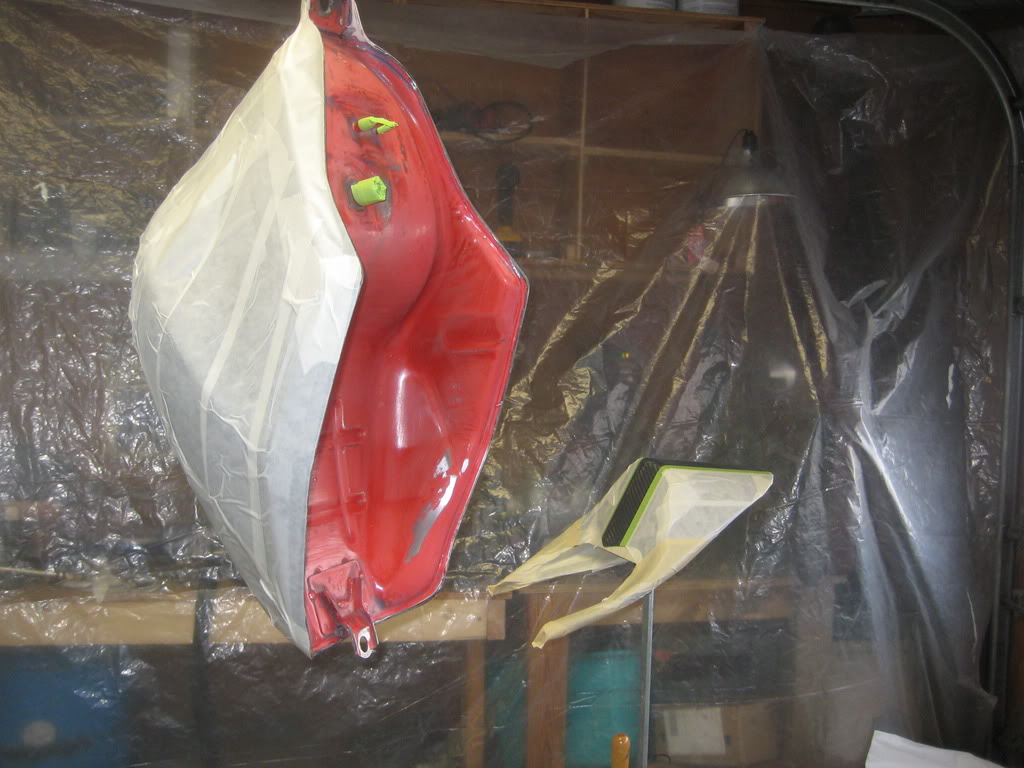
there is something AWESOME about flat black and white. i kinda wish i could keep it that way.
but... the Carbon fiber resin is photoreactive, so i need a UV protectant clear-coat to keep it from yellowing, so gloss it is!
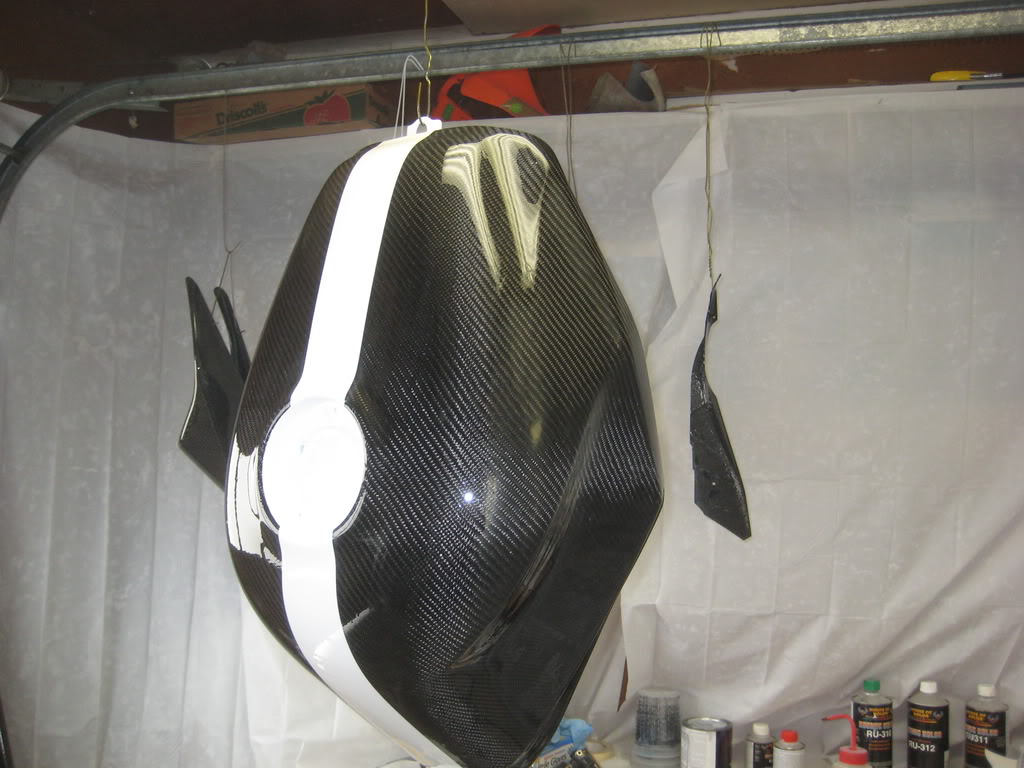
also.. i kinda like the white underside..
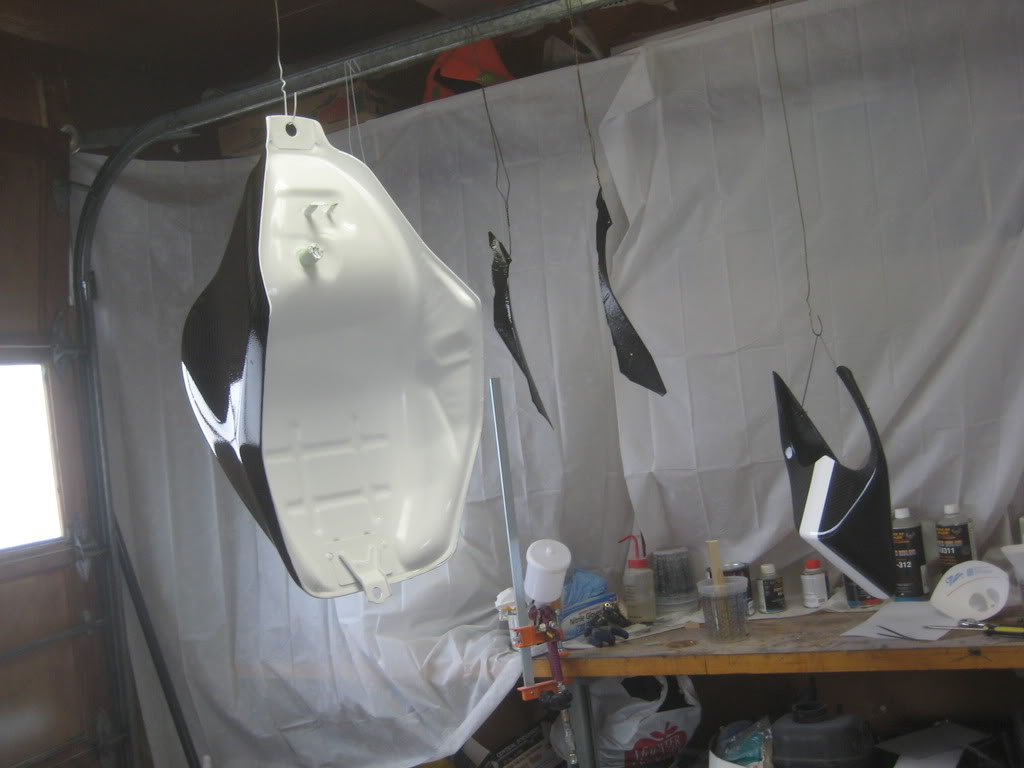
tail, undertail and side-covers too:
Huge shout-out to bengone1 for letting me borrow the compressor. i really need to get one.
okay, huge development yesterday.
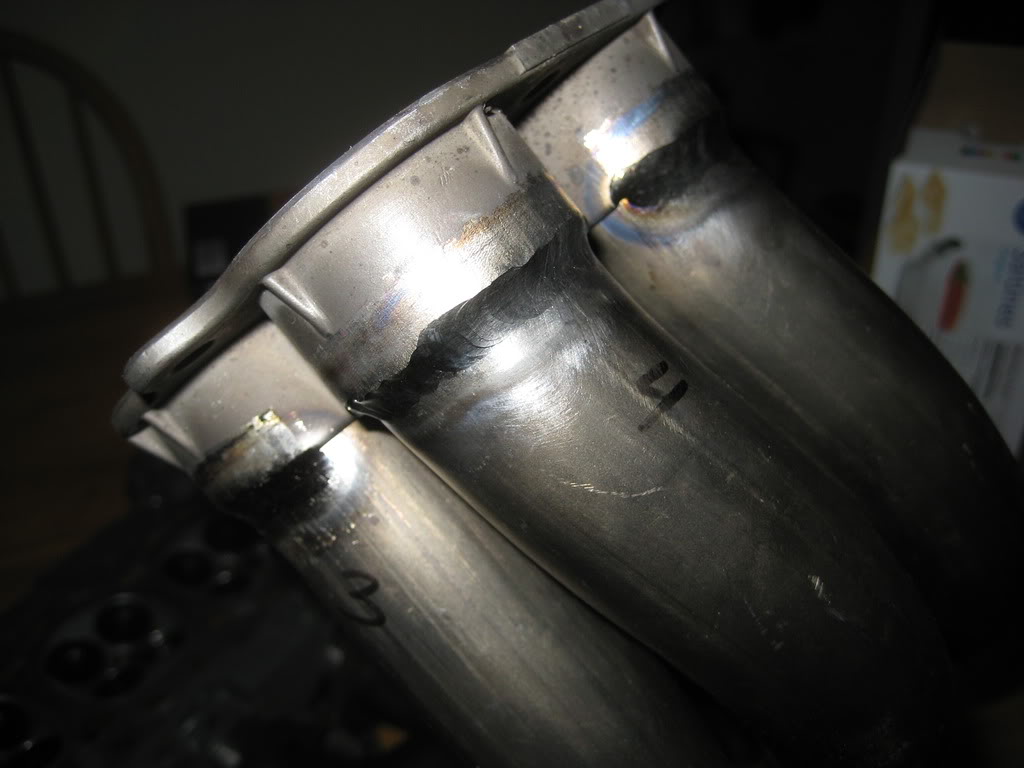
i got the header back!
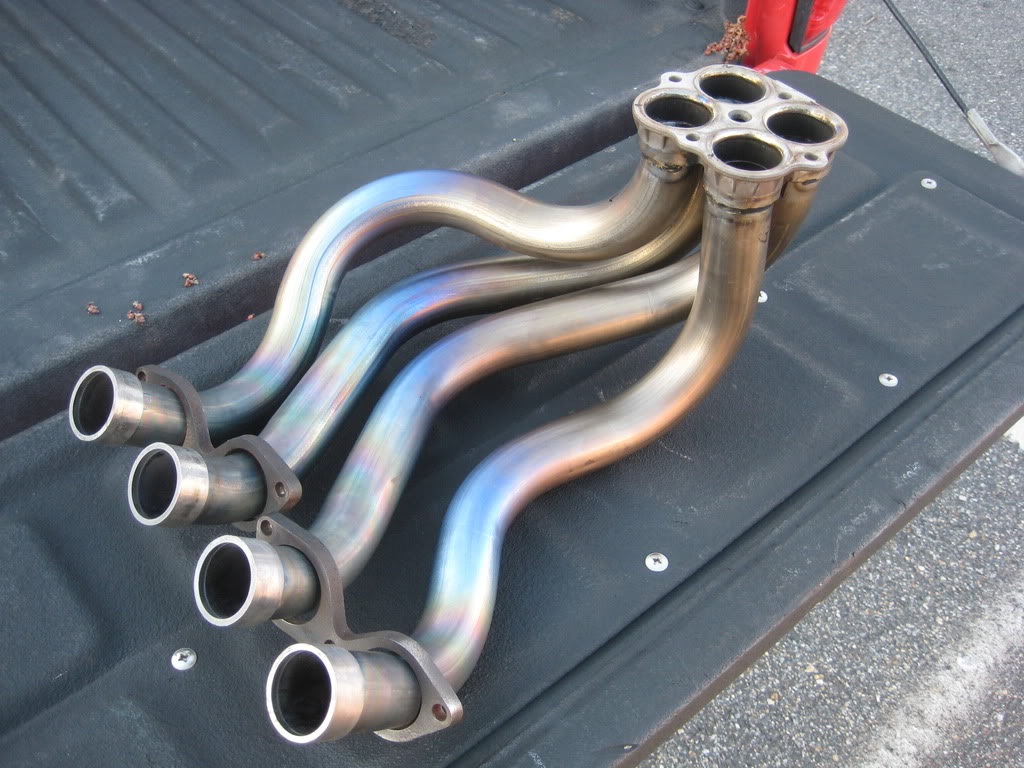
The welds are strong and crack-free
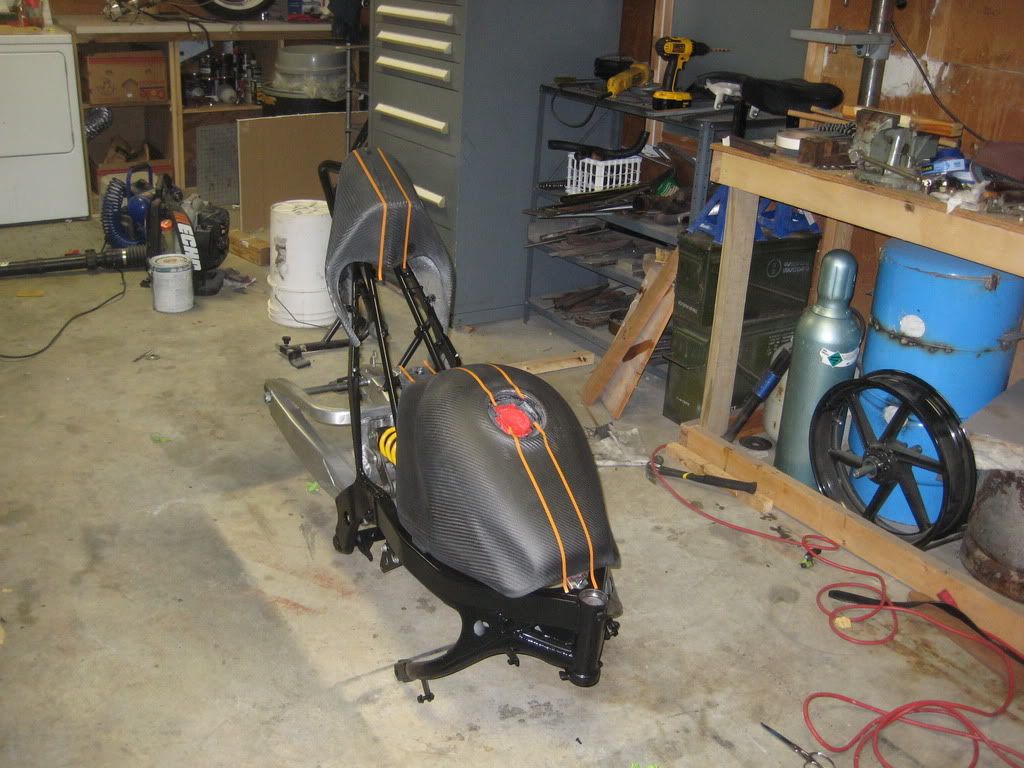
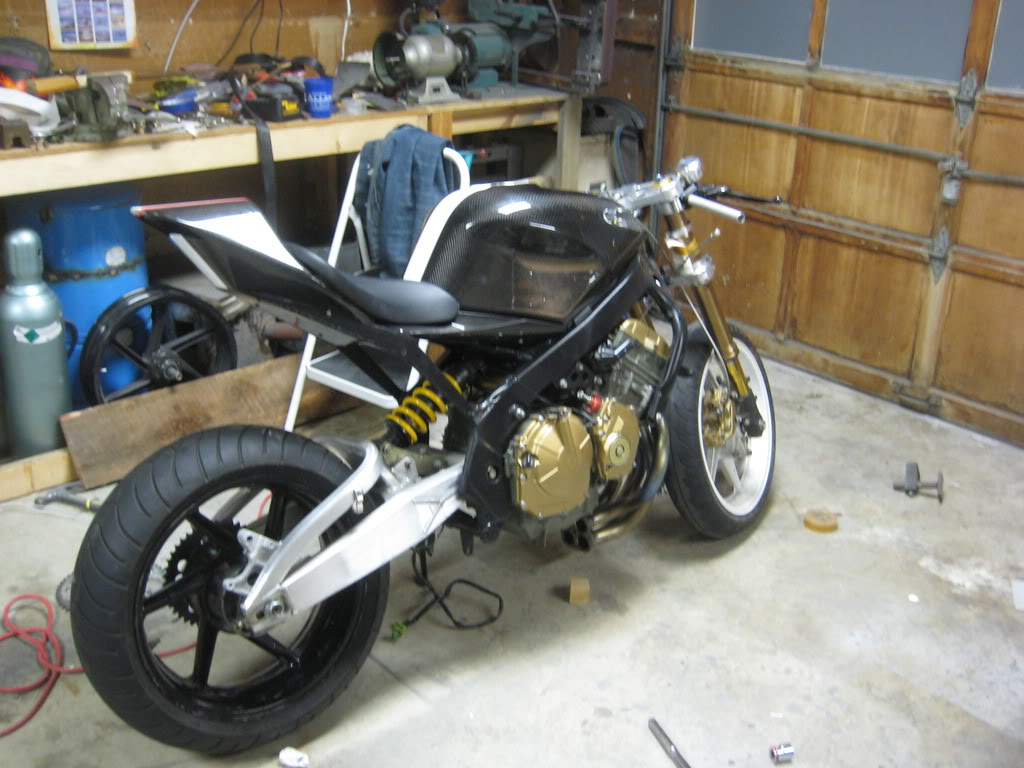
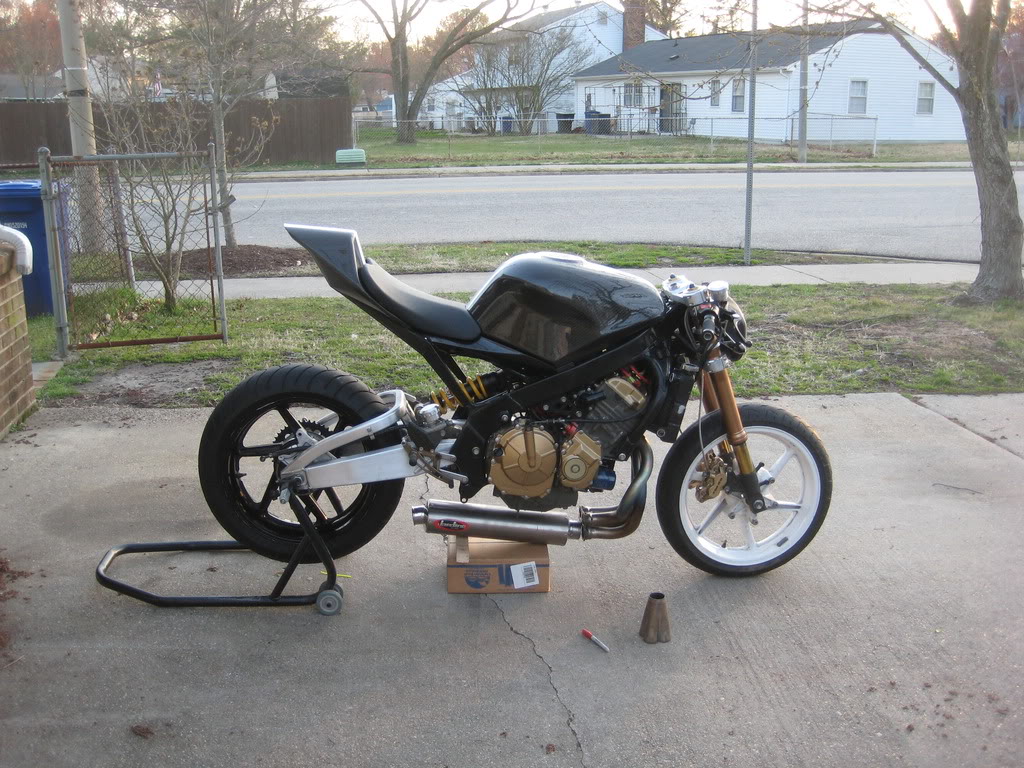
i also put the body-work on the frame just for fun. i ran out of daylight, but you still get the idea.
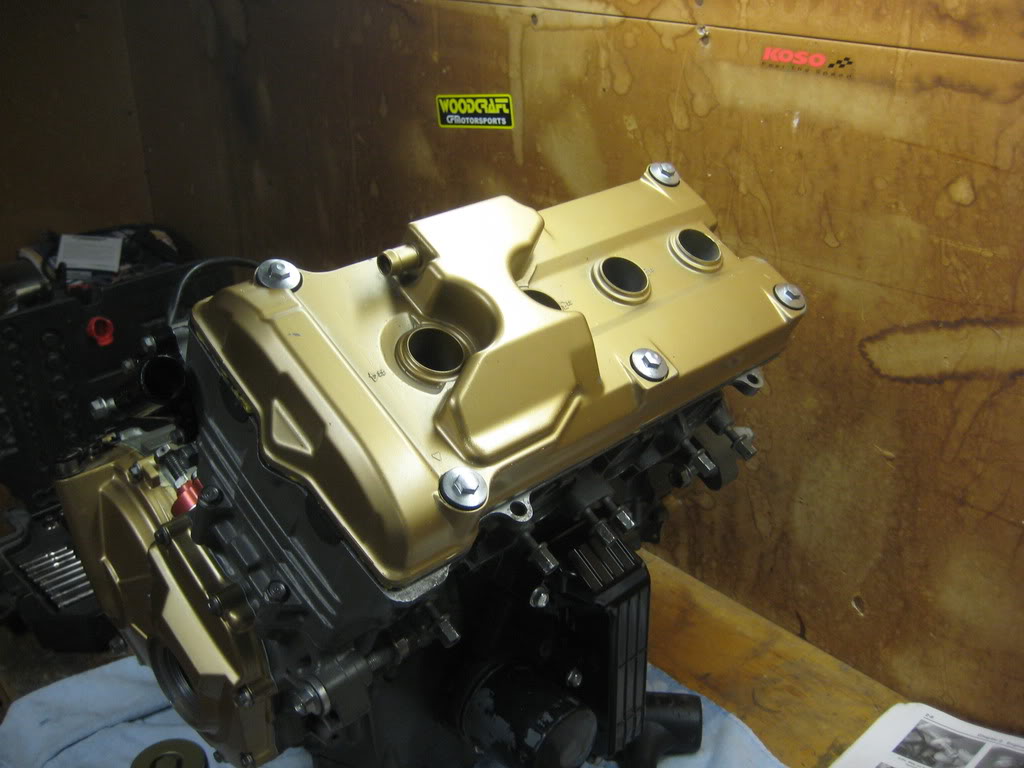
next step, finish the engine.
more soon!
then i put some hooks in the rafters, and got everything set up.
also i wanted to paint the bottom of the tank in black, but it worked out better to just do it all one color...but i did need to cover up the red.
there is something AWESOME about flat black and white. i kinda wish i could keep it that way.
but... the Carbon fiber resin is photoreactive, so i need a UV protectant clear-coat to keep it from yellowing, so gloss it is!
also.. i kinda like the white underside..
tail, undertail and side-covers too:
Huge shout-out to bengone1 for letting me borrow the compressor. i really need to get one.
okay, huge development yesterday.
i got the header back!
The welds are strong and crack-free
i also put the body-work on the frame just for fun. i ran out of daylight, but you still get the idea.
next step, finish the engine.
more soon!
Thread Starter
|
July 2011 ROTM
Joined: May 2010
Posts: 223
Likes: 8
From: Hampton Roads, VA
lunch-break....
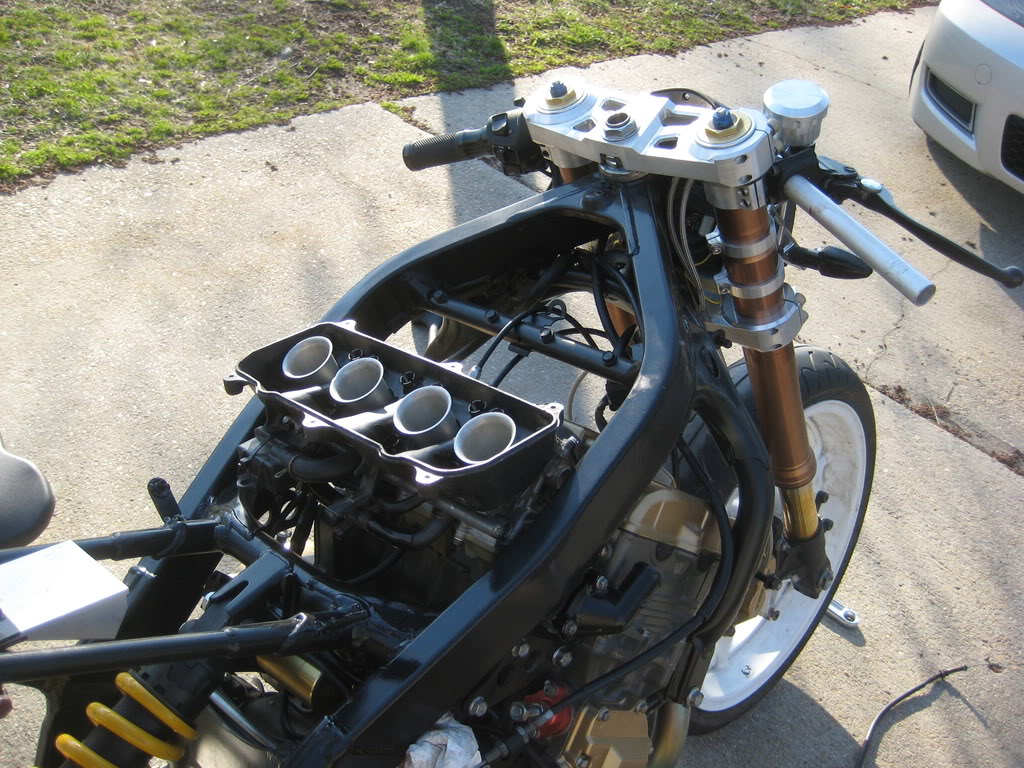
new headlight brackets

okay...
major update!
i went out of town since my wife had time off for spring break, but got some some tonight to get the engine buttoned up.
This is why you keep your valve followers and shims organized!
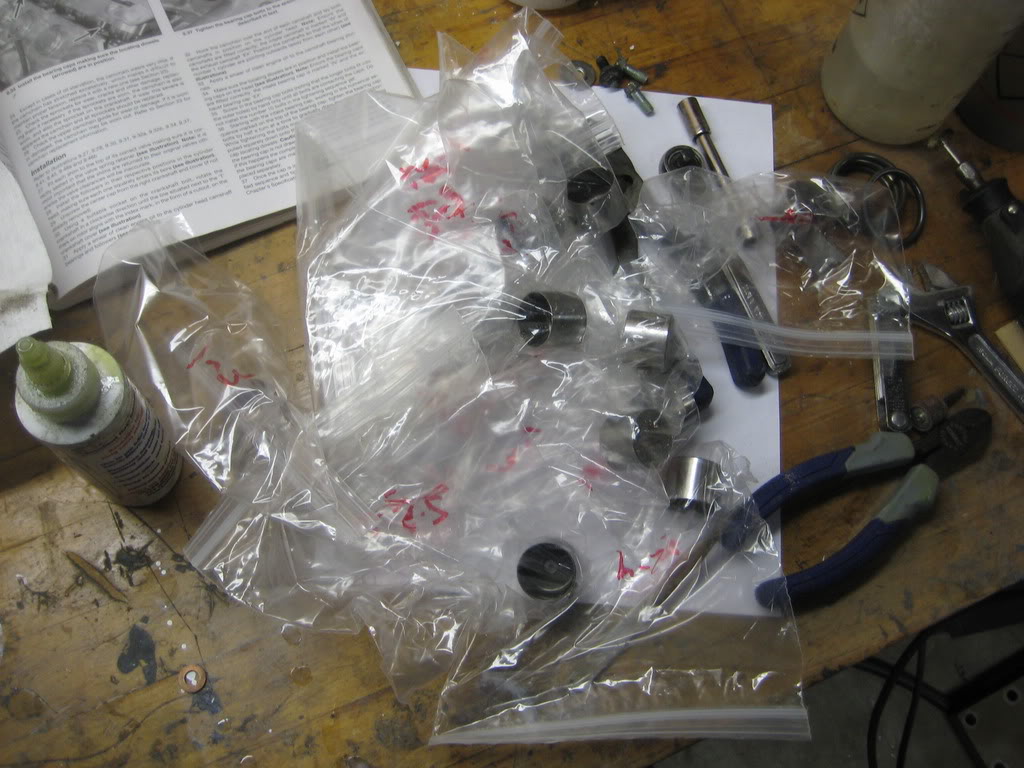
shim in:
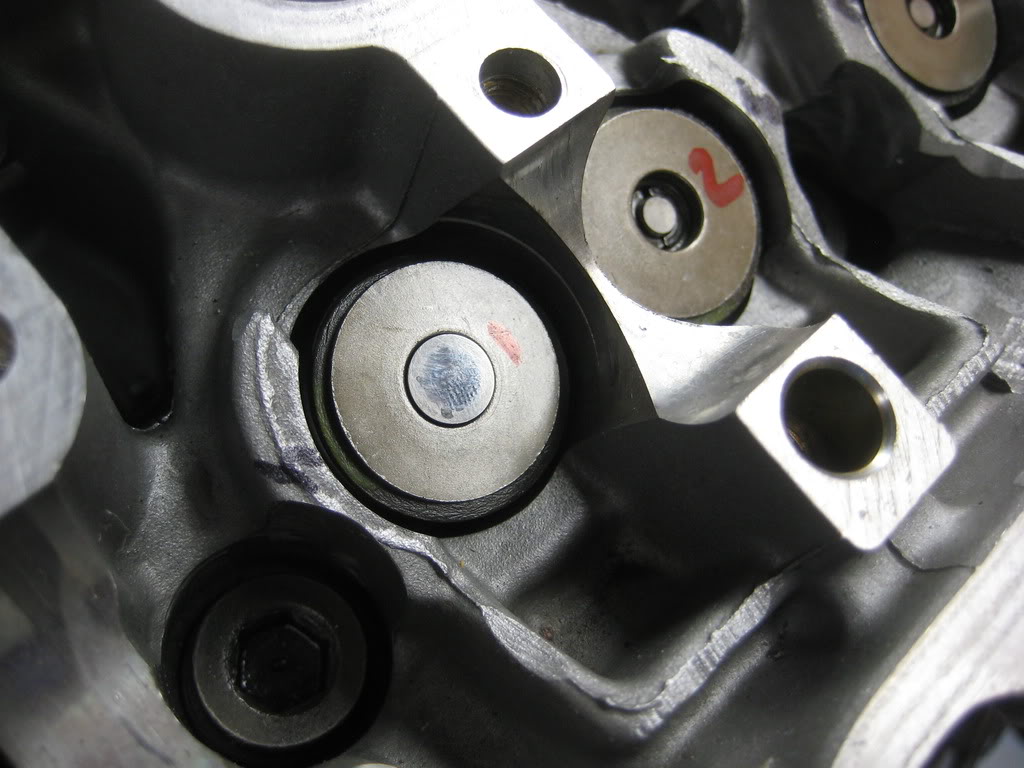
Half of the followers in:
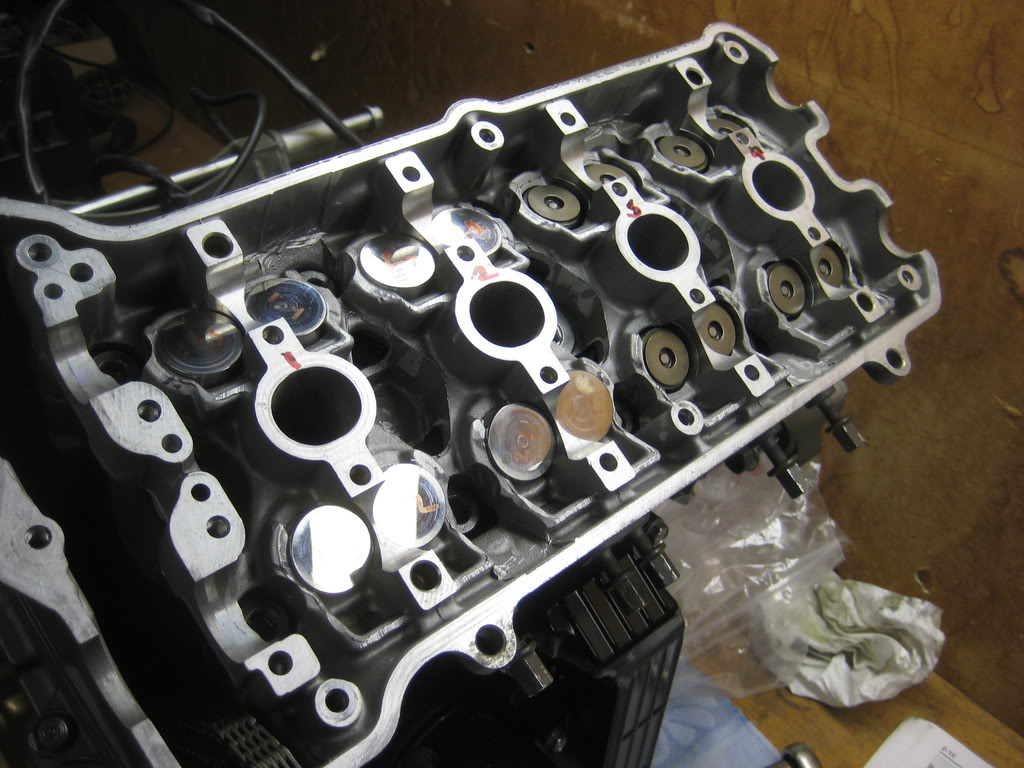
Camshafts in:

All buttoned up!
and here is where i started the assembly.
this way i could do all the assembly by myself.
Lowered the frame on, and slid the bolts through
swingarm on
forks going on:
rear wheel and kick-stand
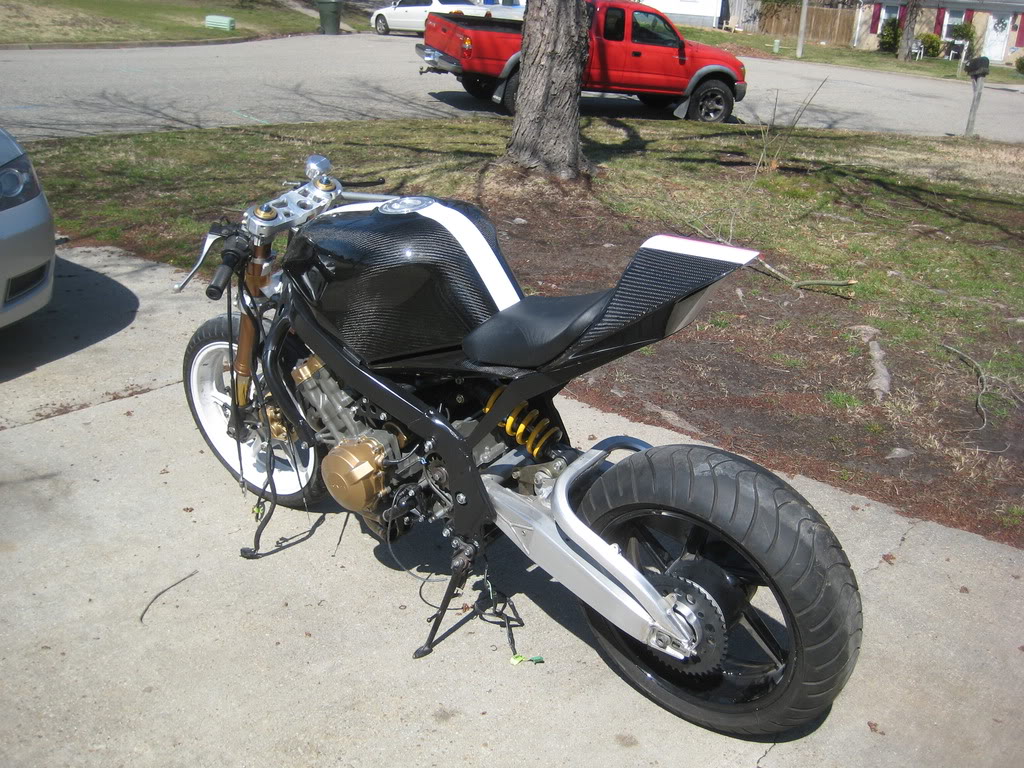
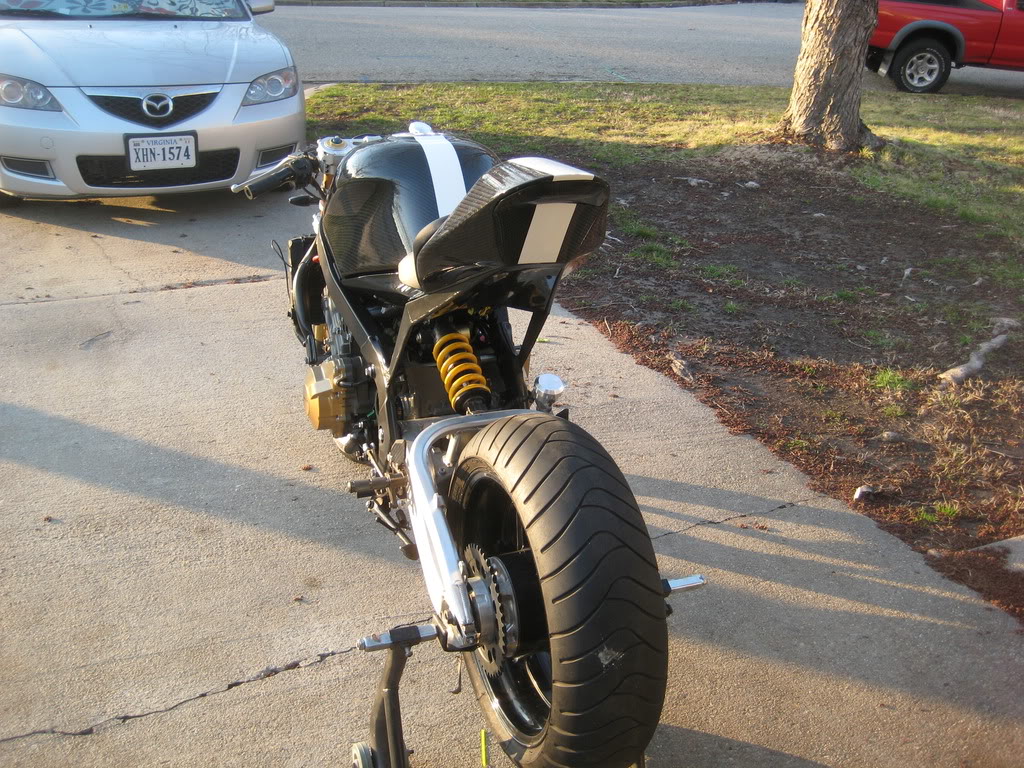
tank:
tail:
and... a blurry side-shot
i am very excited to see the bike together! the new swing-arm lowered the bike just enough.
also.. i am going to do this style stripe: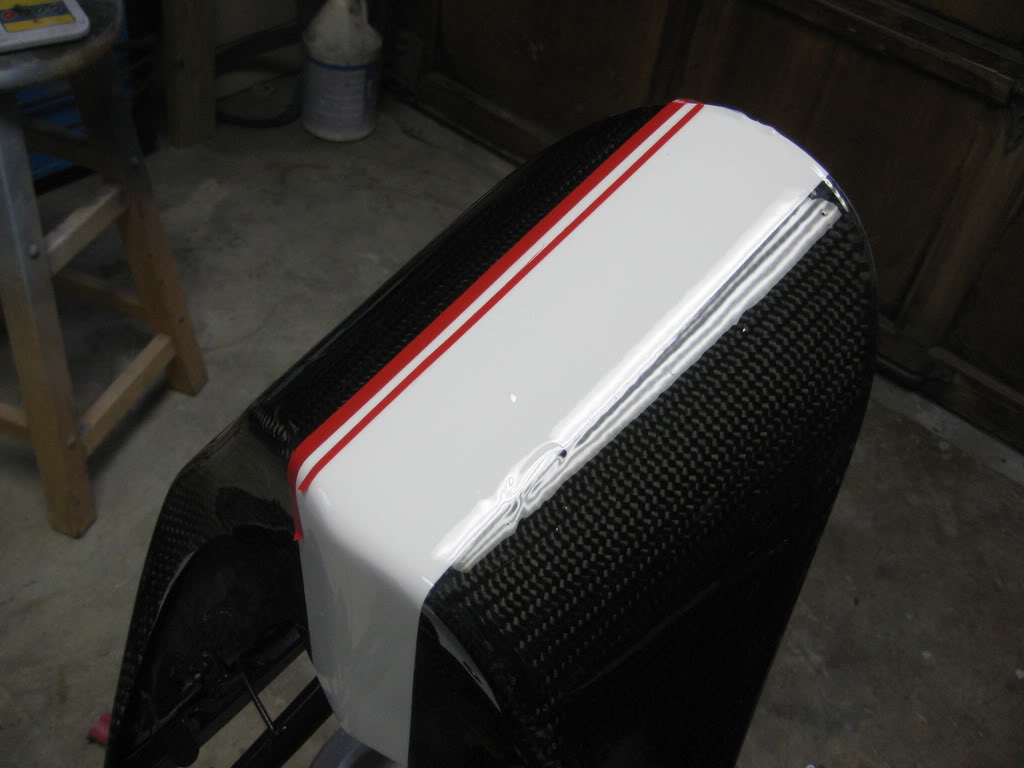
thanks yall!
~Chris
new headlight brackets
okay...
major update!
i went out of town since my wife had time off for spring break, but got some some tonight to get the engine buttoned up.
This is why you keep your valve followers and shims organized!
shim in:
Half of the followers in:
Camshafts in:
All buttoned up!
and here is where i started the assembly.
this way i could do all the assembly by myself.
Lowered the frame on, and slid the bolts through
swingarm on
forks going on:
rear wheel and kick-stand
tank:
tail:
and... a blurry side-shot
i am very excited to see the bike together! the new swing-arm lowered the bike just enough.
also.. i am going to do this style stripe:
thanks yall!
~Chris
Thread Starter
|
July 2011 ROTM
Joined: May 2010
Posts: 223
Likes: 8
From: Hampton Roads, VA
sorry i didnt post these up yesterday, but i got to work on the bike a good bit.
i however.. didnt get much done. =(
i rolled it out into the sun
put the headlight and everything on...

and i put the carburetors in. or rather started to. however, the throttle cables were too long due to the front end remodel, making the throttle stick. so i played around with it for most of the day, but was unable to keep the cables from bending so much that they stuck.
so, i put in the loom to see where it needed to be modified. these pictures are with the loom in.
and i figured out how i need to cut the can for it to fit. but it should look like this:
so... i will need to fid throttle cables that are shorter but will work for my throttle. any ideas? maybe a vfr? i need something shorter or with a different angle of exit from the housing. i really need your help here.
i however.. didnt get much done. =(
i rolled it out into the sun
put the headlight and everything on...
and i put the carburetors in. or rather started to. however, the throttle cables were too long due to the front end remodel, making the throttle stick. so i played around with it for most of the day, but was unable to keep the cables from bending so much that they stuck.
so, i put in the loom to see where it needed to be modified. these pictures are with the loom in.
and i figured out how i need to cut the can for it to fit. but it should look like this:
so... i will need to fid throttle cables that are shorter but will work for my throttle. any ideas? maybe a vfr? i need something shorter or with a different angle of exit from the housing. i really need your help here.
Senior Member
Joined: May 2010
Posts: 1,753
Likes: 3
From: West Monroe,Louisiana
How well does that work? I have a bigger 26gal CH compressor and am thinking about repainting my wheels with it. What brand/style of gun are you using?