
'93 600 Fighter project

Thread Starter
|
July 2011 ROTM
Joined: May 2010
Posts: 223
Likes: 8
From: Hampton Roads, VA
okay... update time here...
USD forks are going to be MINE! bwahahahaha
now i just need to source some new 320mm dia rotors that will fit a f2 rim... that are super cheap.
USD forks are going to be MINE! bwahahahaha
Originally Posted by fslflint
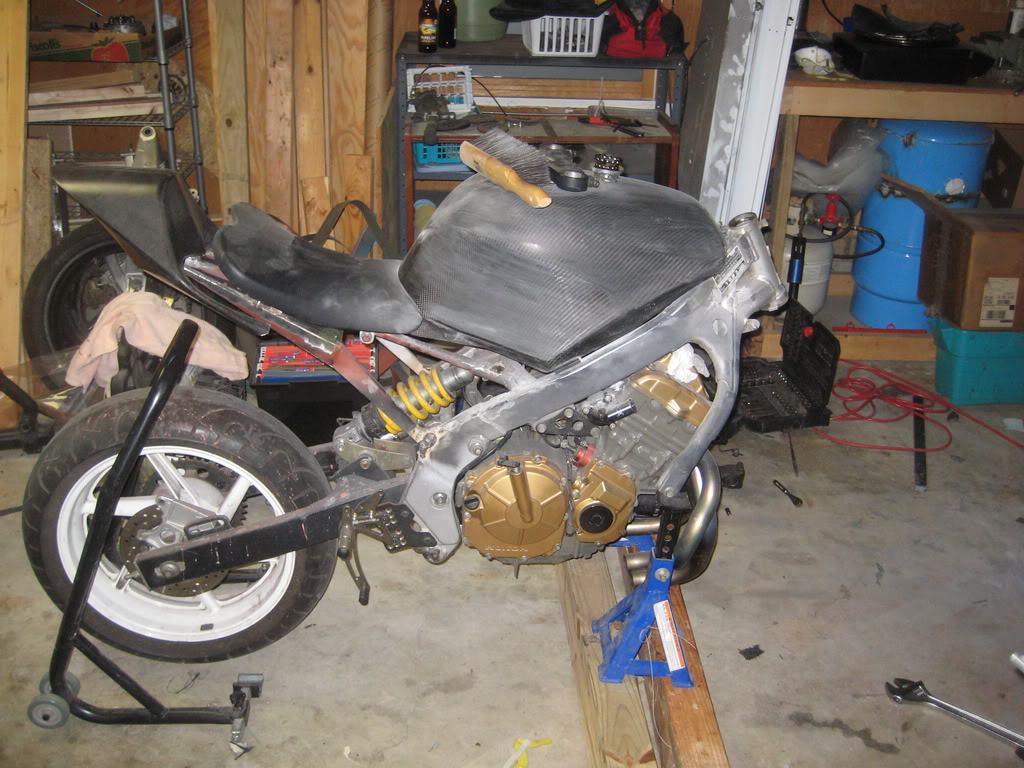
heres the pics I could find of the front end. I think I can make the yokes look allot better with some minor machine work


Thread Starter
|
July 2011 ROTM
Joined: May 2010
Posts: 223
Likes: 8
From: Hampton Roads, VA
okay... well, apparently what i need are 2004-2006 R1 front rotors. anybody got any they would be willing to part with? Hit me up.. we can work something out.
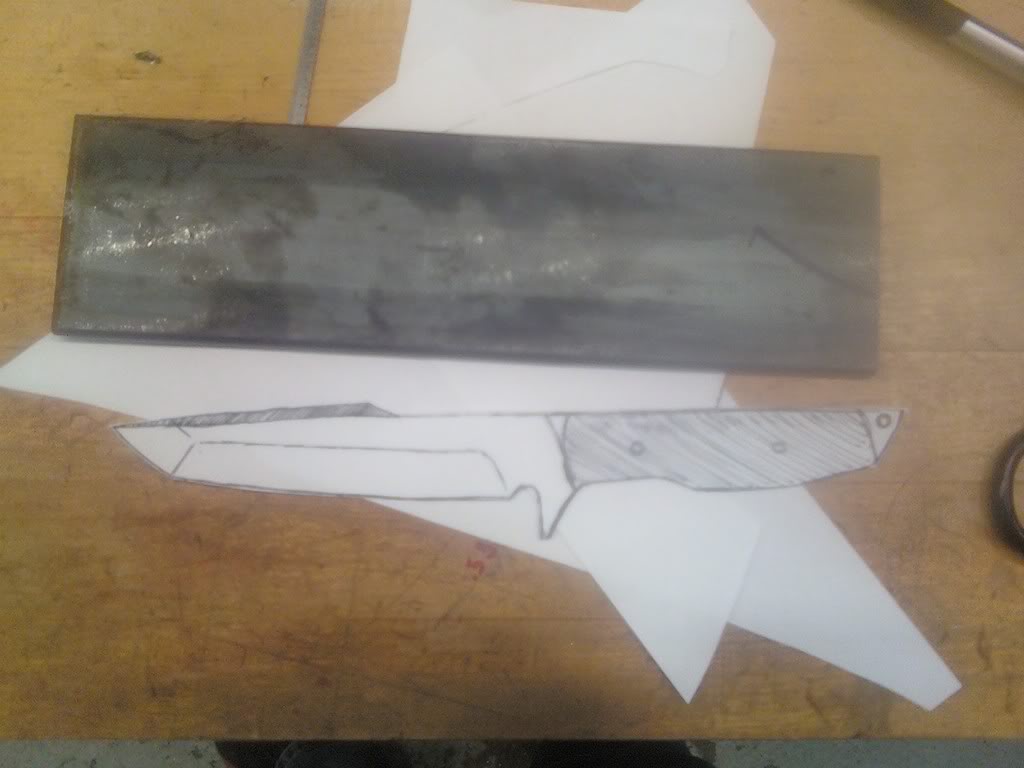
Okay.. on a side note, i am trading a knife for these forks, so i thought i might put in some simplified info and picture about making the knife.. as it is actually build related.
okay.. always gotta start out with a plan, even if it is in your head, otherwise you just make crap. so.. here is a drawing. i had several things to go on; blade is 5" or less, very thick tough blade to put up with abuse, a drop point, and a modern tanto tip. so, here you go:
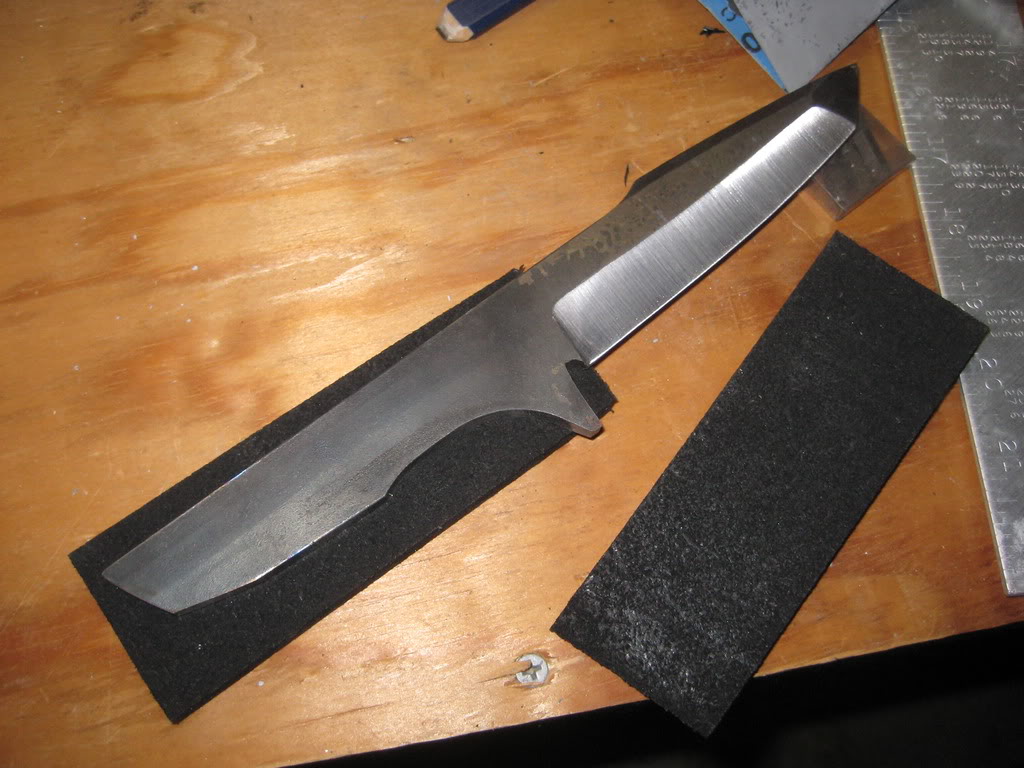
then i sawed it out (roughly) and profiled it on the grinder. i forgot to say, this is 5160 spring steel.
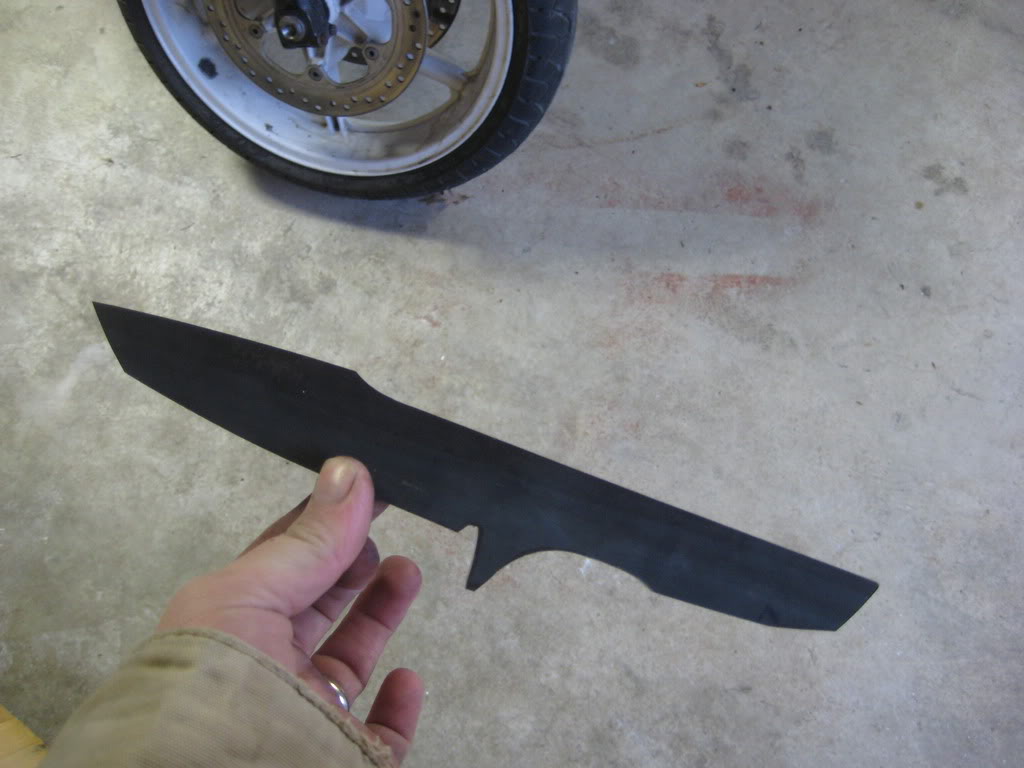
then i rough round in the bevels. I will heat treat it next before drilling the handle pin holes and lanyard hole.

okay..
heat treated the blade. Heated to 1550 degrees, quenched in 10 second oil. I edge quenched it, so the back is a very tough springy 40 Rockwell hardness but the edge is a very hard 60 Rockwell. this will enable the blade to sustain maximum abuse while keeping a hard edge that will stay sharp even under the most taxing repeated cutting.
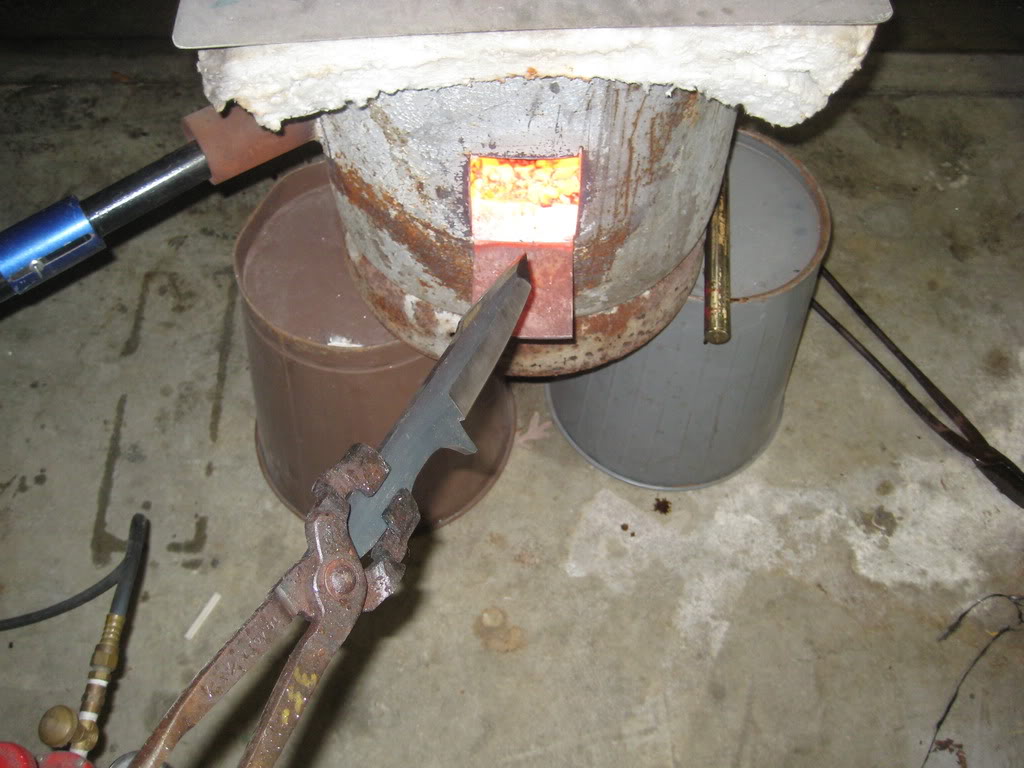
tempered twice at 390 degrees for an hour.
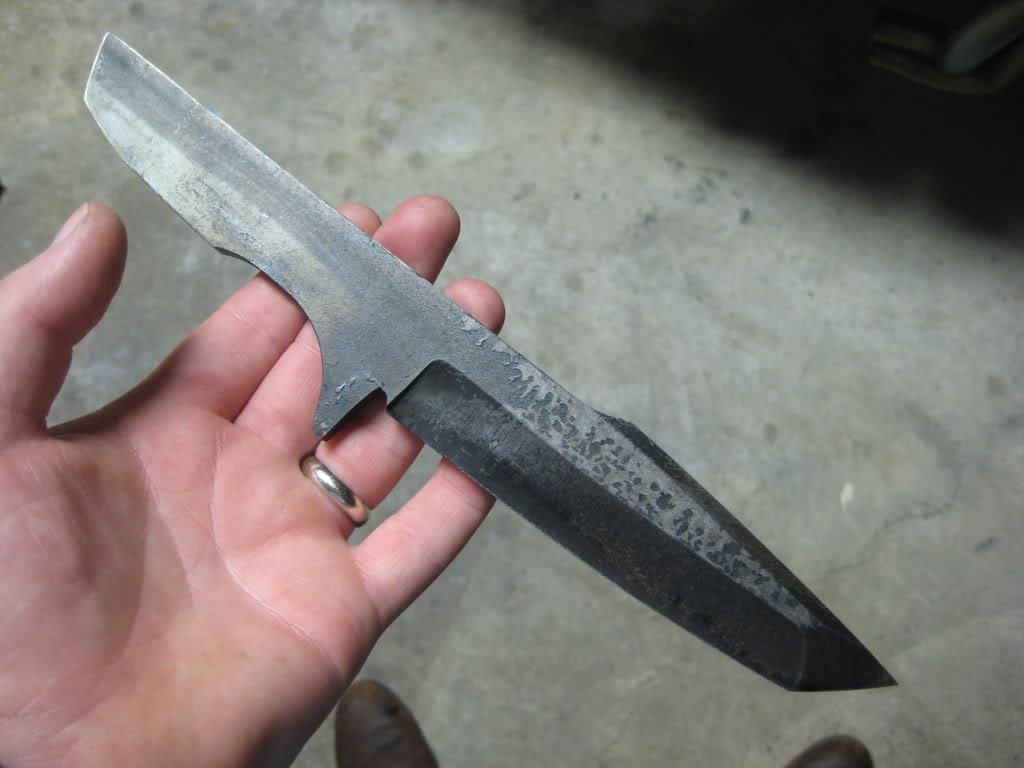
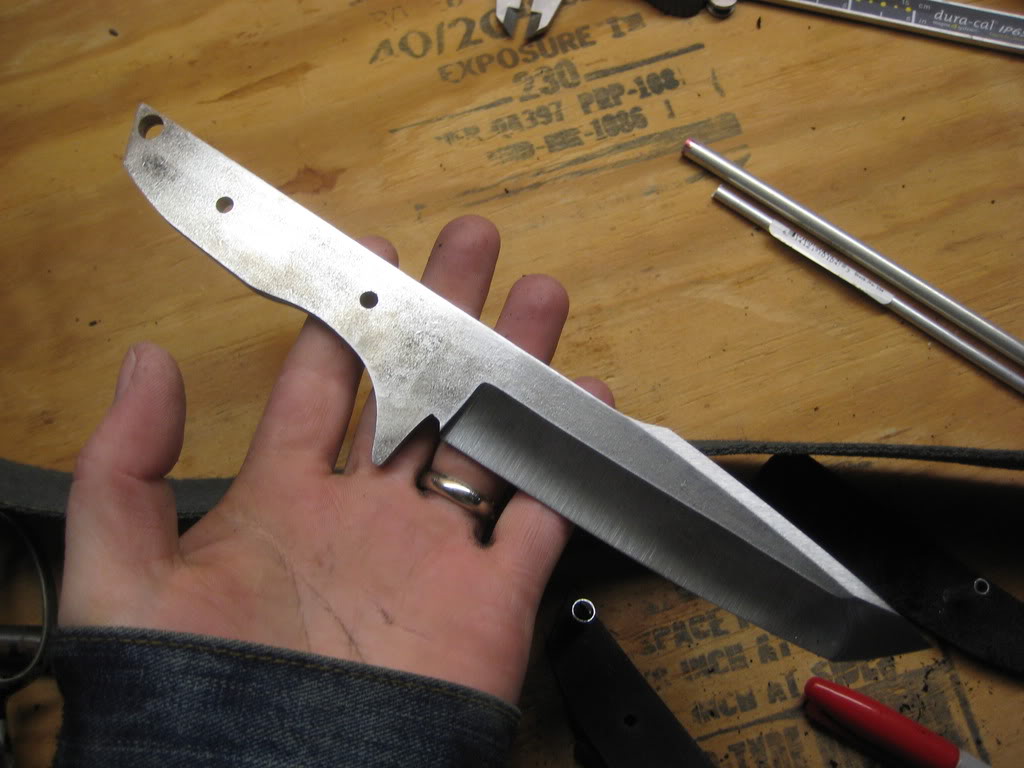
the handle pin-holes need to be drilled, as does the lanyard hole, then the handle can be fitted. The knife will be done by Friday.
Also the final work on the side-covers is almost done, but there are no pictures at the moment. I was also able to finish sanding one half of the tank, and now with a better vacuum pump in hand, i am ready to start on the tail.
Okay.. on a side note, i am trading a knife for these forks, so i thought i might put in some simplified info and picture about making the knife.. as it is actually build related.
okay.. always gotta start out with a plan, even if it is in your head, otherwise you just make crap. so.. here is a drawing. i had several things to go on; blade is 5" or less, very thick tough blade to put up with abuse, a drop point, and a modern tanto tip. so, here you go:
then i sawed it out (roughly) and profiled it on the grinder. i forgot to say, this is 5160 spring steel.
then i rough round in the bevels. I will heat treat it next before drilling the handle pin holes and lanyard hole.
okay..
heat treated the blade. Heated to 1550 degrees, quenched in 10 second oil. I edge quenched it, so the back is a very tough springy 40 Rockwell hardness but the edge is a very hard 60 Rockwell. this will enable the blade to sustain maximum abuse while keeping a hard edge that will stay sharp even under the most taxing repeated cutting.
tempered twice at 390 degrees for an hour.
the handle pin-holes need to be drilled, as does the lanyard hole, then the handle can be fitted. The knife will be done by Friday.
Also the final work on the side-covers is almost done, but there are no pictures at the moment. I was also able to finish sanding one half of the tank, and now with a better vacuum pump in hand, i am ready to start on the tail.
Thread Starter
|
July 2011 ROTM
Joined: May 2010
Posts: 223
Likes: 8
From: Hampton Roads, VA
Well... i have an update for you.
Knife work:
I cut out the handle material. Horse stall mat; the ultimate handle material
cut the holes and transferred them to the handle material
then i roughed the handle out and glued it on before flaring the tubes. the string holds it tighter than clamps
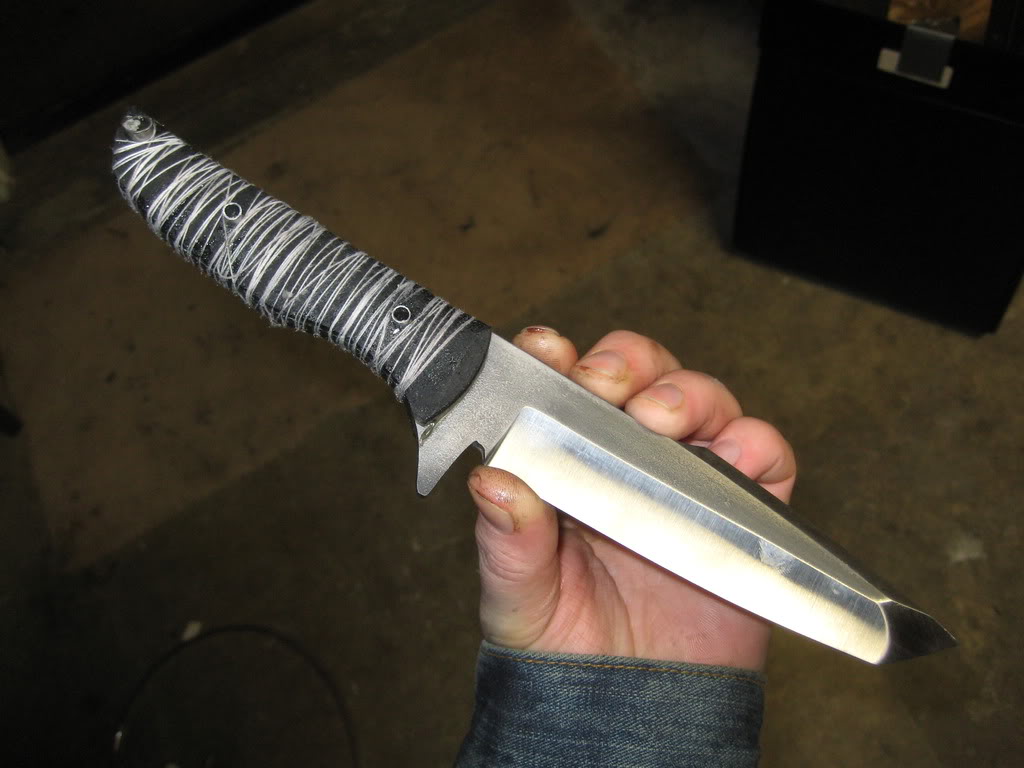
glue dry, string off,
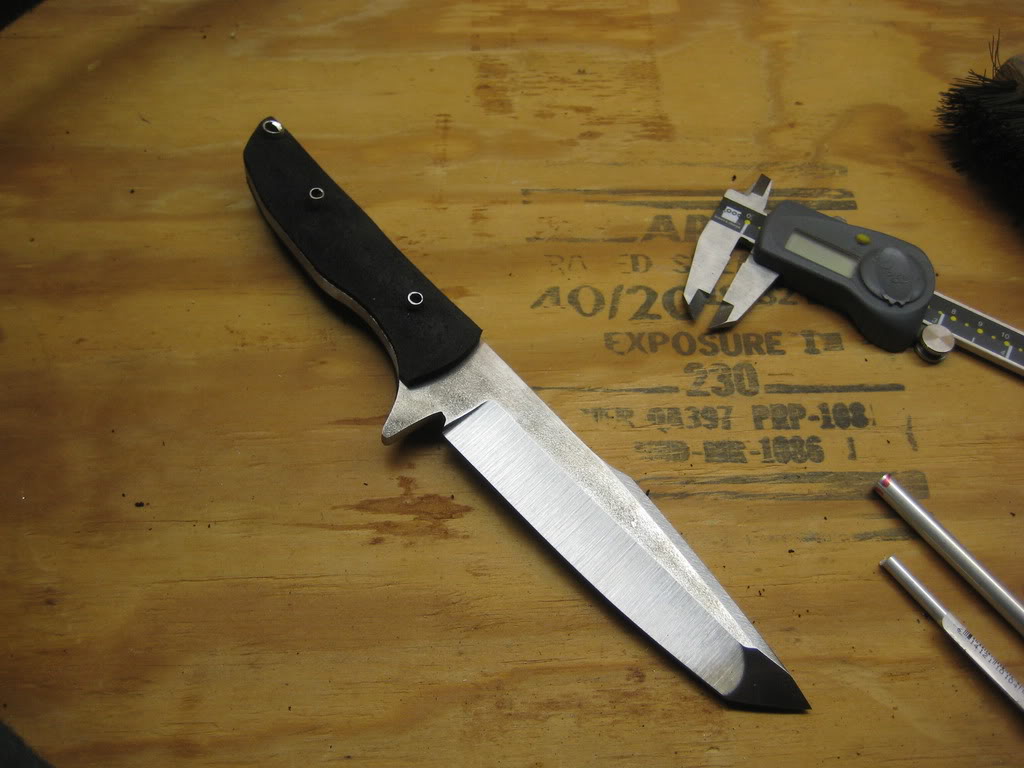
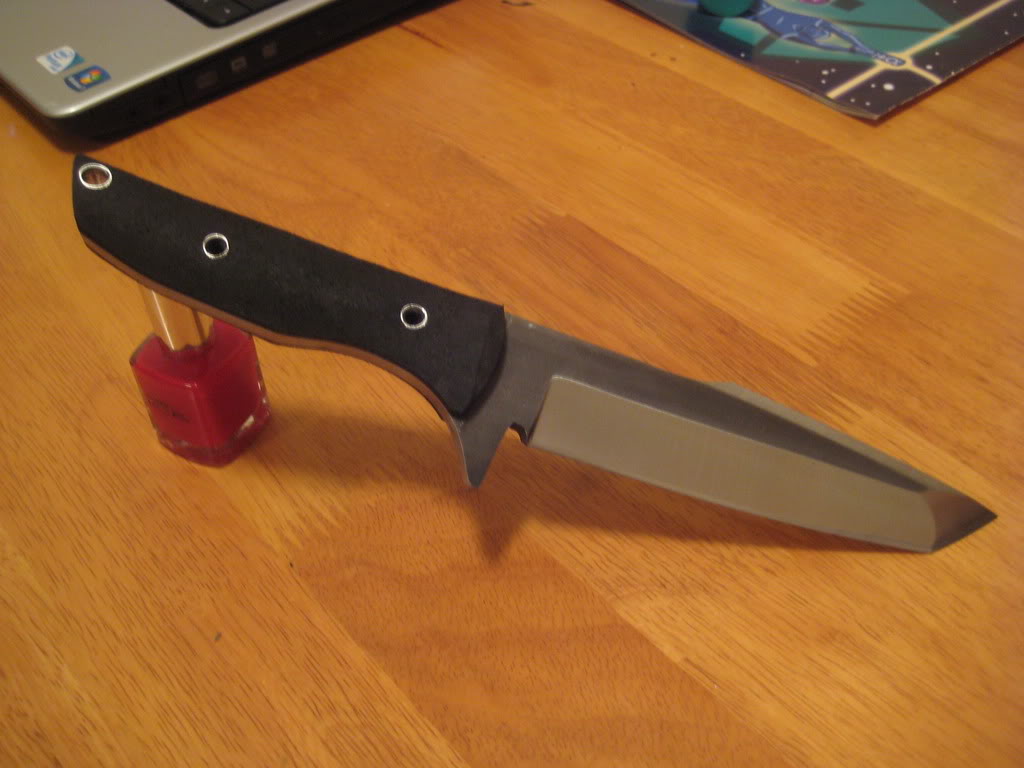
and.. the finished product ready to cut
i have been doing some machine work as well.
new 50mm headlight clamps... (there are 16 of them total)
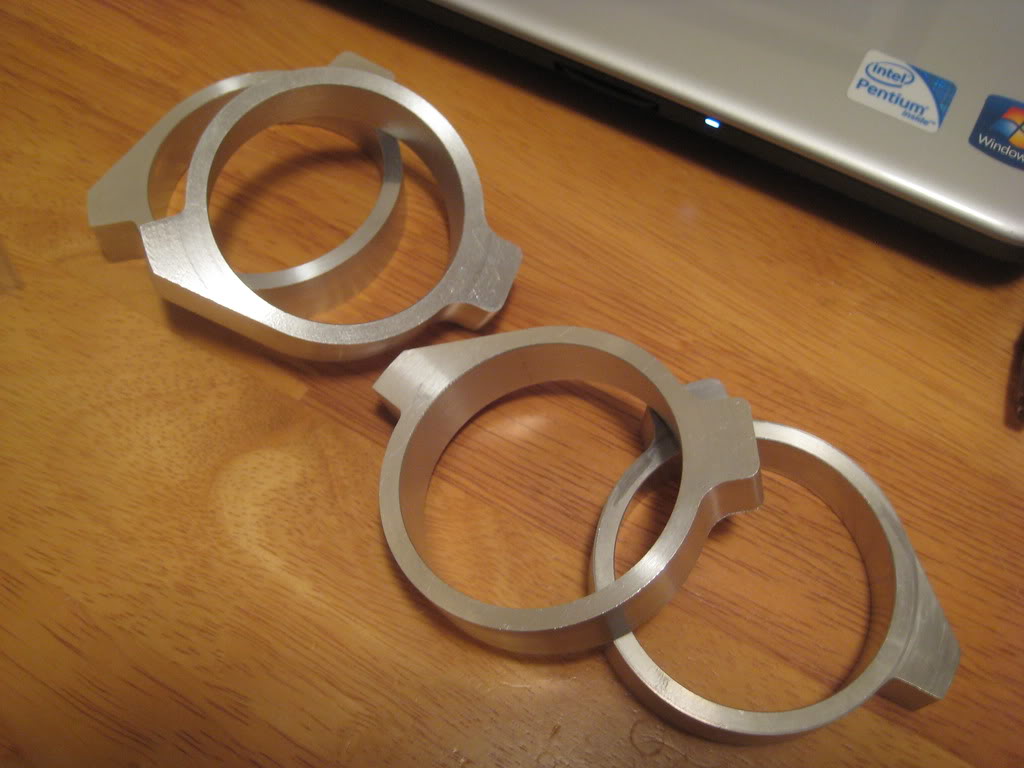
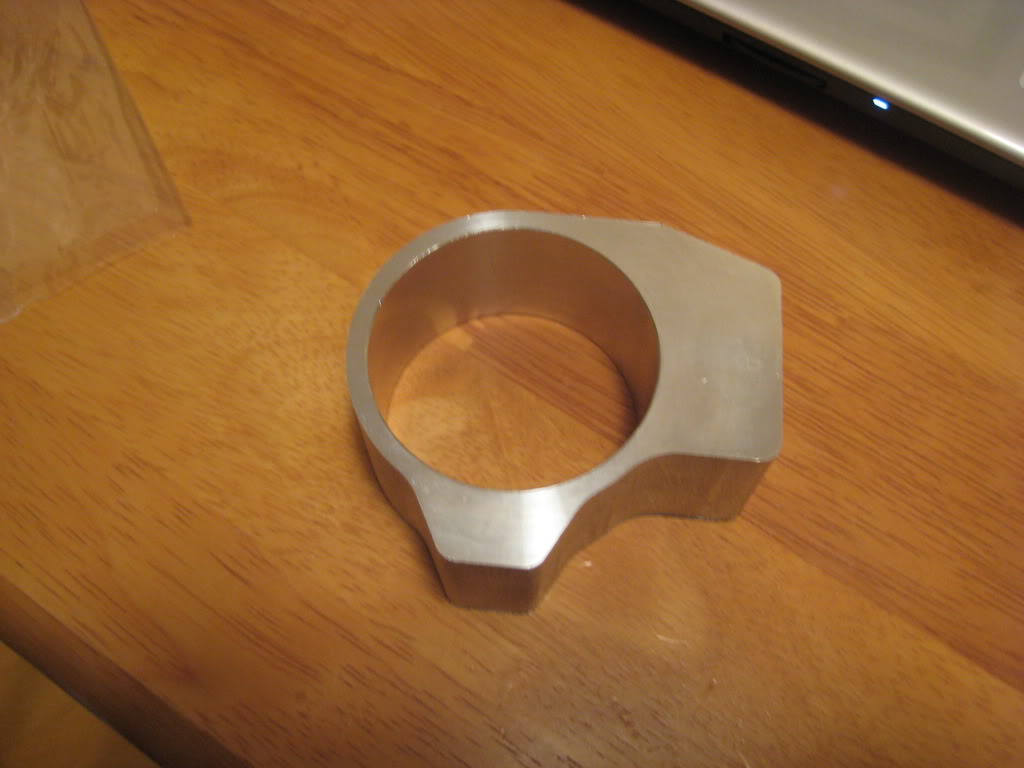
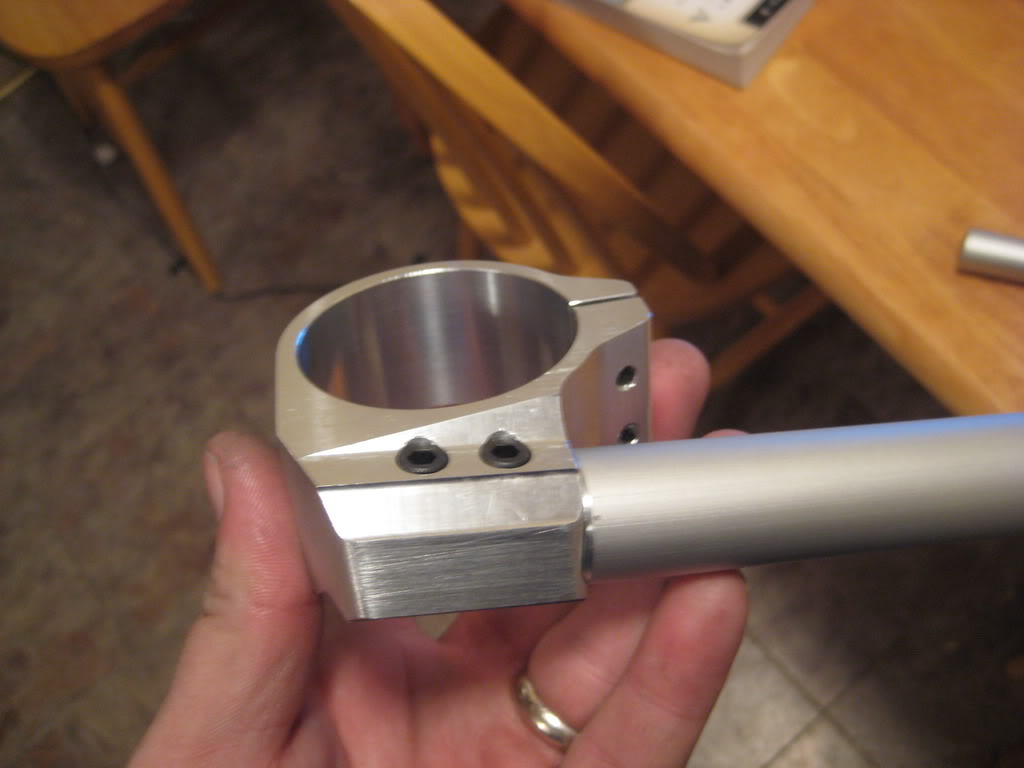
and the beginnings of a clip-on
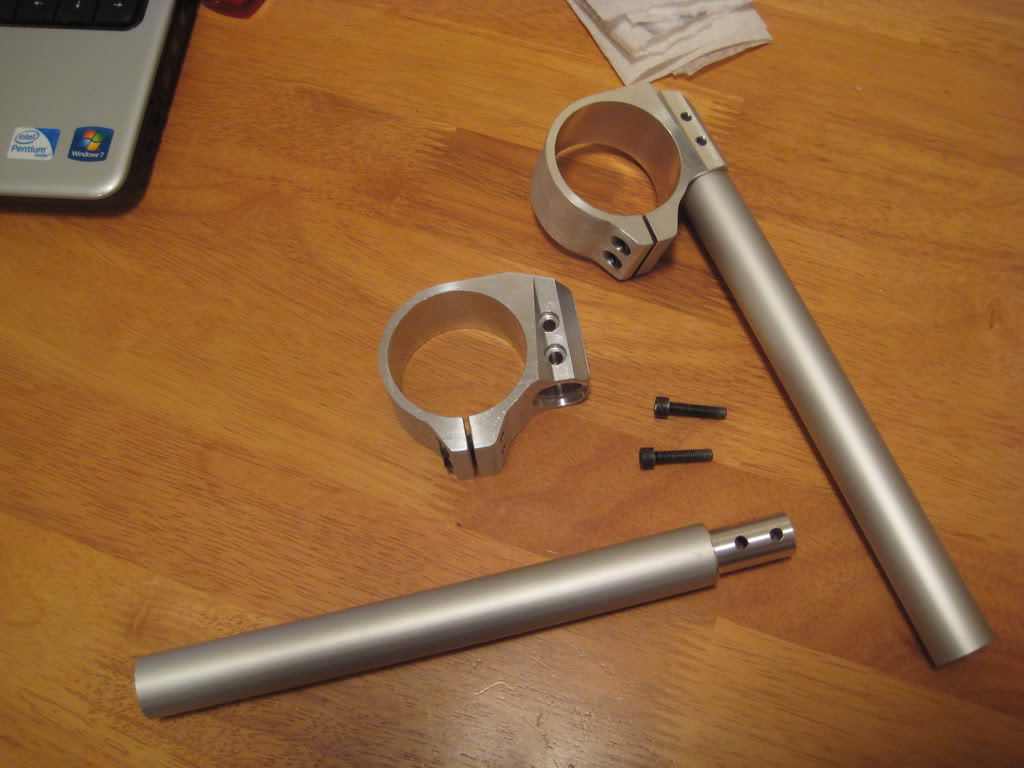
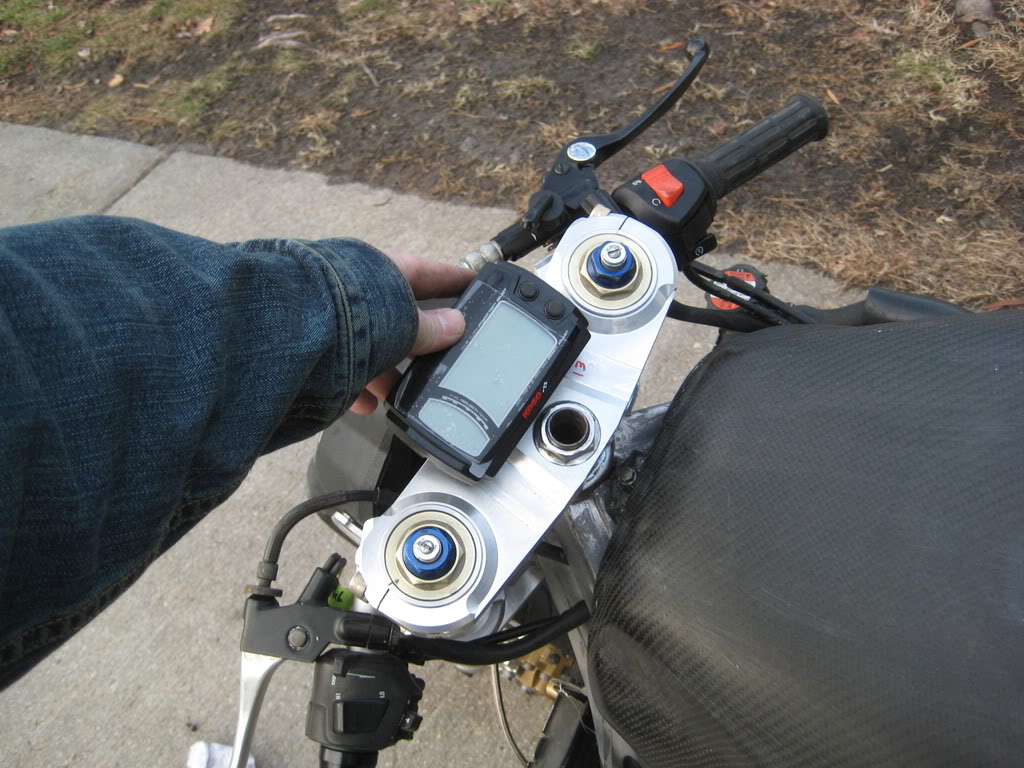
and... here are the finished clip-ons. i am re-making the bars with a solid stainless stell adapter and beef up the screws to 1/4-20's the clamps and bars are 6160-t6 aluminum and the adapters are 7075. they will be 416 stainless
So... my wife and i drove up to MD to get the front end and give Zach the knife today.
i am now in possession of a USD front end with custom triples. thanks Zach!
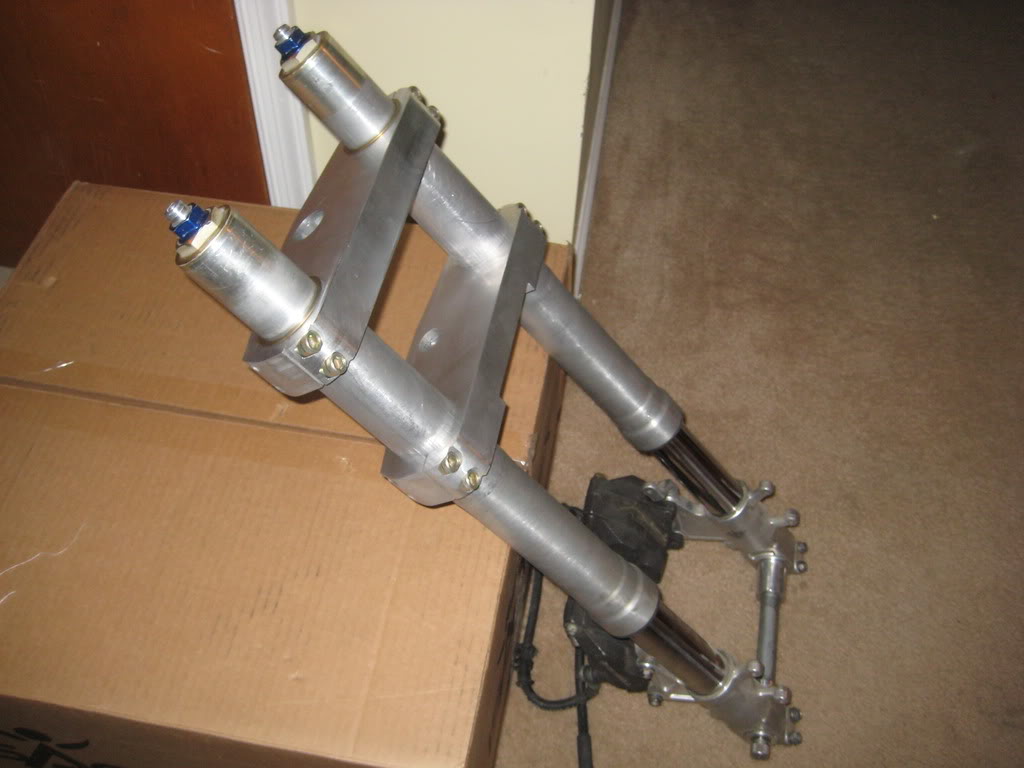
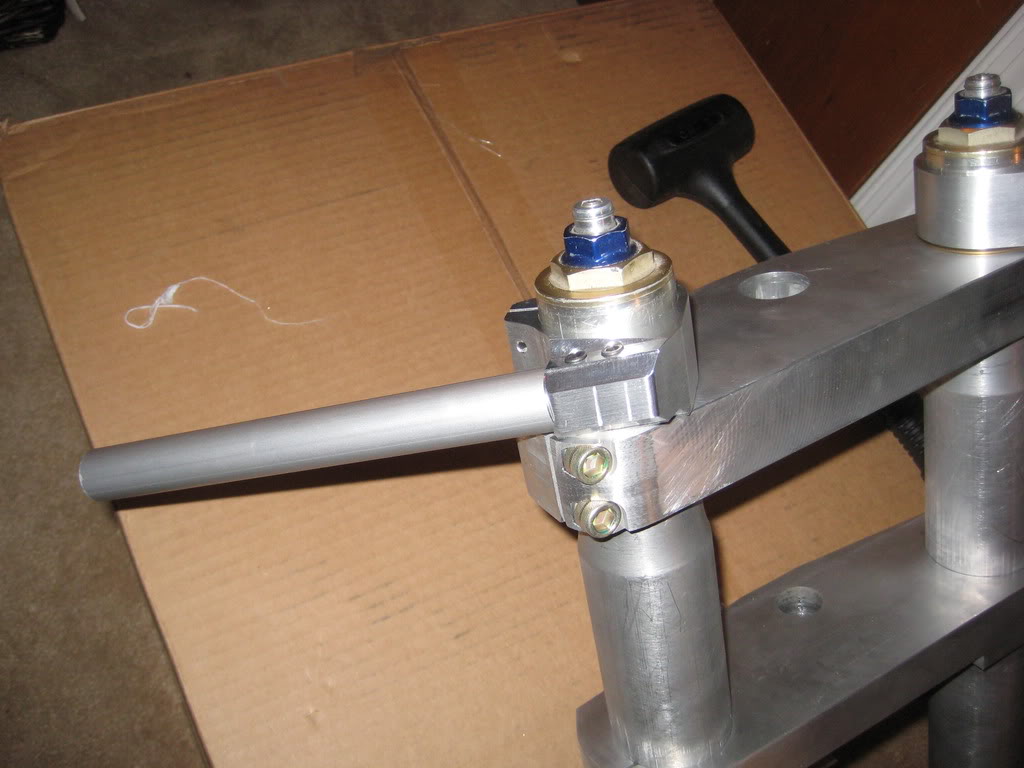
and... i just had to try out the clip-ons
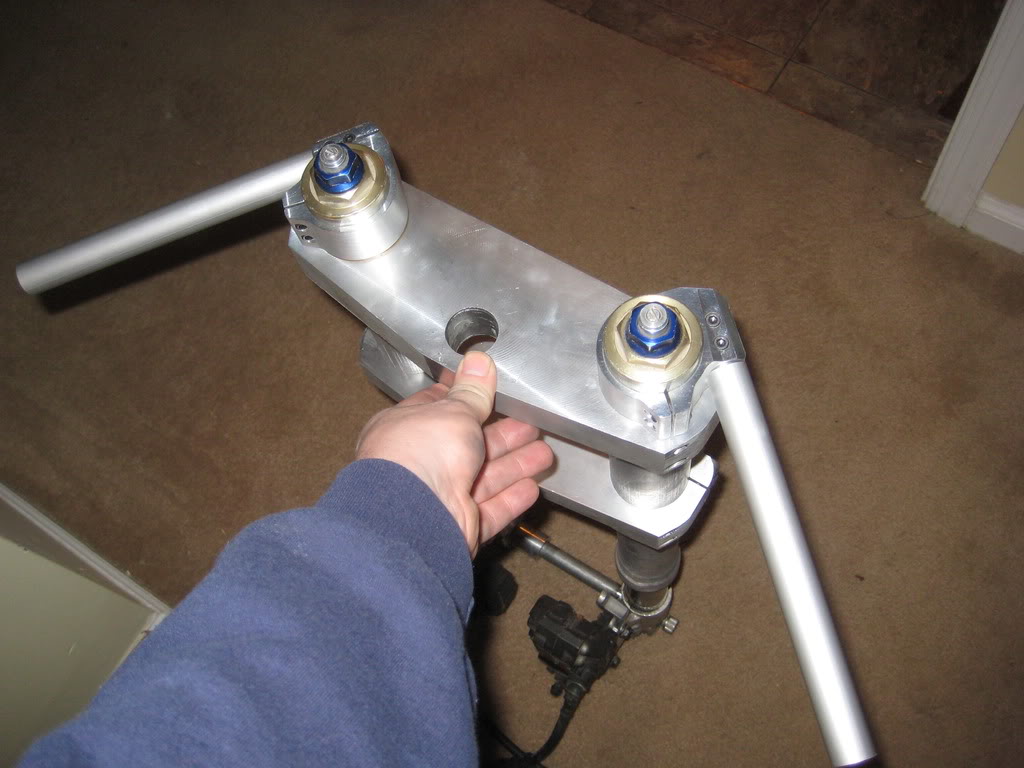
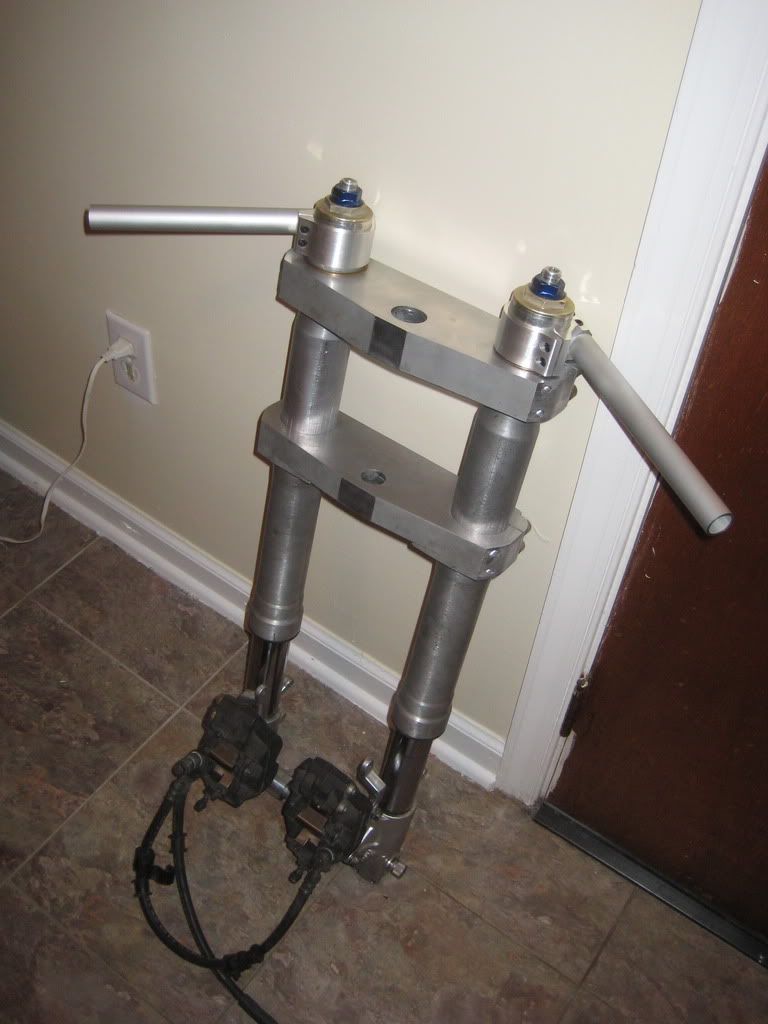
the triples will be getting a stem of their very own for Christmas as well as a face lift and liposuction. makeover time!
i cant throw out enough rep for Zach and all he was done. and Denver donated some 320 rotors. thanks man!
more to come...
Knife work:
I cut out the handle material. Horse stall mat; the ultimate handle material
cut the holes and transferred them to the handle material
then i roughed the handle out and glued it on before flaring the tubes. the string holds it tighter than clamps
glue dry, string off,
and.. the finished product ready to cut
i have been doing some machine work as well.
new 50mm headlight clamps... (there are 16 of them total)
and the beginnings of a clip-on
and... here are the finished clip-ons. i am re-making the bars with a solid stainless stell adapter and beef up the screws to 1/4-20's the clamps and bars are 6160-t6 aluminum and the adapters are 7075. they will be 416 stainless
So... my wife and i drove up to MD to get the front end and give Zach the knife today.
i am now in possession of a USD front end with custom triples. thanks Zach!
and... i just had to try out the clip-ons
the triples will be getting a stem of their very own for Christmas as well as a face lift and liposuction. makeover time!
i cant throw out enough rep for Zach and all he was done. and Denver donated some 320 rotors. thanks man!
more to come...
Thread Starter
|
July 2011 ROTM
Joined: May 2010
Posts: 223
Likes: 8
From: Hampton Roads, VA
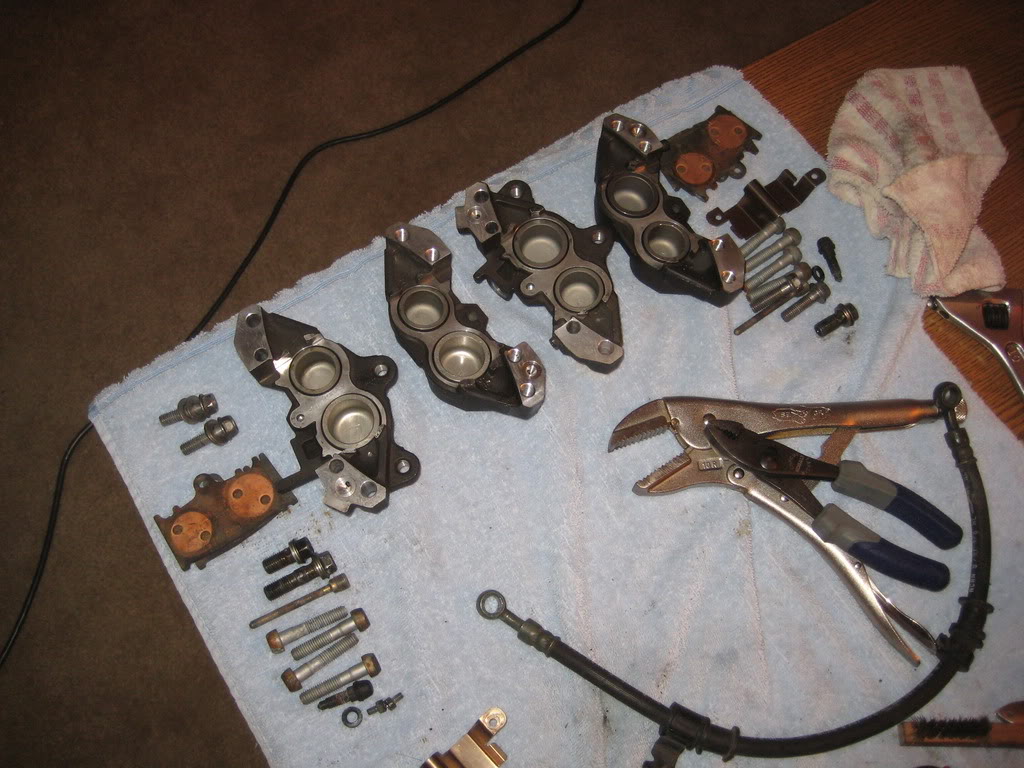
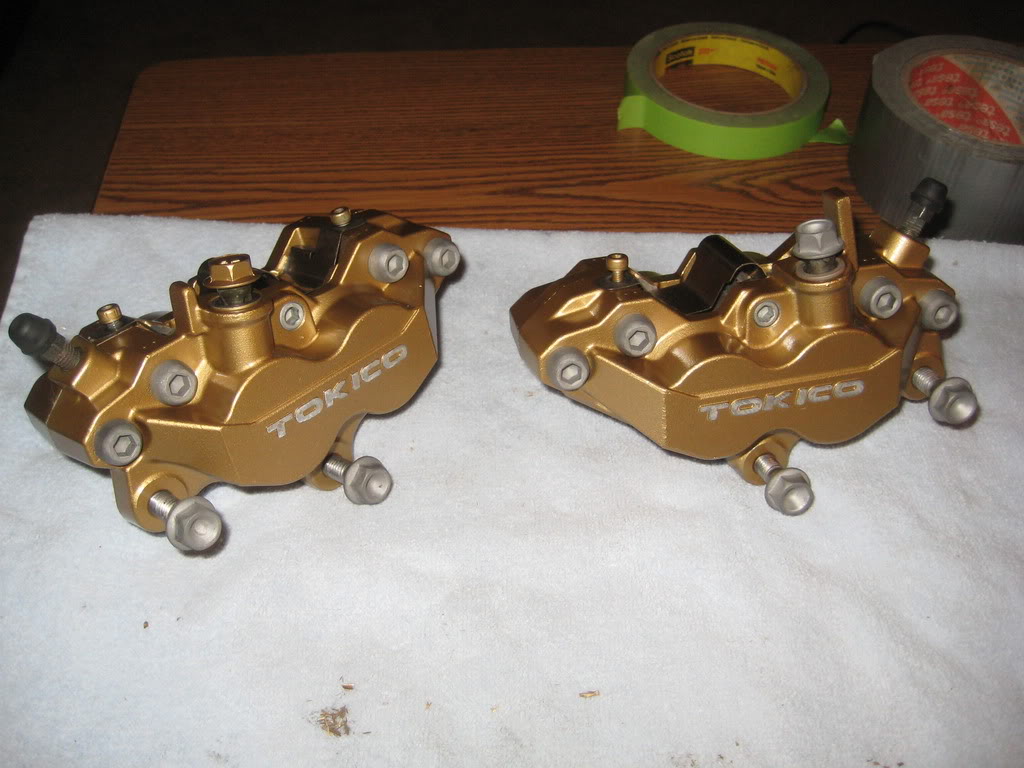
I stripped cleaned, painted and rebuilt the brakes...
my wife rocks. in exchange for watching a chick flick with her i got to do all the brake work on the coffee table instead of the freezing garage!
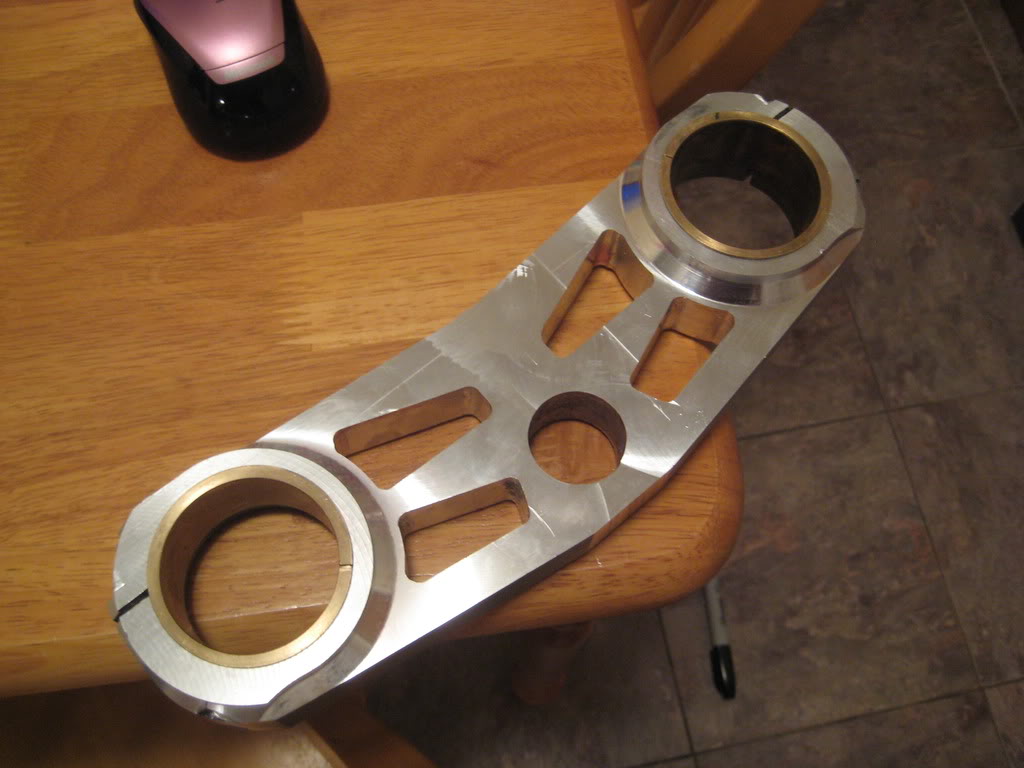
I have been pulling 12 hour days for the last week trying to get this project we are working on done, but some of the time i am just watching the machine run... so i got some work done on the top triple.
Here is how it started out.

I set up the 50mm slug to center the triple on the turntable so that i could switch sides without having to setup every time.

slimmed down a bit
I then laid out my lines to cut the pockets.

i still need to do the final passes and clean everything up, but here is what it looks like now.
I also found out that i get Christmas Eve off, so i will be trying to knock out the final CF tail while my wife is at work.
thanks so much!
~Chris
my wife rocks. in exchange for watching a chick flick with her i got to do all the brake work on the coffee table instead of the freezing garage!
I have been pulling 12 hour days for the last week trying to get this project we are working on done, but some of the time i am just watching the machine run... so i got some work done on the top triple.
Here is how it started out.
I set up the 50mm slug to center the triple on the turntable so that i could switch sides without having to setup every time.
slimmed down a bit
I then laid out my lines to cut the pockets.
i still need to do the final passes and clean everything up, but here is what it looks like now.
I also found out that i get Christmas Eve off, so i will be trying to knock out the final CF tail while my wife is at work.
thanks so much!
~Chris
Thread Starter
|
July 2011 ROTM
Joined: May 2010
Posts: 223
Likes: 8
From: Hampton Roads, VA
I was kinda busy this past week/weekend. Merry Christmas! we also got a foot of snow, canceling our holiday travels, so i did get the tail made:
Cloth prepped and ready
ready for a little hand-work. sorry i didn't get more pictures. i kinda hand my hands full.
I also got an F3 wheel from a guy here at work to play around with. I will prolly end up taking it off his hands so i can use the 320mm rotors i have.
And i took the OEM front end off to pull out the steering stem to put it in the new triples.
And... as it turns out, the triple that i cleaned up is the lower triple. Oops. i thought it was the top.
more to come soon. working 12 hour days over the holidays... Happy new year! stay safe ya hooligans.
Thread Starter
|
July 2011 ROTM
Joined: May 2010
Posts: 223
Likes: 8
From: Hampton Roads, VA
I pulled the stem out of the old triple. well the existing hole in the new triple fit perfectly. for a press fit. I did want some assurance however that it wouldnt be coming back out, but i couldnt weld it since the triple is aluminum and the stem is steel... so... i threaded the inside of the stem.
Sadly, the only thread that would work was a 1"-20 so i tapped it. easy work. then... i find out they dont even MAKE 1"-20 bolts... so.. now i need to make a "bolt" (pictures later today)
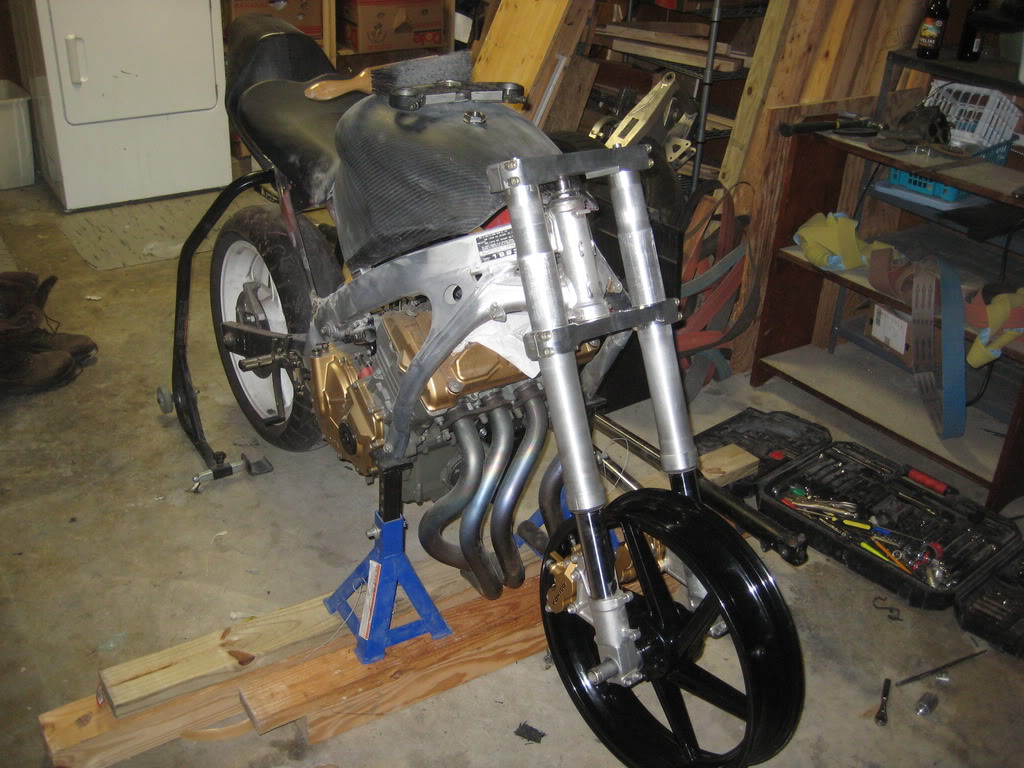
I was able to slap the forks on. the top triple needs to be modified to accept the stem, but otherwise...
more coming today...
Sadly, the only thread that would work was a 1"-20 so i tapped it. easy work. then... i find out they dont even MAKE 1"-20 bolts... so.. now i need to make a "bolt" (pictures later today)
I was able to slap the forks on. the top triple needs to be modified to accept the stem, but otherwise...
more coming today...
Thread Starter
|
July 2011 ROTM
Joined: May 2010
Posts: 223
Likes: 8
From: Hampton Roads, VA
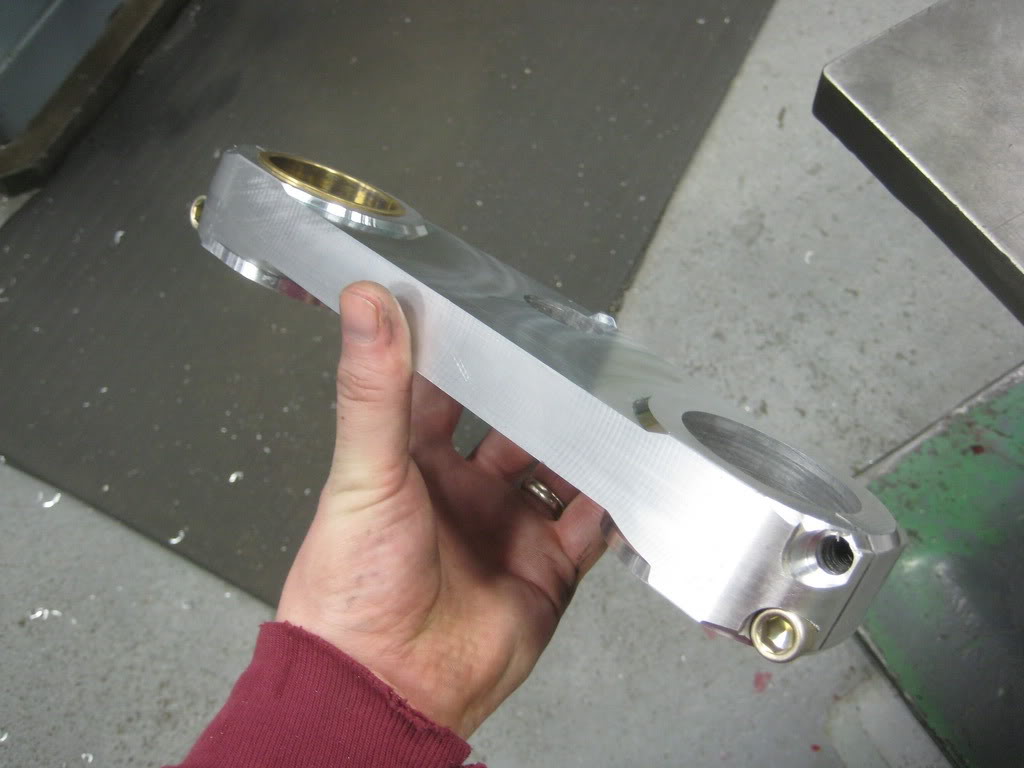
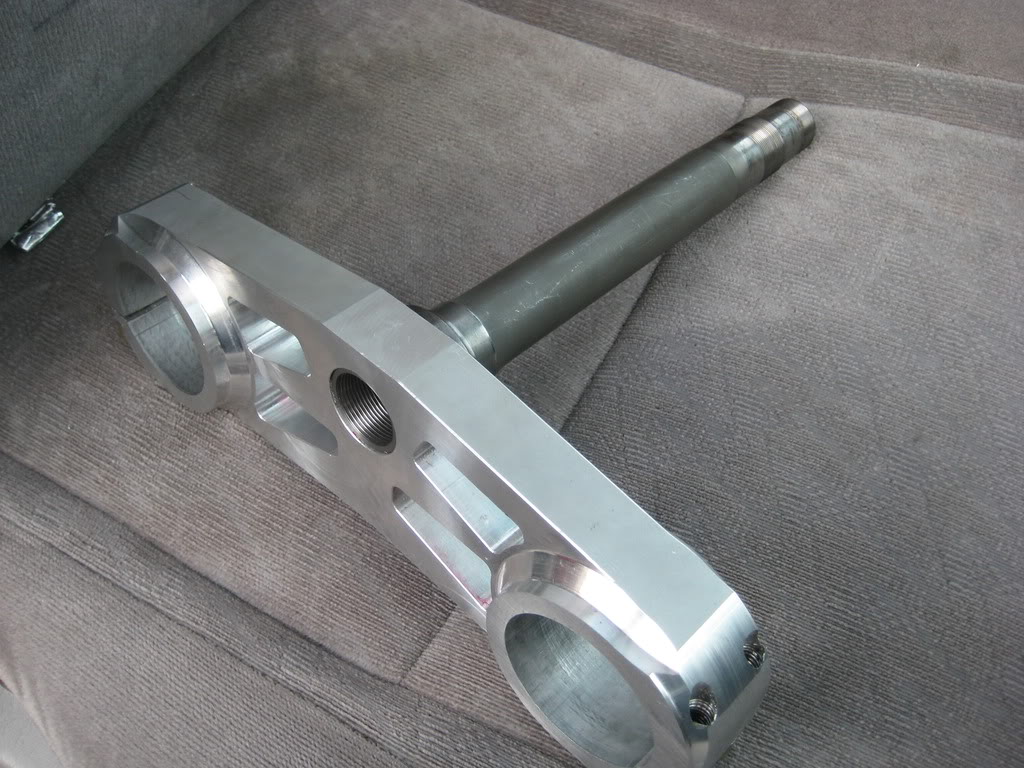
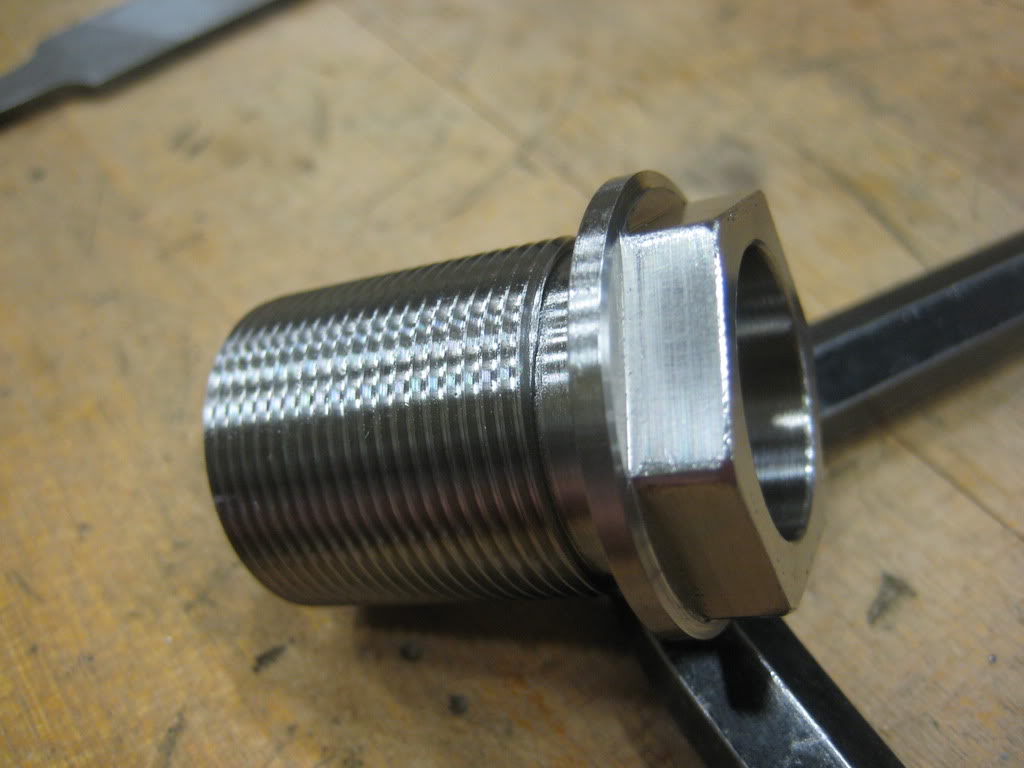
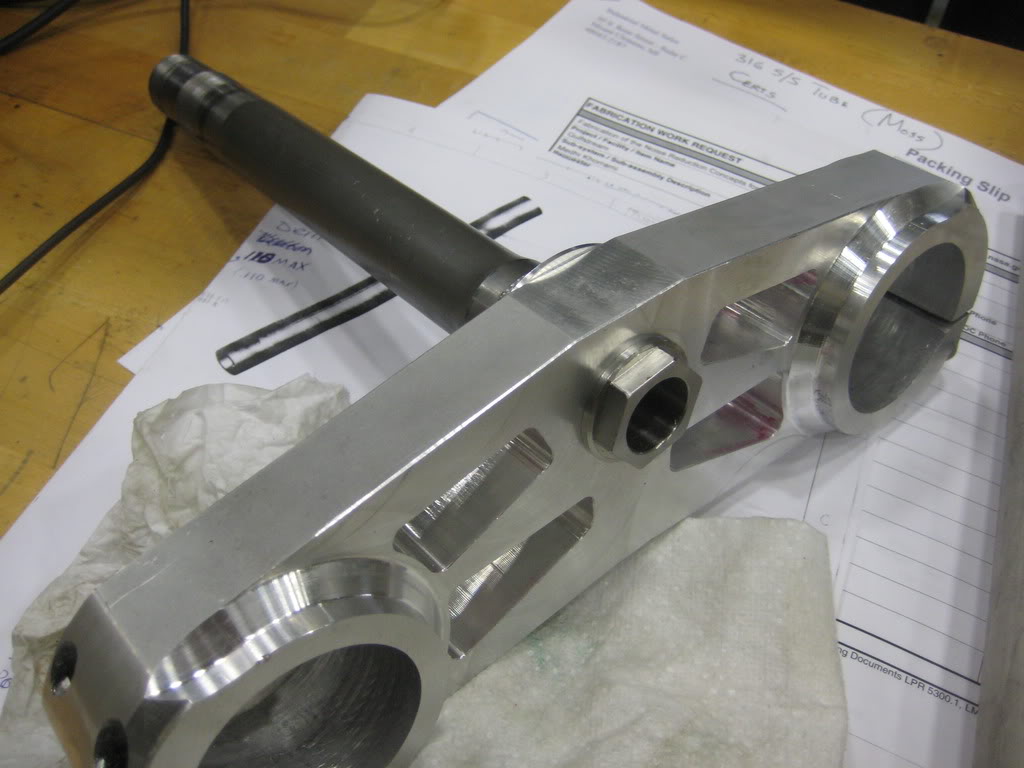
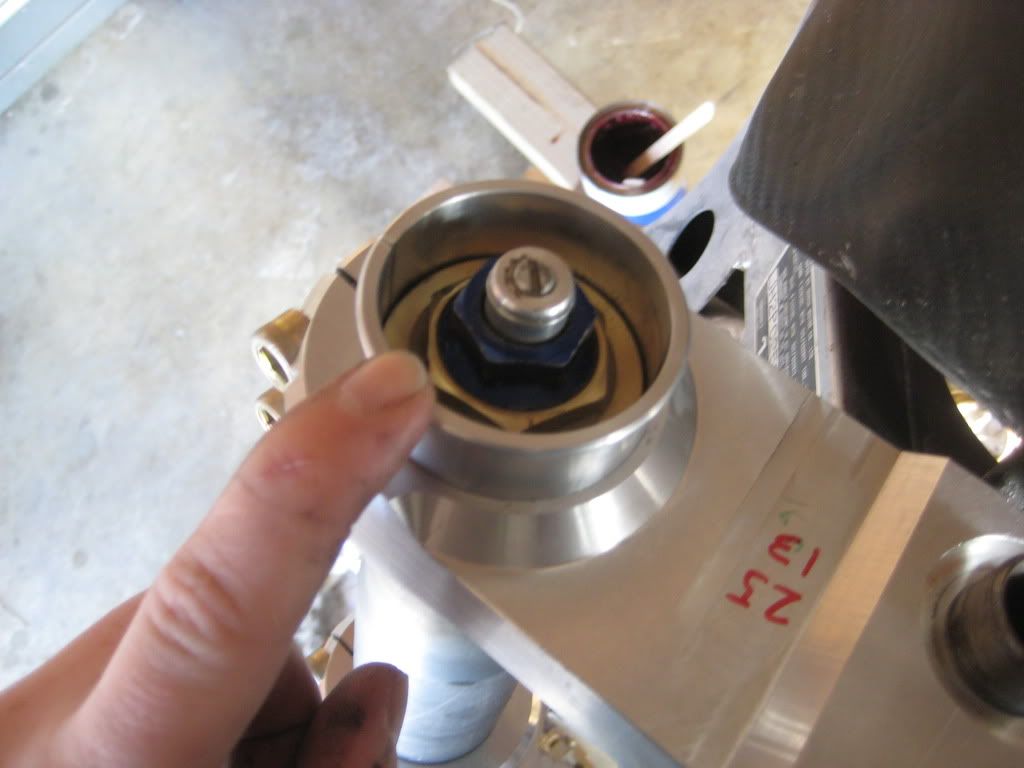
Here are the pictures of the steering stem "bolt" 1"-20 threads. came out pretty. made out of 316 stainless.
and then installed and everything pressed together. I am still put a pin in to lock it. Not going to hurt anything, and better safe than sorry.
gonna try and put the front end on tonight.
Okay... pretty productive weekend... for New Years anyway.
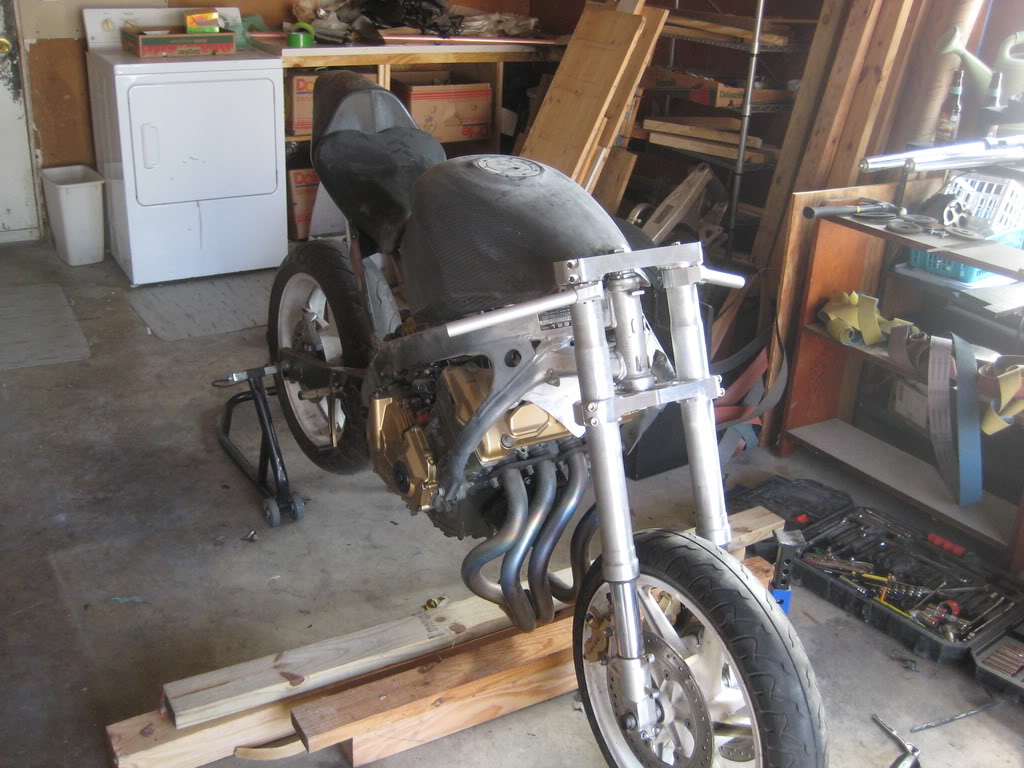
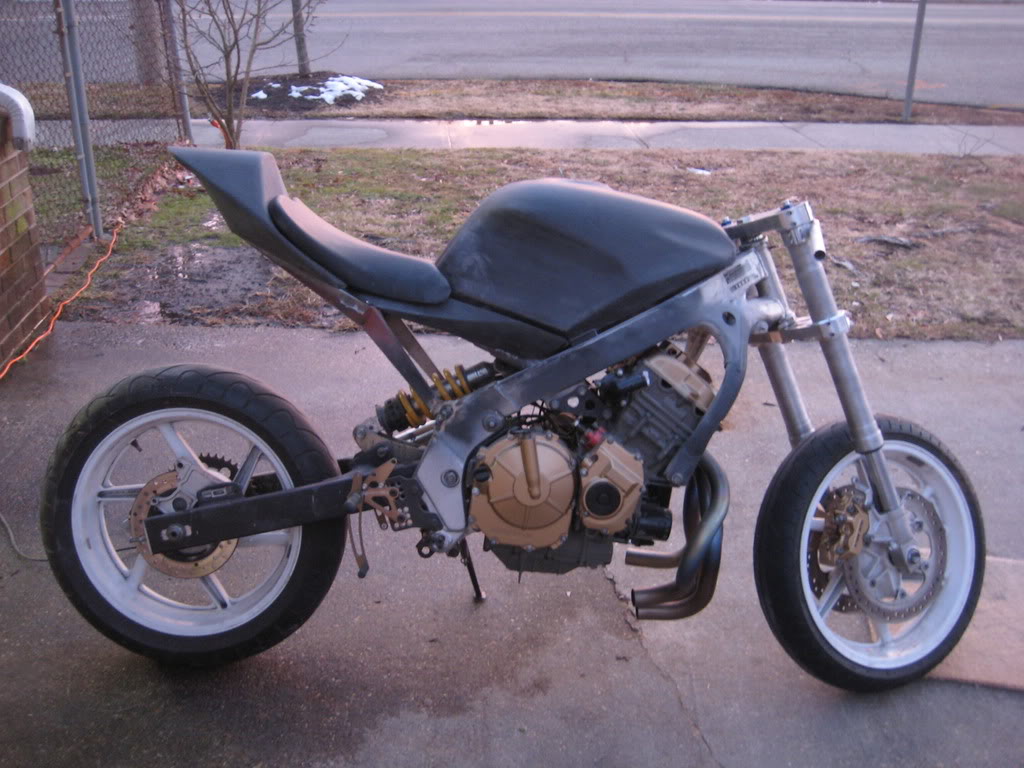
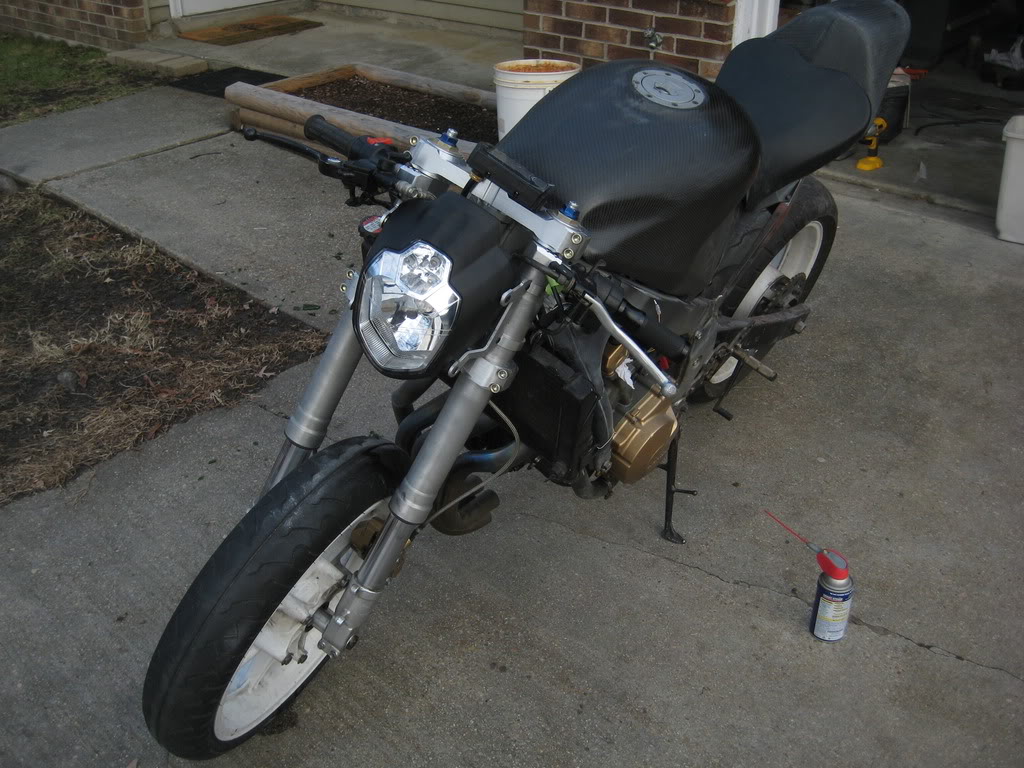
I got the front end on. the wheel is just a mock-up. and the top triple needs a good bit more work.
I then turned to the body work.
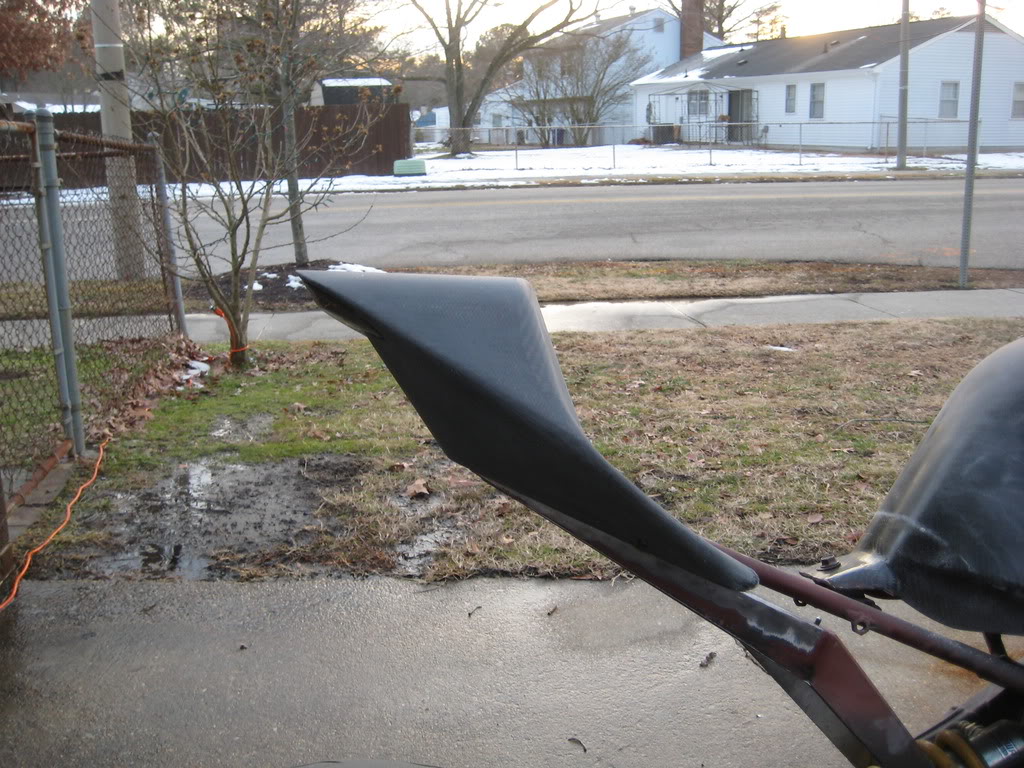
I got the Final tail fit and bolted on, but didnt like how the bottom stuck out.

So... i cut it off. I will modify the subframe to fill the whole and allow for a mounting bolt to secure it in the back. This part is alot more rigid, and really needs no more support... but it certainly wont hurt.
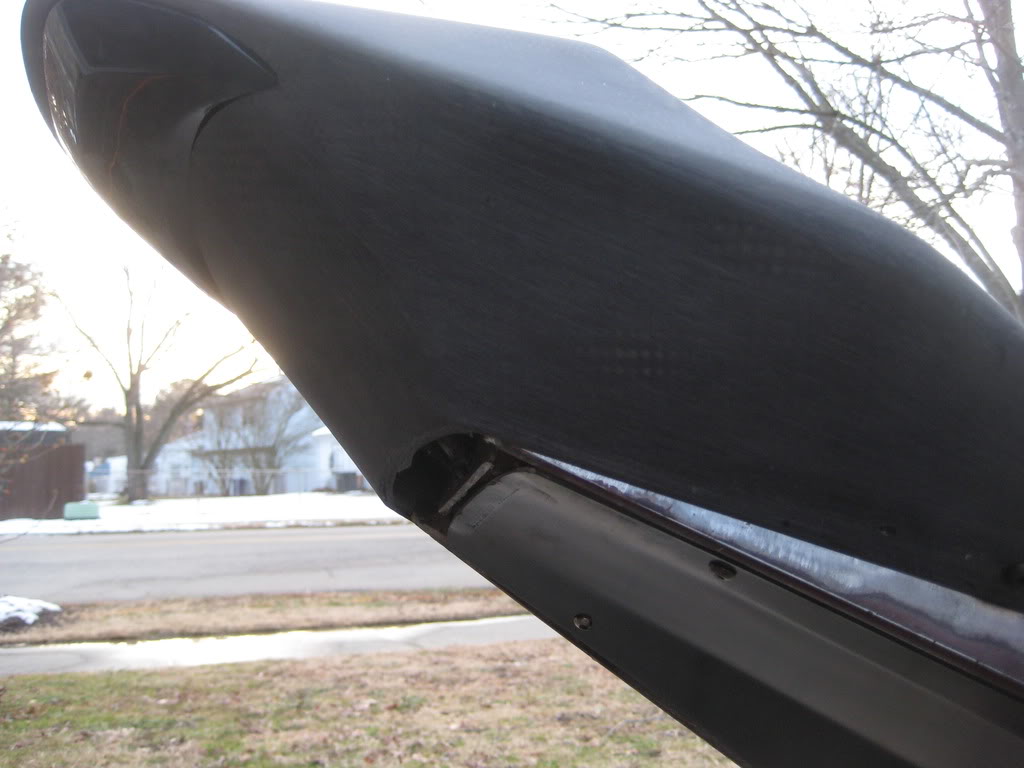
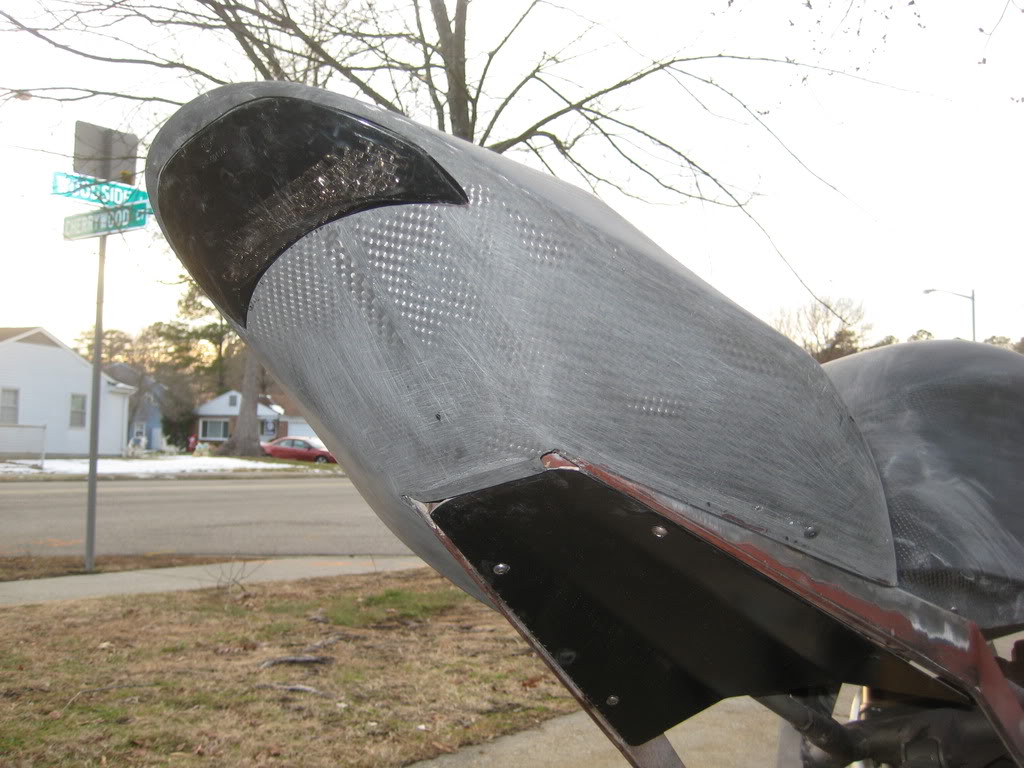
Looks better from the side too.

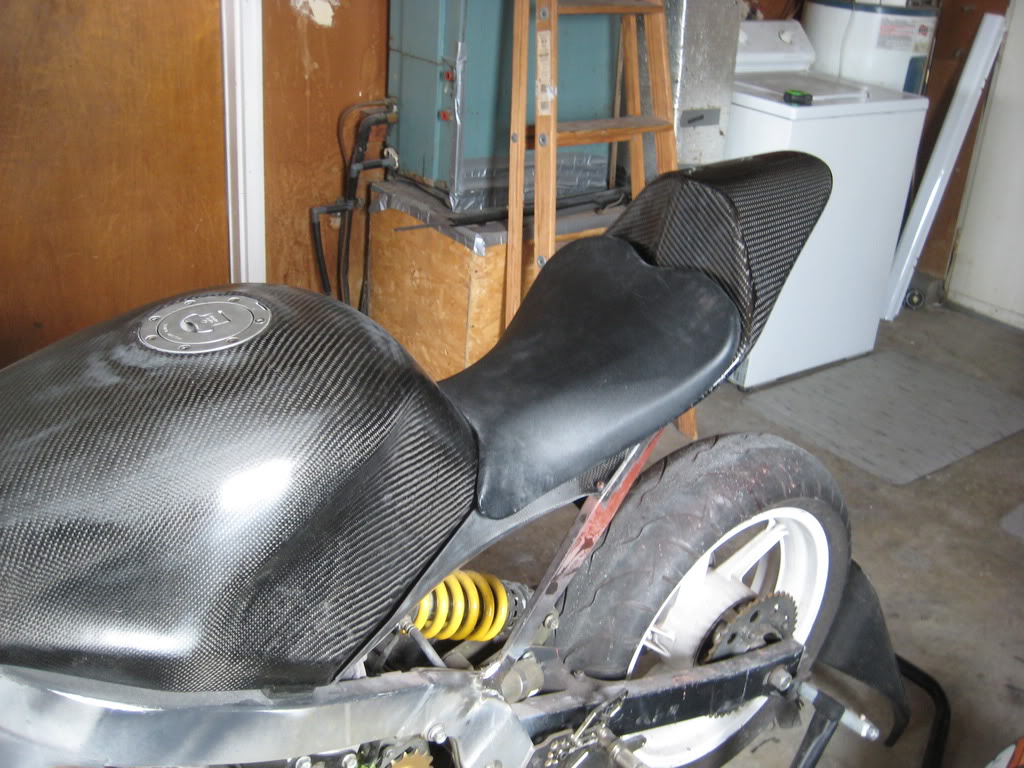
I also got the final side covers fit and bolted on. all they need now is paint.

I put the final coat of resin on the tail (just a light one to fix some pin-holes) The twill tail matches better i think.

anyway.. should have some triple update soon.
thanks
~Chris
and then installed and everything pressed together. I am still put a pin in to lock it. Not going to hurt anything, and better safe than sorry.
gonna try and put the front end on tonight.
Okay... pretty productive weekend... for New Years anyway.
I got the front end on. the wheel is just a mock-up. and the top triple needs a good bit more work.
I then turned to the body work.
I got the Final tail fit and bolted on, but didnt like how the bottom stuck out.
So... i cut it off. I will modify the subframe to fill the whole and allow for a mounting bolt to secure it in the back. This part is alot more rigid, and really needs no more support... but it certainly wont hurt.
Looks better from the side too.
I also got the final side covers fit and bolted on. all they need now is paint.
I put the final coat of resin on the tail (just a light one to fix some pin-holes) The twill tail matches better i think.
anyway.. should have some triple update soon.
thanks
~Chris
Thread Starter
|
July 2011 ROTM
Joined: May 2010
Posts: 223
Likes: 8
From: Hampton Roads, VA
Okay... pretty productive weekend... for New Years anyway.
I got the front end on. the wheel is just a mock-up. and the top triple needs a good bit more work.

I then turned to the body work.
I got the Final tail fit and bolted on, but didnt like how the bottom stuck out.
So... i cut it off. I will modify the subframe to fill the whole and allow for a mounting bolt to secure it in the back. This part is alot more rigid, and really needs no more support... but it certainly wont hurt.

Looks better from the side too.
I also got the final side covers fit and bolted on. all they need now is paint.
I put the final coat of resin on the tail (just a light one to fix some pin-holes) The twill tail matches better i think.
I have a nice little update in store for you... so here goes.
first off, i made some new bushings. They are made out of Aluminum, but will be replaced with Bronze ones when i can find some material.
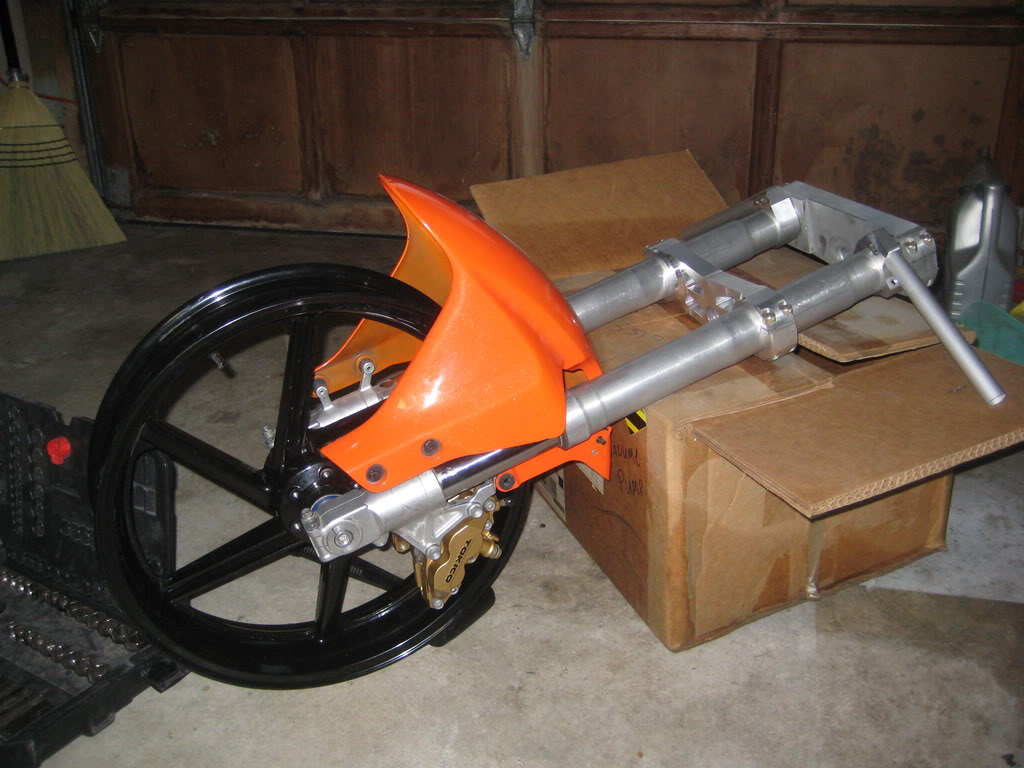
Now that i have the front end ironed out, i decided i could finally make my front fender. I have a 600rr front fender and it will actually bolt up to the GSXR front end... but.. i think it is too big looking. and plus, it is plastic... and orange.
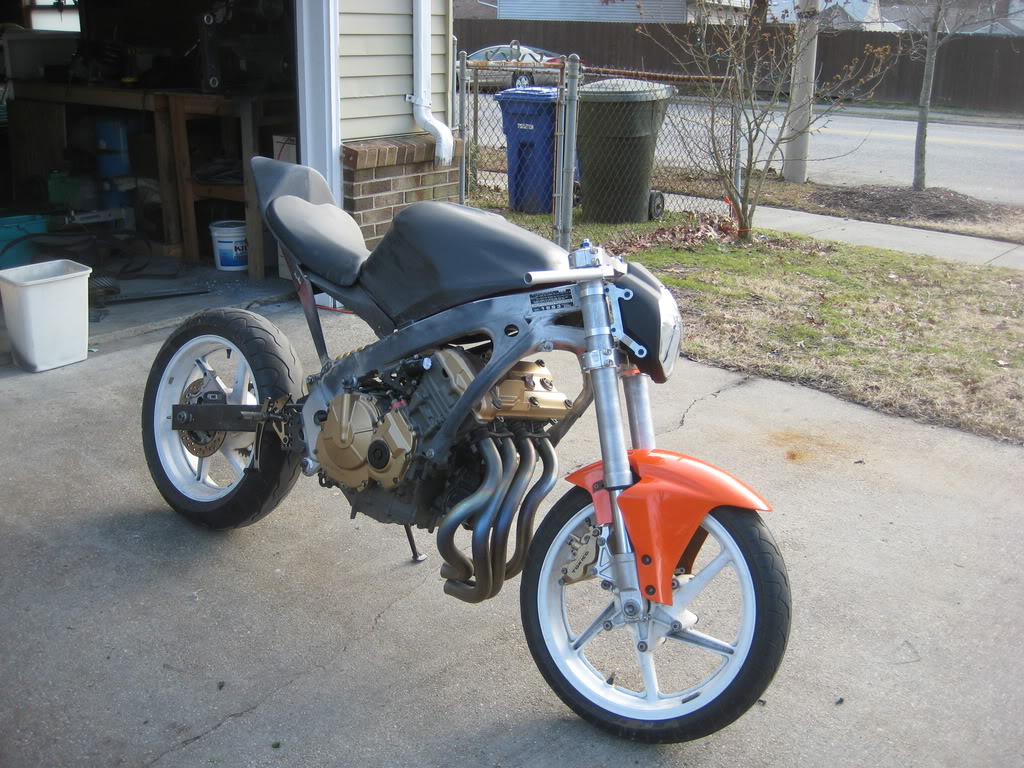
So, i decided to make a new one out of Carbon fiber. or rather to copy then modify the existing 600rr fender. the beauty of this plan is the fender was cheap, will make a great mold, and i like the overall shape.
The first order of business is the clean it up. i polished it up so as to resent as perfect a surface as i could (this minimizes sticking.
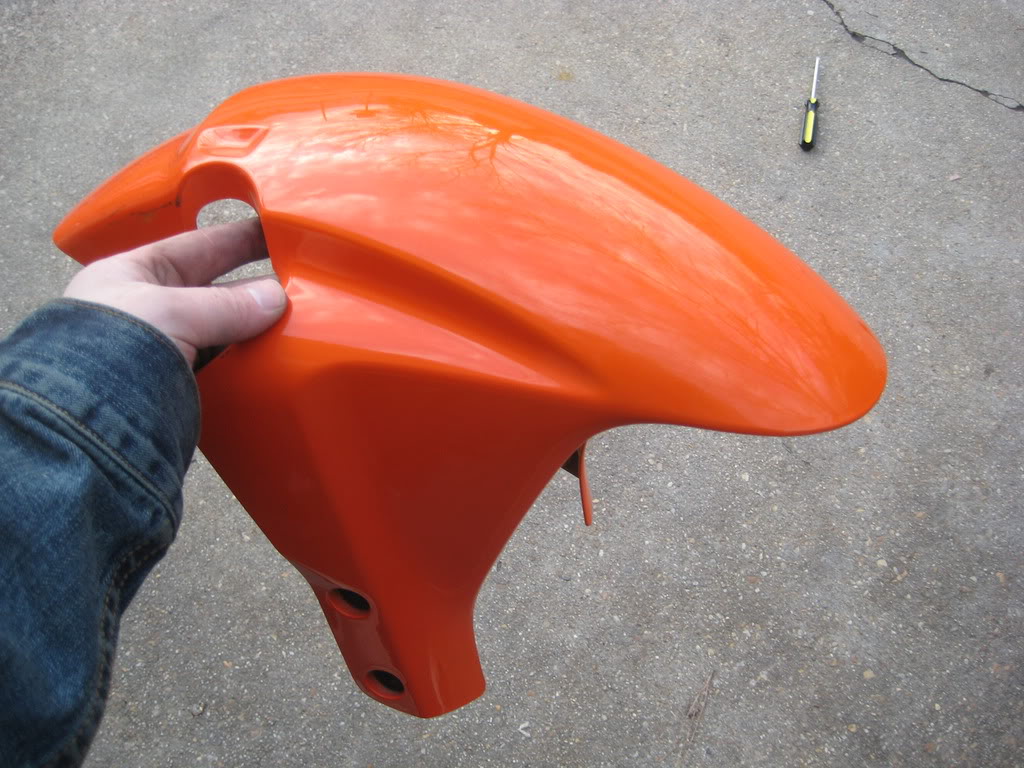
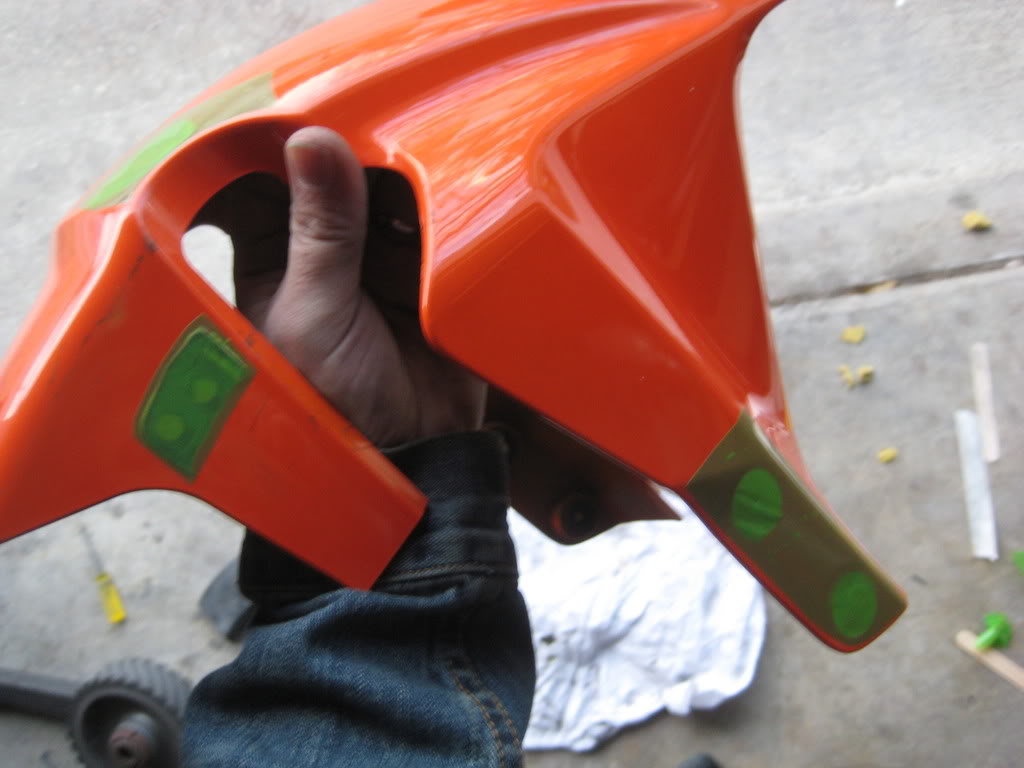
then i filled all the holes that i didnt want with clay. not totally neccesary but makes for a better part
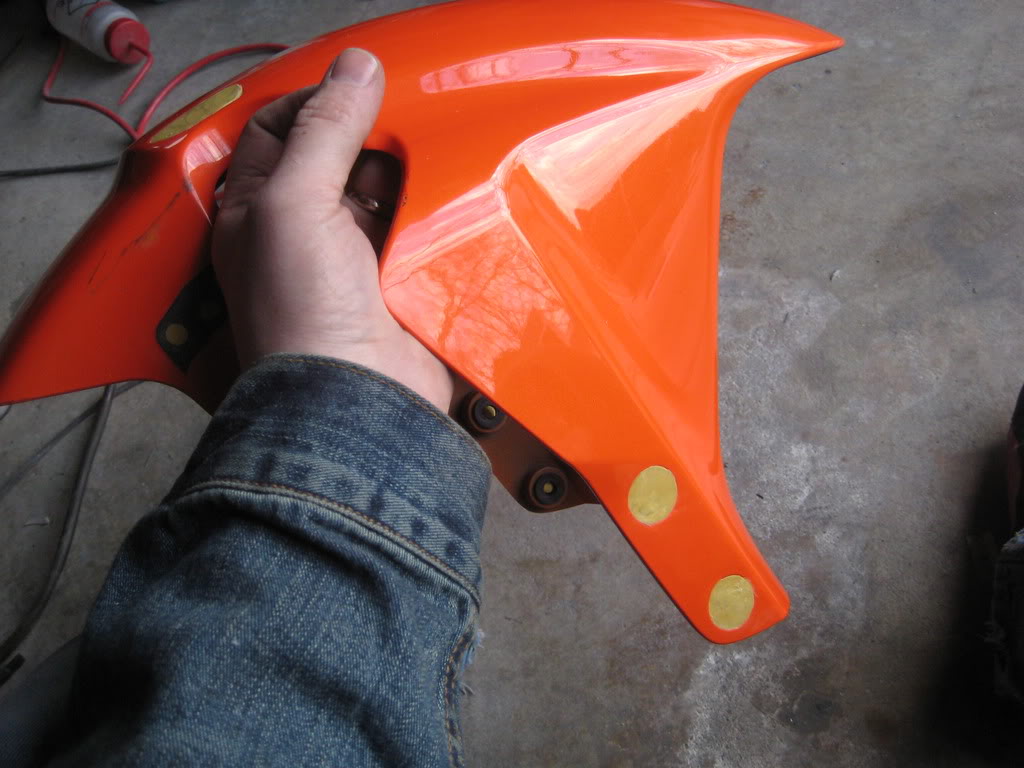
I then covered them with tape. I have special non-stick teflon tape, but packing tape would work just as well for this. the clay supports the tape, and the tape provides a flexible resin-proof barrier.
Then you wax your part. regular car-wax will work if it is actually wax. (i didn think you needed a picture)
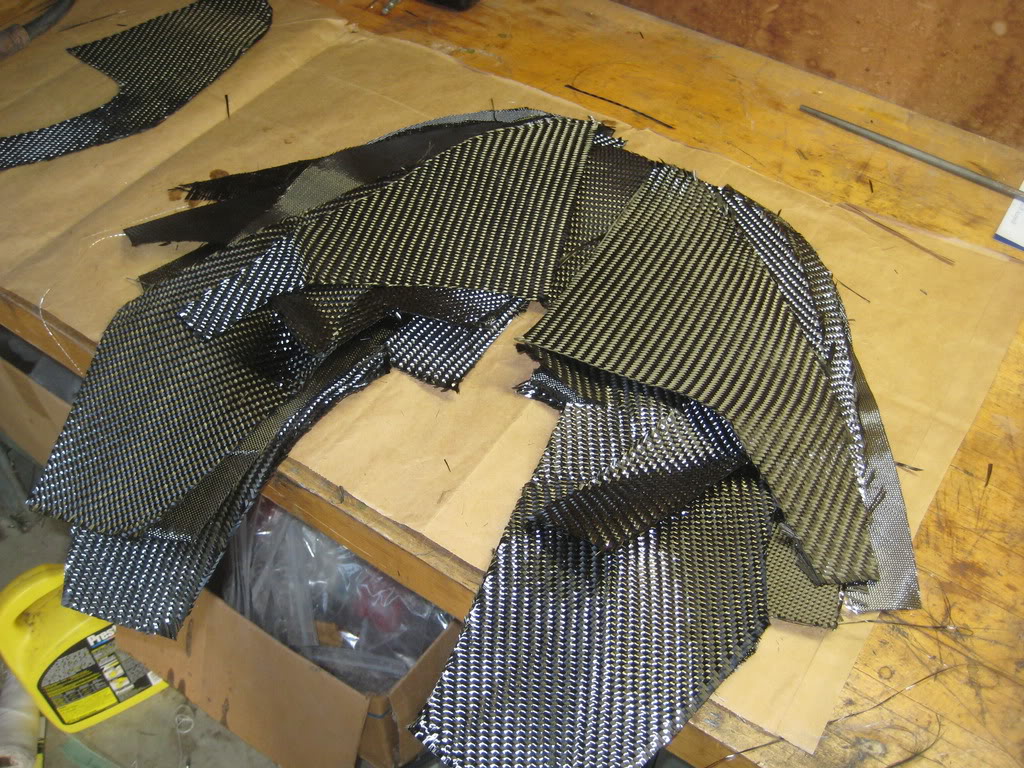
Once your part is ready, cut out your cloth. I used a 3 peice method. on for the top and rear section, and then another peice for each side. the simpler your plan the better. but have a plan... even if it is complex. Carbon has a way of sneaking up on your and entangling you in its sticky web if you go in unprepared. you were warned.
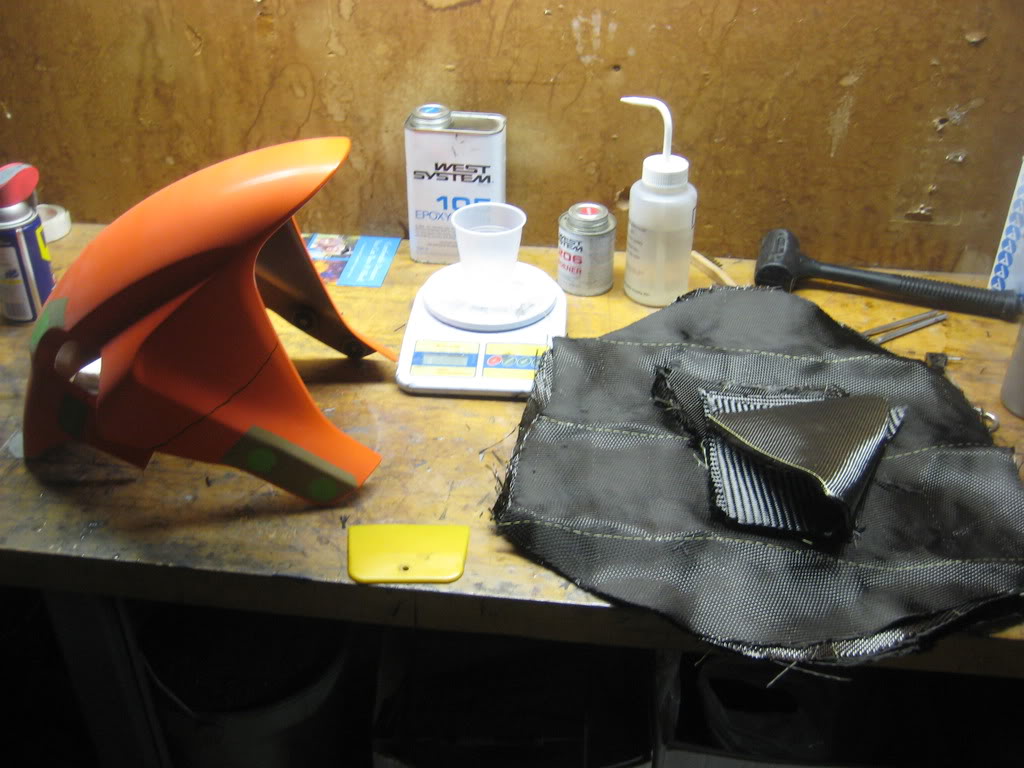
and.... it is because of that sticky web that i dont have any pictures of the lay-up. but it is simple. you want to wet the whole part with resin, then lay on the first piece (start with the biggest or most stable) and smooth it down. do this with all your pieces, only applying resin if the cloth wont stick. make sure to overlap if you have multiple pieces. then apply a coat of resin over the cloth. and repeat the process. i use a Bondo squeegee to smooth the cloth and ensure the resin has permeated it.
So here is the fender all laid up and curing overnight. dont rush it letting it cure. if you take it off too soon the part will still be pliable and can warp pretty badly. then you are screwed. dont do it. please.
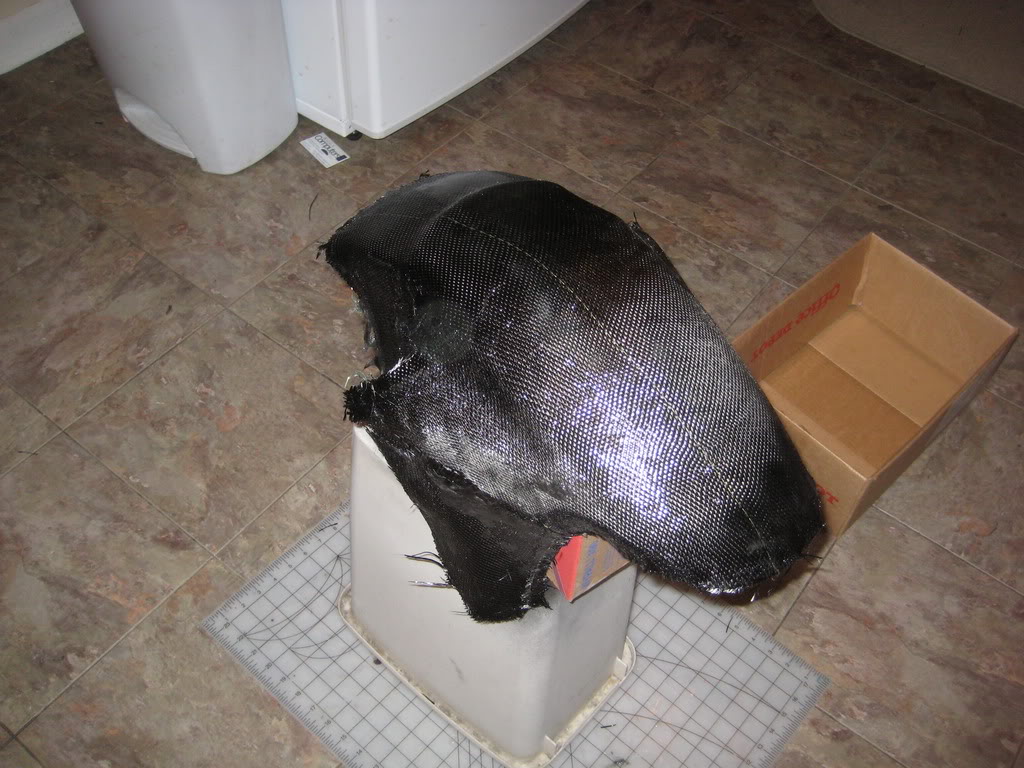
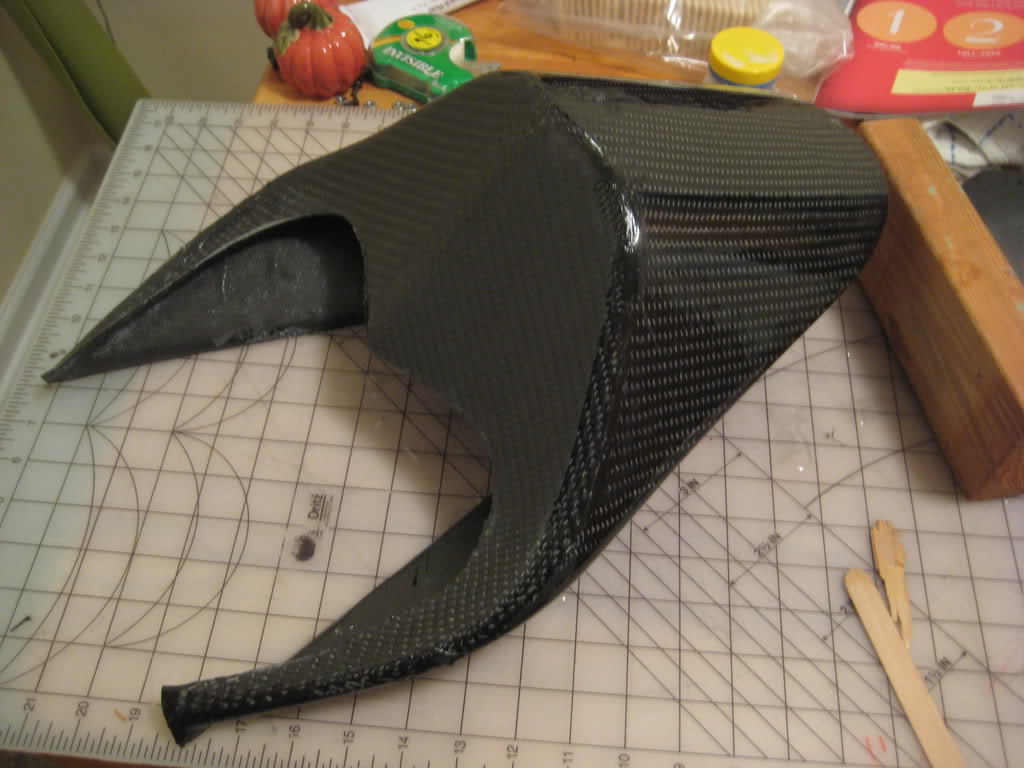
Then... when your part is done curing (give it a full day at least) remove it from your mold. the nice thing about the plastic fender is it is flexible and you can use popsicle stick, paint stirrers and (very carefully) a screwdriver, to pop the part off. after that... you just have to trim it.
I sanded and shaped mine before i took the picture...
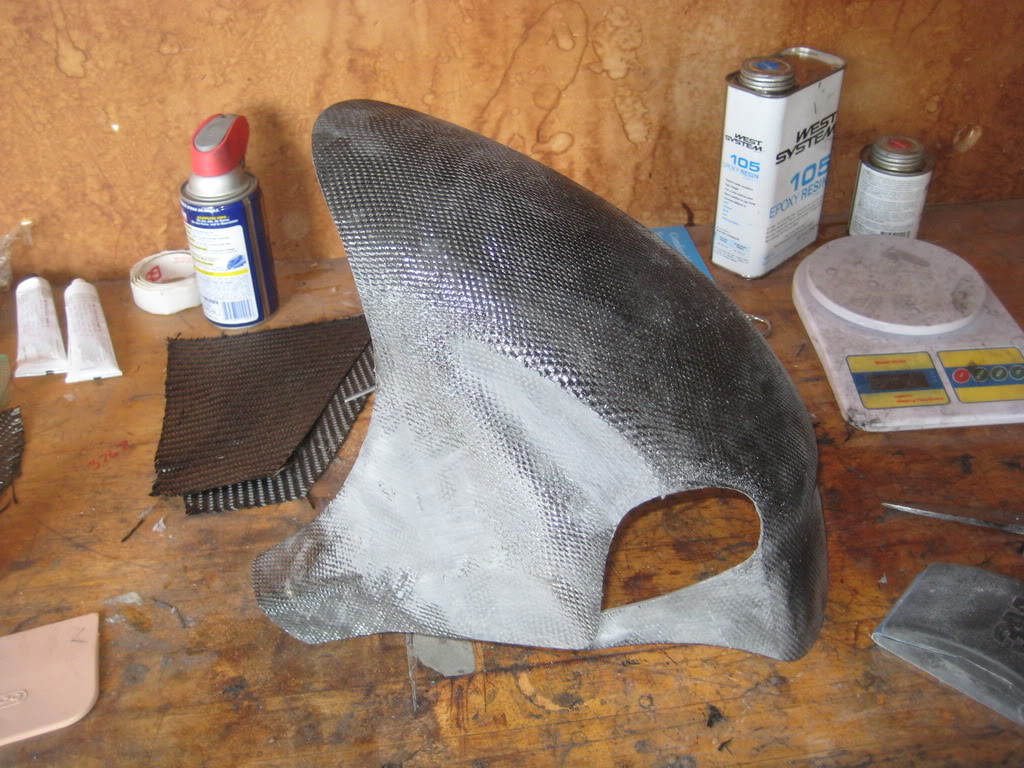
and then you get to see how it looks. still needs some work IMO.. but looking good.
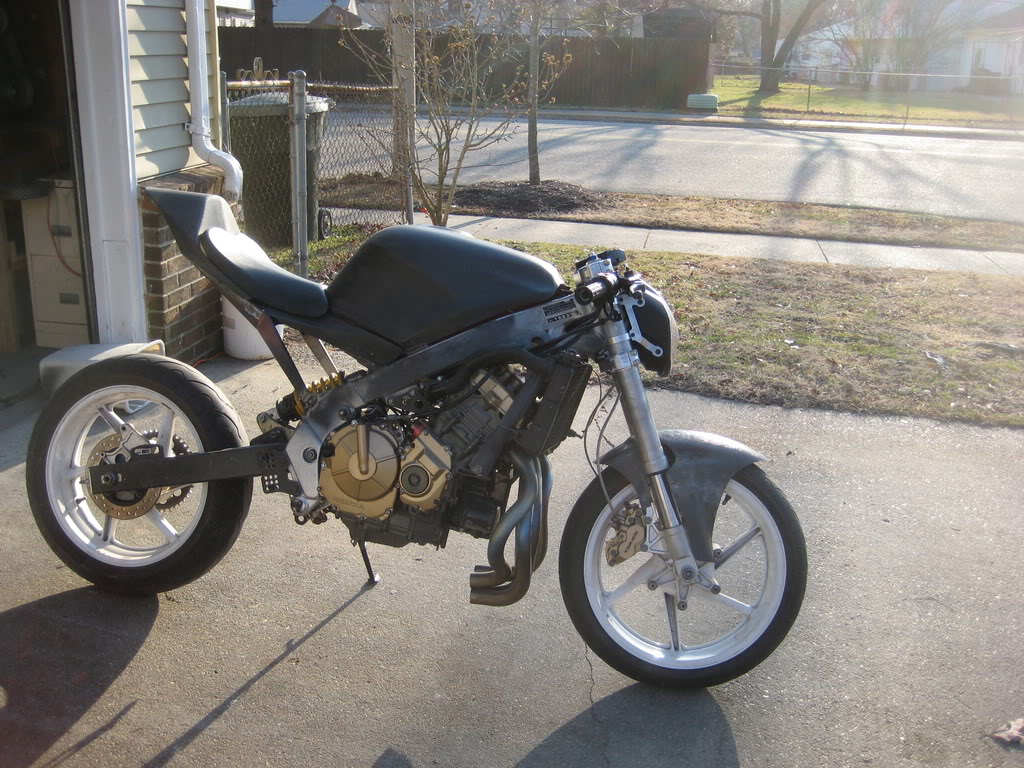
now... while the part was curing i put the brakes, controlls grips and stuff on the bike...
I need to make a bracket for this.. but cant decide where it should go
anyway... there is more where this came from...
thanks for looking!
~Chris
I got the front end on. the wheel is just a mock-up. and the top triple needs a good bit more work.
I then turned to the body work.
I got the Final tail fit and bolted on, but didnt like how the bottom stuck out.
So... i cut it off. I will modify the subframe to fill the whole and allow for a mounting bolt to secure it in the back. This part is alot more rigid, and really needs no more support... but it certainly wont hurt.
Looks better from the side too.
I also got the final side covers fit and bolted on. all they need now is paint.
I put the final coat of resin on the tail (just a light one to fix some pin-holes) The twill tail matches better i think.
I have a nice little update in store for you... so here goes.
first off, i made some new bushings. They are made out of Aluminum, but will be replaced with Bronze ones when i can find some material.
Now that i have the front end ironed out, i decided i could finally make my front fender. I have a 600rr front fender and it will actually bolt up to the GSXR front end... but.. i think it is too big looking. and plus, it is plastic... and orange.
So, i decided to make a new one out of Carbon fiber. or rather to copy then modify the existing 600rr fender. the beauty of this plan is the fender was cheap, will make a great mold, and i like the overall shape.
The first order of business is the clean it up. i polished it up so as to resent as perfect a surface as i could (this minimizes sticking.
then i filled all the holes that i didnt want with clay. not totally neccesary but makes for a better part
I then covered them with tape. I have special non-stick teflon tape, but packing tape would work just as well for this. the clay supports the tape, and the tape provides a flexible resin-proof barrier.
Then you wax your part. regular car-wax will work if it is actually wax. (i didn think you needed a picture)
Once your part is ready, cut out your cloth. I used a 3 peice method. on for the top and rear section, and then another peice for each side. the simpler your plan the better. but have a plan... even if it is complex. Carbon has a way of sneaking up on your and entangling you in its sticky web if you go in unprepared. you were warned.
and.... it is because of that sticky web that i dont have any pictures of the lay-up. but it is simple. you want to wet the whole part with resin, then lay on the first piece (start with the biggest or most stable) and smooth it down. do this with all your pieces, only applying resin if the cloth wont stick. make sure to overlap if you have multiple pieces. then apply a coat of resin over the cloth. and repeat the process. i use a Bondo squeegee to smooth the cloth and ensure the resin has permeated it.
So here is the fender all laid up and curing overnight. dont rush it letting it cure. if you take it off too soon the part will still be pliable and can warp pretty badly. then you are screwed. dont do it. please.
Then... when your part is done curing (give it a full day at least) remove it from your mold. the nice thing about the plastic fender is it is flexible and you can use popsicle stick, paint stirrers and (very carefully) a screwdriver, to pop the part off. after that... you just have to trim it.
I sanded and shaped mine before i took the picture...
and then you get to see how it looks. still needs some work IMO.. but looking good.
now... while the part was curing i put the brakes, controlls grips and stuff on the bike...
I need to make a bracket for this.. but cant decide where it should go
anyway... there is more where this came from...
thanks for looking!
~Chris
Thread Starter
|
July 2011 ROTM
Joined: May 2010
Posts: 223
Likes: 8
From: Hampton Roads, VA
AS for machining skills. I gotta practice on something as i learn my job... so i guess a few motorcycle parts must be made *fake tear* it is nice to work in a machine shop.
okay... sorry bout the wait, but we have a critical job at work that is due and so i have been working alot. however, i did get SOME work done.
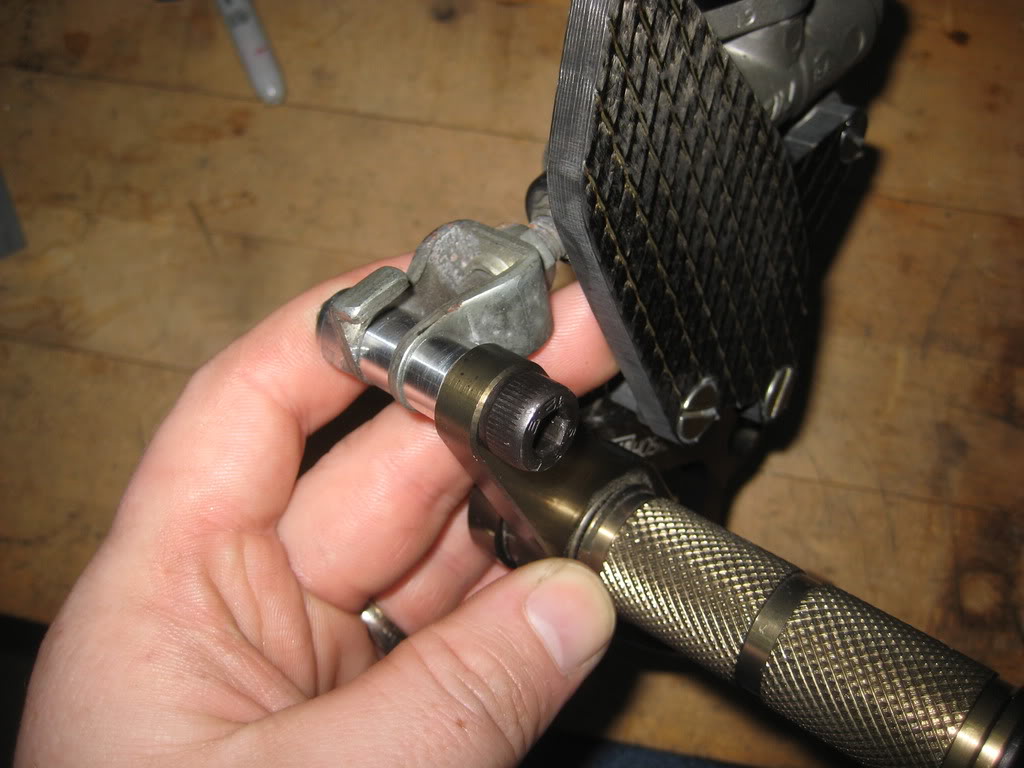
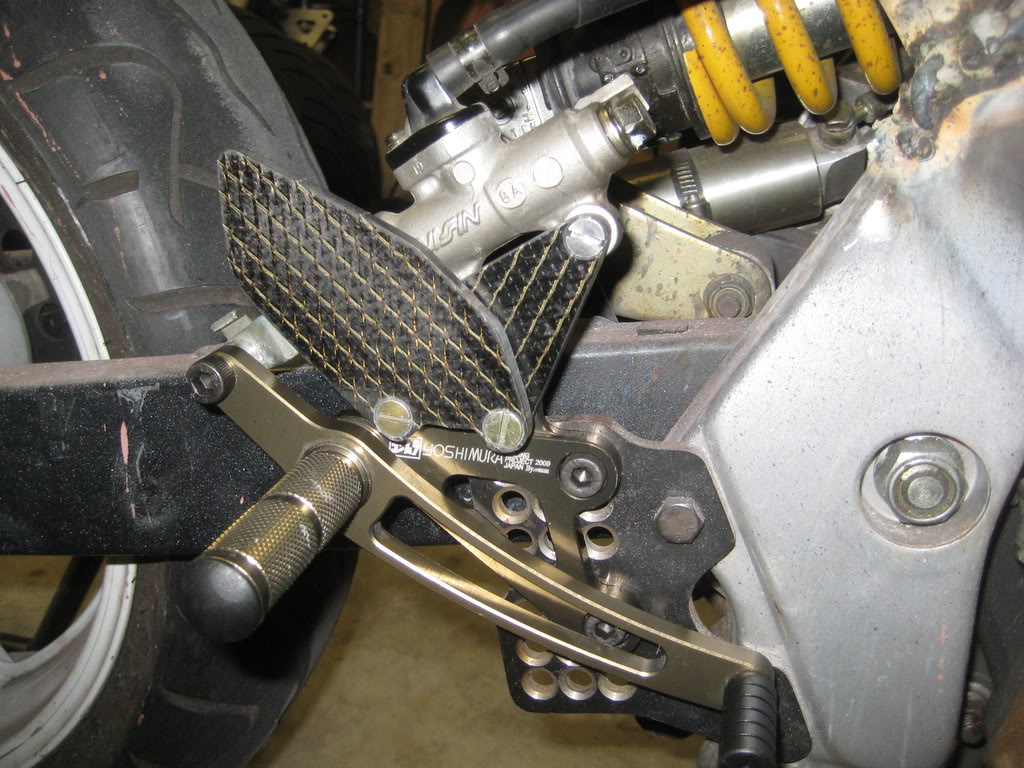
I got the rearsets figured out
Custom Carbon and kevlar heel gaurds (still need the edge bevels)
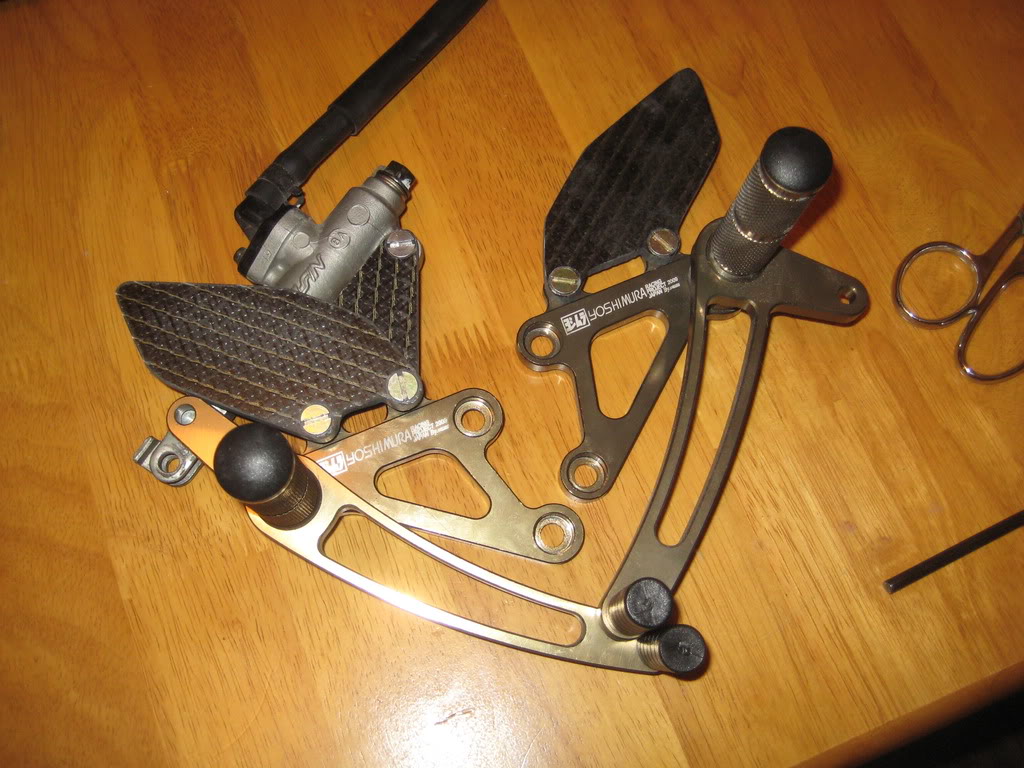
I changed out the 1/2" master cylynder for the 900rr 5/8" master and got it set up.
...and i am not sure i am going to keep the adapter plates or not..
I will also have a new gas cap...

i also got some sanding done on the front fender. it is all smoothed out, and just need to get it fitted.
more later...
thanks
~Chris