
'93 600 Fighter project


Junior Member
Joined: Jul 2010
Posts: 18
Likes: 0
From: Missoula,MT
looks like your doin some great work man. awesome build.i like that scale ya have. ive been lookin at one myself but i cant find anything with a decent range for less that like $500. how much was that scale if ya dont mind me askin? im lookin for sumthin i can weigh fluids like you are but have enough range to weigh motor parts for blue printing also.
Thread Starter
|
July 2011 ROTM
Joined: May 2010
Posts: 223
Likes: 8
From: Hampton Roads, VA
looks like your doin some great work man. awesome build.i like that scale ya have. ive been lookin at one myself but i cant find anything with a decent range for less that like $500. how much was that scale if ya dont mind me askin? im lookin for sumthin i can weigh fluids like you are but have enough range to weigh motor parts for blue printing also.
thanks so much. I got the scale at Harbor freight for $23. it only goes to 11lbs though. they did have a heavier duty one and it was about $50. you can check them out on the web, or see if there is a store close to you.
thanks for looking
~Chris

Thread Starter
|
July 2011 ROTM
Joined: May 2010
Posts: 223
Likes: 8
From: Hampton Roads, VA
thanks yall! i am glad you enjoy it. i have a couple updates actually... i cant always get on here at work
well....
i ran into a bit of a snag...
I got the mold sanded, and bondo'ed then i sprayed a little primer in there to help me see what i was doing.
The primer goes into all the dips and mistakes...
so then i sanded it smooth (this goes for both sides)
a little bit more primer, and sanded to 1200 grit, then 4-5 coats of wax, bolted together then PVA. in other words, ready to lay up the carbon.
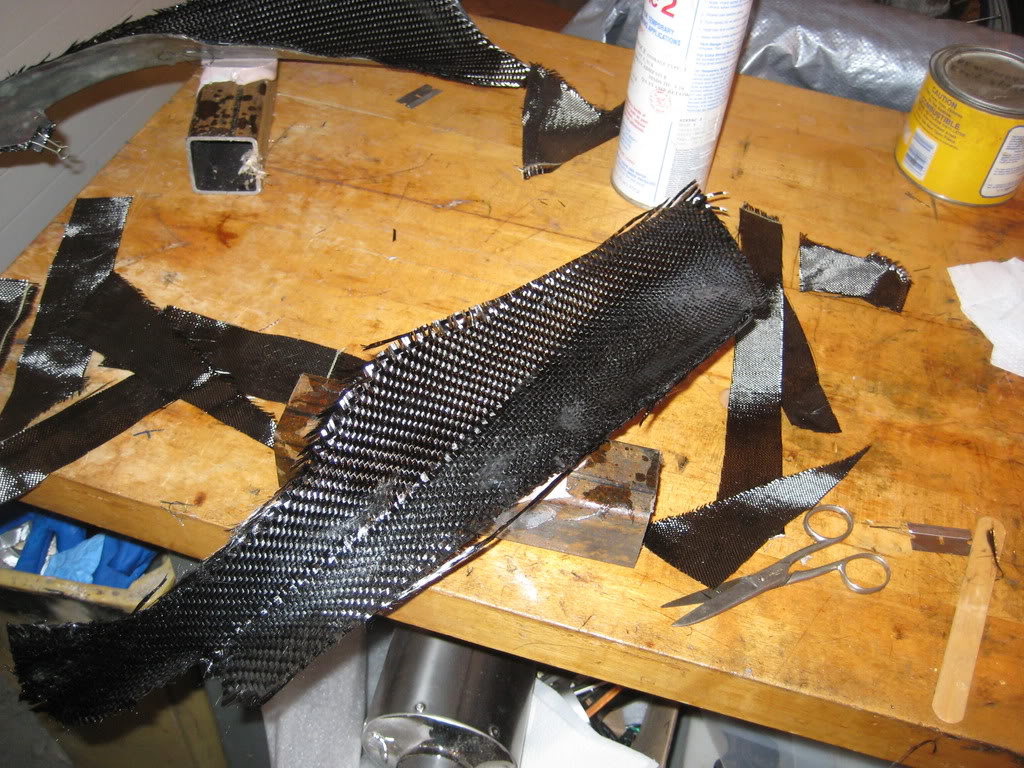
I had all my peices cut out and ready to go...
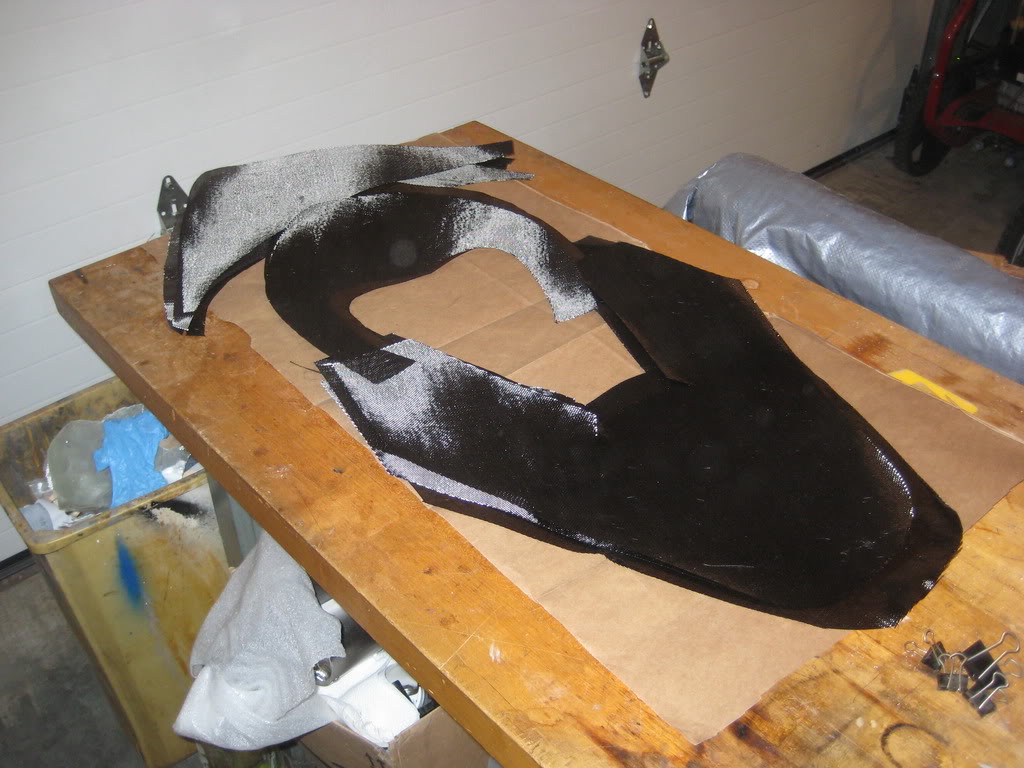
And then.. disaster struck. I had already practiced laying up the carbon inside the mold with the brown paper templates, but with the resin, the cloth was unmanageable.... so i ended up cutting the peices in half and laying the parts up sperately.
This will add a step, but the parts will be better.
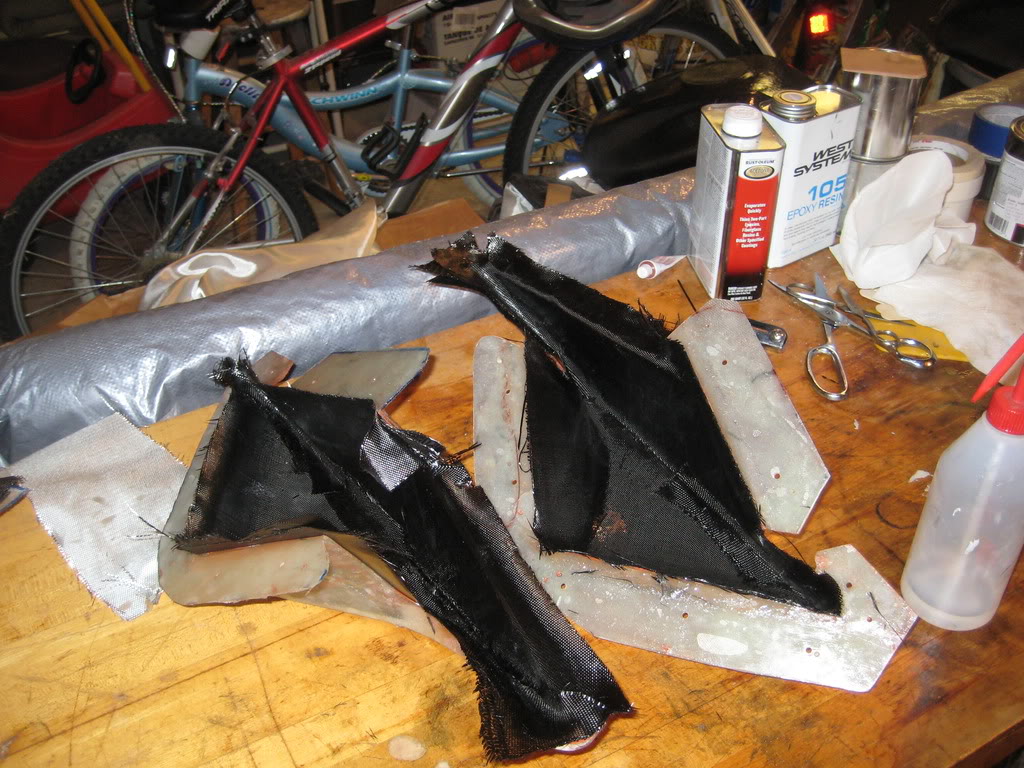
so... they cured, and before removing them, i used a razor to mark the exact edge of the mold on the part.
then i popped them both out
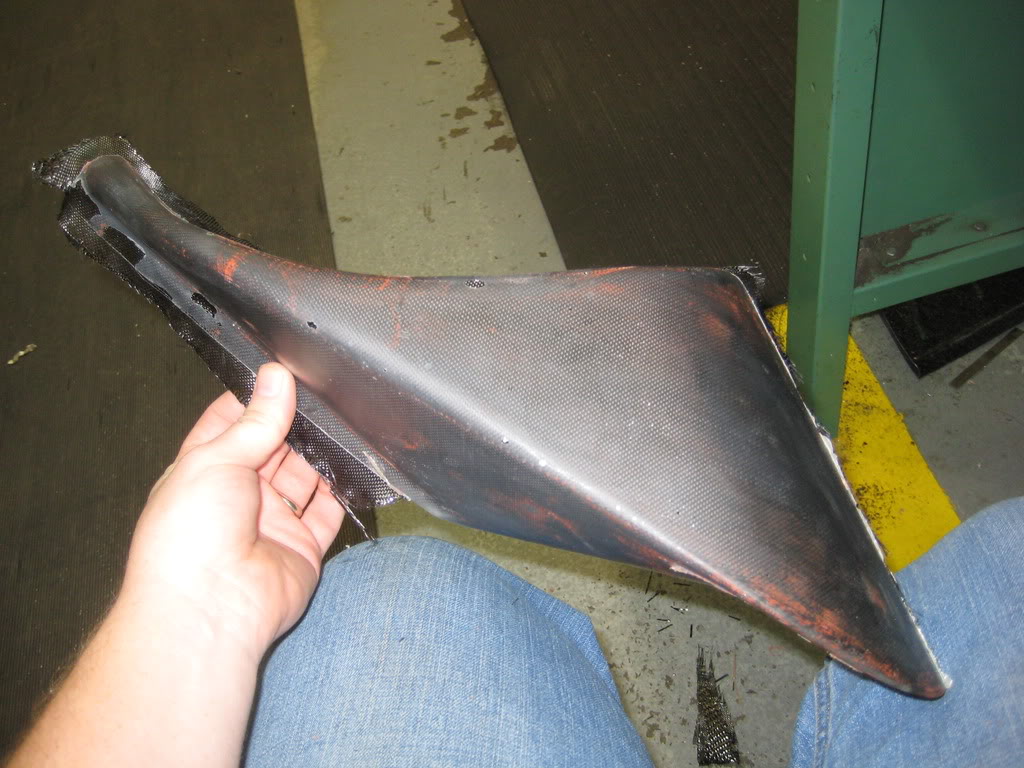
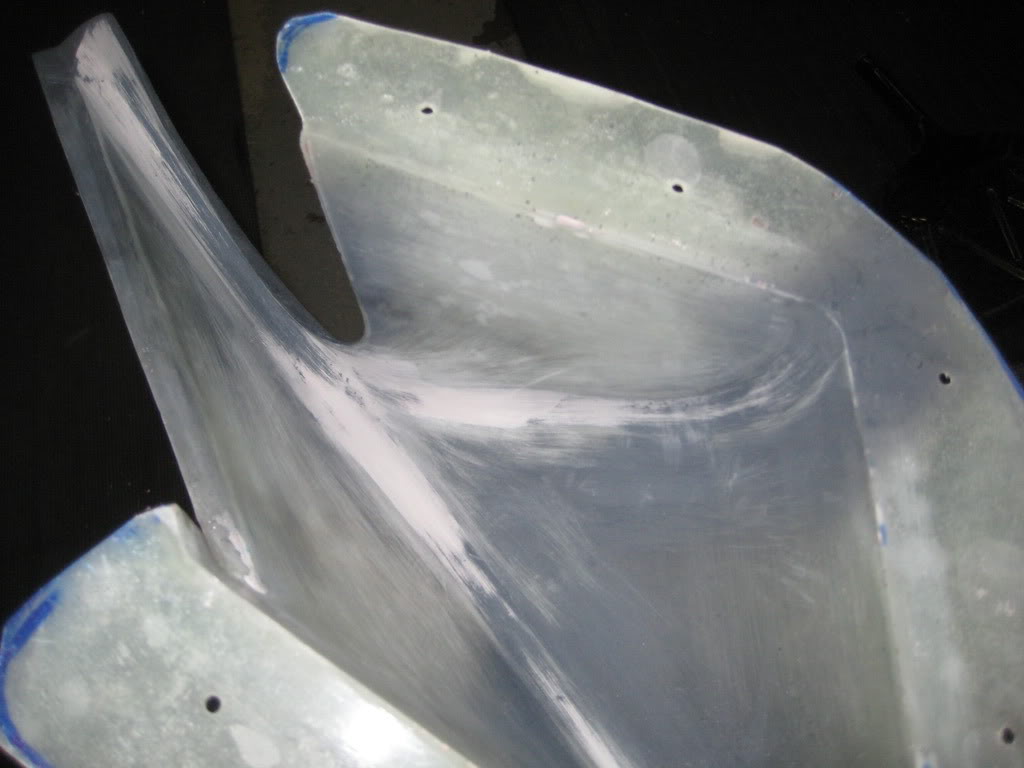
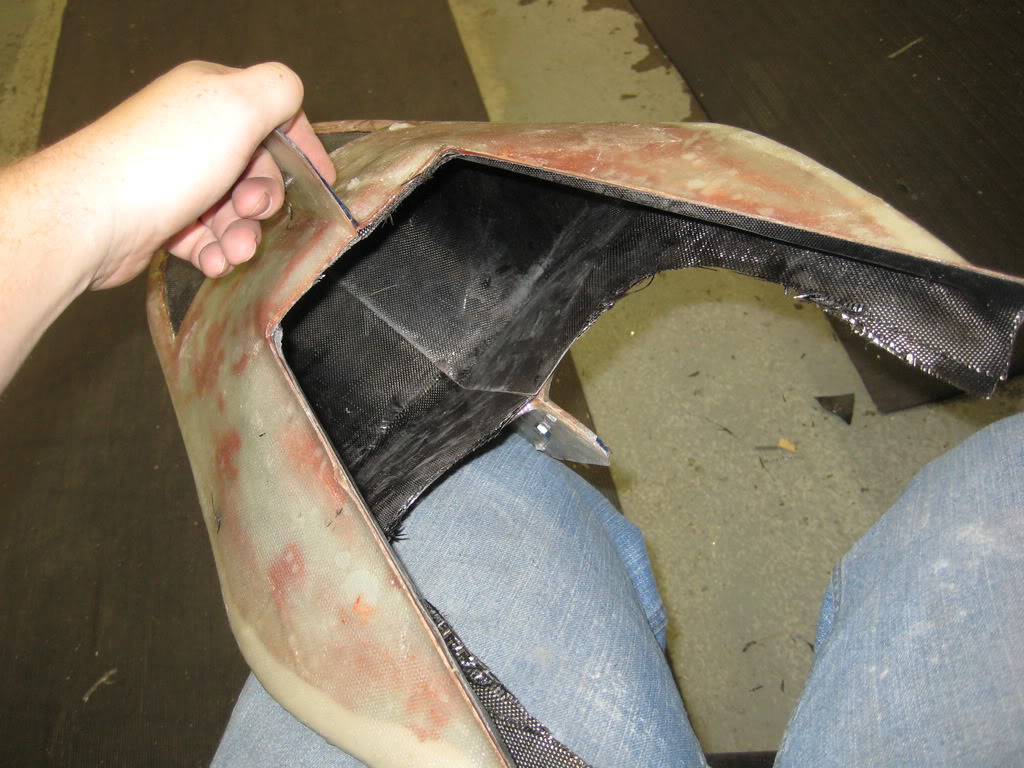
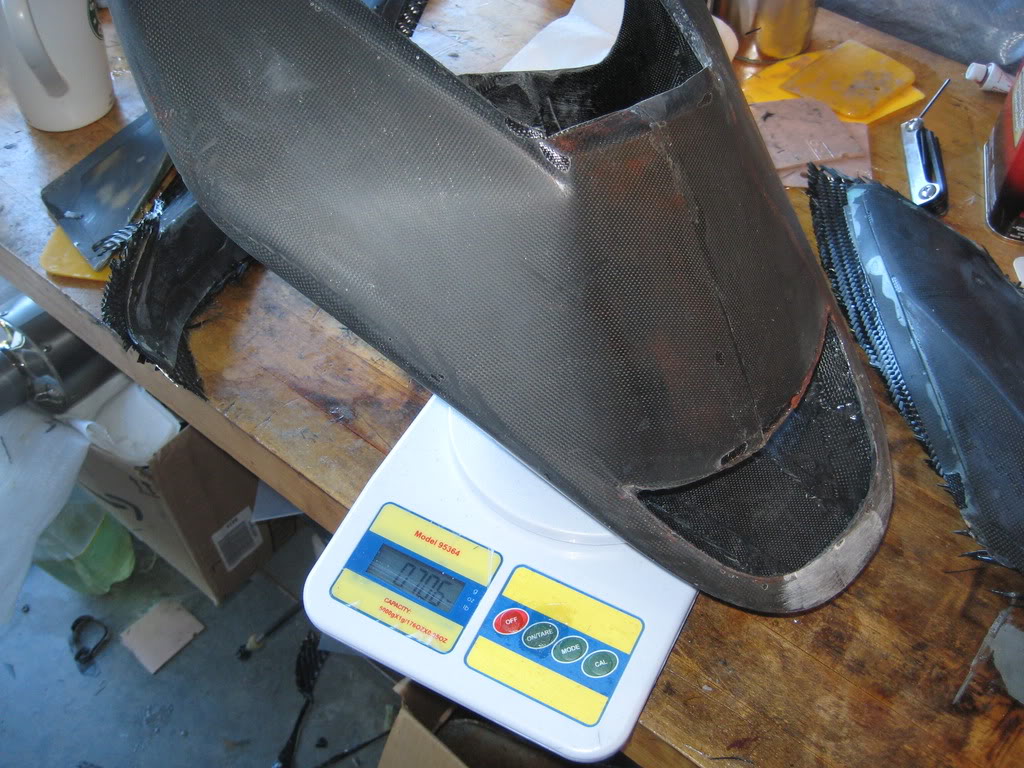
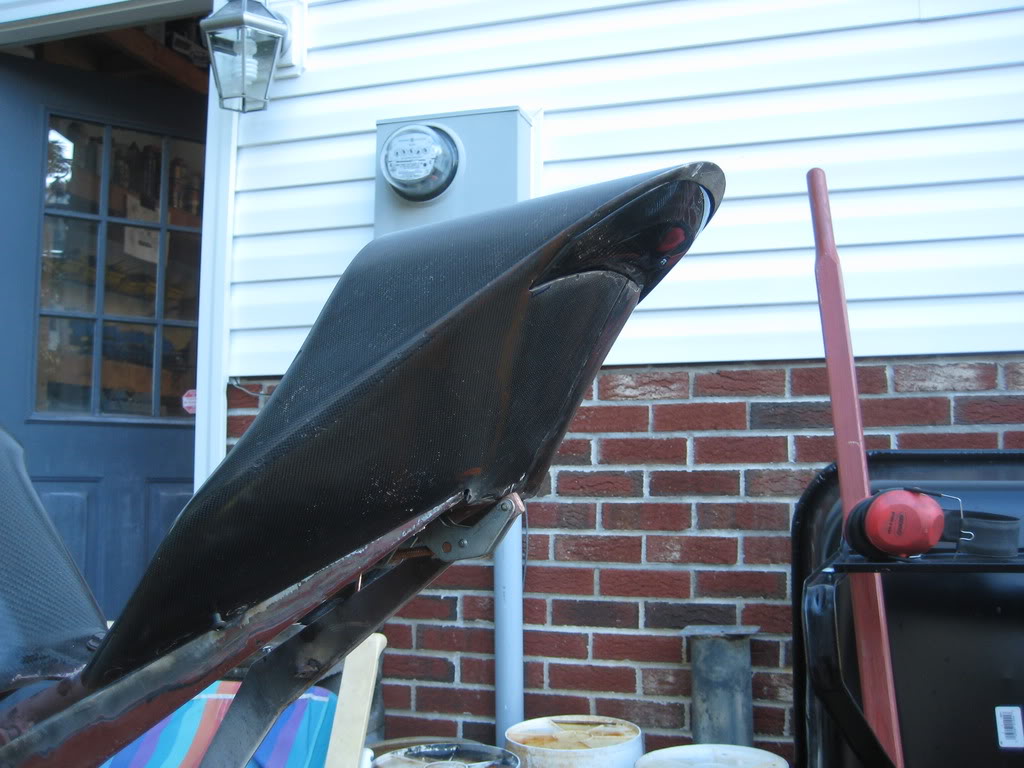
I trimmed them to the line, and viola! here is the tail. (it is going to need some sanding.. dont worry, the red will come off)

so then, i will bolt the parts back together and run carbon down the seam.
The benifit with this is that i will do twill for the next tail, and it will look even better with a seam down the middle. i can get the pattern to mirror itself.
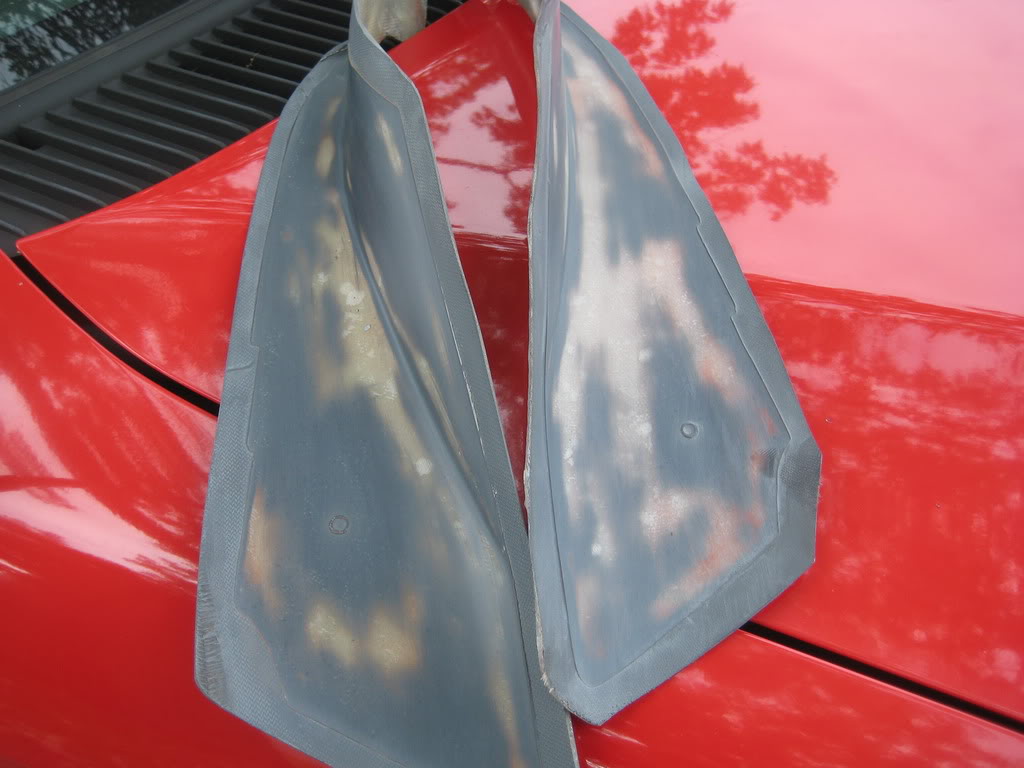
I also got the side-covers done.
Molds ready for carbon
and then all laid up

anyway.. i will post pictures as soon as the resin cures.
thanks!
well....
i ran into a bit of a snag...
I got the mold sanded, and bondo'ed then i sprayed a little primer in there to help me see what i was doing.
The primer goes into all the dips and mistakes...
so then i sanded it smooth (this goes for both sides)
a little bit more primer, and sanded to 1200 grit, then 4-5 coats of wax, bolted together then PVA. in other words, ready to lay up the carbon.
I had all my peices cut out and ready to go...
And then.. disaster struck. I had already practiced laying up the carbon inside the mold with the brown paper templates, but with the resin, the cloth was unmanageable.... so i ended up cutting the peices in half and laying the parts up sperately.
This will add a step, but the parts will be better.
so... they cured, and before removing them, i used a razor to mark the exact edge of the mold on the part.
then i popped them both out
I trimmed them to the line, and viola! here is the tail. (it is going to need some sanding.. dont worry, the red will come off)
so then, i will bolt the parts back together and run carbon down the seam.
The benifit with this is that i will do twill for the next tail, and it will look even better with a seam down the middle. i can get the pattern to mirror itself.
I also got the side-covers done.
Molds ready for carbon
and then all laid up
anyway.. i will post pictures as soon as the resin cures.
thanks!
Thread Starter
|
July 2011 ROTM
Joined: May 2010
Posts: 223
Likes: 8
From: Hampton Roads, VA
Good morning yall!
well... my brother came home this weekend. He was spent 8 months training for the military, so some time WAS spent hanging out, but at the same time... i did get some work done.
I roughed up the surface where i would be laying up, re-released the molds and then bolted them together again.
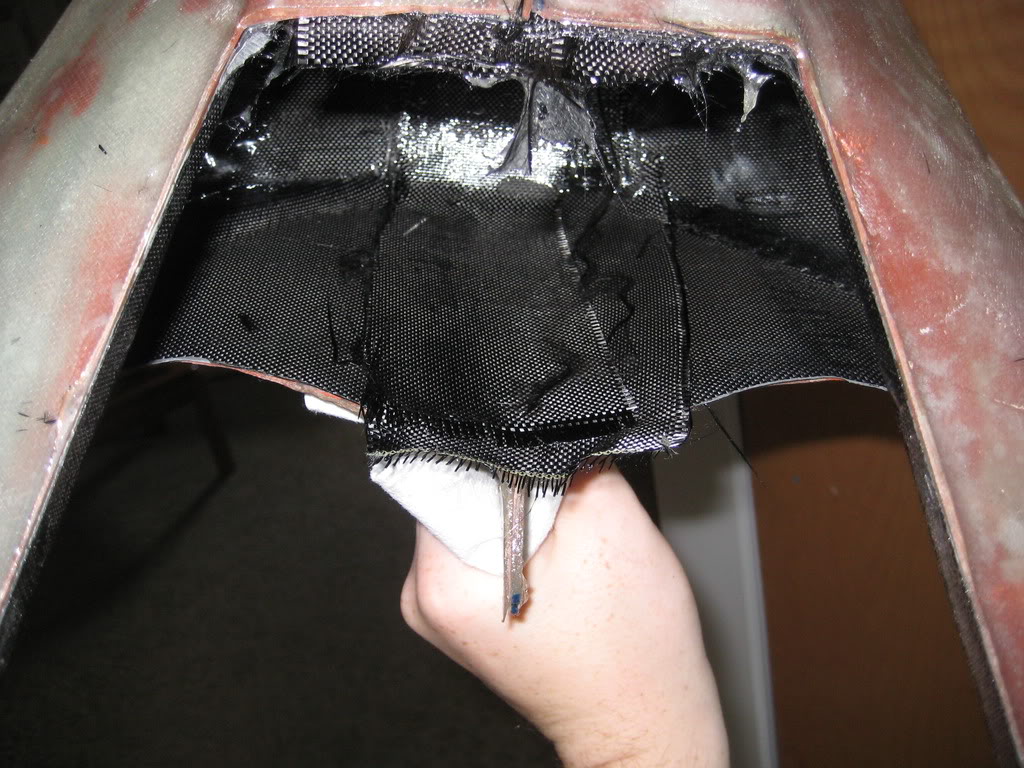
then i cut the cloth mixed the resin and laid the cloth down over the seam. I used gracually wider strips of cloth starting with something only about 3/8" wide and ending up with about 3" wide. about 5 layers.
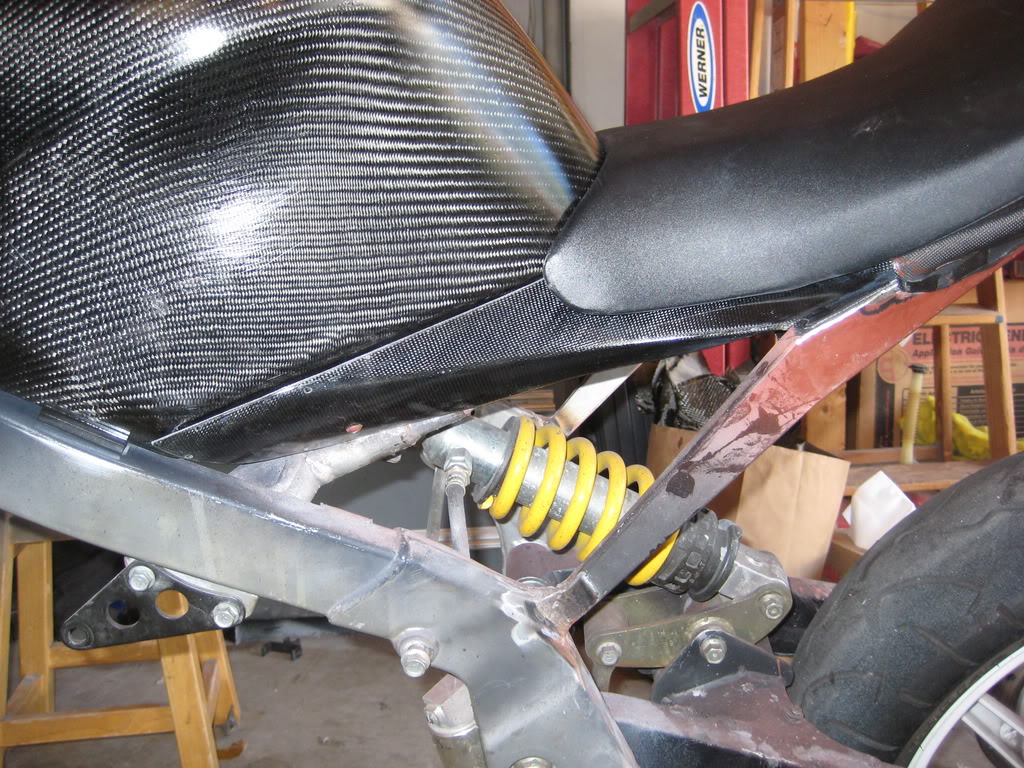
I also put another layer of Carbon on the side covers to make them a little siffer.
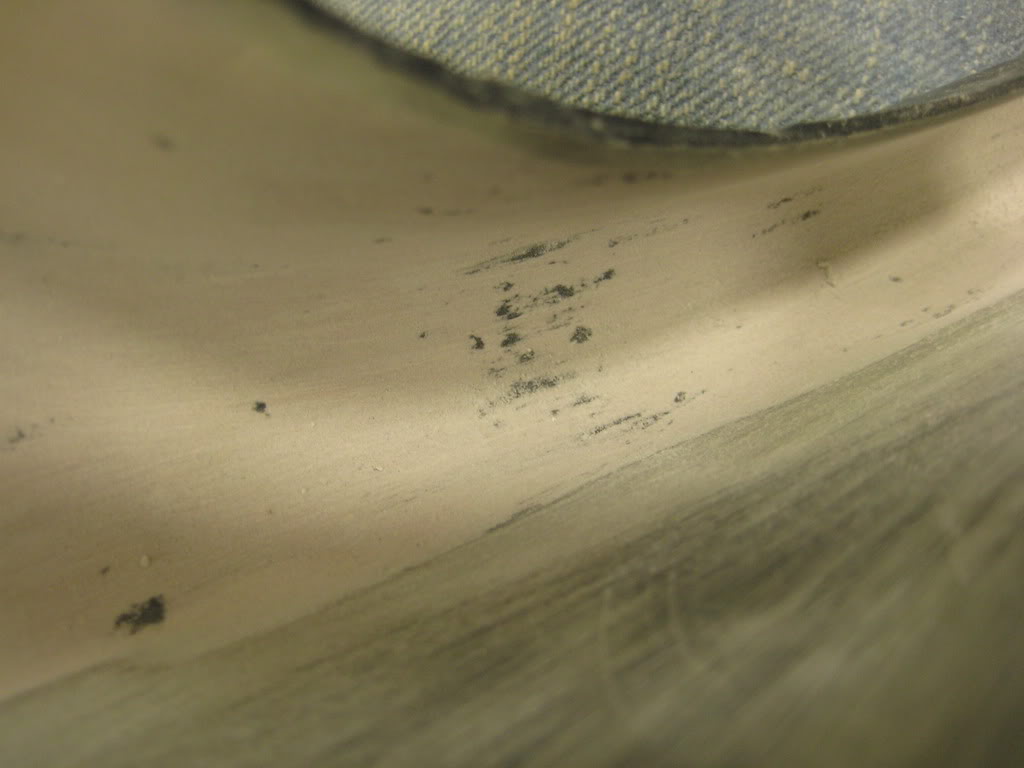
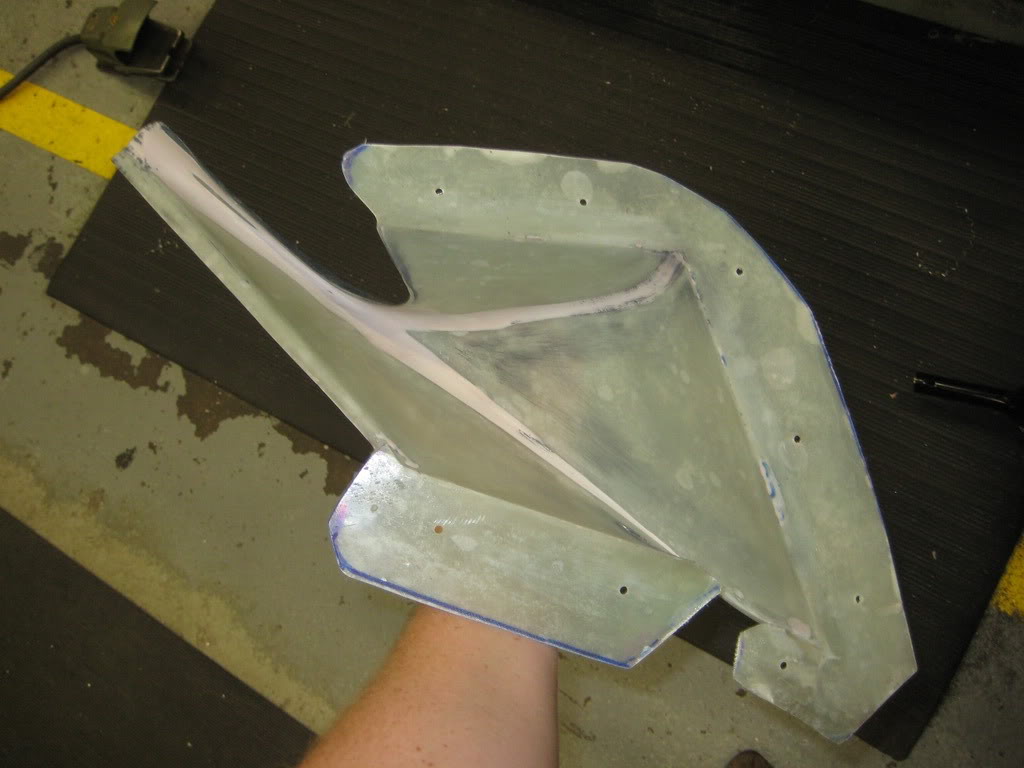
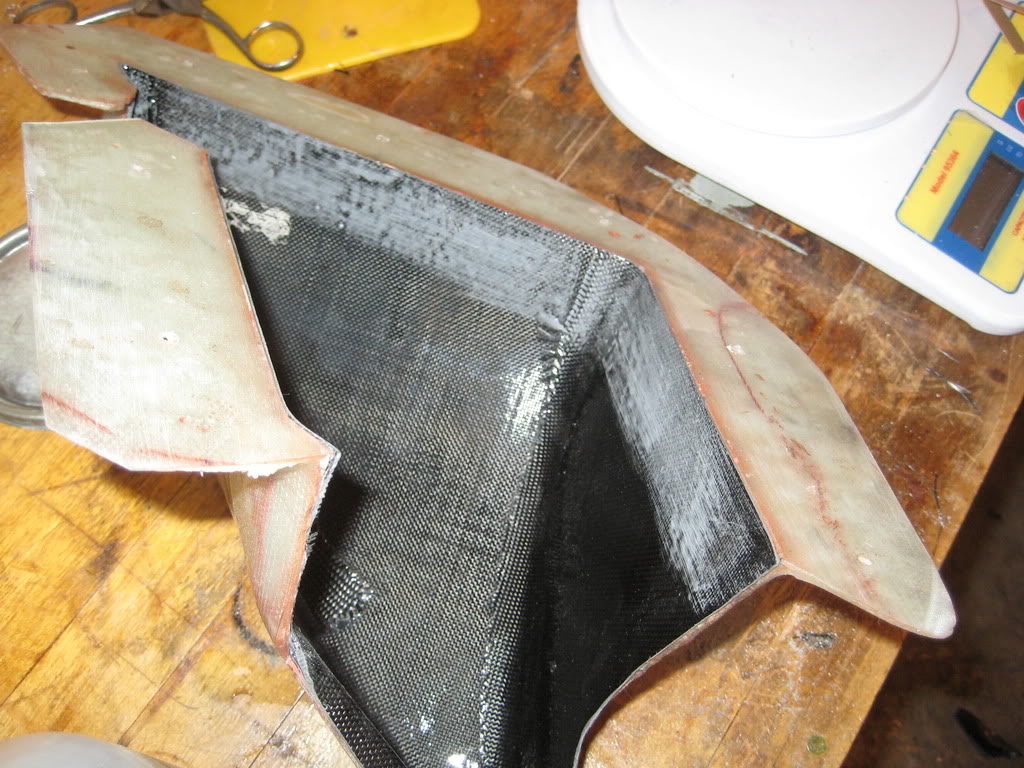
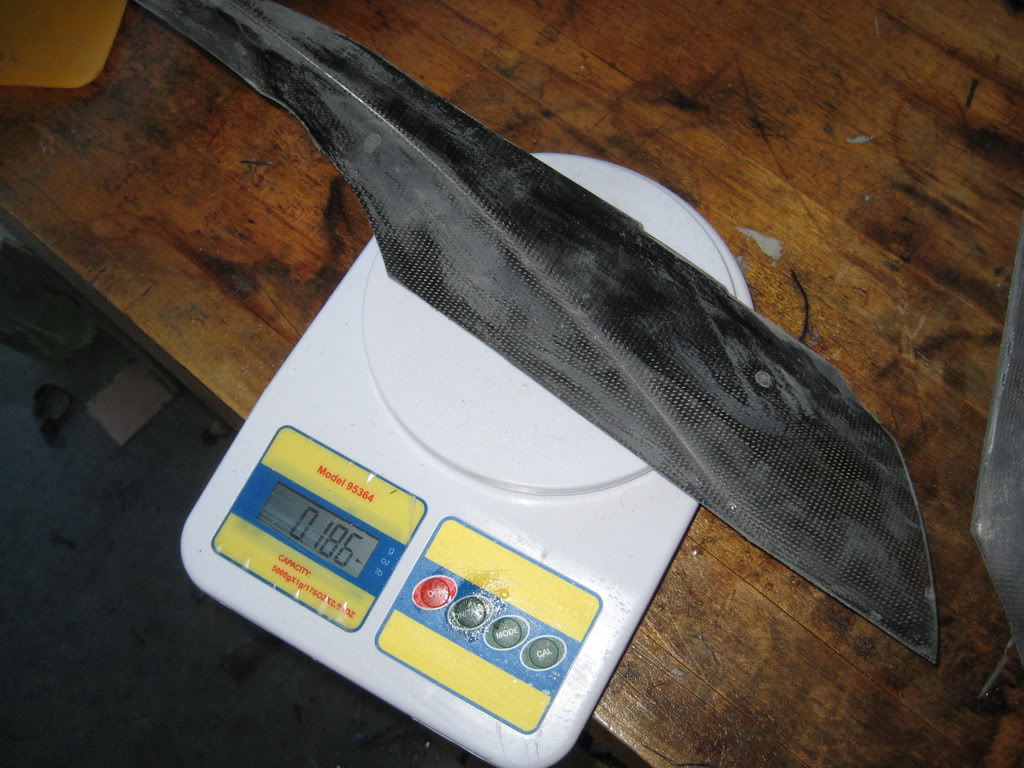
So then, the next day i took it out of the mold and cleaned up the join line. The pat is extremely rigid... and light. 0.7 lbs to be exact.
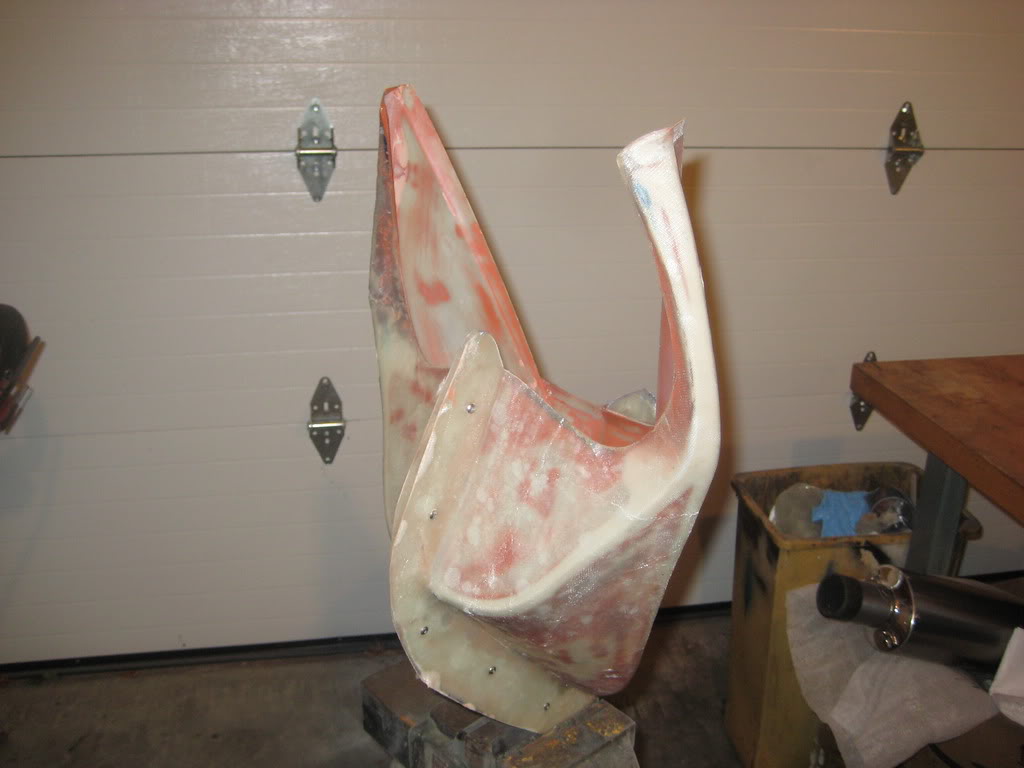
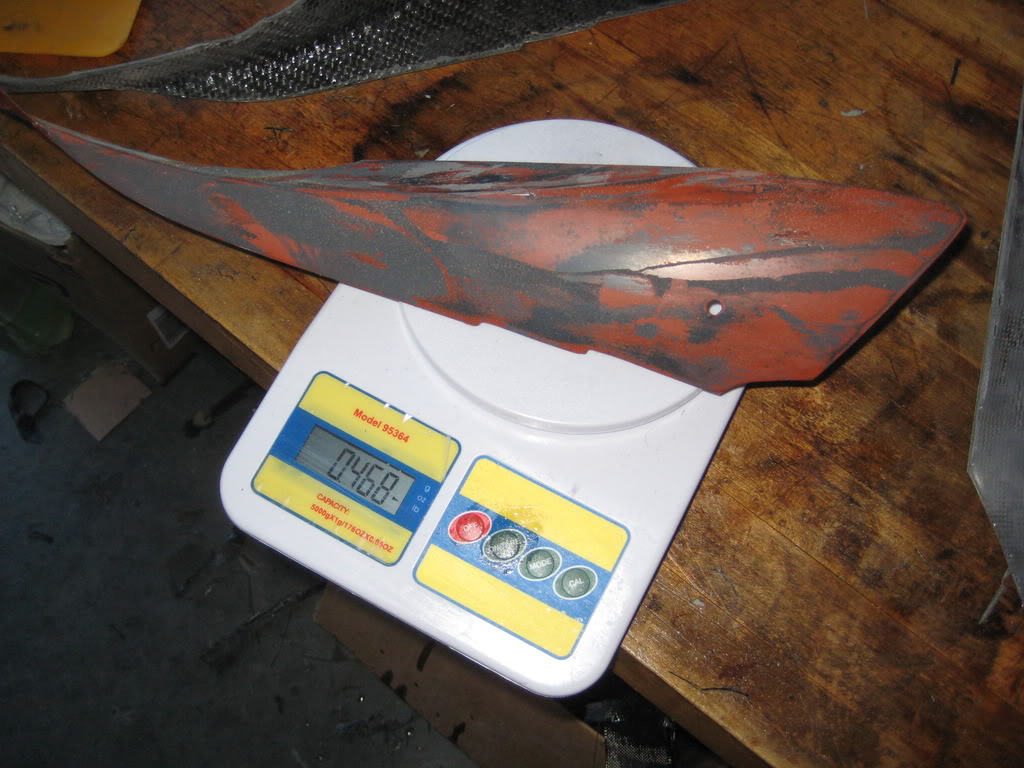
and compared to some of the stuff that i cut off the tail...

Likewise i cleaned up the side covers...
And the flimsy steel counterpart...
so... i guess you want to see it all together. (i know i did)
Side covers need some tweaking.
And... playing around with the headlight. the ignition mount needs to be trimmed off the triple, and the front fairing stay bracket needs to go, so that it will fit right. this is too high, but safety wire is only so good.
anyway... this tail will be a pilot then a back-up. I will fit it to the subframe, weld on the mounting tabs, and then transfer the final shape back to the mold, so i will have a clean part what is ready to bolt on. I have also learned alot of things that i can apply to the final tail. And i will still have a back-up should something happen to final part. (plus i will still have the molds)
thanks for looking!
well... my brother came home this weekend. He was spent 8 months training for the military, so some time WAS spent hanging out, but at the same time... i did get some work done.
I roughed up the surface where i would be laying up, re-released the molds and then bolted them together again.
then i cut the cloth mixed the resin and laid the cloth down over the seam. I used gracually wider strips of cloth starting with something only about 3/8" wide and ending up with about 3" wide. about 5 layers.
I also put another layer of Carbon on the side covers to make them a little siffer.
So then, the next day i took it out of the mold and cleaned up the join line. The pat is extremely rigid... and light. 0.7 lbs to be exact.
and compared to some of the stuff that i cut off the tail...
Likewise i cleaned up the side covers...
And the flimsy steel counterpart...
so... i guess you want to see it all together. (i know i did)
Side covers need some tweaking.
And... playing around with the headlight. the ignition mount needs to be trimmed off the triple, and the front fairing stay bracket needs to go, so that it will fit right. this is too high, but safety wire is only so good.
anyway... this tail will be a pilot then a back-up. I will fit it to the subframe, weld on the mounting tabs, and then transfer the final shape back to the mold, so i will have a clean part what is ready to bolt on. I have also learned alot of things that i can apply to the final tail. And i will still have a back-up should something happen to final part. (plus i will still have the molds)
thanks for looking!
Thread Starter
|
July 2011 ROTM
Joined: May 2010
Posts: 223
Likes: 8
From: Hampton Roads, VA
i do have an update.. but sadly it is hard to fit body work to the motorcycle when you dont have he motorcycle in front of you, however, i have been able to use my time well and am halfway through doing the valves.
But first, i do have a question. I know people buy shim kits, nothing in the Haynes manual says anything about fitting, replacing or measuring the shims... what am i missing? i am going to re-lap the valves, so i would assume it is necessary.
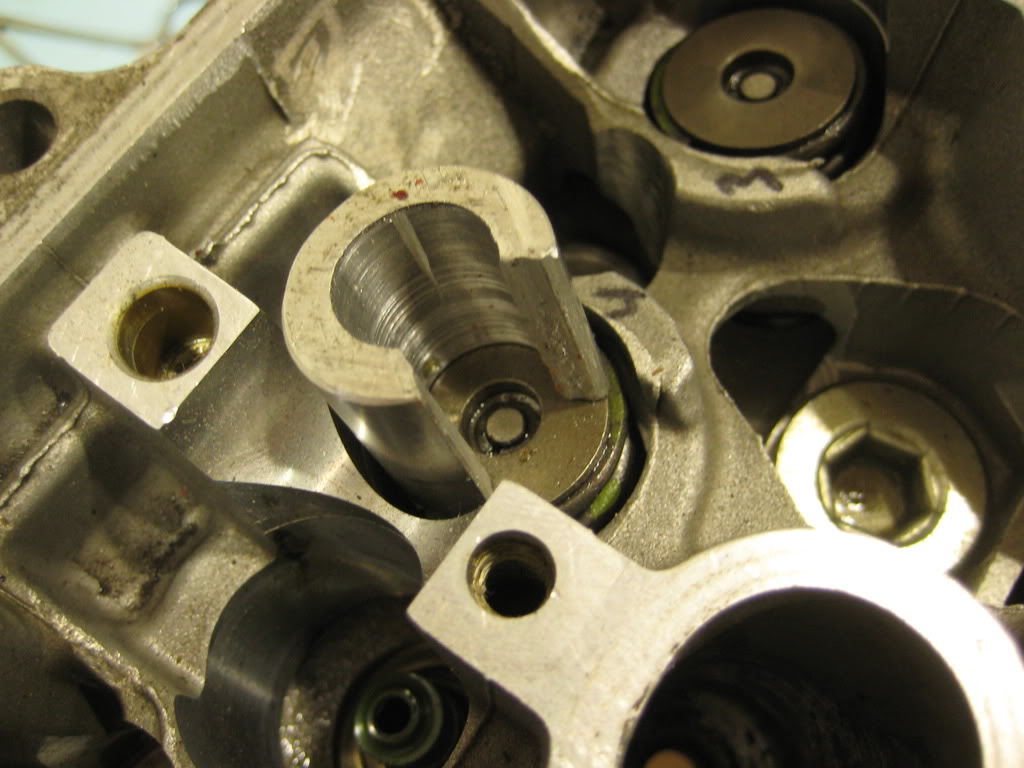
Okay to jump right in.
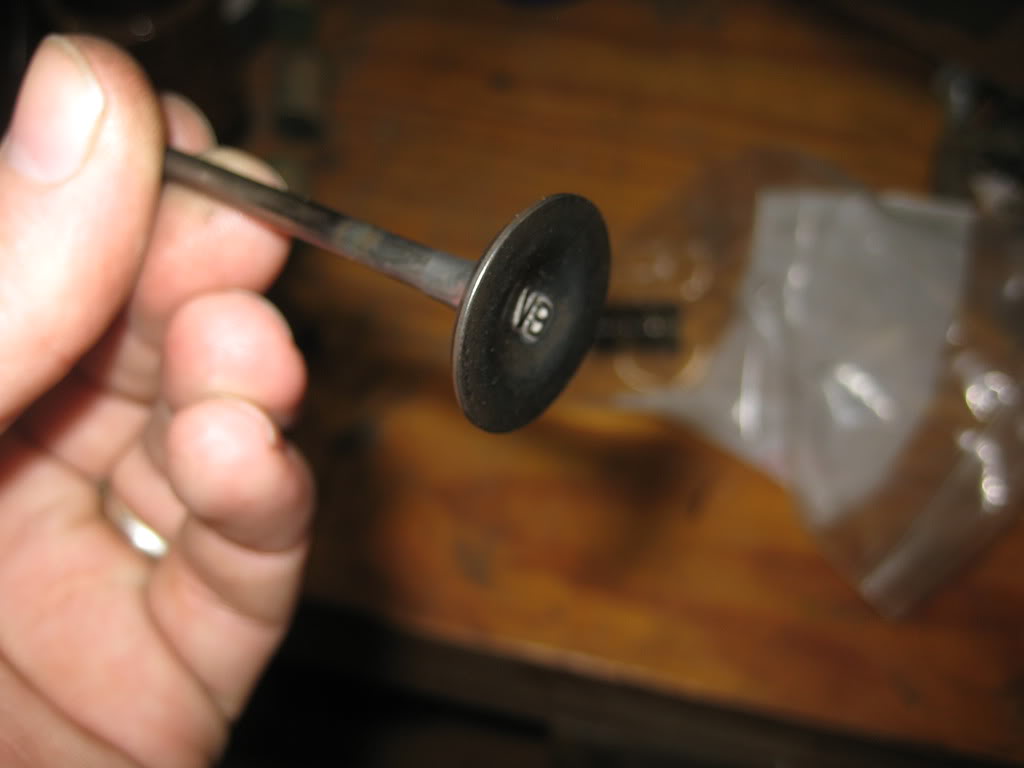
here is the head with the valves in (i took two out before realizing i needed this picture)
Then i rigged up my handy dandy very expensive special tooling
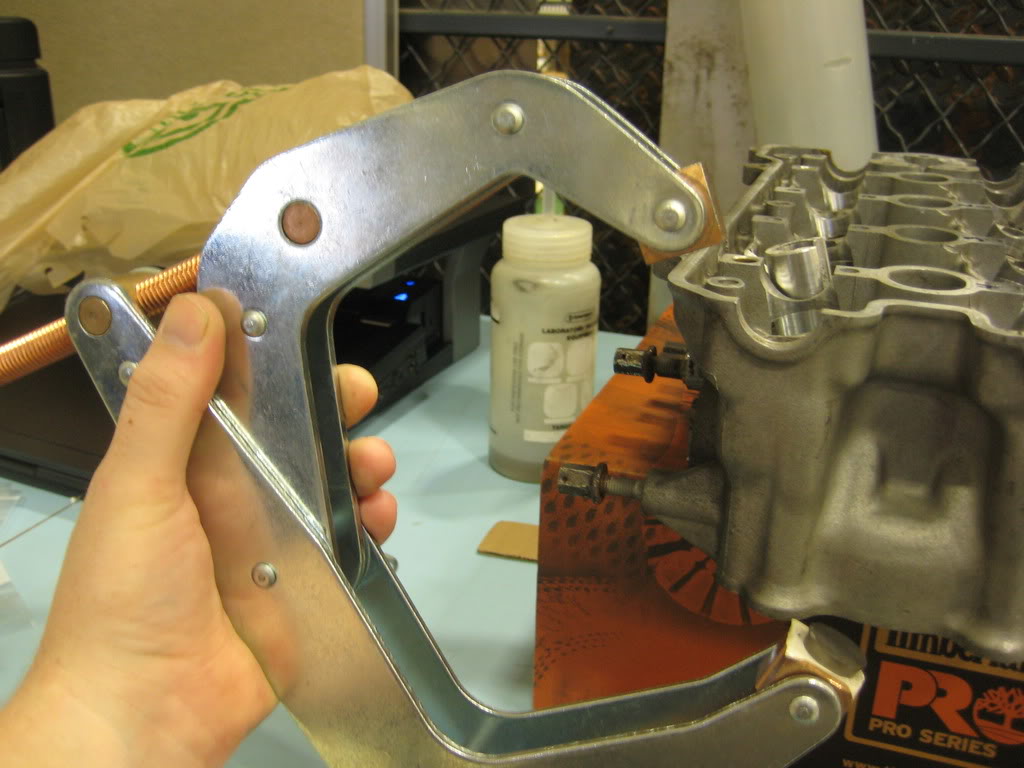
the clamp has a round piece of soft metal on the bottom to contact the face of the valve, and then uses the piece of pipe to compress the spring retainer but not the followers so i can use a pair of tweezers and get them out, freeing the valve.
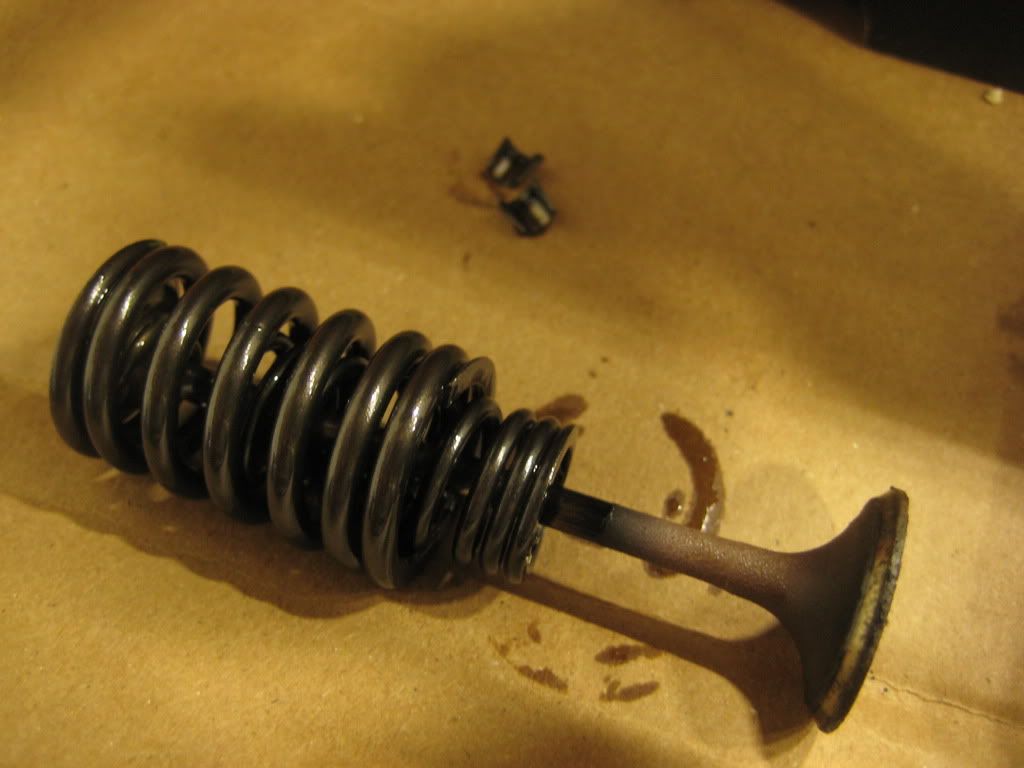
As you remove the valves, make sure you keep them not only separate but labeled so that you can put them back in the correct spot. I used bags. it also allowed me to record the valves stem diameter as well as the inner and outer spring free length to see if they were in tolerance.

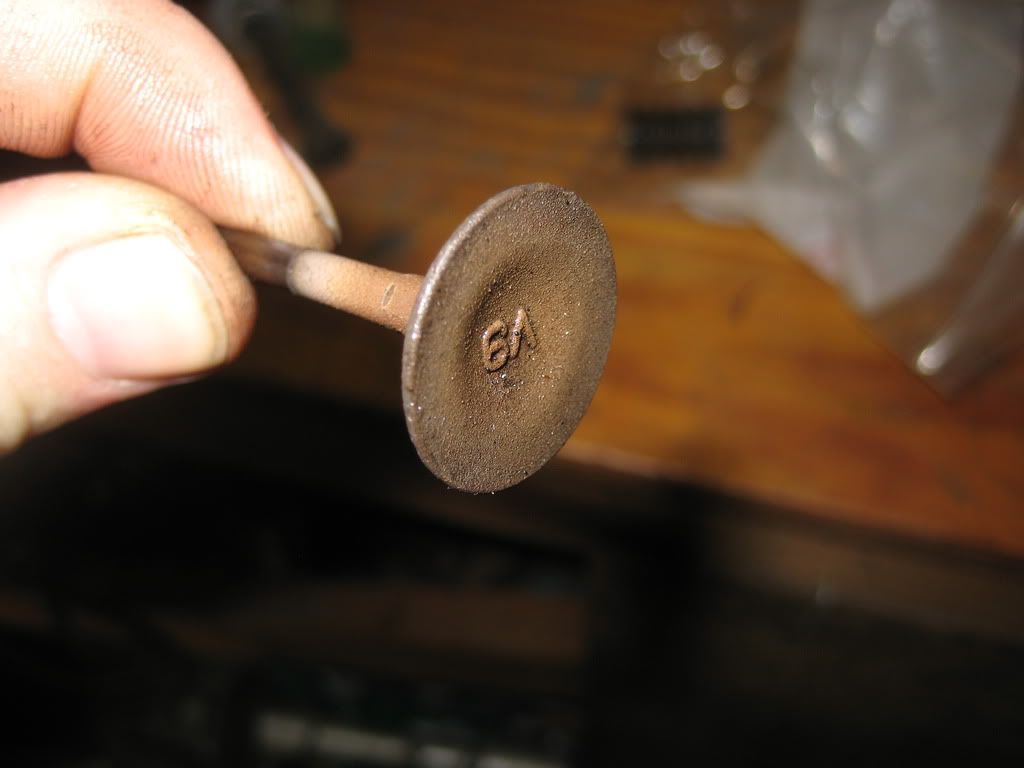
Then i cleaned up the valves (making sure to keep them in separate)
before:
after about 1 min on the wire wheel:
so today i am hoping to clean the head, lap the valves and if possible, get them back in.
thanks for looking!
~Chris
But first, i do have a question. I know people buy shim kits, nothing in the Haynes manual says anything about fitting, replacing or measuring the shims... what am i missing? i am going to re-lap the valves, so i would assume it is necessary.
Okay to jump right in.
here is the head with the valves in (i took two out before realizing i needed this picture)
Then i rigged up my handy dandy very expensive special tooling
the clamp has a round piece of soft metal on the bottom to contact the face of the valve, and then uses the piece of pipe to compress the spring retainer but not the followers so i can use a pair of tweezers and get them out, freeing the valve.
As you remove the valves, make sure you keep them not only separate but labeled so that you can put them back in the correct spot. I used bags. it also allowed me to record the valves stem diameter as well as the inner and outer spring free length to see if they were in tolerance.
Then i cleaned up the valves (making sure to keep them in separate)
before:
after about 1 min on the wire wheel:
so today i am hoping to clean the head, lap the valves and if possible, get them back in.
thanks for looking!
~Chris
Thread Starter
|
July 2011 ROTM
Joined: May 2010
Posts: 223
Likes: 8
From: Hampton Roads, VA
well i am really excited for the hardware update on the back end. i am really glad i havent even played around with the swinger.
I did finish the valve job, and have some pictures.
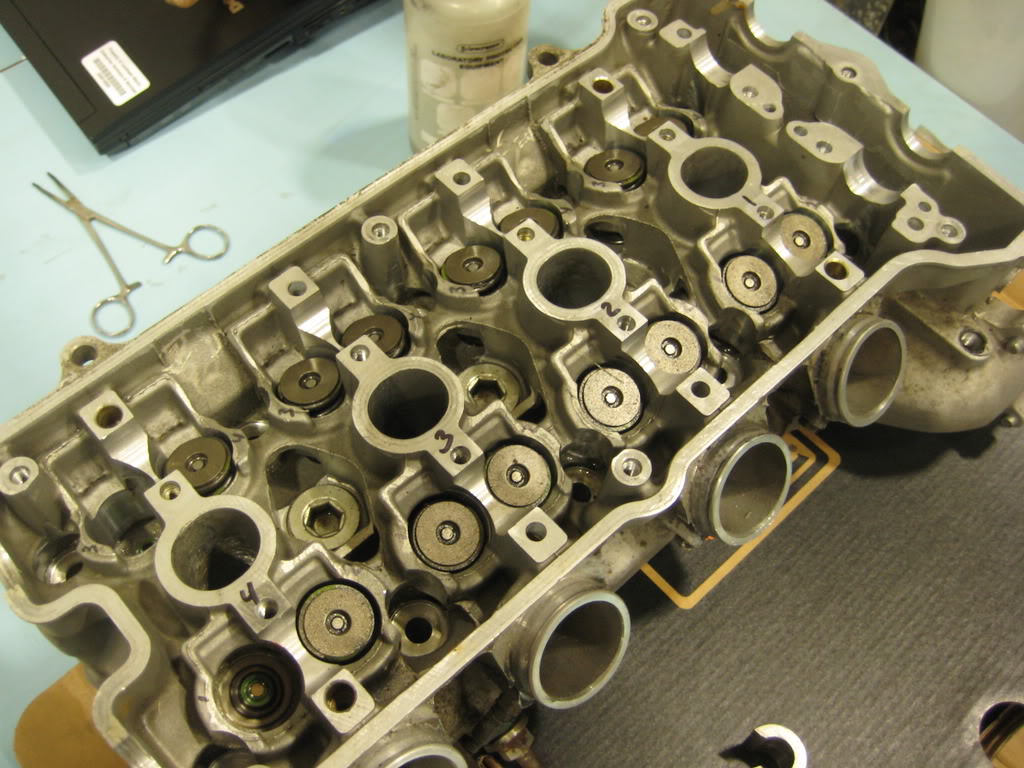
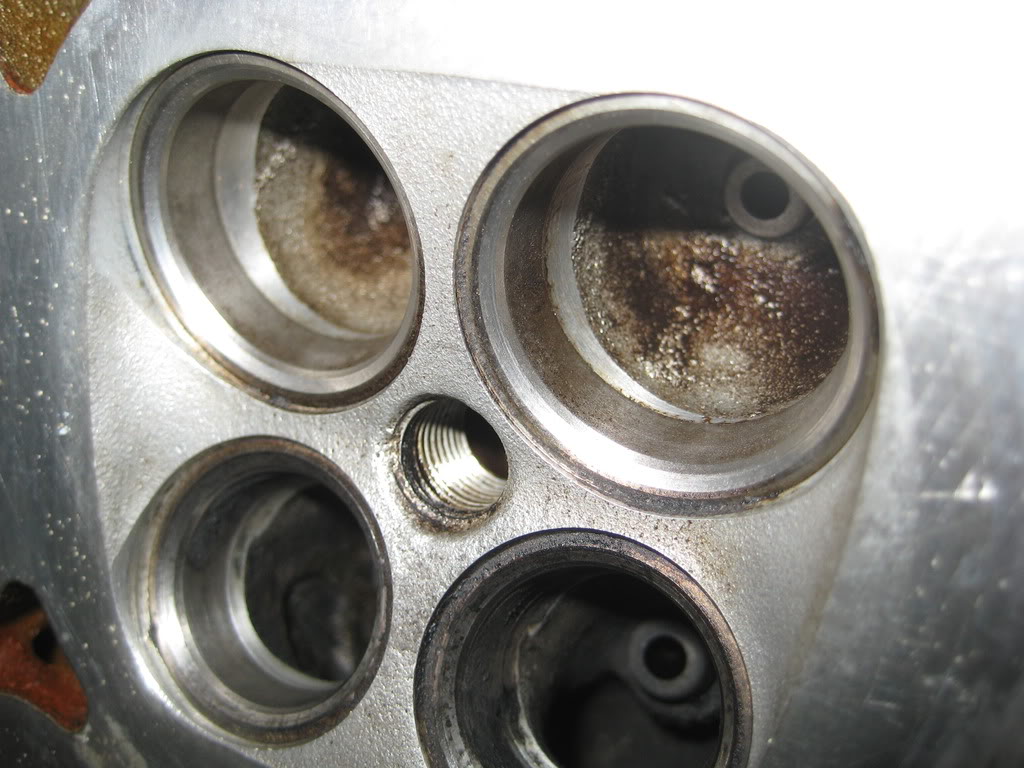
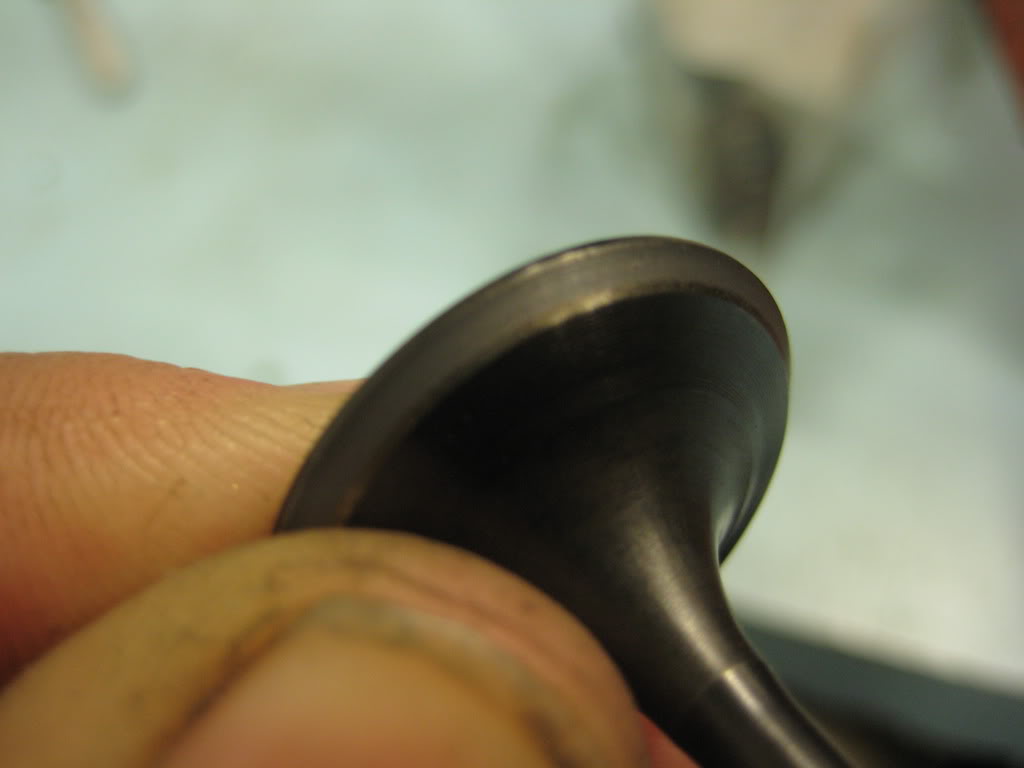
these are the surfaces that the valves seal against, and what will be lapped mostly.
So you use some coarse lapping compound and apply it to the valve like so:
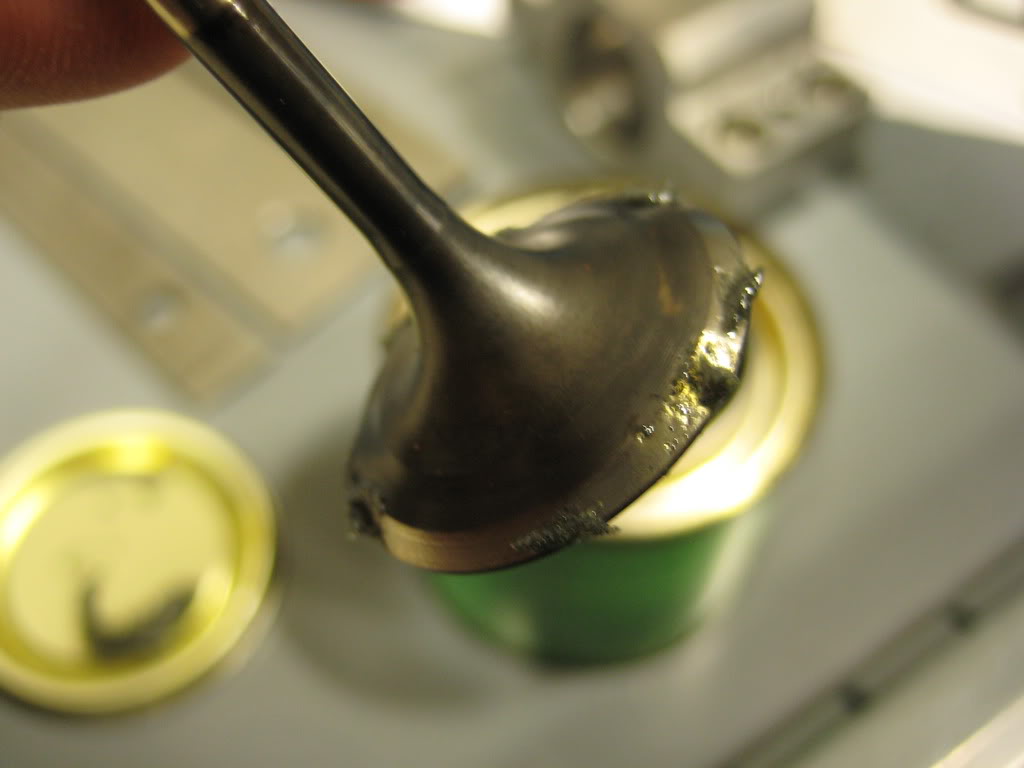
and, being very careful to not get any compound on the valve step, install the valve in the head. I used a peice of rubber hose to rotate the valve while pulling it against the face.
this is a valve that had been lapped.
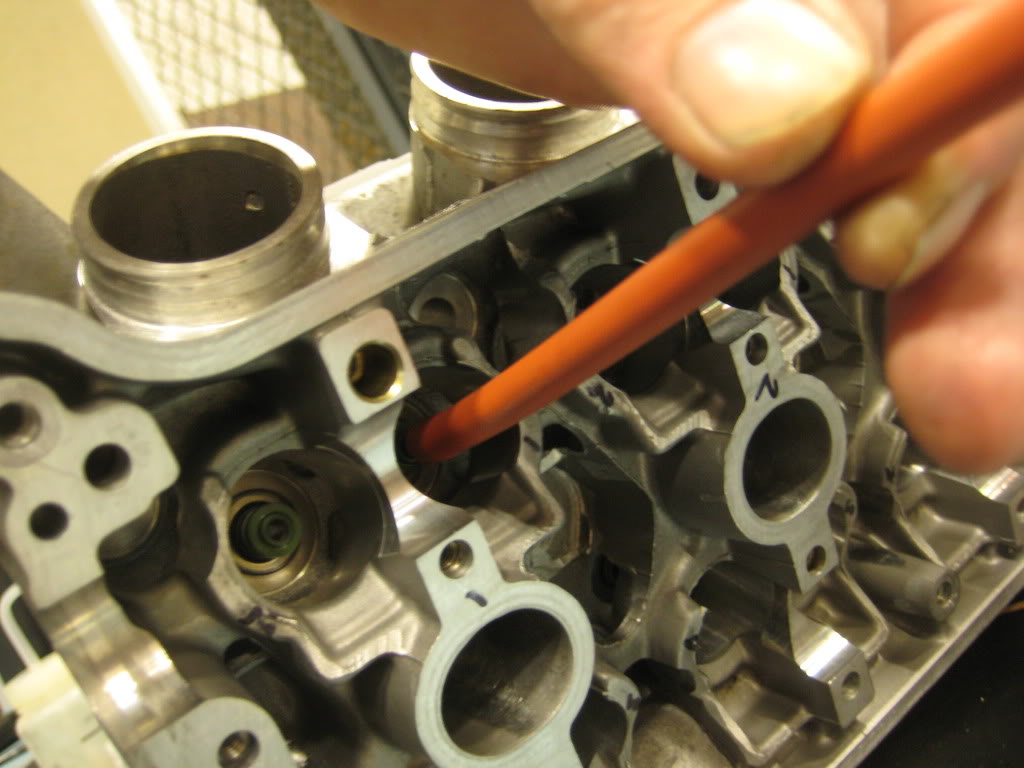
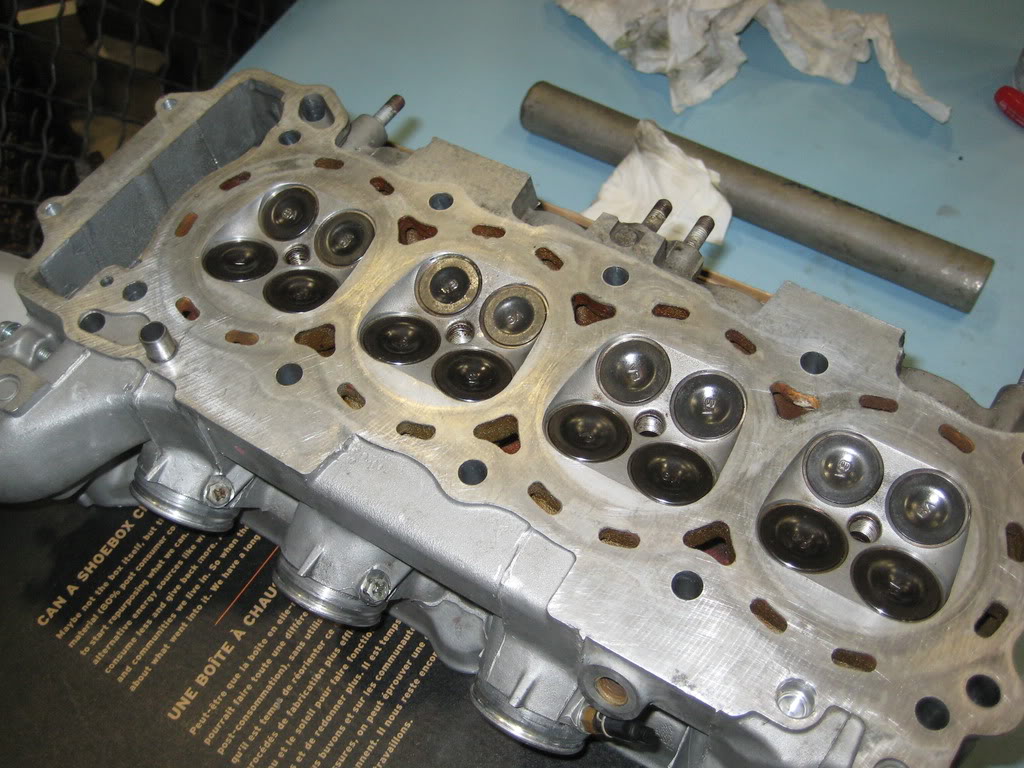
installing them back in...
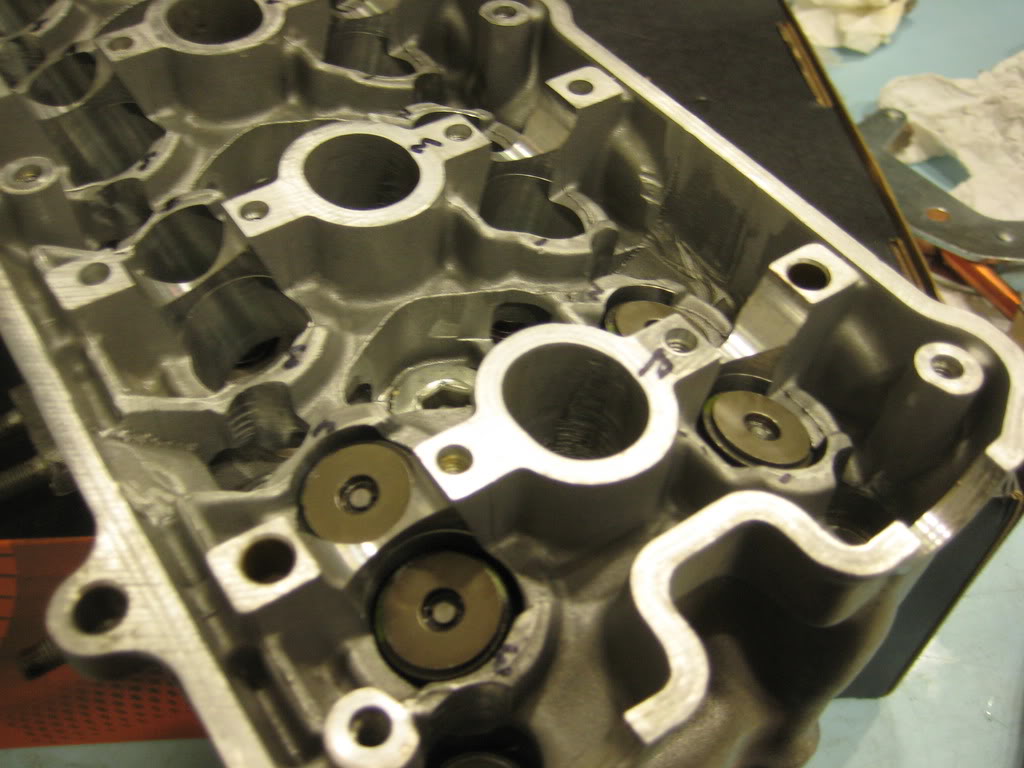
all cleaned up and put back together. i cleaned out the ports as well.. just wasnt able to get a good picture.
and then a few other random things...
I got a new power source
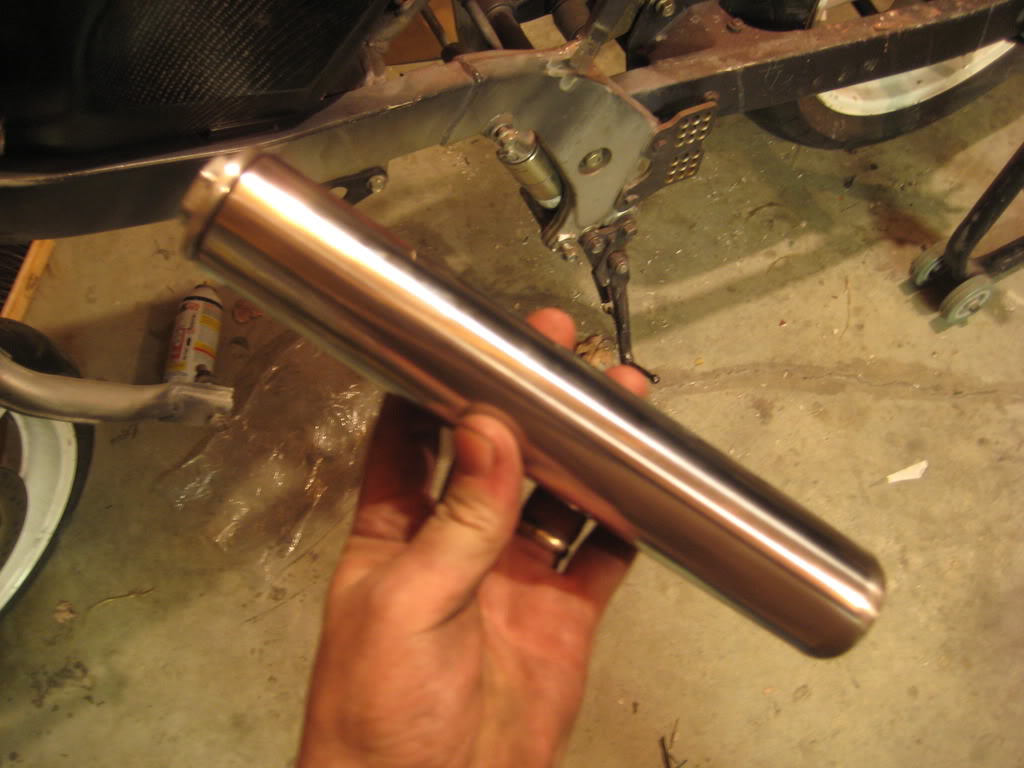
started a radiator overflow reservoir out of a past bike... I snapped this off on a gaurdrail. sheared clean at the lower triple, and it has been floating around. it means i dont have to cut threads for a cap.
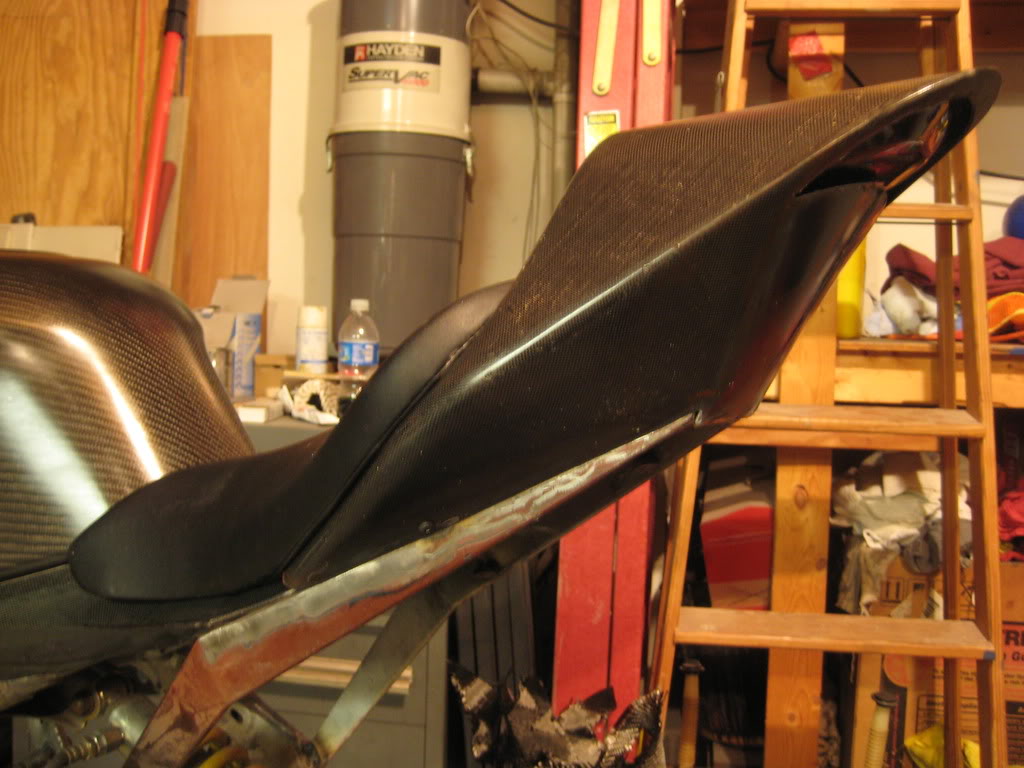
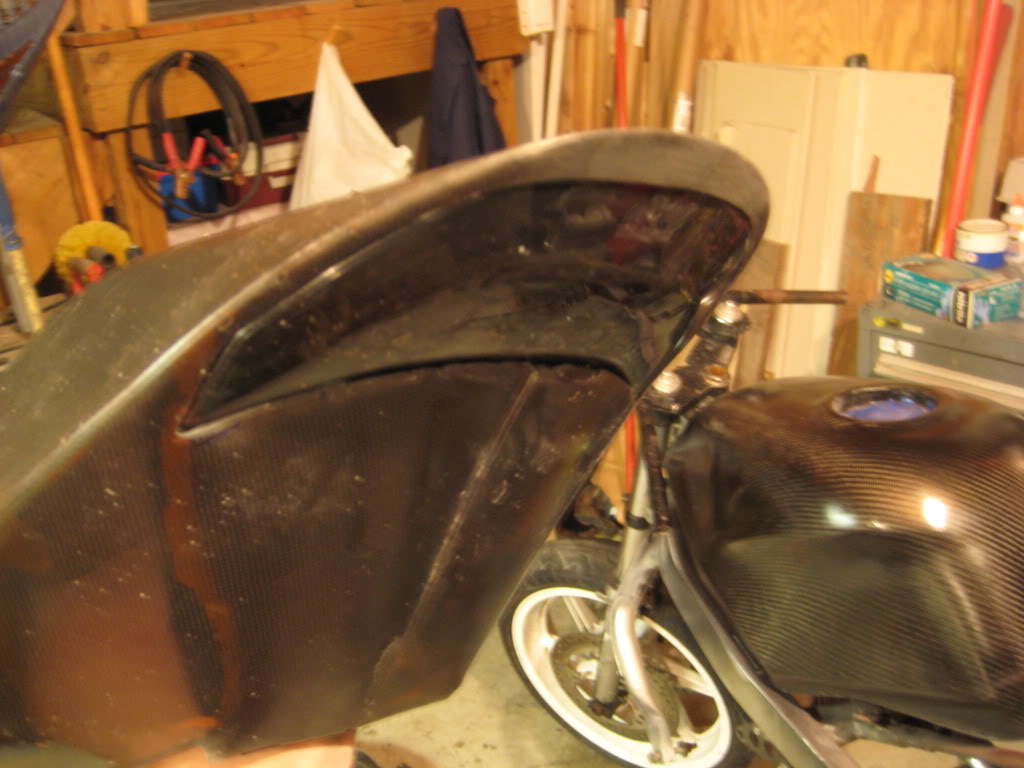
I also got the tail trimmed and fitted. unfortunately the placement of the tail-light changed a little bit, so i have to figure out how to re-weld the bracket inside while completely blind.
I cant decide, i can make the tail-light flush; like this:
or, i can make it protrude slightly. it kinda breaks up the flow a little bit, but also looks cool. sorry, no picture i will update with pictures tonight.
thanks so much for looking and helping!
~Chris
I did finish the valve job, and have some pictures.
these are the surfaces that the valves seal against, and what will be lapped mostly.
So you use some coarse lapping compound and apply it to the valve like so:
and, being very careful to not get any compound on the valve step, install the valve in the head. I used a peice of rubber hose to rotate the valve while pulling it against the face.
this is a valve that had been lapped.
installing them back in...
all cleaned up and put back together. i cleaned out the ports as well.. just wasnt able to get a good picture.
and then a few other random things...
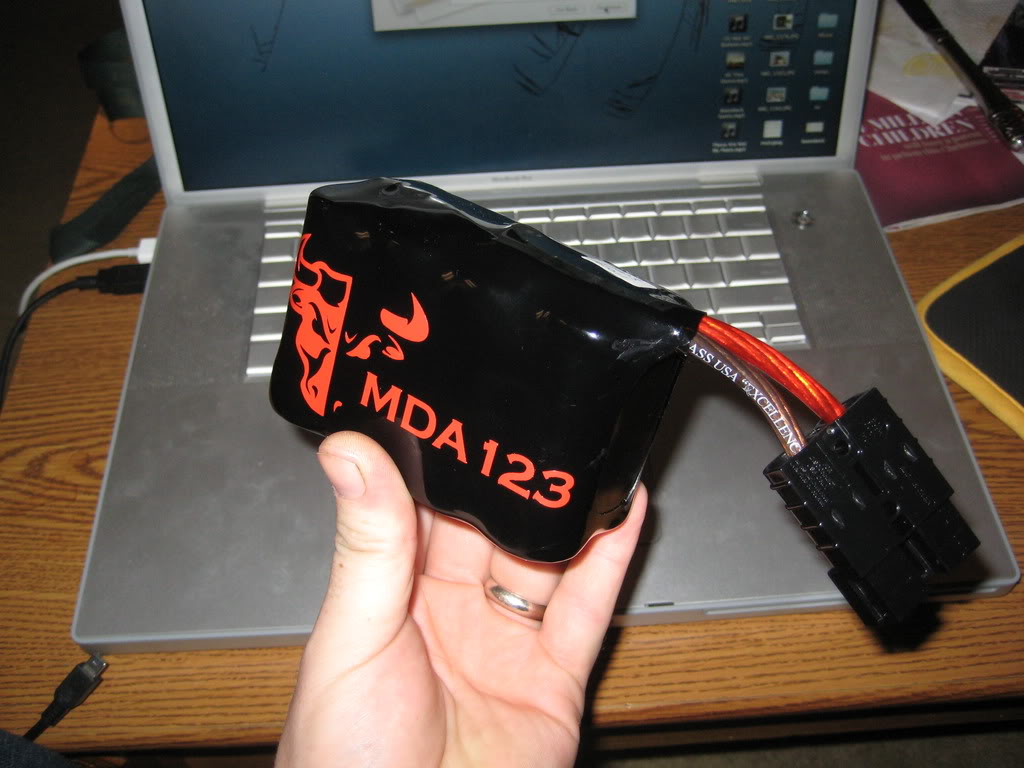
I got a new power source
started a radiator overflow reservoir out of a past bike... I snapped this off on a gaurdrail. sheared clean at the lower triple, and it has been floating around. it means i dont have to cut threads for a cap.
I also got the tail trimmed and fitted. unfortunately the placement of the tail-light changed a little bit, so i have to figure out how to re-weld the bracket inside while completely blind.
I cant decide, i can make the tail-light flush; like this:
or, i can make it protrude slightly. it kinda breaks up the flow a little bit, but also looks cool. sorry, no picture i will update with pictures tonight.
thanks so much for looking and helping!
~Chris
Thread Starter
|
July 2011 ROTM
Joined: May 2010
Posts: 223
Likes: 8
From: Hampton Roads, VA
trying to keep it up:
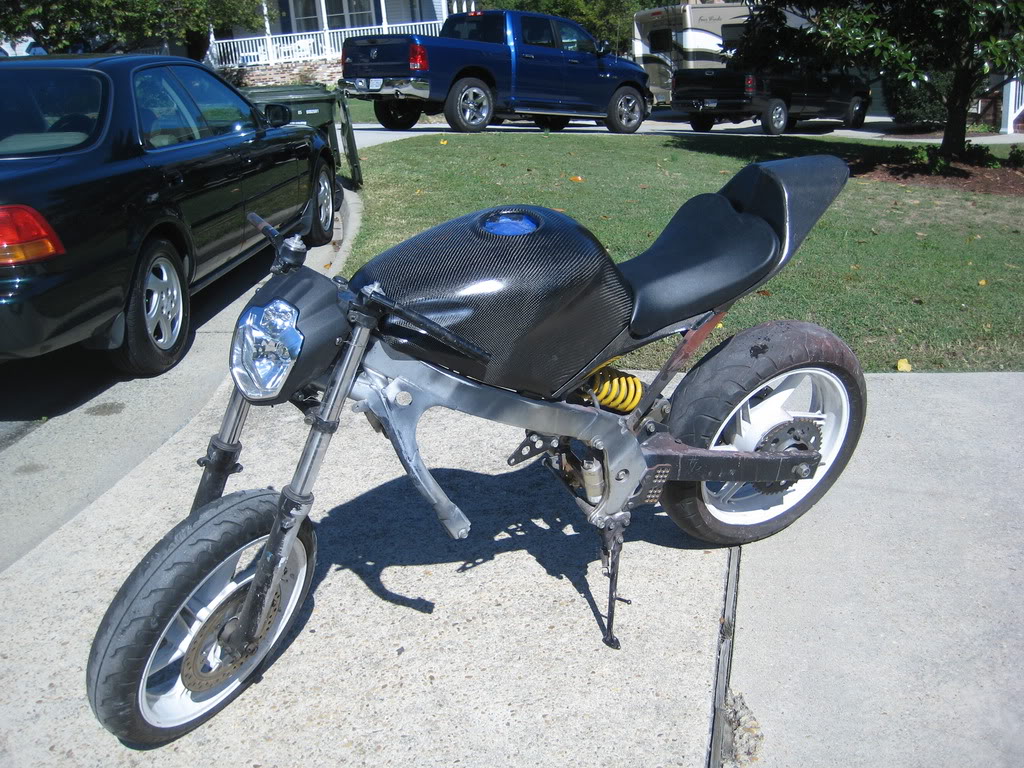
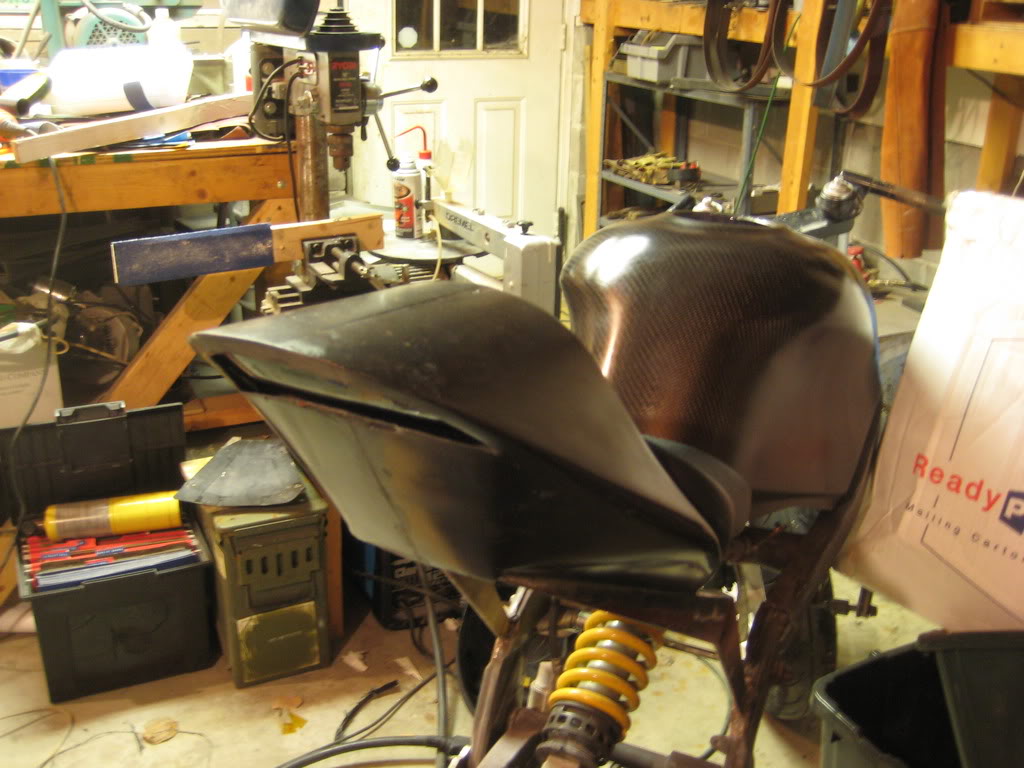
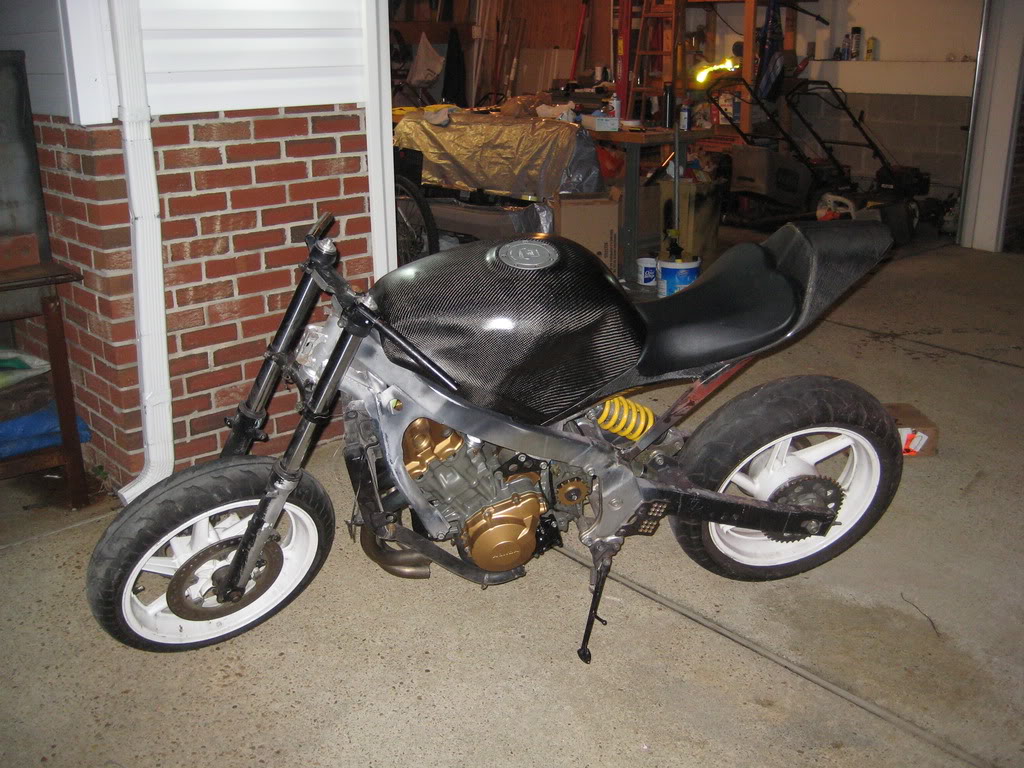
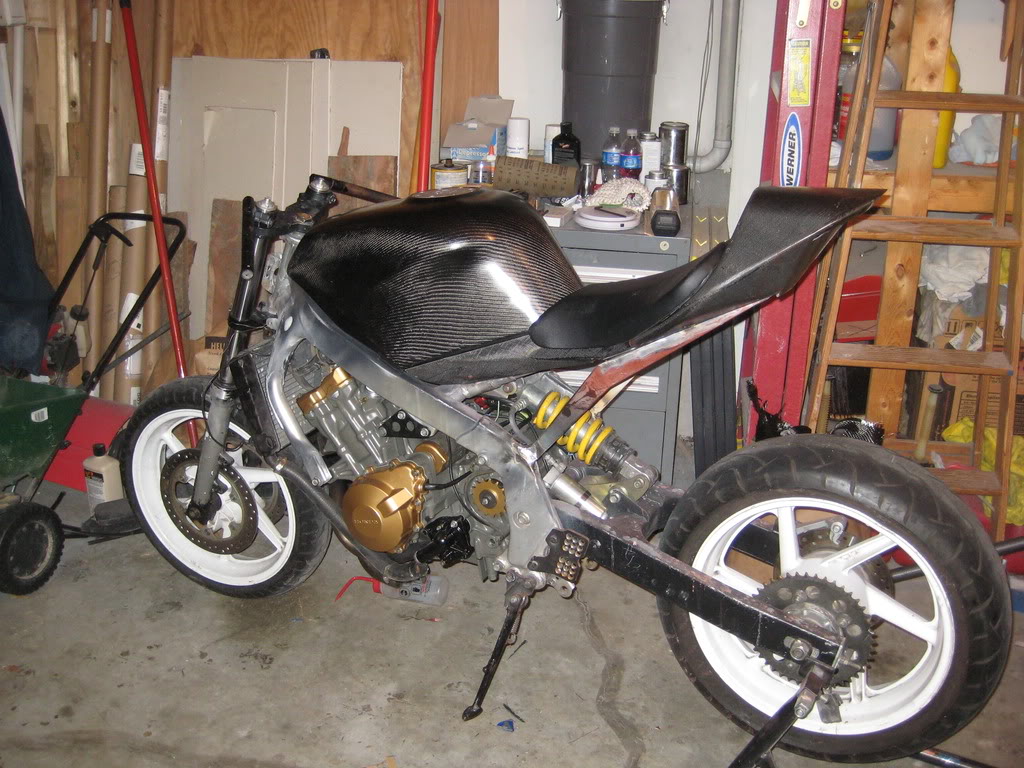
Gas-cap fitted

tail-light re-installed (this was a major pain in the butt)
and put the engine in:
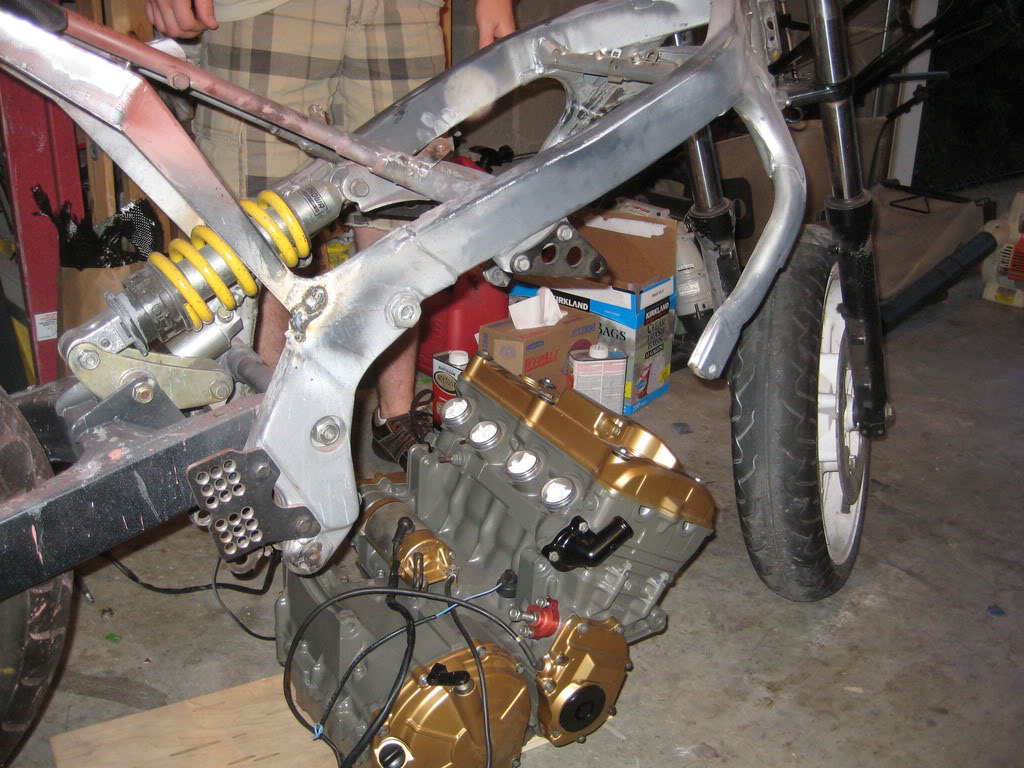
Well... it was so nice to see everything together.. that i just had to throw on all i could. that and i really wanted to see what kind of angle i am going to need to cut the Ti headers to..
I put on my F2 radiator... as i dont know that my r6 radiator is going to work.. but the F2 radiator is pretty rusty and i dont want to contaminate the new engine. ideas?
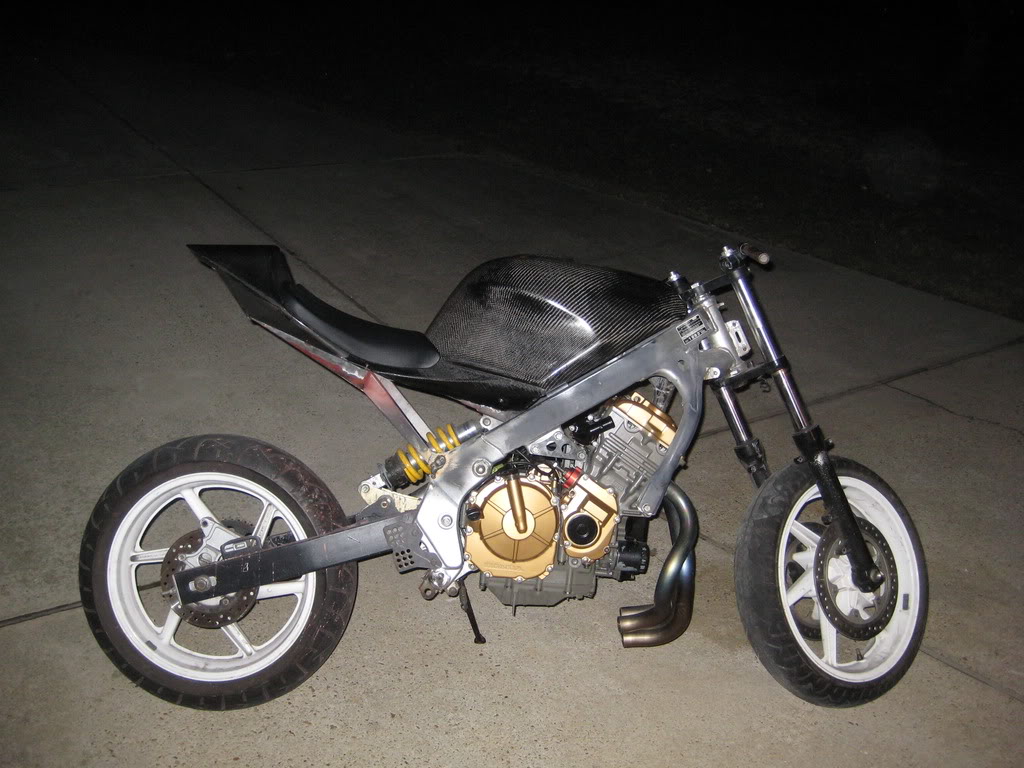
Its a tall ride right now, but i am going to change that some with the new swinger.
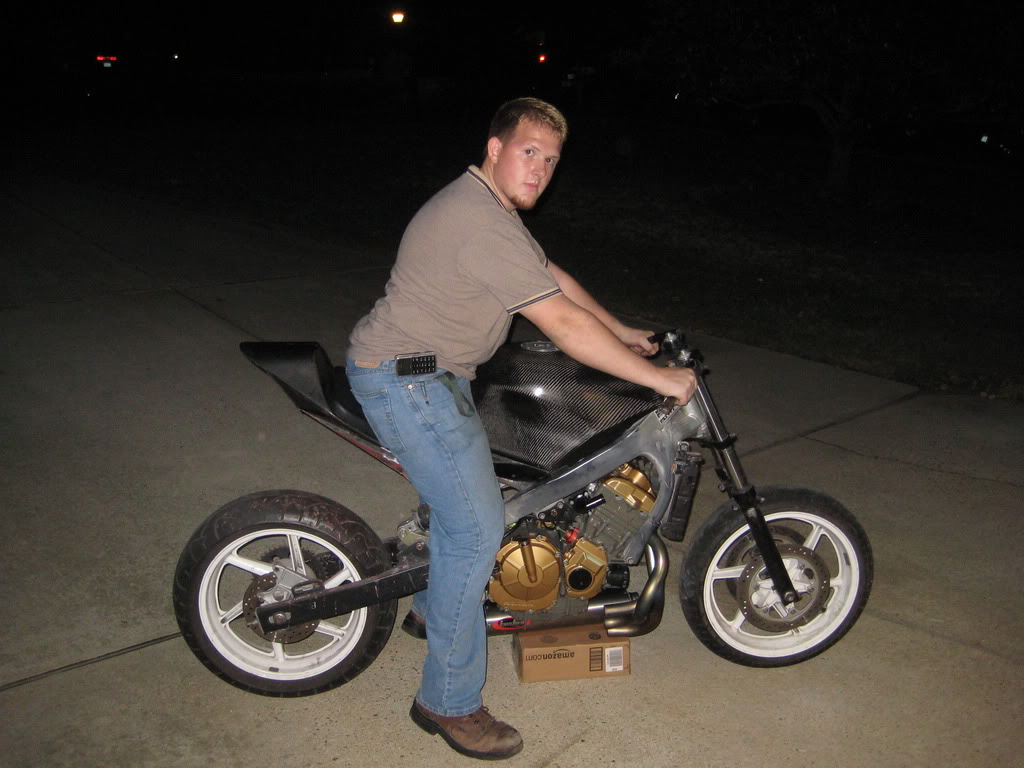
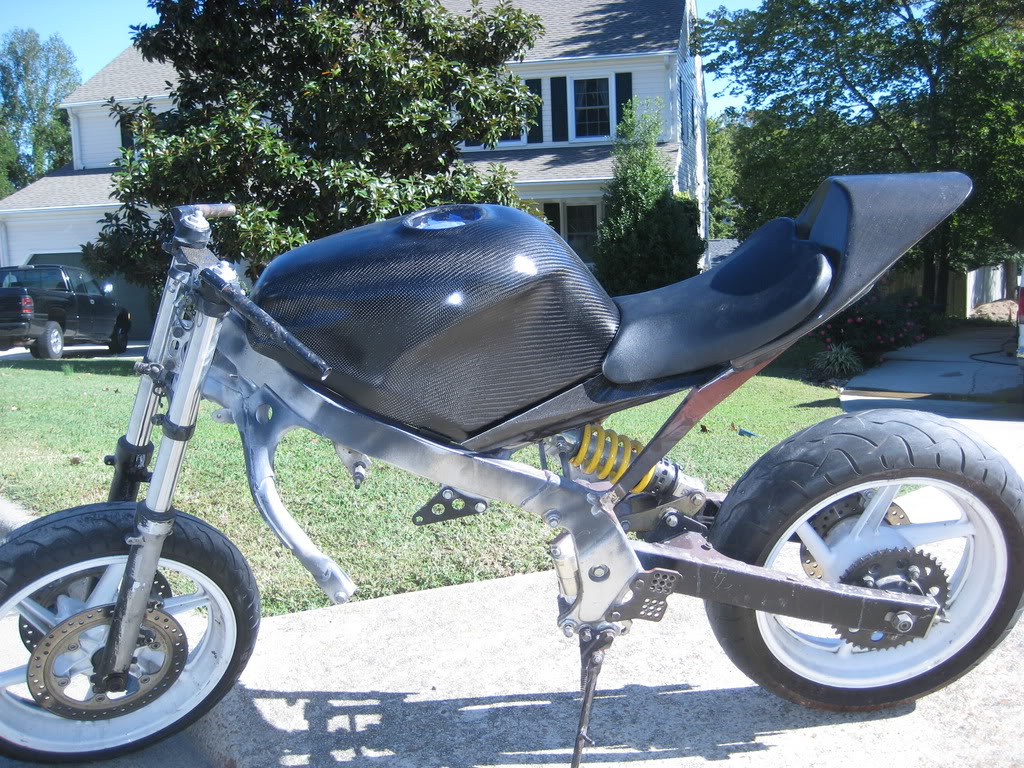
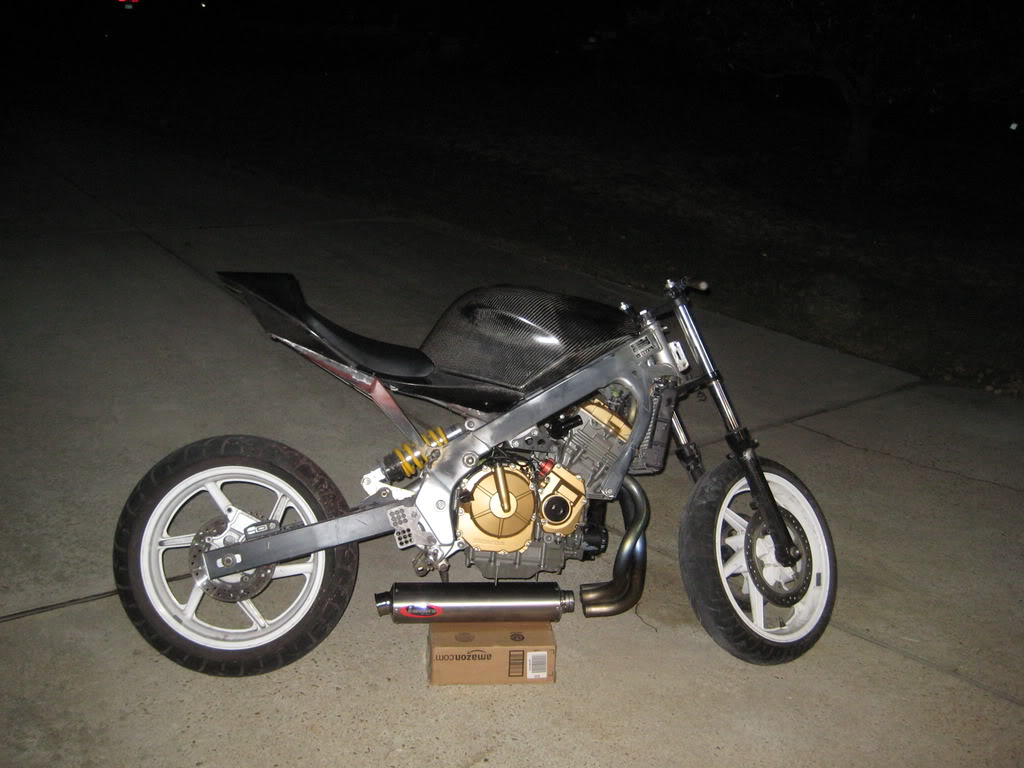
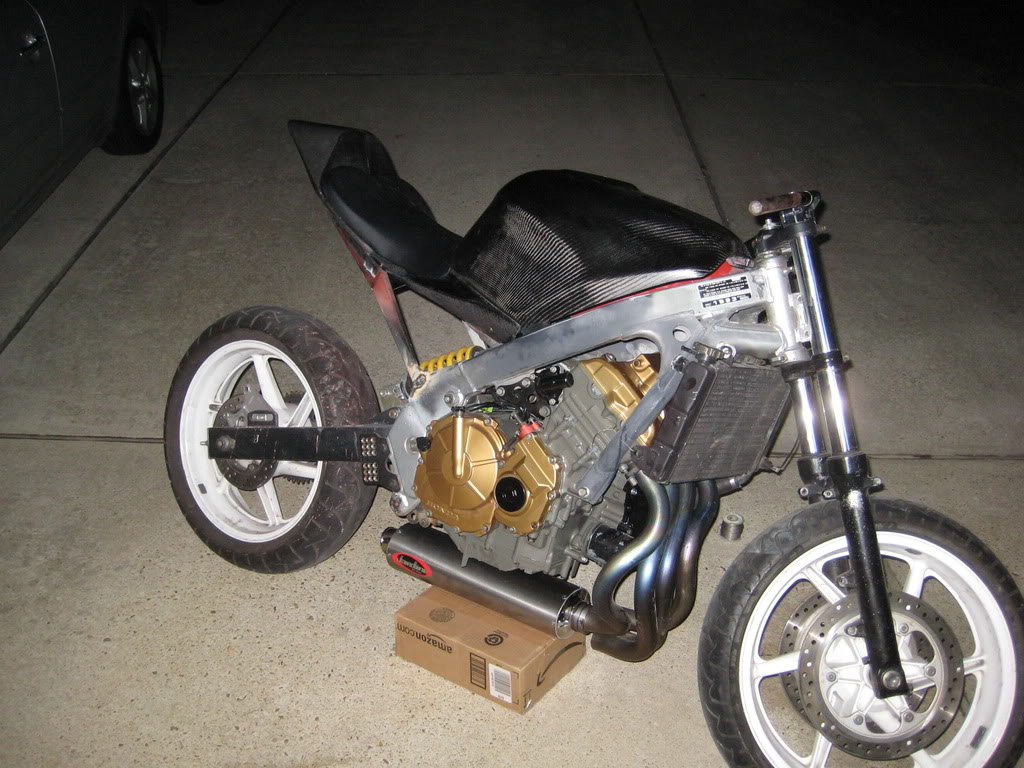
it is the first time it has actually looked like a motorcycle.. so.. a few more pics
thanks for lookin!
~Chris
Gas-cap fitted
tail-light re-installed (this was a major pain in the butt)
and put the engine in:
Well... it was so nice to see everything together.. that i just had to throw on all i could. that and i really wanted to see what kind of angle i am going to need to cut the Ti headers to..
I put on my F2 radiator... as i dont know that my r6 radiator is going to work.. but the F2 radiator is pretty rusty and i dont want to contaminate the new engine. ideas?
Its a tall ride right now, but i am going to change that some with the new swinger.
it is the first time it has actually looked like a motorcycle.. so.. a few more pics
thanks for lookin!
~Chris

