
'93 F2 Mods - Phase 2


Retired Super Moderator, Tin Star Man & Hurricane Saloon Prospect, ROTM Feb 2015
Joined: Sep 2011
Posts: 2,382
Likes: 5
From: V��ksy, Finland
Plastic parts cannot be powdercoated because the powdery paint is baked on the parts in a hot oven, plastic parts would melt.
EDIT: I'm visiting the powdercoating place i've mentioned before, and just checked from them: they keep theit two ovens at 188 and 210 celsius for different kinds of paint. Very few plastics,if any, survive that.
EDIT: I'm visiting the powdercoating place i've mentioned before, and just checked from them: they keep theit two ovens at 188 and 210 celsius for different kinds of paint. Very few plastics,if any, survive that.
Last edited by Mattson; Feb 18, 2013 at 11:24 PM.

Thread Starter
|
Welcome Crew and ROTY 2014
Joined: Dec 2010
Posts: 2,059
Likes: 6
From: Kansas
Plastic parts cannot be powdercoated because the powdery paint is baked on the parts in a hot oven, plastic parts would melt.
EDIT: I'm visiting the powdercoating place i've mentioned before, and just checked from them: they keep theit two ovens at 188 and 210 celsius for different kinds of paint. Very few plastics,if any, survive that.
EDIT: I'm visiting the powdercoating place i've mentioned before, and just checked from them: they keep theit two ovens at 188 and 210 celsius for different kinds of paint. Very few plastics,if any, survive that.
Thread Starter
|
Welcome Crew and ROTY 2014
Joined: Dec 2010
Posts: 2,059
Likes: 6
From: Kansas
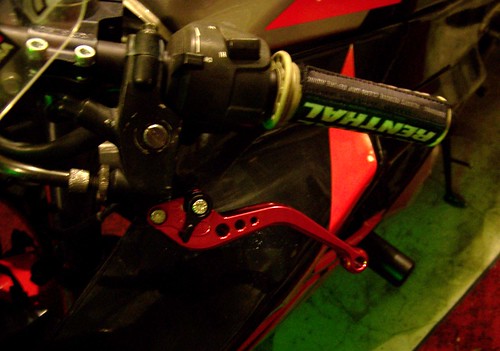
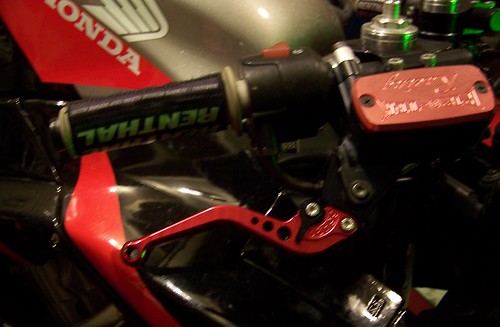
The CRG "knock-off" levers arrived yesterday, and I got them mounted last night without a hitch - the quality seems fine - time will tell, but expensive brand or not, in the end, they are billet CNC machined levers, I don't think I'll have any issues.

I got these from a U.S. seller, for $30.96, with free shipping - my CRG race levers of the same construct were somewhere between $150 and $200, for comparison.
I got these from a U.S. seller, for $30.96, with free shipping - my CRG race levers of the same construct were somewhere between $150 and $200, for comparison.

Thread Starter
|
Welcome Crew and ROTY 2014
Joined: Dec 2010
Posts: 2,059
Likes: 6
From: Kansas
Piece of cake... the only real "work" involved, is just to slacken the clutch cable enough to get it in the channel on the new lever... both levers were installed in probably 7 minutes.
Thread Starter
|
Welcome Crew and ROTY 2014
Joined: Dec 2010
Posts: 2,059
Likes: 6
From: Kansas
I think I already put up a pic of the old Yoshimura R&D can, but here it is again. I believe this muffler pre-dates the RS-3 designation, but it's very similar to the older RS-3's - anyway, it needs some work.

Here is the dent in the shell, which needs to be attended to:
After removing the screws - most of which will have to be replaced, as 5 or 6 of the 8 total screws could not be removed using an allen wrench, and I had to slot them with a Dremel, and get them off with a large flathead screwdriver - and, after drilling out the rivets, I began examining how this muffler is put together.
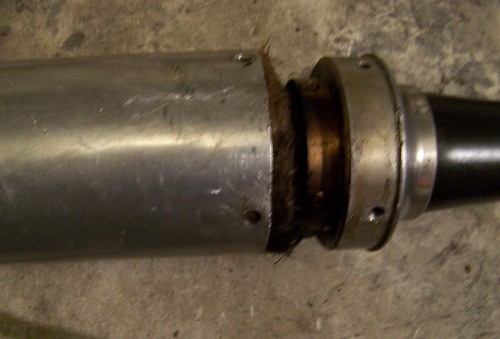
I made an initial shortening cut of the outer sleeve, just so I could further
examine the construction.
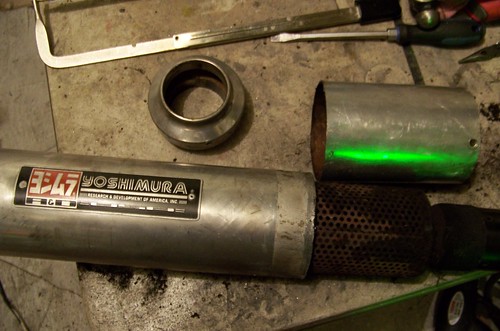
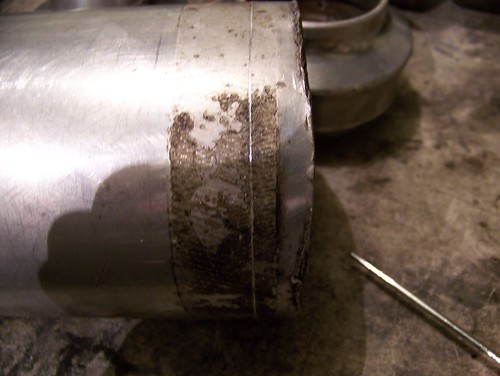
The baffle is pretty rough, with a good amount of surface rust, and of course, plenty of carbon build up, and, it has some spots where the steel mesh is missing some little bits, and is "caved in" a little - I'll make my shortening cut in that area, to address that issue.
First, though, I needed to come up with some way to get that dent out.
It's too far inside the shell to use a hammer to tap it out, and it needs more than tapping, as the stainless steel outer sleeve is pretty tough stuff.
So, I used the rounded handle of a breaker-bar for surface contact from the inside, at the dent's location, placed the other end on a drift to elevate it from the floor, and struck the breaker-bar with a dead-blow hammer, close to the opening of the shell, essentially causing the breaker bar handle to became a radiused surface hammer of sorts.
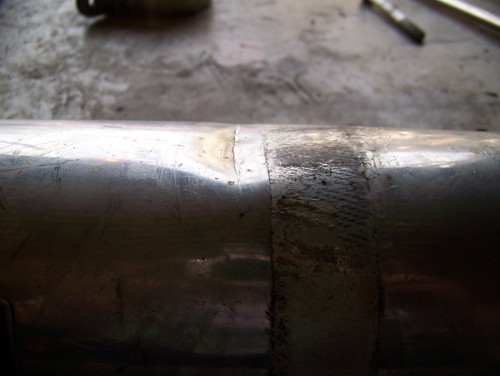
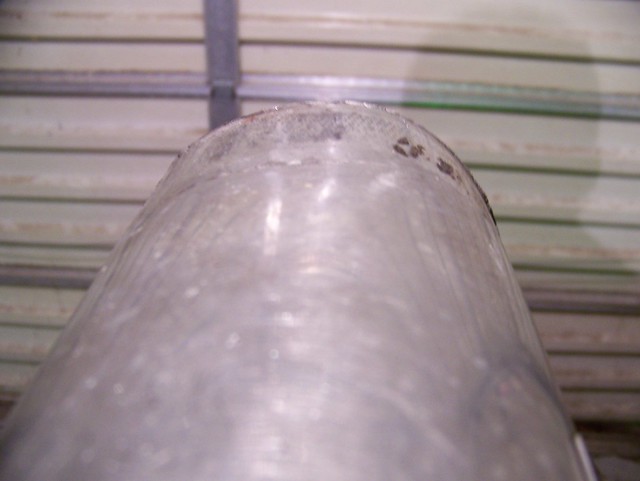
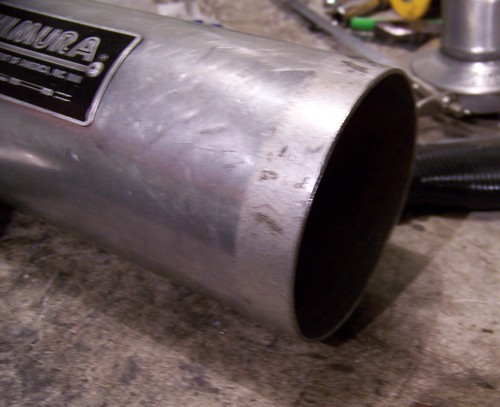
It worked out perfectly, and after re-examining the dent, repositioning my rigged-up dealio, striking again, and repeating for a bit, the dent is gone except for the scratch that's right at what was the crease of the dent.
This pic isn't that great, but this is where the dent was.
I picked the spot where I want the final cut to be, and using some precision measurements from the non-cut, square end of the shell, I made a series of light etchings in the surface, and then took a large, straight hose clamp, tightened it where its edge was right at my marks, all the way around, and made a deeper etch around the circumference, using the hose clamp as a guide to slide against.
I carefully, and with short strokes, made my way around the etching with the hack-saw, to make a slightly deeper and wider groove for my saw to follow, when I started goin' to town on it.

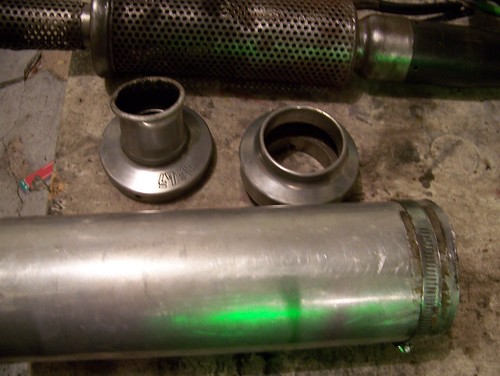
Then hacked it off, and used a small drum sander on the Dremel to clean up the edge.

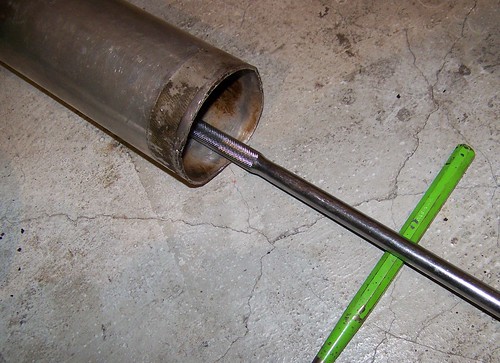
Now, I've got to do some mock-ups, and measurements, to determine where to cut the baffle, for shortening the internal bits, and once all my cuts are made, and the baffle parts are tack-welded back together, I'm going to try to straighten the final outlet tube, which is slightly bent (that's not going to be easy)... then drill out the rivets and remove the nameplate, fully polish the surface of the shell and end-caps, re-pack it, re-do the rivets, install new screws and, get it on the street bike!
When it's warmer, I might sand the black mid-pipe/inlet connector pipe, mask off the muffler from it, at the appropriate place, and get that part painted a nice black again.
Here is the dent in the shell, which needs to be attended to:
After removing the screws - most of which will have to be replaced, as 5 or 6 of the 8 total screws could not be removed using an allen wrench, and I had to slot them with a Dremel, and get them off with a large flathead screwdriver - and, after drilling out the rivets, I began examining how this muffler is put together.
I made an initial shortening cut of the outer sleeve, just so I could further
examine the construction.
The baffle is pretty rough, with a good amount of surface rust, and of course, plenty of carbon build up, and, it has some spots where the steel mesh is missing some little bits, and is "caved in" a little - I'll make my shortening cut in that area, to address that issue.
First, though, I needed to come up with some way to get that dent out.
It's too far inside the shell to use a hammer to tap it out, and it needs more than tapping, as the stainless steel outer sleeve is pretty tough stuff.
So, I used the rounded handle of a breaker-bar for surface contact from the inside, at the dent's location, placed the other end on a drift to elevate it from the floor, and struck the breaker-bar with a dead-blow hammer, close to the opening of the shell, essentially causing the breaker bar handle to became a radiused surface hammer of sorts.
It worked out perfectly, and after re-examining the dent, repositioning my rigged-up dealio, striking again, and repeating for a bit, the dent is gone except for the scratch that's right at what was the crease of the dent.
This pic isn't that great, but this is where the dent was.
I picked the spot where I want the final cut to be, and using some precision measurements from the non-cut, square end of the shell, I made a series of light etchings in the surface, and then took a large, straight hose clamp, tightened it where its edge was right at my marks, all the way around, and made a deeper etch around the circumference, using the hose clamp as a guide to slide against.
I carefully, and with short strokes, made my way around the etching with the hack-saw, to make a slightly deeper and wider groove for my saw to follow, when I started goin' to town on it.
Then hacked it off, and used a small drum sander on the Dremel to clean up the edge.
Now, I've got to do some mock-ups, and measurements, to determine where to cut the baffle, for shortening the internal bits, and once all my cuts are made, and the baffle parts are tack-welded back together, I'm going to try to straighten the final outlet tube, which is slightly bent (that's not going to be easy)... then drill out the rivets and remove the nameplate, fully polish the surface of the shell and end-caps, re-pack it, re-do the rivets, install new screws and, get it on the street bike!
When it's warmer, I might sand the black mid-pipe/inlet connector pipe, mask off the muffler from it, at the appropriate place, and get that part painted a nice black again.
Last edited by JNSRacing; Mar 18, 2013 at 12:42 PM.

Looks really good JNS! I'm going to attempt this soon with my stock pipe so will be following this closely.
Out of interest, when you do things like this, do you get a real sense of achievement?? I'm no engineer or mechanic,so when I do a job like this, and it works well and looks good. I'm proud of myself! Do you still get like that is this second nature to you??
Out of interest, when you do things like this, do you get a real sense of achievement?? I'm no engineer or mechanic,so when I do a job like this, and it works well and looks good. I'm proud of myself! Do you still get like that is this second nature to you??
Thread Starter
|
Welcome Crew and ROTY 2014
Joined: Dec 2010
Posts: 2,059
Likes: 6
From: Kansas

Don't get me wrong, I learn more all the time, and there are untold quantities of knowledge still to be had, but that's part of what I like about it... good mechanical engineering is just a good understanding of physics, tools, and some ingenuity - that's over-simplified, but it's a good "in a nutshell" description.
I love engineering, and I love working on cars and bikes... definitely more on bikes than on cars, and if I had to do it all over again, firstly, I would have gone straight from MX racing as a kid, to roadracing, or at least not quit trying to go racing in my late teens/early twenties (it was not as easy back then, to get involved, as it is now), but my second choice, or, what I would have done for work in order to fund my racing in the beginning, would be building cars and bikes for racing... definitely... at a professional level, I mean.
Oh, to have a time machine! To start it all again, when you're finally "un-dumb" enough to know what you REALLY want to do with your life!!
")
Last edited by JNSRacing; Nov 22, 2013 at 01:33 PM.

Retired Super Moderator, Tin Star Man & Hurricane Saloon Prospect, ROTM Feb 2015
Joined: Sep 2011
Posts: 2,382
Likes: 5
From: V��ksy, Finland
^
^
Oh, to be able to know what I would like to do... I have an electronics/network assembly (?) degree, although I`ve never worked one day in my life as such, the skills learned in the school has helped me from a lot of scheibe around cars. I currently work as a trucking entrepreneur but if the lottery ticket in my wallet hits jackpot I`ll quit that faster than you can blink and start a guitar building workshop. ATM there is three shops around Finland that makes a living from guitars alone, but all of them are top of the line pros and the products cost like 15 000+ per a piece. That`ll be something to strive for...

