
'93 600 Fighter project


Thread Starter
|
July 2011 ROTM
Joined: May 2010
Posts: 223
Likes: 8
From: Hampton Roads, VA
and yet, since i am slpitting the cases any way, where can i get new dogs?
Thread Starter
|
July 2011 ROTM
Joined: May 2010
Posts: 223
Likes: 8
From: Hampton Roads, VA
Sorry i havent been on in so long... the forum said the server was busy or something for a long time. anyway...
you know what? i just realized i never posted the end of the engine tear down! i have the pictures hosted on photobucket but i never put them on here! i cant belive it!
well here they are:
I had to find this bolt to serve as my "special tool to pop the alternator rotor off:

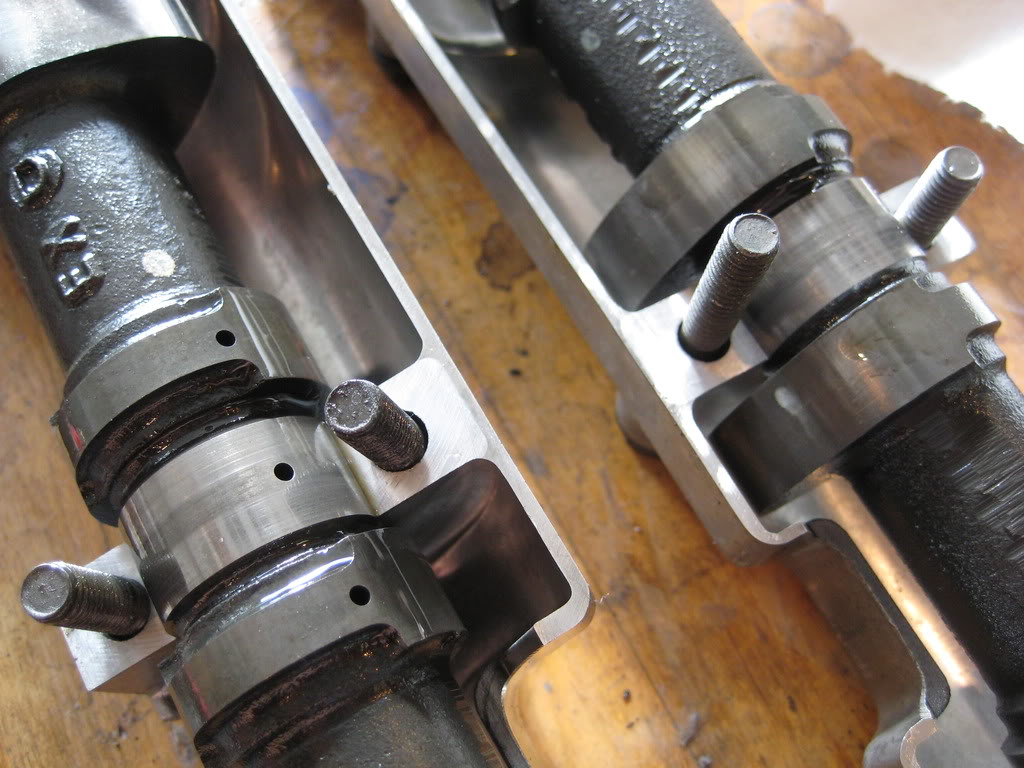
Random picture of the wear (oir lack thereof) on the camshafts & bearings (is it bad?)
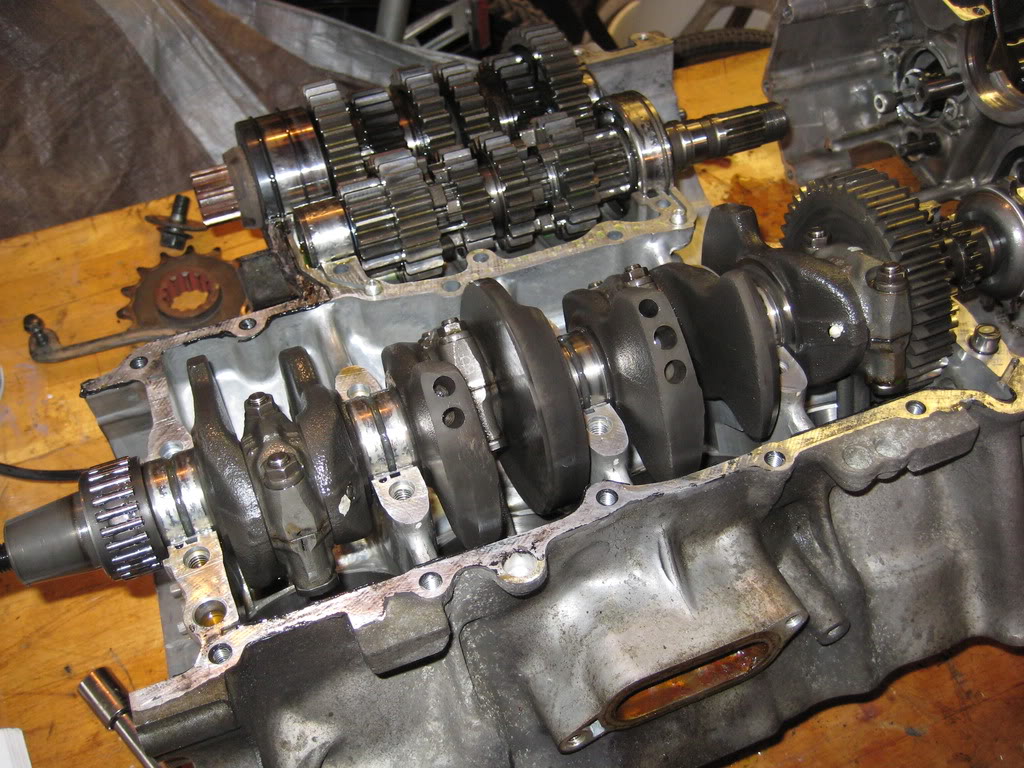
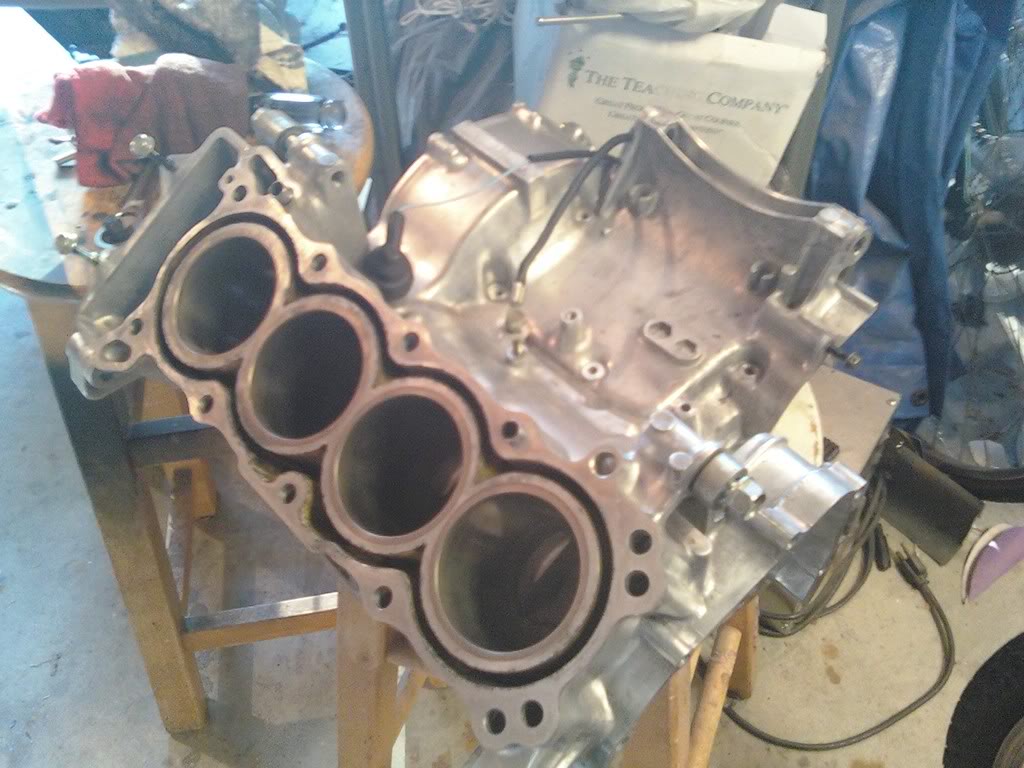
removed a gajillion bolts, and organized them very nicely in a piece of carboard to keep track of them, and then split the crankcases:
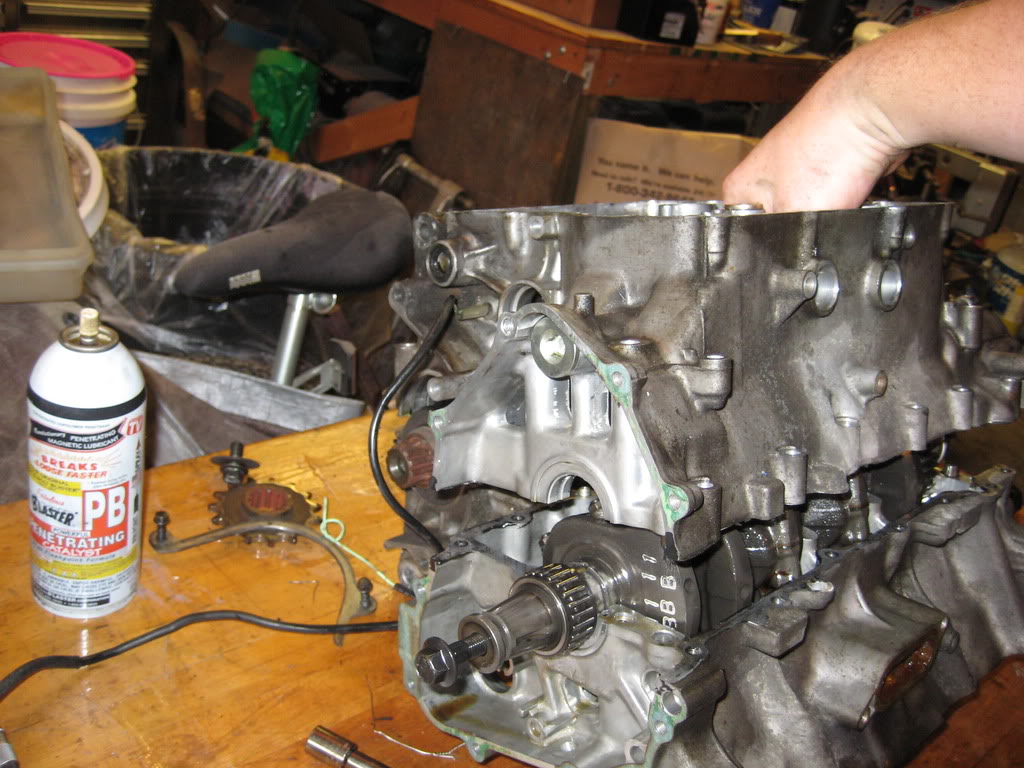
apart!
who knows how this got here...
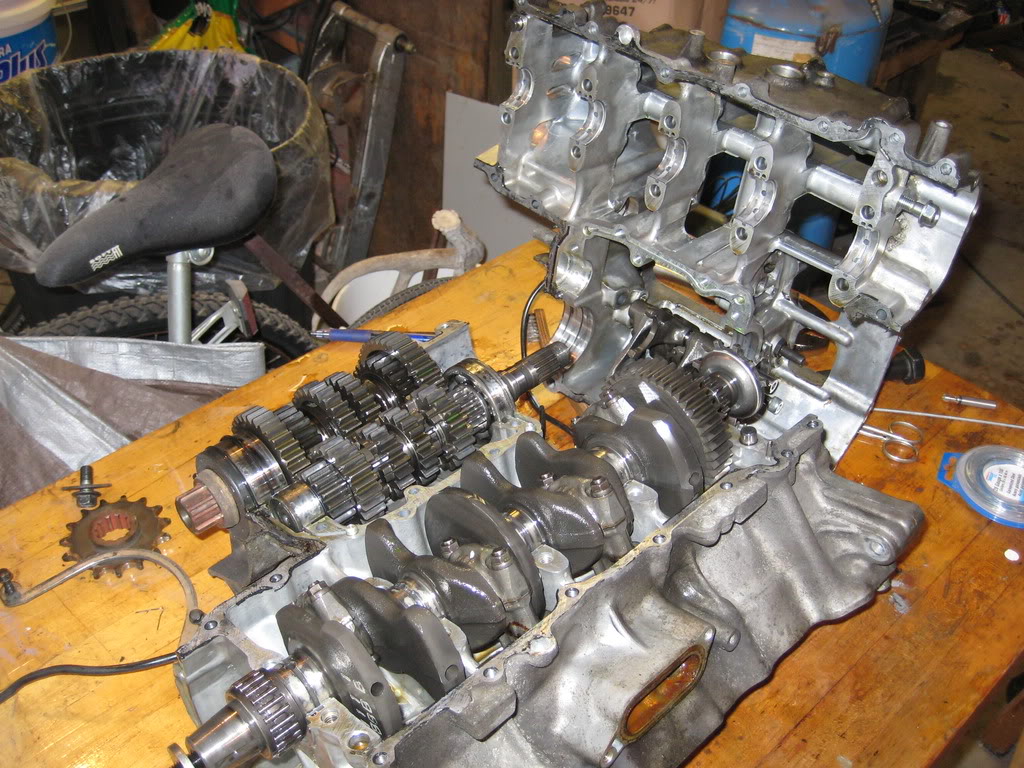
crankshaft....
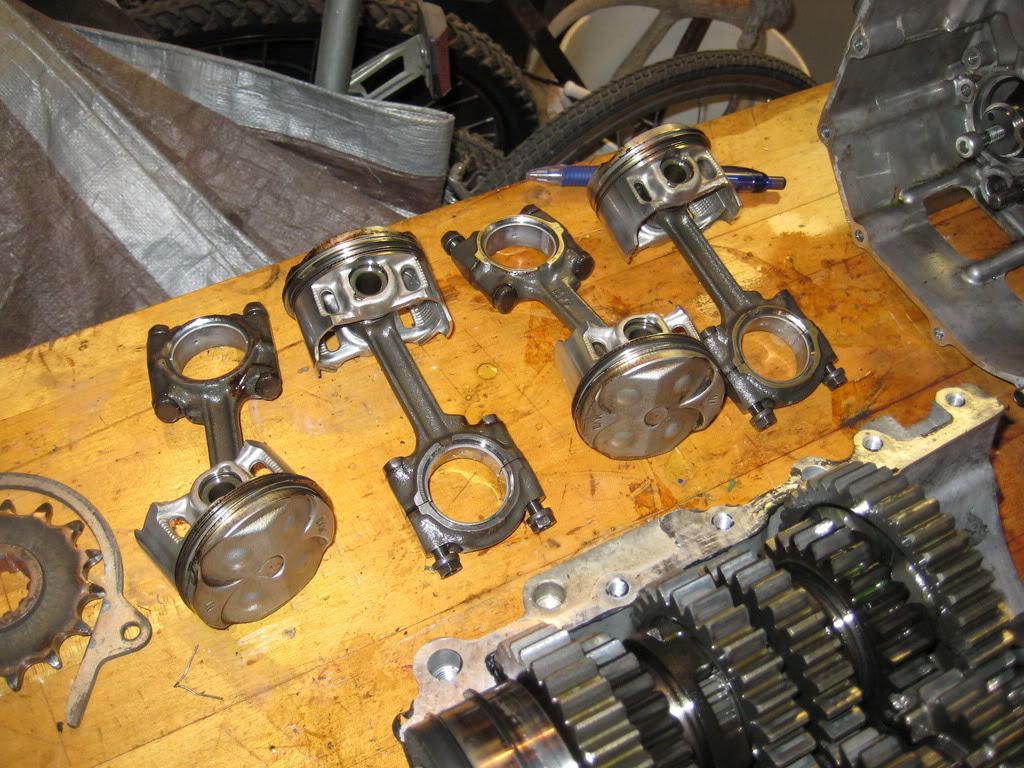
Pistons removed:
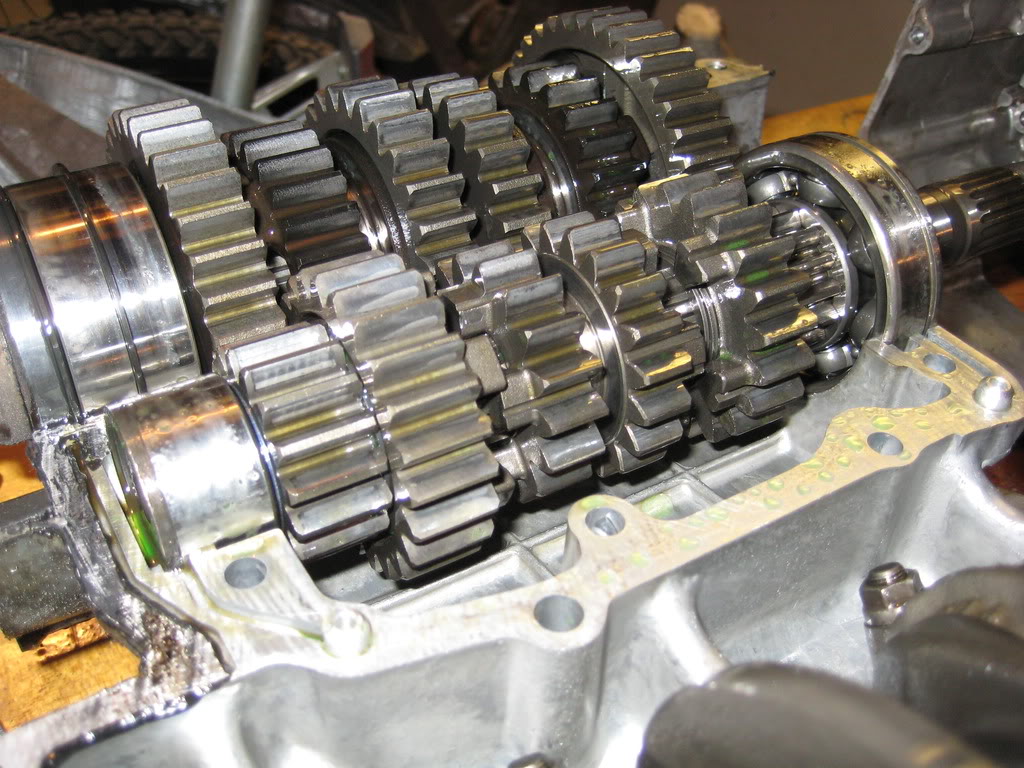
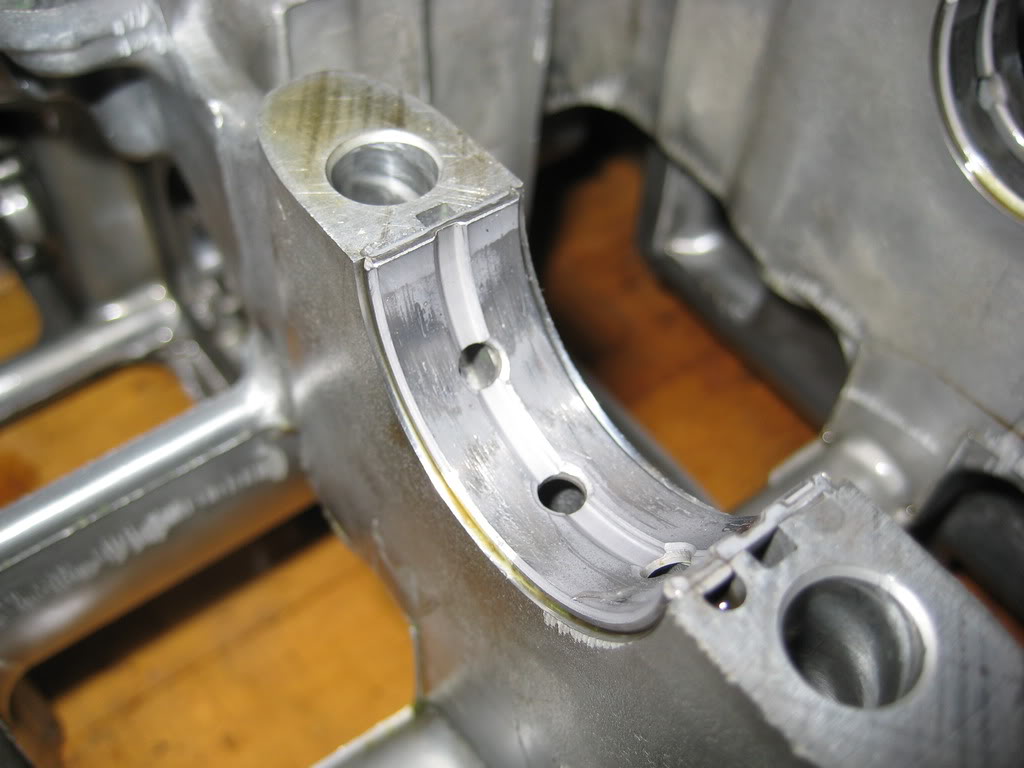
wear on one of the crankshaft bearings (is it good or bad?)
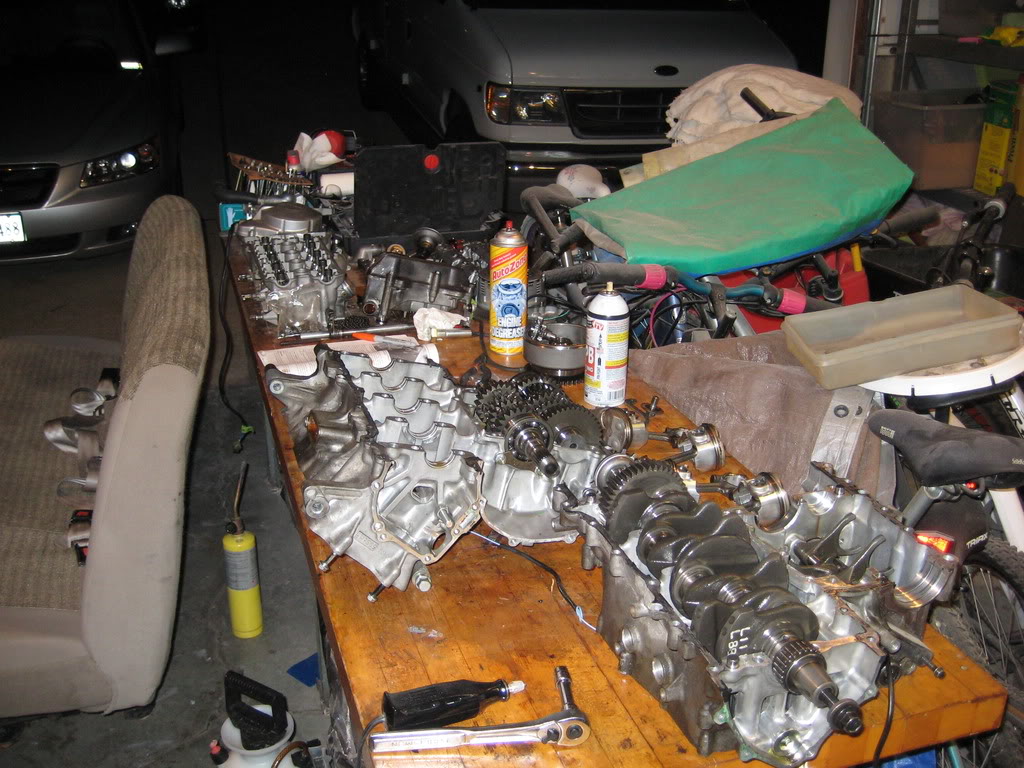
here be a mighty pile-o-parts! arrrrrr
anyway... sorry for not posting that... i did it prolly 2-3 weeks ago.
keepin you posted!
~Chris
you know what? i just realized i never posted the end of the engine tear down! i have the pictures hosted on photobucket but i never put them on here! i cant belive it!
well here they are:
I had to find this bolt to serve as my "special tool to pop the alternator rotor off:
Random picture of the wear (oir lack thereof) on the camshafts & bearings (is it bad?)
removed a gajillion bolts, and organized them very nicely in a piece of carboard to keep track of them, and then split the crankcases:
apart!
who knows how this got here...
crankshaft....
Pistons removed:
wear on one of the crankshaft bearings (is it good or bad?)
here be a mighty pile-o-parts! arrrrrr
anyway... sorry for not posting that... i did it prolly 2-3 weeks ago.
keepin you posted!
~Chris
Thread Starter
|
July 2011 ROTM
Joined: May 2010
Posts: 223
Likes: 8
From: Hampton Roads, VA
Okay! update time.
So.. my truck threw a rod about two weeks ago... and blew a hole in the side of the engine. this is the result:
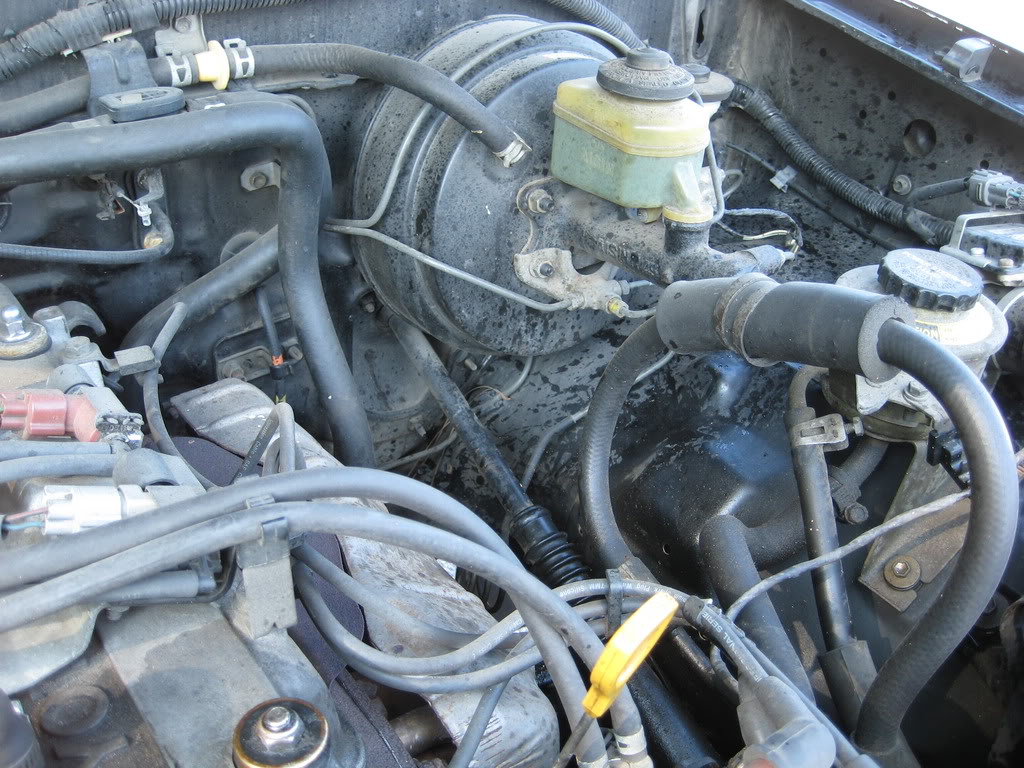
so i spent the next two weeks searching for a replacement. the plan was to buy a $500 car (which is what i could afford...) my parents said that they wanted to use someof the money they set aside for my college (which i never used as i got a full ride) to get me a new truck. (so they could use it too!) anyway.. so i found and purchased this:
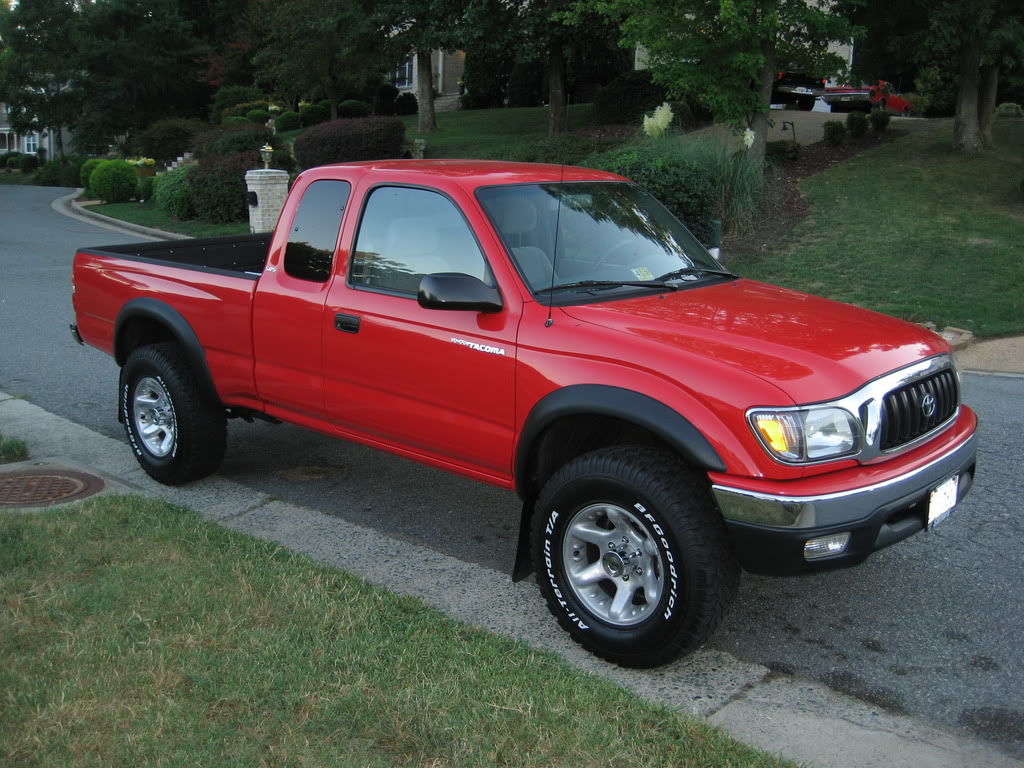
So now with money in the bank and a car sale pending, i can get back to work.
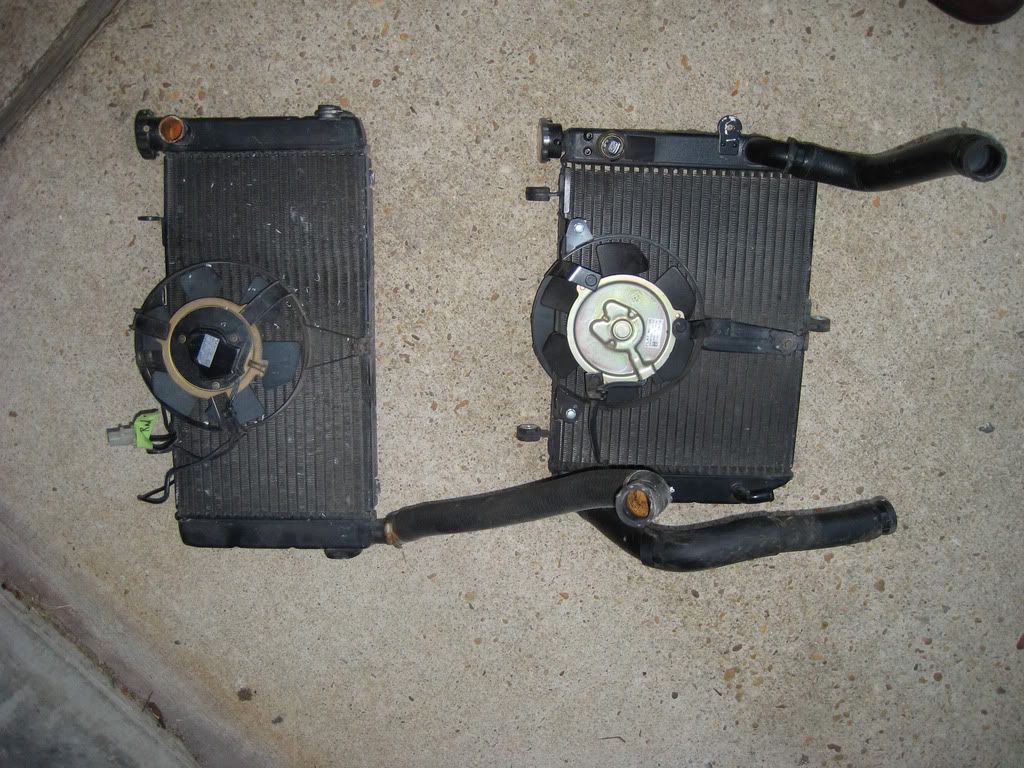
here is the 01 R6 radiator that i got to replace the stock one:
I won some F2 front brake calipers on ebay for $0.99 + $12 shipping.. and when the box arrived it contained this:
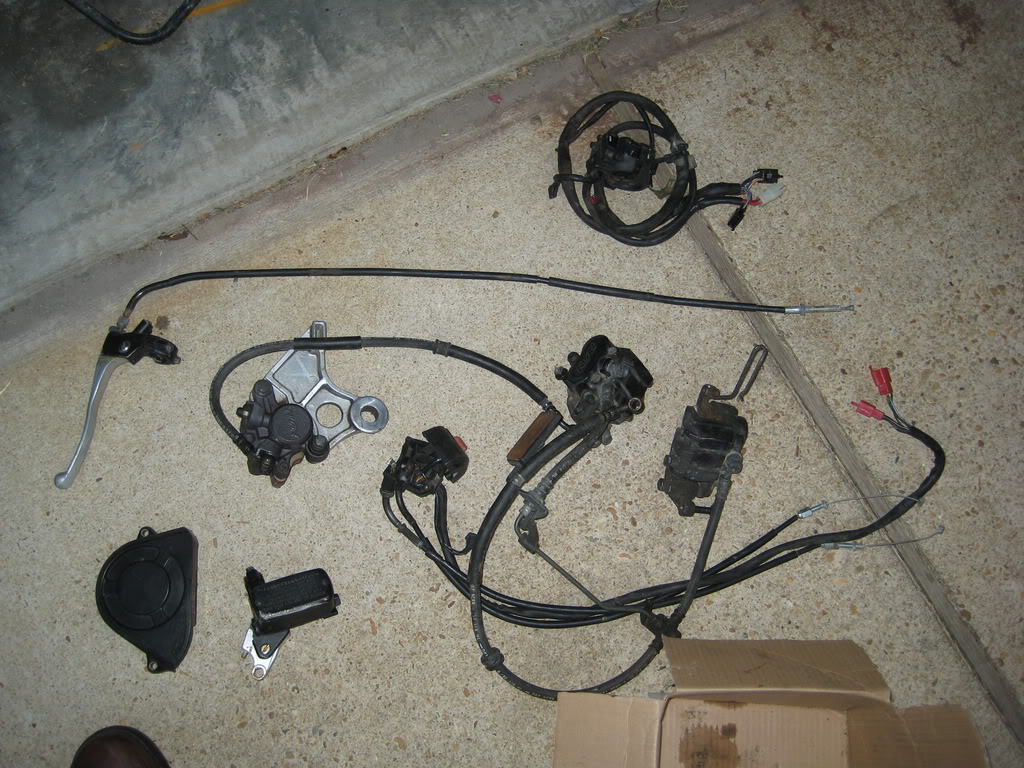
Front brake calipers
rear brake caliper
Master cylinder
Clutch lever and cable
Left clip-on controls and choke cables
Right clip-on controls (no ignition)
Front sprocket cover
all in all worth the $12 :LolLolLolLol:
So, now i need to figure out which bearings to buy so that i can put the bike back together. Any help here would be appreciated.
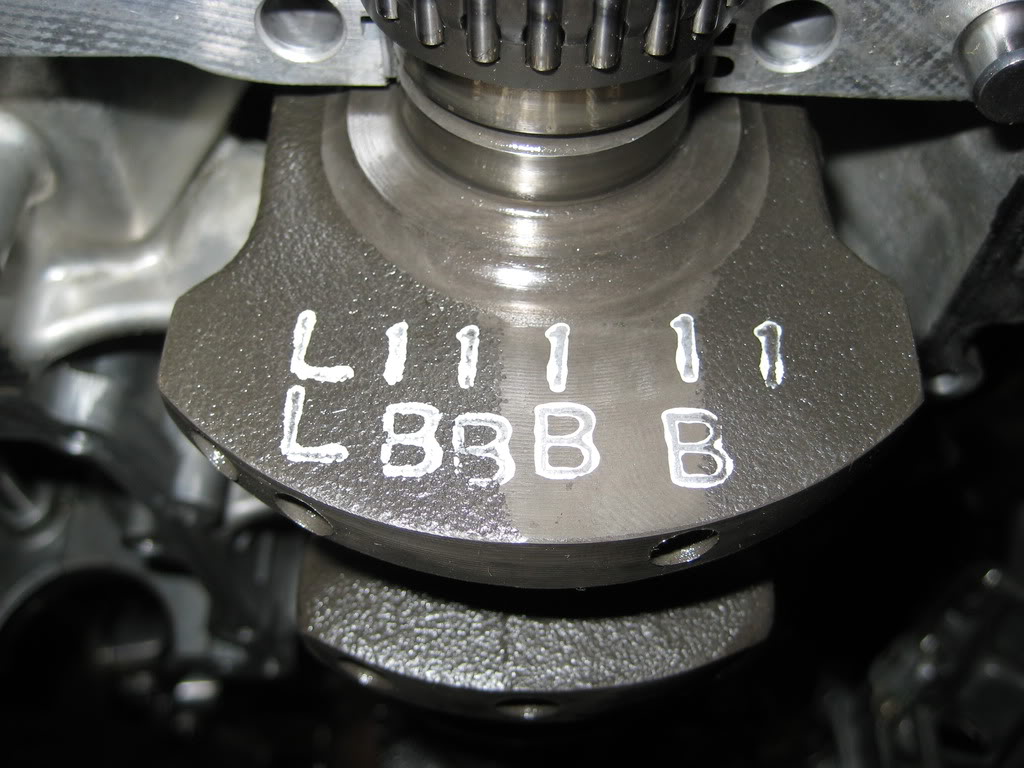
So that is:
Crankshaft:
L 11111
L BBBB
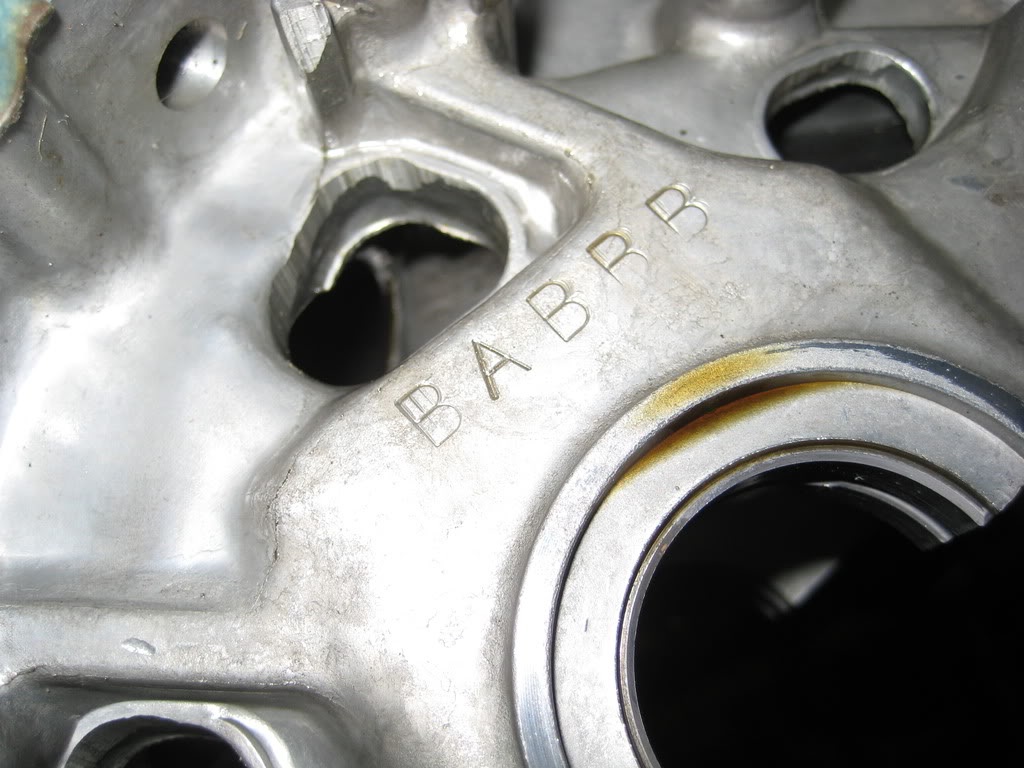
Crankcase:
BABBB
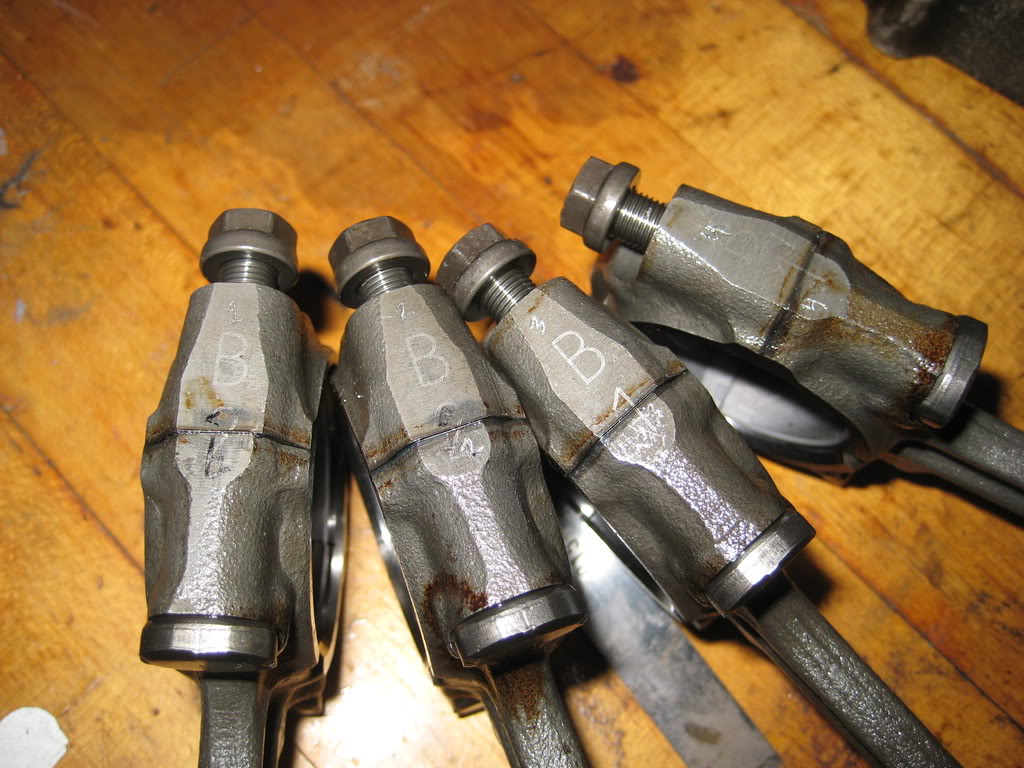
And for the pistons:
1 B2
2 B2
3 B1
4 B1
Which bearings do i need? i am pretty sure i need:
rod bearings: 2 brown 2 green
cranshaft: 4 yellow 1 pink
can i get confirmation on that?
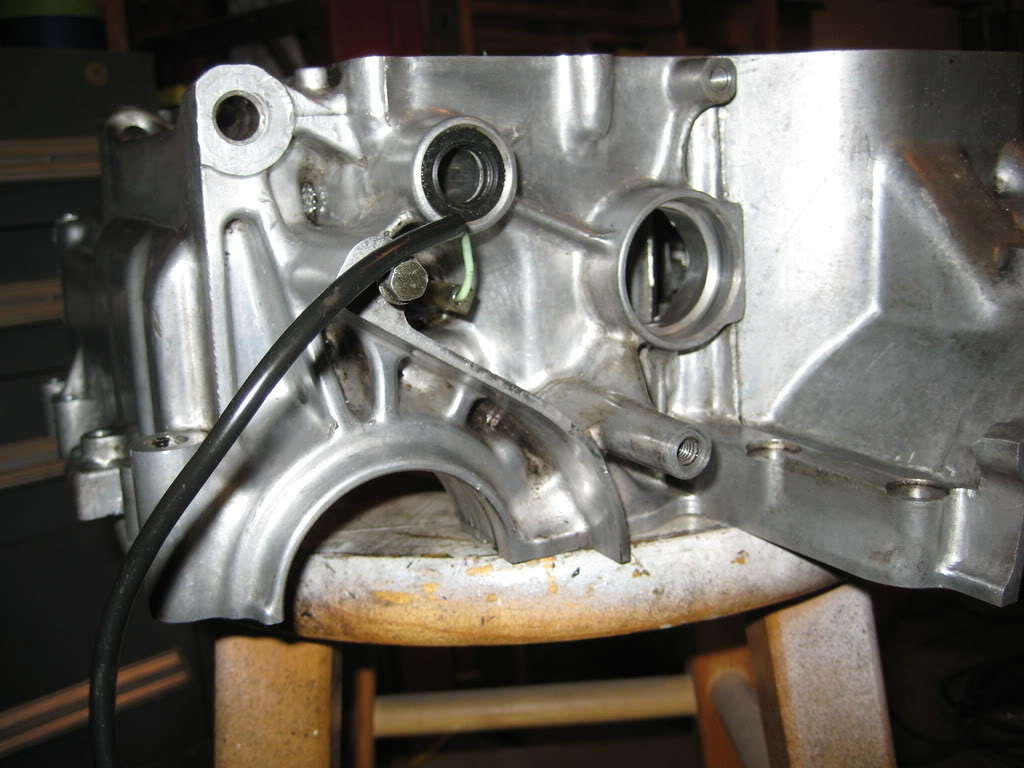
Then.. i did some cleaning. this was the area around thre sprocket.. very cruddy
More to come!
thanks
~Chris
So.. my truck threw a rod about two weeks ago... and blew a hole in the side of the engine. this is the result:
so i spent the next two weeks searching for a replacement. the plan was to buy a $500 car (which is what i could afford...) my parents said that they wanted to use someof the money they set aside for my college (which i never used as i got a full ride) to get me a new truck. (so they could use it too!) anyway.. so i found and purchased this:
So now with money in the bank and a car sale pending, i can get back to work.
here is the 01 R6 radiator that i got to replace the stock one:
I won some F2 front brake calipers on ebay for $0.99 + $12 shipping.. and when the box arrived it contained this:
Front brake calipers
rear brake caliper
Master cylinder
Clutch lever and cable
Left clip-on controls and choke cables
Right clip-on controls (no ignition)
Front sprocket cover
all in all worth the $12 :LolLolLolLol:
So, now i need to figure out which bearings to buy so that i can put the bike back together. Any help here would be appreciated.
So that is:
Crankshaft:
L 11111
L BBBB
Crankcase:
BABBB
And for the pistons:
1 B2
2 B2
3 B1
4 B1
Which bearings do i need? i am pretty sure i need:
rod bearings: 2 brown 2 green
cranshaft: 4 yellow 1 pink
can i get confirmation on that?
Then.. i did some cleaning. this was the area around thre sprocket.. very cruddy
More to come!
thanks
~Chris
Thread Starter
|
July 2011 ROTM
Joined: May 2010
Posts: 223
Likes: 8
From: Hampton Roads, VA
Okay... got the engine parts ordered... so now i have to get the engine ready to re-assemble.
first i had to clean the case... which was a real pain. the skin is still missing on most of my knuckles. (sorry for the crappy cell-phone pic)
masked off:
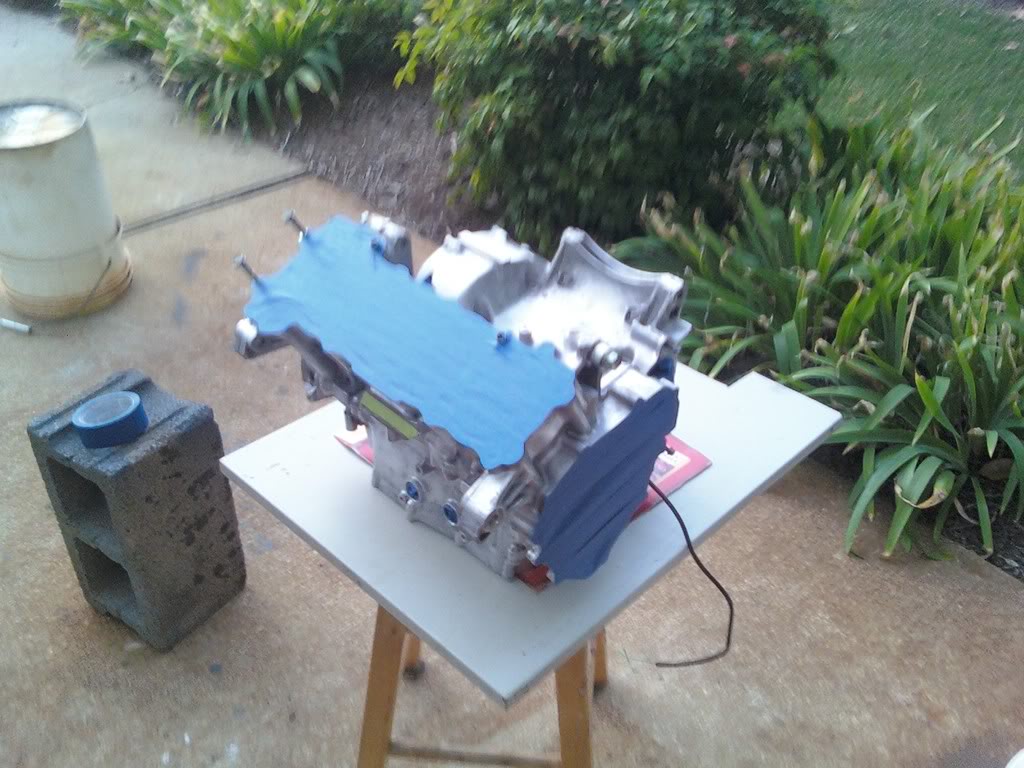
primer:


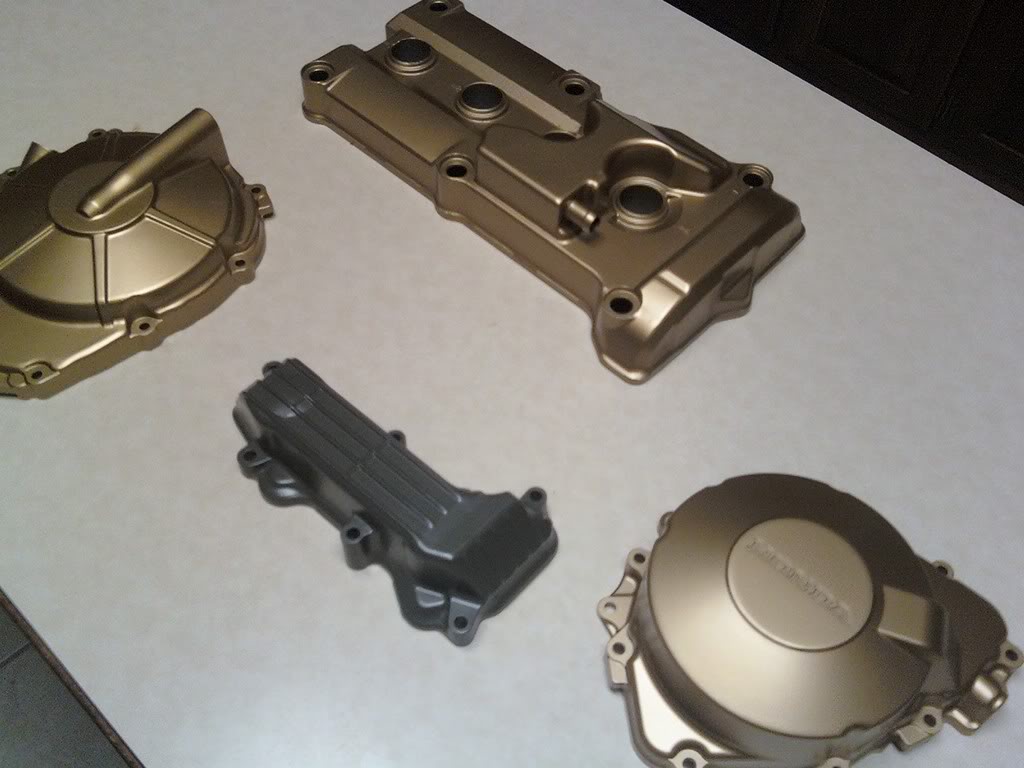
Covers and accents get VHT gold... (the front of the oil cooler is the main engine color... i dont know if it will stay that way)
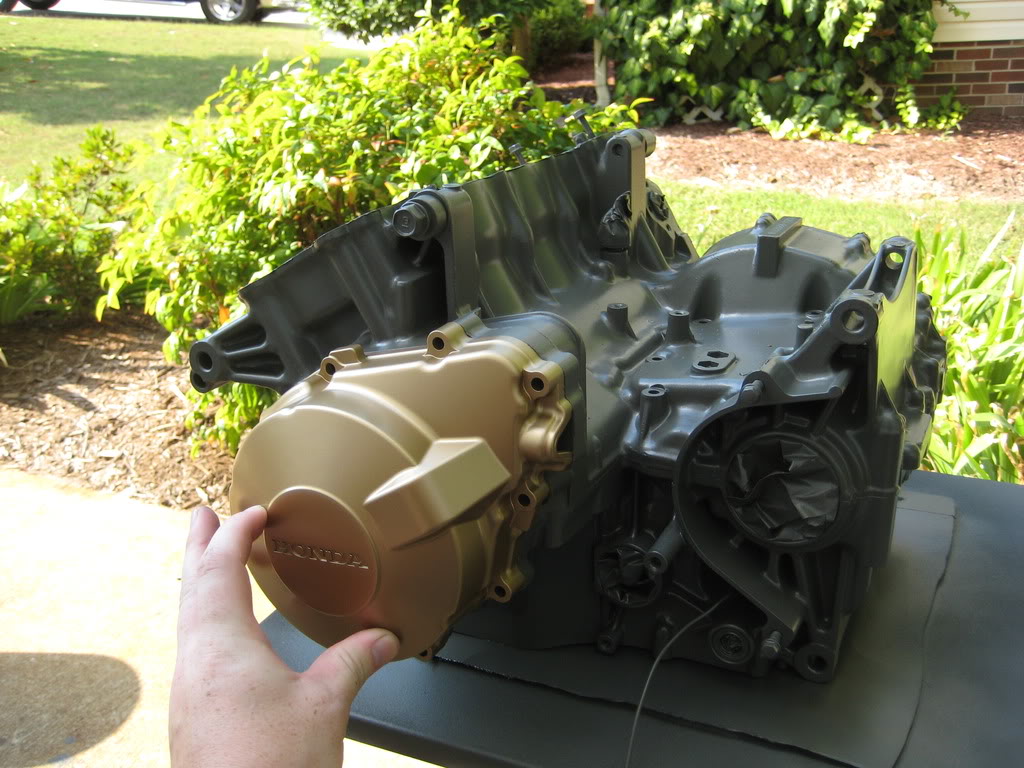
and the basic color scheme:
Also got the calipers cleaned, sand blasted, and painted. i did the Nissin emblems in black.. but didnt get a picture.
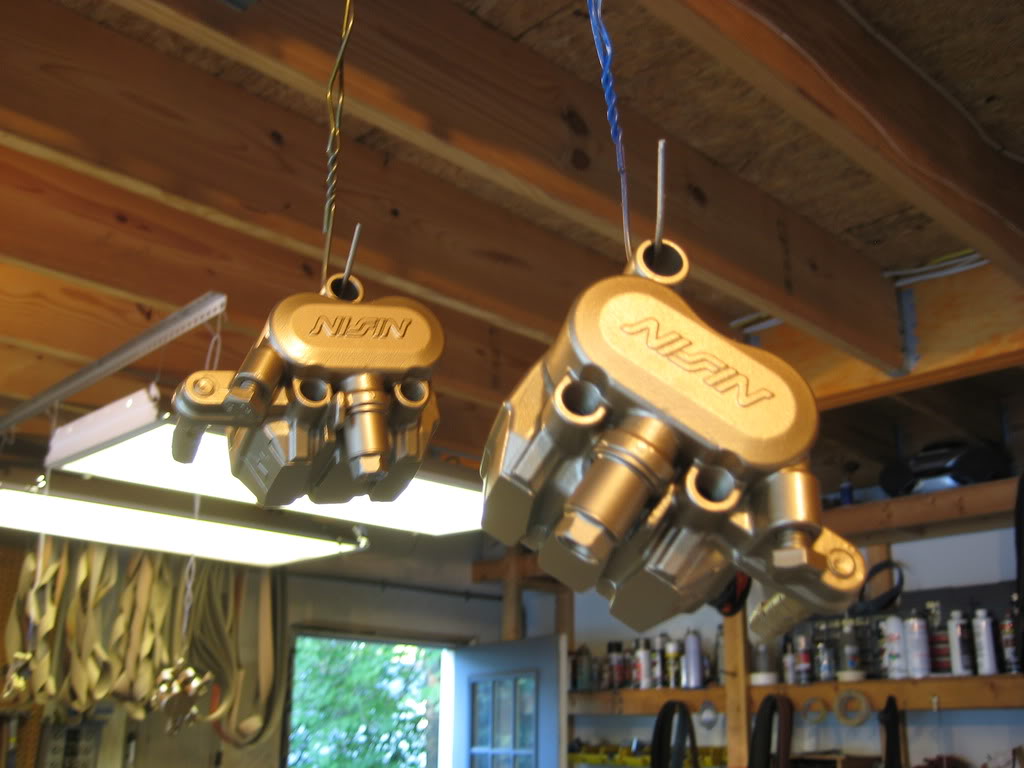
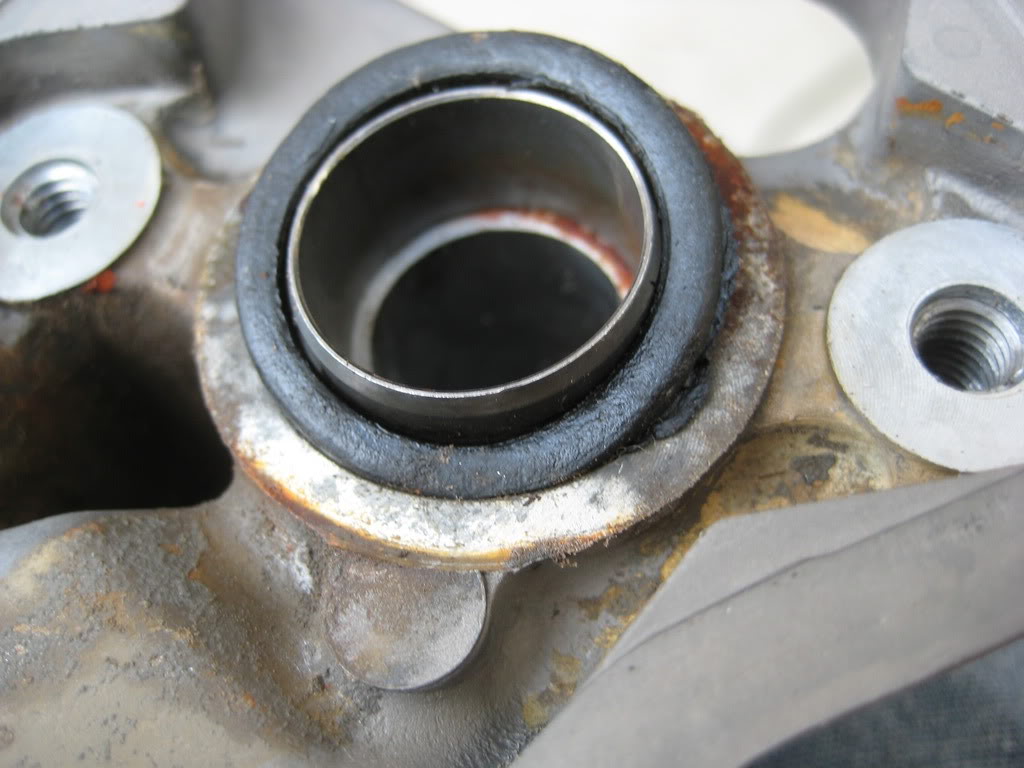
Also, i think i may have figured about a major source of oil/coolant contamination. This is one of the collars and 0-rings going between the oil cooler and main engine... replacements have been ordered.
well hopefully i will have more to show you soon. once the bearings come in i can start putting things back together.
thanks!
~Chris
first i had to clean the case... which was a real pain. the skin is still missing on most of my knuckles. (sorry for the crappy cell-phone pic)
masked off:
primer:
Covers and accents get VHT gold... (the front of the oil cooler is the main engine color... i dont know if it will stay that way)
and the basic color scheme:
Also got the calipers cleaned, sand blasted, and painted. i did the Nissin emblems in black.. but didnt get a picture.
Also, i think i may have figured about a major source of oil/coolant contamination. This is one of the collars and 0-rings going between the oil cooler and main engine... replacements have been ordered.
well hopefully i will have more to show you soon. once the bearings come in i can start putting things back together.
thanks!
~Chris


Thread Starter
|
July 2011 ROTM
Joined: May 2010
Posts: 223
Likes: 8
From: Hampton Roads, VA
hey!
sorry i havent updated more regularly on this forum. the sever at work wont load the page. what is keeping you from restoring the CBR?
been doing a little work...
first off, i am going to need to make a new header as i would like to have the Jardine can under the engine. for that purpose i got a 954 header for $9 on ebay. yeah $9 that was nice. anyway i am hoping to modify it to fir the F2 or use the beautiful curvy pipes to make a custom header.
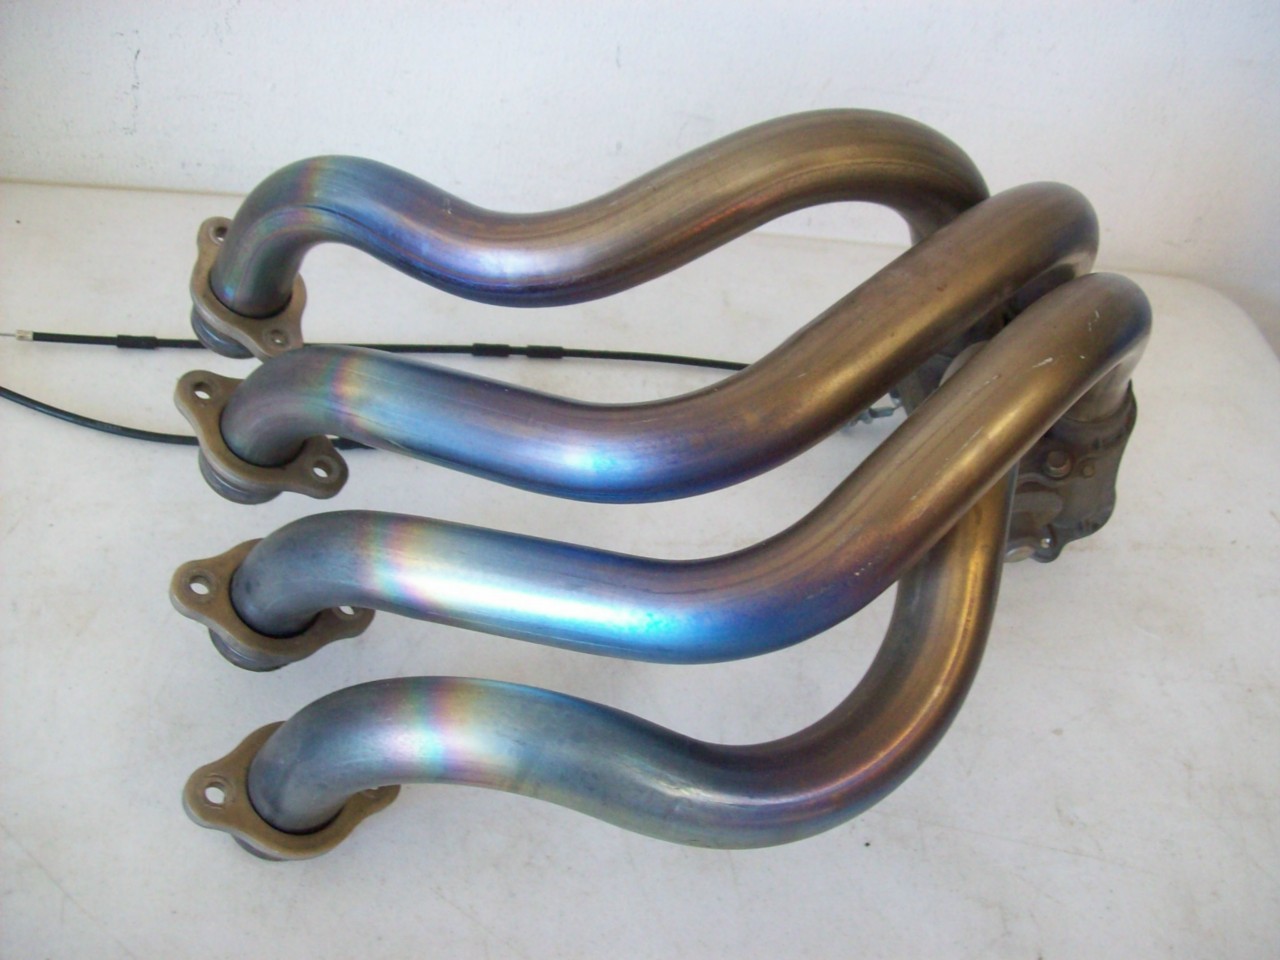
i also got the 2" pipe 4-1 collector in the mail.
Then... i got bored. I cant actually do any work on the motor till i get the parts from CheapCycleParts (and it is taking forever) so i decided to use some of the war weather to do some composite work.
:thumbsup:
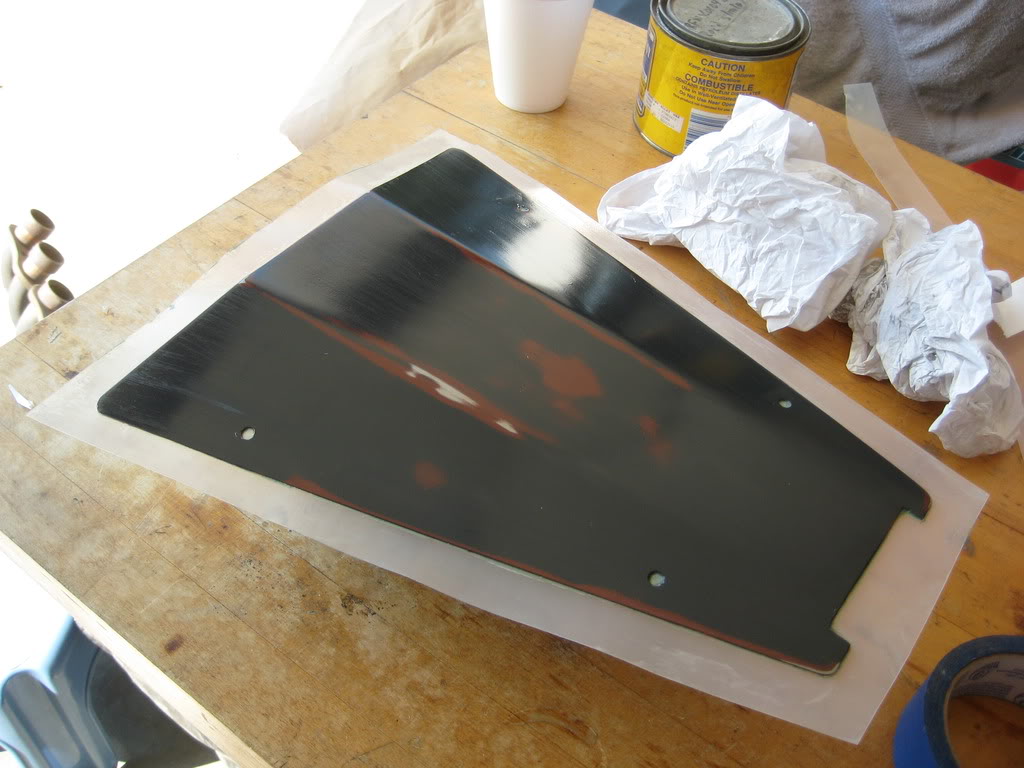
I got the tank dents all worked out and the sprayed it with primer. Some wet-sanding to get it smooth and then a gentle cleaning with soap and water. as with painting, in order to get a good end product you have to do your prep well.
So... #1 clean the surface you are going to bond to.
then.. #2 you cut your overlay material to size. this keeps you from wasting valuable time and material while your resin is mixed.
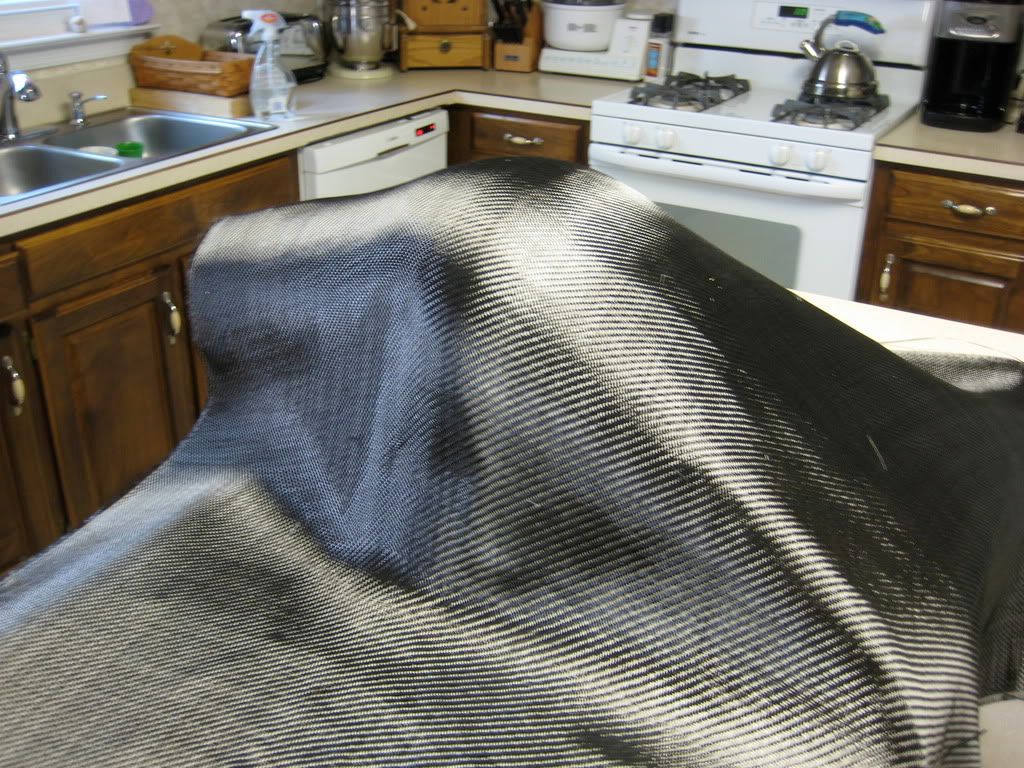
in this case i am using carbon
then, #3 you make sure that alllll your stuff is in order. that means brushes, gloves, solvent,
or anything else you spread that resin. (no pic.. sorry)
#4 Coat the entire surface FIRST. this allow you to get better adhesion as well as giving the cloth something to "stick" to. (keeps the pattern pretty too)
my hands were messy, so no pic of this stage. imagine a primer colored tank covered in resin
#5 lay the cloth down and smooth it evenly (symmetrically too if possibly) so that it stick to the surface. the resin i was using had a pot life of 12 minutes so i got my sister to help lay the resin. (this is why preparation is key)
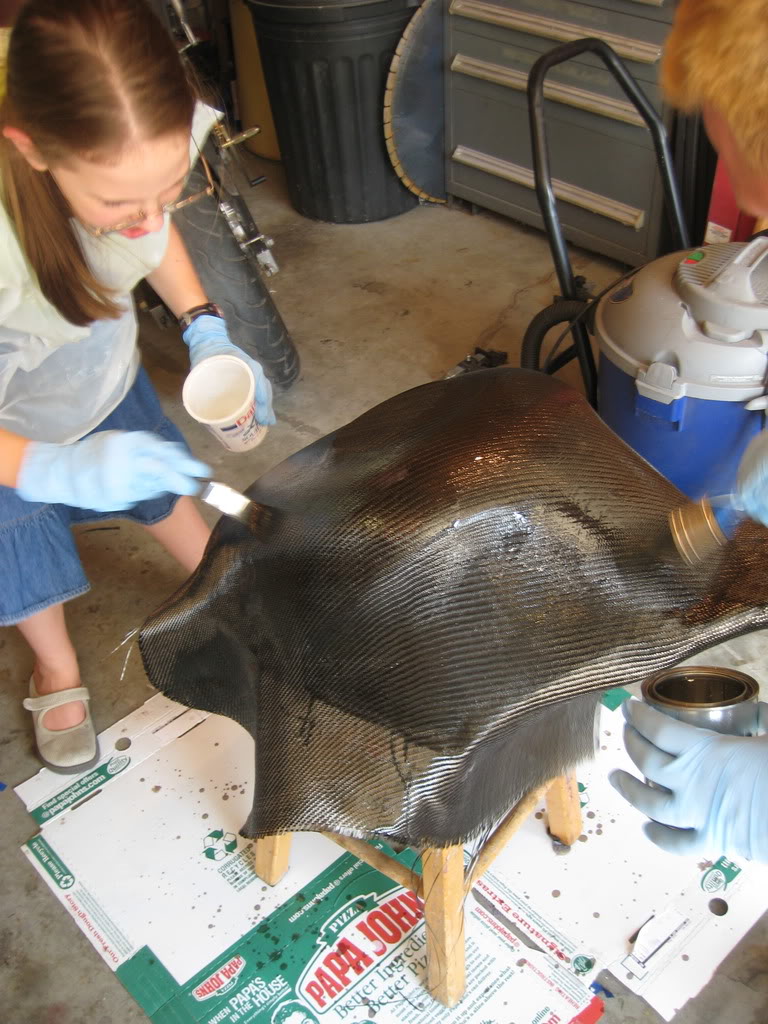
#6 brush the rest of the resin on the smoothes cloth and continue to monitor how well it is adhering to the curves of the part. certain areas will want to pull away or bubble... just just brush it back down. the resin in the fabric will take longer to set up that in the mixing cup (due to the volume)
so here you go...
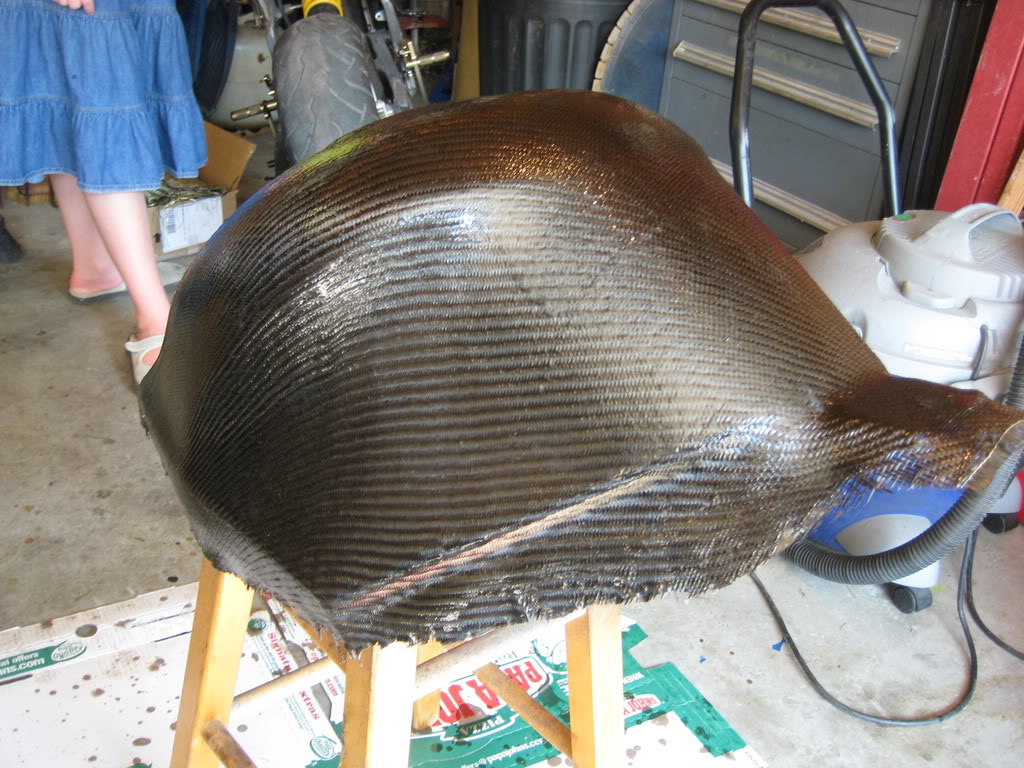
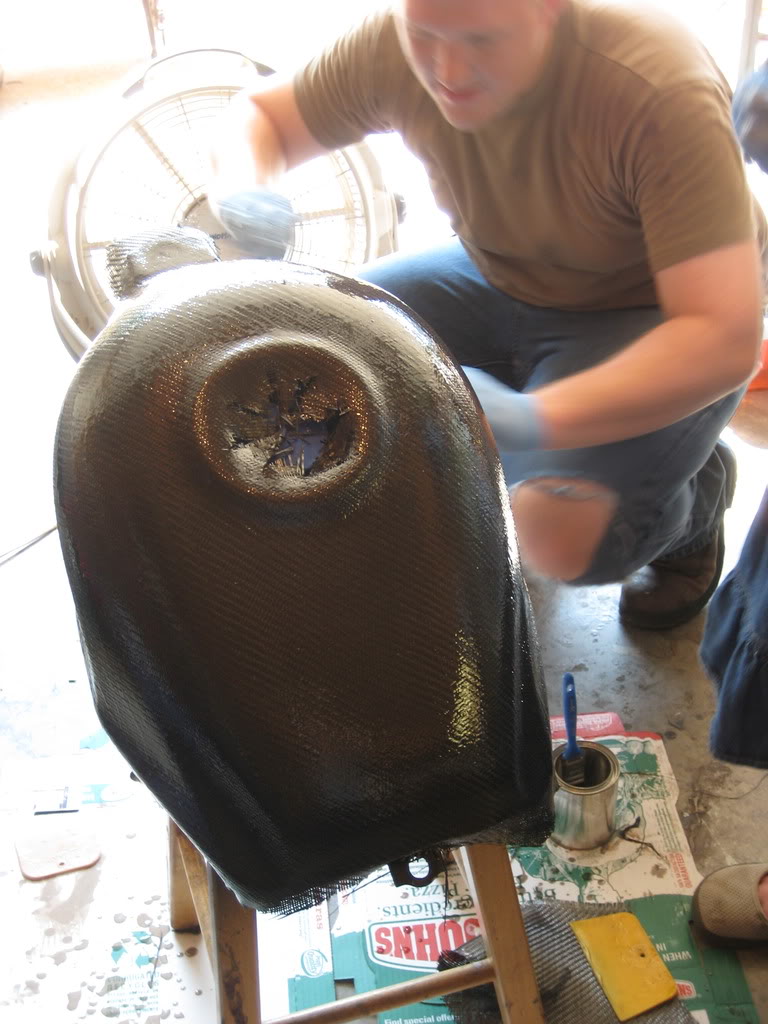
you are done.... sorta
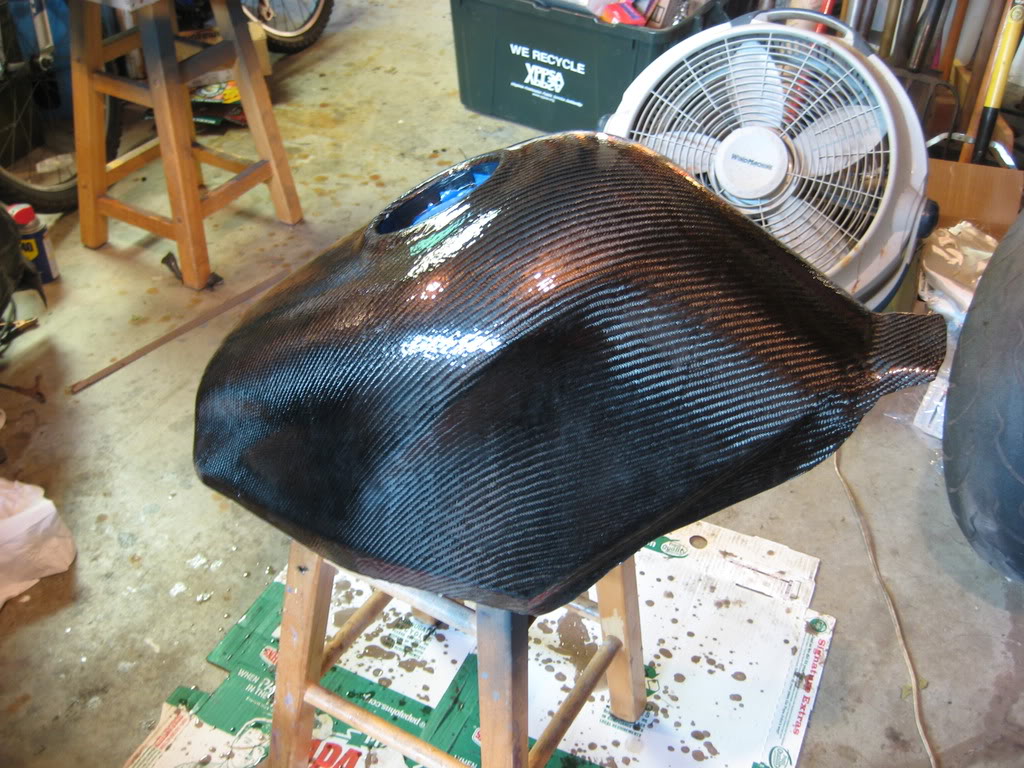
you wil want to trim the excess off before it cures too long. You can cut it off with scissors with a low layer count and semi-hardened resin (prolly your best bet) then... put another layer of resin on. and it looks like this:
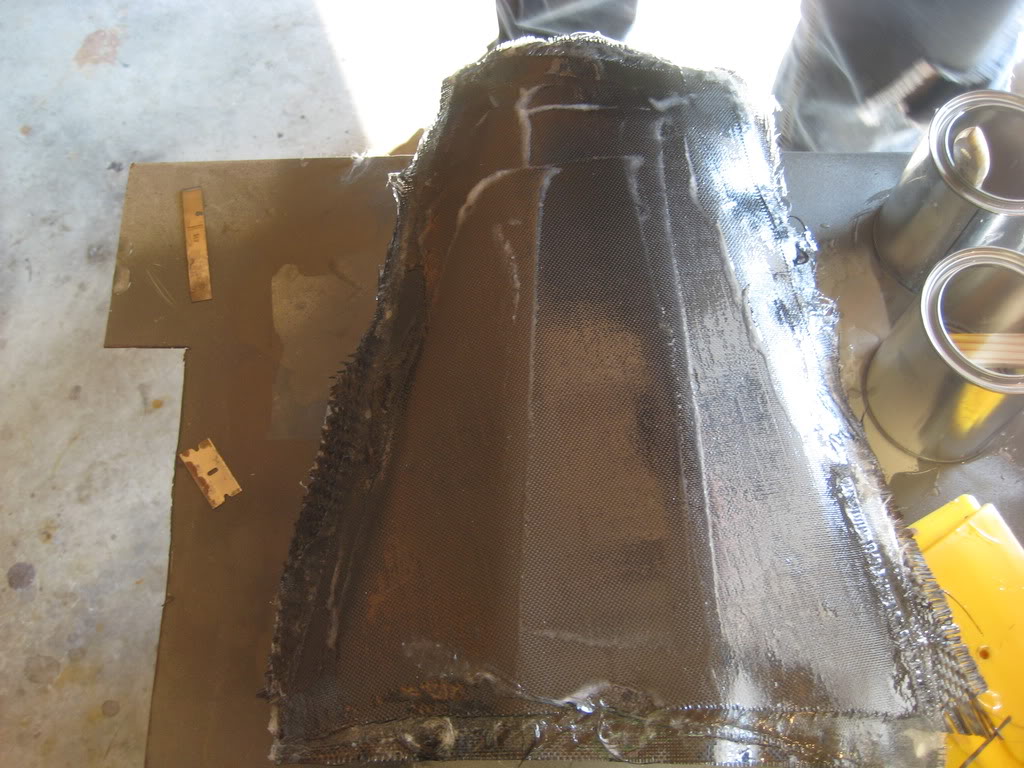
Now... if you want to make something not stick, you would do what i did for the undertail panel
#1 prep/clean... just make sure it is smooth and clean.. ( i have also added material extending past the edges to make sure i get all of the part that i want, no ragged edges.)
#2 Wax. i use car wax first, then after buffing that out, i use some bowling ally wax. works great. technically at this pint you could put resin on it and it would most likely not stick, but use some PVA (poly vinyl Alcohol) and that will make sure it doesnt stick.
#3 Cut you material.. this time you have to cut your layers. depending on how thick/heavy/flexible you want it.. cut out your layers. I used i thin layer of carbon one very heavy layer, three heavy fiberglass (for thickness and expense) and one more thin carbon fiber.
#4 Get ready.. materials layers "mold"
#5 Now, you want to mix the resin and again, apply the resin first to the "mold" then lay your first layer of glass or carbon. this is the most important as it is the one that you will see (usually.. ) then, smooth the cloth down spreading the resin through it evenly. repeat for each layer.
i didnt leave those glops of resin on there.. i promise.
again, i apologize for lack of pictures. messy hands. i have more stuff to do, more pictures to come.
#6 let it cure before attempting to remove it. i really wanted to try and take the part off as soon as it looked cure. DONT DO IT! until the resin has fully cure (overnight is usually good) even if you manage to remove the part successfully without destroying it, your part can warp or deform after removal.
save yourself some heartache go drink a beer find someone better looking than yourself to hit on, and come back later. (i'll have pictures of that part overnight =D)
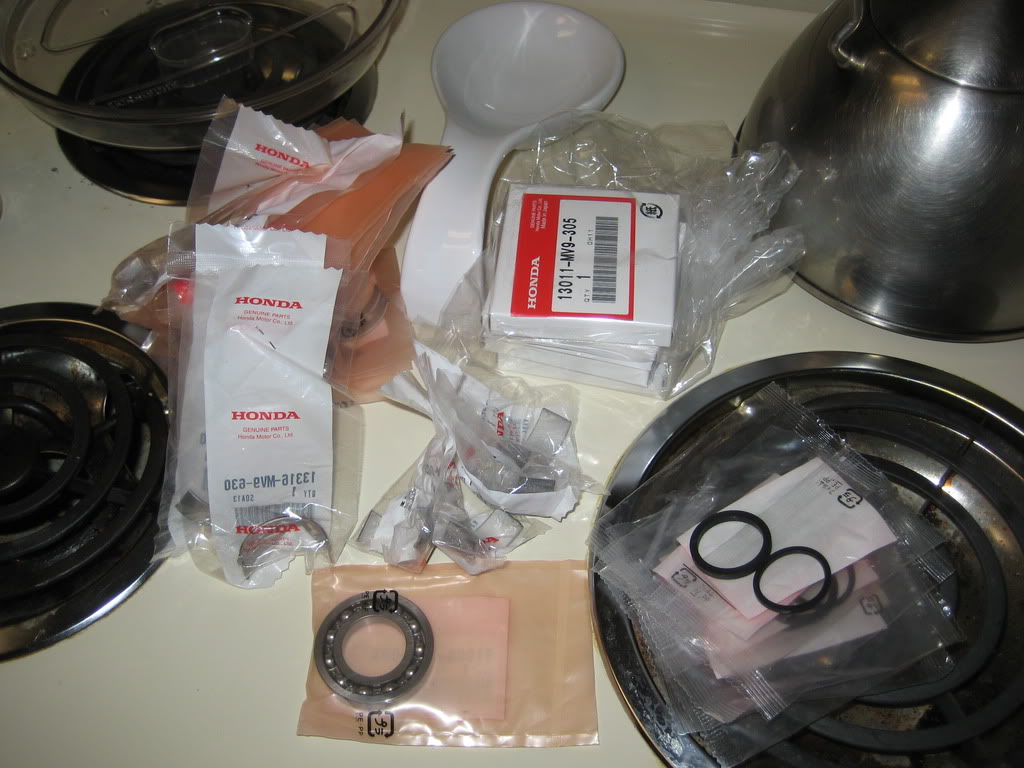
Then, i came home to my hottie, and found out that my parts cam in! $275 worth of parts? looks kinda pathetic if you ask me.
anyway, till next time yall!
thanks for reading.
~Chris
thanks!
~Chris
Last edited by knifemaker87; Sep 22, 2010 at 09:37 PM.

