
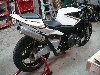
1987 Hurricane to 2003 CBR600RR Conversion

Thread Starter
|
Senior Member
Joined: Dec 2012
Posts: 873
Likes: 8
Yes, I used to have a spread sheet on the costs...but gave up keeping track when I hit $3000...it's my baby now.
Those parts are still available OEM...but holy cow! Expensive!
1989 Honda CBR600F Parts, 1989 Honda CBR600F OEM Parts - BikeBandit.com
I usually treat the rubber parts by soaking in some Armor All for a day or so...haven't tried that on carb parts tho.
Those parts are still available OEM...but holy cow! Expensive!
1989 Honda CBR600F Parts, 1989 Honda CBR600F OEM Parts - BikeBandit.com
I usually treat the rubber parts by soaking in some Armor All for a day or so...haven't tried that on carb parts tho.

Senior Member
Joined: Apr 2014
Posts: 257
Likes: 1
From: Bainbridge Is., WA
Thanks for the link. I got all the diaphragms and needles done last night. Luckily only the one diaphragm was damaged and the small repair seems to work fine now. It's good rubber and it's surprising that one was torn. Someone has been into the carbs at some point, as they have aftermarket adjustable jet needles. Presumably they were installed when the Yoshi pipe that was on the bike when I got it was installed.
Which brings me to a question - the service manual shows the stock needles with a fixed flange at the fat end, that the spring of the needle holder pushes against. It also shows a washer slipping over the needle end, that slides up the needle and sits under that flange, between it and the bottom of the slide.
On my bike the needles are adjustable so they have an e clip where that flange is on the stock needle. Whoever assembled the setup put those washers on the "wrong side" between the e clip and the spring rather than between the e clip and the bottom of the slide.
Looks incorrect, but is that maybe they way the washer should be installed on aftermarket adjustable needles? Unless I hear different I think I will change it to the stock configuration.
EDIT - whoa, check that. Breaking one of my commandments - change only one thing at a time. I will clean it and put it back together the way I found it first. Then start moving the jet needle around if it seems lean.
Last edited by Doc B.; Sep 13, 2014 at 12:53 PM.
Senior Member
Joined: Apr 2014
Posts: 257
Likes: 1
From: Bainbridge Is., WA
Senior Member
Joined: Apr 2014
Posts: 257
Likes: 1
From: Bainbridge Is., WA
You will get there, either before or after and you will love it. After 15 months putting my spare time into it I felt this wave of elation hearing the thing run. I decided not to put up the blurry video where the motor finally smooths out and I'm telling my son to keep revving it and I'm falling in love with the exhaust note and suddenly the new header paint starts smoking like crazy and peeling. Oops.
It's running lean and popping quite a bit along with those pipes getting really hot so I think I will go back in and move those jet needles up a notch. Getting pretty quick at pulling the carb rack by now. Now on to the front sprocket and chain, the new instrument panel, lights and the rest of the vinyl wrap.
It's running lean and popping quite a bit along with those pipes getting really hot so I think I will go back in and move those jet needles up a notch. Getting pretty quick at pulling the carb rack by now. Now on to the front sprocket and chain, the new instrument panel, lights and the rest of the vinyl wrap.
Thread Starter
|
Senior Member
Joined: Dec 2012
Posts: 873
Likes: 8
You will get there, either before or after and you will love it. After 15 months putting my spare time into it I felt this wave of elation hearing the thing run. I decided not to put up the blurry video where the motor finally smooths out and I'm telling my son to keep revving it and I'm falling in love with the exhaust note and suddenly the new header paint starts smoking like crazy and peeling. Oops.
It's running lean and popping quite a bit along with those pipes getting really hot so I think I will go back in and move those jet needles up a notch. Getting pretty quick at pulling the carb rack by now. Now on to the front sprocket and chain, the new instrument panel, lights and the rest of the vinyl wrap.
It's running lean and popping quite a bit along with those pipes getting really hot so I think I will go back in and move those jet needles up a notch. Getting pretty quick at pulling the carb rack by now. Now on to the front sprocket and chain, the new instrument panel, lights and the rest of the vinyl wrap.
I love that feeling when they first run. I have a 1975 Norton Commando 850 that the PO said hadn't run for 10 years. I did a bunch of upgrades to it (still working on it), put electronic ignition, mikuni carb, etc. It started on the second kick (electric starter not working). The sound was awesome and the feeling was too.
If your popping back at low speed, in the idle move to throttle your pilot screws need adjustment (out), or the pilot jets are too small. Needle move usually won't help that much. I'm very good at tuning carbs so try to open the pilot screws a turn or so. Also carb sync can cause them to do this, but if she's running hot usually means too lean, and the pilot circuit needs adjustment.
The proper way to adjust the pilot screws is with the engine running and hot. Adjust each carb individually. You turn the screw until it runs smooth on that carb. I've never done it on four carbs but have done many twins. The CBR is a tough one because the screws are hard to get at. I think there is a special tool for it.
Once you get all four of them running smooth at idle you adjust the main idle screw to proper RPM for idle. It should be running too fast when you get the screws adjusted right...then set idle speed with idle screw.
The whole procedure is a little tricky because the screw adjustment will tell you if your pilot jets are too small or too big. If you have to turn the screw out past about 3 1/2 turns the jet is too small (this will be your case). When you need to turn it in too far (almost closed) the jet is too big.
Last edited by dennisgb; Sep 14, 2014 at 09:02 AM.
Senior Member
Joined: Apr 2014
Posts: 257
Likes: 1
From: Bainbridge Is., WA
Thanks, the four carbs are indeed a bit daunting. It's idling OK, just wanders a bit. The popping is mostly happening rolling off the throttle from maybe 4 or 5K or higher. I will be borrowing a sync tool this week and I'll definitely start with the pilot jets as you suggest. I believe the factory spec is 2-1/2 turns out. I have that Danmoto pipe with an optional baffle and also a Uni foam filter in the stock airbox, so it's quite possible I need to adjust things away from the stock settings.
Thread Starter
|
Senior Member
Joined: Dec 2012
Posts: 873
Likes: 8
Thanks, the four carbs are indeed a bit daunting. It's idling OK, just wanders a bit. The popping is mostly happening rolling off the throttle from maybe 4 or 5K or higher. I will be borrowing a sync tool this week and I'll definitely start with the pilot jets as you suggest. I believe the factory spec is 2-1/2 turns out. I have that Danmoto pipe with an optional baffle and also a Uni foam filter in the stock airbox, so it's quite possible I need to adjust things away from the stock settings.
Roll off is usually pilot circuit because the fuel transfer point is at about 1/8 to 1/4 throttle. The stock setting (if 2 1/2 turns) is the starting point after a carb rebuild or tear down. Many confuse this with the actual settings but each carb needs to be adjusted independently and "tuned" to the jet size. You will find many instructions on the web that are incorrect about this. It is very important especially with aftermarket exhaust to tune this and understand what I said previously about pilot screw position because it is the only way short of an O2 sniffer to get the proper air fuel mixture on the low end.
The main sizing and main needle position should be checked with a "throttle chop" or O2 sniffer to get it right.
Tuning takes time to get right and be careful who you listen to or what you read because there is a ton of mis-information on the web on this.
Senior Member
Joined: Apr 2014
Posts: 257
Likes: 1
From: Bainbridge Is., WA
What?! Mis-information on the web? Say it ain't so! I read an interesting blog article by a guy who swore that boiling jets in water was the only way to get them clean and that carb dunk was worthless. Tried both. Boiling was pretty useless, overnight in the carb dunk made the jets look new.
Here's a short vid with a little better demo of the popping (and from which I cut the embarrassing exhaust paint smoke episode):
Here's a short vid with a little better demo of the popping (and from which I cut the embarrassing exhaust paint smoke episode):
Thread Starter
|
Senior Member
Joined: Dec 2012
Posts: 873
Likes: 8
The video is a bit different than what I expected to hear. I still think it is a lean condition in the pilot circuit, but there are a couple of other things that might cause this. You may want to check for vacuum leaks because if it is allowed to suck extra air it will do this because it leans out the mixture. You do have the air filter in place right? The aftermarket air filter with the exhaust you have will breathe a lot better than stock and almost always requires bigger jets...including the pilot jets. I would open the pilot screws and see if it improves. If you can't get in there pull the carbs and open them a turn and see what happens. It should improve but won't be perfect and will give you an idea of what's going on.
The thing that bothers me is this is happening on deceleration of the engine which can be a backfire, which is a whole different animal. Before you pull it apart try to raise the throttle slowly and see if you can find a spot where it pops...it will be a slightly different sound like a small explosion in the air box, because that is essentially what it is.
The thing that bothers me is this is happening on deceleration of the engine which can be a backfire, which is a whole different animal. Before you pull it apart try to raise the throttle slowly and see if you can find a spot where it pops...it will be a slightly different sound like a small explosion in the air box, because that is essentially what it is.