'93 F2 Mods - Phase 1
#61
 04-19-2012, 08:15 AM


#62
04-19-2012, 10:19 AM
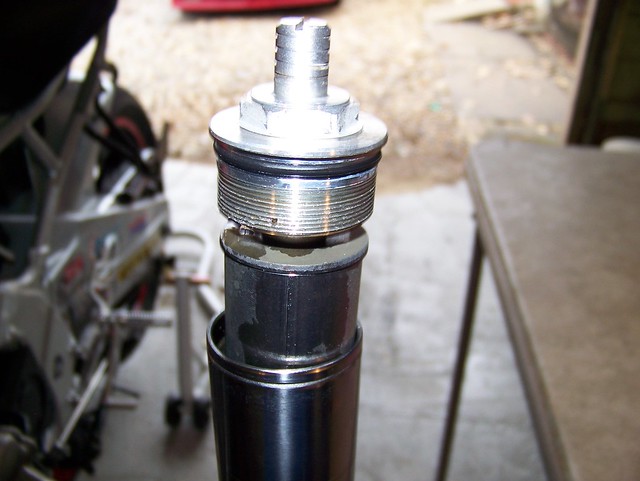
Now I chose to back out the preload adjuster all the way, to lessen some of the spring tension for when you remove the cap, because it's "good practice", but even if you have just the strength of an INFANT, you shouldn't have any issue with the cap flying off - it's SERIOUSLY that softly sprung!

Cap removed:
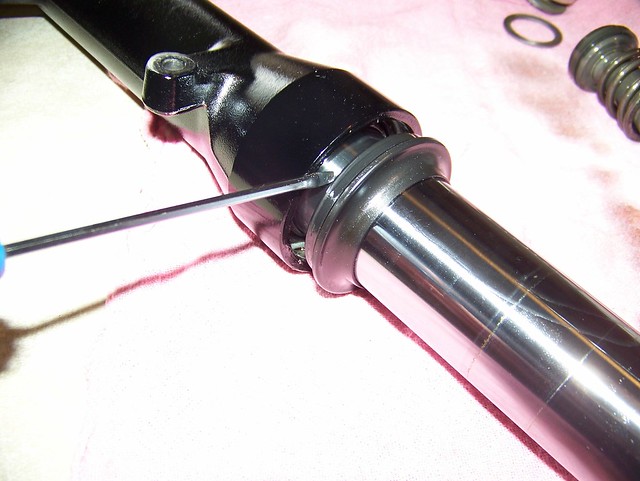
Dust wiper carefully removed with a thin-bladed flathead screwdriver:
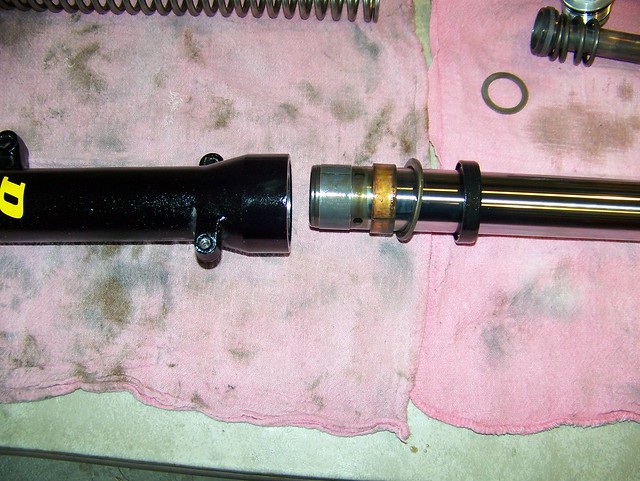
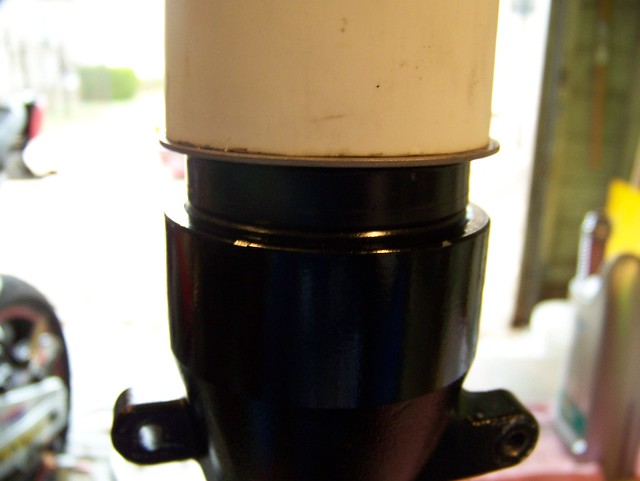
Used the common "slide hammer" method to separate the fork seals from the sliders:
Cap removed:
Dust wiper carefully removed with a thin-bladed flathead screwdriver:
Used the common "slide hammer" method to separate the fork seals from the sliders:
#63
04-19-2012, 10:34 AM
After seating the new fork seal by hand, evenly, as far as I could get it, I placed the old fork seal directly in line then used a large washer and PVC pipe to drive it in.
Using the old seal virtually guarantees no damage to the new seal, and using the large washer allows you to just use the PVC pipe with it's existing diameter, withought having to "slot" it, and use a hose clamp to tighten up the diameter - just put a PVC cap on the top of the pipe, and hit it with a rubber mallet, until the seal is seated.
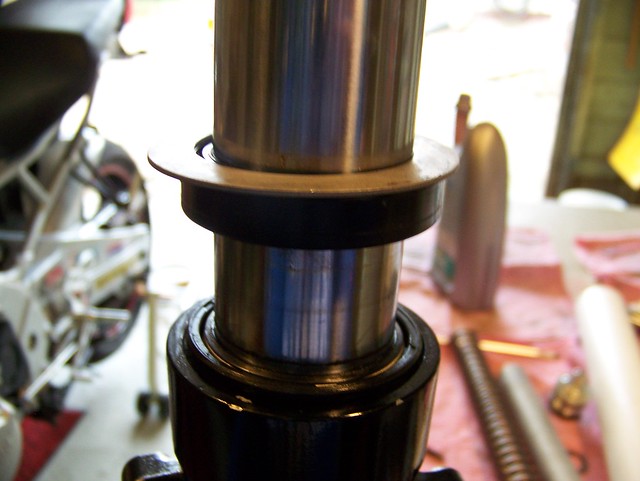
Using the old seal virtually guarantees no damage to the new seal, and using the large washer allows you to just use the PVC pipe with it's existing diameter, withought having to "slot" it, and use a hose clamp to tighten up the diameter - just put a PVC cap on the top of the pipe, and hit it with a rubber mallet, until the seal is seated.
#64
04-19-2012, 10:53 AM
After calculating the desired length of the preload spacer, based on the preload I want, the height of the adjuster/cap, and the distance from the top of the leg to the top of the spring, I cut the preload spacer, and installed all the parts, using Loctite on the damping rod retaining bolts before torquing them to spec.
To get the fork oil at the proper level of 135mm from the top of the fork leg, I used the "depth guage" portion of my caliper, and set the caliper to 136mm, so that way I could use the depth guage as sort of a "dipstick", and added little bits of oil at a time, until about 1mm of oil showed up on the end - keeping the fork leg perfectly vertical and inserting the depth guage perfectly straight is, of course, a given quantity.


To get the fork oil at the proper level of 135mm from the top of the fork leg, I used the "depth guage" portion of my caliper, and set the caliper to 136mm, so that way I could use the depth guage as sort of a "dipstick", and added little bits of oil at a time, until about 1mm of oil showed up on the end - keeping the fork leg perfectly vertical and inserting the depth guage perfectly straight is, of course, a given quantity.
#65
04-19-2012, 11:23 AM
The work done to these forks is not going to be sufficient for long-term handling issue resolution, it is merely a temporary fix -the rear end will still need to be dealt with, and I still have to decide which of the following I am going to do:
1) Entire front-end swap from late '90's GXR 600/750.
2) Entire front-end swap from CBR 954RR.
3) Installing fork leg uppers from '94 F2, into my current sliders, to at least obtain more adjustability.
Clearly, the last option would be the cheapest, but obviously, if I stumbled upon a sweet deal for one of the aformentioned full front-ends, I would have to seriously consider it - what the hell am I talking about? If I scored one of those cheap, I would just DO IT!!! The USD forks would be vastly superior, not to mention better brakes.
Another consideration, of course, is losing the ability to contest Superstock and Classic race events, if I went with the front-end swap, though, swapping back and forth is not too much work, really.
That said, regardless of the lack of adjustability, the new springs, preload settings, and fork oil, have been an amazing help in the handling department!! Bumpy S-curves and bumpy sharp hairpin-like turns are navigated with ease, now that the front end wallowing is GONE!!!
As expected, I am now noticing a touch more issues with the rear - with the front end stiffened up, it reveals an "imbalance" in the suspension, front to back - but it is far less of a problem than what I had with the super-soft front end.
Major dive on hard-braking, is also pretty much entirely GONE - this has been tested from 125 mph indicated.
Last edited by JNSRacing; 04-19-2012 at 11:32 AM.
#66
04-19-2012, 12:53 PM

Senior Member
Join Date: Mar 2011
Location: Vancouver, Canada
Posts: 249
Likes: 0
Received 0 Likes
on
0 Posts
Nice thread. The bike looks great and I actually like the decals. Sometimes decals look a bit random and out of place but your's look ok. The swing arm and rear hugger can look a bit bland and I think the ones you have used jazz it up a bit.
I've got a '93 F2 with the same colour scheme that you used to have so I'm a bit partial to the old look of your bike. The new look is very professional though and does look great.
I enjoyed looking over the front fork work. I've had the same thoughts about the softness of the springs and wondered about changing springs etc. It was interesting to see what you changed and how it affected the ride. 'm encouraged to make a few changes myself.
#67
04-19-2012, 04:26 PM
Thanks, Prime, and yeah, I noticed your profile pic, when I read your post on that 38S pilot jet, and saw that you have the same scheme - I really love that color set, none of the others come close!
I hope to one day have my original fairings repaired and painted, where needed, and apply new original graphics, where mine are damaged, which isn't a lot of pieces, actually.
I definitely recommend the springs, and I would highly recommend finding some cheap '94 uppers FIRST, and dropping those in (it's a direct bolt on), and then upgrading the springs. I just couldn't do it, since I have a lot more yet to do, in a limited amount of time, to get ready for my first track-days this year - but I had to at least install these springs to stiffen it up, or I would be completely wasting my time at the track - it's going to be frustrating enough as it is, having no adjustability for compression and rebound damping, but I'll have to make do, for the first two outings at least.
I hope to one day have my original fairings repaired and painted, where needed, and apply new original graphics, where mine are damaged, which isn't a lot of pieces, actually.
I definitely recommend the springs, and I would highly recommend finding some cheap '94 uppers FIRST, and dropping those in (it's a direct bolt on), and then upgrading the springs. I just couldn't do it, since I have a lot more yet to do, in a limited amount of time, to get ready for my first track-days this year - but I had to at least install these springs to stiffen it up, or I would be completely wasting my time at the track - it's going to be frustrating enough as it is, having no adjustability for compression and rebound damping,
but I'll have to make do, for the first two outings at least.
#68
04-20-2012, 08:51 AM

#69
04-20-2012, 09:27 AM
Some guys (or gals), who have done track-days, might know the woes of peeling masking tape off of a headlight that was not turned off while running with it taped up - I do not, but I hear it sucks.
I usually diconnect the headlight, some pull a fuse - this time around, I don't want to do anything but flip a switch, so I installed a headlight cut-off switch for when I'm doing my track-days.
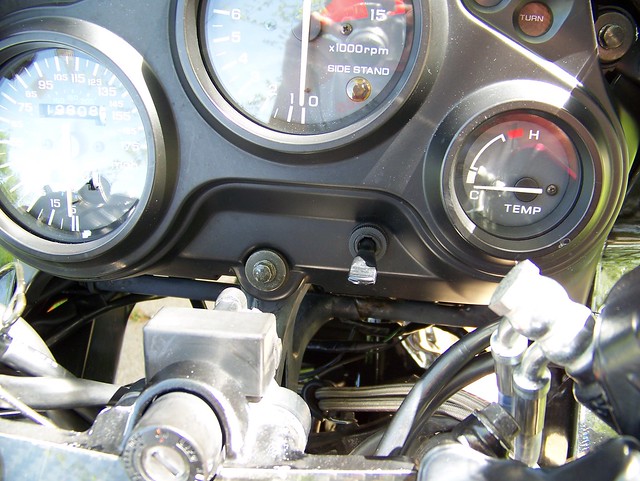
I usually diconnect the headlight, some pull a fuse - this time around, I don't want to do anything but flip a switch, so I installed a headlight cut-off switch for when I'm doing my track-days.
#70
04-20-2012, 11:52 AM
So I've already mentioned some of the headaches with the initial installation of the fairings, in previous posts, and mentioned the issues with poor quality and fitment - here are some more...with their fixes.
The side/tail fairings have had the middle and rear tabs break off on BOTH sides, requiring them to be glued back on with a good size mound of plastic epoxy - they are much stronger than they were before, and have held up now for several thousand miles of riding, and many more removals.
The rear tab, was too small for the rubber grommets in the tail, and would frequently pop out, on both sides, if I hit any significant bumb in the road - the front tabs, nearest the tank, were FAR too big around, and too long, to properly seat in the grommets - the fairing would be "flared out" at the front, and when you would pull the fairings, the tabs would take the grommets with them.
The good thing is, that you had to look closely to see this, and most people didn't seemed to notice it, but ME...it was driving me nuts!!
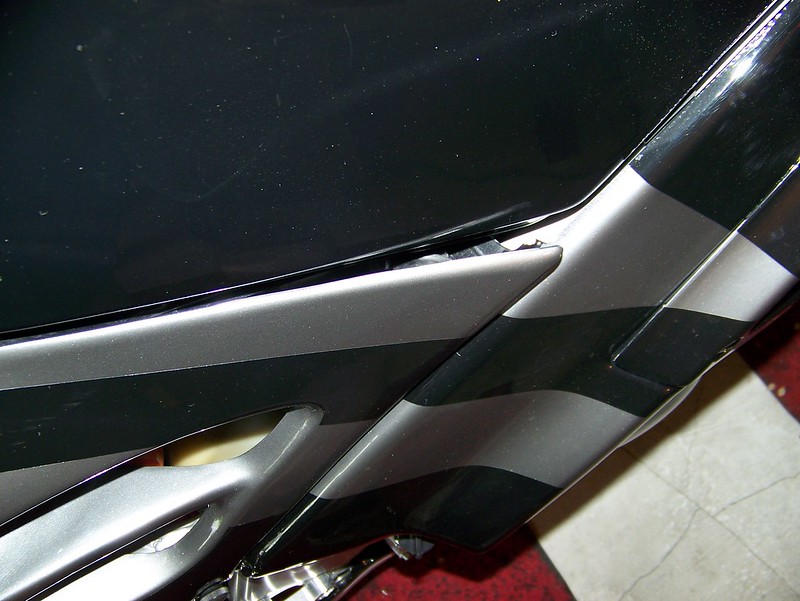
The fix for these issues is simple, but still irritating, since I don't think I should have to repair BRAND NEW fairings!
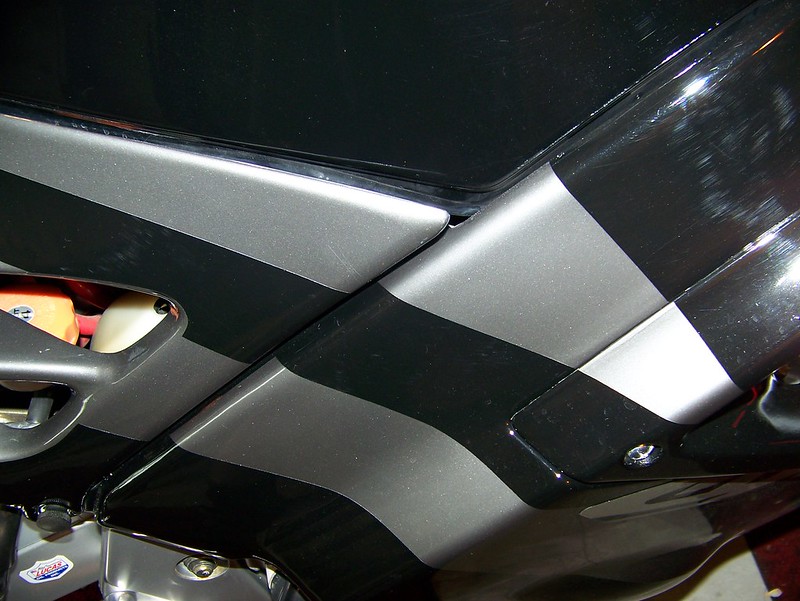
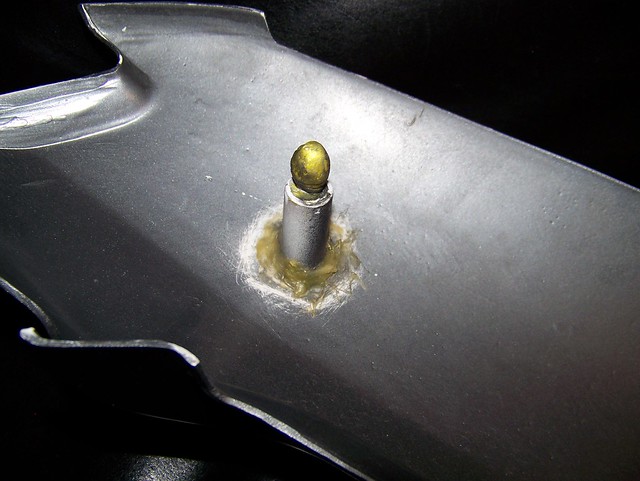
At the back, I just sanded the suface of the shaft, around the tab, and added material to make it larger, using plastic epoxy, then used my Dremel to carefully re-shape the tip, so that it fits in the grommets easily enough, but snugly.
I am missing some of the pictures I took, but you'll get the idea:
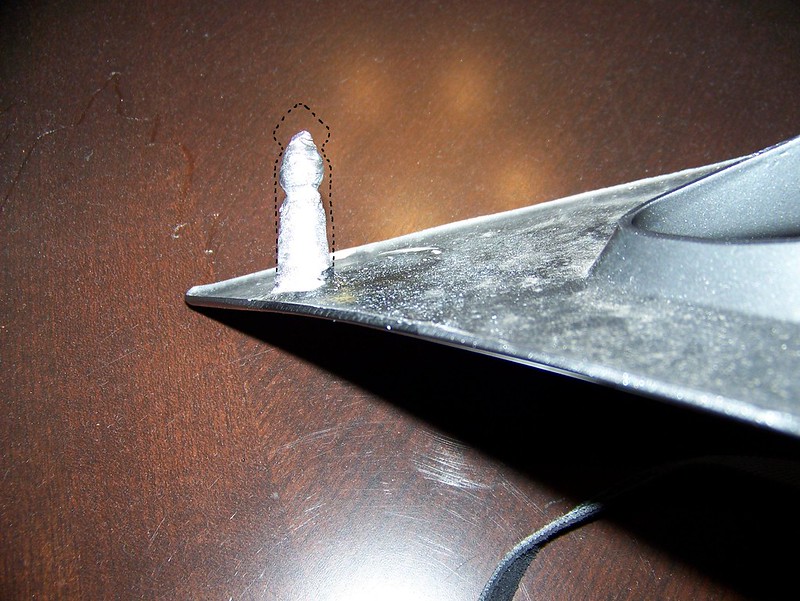
At the front, I had to use my Dremel to cut the tab shorter, shrink the diameter of the whole shaft, and completely reshape a new, smaller tip, that would fit snugly in the grommets. Once again, I am missing some pictures, but this pic is one of the tabs, with the "rough cut" of the new shape, and an outline of about where the original would have been.
So now, the rear tabs have not popped out once!! I no longer have to stop and check, or try to crane my head around, while riding, to see if the fairings have come loose at the back, every time I hit a decent sized bump.
The front has been resolved as well, with things sitting flush, as they should.

The side/tail fairings have had the middle and rear tabs break off on BOTH sides, requiring them to be glued back on with a good size mound of plastic epoxy - they are much stronger than they were before, and have held up now for several thousand miles of riding, and many more removals.
The rear tab, was too small for the rubber grommets in the tail, and would frequently pop out, on both sides, if I hit any significant bumb in the road - the front tabs, nearest the tank, were FAR too big around, and too long, to properly seat in the grommets - the fairing would be "flared out" at the front, and when you would pull the fairings, the tabs would take the grommets with them.
The good thing is, that you had to look closely to see this, and most people didn't seemed to notice it, but ME...it was driving me nuts!!
The fix for these issues is simple, but still irritating, since I don't think I should have to repair BRAND NEW fairings!
At the back, I just sanded the suface of the shaft, around the tab, and added material to make it larger, using plastic epoxy, then used my Dremel to carefully re-shape the tip, so that it fits in the grommets easily enough, but snugly.
I am missing some of the pictures I took, but you'll get the idea:
At the front, I had to use my Dremel to cut the tab shorter, shrink the diameter of the whole shaft, and completely reshape a new, smaller tip, that would fit snugly in the grommets. Once again, I am missing some pictures, but this pic is one of the tabs, with the "rough cut" of the new shape, and an outline of about where the original would have been.
So now, the rear tabs have not popped out once!! I no longer have to stop and check, or try to crane my head around, while riding, to see if the fairings have come loose at the back, every time I hit a decent sized bump.
The front has been resolved as well, with things sitting flush, as they should.