'93 F2 Mods - Phase 1
#71
 04-20-2012, 02:34 PM


The new plastics, as I've mentioned before, are much lighter in weight, yet, as a result, are much more easily broken, and "flimsier", for lack of a better description.
An example of the "flimsy" issue, is the front fender - at high speeds (I am not confessing HOW high), the fender has been pushed down in the front, by the airflow, so that it rubs on the tire and cooks away, leaving a spot that looks like Cookie Monster has set his affections on polymers now, and took a bite out of it!!
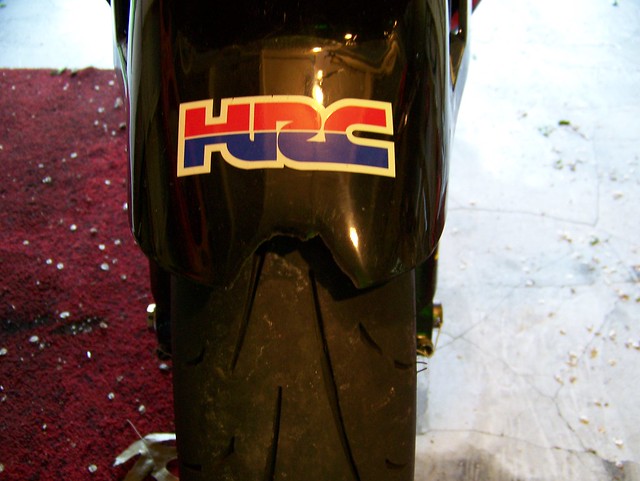
One easy solution, would have been to just put the OEM fender back on, but the problem with that is, the silver of the old color scheme, is considerably lighter than the silver in the new fairings, which is more of a "sparkly" charcoal gray - not to mention that with all the black in the new fairings, the old silver fender just wouldn't look right - sure, I could strip it and have it painted to match, but I do want to leave the OEM plastics alone, in the event that I eventually restore the bike to its original state.
So, I opted for a different easy solution, which was to trim the new fender back, to the point where the plastic was a little thicker, and being shorter in length, also have more tensile strength.
I made kind of a rudimentary pattern, using the radius of the OEM front fender, and taped it to the new fender to mark a cut line - this pic isn't of the final template I actually used, but I once again have missing pictures...you get the idea, I'm sure.

I used a sharp hook tool, running it along the edge of the thin cardboard template, to trace a rough "cut-line" onto the plastics.

Then I made the cut, using my Dremel, with a very thin cutting wheel, to perform the original cut, a sanding band to fine-tune the lines and smooth the rough edges, followed by an application of Honda gloss black touch up paint on the cut edge.
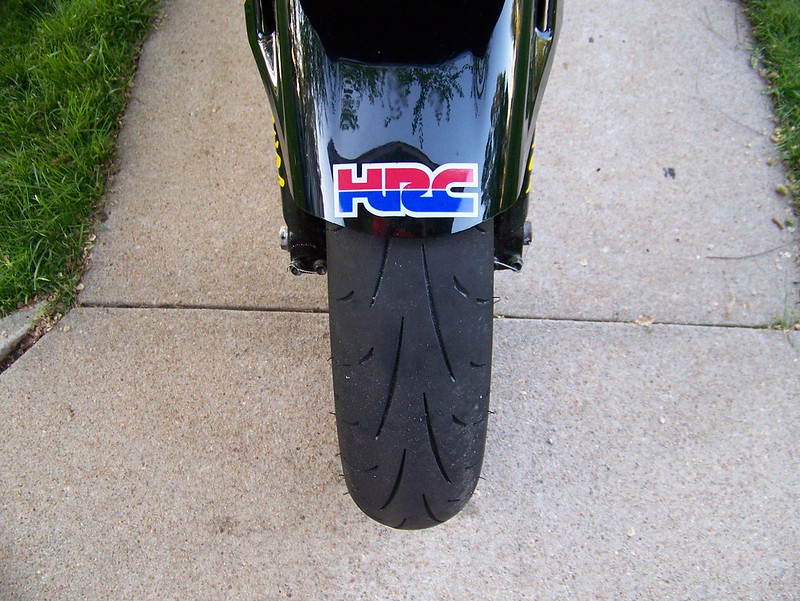
If you give the new profile very, very close scrutiny, you'll see that it's not absolutely perfect, but I think it looks just fine, especially considering how hideous it looked before - it was like the bike was missing two front teeth! It's much better now.
An example of the "flimsy" issue, is the front fender - at high speeds (I am not confessing HOW high), the fender has been pushed down in the front, by the airflow, so that it rubs on the tire and cooks away, leaving a spot that looks like Cookie Monster has set his affections on polymers now, and took a bite out of it!!
One easy solution, would have been to just put the OEM fender back on, but the problem with that is, the silver of the old color scheme, is considerably lighter than the silver in the new fairings, which is more of a "sparkly" charcoal gray - not to mention that with all the black in the new fairings, the old silver fender just wouldn't look right - sure, I could strip it and have it painted to match, but I do want to leave the OEM plastics alone, in the event that I eventually restore the bike to its original state.
So, I opted for a different easy solution, which was to trim the new fender back, to the point where the plastic was a little thicker, and being shorter in length, also have more tensile strength.
I made kind of a rudimentary pattern, using the radius of the OEM front fender, and taped it to the new fender to mark a cut line - this pic isn't of the final template I actually used, but I once again have missing pictures...you get the idea, I'm sure.
I used a sharp hook tool, running it along the edge of the thin cardboard template, to trace a rough "cut-line" onto the plastics.
Then I made the cut, using my Dremel, with a very thin cutting wheel, to perform the original cut, a sanding band to fine-tune the lines and smooth the rough edges, followed by an application of Honda gloss black touch up paint on the cut edge.
If you give the new profile very, very close scrutiny, you'll see that it's not absolutely perfect, but I think it looks just fine, especially considering how hideous it looked before - it was like the bike was missing two front teeth! It's much better now.

#73
04-20-2012, 03:53 PM

#76
04-22-2012, 08:07 PM

I'm curious to see how it works, I hope it works well...but I'm wondering if even though it's thicker plastic...it may not be thick enough? I'm wondering if now that the other material is gone if it will just now push this down and cause the same problem. Have you tried strengthening the underside of the plastic?
You could bring it to a fiberglass shop and they could probably put some glass in there in a day or two that would only add a few grams but would strengthen it up quite a bit, plus it would be invisible from most views (if not all) when it's on the bike.
Just a thought!
Sweeeeeet F2 by the way!
You could bring it to a fiberglass shop and they could probably put some glass in there in a day or two that would only add a few grams but would strengthen it up quite a bit, plus it would be invisible from most views (if not all) when it's on the bike.
Just a thought!
Sweeeeeet F2 by the way!
#77
04-22-2012, 09:39 PM
Thanks, I'm lovin' it, but I am biased toward my own work!!
No worries, the fix was an absolute success - pressing down on the fender with my hand, it feels about as strong as the OEM fender; it's very stiff now - besides, I have already had it at high speeds, with a head wind...it's not budging.  The cut really did make a huge difference.
Last edited by JNSRacing; 04-22-2012 at 09:58 PM.
#78
04-23-2012, 10:42 AM
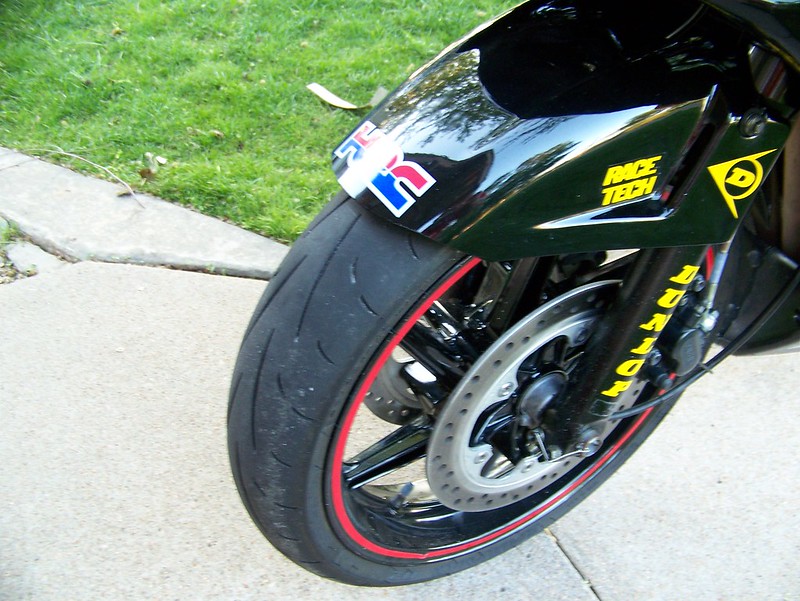
Since the new plastic are more fragile, it stands to reason that I might get some cracks and breaks in areas with the least material, especially around mounting holes that had to be drilled out larger for proper fitment.
This is one of those spots - though you practically have to be a vampire or a wombat to make it out in this picture, you can just barely see where this crack is, which goes all the way from the hole, to the outer radius:

I lightly sanded and cleaned the backside of this area, and did the same thing to a 1/16 inch thick plastic washer, then used JB Weld to fuse 'em together - it's ghetto, but it works just fine!

This is one of those spots - though you practically have to be a vampire or a wombat to make it out in this picture, you can just barely see where this crack is, which goes all the way from the hole, to the outer radius:
I lightly sanded and cleaned the backside of this area, and did the same thing to a 1/16 inch thick plastic washer, then used JB Weld to fuse 'em together - it's ghetto, but it works just fine!
#79
04-23-2012, 02:17 PM
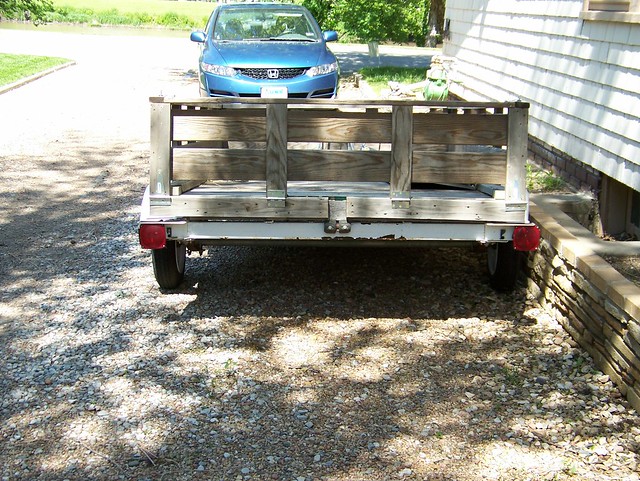
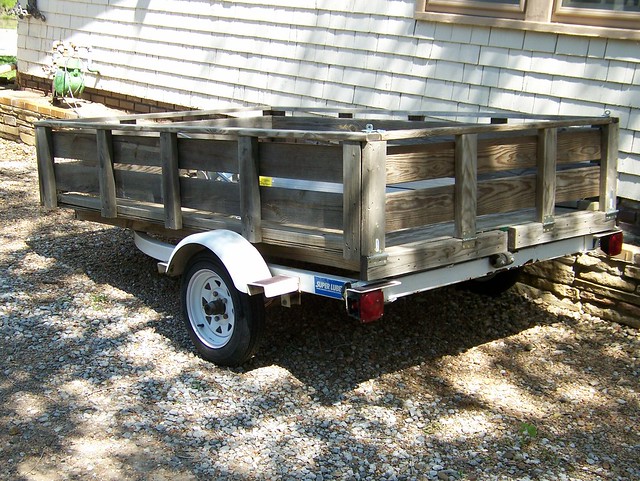
This post is kind of "off-topic", but then again, not really, being that "Phase 1" is all about mods that are in preparation for track duty...one thing I need for that, is a means to get it to various tracks.
I feel like I scored a pretty decent deal on this trailer - it was a boat trailer that had been converted for hauling other stuff, and the job was done well - whoever did it used treated lumber, which is nice.
The paint could use a little touching up, but it doesn't look that bad - I picked it up for $250 - the lights all function properly, and it has new tires.
#80
04-23-2012, 03:20 PM
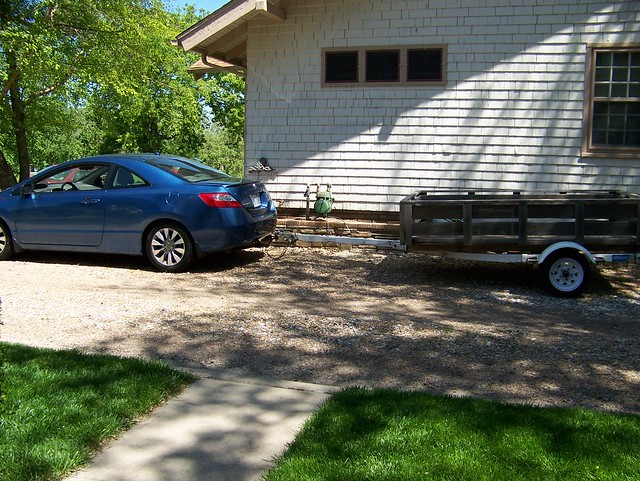
I installed a Curt tow hitch on my newest vehicle, which is a 2010 Civic - it's not ideal for towing - I'd prefer to have a truck - but that is not in the current budget...I mean, if I got what I would "prefer", it would be an 8 X 12 dual axle enclosed trailer with a loading ramp for the back door, hauled by a brand new diesel-powered 3/4 ton or 1 ton truck, but, that's for another time...next season, maybe.
I wanted to put a hitch on my 635 CSi, since it's a larger, MUCH more powerful vehicle, but the hitch for the BMW would have been twice as much, and of couse, I really didn't want to put an ugly hitch on it! It would be a very comfortable ride, though, and that car has an auto ride-leveling system, that could adjust for increased weight in the rear.
Other issues with that option are, that there's some front suspension work on the 635 that I need to perform, and don't want to spend the money right now, not to mention, 300 hp would be nicer for pulling a load, but also means she drinks too much - I can't imagine how poor the mileage would be with a trailer attached!
The truth is, the Civic handles the weight of the trailer, bike, tools, paddock stands, shade canopy and chairs, 10 gallons of extra fuel, ramps, a large cooler full of ice, two passengers, light luggage for hotel stay, my leathers and all other riding gear, with only a slight drop in the rear (surprisingly stiff springs in the rear), and after a test trip, gets 33 mpg on the highway, as opposed to the "non-loaded" 39 mpg - holding the speed limit and accelerating is only marginally affected, and that's only when going up a decent grade - all this is acceptable for me, for use this season, and maybe a little bit into the next.
I mounted a front wheel chock, and a couple of heavy-duty D-rings. The D-rings will be used, not only for strapping things down, but for running a 30 ft long vinyl covered steel cable, laced through the rings, both wheels, and holes I cut in the sidewalls of the ramps, to lock things down - this is in addition to having an alarmed disc lock on both wheels.
Altogether, this is still not as secure as an enclosed trailer, but it will make it much more difficult for someone to steel the bike while I'm snoozin' away in a hotel room.

Tail down and ramps in place - it's not as easy to load as a low, enclosed trailer with a built-in access ramp/rear door, but this trailer is low enough that it's relatively simple for me to load the bike without help, and their's still about 3 to 4 inches of clearance for the lower body work on the bike.
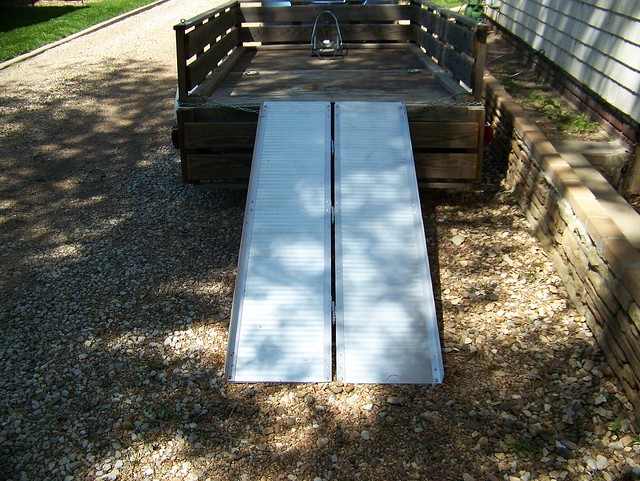
I am not a fan of using straps for securing a bike, so my plan is to use the front chock, in conjunction with Pitbull's awesome trailer restraint system - I'll be acquiring that soon enough, and we'll see how sturdy things are with just those two items.
I wanted to put a hitch on my 635 CSi, since it's a larger, MUCH more powerful vehicle, but the hitch for the BMW would have been twice as much, and of couse, I really didn't want to put an ugly hitch on it! It would be a very comfortable ride, though, and that car has an auto ride-leveling system, that could adjust for increased weight in the rear.
Other issues with that option are, that there's some front suspension work on the 635 that I need to perform, and don't want to spend the money right now, not to mention, 300 hp would be nicer for pulling a load, but also means she drinks too much - I can't imagine how poor the mileage would be with a trailer attached!
The truth is, the Civic handles the weight of the trailer, bike, tools, paddock stands, shade canopy and chairs, 10 gallons of extra fuel, ramps, a large cooler full of ice, two passengers, light luggage for hotel stay, my leathers and all other riding gear, with only a slight drop in the rear (surprisingly stiff springs in the rear), and after a test trip, gets 33 mpg on the highway, as opposed to the "non-loaded" 39 mpg - holding the speed limit and accelerating is only marginally affected, and that's only when going up a decent grade - all this is acceptable for me, for use this season, and maybe a little bit into the next.
I mounted a front wheel chock, and a couple of heavy-duty D-rings. The D-rings will be used, not only for strapping things down, but for running a 30 ft long vinyl covered steel cable, laced through the rings, both wheels, and holes I cut in the sidewalls of the ramps, to lock things down - this is in addition to having an alarmed disc lock on both wheels.
Altogether, this is still not as secure as an enclosed trailer, but it will make it much more difficult for someone to steel the bike while I'm snoozin' away in a hotel room.
Tail down and ramps in place - it's not as easy to load as a low, enclosed trailer with a built-in access ramp/rear door, but this trailer is low enough that it's relatively simple for me to load the bike without help, and their's still about 3 to 4 inches of clearance for the lower body work on the bike.
I am not a fan of using straps for securing a bike, so my plan is to use the front chock, in conjunction with Pitbull's awesome trailer restraint system - I'll be acquiring that soon enough, and we'll see how sturdy things are with just those two items.