Shortened exhaust mockup
#21
 02-21-2011, 05:10 PM


I don't have any more pictures, and the bike's now totaled and half parted out including the exhaust. I just cut the strap in two, kept the two pieces that the bolt goes through, had about an inch on the outside (just enough to put two rivets through) and went almost down the full body of the can on the inside using about 6 rivets. I used the same rivets as the ones to put the can back together after cutting it. Even after the bike hit a guard rail post, the rivets holding the tabs were fine.
#22
03-08-2011, 08:59 PM

Join Date: Jan 2011
Posts: 44
Likes: 0
Received 0 Likes
on
0 Posts
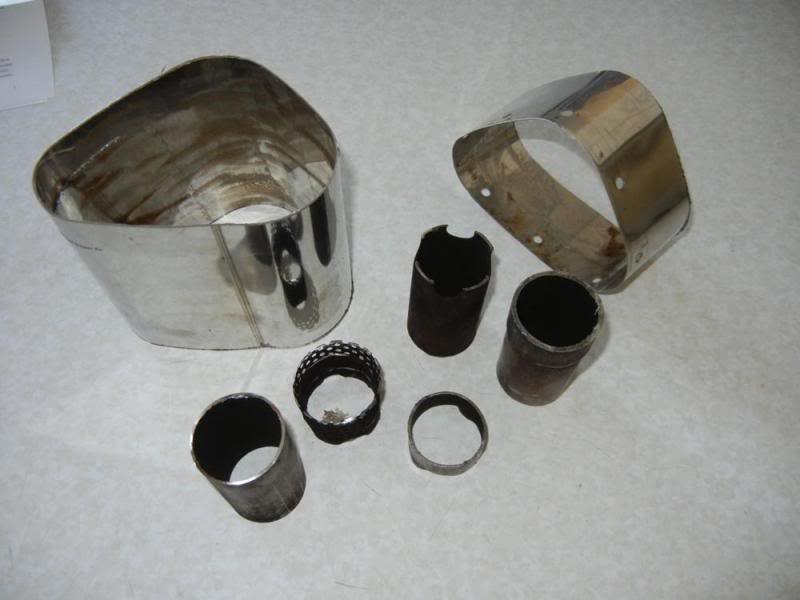
Hi all, I grew a pair and continued my mission. Here are the results so far. As I feared, that inner ring was indicative of a very complex situation in the muffler. However, that ring also allowed me to tap the end off. The inlet end piece was on there very tightly--without hitting it from the other end I would not have gotten it off.
Here are the guides I used to get an idea of what I needed to do for this project:
https://cbrforum.com/forum/f4i-main-forum-11/where-exhaust-shortening-how-118394/
http://home.comcast.net/~nstama/shortyyoshi.html
https://cbrforum.com/forum/f4i-main-forum-11/finished-cutting-pipe-pics-119988/
Tapping that inlet end piece off. Quite the chore.

Unwrapping the innards to expose the baffle tube. This baffle was a nightmare. It was an outer tube of mesh and an inner tube of mesh toward the inlet half, and solid steel toward the outlet.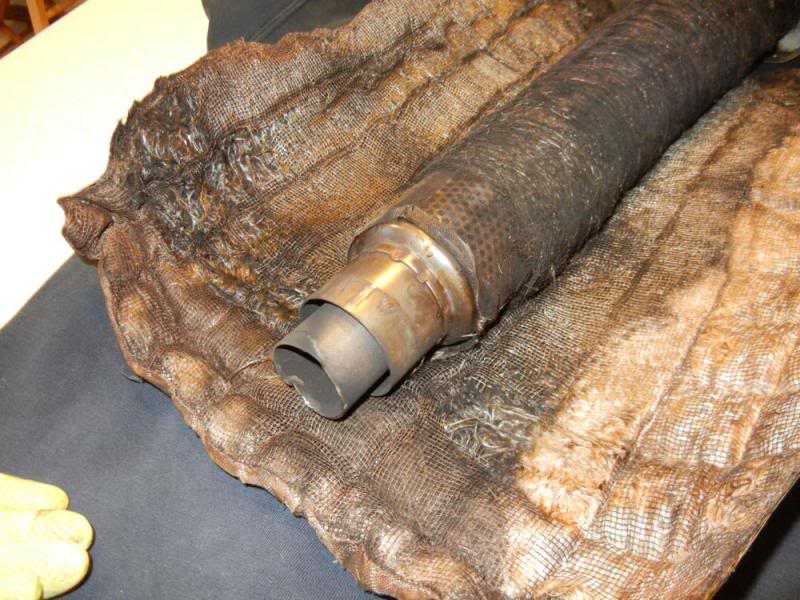
We used a tin snips to cut away the outer mesh of the portion we were to remove to expose the solid steel inner tube, which we then cut off.
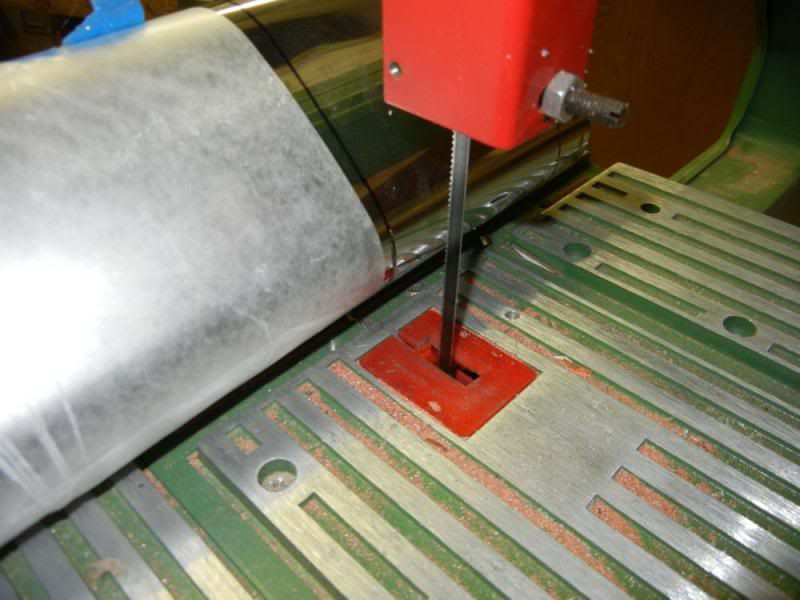
I used a Dremel to start the cut, then used a band saw with a 1/4 x .014 and 14 teeth per inch blade. It cut very well. Then I used a sander/grinder to pretty up the cut.
I grinded away the mesh off the outlet end baffle piece so we could weld this back together. This is what we ended up with. You can't see this, but the baffle is two layers of mesh.
Here was all the extra crap we removed. Here you can see the solid inner tube pieces.
Stay tuned for more on this project.
Here are the guides I used to get an idea of what I needed to do for this project:
https://cbrforum.com/forum/f4i-main-forum-11/where-exhaust-shortening-how-118394/
http://home.comcast.net/~nstama/shortyyoshi.html
https://cbrforum.com/forum/f4i-main-forum-11/finished-cutting-pipe-pics-119988/
Tapping that inlet end piece off. Quite the chore.
Unwrapping the innards to expose the baffle tube. This baffle was a nightmare. It was an outer tube of mesh and an inner tube of mesh toward the inlet half, and solid steel toward the outlet.
We used a tin snips to cut away the outer mesh of the portion we were to remove to expose the solid steel inner tube, which we then cut off.
I used a Dremel to start the cut, then used a band saw with a 1/4 x .014 and 14 teeth per inch blade. It cut very well. Then I used a sander/grinder to pretty up the cut.
I grinded away the mesh off the outlet end baffle piece so we could weld this back together. This is what we ended up with. You can't see this, but the baffle is two layers of mesh.
Here was all the extra crap we removed. Here you can see the solid inner tube pieces.
Stay tuned for more on this project.
#24
04-05-2011, 12:26 AM
Join Date: Jan 2011
Posts: 44
Likes: 0
Received 0 Likes
on
0 Posts
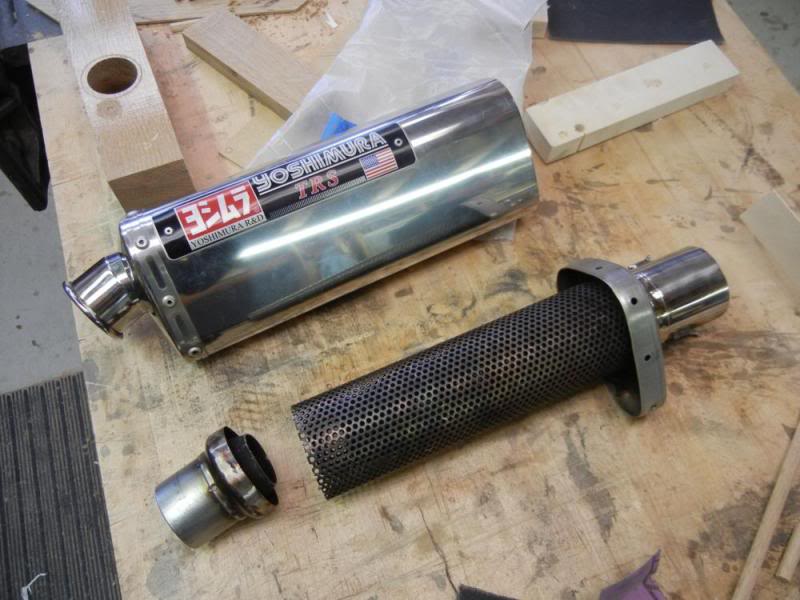
A couple weeks ago I finished this project. Here are the goodies!
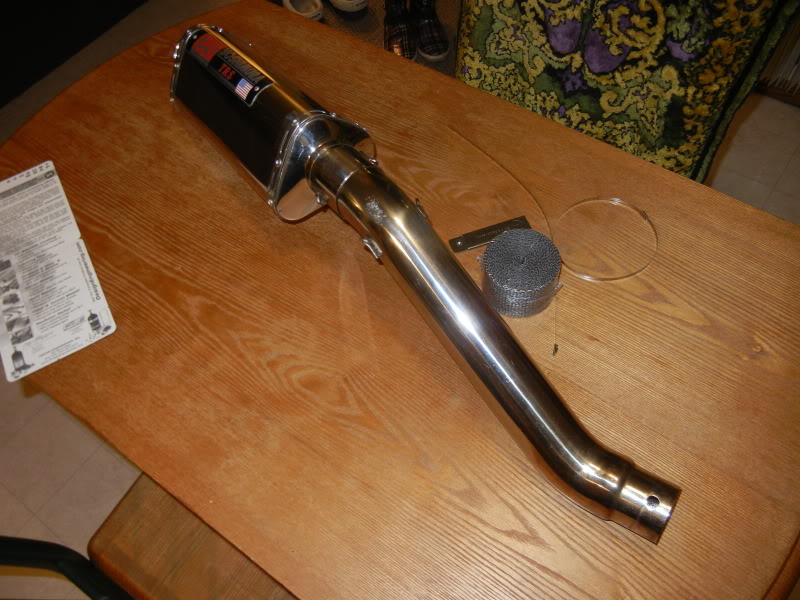
I had a neighborhood muffler shop weld the pieces together and fix my bent inlet hole. Dude did it in 5 minutes for free. Sweet! It was at Muffler Clinic & Brakes on 4301 Excelsior Blvd. Minneapolis, MN.

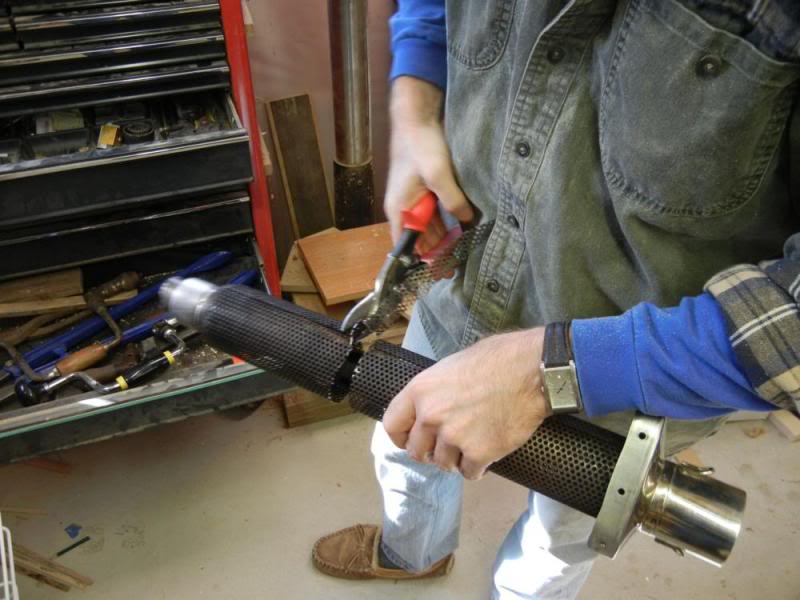
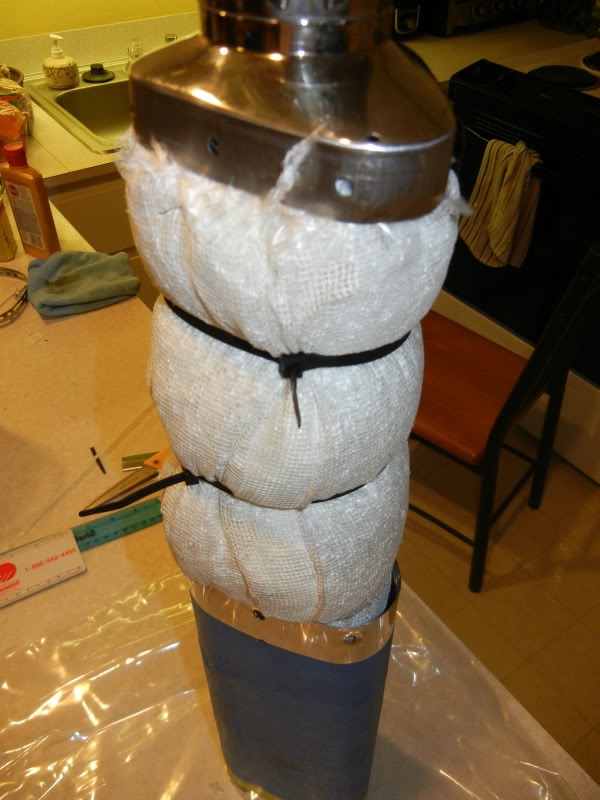
Getting the mesh, steel wire, and packing material to fit in the muffler was a real pain, but I got it. I removed the zip ties as I put everything in there.
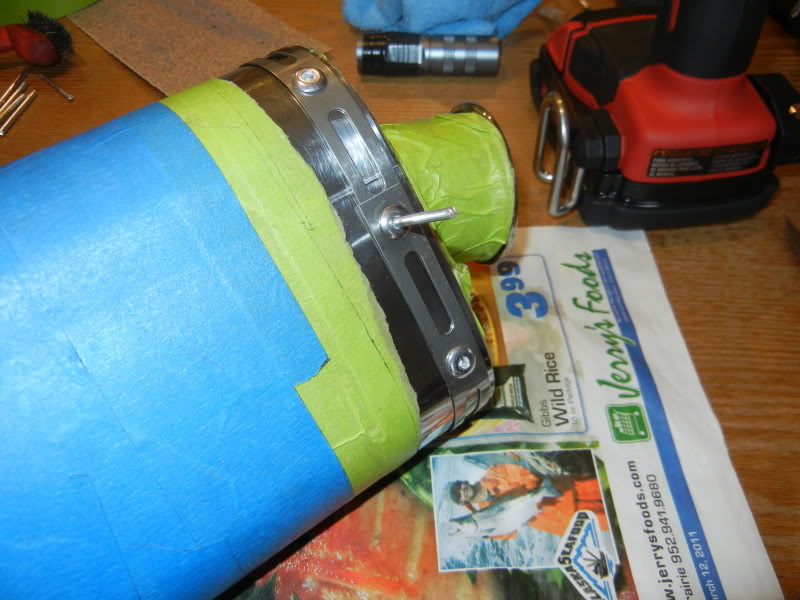
Getting all the holes to line up was another big pain in the ***. The riveting process was fun as hell though!
I decided to cover up that ugly scratches with some heat wrap. I think it looks damn good.
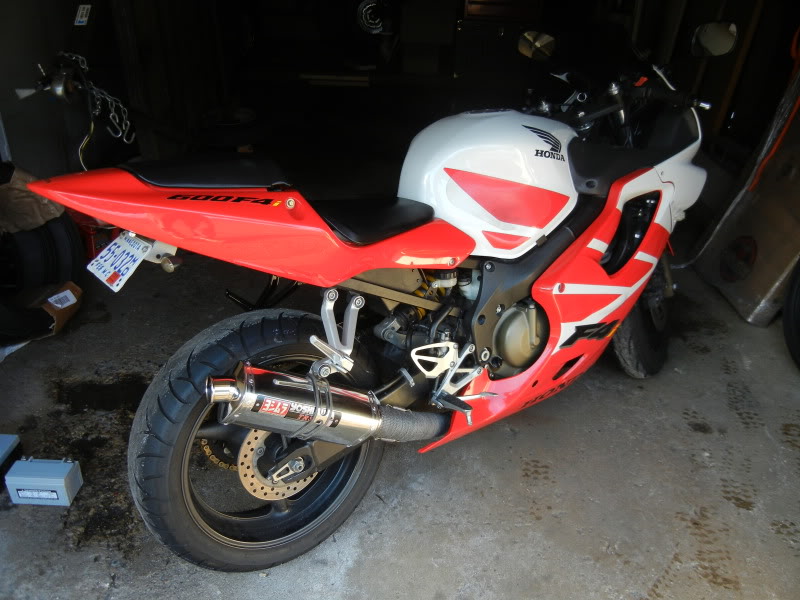
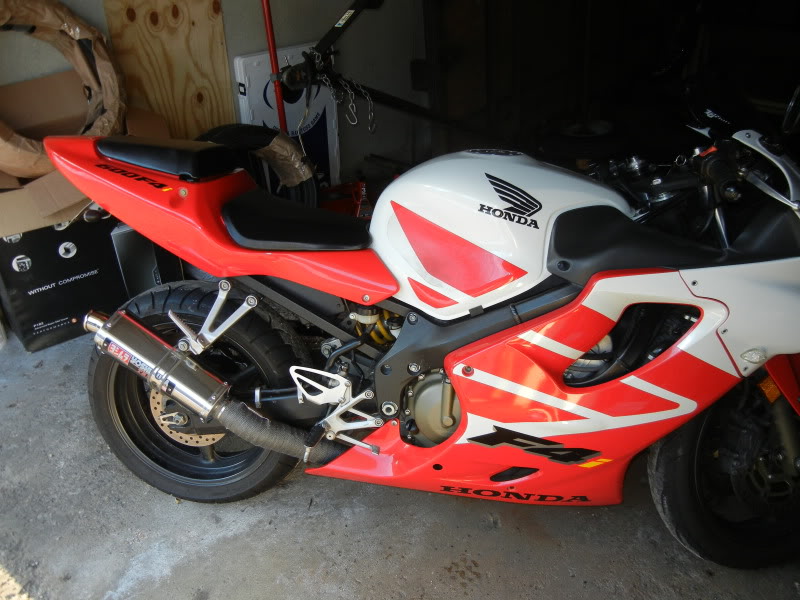
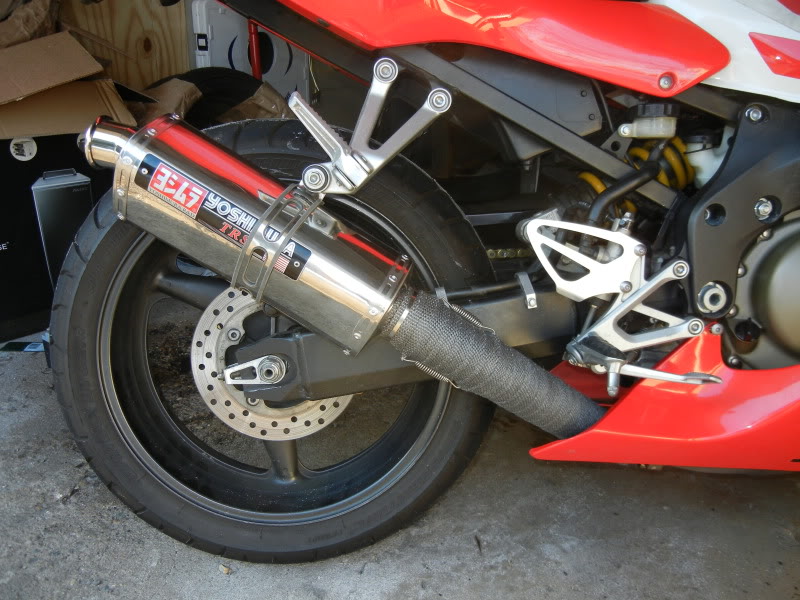
I haven't even changed the oil in this thing yet, so here's an almost useless clip of the thing idling. It's quite loud. I'll have to hear it scream when I get some new oil in it.

I had a neighborhood muffler shop weld the pieces together and fix my bent inlet hole. Dude did it in 5 minutes for free. Sweet! It was at Muffler Clinic & Brakes on 4301 Excelsior Blvd. Minneapolis, MN.
Getting the mesh, steel wire, and packing material to fit in the muffler was a real pain, but I got it. I removed the zip ties as I put everything in there.
Getting all the holes to line up was another big pain in the ***. The riveting process was fun as hell though!
I decided to cover up that ugly scratches with some heat wrap. I think it looks damn good.
I haven't even changed the oil in this thing yet, so here's an almost useless clip of the thing idling. It's quite loud. I'll have to hear it scream when I get some new oil in it.
#25
04-05-2011, 01:48 AM

Senior Member
Join Date: Aug 2010
Location: NJ
Posts: 805
Likes: 0
Received 0 Likes
on
0 Posts
Looks sick glad to see you finally got it done. I finally did it to my jardine the other week too. I like what you did with the heatwrap it looks cool, i never thought of that. Ive got some scratches on my midpipe too but i did my best to just sand em out....but i do have some extra heatwrap layin around...

Thread
Thread Starter
Forum
Replies
Last Post