
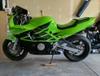
Meet my 1994 CBR600F2

Thread Starter
|
Member
Joined: Sep 2017
Posts: 76
Likes: 0
From: Denver, Colorado
Ha, that's pretty ironic that the manual specifically calls out the altitude that I live at. How can you know if you have a California model? I also have a gutted D&D full exhaust So I can only assume that's why the jets are 125/128? Even with those jets, it was still running rich which I can now assume is simply due to my incorrect airbox configuration.
Last edited by Rybo; Oct 8, 2017 at 01:16 PM.


You dont need the electric thing in the picture. Most F3 owners do away with it. It switches where the air comes from to the carbs, something to do with pressurizing the float bowls. Below 12mph then it switches above 12mph. You just got to plumb it all right when eliminating it. Its a modification in the F3 section somewhere. It simplifies things under the tank also


Search...... (FIXED) Flat spot at 5k rpm........I just found it, I dont know how to "attach it" here. It has a link for the HRC modification the eliminates the "thing". Maybe a moderator or administrator could update it so the pics could be seen again. You can see the HRC stuff but not the posters pics of his hose routing with the "thing" eliminated.
Also, F3 carbs supposed to have coolant ran through them. F2 carbs not. Wonder whats going on there? I figure F3 carbs without coolant going through them would be ok, just wondering how your bike is.
Thread Starter
|
Member
Joined: Sep 2017
Posts: 76
Likes: 0
From: Denver, Colorado
My carbs have the ports for coolant but nothing was hooked up. I've studied it quite a bit and they aren't particularly needed in my climate, and there are lots of people that remove them without any issues. They aren't actually used to cool anything, but used to warm the carb throats to prevent carb icing (similar to carb icing seen in general aviation for those familiar). During the riding months humidity around here is in the 10-25% range so for now I'm just planning on leaving them off. Next time I do a coolant flush I'll probably add T's in the lines to hook them up just to get back to a mostly OEM state.
Thread Starter
|
Member
Joined: Sep 2017
Posts: 76
Likes: 0
From: Denver, Colorado
New update!
Got everything all cleaned and mostly back together. Jets weren't in terrible shape but not great either. Now they're all nice and shiny. I checked the diaphragms and they were all in great shape. I didn't bother with a needle adjustment, just cleaned them and put it back together. Cleaned the floats and their little springy things and they move much more freely now. They weren't sticking before, but they definitely took more effort to move. I saved the bowls for last and I noticed this on the #1 carb:
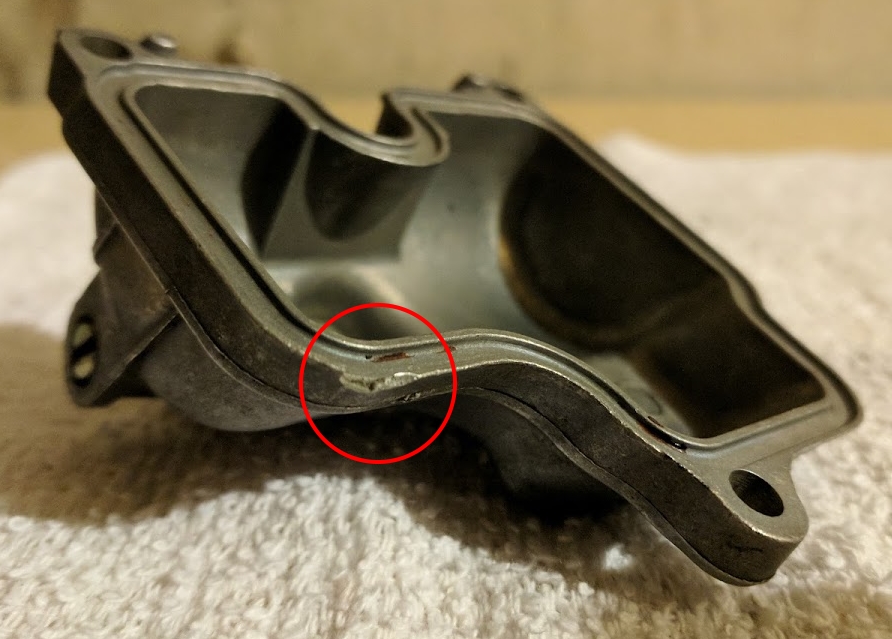
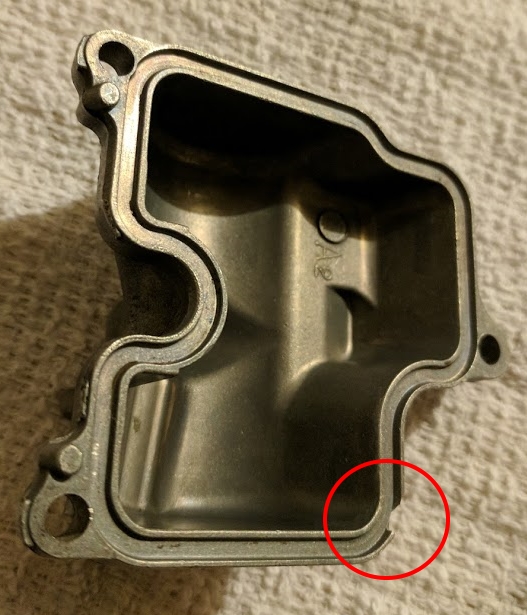
What do you think? Will it still seal up? Can I just throw the gasket on, screw it all back together, and then just throw some JB weld over that spot? Really hoping to avoid having another thing to buy...
Unfortunately I also STILL can't get the old TPS out, and I broke some vacuum thing on the other side while trying to remove those dang screws. Seems that for each thing I fix, two more things get broken. If anyone has any good ideas for getting that thing out, I'm all ears. So far I've soaked the screws in WD40, PB Blaster, I tried an impact driver, I tried tightening and then loosening, and I've had no luck.
Got everything all cleaned and mostly back together. Jets weren't in terrible shape but not great either. Now they're all nice and shiny. I checked the diaphragms and they were all in great shape. I didn't bother with a needle adjustment, just cleaned them and put it back together. Cleaned the floats and their little springy things and they move much more freely now. They weren't sticking before, but they definitely took more effort to move. I saved the bowls for last and I noticed this on the #1 carb:
What do you think? Will it still seal up? Can I just throw the gasket on, screw it all back together, and then just throw some JB weld over that spot? Really hoping to avoid having another thing to buy...
Unfortunately I also STILL can't get the old TPS out, and I broke some vacuum thing on the other side while trying to remove those dang screws. Seems that for each thing I fix, two more things get broken. If anyone has any good ideas for getting that thing out, I'm all ears. So far I've soaked the screws in WD40, PB Blaster, I tried an impact driver, I tried tightening and then loosening, and I've had no luck.

Senior Member
Joined: Sep 2017
Posts: 370
Likes: 1
From: Kansas City
Might mention that I've been using Dow Corning High Vacuum Grease on neoprene and other rubber type gaskets for 30+ years and they last forever. As an example, I have a '89 Prelude with 150K on the clock that needs a valve adjustment every 15K, and it still has the factory original valve cover gasket. It gets cleaned and smeared with the Dow Corning stuff every time it comes off. Still looks and works like new after nearly 3 decades. Really good stuff to use on those bowl gaskets and on the inside of those rubber intake runners between the carbs and the head.
If the rubber 'intake' between the carb and the head has badly hardened, removing and soaking in a 3:1 mixture of isopropyl and wintergreen oil for a few days will soften them back up considerably.
Anyway, link to Dow Corning stuff:
Unfortunately I also STILL can't get the old TPS out, and I broke some vacuum thing on the other side while trying to remove those dang screws. Seems that for each thing I fix, two more things get broken. If anyone has any good ideas for getting that thing out, I'm all ears. So far I've soaked the screws in WD40, PB Blaster, I tried an impact driver, I tried tightening and then loosening, and I've had no luck.
Thread Starter
|
Member
Joined: Sep 2017
Posts: 76
Likes: 0
From: Denver, Colorado
Thanks for the advice, I'll definitely grab some of that grease. If I can avoid spending $50 on gaskets every year that would be awesome.
I think I'm going to try taking the carbs to the CNC shop at work to see if our guy can get them out. If not, I may just end up buying carbs off of eBay. At this point it would have been cheaper if I had just started with that, but it's been like a decade since I worked on carbs so this has been good practice. I'll be sure to let you guys know how it all turns out.
I think I'm going to try taking the carbs to the CNC shop at work to see if our guy can get them out. If not, I may just end up buying carbs off of eBay. At this point it would have been cheaper if I had just started with that, but it's been like a decade since I worked on carbs so this has been good practice. I'll be sure to let you guys know how it all turns out.