
Stick coils for the CBR1000F?


Welcome Crew
Joined: Jan 2011
Posts: 990
Likes: 5
From: Tasmania Australia
In one word, no, I have also noted that a lot of members set their idle at 1100 anyway.
Hopefully someone else can come up with another reason for your problem.
Hopefully someone else can come up with another reason for your problem.
Last edited by jarvid; Aug 30, 2015 at 11:55 PM.

Senior Member
Joined: Apr 2016
Posts: 217
Likes: 1
From: South Wales, UK
Thought I'd update this thread with my info following my conversion, in case it may assist anyone further.
I made my loom a few nights back and was awaiting my grommits and electrical connectors arriving. I followed the How To on here and set the coil plugs apart by 80mm/150mm/80mm and left the length of wire before the bend around 140mm long so the plugs can face the back of the bike and allow a nice length of cable and look tidy. I also tried to follow the BL/WH colours back to the original loom so I knew the colours will follow through and maintain the -ive colour at the coil sticks, the +ive colours I wasn't too bothered about.
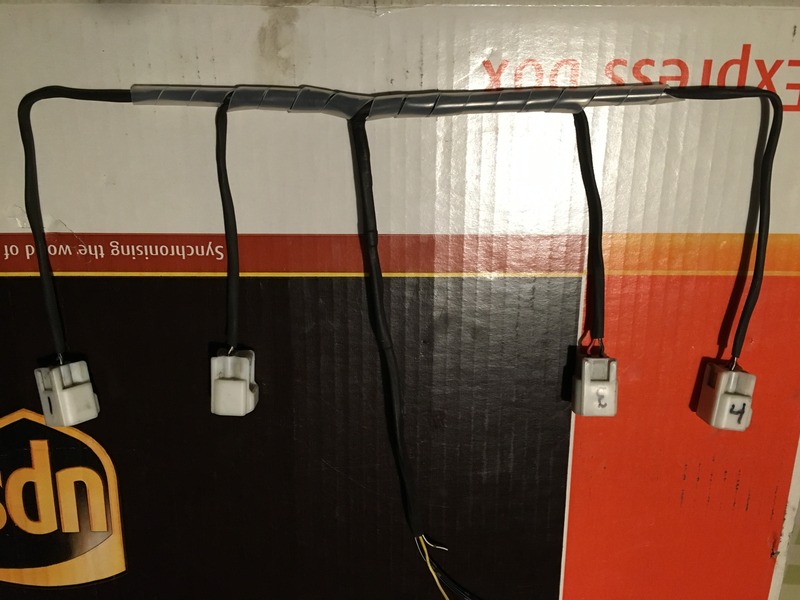
I purchased 4 x Ford PCV rubber grommits from Burton Power Products at just over a tenner for 4 inc delivery.
PCV valve grommet - Ford X/Flow OHV Kent, SOHC Pinto, Cologne V4/V6, Essex V4/V6 & DOHC 8v
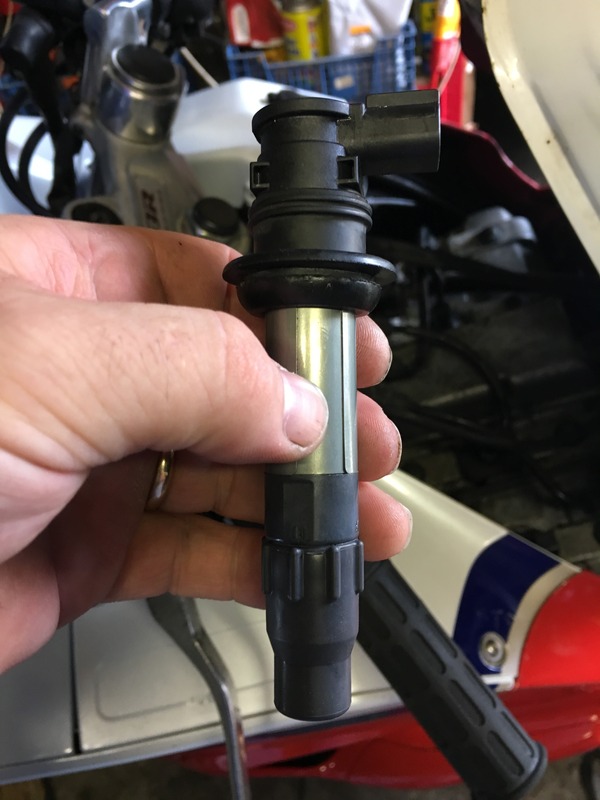
They are a perfect fit on the CBR sticks and are a tight fit in the head so will deffo be water and oil tight.
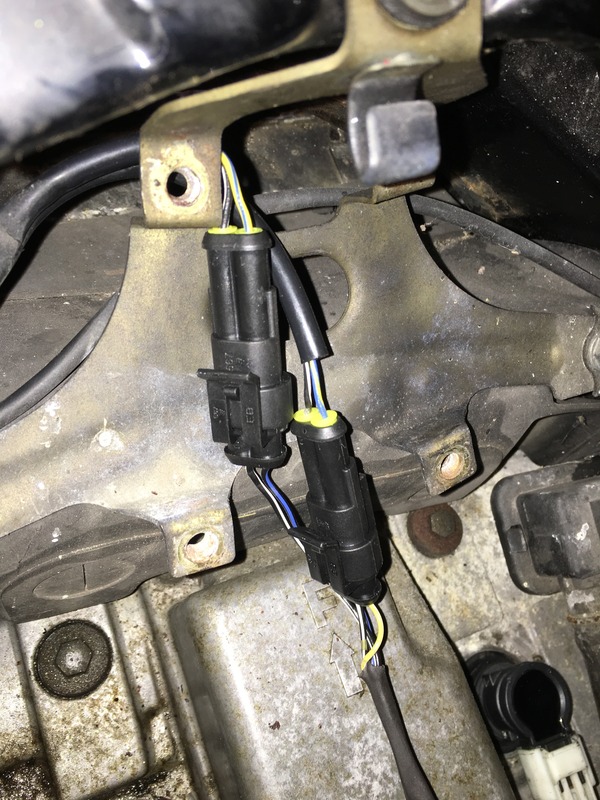
I purchased 2 x pairs of 2 way Tyco AMP econoseal water proof electrical connectors and cut off the coil connections. These are marked with the terminal number so it's quite a straightforward job. I never had the proper crimper so used a pliers after tinning the wires with solder then after fitting the waterproof seals, heated up the crimp after and dabbed the solder to ensure a perfect connection.
Genuine AMP Tyco TE 2 Way Superseal Electrical Waterproof Connector Kit | eBay
Then fitted the coils and attached the loom,
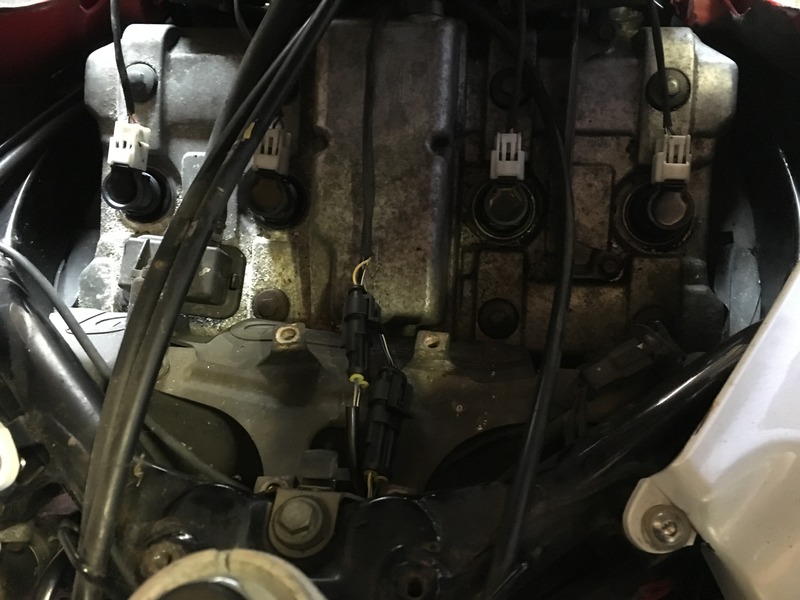
Tried the bike and it runs sweet enough. It seemed to settle down to a smooth idle and came off the choke sooner than it used to but that may be my imagination. Should make the bike more reliable and give a stronger spark.
EDIT>
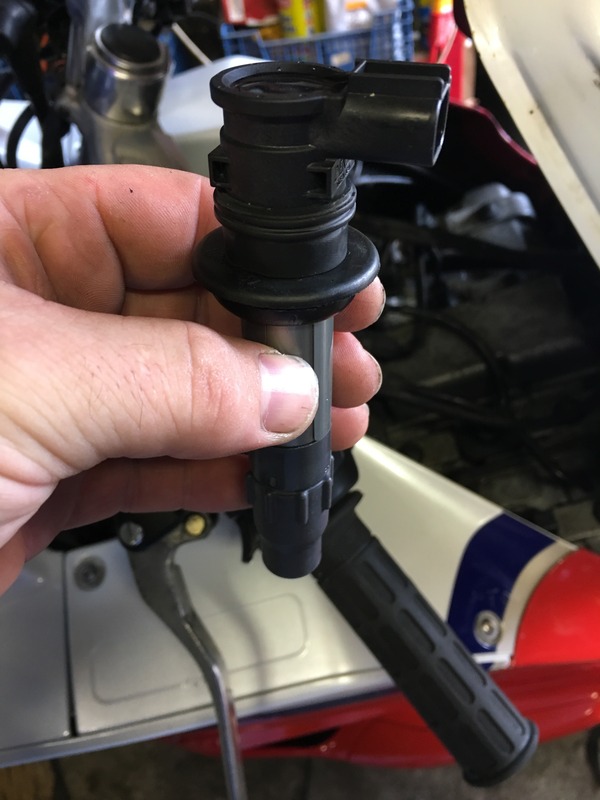
In pic 1 you can see the original Fireblade grommet above the tapered Ford PCV grommet, I ended up having to remove this as it was causing the coils to rise off the plugs and give a strange misfire. Removing this and seating the coils and grommets correctly cured the misfire.
I made my loom a few nights back and was awaiting my grommits and electrical connectors arriving. I followed the How To on here and set the coil plugs apart by 80mm/150mm/80mm and left the length of wire before the bend around 140mm long so the plugs can face the back of the bike and allow a nice length of cable and look tidy. I also tried to follow the BL/WH colours back to the original loom so I knew the colours will follow through and maintain the -ive colour at the coil sticks, the +ive colours I wasn't too bothered about.
I purchased 4 x Ford PCV rubber grommits from Burton Power Products at just over a tenner for 4 inc delivery.
PCV valve grommet - Ford X/Flow OHV Kent, SOHC Pinto, Cologne V4/V6, Essex V4/V6 & DOHC 8v
They are a perfect fit on the CBR sticks and are a tight fit in the head so will deffo be water and oil tight.
I purchased 2 x pairs of 2 way Tyco AMP econoseal water proof electrical connectors and cut off the coil connections. These are marked with the terminal number so it's quite a straightforward job. I never had the proper crimper so used a pliers after tinning the wires with solder then after fitting the waterproof seals, heated up the crimp after and dabbed the solder to ensure a perfect connection.
Genuine AMP Tyco TE 2 Way Superseal Electrical Waterproof Connector Kit | eBay
Then fitted the coils and attached the loom,
Tried the bike and it runs sweet enough. It seemed to settle down to a smooth idle and came off the choke sooner than it used to but that may be my imagination. Should make the bike more reliable and give a stronger spark.
EDIT>
In pic 1 you can see the original Fireblade grommet above the tapered Ford PCV grommet, I ended up having to remove this as it was causing the coils to rise off the plugs and give a strange misfire. Removing this and seating the coils and grommets correctly cured the misfire.
Last edited by exuptoy; Sep 9, 2016 at 12:51 PM.

Senior Member
Joined: Jun 2006
Posts: 4,237
Likes: 15
From: Bir Tawil
^ Thanks for the PVC grommet info.
Today I replaced my home built stuff with the same grommet.
Works great.
The part number in the states is 'Doorman #42066'.
The paperwork said - 1975 Ford Pinto 2.3L 140 cid L4.
Today I replaced my home built stuff with the same grommet.
Works great.
The part number in the states is 'Doorman #42066'.
The paperwork said - 1975 Ford Pinto 2.3L 140 cid L4.
Super Moderator
Joined: Oct 2013
Posts: 596
Likes: 21
From: Calgary, Canada
Might be useful for fellow Canadians - another grommet that works really well is the Dorman 42323. I couldn't find the Dorman 42066 locally, but they had these in stock at Cdn Tire and if you cut the end off with a knife you get a really good seal
Just don't cut your fingers
Just don't cut your fingers


Senior Member
Joined: Mar 2005
Posts: 334
Likes: 7
From: Prosper, Texas
It was going so easy to be true.
Oh well, back to cutting and welding and thanks for the pointing the issue.
The tank is still off, so no cursing after it was re-installed.
Thanks Jarvid.