
Camchain adjuster completed


Thread Starter
|
Very Honorable Most Senior Member :)
Joined: Jul 2005
Posts: 769
Likes: 2
From: Central Montana, USA
Today the CCT came out and was modified as per your example. Super easy. Aaaannnd, if the proper size rivet can be found, tomorrow it will be back in the bike.
That's the one downside of living in a small Montana town. 5x80 bolts? Sorry, we only go down to 6x80. Rivets? Well, you could try the local machine shop, or maybe the hardware store. And once there you hear, "Metric, uh, nope."
Ah well, tomorrow is another day to go searching. If all else fails I'll try filing the threads off a 6x25 bolt. Those who live in the sticks must occasionally improvise.

Thread Starter
|
Very Honorable Most Senior Member :)
Joined: Jul 2005
Posts: 769
Likes: 2
From: Central Montana, USA
Pictures were asked for. Well, here they are:
I didn't think of pictures until they were requested. By then the initial process of removing and disassembling the CCT was done, so pictures take up part way through.
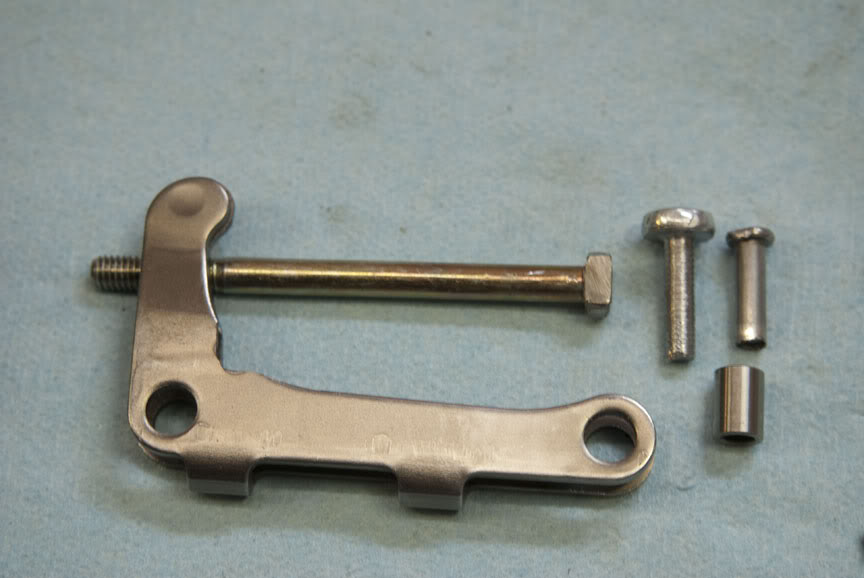
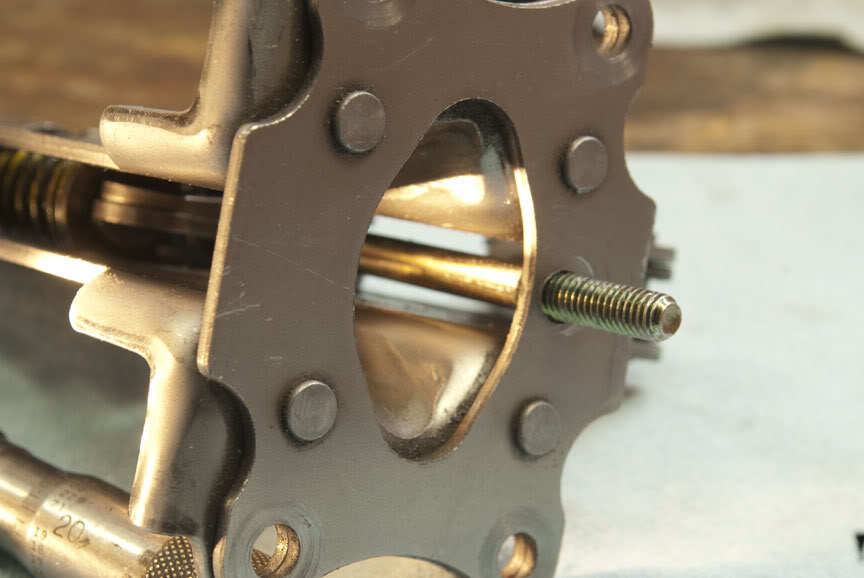
Here's the bolt that will be used along with the CCT arm that has been ground to take the bolt. A 5x80 bolt was suggested, but all that was available here was a 6x80. It was a snug fit. I ran a 1/4 inch drill bit through the arm and loosened things up a little.
Included in the picture are the old rivet, spacer and the new rivet. More about that rivet later.
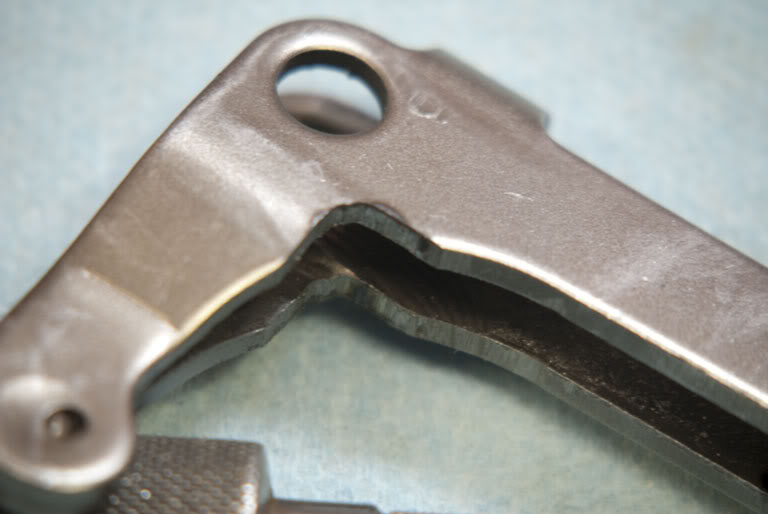
A detail view of what was ground off. As said in butthead's instructions, take only as much as is needed to fit the bolt.
Slide the bolt through the arm thusly.
Since I really dislike expensive noises within my engine, the bolt was safety wired to the arm. The chance that the head would snap off is minuscule, but I'm paranoid about things like that. A 1/16" hole drilled through the bolt head accepted the wire.
It took a couple different tries to find a way to thread the wire so everything cleared inside the CCT. This arrangement left everything room to move.

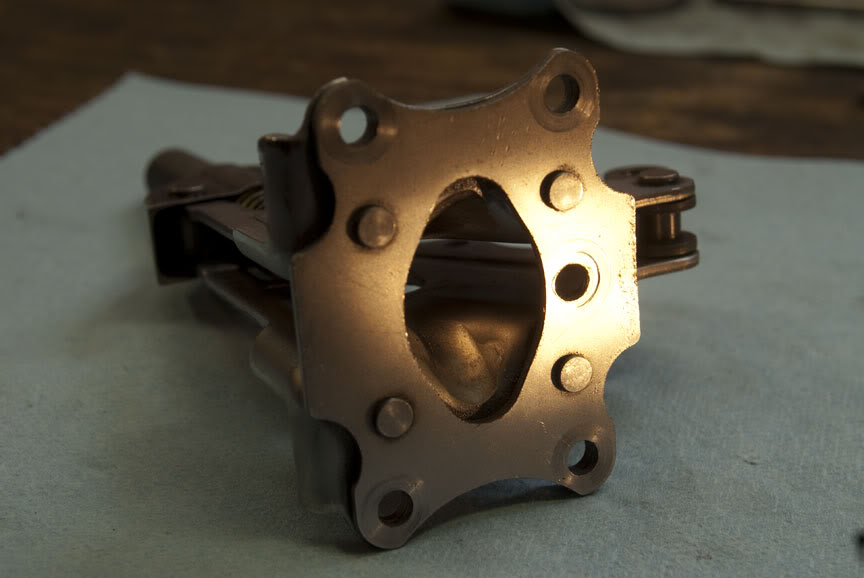
In his directions butthead cut a slot to take the bolt. I decided that a hole drilled through would weaken the top plate less. A 1/4" hole left enough room for the 6mm bolt to move freely.
A trial assembly showed everything ready to go. It takes a little fiddling to get it all together.
Getting a rivet to replace the one ground off when disassembling the CCT was the most difficult part of this project. Finally, a 6x30 bolt was chucked in the drill press and filed to the appropriate size. Not elegant, but it worked. After getting to this point the oil cup was filled and the lever worked until the oil reservoir was filled. It took about three cup fillings before the resevoir was completely full.

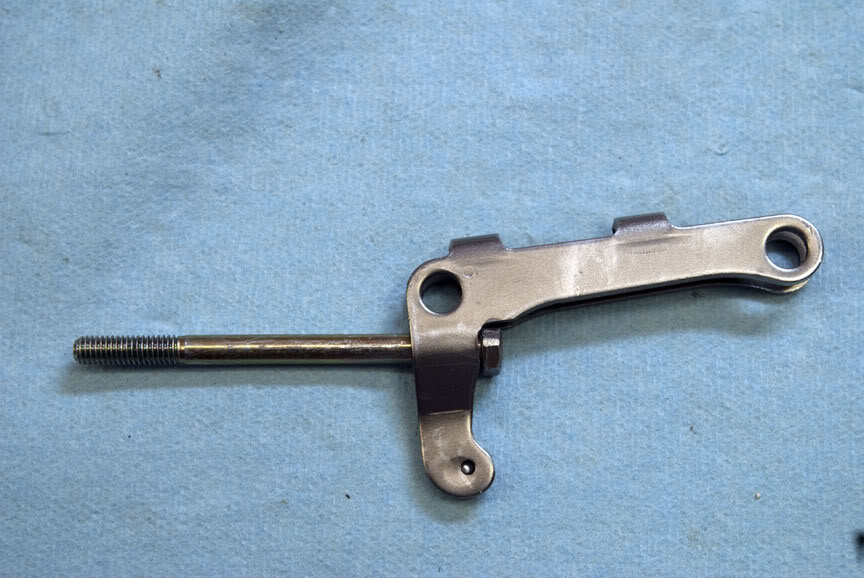
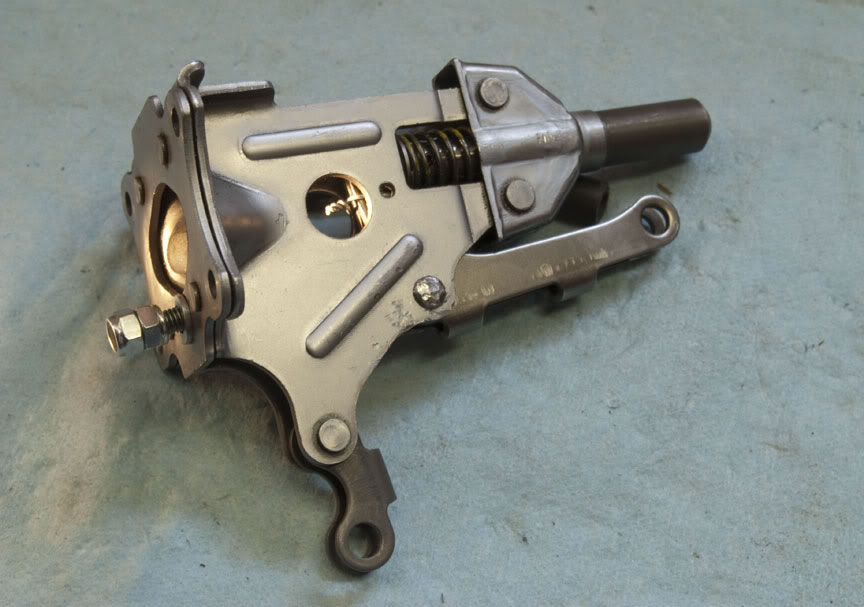
Here's the finished project with two nylock nuts waiting to do their job. You can see the safety wiring inside.
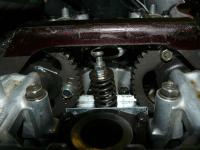
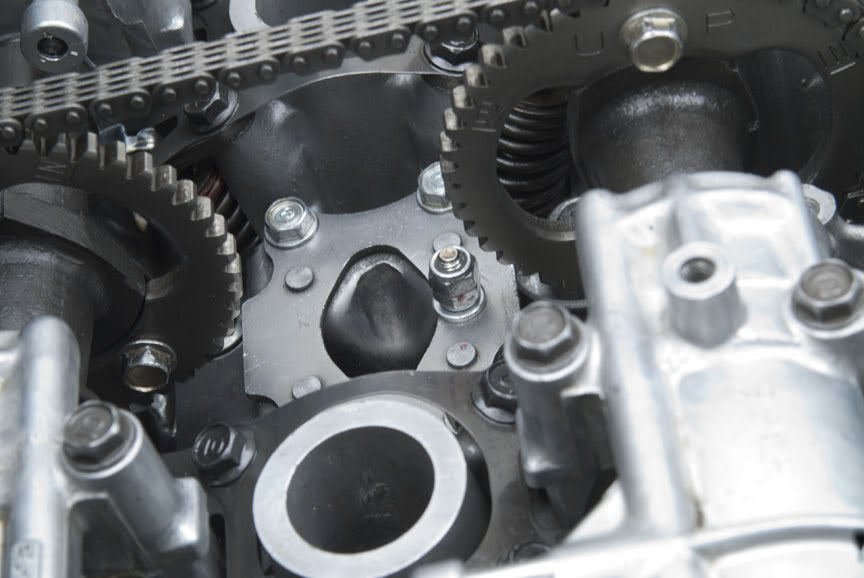
And here in it's home sweet home. Time ran out this afternoon, so the bike won't fire until tomorrow. It's like waiting for Christmas when I was a kid.
I'll post tomorrow night and let you know if it worked.
I didn't think of pictures until they were requested. By then the initial process of removing and disassembling the CCT was done, so pictures take up part way through.
Here's the bolt that will be used along with the CCT arm that has been ground to take the bolt. A 5x80 bolt was suggested, but all that was available here was a 6x80. It was a snug fit. I ran a 1/4 inch drill bit through the arm and loosened things up a little.
Included in the picture are the old rivet, spacer and the new rivet. More about that rivet later.
A detail view of what was ground off. As said in butthead's instructions, take only as much as is needed to fit the bolt.
Slide the bolt through the arm thusly.
Since I really dislike expensive noises within my engine, the bolt was safety wired to the arm. The chance that the head would snap off is minuscule, but I'm paranoid about things like that. A 1/16" hole drilled through the bolt head accepted the wire.
It took a couple different tries to find a way to thread the wire so everything cleared inside the CCT. This arrangement left everything room to move.
In his directions butthead cut a slot to take the bolt. I decided that a hole drilled through would weaken the top plate less. A 1/4" hole left enough room for the 6mm bolt to move freely.
A trial assembly showed everything ready to go. It takes a little fiddling to get it all together.
Getting a rivet to replace the one ground off when disassembling the CCT was the most difficult part of this project. Finally, a 6x30 bolt was chucked in the drill press and filed to the appropriate size. Not elegant, but it worked. After getting to this point the oil cup was filled and the lever worked until the oil reservoir was filled. It took about three cup fillings before the resevoir was completely full.
Here's the finished project with two nylock nuts waiting to do their job. You can see the safety wiring inside.
And here in it's home sweet home. Time ran out this afternoon, so the bike won't fire until tomorrow. It's like waiting for Christmas when I was a kid.
I'll post tomorrow night and let you know if it worked.
Last edited by DRam; May 8, 2011 at 06:45 PM.
Thread Starter
|
Very Honorable Most Senior Member :)
Joined: Jul 2005
Posts: 769
Likes: 2
From: Central Montana, USA
Project completed. I got the bike glued back together today, fired it up and went for a ride. Ahhh, silence. No rattles. Only five miles, but it hasn't broken yet.
Well done D. Ace pictures too. There's now no doubt that this modification can and does work.
Please do post up again to let us know how often you need to adjust it (if at all) or if the rattle reappears.
There's nothing like a long term test to prove the theory in practice.
I'll very likely be following suit as I'm sure others will.
Thanks again for taking the time to explain the work. 5 stars and a feather in your cap matey.

Redcoat, & Maxwell's Silver Hammer, MVN and curmudgeon
Joined: Dec 2007
Posts: 11,608
Likes: 5
From: Mud hut, Zululand
I can see the sales of new camchains falling as we speak.................
Great job.
I wonder if it would be possible to cut a hole in the tappet cover, to take, say, a rubber plug (like some rubber plugs used to keep water off the plugs in some engines)
This would allow adjustments without removing the tappet cover......HOOOO what a bargain !!!! (assuming regular adjustments are even neccessary)
WHY COULDN'T ALL THE THOUSANDS OF DESIGN ENGINEERS AT HONDA COME UP WITH THIS ??????????????
Sometimes less really is more - the old CB750 tensioner - case in point.
Now all we need is a way to improve the design of the primary chain tensioner, and my life will be complete !!!
 , great pics nice write up, like Pete's idea about putting an access hole
Any news DR? Is she still quite as a mouse? Have you needed to adjust it since initial installation?
How many miles etc etc etc?
C'mon man. this is important! We ALL need to know!!!
How many miles etc etc etc?
C'mon man. this is important! We ALL need to know!!!

Thread
Thread Starter
Forum
Replies
Last Post