Angel Eyes/Demon Eyes- how to (1000RR) -lots of pics


Thread Starter
|
Senior Member
Joined: Aug 2006
Posts: 1,284
Likes: 0
From:
This is a How-To MAKE and install your own angel eyes or demon eyes.
First off - I used a video that I initiall found in the F4I section. The same video was posted in this section click here - thanks to the people who posted this.
you will need the following items:
Common tools that are likely to already be in your garage
. -ruler
. -drill
. -Dremel tool (or a hacksaw might work, but that would be a pain)
. -Screwdrivers, socket set, allen set (typical tools to take your fairings off)
. -pliers
. -heat shrink
. -electrical tape, electrical wire, and wire strippers
Probably not already in your garage
. -foil tape (used for duct work in houses)
. -clear nail polish/hardner
. -at least 8 ultrabright LED's (I would suggest at least 12) (Ebay is good- I bought from seller "auspicious.e")
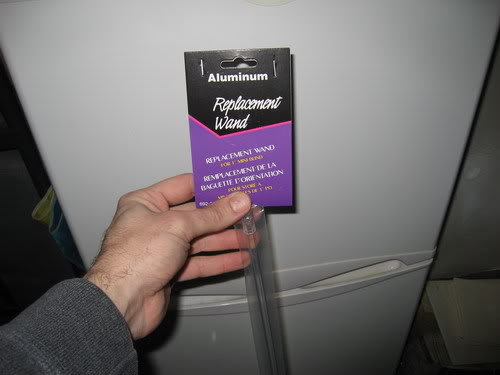
. -2- mini blind/window blind rods (~$3 each ($6 total) at home depot or lowes- hexagon in shape)
I think that covers everything. If I am missing something, let me know. You should NOT need any resistors.
a photo of the mini blind rods that you need to get (you will need 2 of these)
-------------------------------------------------------------------------------
removing the headlights from the bike
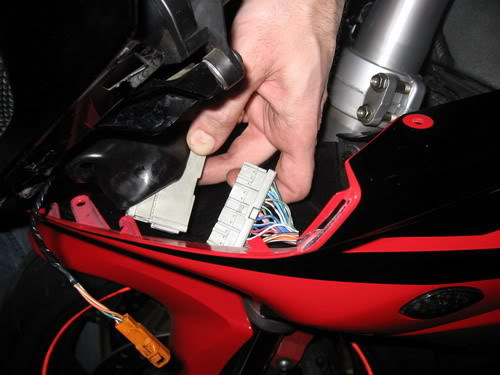
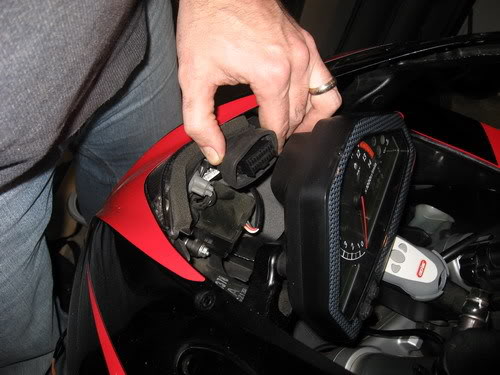
I think most of us are familiar with removing the cowling, just remember to disconnect the electrical harnesses and the wires that go to the turn signals.
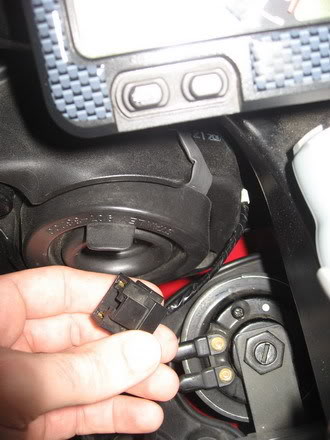
Remove the 2 nuts that hold the tip-over sensor (the center 2 highlighted circle). There is a screw behind this sensor - this also needs to be removed. Also remove the other 4 screws holind the fairing to the headlight assembly (the other 4 yellow circles in this photo):
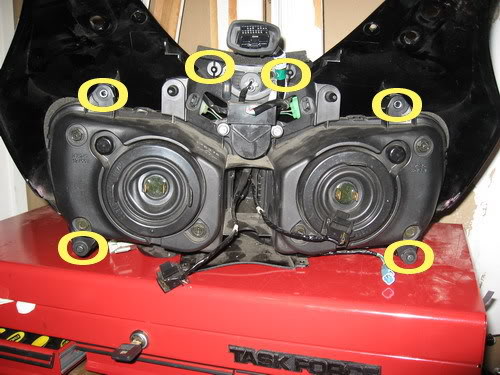
Make sure you dont loose any of the 5 removable fasteners/nuts:
------------------------------------------------------------------------------------
I decided to remove all wire harnesses BEFORE placing the unit into the over (just to be safe)
To do this, you will need to disconnect the tip-over sensor:

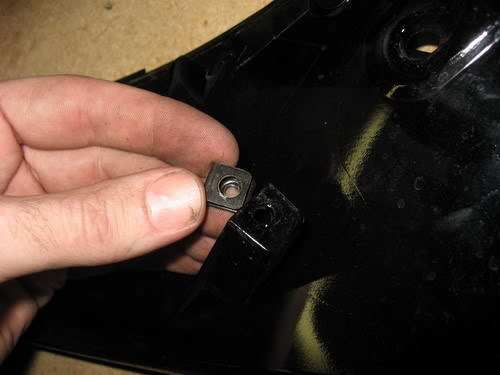
I also removed the headlights themselves. Now it is time to cook. I preheated my oven to 250 and then I placed the unit in the oven for 6 minutes. This is enough time to heat and loosen the adhesive. Then I used a screwdriver to open the tabs and I was able to seperate the headlight casing from the rest of the unit.
First off - I used a video that I initiall found in the F4I section. The same video was posted in this section click here - thanks to the people who posted this.
you will need the following items:
Common tools that are likely to already be in your garage
. -ruler
. -drill
. -Dremel tool (or a hacksaw might work, but that would be a pain)
. -Screwdrivers, socket set, allen set (typical tools to take your fairings off)
. -pliers
. -heat shrink
. -electrical tape, electrical wire, and wire strippers
Probably not already in your garage
. -foil tape (used for duct work in houses)
. -clear nail polish/hardner
. -at least 8 ultrabright LED's (I would suggest at least 12) (Ebay is good- I bought from seller "auspicious.e")
. -2- mini blind/window blind rods (~$3 each ($6 total) at home depot or lowes- hexagon in shape)
I think that covers everything. If I am missing something, let me know. You should NOT need any resistors.
a photo of the mini blind rods that you need to get (you will need 2 of these)
-------------------------------------------------------------------------------
removing the headlights from the bike
I think most of us are familiar with removing the cowling, just remember to disconnect the electrical harnesses and the wires that go to the turn signals.
Remove the 2 nuts that hold the tip-over sensor (the center 2 highlighted circle). There is a screw behind this sensor - this also needs to be removed. Also remove the other 4 screws holind the fairing to the headlight assembly (the other 4 yellow circles in this photo):
Make sure you dont loose any of the 5 removable fasteners/nuts:
------------------------------------------------------------------------------------
I decided to remove all wire harnesses BEFORE placing the unit into the over (just to be safe)
To do this, you will need to disconnect the tip-over sensor:
I also removed the headlights themselves. Now it is time to cook. I preheated my oven to 250 and then I placed the unit in the oven for 6 minutes. This is enough time to heat and loosen the adhesive. Then I used a screwdriver to open the tabs and I was able to seperate the headlight casing from the rest of the unit.
Thread Starter
|
Senior Member
Joined: Aug 2006
Posts: 1,284
Likes: 0
From:
Now to the making of the angel/demon eyes:
Keep in mind that the link to the video mentioned above is an excellent resource!
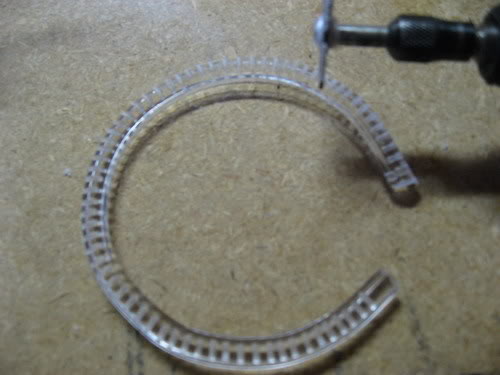
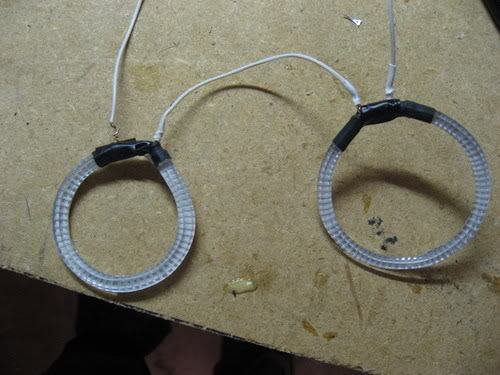
cut 2 lengths of the mini blind rod to 8 1/2 inches and then cut 2 more at 7 inches.
You now have TWO: 8-and-a-half inch long pieces and TWO: 7 inch long pieces.
Also place these in the oven for about 6 minutes (only work with 2 at a time).
wearing gloves, take one out of the oven and curve them around a circular object (I used 2 different sized aerosol cans).repeat.
Once you have the curved pieces, start making cuts in them with your dremel tool.
This is only to refract the light, so the cuts do not have to be deep.
Then drill out a space (at both ends) for the LED. This takes a steady hand.
I made mine deep enough to fit about 1/3 of the LED.
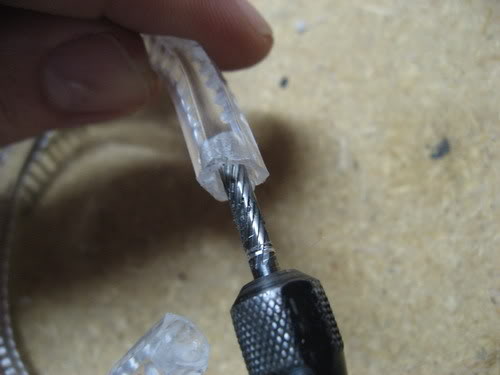
Put a light coat of clear nail polish into the newly drilled holes.
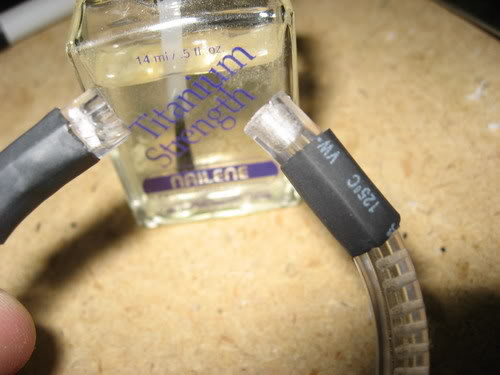
I also put on some heat-shrink tubing which I will heat after I install the LEDs.
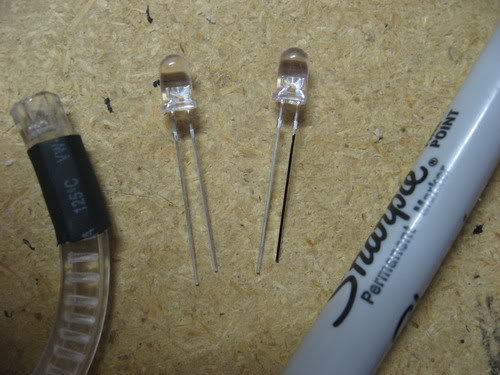
TIP: mark the short ends of the LED's with a black sharpie (like the LED on the right)
The shorter wires are negative, the larger are positive.
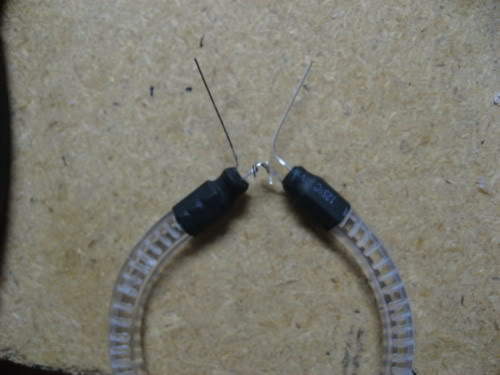
heat-shrink the LEDs into the holes. Connect one of the positive ends to the negative end on the other LED.
put electrical tape around the two wires that you just connected
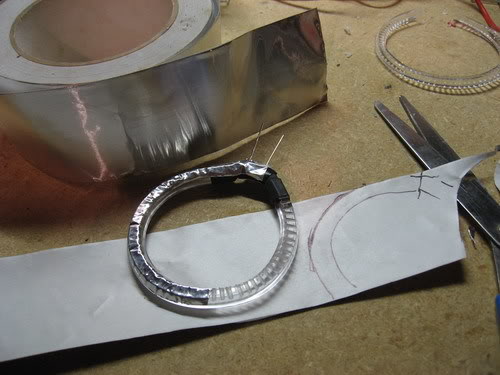
Trace out and cut some foil tape - this will help focus the light to the front.
You will put the tape over the cuts that you made.
IMPORTANT: the foil CAN conduct electricity, so do not let it touch the wires.
Wire a positive of one "eye" to the negative of the othe "eye". Also add wires to connect to a power source later on.
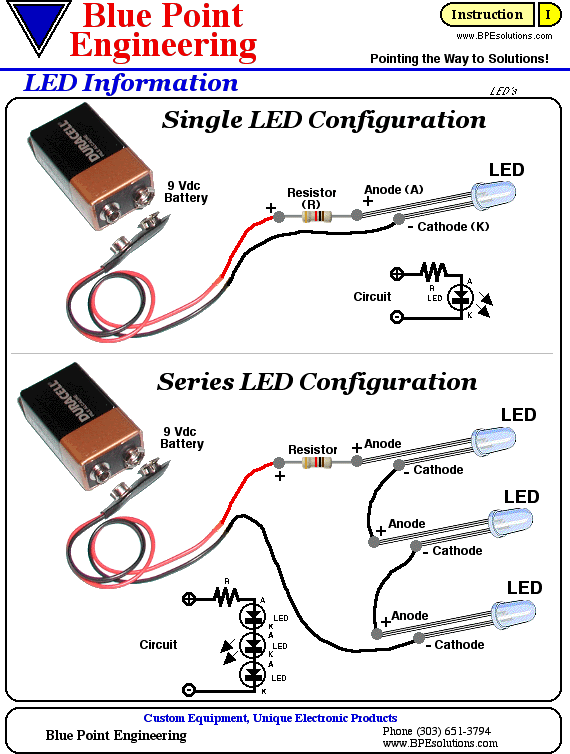
If you have 4 extra LED's, wire them together (pos.-neg-pos-neg-pos-neg, etc) and test them on a regular 12v. source (i.e. car battery). 4 ultra bright LEDs (wired in serial SIMILAR to the image below but without the resistor) should have enough resistance on a 12 volt source so they will not burn out.If that works, then it should be safe to light up your new eyes.
Tape the "eyes" into your light housing to find out how/where you want yours to be located.
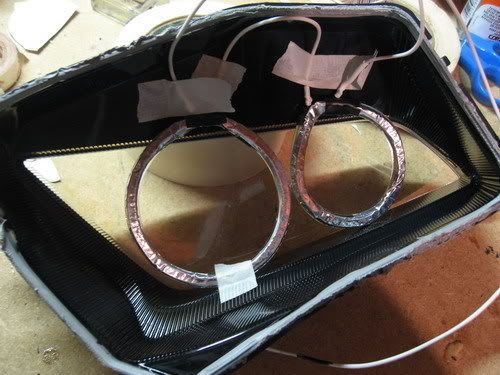
Once you have them positioned, Glue them in place. DO NOT USE Gorilla Glue- That crap bubbled up on me! I would suggest the two part plastic epoxy - it sets quick and holds strong. Don't go overboard on the glue.
Now the hard part wait for the glue to dry.
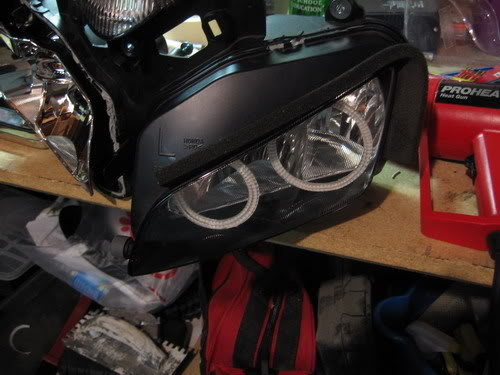
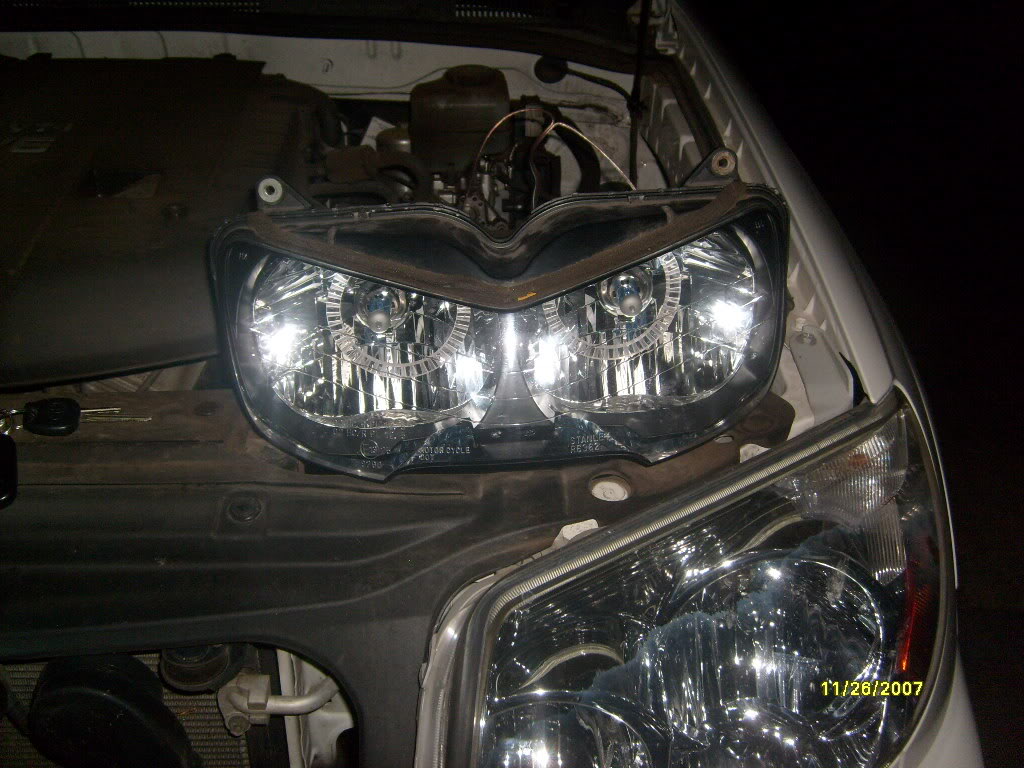
Finally- time to reassemble. I left my low beam headlight out. I wired my angel eyes to a 12v power source (my running cat eye (center light between the two headlights and at the bottom of the windscreen). You might have to drill a hole to run your wires out of the headlight assembly. I was able to bend the wire enough that the large rubber grommet still fit.
Keep in mind that the link to the video mentioned above is an excellent resource!
cut 2 lengths of the mini blind rod to 8 1/2 inches and then cut 2 more at 7 inches.
You now have TWO: 8-and-a-half inch long pieces and TWO: 7 inch long pieces.
Also place these in the oven for about 6 minutes (only work with 2 at a time).
wearing gloves, take one out of the oven and curve them around a circular object (I used 2 different sized aerosol cans).repeat.
Once you have the curved pieces, start making cuts in them with your dremel tool.
This is only to refract the light, so the cuts do not have to be deep.
Then drill out a space (at both ends) for the LED. This takes a steady hand.
I made mine deep enough to fit about 1/3 of the LED.
Put a light coat of clear nail polish into the newly drilled holes.
I also put on some heat-shrink tubing which I will heat after I install the LEDs.
TIP: mark the short ends of the LED's with a black sharpie (like the LED on the right)
The shorter wires are negative, the larger are positive.
heat-shrink the LEDs into the holes. Connect one of the positive ends to the negative end on the other LED.
put electrical tape around the two wires that you just connected
Trace out and cut some foil tape - this will help focus the light to the front.
You will put the tape over the cuts that you made.
IMPORTANT: the foil CAN conduct electricity, so do not let it touch the wires.
Wire a positive of one "eye" to the negative of the othe "eye". Also add wires to connect to a power source later on.
If you have 4 extra LED's, wire them together (pos.-neg-pos-neg-pos-neg, etc) and test them on a regular 12v. source (i.e. car battery). 4 ultra bright LEDs (wired in serial SIMILAR to the image below but without the resistor) should have enough resistance on a 12 volt source so they will not burn out.If that works, then it should be safe to light up your new eyes.
Tape the "eyes" into your light housing to find out how/where you want yours to be located.
Once you have them positioned, Glue them in place. DO NOT USE Gorilla Glue- That crap bubbled up on me! I would suggest the two part plastic epoxy - it sets quick and holds strong. Don't go overboard on the glue.
Now the hard part wait for the glue to dry.
Finally- time to reassemble. I left my low beam headlight out. I wired my angel eyes to a 12v power source (my running cat eye (center light between the two headlights and at the bottom of the windscreen). You might have to drill a hole to run your wires out of the headlight assembly. I was able to bend the wire enough that the large rubber grommet still fit.
Thread Starter
|
Senior Member
Joined: Aug 2006
Posts: 1,284
Likes: 0
From:
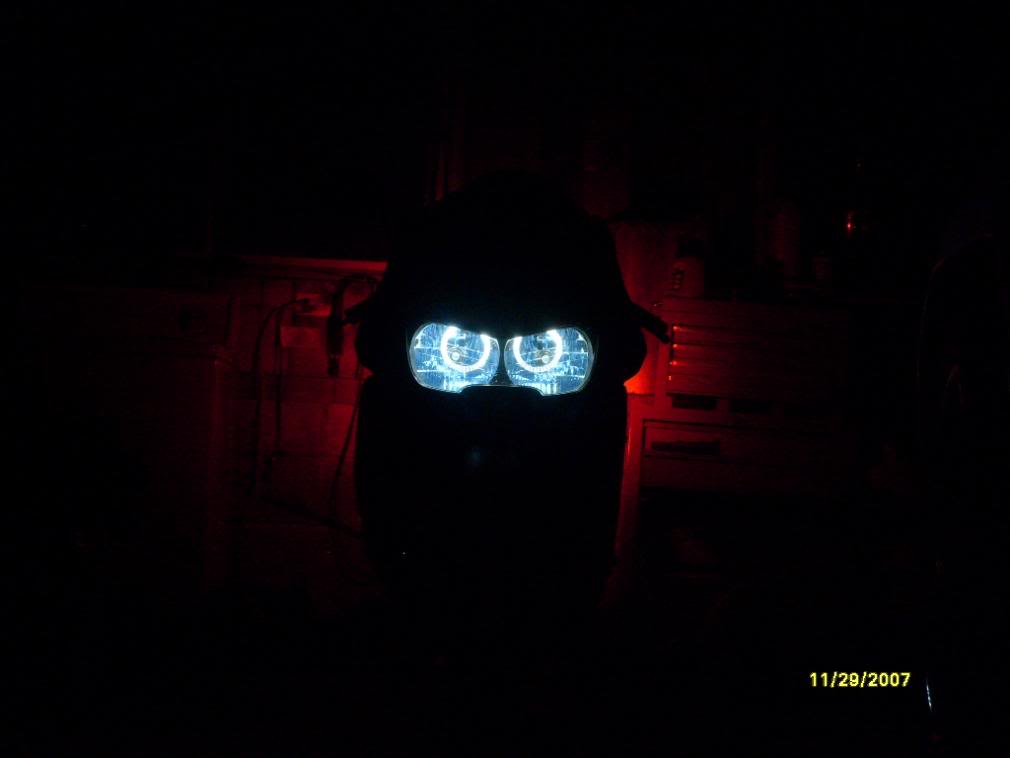
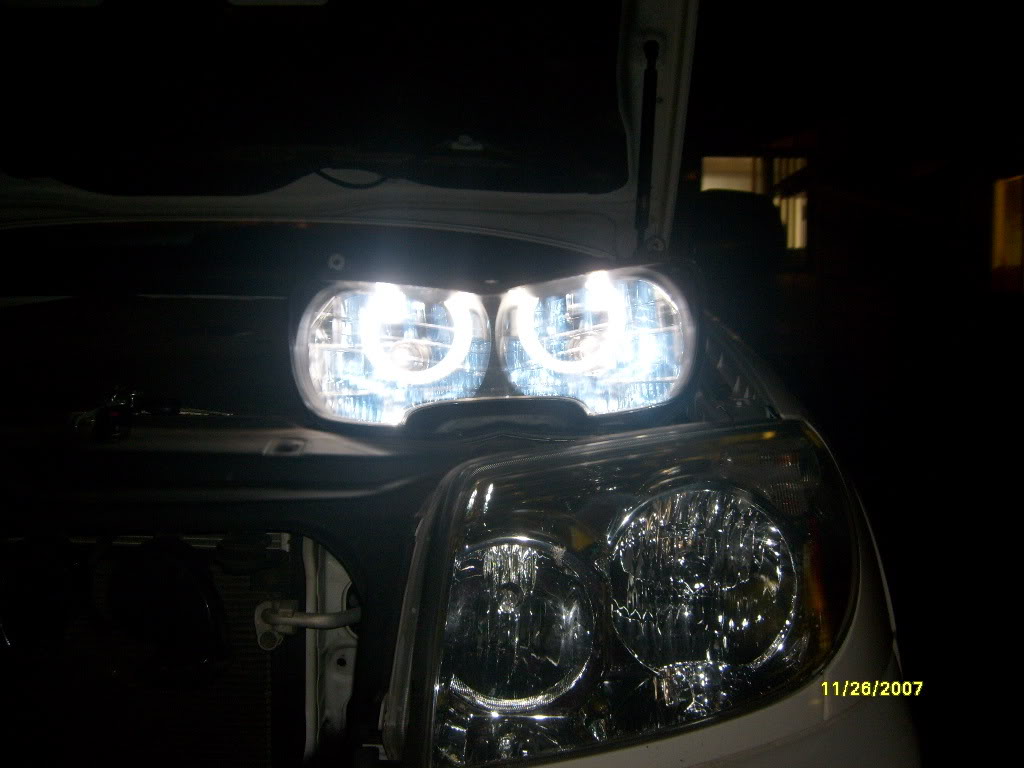
Finally...
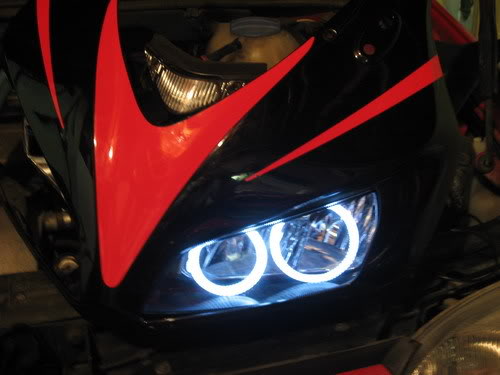
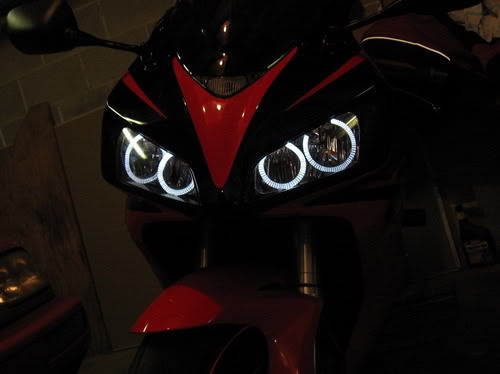
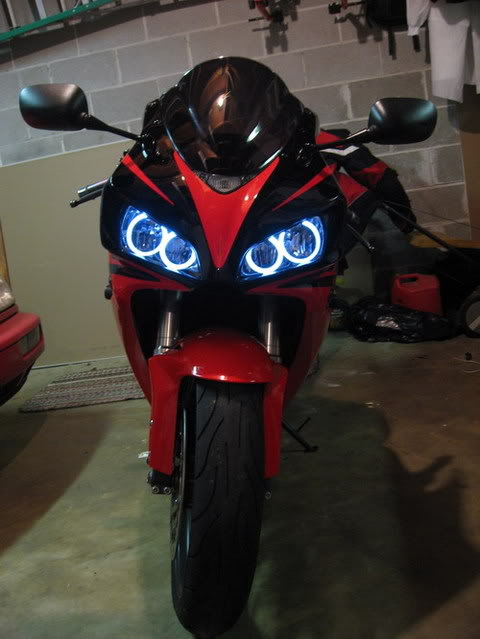
Unfortunately, direct sunlight washes out the LEDs, but I still think it looks cool. Like I said before, I would have LOVED to use red, but I don't want any trouble with Law Enforcement Officers.
Ask any questions- I will do my best to answer them. Your opinions are always welcome (well, almost always)


Senior Member
Joined: Oct 2006
Posts: 1,050
Likes: 0
From: Fort Washington, MD
Wow, very awesome write up. I read another one on how to make angel eyes, but you've definately added some different and nice touches to yours.[sm=smiley20.gif][sm=smiley20.gif]

Senior Member
Joined: Feb 2007
Posts: 571
Likes: 0
Yeah man, looks awesome - my process got delayed cuz when I brought my angel eyes into work to show some buddies, they connected the LED's directly to the battery (bypassing the resistor...) so : oof:: there goes my LED's
 But I ordered a ton more, and I got another one of my "surprises" in the mail to continue the squidification of my f4i - anybody curious can check out this page - https://cbrforum.com/m_53586/mpage_3/tm.htm - I will also be doing a f4i specific write-up when I find some time.
When all is said and done I'm going to have 104 LED's including two special LED's yay!
yay!
oof:: there goes my LED's But I ordered a ton more, and I got another one of my "surprises" in the mail to continue the squidification of my f4i - anybody curious can check out this page - https://cbrforum.com/m_53586/mpage_3/tm.htm - I will also be doing a f4i specific write-up when I find some time.When all is said and done I'm going to have 104 LED's including two special LED's
yay!
Thread Starter
|
Senior Member
Joined: Aug 2006
Posts: 1,284
Likes: 0
From:
Also...
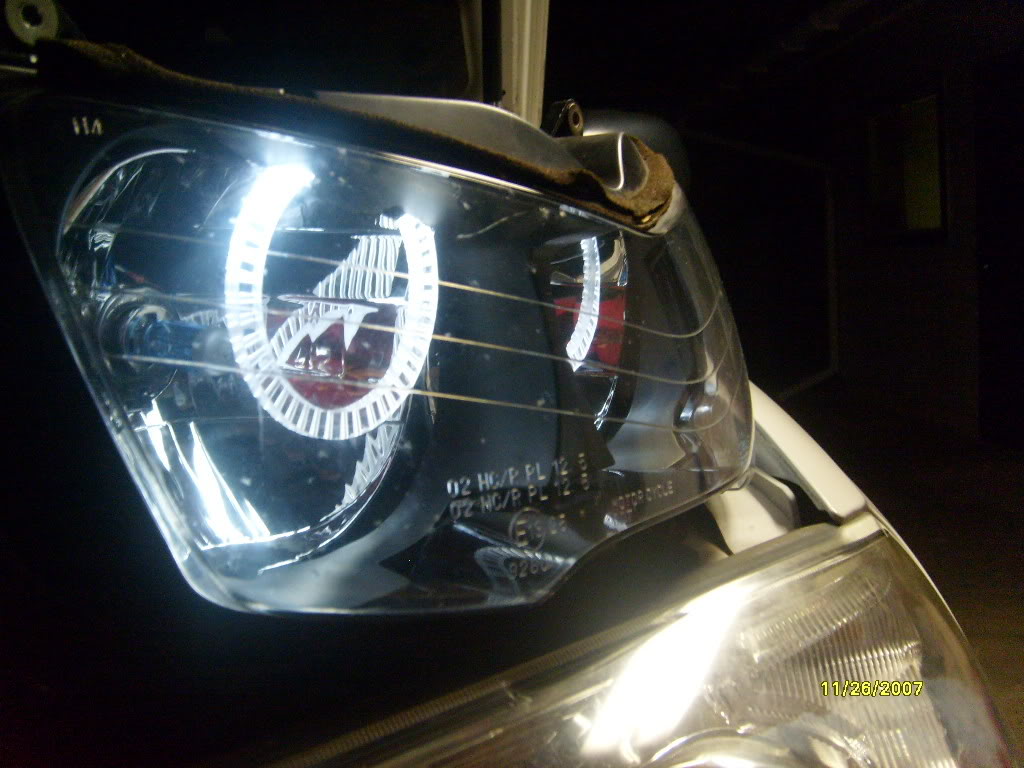
Here is a photo of what I meant by "bend the wire enough that the large rubber grommet still fit". You can see the grey wire coming out of the top right.
This way- I didn't have to drill into the light housing.
I also left the low beam unplugged so only the angel eyes are on.
I still have my hi-beam light hooked up for night time...