
Led


Banned
Joined: Nov 2010
Posts: 489
Likes: 0
Sure, you can use a mini add-a-circuit like that, will give you a fresh power wire right from your fuse box (only downside is you can't close it).
Run the power wire to switch, and from the switch to your lights and you can use it anytime, bike on or off, key or no key.
Run the power wire to switch, and from the switch to your lights and you can use it anytime, bike on or off, key or no key.
So this would plug directly into the fuse box? Where exactly would it plug into?
And I am doing audi style lights on my headlights, so would I be able to run a wire all the way back to the fuse box?
And what do you mean when you say you can't close it?

Welcome Crew and May 2012 Ride of the Month
Joined: Aug 2010
Posts: 1,563
Likes: 2
From: Kitchener, Ontario
I know nothing about wiring so excuse the noob questions....
So this would plug directly into the fuse box? Where exactly would it plug into?
And I am doing audi style lights on my headlights, so would I be able to run a wire all the way back to the fuse box?
And what do you mean when you say you can't close it?
So this would plug directly into the fuse box? Where exactly would it plug into?
And I am doing audi style lights on my headlights, so would I be able to run a wire all the way back to the fuse box?
And what do you mean when you say you can't close it?
And he meant "can't close it" if you are wiring it drirectly to a source that is on whenever the bike is running then if you wanted them off you can turn them off while driving.
If your doing the Audi headlights I see why you would want that and you could splice into your lo-beam.
I personally with the Audi headlights would do the 3wire to 2 wire How to and make them running/ turn signals.
Banned
Joined: Nov 2010
Posts: 489
Likes: 0
I want the audi lights to run independently from everything else. That way if I don't want them I can take them out quick and easy. I know I could just splice intot he low beam, but I really would rather it be independent from everything else.
Anyone have any ideas on how to wire this in with a switch directly to the battery/fuse box?
Anyone have any ideas on how to wire this in with a switch directly to the battery/fuse box?
Welcome Crew and May 2012 Ride of the Month
Joined: Aug 2010
Posts: 1,563
Likes: 2
From: Kitchener, Ontario
You can use a inline fuse to a switch where ever you want to put it, (maybe in the holes in the air duct covers) and just have the switch turn them on and off but you will have to tuen them off everytime you turn the bike off. I havent looked at the fuse box in awhile so I am not sure if there is an auxilary spot or not.
Banned
Joined: Nov 2010
Posts: 489
Likes: 0

Member
Joined: Jun 2011
Posts: 38
Likes: 0
From: San Diego
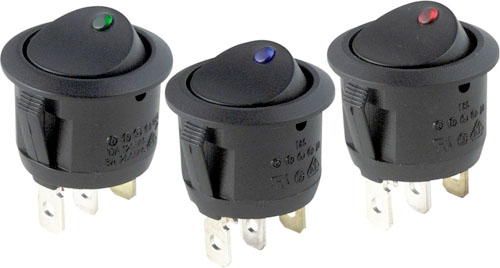
Thats a perfect diagram if you want a rocker switch that has a light built in to confirm they are on.
I added the "audi" headlights to my f4i as well. I have a standard rocker switch with no extra light on it and with that you just have to run the pos to the switch rather than the pos and ground. I just placed the switch in one of the little holes in the air duct cover, than way no drilling was needed and is easily removable. Also in an easy to reach spot.
Banned
Joined: Nov 2010
Posts: 489
Likes: 0
Thats a perfect diagram if you want a rocker switch that has a light built in to confirm they are on.
I added the "audi" headlights to my f4i as well. I have a standard rocker switch with no extra light on it and with that you just have to run the pos to the switch rather than the pos and ground. I just placed the switch in one of the little holes in the air duct cover, than way no drilling was needed and is easily removable. Also in an easy to reach spot.
I added the "audi" headlights to my f4i as well. I have a standard rocker switch with no extra light on it and with that you just have to run the pos to the switch rather than the pos and ground. I just placed the switch in one of the little holes in the air duct cover, than way no drilling was needed and is easily removable. Also in an easy to reach spot.
Number 2 - could you possibly snap a couple pics to show me the switch location, and any other pics that may help.
I know its a pain in the *** to take pics and then load them, but you would really help me out.
Welcome Crew and May 2012 Ride of the Month
Joined: Aug 2010
Posts: 1,563
Likes: 2
From: Kitchener, Ontario


Welcome Crew and May 2012 Ride of the Month
Joined: Aug 2010
Posts: 1,563
Likes: 2
From: Kitchener, Ontario
But you will most likely have to strecth the hole if you want it to fit,
You could just drill it,
Its not hard at all, lol
I had to drill just a touch and mine was like the one below.
That swich will look pretty awesome though, and will sit fairly flush.
With mine I had to remove the baffle Triangular thing (brain fart on the name) so I could put the wiring behind there, but I also had a variable resistor and my HID wiring back there.

Last edited by jeffjones; Aug 3, 2011 at 01:03 PM.