
Oil-drenched engine
#131
 04-01-2015, 11:34 AM


#132
04-01-2015, 02:41 PM

Haha, I listen to everything you guys say, otherwise I wouldn't be able to do anything right.
So today I put the carbs back together. I had separated them from the linkage and every time I thought I had put them back I noticed that I had forgot a spring, or an o-ring or something else. Took me like eight attempts before I got everything in. Then I loosely mounted the steering stem and triple tree just to have a look at it, I mounted the radiator and the battery box and I started with the wiring harness when I realized that the ground point for the R/R is now covered with beautiful non-conductive powder coat. No worries though, I'll just lengthen the cable and attach it to some other point.

So today I put the carbs back together. I had separated them from the linkage and every time I thought I had put them back I noticed that I had forgot a spring, or an o-ring or something else. Took me like eight attempts before I got everything in. Then I loosely mounted the steering stem and triple tree just to have a look at it, I mounted the radiator and the battery box and I started with the wiring harness when I realized that the ground point for the R/R is now covered with beautiful non-conductive powder coat. No worries though, I'll just lengthen the cable and attach it to some other point.
#133
04-06-2015, 04:25 PM
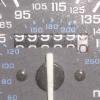
Pictorial update after the fifteen hours or so of wrenching this Easter. I still haven't fired her up, because I have some wiring to do with installing my new speedometer and will go through the carbs properly too, but compared to the state my poor bike was in a couple of weeks ago, it feels good to see her again.


#134
04-06-2015, 04:35 PM

Going along nicely  How much did those bar clamps set you back? Was considering something like that myself but it would have msde the already upright front end even more so to push the shocks through.
Bet you're itching to get it back on the black already! Just fetched my summer car from my moms today after yelling profanities under it most of the easter trying to swap some suspension parts and should be getting the trumpet's fairings by the end of this week.
Btw, 1-2.8. There's a big trackday weekend @ Botniaring, Jurva. Me and missynet are probly going, it's not far from the west coast. 56km from Vaasa, 296km from Turku
How much did those bar clamps set you back? Was considering something like that myself but it would have msde the already upright front end even more so to push the shocks through.Bet you're itching to get it back on the black already! Just fetched my summer car from my moms today after yelling profanities under it most of the easter trying to swap some suspension parts and should be getting the trumpet's fairings by the end of this week.
Btw, 1-2.8. There's a big trackday weekend @ Botniaring, Jurva. Me and missynet are probly going, it's not far from the west coast. 56km from Vaasa, 296km from Turku
#135
04-06-2015, 04:49 PM
Those clamps, together with the bar and brake hoses (they were a LSL Superbike kit), set me back like 2 500 SEK (350 dollars I reckon). Expensive as hell, but still the cheapest around with a decent delivery time (bought them during last season and wanted them ASAP). I had to get them, the clipons killed my back.
I am so eager to get out now, but fortunately I have my street legal KTM 450 EXC to ride around with, and a buddy lends me his old Yamaha XS400 to scratch the itch. Selling my EXC though, so I can afford a KTM 690. I want something with fuel injection and motored riding is FUN!
Haha, track day, you say... Maybe I should take a look at that one. I was planning to ride around Europe anyways. My mods have probably ruined all the track in her though, hehe.
#136
04-06-2015, 05:09 PM
Pictorial update after the fifteen hours or so of wrenching this Easter. I still haven't fired her up, because I have some wiring to do with installing my new speedometer and will go through the carbs properly too, but compared to the state my poor bike was in a couple of weeks ago, it feels good to see her again.
One of these days I'm going to get around to working on mine...
#137
04-07-2015, 11:19 AM

Great thread, never noticed it before. I took my spare F3 engine apart sometime in October and left all the parts on my work bench. I recently tried to put it back together and since I didn't label or put any kind of order in the disassembly, I now have no idea were anything go. I'm probably just going to trash the engine and not deal with it since I don't think I want to spend the rest of my summer trying to figure out what go where.
When I took the engine apart I had the right tools so it basically took me a few hours to completely take the whole thing apart. The only thing I was worried about was the timing and how to degree it after I put it back together. How did you get past that obstacle?
When I took the engine apart I had the right tools so it basically took me a few hours to completely take the whole thing apart. The only thing I was worried about was the timing and how to degree it after I put it back together. How did you get past that obstacle?
#138
04-07-2015, 11:59 AM
Hey man, if you want you could probably mail me some pics and I could help you out in which order and how to do it. I totally understand your confusion, trust me, I was there a few weeks ago myself. I even made and still make the same mistakes of putting things back in the wrong order, only to have to it again later on.
The timing... Disclaimer: I haven't tried firing up the engine yet so I don't know if I'm on, but what I did was that I lined up the marking on the sprocket of the crankshaft (right side, the one visible when the ignition cover is removed) with the marking on the cover itself (the one visible when removing the inspection cap from the ignition cover in place. My sprocket was apparently aftermarket and lacked the marking, but fortunately for me, Phil314 posted a great pic which I used to scratch my own market in the sprocket. With that in place I installed the camshafts and cam chain, taking care to line up the markings of the shafts with the edge of the cylinder head and making sure that the camshafts were pointing in different directions. Hopefully that means the timing will be good when I try it. But of course I will let you know if all this was done in vain or not.
The timing... Disclaimer: I haven't tried firing up the engine yet so I don't know if I'm on, but what I did was that I lined up the marking on the sprocket of the crankshaft (right side, the one visible when the ignition cover is removed) with the marking on the cover itself (the one visible when removing the inspection cap from the ignition cover in place. My sprocket was apparently aftermarket and lacked the marking, but fortunately for me, Phil314 posted a great pic which I used to scratch my own market in the sprocket. With that in place I installed the camshafts and cam chain, taking care to line up the markings of the shafts with the edge of the cylinder head and making sure that the camshafts were pointing in different directions. Hopefully that means the timing will be good when I try it. But of course I will let you know if all this was done in vain or not.
#139
04-07-2015, 12:15 PM
Hey man, if you want you could probably mail me some pics and I could help you out in which order and how to do it. I totally understand your confusion, trust me, I was there a few weeks ago myself. I even made and still make the same mistakes of putting things back in the wrong order, only to have to it again later on.
The timing... Disclaimer: I haven't tried firing up the engine yet so I don't know if I'm on, but what I did was that I lined up the marking on the sprocket of the crankshaft (right side, the one visible when the ignition cover is removed) with the marking on the cover itself (the one visible when removing the inspection cap from the ignition cover in place. My sprocket was apparently aftermarket and lacked the marking, but fortunately for me, Phil314 posted a great pic which I used to scratch my own market in the sprocket. With that in place I installed the camshafts and cam chain, taking care to line up the markings of the shafts with the edge of the cylinder head and making sure that the camshafts were pointing in different directions. Hopefully that means the timing will be good when I try it. But of course I will let you know if all this was done in vain or not.
The timing... Disclaimer: I haven't tried firing up the engine yet so I don't know if I'm on, but what I did was that I lined up the marking on the sprocket of the crankshaft (right side, the one visible when the ignition cover is removed) with the marking on the cover itself (the one visible when removing the inspection cap from the ignition cover in place. My sprocket was apparently aftermarket and lacked the marking, but fortunately for me, Phil314 posted a great pic which I used to scratch my own market in the sprocket. With that in place I installed the camshafts and cam chain, taking care to line up the markings of the shafts with the edge of the cylinder head and making sure that the camshafts were pointing in different directions. Hopefully that means the timing will be good when I try it. But of course I will let you know if all this was done in vain or not.