


I'm back with another build - 98 900rr

Thread Starter
|
Senior Member
Joined: Nov 2010
Posts: 124
Likes: 0

Hockey and a fairly intense course for work have kept me from my garage. I made it out there long enough to put the head together. Tomorrow is my last day of class and last weekend was the last of the hockey season, so I plan to be out there all weekend. Number 1 job is to get the engine back together and in the bike. I don't believe I'll be able to paint, because the temp isn't quite where I'd like it, but I can certainly start the body work and get everything ready.
Thread Starter
|
Senior Member
Joined: Nov 2010
Posts: 124
Likes: 0
This has been an interesting day to say the least. I've taken this engine apart 6 times today just to get to this point.
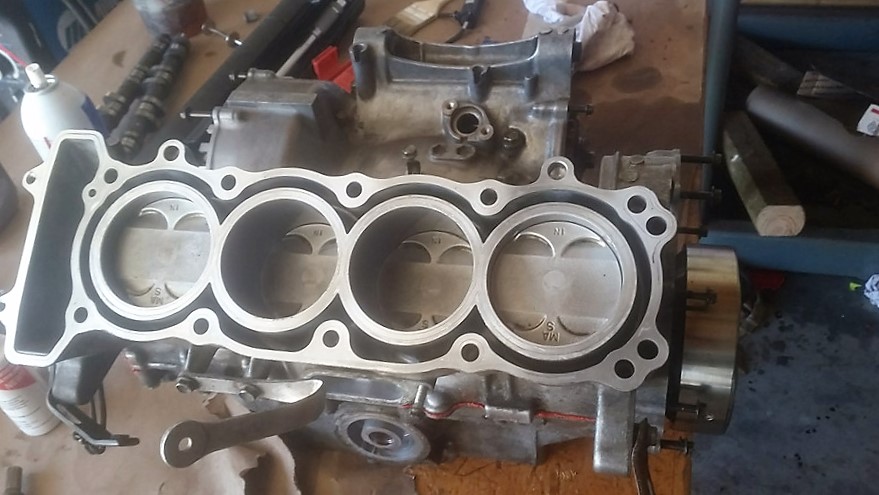
The first time was to get the transmission lined up with the studs. I then took it apart, because I didn't put sealer in an area where it was needed. I then took it apart because I didn't have the oil orifices in place. (Remember, this engine was bought in pieces.) I ended up taking the broken engine apart for the orifices. And then a few others. Keep in mind, each time you take it apart, you have to clean the gasket surfaces and bolts to prep them for the next go around.
I will say I'm a little disappointed in the factory service manual. It does a good job of telling you how to do certain tasks, but it does very little with telling you the order to do things. For example, you must install x before you can install x. I'm relatively intelligent, but I was chasing my *** most of the day.
Moving on. The next install should be the head.

The first time was to get the transmission lined up with the studs. I then took it apart, because I didn't put sealer in an area where it was needed. I then took it apart because I didn't have the oil orifices in place. (Remember, this engine was bought in pieces.) I ended up taking the broken engine apart for the orifices. And then a few others. Keep in mind, each time you take it apart, you have to clean the gasket surfaces and bolts to prep them for the next go around.
I will say I'm a little disappointed in the factory service manual. It does a good job of telling you how to do certain tasks, but it does very little with telling you the order to do things. For example, you must install x before you can install x. I'm relatively intelligent, but I was chasing my *** most of the day.
Moving on. The next install should be the head.
Retired Super Moderator and Fighterer
Joined: Nov 2006
Posts: 6,146
Likes: 37
Hey, the bottom end is together - so that's the important part. You definitely don't want any 'spare parts' leftover after you assembly. It does help to take stuff apart, and that's one of the challenges with a basket case bike.
Good job
Good job
Thread Starter
|
Senior Member
Joined: Nov 2010
Posts: 124
Likes: 0
She's starting to look like an engine again.
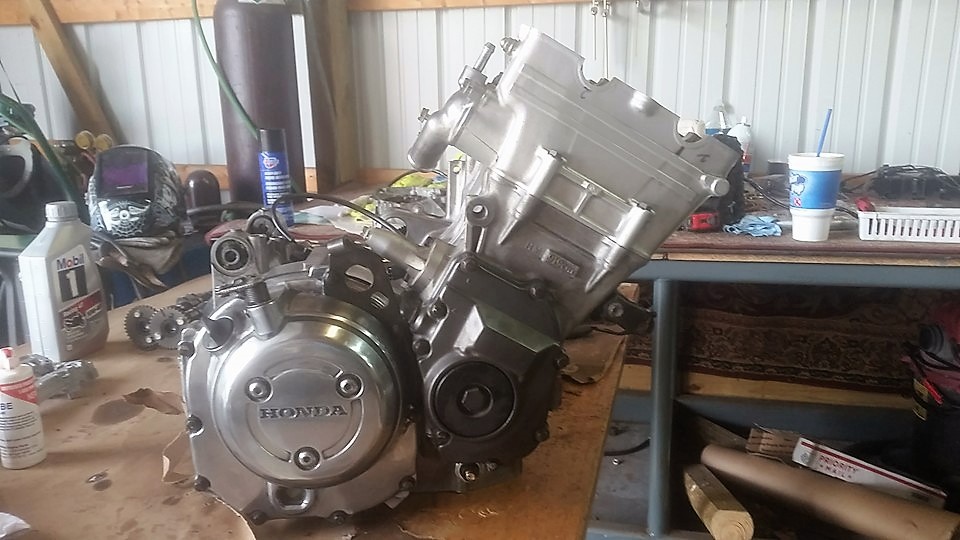
I need to replace the flywheel, because it looks like the bike was laid down at some point. Thankfully, the flywheel on my old engine is fine. I need to find the right puller for it, though.
I'm trying to come up with a good strategy for setting the valves. I have no idea which valves had which shims. I'm leaning towards putting it together without shims and going from there. The math would be easier that way. Sadly, I have to order another shim kit. I had the hot cams shims, but they've been misplaced since the move and I'll be darned if I can find them.

I need to replace the flywheel, because it looks like the bike was laid down at some point. Thankfully, the flywheel on my old engine is fine. I need to find the right puller for it, though.
I'm trying to come up with a good strategy for setting the valves. I have no idea which valves had which shims. I'm leaning towards putting it together without shims and going from there. The math would be easier that way. Sadly, I have to order another shim kit. I had the hot cams shims, but they've been misplaced since the move and I'll be darned if I can find them.
Retired Super Moderator and Fighterer
Joined: Nov 2006
Posts: 6,146
Likes: 37
They sell 'puller bolts' on eBay. Its something like an M20 x1.00 bolt and it'll push the flywheel off. Its a much cheaper alternative to your standard puller.
As for valve clearances, either way you look at it - the cams are coming off twice..... So I'd put all the shims in and go from there once you get your shim kit. You'll get lucky with some of them, I bet.
As for valve clearances, either way you look at it - the cams are coming off twice..... So I'd put all the shims in and go from there once you get your shim kit. You'll get lucky with some of them, I bet.
Thread Starter
|
Senior Member
Joined: Nov 2010
Posts: 124
Likes: 0
I took your advice and randomly threw the shims in. The results? Eight are in spec and eight are out of spec.
I need to get another battery for my calipers so I can verify the size of the current shims before I can go any further. I'll start on the body work for now and order some shims. I'll probably pick up the hot cams kit again, because it'll have everything I'll ever need. I wish I could find the one I already bought when I had the 929.
I need to get another battery for my calipers so I can verify the size of the current shims before I can go any further. I'll start on the body work for now and order some shims. I'll probably pick up the hot cams kit again, because it'll have everything I'll ever need. I wish I could find the one I already bought when I had the 929.
Thread Starter
|
Senior Member
Joined: Nov 2010
Posts: 124
Likes: 0
While I wait for my shims to arrive, I decided to start putting some lipstick on this pig. The fairings should have been a warning. Rattle can paint job = lots of sand paper used.
After much sanding, they came out pretty good.
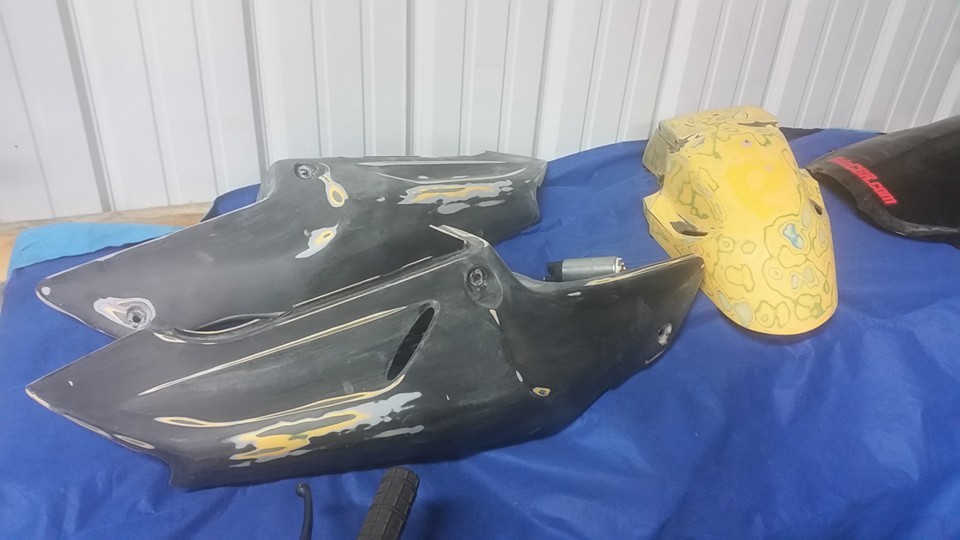
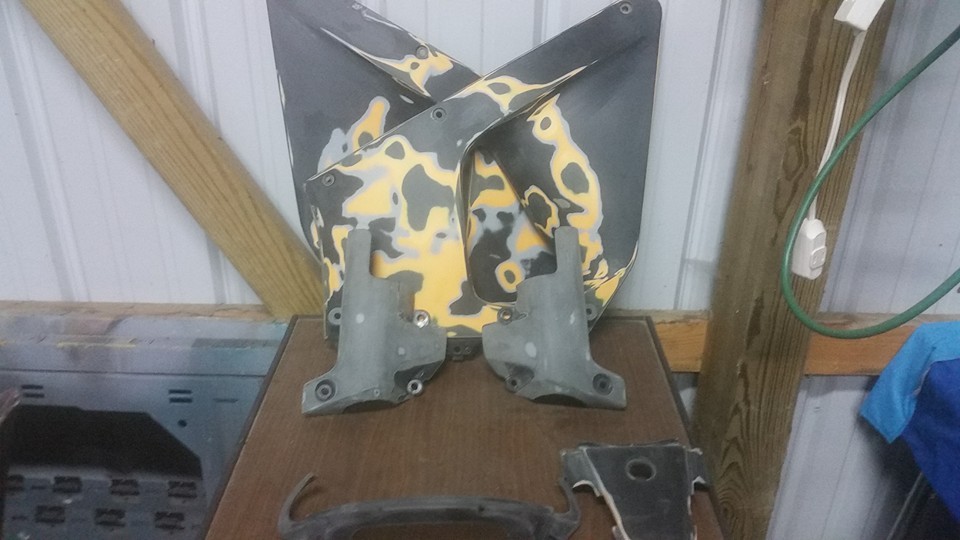
And then we got to the tank. Initially, it looked pretty good. I stumbled upon a little bondo, which is fairly common. But then, I saw a crack in the bondo and that usually only means one thing - very thick bondo. After covering my garage with bondo dust, I find this lovely piece of art. It looks like Hellen Keller was painting a picture with her poo.
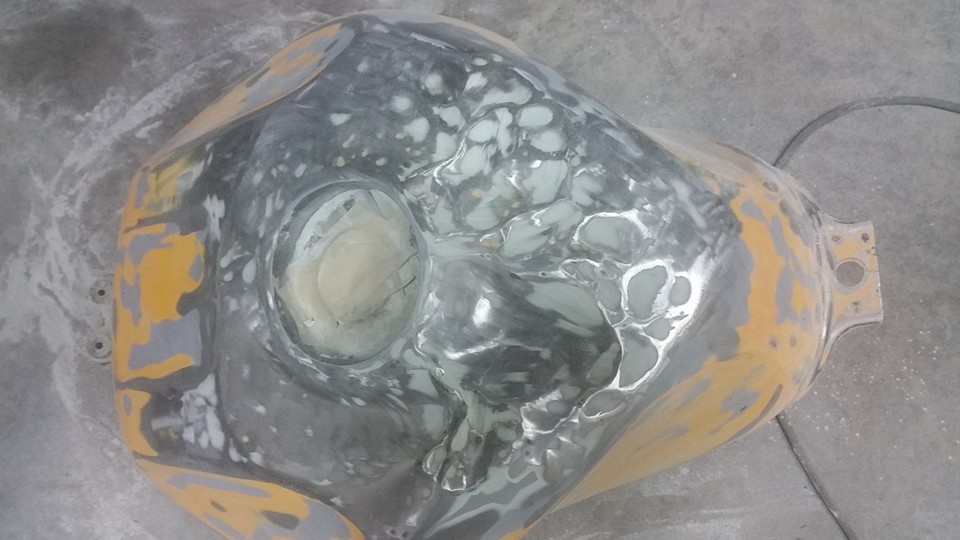
It's actually worse than it looks. Can I fix it? Probably. Will I fix it? Probably not - as long as I can find a reasonably priced tank. Such is life.
After much sanding, they came out pretty good.


And then we got to the tank. Initially, it looked pretty good. I stumbled upon a little bondo, which is fairly common. But then, I saw a crack in the bondo and that usually only means one thing - very thick bondo. After covering my garage with bondo dust, I find this lovely piece of art. It looks like Hellen Keller was painting a picture with her poo.

It's actually worse than it looks. Can I fix it? Probably. Will I fix it? Probably not - as long as I can find a reasonably priced tank. Such is life.
Thread Starter
|
Senior Member
Joined: Nov 2010
Posts: 124
Likes: 0
So I decided to take a crack at the tank. I like a challenge and secretly like pain. I pulled out the stud welder and went to work.

First few dents turned out o.k. I could work with them.
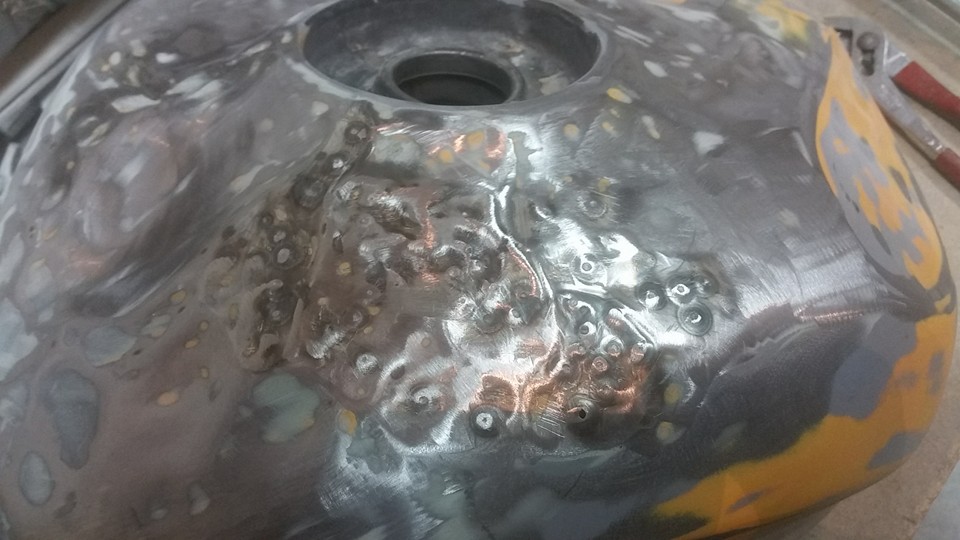
Then I came to the two really ugly dents. I tried shrinking the metal, but I fear it's too far gone. So, I buy a new one, right? Nah. That's too easy. On to the next step.
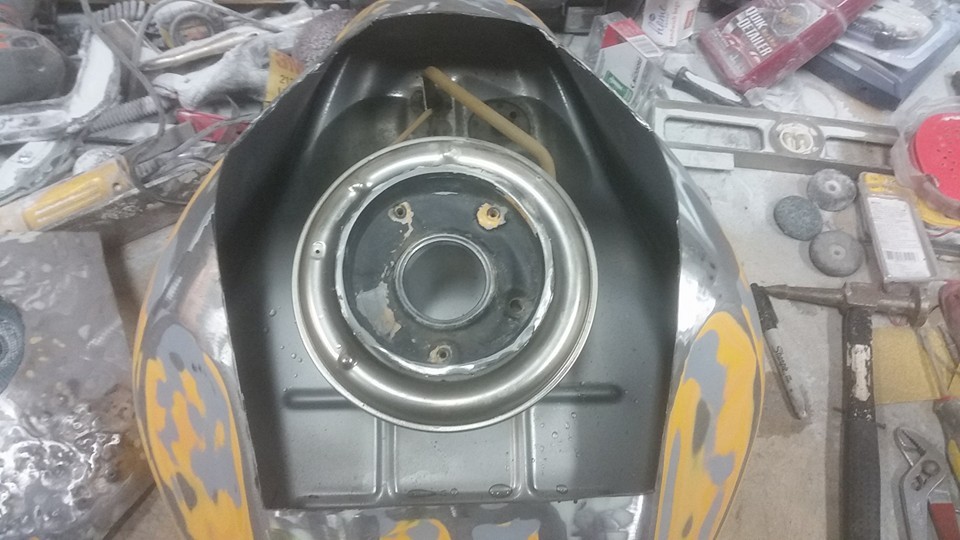
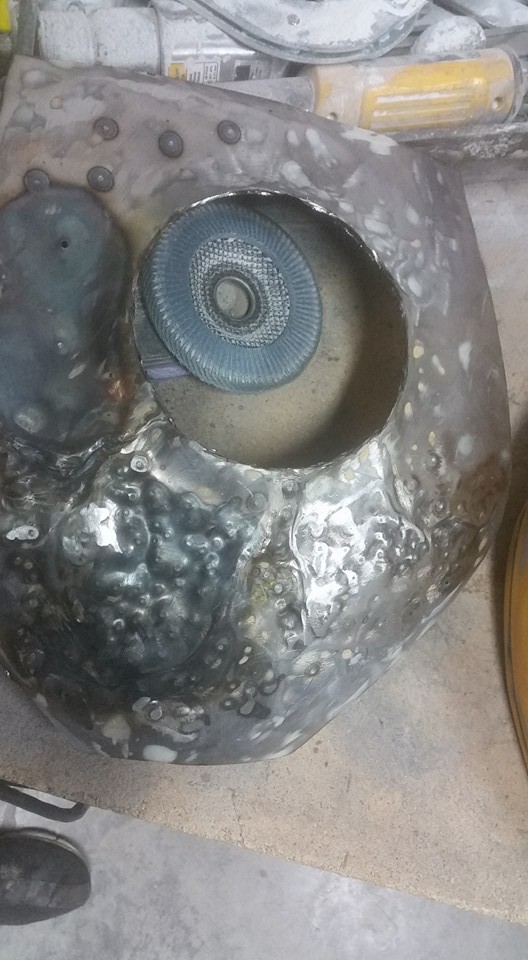
I thought about working with the metal some more, but decided I'll just make a new one. It's all jacked up and I don't think I can get it to where it needs to be with the creases. So, here we are. I'll work on the new piece tomorrow.
On a good note, I received my shims today and bought my paint.

First few dents turned out o.k. I could work with them.

Then I came to the two really ugly dents. I tried shrinking the metal, but I fear it's too far gone. So, I buy a new one, right? Nah. That's too easy. On to the next step.


I thought about working with the metal some more, but decided I'll just make a new one. It's all jacked up and I don't think I can get it to where it needs to be with the creases. So, here we are. I'll work on the new piece tomorrow.
On a good note, I received my shims today and bought my paint.
Thread Starter
|
Senior Member
Joined: Nov 2010
Posts: 124
Likes: 0
Sadly, there's nothing cool to add. I had to order new wheels and thinner wire for my welder, before I start putting the tank back together. I'm currently running .035 wire and it'll blow right through the thin metal. Other than that, I've done nothing but adjust the valves and throw the carbs on. I couldn't find the right flywheel puller bolt locally, so I had to order one. It won't be here for a few days.

