
94 F2 fork seal replacement quickie.....

Thread Starter
|
Welcome Crew
Joined: Feb 2013
Posts: 688
Likes: 1
From: Waycross, Ga
I'm sorry dammit I was wrong, I should have looked in the manual before to make sure before I try to help. I actually redid my forks twice following the manual to a "t". I dont know what made me think "extended". Please for give me. I will never try to help again unless I look it up in the manual first. I promise.
Damn, I did the same thing. Even checked with a coworker when I mentioned it. He said "how ya think I knew to compress em?"
Besides, kind hard to pump the dampening rod with them extended I would think.... Any who, sorry for the confusion guess ill have to include the manual procedure from now on.

Welcome Crew and ROTY 2014
Joined: Dec 2010
Posts: 2,059
Likes: 6
From: Kansas
That said, another option would be to use the drain bolts on the lower, rear-facing part of the sliders, and drain as much oil as you can from there - once it goes to a trickle you could pump the front end up and down to try and extract as much oil as possible, then, with the front end supported by a front stand that uses the lower triple to lift, or some other method to take the weight of the forks, you could remove the caps and pour in the proper volume of oil by putting in a measured amount of fluid.
The manual, at least the Haynes manual, gives not only the spec for the fork oil height, but also the quantity of oil that should go in - this is not quite as precise as measuring the height, and you might add a smidge less than the quantity specified, to account for some fluid that you were unable to drain out, but it should get you close enough to the correct fluid volume... definitely closer than where you are now, which would be overfilled.
I don't have my manual with me, but I'll retrieve it during my lunch hour, and post up the spec quantities.
Also, if you do this, don't forget to replace the crush washers or gaskets (part # 90543-273-000) for those drain bolts, and use a little medium thread-locker on those bolts, and of course, put them back in before refilling!

Last edited by JNSRacing; Jul 24, 2013 at 10:05 AM.
Member
Joined: Apr 2013
Posts: 85
Likes: 3
From: Vegas
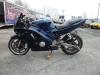
This is my 91 F2 and measuring 135mm of air from the top fully extended.

Member
Joined: Feb 2011
Posts: 56
Likes: 0
Ok, I decided to go ahead and post some pics of me replacing my fork seals along with how I did it. Most of you know how to do this, but after actually looking at my manual, the directions weren't exactly clear and there was no actual pictures. Hopefully this will help someone. If this is in the wrong spot, by all means move it. First of all, obviously remove the forks. My left seal was leaking and aparently had been for along while before I got it as evidenced by the mess on the fork. Plus there was a little surface rust on the upper tube, I cleaned that up a bit too. Keep in mind, these forks are off a 94 f2.
You can see the built up grease and dirt on the lower tube here.

Here is the slight rust I mentioned.

Ok, now that the forks are off the bike I started disassembly. First thing was to turn the preload adjuster counterclockwise to release some of the pressure...

Then you unscrew the fork cap from the upper tube. There is still going to be a little presure there obviously. This is where I walked to the bucket and dumped out alot of fluid. and was left with this.

Next, you have to remove the fork cap itself in order to get the spring out. Be sure to check the oring at the top. Make sure its not swollen or cracked. If so, replace it before you reassemble or you will find yourslef having to redo this.... and thats never fun.

First remove the spring seat and the spring seat join plate, marked by the yellow and red arrow.

You may have to slightly push the spring down, then slide the top plate out, then lift the bottom plate.

Then the spring will slide right over and out.Then I hung it upside down to make sure all the oil I could get out was out.
I used a small flat head screw driver to remove the dust seal, then the snap ring for the oil seal.
At this stage you should have all three of these removed. Snap ring, spring seat, and spring seat join plate.

To remove the oil seal, you have to first remove the bolt on the bottom of the fork. I believe its a 7mm hex, not sure if I remember the size correctly.


Now that the bolt on the bottom is removed, find a way to secure the lower tube, I did this by laying it in a vise wrapped in rags and just barely snugging it up. Then grasp the top of the fork piston and pull. It may take repeated pulls, kinda like using a slide hammer. The oil seal should pop out. This is from the fork that was actually leaking. It even looked like this before I removed it.


The person that replaced this last, looks to have used a screwdriver to seat it. Of course, with what I have already seen, they were not a do it yourselfer.
And.... moving on.
With the fork piston removed from the fork tubes, inspect the bushings. Don't take them off unless they need to be replaced. Also, there is a crush washer where you removed the bolt from the bottom of the fork earlier. I always replace them. You can get them cheap at a hardware store. Just grab the ones you need, go in and match them up. Also, check any and all orings. Replace what you think is suspect. If in doubt, replace it. Alot cheaper and less frustrating to replace it when you have it apart the first time, then to have to go back and replace it after you have it back together.


All thats left is to clean it up and reinstall your seals. Use new dust shields too. You can get the lot for cheap.Just be sure to research who you get them from. Some companys quality control isn't up to par. I've replaced seals before, skipped on a cheap company, and had them leaking within a week. Not due to installer error either, just crap QC. As for me, I've had the best luck with All *****. That goes for their bearings too, but thats another subject. So, get a complete set, think these may have cost me bout 25 dollars with shipping.

I won't go over how to install the oil seals cause it has been gone over alot. I will say, make sure when putting your snapring back in, make sure it is fully seated in the groove. Oh, one thing I forgot to mention. Wipe the tubes before installing seals. Keep wiping. A lil bit of grime can scratch the tube or seal and then you will be leaking again.


Next install the dust seal until it is flush with the tube assembly.

Now installation is the reverse of removal. Fill with oil, pump the piston a few times to remove air, then fill to appropriate level. For my forks, I took the advice of 135mm from the top. Don't forget to cover the holes in the piston assembly when pumping or you will wear your fork oil, ask me how I know. doh....
Anyways, all said and done you should have this.... Wala

Hope this helps someone. If I missed something or did something wrong, by all means correct and inform. I'm sure I missed alot, but I still gotta get out there and get working on her so, til later....
You can see the built up grease and dirt on the lower tube here.
Here is the slight rust I mentioned.
Ok, now that the forks are off the bike I started disassembly. First thing was to turn the preload adjuster counterclockwise to release some of the pressure...
Then you unscrew the fork cap from the upper tube. There is still going to be a little presure there obviously. This is where I walked to the bucket and dumped out alot of fluid. and was left with this.
Next, you have to remove the fork cap itself in order to get the spring out. Be sure to check the oring at the top. Make sure its not swollen or cracked. If so, replace it before you reassemble or you will find yourslef having to redo this.... and thats never fun.
First remove the spring seat and the spring seat join plate, marked by the yellow and red arrow.
You may have to slightly push the spring down, then slide the top plate out, then lift the bottom plate.
Then the spring will slide right over and out.Then I hung it upside down to make sure all the oil I could get out was out.
I used a small flat head screw driver to remove the dust seal, then the snap ring for the oil seal.
At this stage you should have all three of these removed. Snap ring, spring seat, and spring seat join plate.
To remove the oil seal, you have to first remove the bolt on the bottom of the fork. I believe its a 7mm hex, not sure if I remember the size correctly.
Now that the bolt on the bottom is removed, find a way to secure the lower tube, I did this by laying it in a vise wrapped in rags and just barely snugging it up. Then grasp the top of the fork piston and pull. It may take repeated pulls, kinda like using a slide hammer. The oil seal should pop out. This is from the fork that was actually leaking. It even looked like this before I removed it.
The person that replaced this last, looks to have used a screwdriver to seat it. Of course, with what I have already seen, they were not a do it yourselfer.
And.... moving on.
With the fork piston removed from the fork tubes, inspect the bushings. Don't take them off unless they need to be replaced. Also, there is a crush washer where you removed the bolt from the bottom of the fork earlier. I always replace them. You can get them cheap at a hardware store. Just grab the ones you need, go in and match them up. Also, check any and all orings. Replace what you think is suspect. If in doubt, replace it. Alot cheaper and less frustrating to replace it when you have it apart the first time, then to have to go back and replace it after you have it back together.
All thats left is to clean it up and reinstall your seals. Use new dust shields too. You can get the lot for cheap.Just be sure to research who you get them from. Some companys quality control isn't up to par. I've replaced seals before, skipped on a cheap company, and had them leaking within a week. Not due to installer error either, just crap QC. As for me, I've had the best luck with All *****. That goes for their bearings too, but thats another subject. So, get a complete set, think these may have cost me bout 25 dollars with shipping.
I won't go over how to install the oil seals cause it has been gone over alot. I will say, make sure when putting your snapring back in, make sure it is fully seated in the groove. Oh, one thing I forgot to mention. Wipe the tubes before installing seals. Keep wiping. A lil bit of grime can scratch the tube or seal and then you will be leaking again.
Next install the dust seal until it is flush with the tube assembly.
Now installation is the reverse of removal. Fill with oil, pump the piston a few times to remove air, then fill to appropriate level. For my forks, I took the advice of 135mm from the top. Don't forget to cover the holes in the piston assembly when pumping or you will wear your fork oil, ask me how I know. doh....
Anyways, all said and done you should have this.... Wala
Hope this helps someone. If I missed something or did something wrong, by all means correct and inform. I'm sure I missed alot, but I still gotta get out there and get working on her so, til later....

Thread
Thread Starter
Forum
Replies
Last Post