'93 F2 Mods - Phase 1
#21
 04-06-2012, 08:54 PM


#22
04-06-2012, 10:14 PM

I bought a kit online as well and I installed my maintenance covers with speed clips and a big flat head bolt. Cheap and I didn't have to toy with any of the oem panels.
I have the same exact oem paint scheme as you have. I've been looking for the oem decals for almost a year and I can't find anything...Where did you find them? I went to the dealership with my paint code and they couldn't get anything. They search other dealerships around the US and couldn't find anything. I've brought my panels to decal shops hoping to match and they won't even touch it since they say they couldn't get it to match correctly. I'm in need of the right side. If you decide to sell let me know, I'd take the right side!
Thanks,
Ryan
#23
04-06-2012, 10:36 PM
Now, the next part I replaced was another source of irritation, and this shouldn't have been the case, since I ordered two different brands of the same part, from known aftermarket companies.
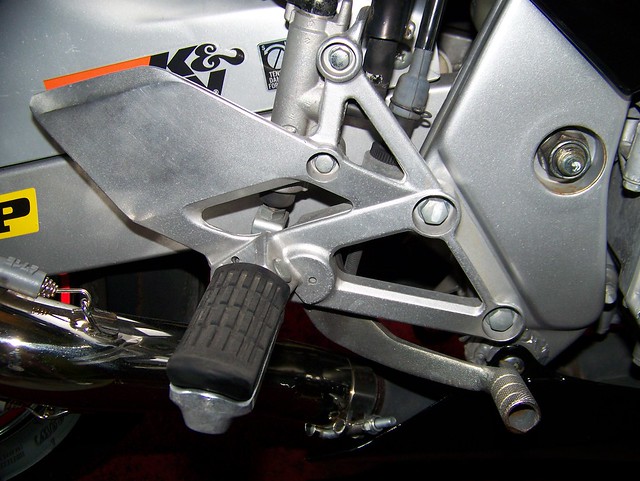
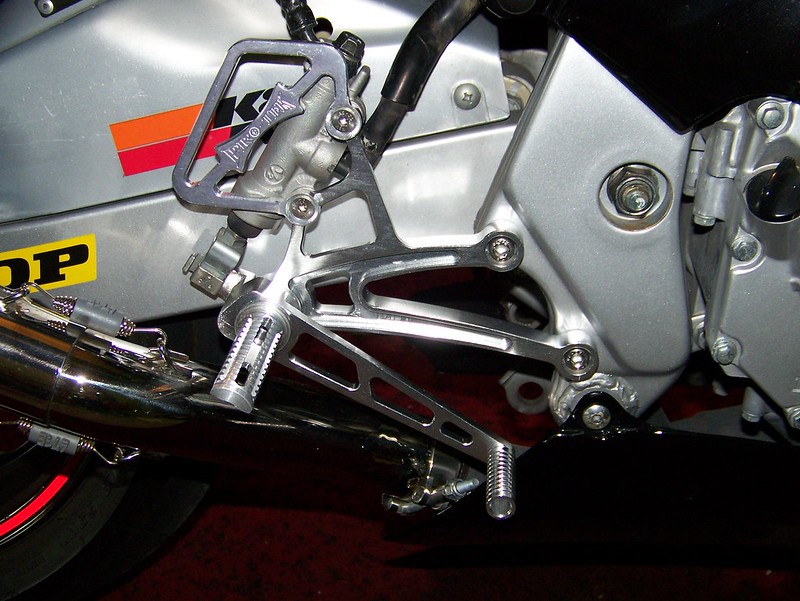
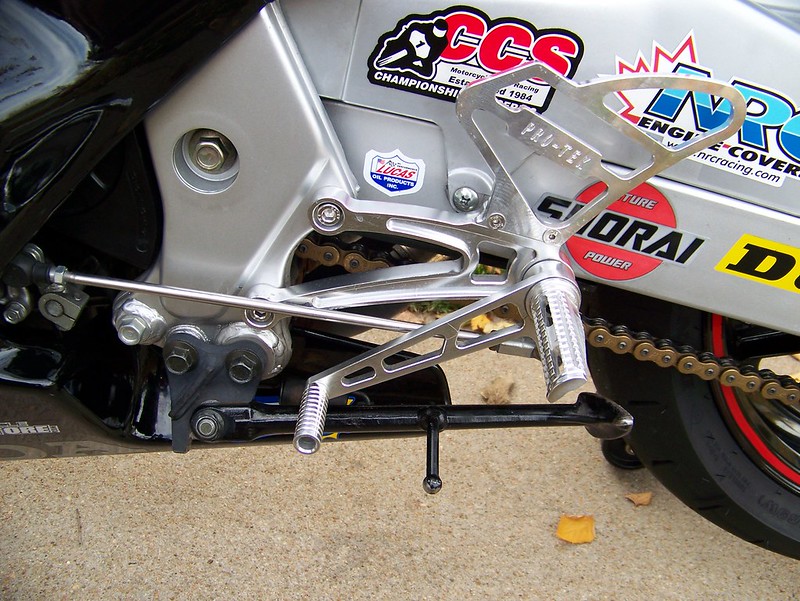
I'm talking about billet aluminum passenger footpegs,.
I first ordered a set from Competition Werkes, which did not fit, then returned those and ordered a set from Pro-Tek, which likewise didn't fit - both of these sets were the part numbers that were supposed to fit my bike.
The two brands look like they were milled from the very same CNC machine, using the same program.
The problem is, that in order for the pegs to be able to be installed, they would have to remain folded up - more than 3/8 inch of aluminum would need to be removed before they could be extended to the down position for use.
I was too frustrated to send back the second set, and decided to risk attempting to modify them myself - I used my bench grinder to take off material, and round down one of the edges, a little bit at a time, then test the fit, and repeat until done.
Another thing about these pegs is that they didn't employ any kind of a spring-like action, that would keep them in place, and not flop down, when you want them folded up - to rectify this, I used some cut down rubber washers to keep some tension on the pegs, whether up or down.
Left side:
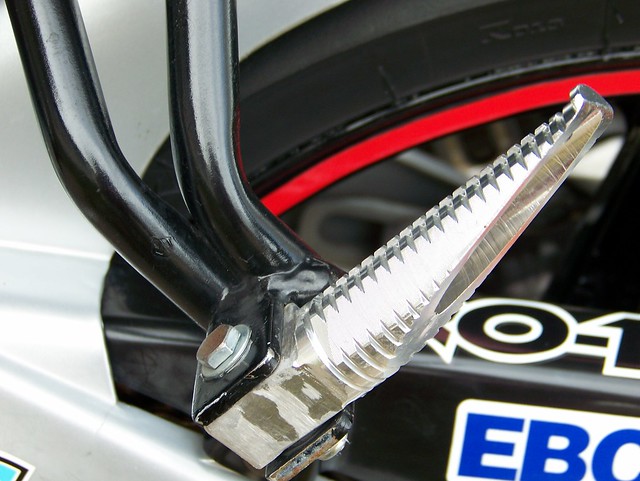

Right side:


I'm talking about billet aluminum passenger footpegs,.
I first ordered a set from Competition Werkes, which did not fit, then returned those and ordered a set from Pro-Tek, which likewise didn't fit - both of these sets were the part numbers that were supposed to fit my bike.
The two brands look like they were milled from the very same CNC machine, using the same program.
The problem is, that in order for the pegs to be able to be installed, they would have to remain folded up - more than 3/8 inch of aluminum would need to be removed before they could be extended to the down position for use.
I was too frustrated to send back the second set, and decided to risk attempting to modify them myself - I used my bench grinder to take off material, and round down one of the edges, a little bit at a time, then test the fit, and repeat until done.
Another thing about these pegs is that they didn't employ any kind of a spring-like action, that would keep them in place, and not flop down, when you want them folded up - to rectify this, I used some cut down rubber washers to keep some tension on the pegs, whether up or down.
Left side:
Right side:
#24
04-06-2012, 10:54 PM
Ryan, it's been so long since I found a resource for those particular OEM graphics, that I forget where I located them - I'll have to check my links.
The sad thing about the right side though is this: after the accident, where the $#!thead ran me into the gutter, I continued to ride the bike, with the damage for a while.
Now, I didn't bother to mention it before, since I was going to mount new fairings anyway, but, the bike was outside one day at the onset of a storm, and just when it was beginning to pour like crazy, and I said to myself "I should get my bike put away", some freakishly high wind gusts began, and literally blew the bike over, onto the right side.
When I say this wind was sudden, I mean just that: I heard the rain, I grabbed my keys and opened the front door, and then - smack...the bike blows over - to say I was extremely angry at my fortune would be a drastic understatement.
My point is, that both sides have a little damage now, but not on every piece - I forget which are unaffected.
I am still in debate on whether to keep the original pieces, or sell them, which is why I haven't shown any pics to potential buyers, because I don't want to tease with what I won't part with, if that makes any sense.
#25
04-07-2012, 01:11 PM
And now for some "full" pics of the bike (as well as some weight loss data) at this current stage, which involves all that has been covered in the thread, as well as a new Zero Gravity windscreen and some faux-carbon fiber mirrors - these particular mirrors are in the exact shape and style as the originals, yet they are lighter weight (I believe due to lighter construction of the arms), by about 1/2 pound for the set.
Other weight data...
The fairing set was a total 1 lb 5oz lighter, but with the tank cover on, which weighed 2.5 lb, there was actually a weight gain of 3.5oz
Losing the tool kit saved over 1.5 lb
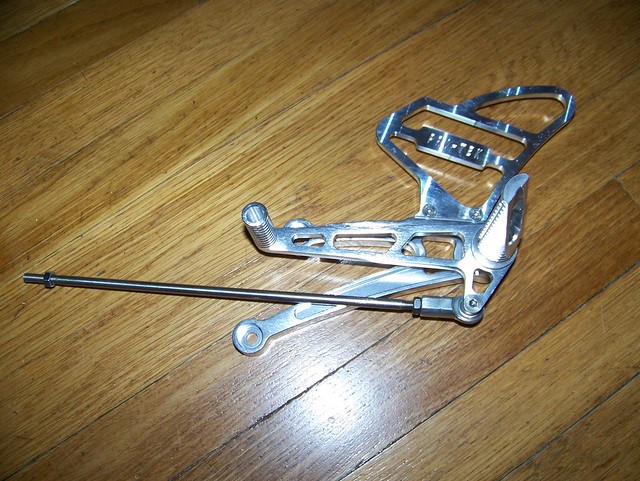
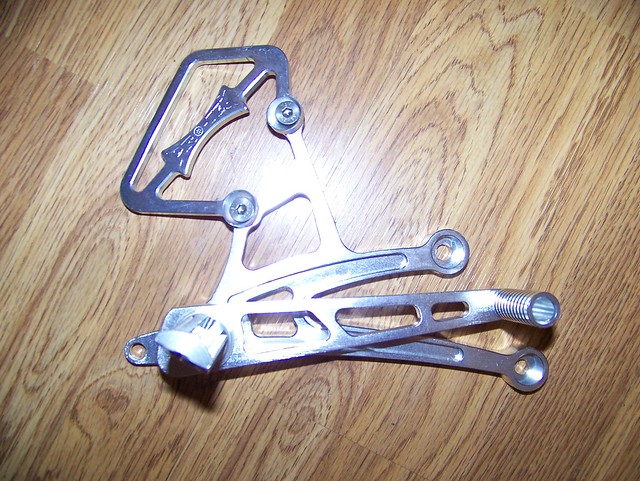
The new footpegs, coupled with cutting those ugly unnecessary brackets saved just under 2 lb.
Removing the cockpit trim bezels, the front reflectors, passenge seat "hold strap", and a few random unnecessary bits removed a further 1.25 lb.
Lighter weight Vortex Delron bar end sliders saved 1/2 lb.
Lastly, the new braided front brake lines saved 5.5 oz
So, all told, the bike lost 13 pounds, 13.4 ounces - then gained 1 pound, 1 ounce with the tank cover, NRC engine cover, and frame sliders - for a total current weight loss of roughly:
12.75 lb.
No more boring data - here's pics of this stage:


Other weight data...
The fairing set was a total 1 lb 5oz lighter, but with the tank cover on, which weighed 2.5 lb, there was actually a weight gain of 3.5oz
Losing the tool kit saved over 1.5 lb
The new footpegs, coupled with cutting those ugly unnecessary brackets saved just under 2 lb.
Removing the cockpit trim bezels, the front reflectors, passenge seat "hold strap", and a few random unnecessary bits removed a further 1.25 lb.
Lighter weight Vortex Delron bar end sliders saved 1/2 lb.
Lastly, the new braided front brake lines saved 5.5 oz
So, all told, the bike lost 13 pounds, 13.4 ounces - then gained 1 pound, 1 ounce with the tank cover, NRC engine cover, and frame sliders - for a total current weight loss of roughly:
12.75 lb.
No more boring data - here's pics of this stage:
#26
04-07-2012, 02:03 PM
The tank cover has it's flaws, as anyone knows, who has seen one mounted, or read about them - but it gives me an idea what the bike would look like with the tank painted black, which idea, I think I like.
One thing that I DON'T like about the tank cover, of course, is that annoying gap between the cover, and the top of the fuel cap - I added one of those slightly puffy fake carbon fiber scratch protectors to minimize the gap - it helps only slightly, but it's not too bad.
Now, in the performance department, there's been no real improvements, as of yet; if anything, it's a touch worse, with the ever so slightly higher exhaust flow, the addition of a K&N filter, and the already present lean condition, due to the carbs being gummed up from years of storage.
I'm not concerned about this, since I planned on working the carbs over anyway, and, the truth is, low and mid range aren't bad at all, I just lose pull and start to stutter when I get to around 9000 rpm, and I can't hit redline - this will be addressed shortly.
It shouldn't be forgotten, though, that braking performance was drastically increased with the installation of the braided stainless steel lines, new fluid, and of course, bleeding the system - not to mention, the bike IS over 12 pounds lighter, and shod with much better tires.
#27
04-07-2012, 02:31 PM
#28
04-07-2012, 04:17 PM
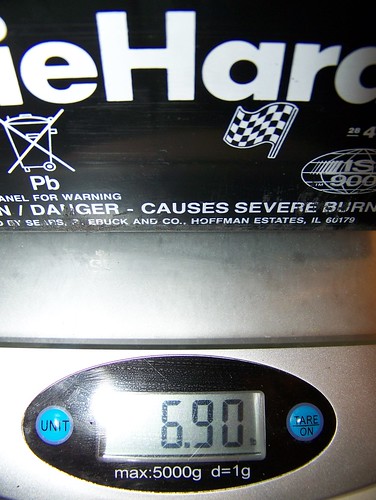
Replacing the original (though not OEM) battery with the Shorai battery, has yielded probably the most significant weight loss, next to the exhaust, considering it's just one item, and takes less than 5 minutes to swap out - this shaved off just under 5 1/2 lb.
Old battery:
New battery:
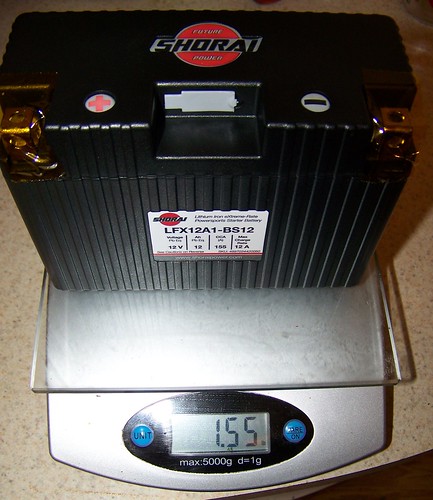
You could juggle 3 of these batteries at once, they're so light!
Old battery:
New battery:
You could juggle 3 of these batteries at once, they're so light!
#29
04-07-2012, 05:20 PM
Next is correcting the fueling - this is where the fun really starts 
This is NOT meant to be a full-on tutorial on carb cleaning and jetting/tuning, there are PILES of walk-throughs, and articles on working with constant velocity carbs - for those who DON'T "know" carb tuning, once you understand the principles behind how they work, these photos will make more sense - my only purpose with these pictures is to maybe help carbs be a little less scary for some, by exposing them a little more.
Or, to give those who have a little knowledge already, and are just looking for ideas, a chance to see what I did, and how that worked.
Ok, so I WILL give a little carb advice for beginners:
1. If all you're doing is cleaning the carbs, there is no reason to not get it right the first time, if you've done adequate research and your thorough - BUT, if you are tuning the carbs, and therefore making jetting changes and circuit adjustments DO NOT expect to pull the carbs just once - it's possible that you could totally luck out, and get all your rev ranges nailed in one attempt, but that is very, very, unlikely - you should count on pulling the carbs and making changes anywhere from 3 to 5 times, to get all the cicuits dialed in...that's just how it goes.
2. Be very thorough with cleaning - clean like a ****, be liberal with the carb cleaner, BUT, make certain that you DO NOT get carb cleaner on anything made of rubber (o-rings, float bowl seals, diaphragms), they will dry out and stretch, and you will likely need to replace them.
3. Take pics as you go, to help you remember where things came from, even if you have a maunual, this will help you to get more familiar with your carbs, and take some of the fear of them away.
Anyway...
Factory Pro jets and kits, are the only type I ever have bought, and ever will buy - the largest main jets with the kit are 138's, if I remember correctly, but I already knew that they would still probably be too small - I gave them a go anyway, and used the typical recommendations for clip positions on the jet needle, and turns of the pilot screw.
Carbs removed:
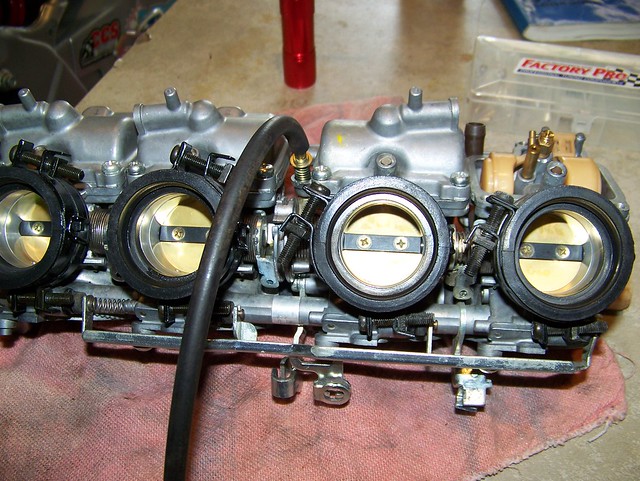
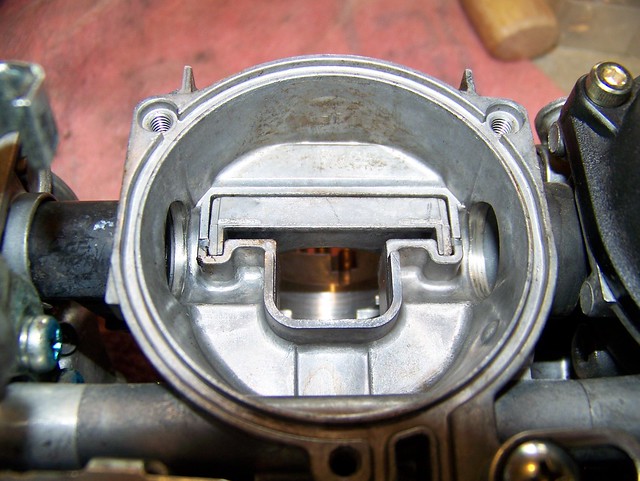
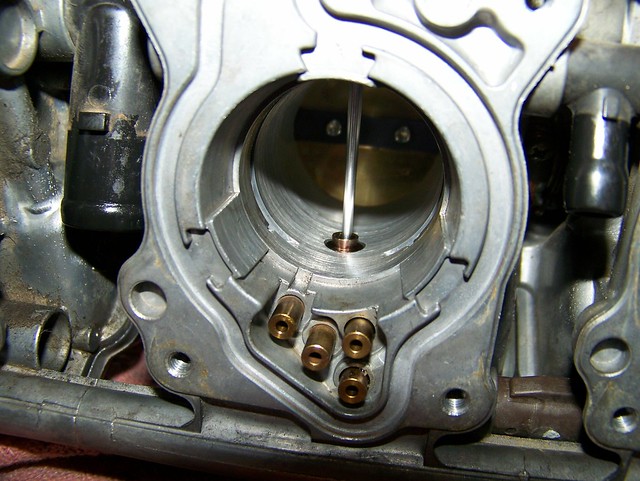
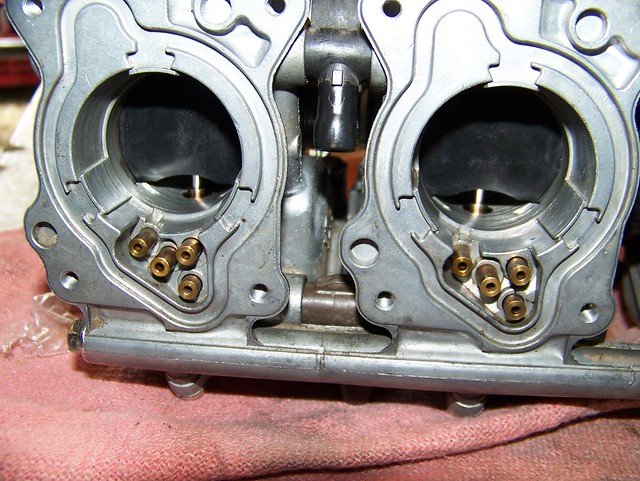
A look in one of the float bowls, and a portion of the jet circuits:

This is NOT meant to be a full-on tutorial on carb cleaning and jetting/tuning, there are PILES of walk-throughs, and articles on working with constant velocity carbs - for those who DON'T "know" carb tuning, once you understand the principles behind how they work, these photos will make more sense - my only purpose with these pictures is to maybe help carbs be a little less scary for some, by exposing them a little more.
Or, to give those who have a little knowledge already, and are just looking for ideas, a chance to see what I did, and how that worked.
Ok, so I WILL give a little carb advice for beginners:
1. If all you're doing is cleaning the carbs, there is no reason to not get it right the first time, if you've done adequate research and your thorough - BUT, if you are tuning the carbs, and therefore making jetting changes and circuit adjustments DO NOT expect to pull the carbs just once - it's possible that you could totally luck out, and get all your rev ranges nailed in one attempt, but that is very, very, unlikely - you should count on pulling the carbs and making changes anywhere from 3 to 5 times, to get all the cicuits dialed in...that's just how it goes.
2. Be very thorough with cleaning - clean like a ****, be liberal with the carb cleaner, BUT, make certain that you DO NOT get carb cleaner on anything made of rubber (o-rings, float bowl seals, diaphragms), they will dry out and stretch, and you will likely need to replace them.
3. Take pics as you go, to help you remember where things came from, even if you have a maunual, this will help you to get more familiar with your carbs, and take some of the fear of them away.
Anyway...
Factory Pro jets and kits, are the only type I ever have bought, and ever will buy - the largest main jets with the kit are 138's, if I remember correctly, but I already knew that they would still probably be too small - I gave them a go anyway, and used the typical recommendations for clip positions on the jet needle, and turns of the pilot screw.
Carbs removed:
A look in one of the float bowls, and a portion of the jet circuits:
#30
04-07-2012, 05:52 PM
Installing new jet needles:

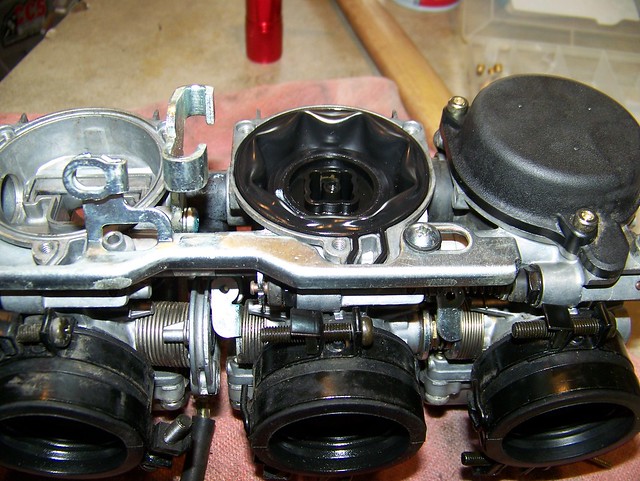
Slide cavity:
Slide and diaphragm installed in cavity:
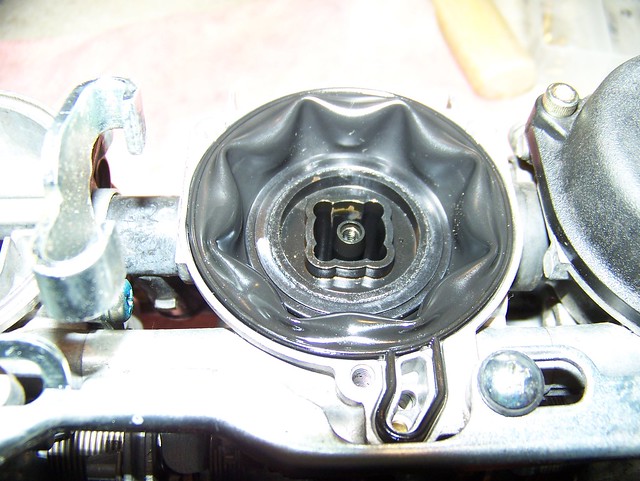
Another shot of installation of slides, diaphragms, and covers - note the new allen-head screws on the covers - these typically come with a jet kit.

Jet needle seated:
Slides in closed position:
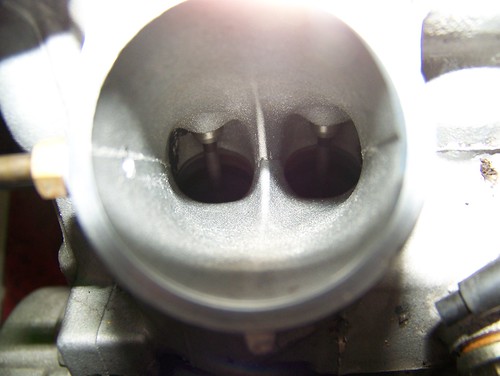
While I can see inside the heads, and view the intake valves, I like to splash some SeaFoam into the ports, just to remove some carbon deposits and general filth from these ports, and the valve seats and stems - this is just something I like to do, if you choose to do this, be sure to allow the chemical to evaporate, or use a soft syringe to suck what remains back out, lest you hydro-lock the motor.
Slide cavity:
Slide and diaphragm installed in cavity:
Another shot of installation of slides, diaphragms, and covers - note the new allen-head screws on the covers - these typically come with a jet kit.
Jet needle seated:
Slides in closed position:
While I can see inside the heads, and view the intake valves, I like to splash some SeaFoam into the ports, just to remove some carbon deposits and general filth from these ports, and the valve seats and stems - this is just something I like to do, if you choose to do this, be sure to allow the chemical to evaporate, or use a soft syringe to suck what remains back out, lest you hydro-lock the motor.
Last edited by JNSRacing; 06-09-2012 at 02:17 PM. Reason: Mis-spelling