


'93 F2 Mods - Phase 1

Thread Starter
|
Welcome Crew and ROTY 2014
Joined: Dec 2010
Posts: 2,059
Likes: 6
From: Kansas

nobody makes a true race tire in 170.
here are the top choices for rear tires:
michelin power one (A or B compound) 160
bridgestone slick (3 diff compounds) 165
pirelli diablo superbike slick (2 compounds) 160
i've been on all of the above tires and have won several national championships on 2 of the 3. PM me for more info.d
do not run a 180. slower tire for sure.
here are the top choices for rear tires:
michelin power one (A or B compound) 160
bridgestone slick (3 diff compounds) 165
pirelli diablo superbike slick (2 compounds) 160
i've been on all of the above tires and have won several national championships on 2 of the 3. PM me for more info.d
do not run a 180. slower tire for sure.
Thread Starter
|
Welcome Crew and ROTY 2014
Joined: Dec 2010
Posts: 2,059
Likes: 6
From: Kansas
I chose to go ahead and safety wire the original caliper mounting bolts, that now connect the calipers to the re-location brackets, and use Loctite for the new hardware that mounts the brackets to the fork sliders.


I neglected in my earlier posts, regarding the installation of the new rotors and caliper brackets, to report on the weight change - the brackets and hardware weighed in at 12.7 ounces, and the larger rotors were heavier than stock by 7.2 ounces, for the set, so, I've gained about 1 1/4 pound on the front end - though gaining unsprung weight is definitely something you usually don't want to do, I don't mind so much, since my goal at the track is to keep the front wheel on the ground, not rising skyward!
My total weight loss now, with this gain, is 23 lb 5.12 oz, with the bike in "street form" - that's still not bad, and I will definitely be losing more front-end weight in the future, with lighter weight clip-ons, levers, and digital gauge set.
I neglected in my earlier posts, regarding the installation of the new rotors and caliper brackets, to report on the weight change - the brackets and hardware weighed in at 12.7 ounces, and the larger rotors were heavier than stock by 7.2 ounces, for the set, so, I've gained about 1 1/4 pound on the front end - though gaining unsprung weight is definitely something you usually don't want to do, I don't mind so much, since my goal at the track is to keep the front wheel on the ground, not rising skyward!
My total weight loss now, with this gain, is 23 lb 5.12 oz, with the bike in "street form" - that's still not bad, and I will definitely be losing more front-end weight in the future, with lighter weight clip-ons, levers, and digital gauge set.

Thread Starter
|
Welcome Crew and ROTY 2014
Joined: Dec 2010
Posts: 2,059
Likes: 6
From: Kansas
Well, the track days I'll be doing might require some of the items to be wired (oil filler plug/dipstick, oil filter, oil drain bolt, radiator cap), and the
racing governing bodies I'll be racing with this season (MCRA and CMRA) DO require all of those listed above and more - the reason, is, so that bolts cannot vibrate loose and "back themselves out", causing a hazard on the track and/or allowing fluids to spill onto the track.
If you look at these two pics, for example, you'll see that if one bolt were to try to turn out, the way it is wired to the other bolt will not allow it to do so, and vice versa.

racing governing bodies I'll be racing with this season (MCRA and CMRA) DO require all of those listed above and more - the reason, is, so that bolts cannot vibrate loose and "back themselves out", causing a hazard on the track and/or allowing fluids to spill onto the track.
If you look at these two pics, for example, you'll see that if one bolt were to try to turn out, the way it is wired to the other bolt will not allow it to do so, and vice versa.
Thread Starter
|
Welcome Crew and ROTY 2014
Joined: Dec 2010
Posts: 2,059
Likes: 6
From: Kansas
Lever "Relief" Holes
This is one of those tricks where I can't recall when and from whom I learned it, but it's an old one.
In lieu of short race levers, which will have to come at a later date, due to financial constraints, I drilled a hole through the levers on the inside of the ball at the ends - this provides a very likely chance, that if you go down, with the lever ends making contact, the ends of the levers will break off at the point where you drilled, so that you still have a useable lever to get where you need to go.
Brake-side:

Clutch-side:

In lieu of short race levers, which will have to come at a later date, due to financial constraints, I drilled a hole through the levers on the inside of the ball at the ends - this provides a very likely chance, that if you go down, with the lever ends making contact, the ends of the levers will break off at the point where you drilled, so that you still have a useable lever to get where you need to go.
Brake-side:
Clutch-side:
Thread Starter
|
Welcome Crew and ROTY 2014
Joined: Dec 2010
Posts: 2,059
Likes: 6
From: Kansas

Thread Starter
|
Welcome Crew and ROTY 2014
Joined: Dec 2010
Posts: 2,059
Likes: 6
From: Kansas
So, this is a "boring" update, as there's no pics, but if I can get home fast tonight and DO WORK in a quick fashion, I'll have something to actually show.
My new F3 rim should arrive early this evening - I'll check the condition of the bearings, get it all squeaky clean, remove the wheel weights, and do any little touching up of the paint that's needed - I have the Honda touch up paint in the wheel color, which works fantastic, but I don't think I'll need much at all, as the wheel looks really good already.
Since I'm stepping up to the F3 rim, I went to a 170/60 for the rear - I'm going with another Dunlop Q2, since I just replaced the front a short while ago - I'm pretty satisfied with the profile and grip of these tires, but I ride too aggresively for the rears to last very long - I need to slow down, and save some money!
The tire arrived yesterday, along with the Dyna-Beads for front and rear of two wheel sets - one for street, and one for track. Also, the Pit Bull trailer restraint system came yesterday too...It is a thing of beauty!!
I'll get the new tire/rim installed tonight and get some pics, and I'll get the Pit Bull unit installed on the trailer, either Friday or Saturday.
My new F3 rim should arrive early this evening - I'll check the condition of the bearings, get it all squeaky clean, remove the wheel weights, and do any little touching up of the paint that's needed - I have the Honda touch up paint in the wheel color, which works fantastic, but I don't think I'll need much at all, as the wheel looks really good already.
Since I'm stepping up to the F3 rim, I went to a 170/60 for the rear - I'm going with another Dunlop Q2, since I just replaced the front a short while ago - I'm pretty satisfied with the profile and grip of these tires, but I ride too aggresively for the rears to last very long - I need to slow down, and save some money!
The tire arrived yesterday, along with the Dyna-Beads for front and rear of two wheel sets - one for street, and one for track. Also, the Pit Bull trailer restraint system came yesterday too...It is a thing of beauty!!
I'll get the new tire/rim installed tonight and get some pics, and I'll get the Pit Bull unit installed on the trailer, either Friday or Saturday.
Thread Starter
|
Welcome Crew and ROTY 2014
Joined: Dec 2010
Posts: 2,059
Likes: 6
From: Kansas
I got the rim all cleaned up last night, it doesn't look quite as good as I was able to tell, from the pics, but it'll do just fine. I thought I was getting an additional cush drive and sprocket carrier, but it was not included - don't get me wrong, the seller did not say it was included, but for some reason I got the impression it would be, so, anyway, no "extra" sprocket setup on hand for quicker changes, but that's no big deal.
The bearings are OEM, and are in exclellent shape, and he provided two each, of the right hand and left hand spacers.
After I installed the tire, I was trying to air it up, and couldn't figure out why it wouldn't take air, then I realized there was no Schrader valve in the stem! - this was no problem, as I needed to run to O'Reilly Auto anyway, for a stem cap, and replace the tool I've lost, for removing the valve from the stem, so I could put in the Dyna-Beads for balancing - I just grabbed another valve core while I was there.
I finished the install, which was a breeze, of course, and true to other posts I've read, everything lined up fine, as long as I used the brake-side spacer for the F3 rim. I rode for about a half hour to see how it all felt and scrub the tire in a little bit - it felt great - rear ride height is only raised a little under a 1/4 inch, so, though turn-in felt a touch quicker, it's nothing significant enough to put me off my game...I've already adapted to it with last night's ride, and to and from work and lunch today. It's possible that the change in turn-in feel is simply due to the new tire (last one was REALLY getting worn), and the ride height change may be undetectable.
I said that I would install and take pics last night, but I ended up working overtime yesterday, and wasn't able to start the work in time to finish before dark - tonight, I will give the bike a needed washing, and take some pics.
The bearings are OEM, and are in exclellent shape, and he provided two each, of the right hand and left hand spacers.
After I installed the tire, I was trying to air it up, and couldn't figure out why it wouldn't take air, then I realized there was no Schrader valve in the stem!
- this was no problem, as I needed to run to O'Reilly Auto anyway, for a stem cap, and replace the tool I've lost, for removing the valve from the stem, so I could put in the Dyna-Beads for balancing - I just grabbed another valve core while I was there.I finished the install, which was a breeze, of course, and true to other posts I've read, everything lined up fine, as long as I used the brake-side spacer for the F3 rim. I rode for about a half hour to see how it all felt and scrub the tire in a little bit - it felt great - rear ride height is only raised a little under a 1/4 inch, so, though turn-in felt a touch quicker, it's nothing significant enough to put me off my game...I've already adapted to it with last night's ride, and to and from work and lunch today. It's possible that the change in turn-in feel is simply due to the new tire (last one was REALLY getting worn), and the ride height change may be undetectable.
I said that I would install and take pics last night, but I ended up working overtime yesterday, and wasn't able to start the work in time to finish before dark - tonight, I will give the bike a needed washing, and take some pics.
Last edited by JNSRacing; Jun 7, 2012 at 04:22 PM.
Thread Starter
|
Welcome Crew and ROTY 2014
Joined: Dec 2010
Posts: 2,059
Likes: 6
From: Kansas
F3 Rim & Tire
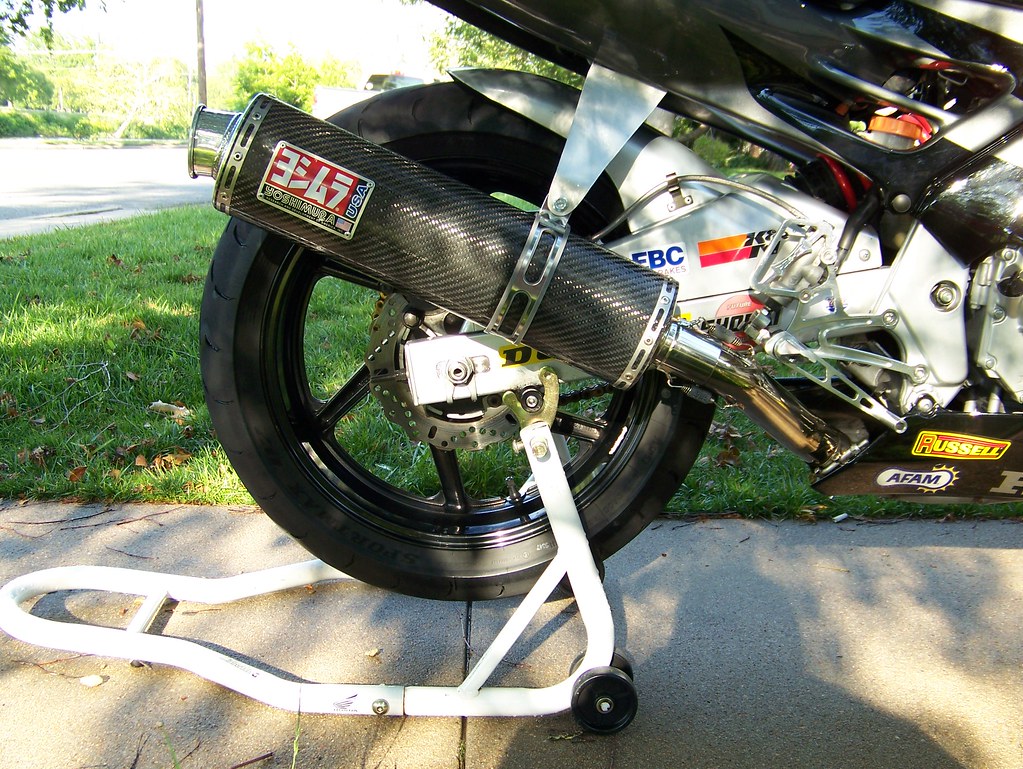
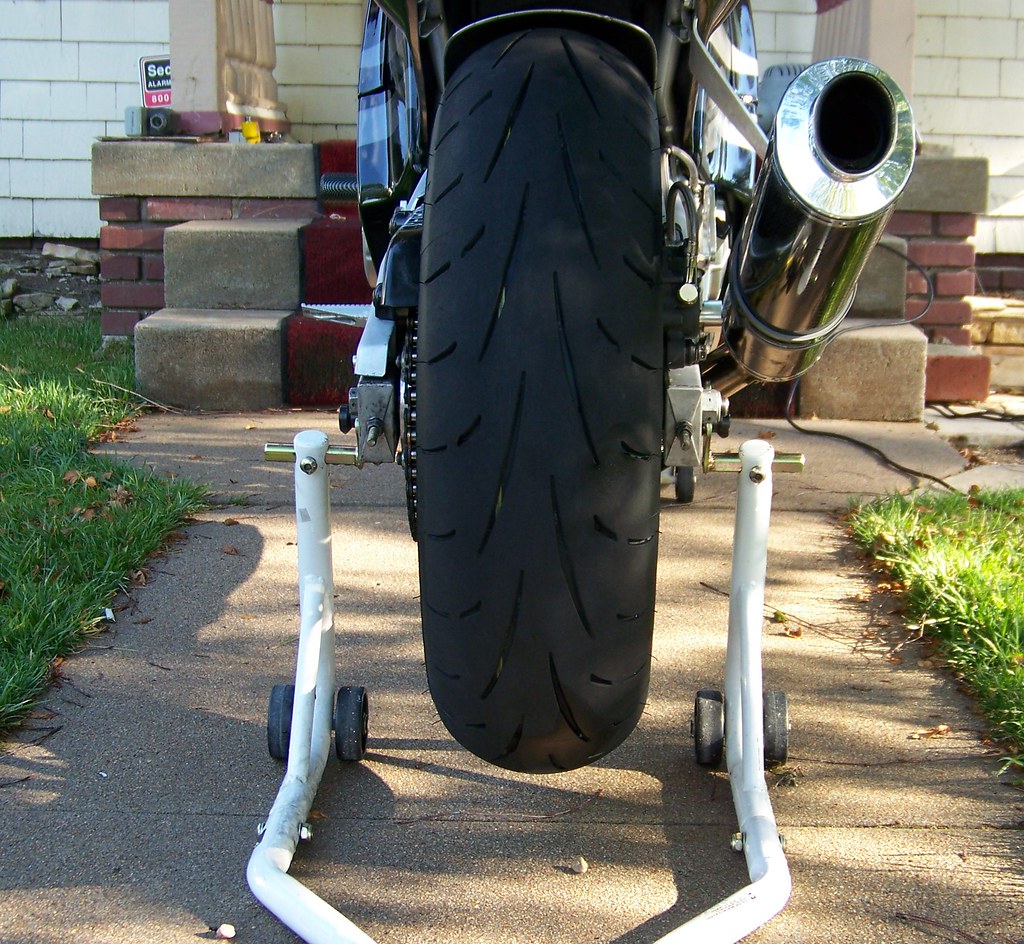
Here's a few pics of the newly mounted F3 rim and Q2 tire - without a side by side comparison, it's not easy to see the difference in width, but I can definitely see it, and I love it!!
Obviously, I need to order more rim striping tape, to make it match the front again - it's unfortunate that I didn't think of it before, because I could have added that item to any of several orders I recently placed, and saved on shipping, not to mention have it here already, so I could apply it.


Obviously, I need to order more rim striping tape, to make it match the front again - it's unfortunate that I didn't think of it before, because I could have added that item to any of several orders I recently placed, and saved on shipping, not to mention have it here already, so I could apply it.

