
'92 Stripper Project


Retired Super Moderator, Tin Star Man & Hurricane Saloon Prospect, ROTM Feb 2015
Joined: Sep 2011
Posts: 2,382
Likes: 5
From: V��ksy, Finland
From what I know of powdercoating, undercuring is the most likely cause of a cracked finish. It probly just wasn't in the oven for long enough or it wasn't hot enough. They most likely will disappear either completely or be very hard to spot the remaining ones after they bake it again. Just here's hoping they don't over bake it so it'll turn yellow...

Thread Starter
|
Senior Member
Joined: May 2013
Posts: 182
Likes: 0
From: TACOMA,wa
From what I know of powdercoating, undercuring is the most likely cause of a cracked finish. It probly just wasn't in the oven for long enough or it wasn't hot enough. They most likely will disappear either completely or be very hard to spot the remaining ones after they bake it again. Just here's hoping they don't over bake it so it'll turn yellow...
I hope it's that simple!
Retired Super Moderator, Tin Star Man & Hurricane Saloon Prospect, ROTM Feb 2015
Joined: Sep 2011
Posts: 2,382
Likes: 5
From: V��ksy, Finland
I'm no powdercoater but I used to visit one shop daily bringing stuff to paint and the finished pallets back to the customer so I did speak with the painters and the owner quite a lot about the process and have gotten the understanding that all powders behave differently, and anything other than regular RAL colors can do unpredictable things. I've seen some dirt particles etc being removed with a light sanding and a rebake to get the surface to gel up again, hopefully it's the case this time too because basically the other solution is to get them to bare metal and start over, powdercoat is very thick so you'll notice if there are two layers, and it doesn't bond well with the lower layers, the clear has to be applied to either a pre-heated paint or just after the baking or it will not bond and flakes off.
Thread Starter
|
Senior Member
Joined: May 2013
Posts: 182
Likes: 0
From: TACOMA,wa
I'm no powdercoater but I used to visit one shop daily bringing stuff to paint and the finished pallets back to the customer so I did speak with the painters and the owner quite a lot about the process and have gotten the understanding that all powders behave differently, and anything other than regular RAL colors can do unpredictable things. I've seen some dirt particles etc being removed with a light sanding and a rebake to get the surface to gel up again, hopefully it's the case this time too because basically the other solution is to get them to bare metal and start over, powdercoat is very thick so you'll notice if there are two layers, and it doesn't bond well with the lower layers, the clear has to be applied to either a pre-heated paint or just after the baking or it will not bond and flakes off.

Edit:
A few hours later they called to tell me they believe it was a bad patch of powder for that candy/color.
They are redoing both wheels in a slightly different candy. Should be close to the same color orange, but with more shiny sparkles!
Last edited by Existenz_is; May 13, 2015 at 11:49 PM.
Thread Starter
|
Senior Member
Joined: May 2013
Posts: 182
Likes: 0
From: TACOMA,wa
Small update.
Finally reupholstered my corbin seat.
It's not great, but for a DIY project and first try, it's pretty good.
It was also really cheap to do, since my mother sewed it!
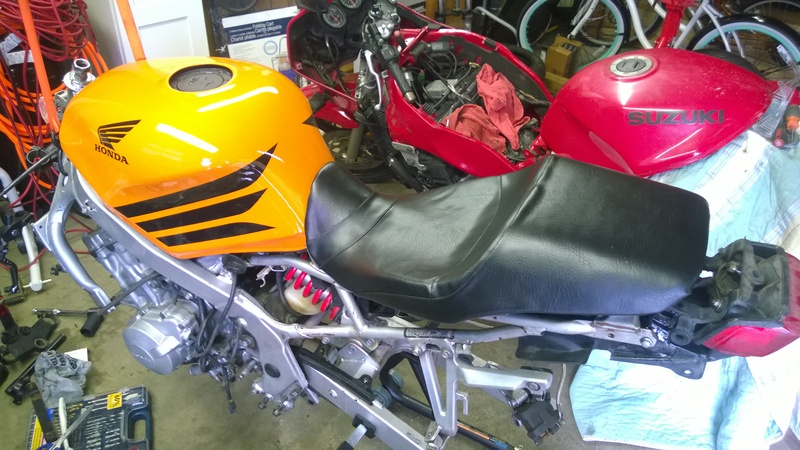
The original cover was leather and vinyl. Unfortunately, the leather panels had damage and couldn't be reused. The vinyl is Artic grade picked up from a local fabric shop.
I still need to work on it a bit more. It's held in by rivets and I reused the same drilled holes from last time but need to add a couple more on the side and rear because of wrinkles.
I'm also painting the top yoke and clip-ons a kind of copper orange color. Hope it wont look like ****.
Thread Starter
|
Senior Member
Joined: May 2013
Posts: 182
Likes: 0
From: TACOMA,wa
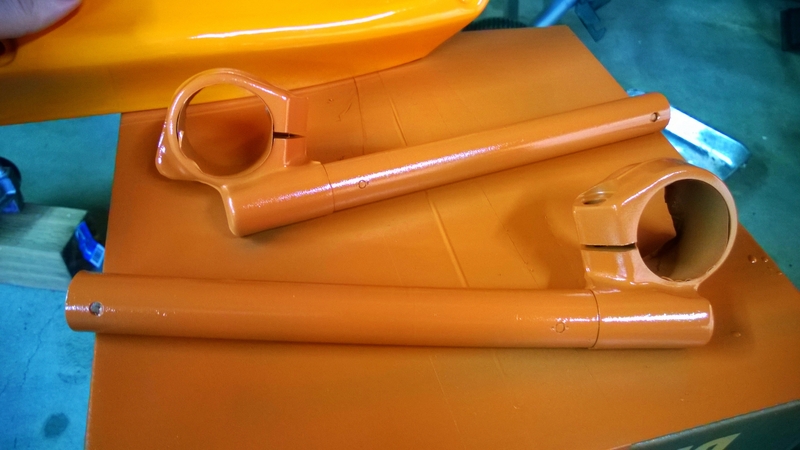
First look at clip-ons and yoke.
It's VHT engine enamel. I believe it is Hemi orange.
I will wait a few days before I put it all back together, to provide curing time.
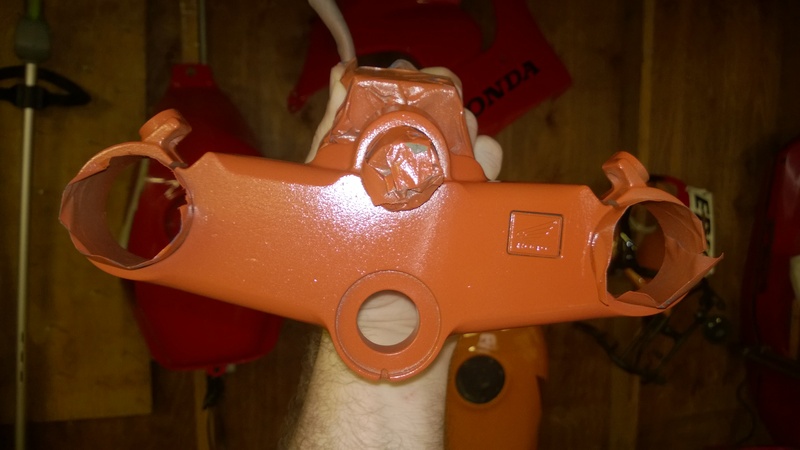
This is part of the repsol kit next to it. Not the same shade, but it's darker, like the wheels.
The levers and such will stay black. The frame will stay silver, just with touchups.
Not sure what color I will paint the brake calipers. Black or silver, but I doubt orange.
Too much of the same color becomes an eye-sore. I will decide once the wheels are mounted.
It's VHT engine enamel. I believe it is Hemi orange.
I will wait a few days before I put it all back together, to provide curing time.

This is part of the repsol kit next to it. Not the same shade, but it's darker, like the wheels.

The levers and such will stay black. The frame will stay silver, just with touchups.
Not sure what color I will paint the brake calipers. Black or silver, but I doubt orange.
Too much of the same color becomes an eye-sore. I will decide once the wheels are mounted.
Last edited by Existenz_is; May 16, 2015 at 10:59 PM.

Wow, I can't wait to see everything mounted. Why is it so hard take pics of orange by the way? Having had KTMs for a while, I am all too familiar with the color coming out either yellow or red.
Never mind, great job regardless!
Never mind, great job regardless!
Thread Starter
|
Senior Member
Joined: May 2013
Posts: 182
Likes: 0
From: TACOMA,wa
I finally tore one of my F3 motors down today, the one with the spun bearing.
Here's what I found.
Left overs.

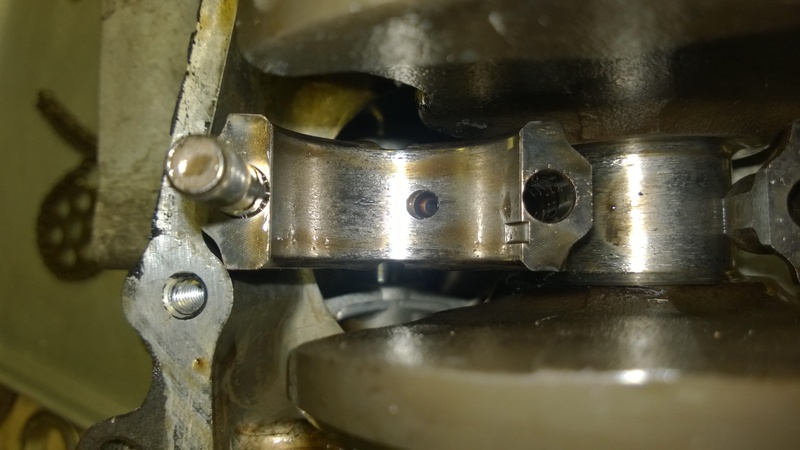
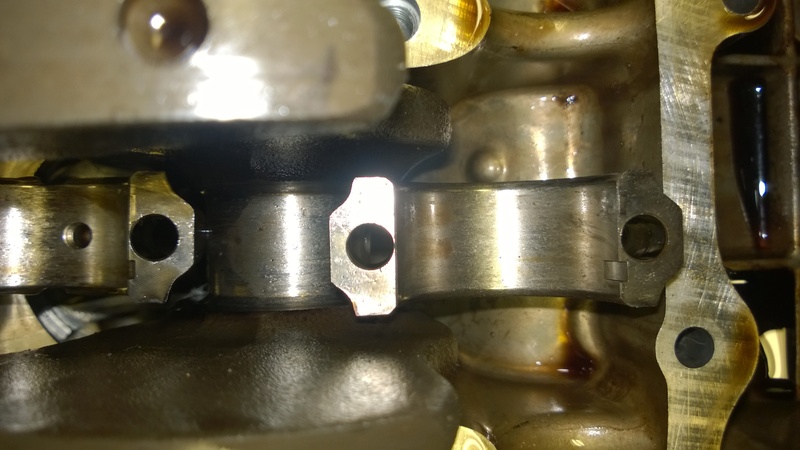

Good one for comparison
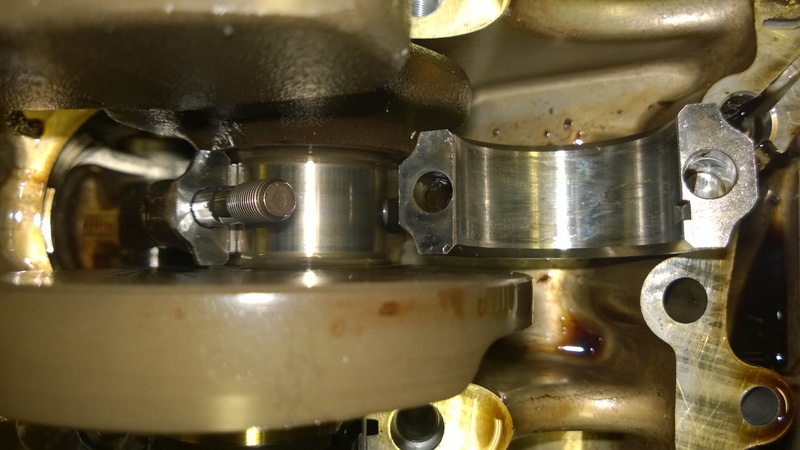
The damage isn't as bad as I thought it might be.
The rod/cap might still be useable, depends on plastiguage.
But the crank is slightly scored, mostly on the side shown in the pics.
I have another F3 motor I will tear down and check, but I doubt the crank will be much better. That motor threw a rod out the case, which means a large impact on the crank.
Could be cracked, gouged, scored, or fine.
It might be worth it for me to either but another used crank or see what a machine shop says about the ones I have.
A complete working F3 motor is worth more than the parts I have and easier to sell.
I might just put it into my F2. I have the carb, airbox, harness etc.
It already has F3 front end and wheels.
Here's what I found.
Left overs.


Good one for comparison

The damage isn't as bad as I thought it might be.
The rod/cap might still be useable, depends on plastiguage.
But the crank is slightly scored, mostly on the side shown in the pics.
I have another F3 motor I will tear down and check, but I doubt the crank will be much better. That motor threw a rod out the case, which means a large impact on the crank.
Could be cracked, gouged, scored, or fine.
It might be worth it for me to either but another used crank or see what a machine shop says about the ones I have.
A complete working F3 motor is worth more than the parts I have and easier to sell.
I might just put it into my F2. I have the carb, airbox, harness etc.
It already has F3 front end and wheels.