
chain question


Thread Starter
|
Senior Member
Joined: Oct 2007
Posts: 1,049
Likes: 1
From: Quebec,Canada
Good evening fellow hurricanes riders
It is going the first time thatI will change the chain o this bike, any tricks and whar is the fastest way ?
Thanks in advance
Dragon64
It is going the first time thatI will change the chain o this bike, any tricks and whar is the fastest way ?
Thanks in advance
Dragon64

Super Moderator
Joined: Aug 2006
Posts: 5,304
Likes: 512
From: South Florida, USA
How many miles or kilometers on your bike ? Are you planning on replacing the sprockets as well ? New chains normally come with 120 links, but maybe longer. The 1000F takes a 114 link chain, which means you'll need to cut it to length. It's not that tough to use a grinder bit attached to a drill to grind of the head of one of the rivits. You'll still need a chain cutter and press to press out the old pins and then press on the new side plate for the master link. I can post pictures of some of the steps if you like.
Super Moderator
Joined: Aug 2006
Posts: 5,304
Likes: 512
From: South Florida, USA
OK, but you didn' answer my questions.... Give me a little bit here as I get my photos uploaded to photobucket then I'll do my best at explaining how I did a chain replacement on my wifes bike. I didn't take any photo'sof removing therear wheel since I figure thatmost people that are going to attemptto doa chain already know how.I'll apologize now for the images of a F3 and not a 1000F. I didn't take photo's of when I did my 1KF, but I did on the F3 for just this purpose. It looks a little different, but it's essentially the same. I don't have photo's of every step as sometimes I forgot to stop my work and take them.

Joined: Dec 2007
Posts: 66
Likes: 0
From:
Depends on whether your going to replace sprockets too,
but if your not going to change sprockets, break the old chain hook a master link to the new chain, and pull it through. Removes the old chain while installing the new chain at the same time.
Make sure you have the same number of links beforehand.
Fastest way, no need to remove anything but the chain. My sprockets are good so I'm going to replace the chain in this manner shortly.
FarAway
Super Moderator
Joined: Aug 2006
Posts: 5,304
Likes: 512
From: South Florida, USA
FarAway is right, if you're not going to replace the sprockets, that's much easier.
Here's the process I went through.
First some background. One of the previous owners of the bike had replaced the chain before, and it was either not maintained, or not very good quality. They used a chain with a "Clip" style master link, which isn't recomended by Honda. A rivited master link is what should be used.
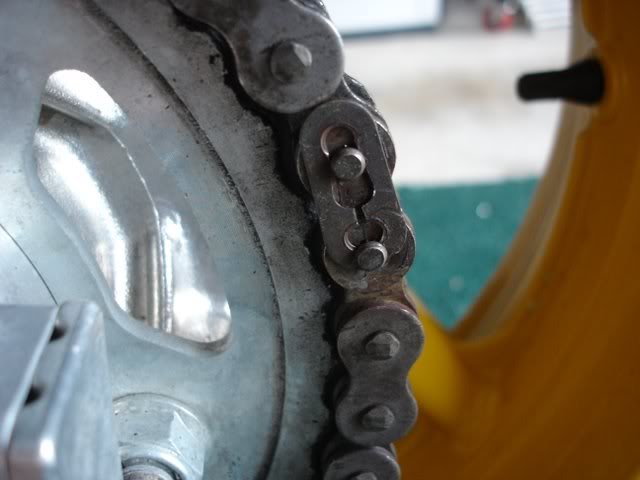
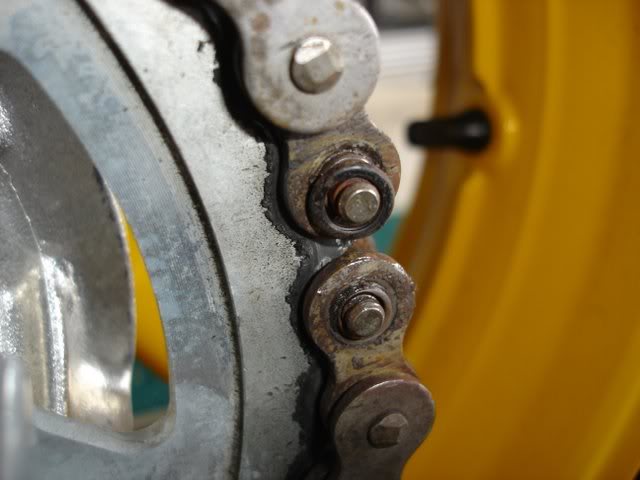
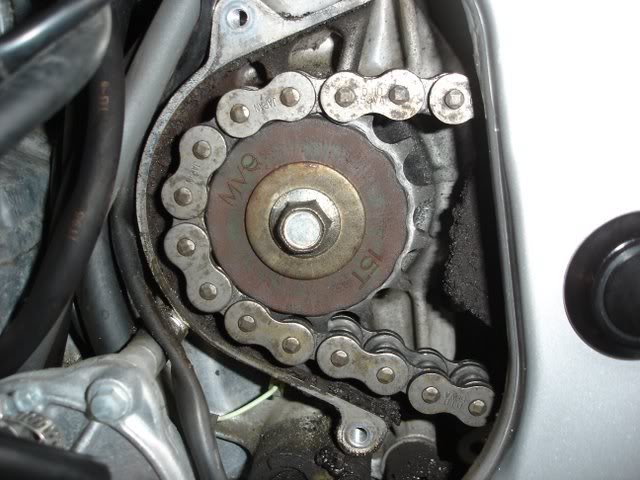
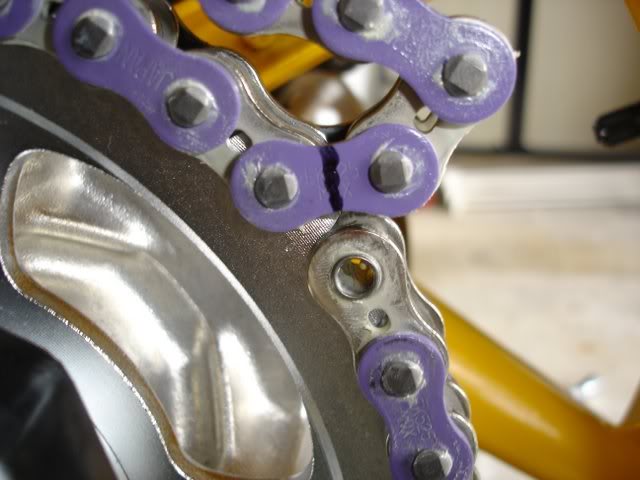
Here's some images that show the chain with typical signs of wear (excessive I think).
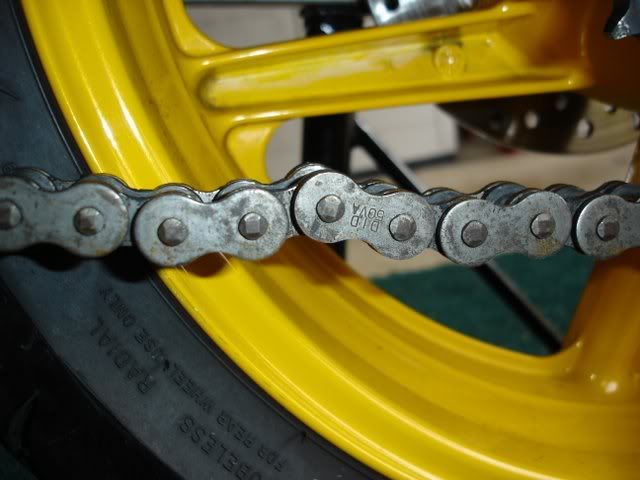
Note the gap between the sprocket and chain, as well as the clip style master link. Having that type of master link did make it easier to remove the old chain since it practically fell apart.


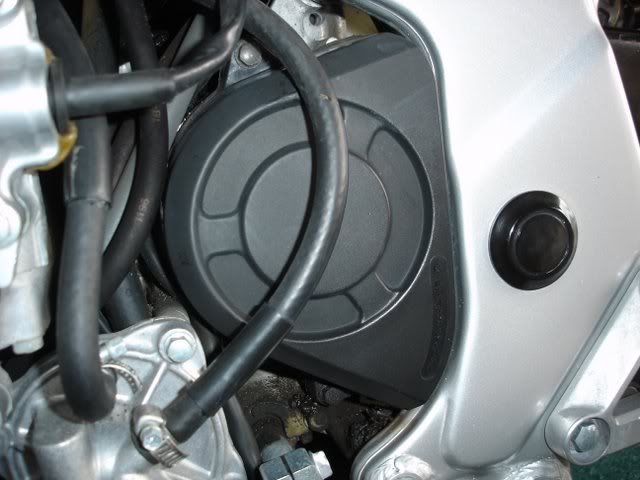
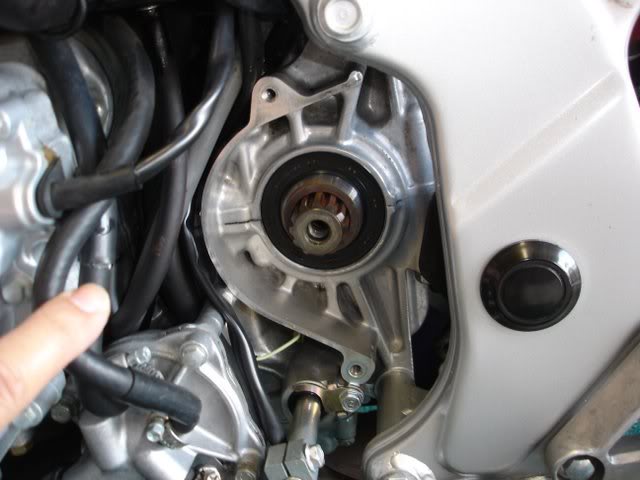
Remove the rear wheel (not shown here) and the cover to the front sprocket.
Getting the bolt off of the front sprocket can be a challenge. I put the bike in gear, and then had my wife press on the rear brake while I broke the bolt loose. An impact wrench would be a big help.
I'm a firm believer in cleaning as I go. It makes things easier.
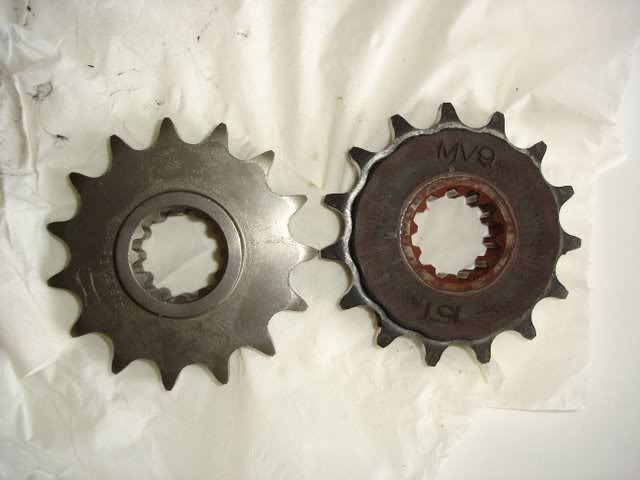
I went with AFAM sprockets. Here is the new one next to the factory one. The factory one has a rubber bushing on the sides. I imagine that its there for noise suppression or something. The new sprocket didn't come with it, and it can't be removed from the original, it's molded through the sprocket. I didn't change the gear ratios, same number of teeth on front and back.
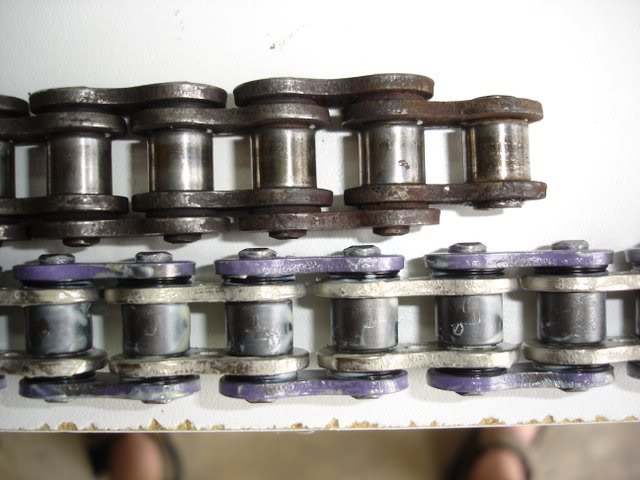
I laid the old chain out next to the new one to get an idea of how much it had stretched (it doesn't actually stretch, the pins wear allowing the chain to become longer) and to get an idea of where I'll need to cut it.
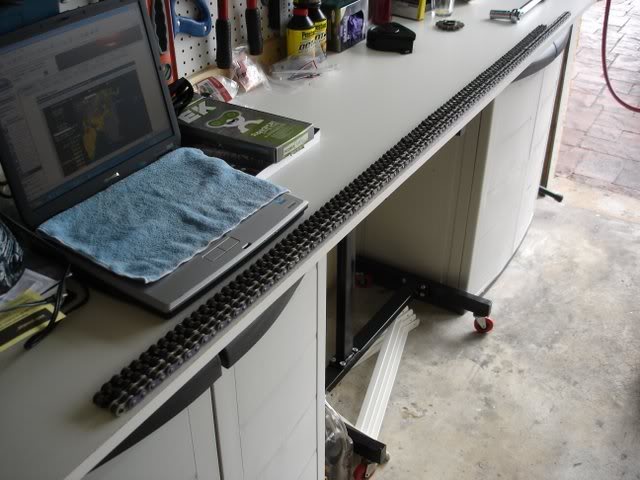
Starting end...
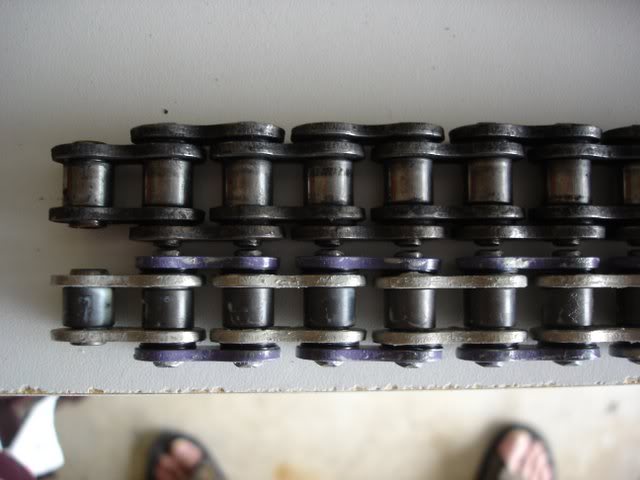
Opposite end. You can see how the old chain is longer. When the chain wears, the pins don't fit between the sprocket teeth correctly anymore and cause the teeth to wear as the pins slide up and down the teeth. You can also see the "O" rings between the side plates on both the new and old chain. It's important not to crush the "O" rings when pressing on the side plate for the new master link. EK (a chain manufacturer) provides a spacer to help prevent this from happening.
I put the chain on the bike with the new sprockets and wheel in place. I was able to verify where I needed to brake (you're not actually braking the chain, but rather pressing out a couple of pins so you can remove one of the side plates) the chain and mark it. It easy to look away from the chain, then look back at it and not be sure which link was which. They all look the same .
.
Using a grinder I ground off the heads of 2 of the rivets and then pressed them out with a chain tool. I've got 3 bikes currently so fo
Here's the process I went through.
First some background. One of the previous owners of the bike had replaced the chain before, and it was either not maintained, or not very good quality. They used a chain with a "Clip" style master link, which isn't recomended by Honda. A rivited master link is what should be used.
Here's some images that show the chain with typical signs of wear (excessive I think).
Note the gap between the sprocket and chain, as well as the clip style master link. Having that type of master link did make it easier to remove the old chain since it practically fell apart.
Remove the rear wheel (not shown here) and the cover to the front sprocket.
Getting the bolt off of the front sprocket can be a challenge. I put the bike in gear, and then had my wife press on the rear brake while I broke the bolt loose. An impact wrench would be a big help.
I'm a firm believer in cleaning as I go. It makes things easier.
I went with AFAM sprockets. Here is the new one next to the factory one. The factory one has a rubber bushing on the sides. I imagine that its there for noise suppression or something. The new sprocket didn't come with it, and it can't be removed from the original, it's molded through the sprocket. I didn't change the gear ratios, same number of teeth on front and back.
I laid the old chain out next to the new one to get an idea of how much it had stretched (it doesn't actually stretch, the pins wear allowing the chain to become longer) and to get an idea of where I'll need to cut it.
Starting end...
Opposite end. You can see how the old chain is longer. When the chain wears, the pins don't fit between the sprocket teeth correctly anymore and cause the teeth to wear as the pins slide up and down the teeth. You can also see the "O" rings between the side plates on both the new and old chain. It's important not to crush the "O" rings when pressing on the side plate for the new master link. EK (a chain manufacturer) provides a spacer to help prevent this from happening.
I put the chain on the bike with the new sprockets and wheel in place. I was able to verify where I needed to brake (you're not actually braking the chain, but rather pressing out a couple of pins so you can remove one of the side plates) the chain and mark it. It easy to look away from the chain, then look back at it and not be sure which link was which. They all look the same
.Using a grinder I ground off the heads of 2 of the rivets and then pressed them out with a chain tool. I've got 3 bikes currently so fo

Thread
Thread Starter
Forum
Replies
Last Post