Street Fighters For the unconventional CBR builder.

The Boxer

Thread Tools
 
Search this Thread
 
Old Apr 4, 2012 | 09:30 AM
  #31  
davideokills's Avatar
Senior Member
Joined: Sep 2011
Posts: 100
Likes: 0
Default

I was thinking that if you do end up polishing all the aluminum pieces it would be cool to see some color highlights in vinyl to accent the body work. Maybe something jet fighter inspired since you have that angular feel of a fighter already.


Reply
Old Apr 4, 2012 | 12:34 PM
  #32  
cabbie's Avatar
Thread Starter
|
Member
Joined: Dec 2008
Posts: 67
Likes: 0
From:
Default

I'm going to the original finish of polished frame/swing arm and painted tank etc.

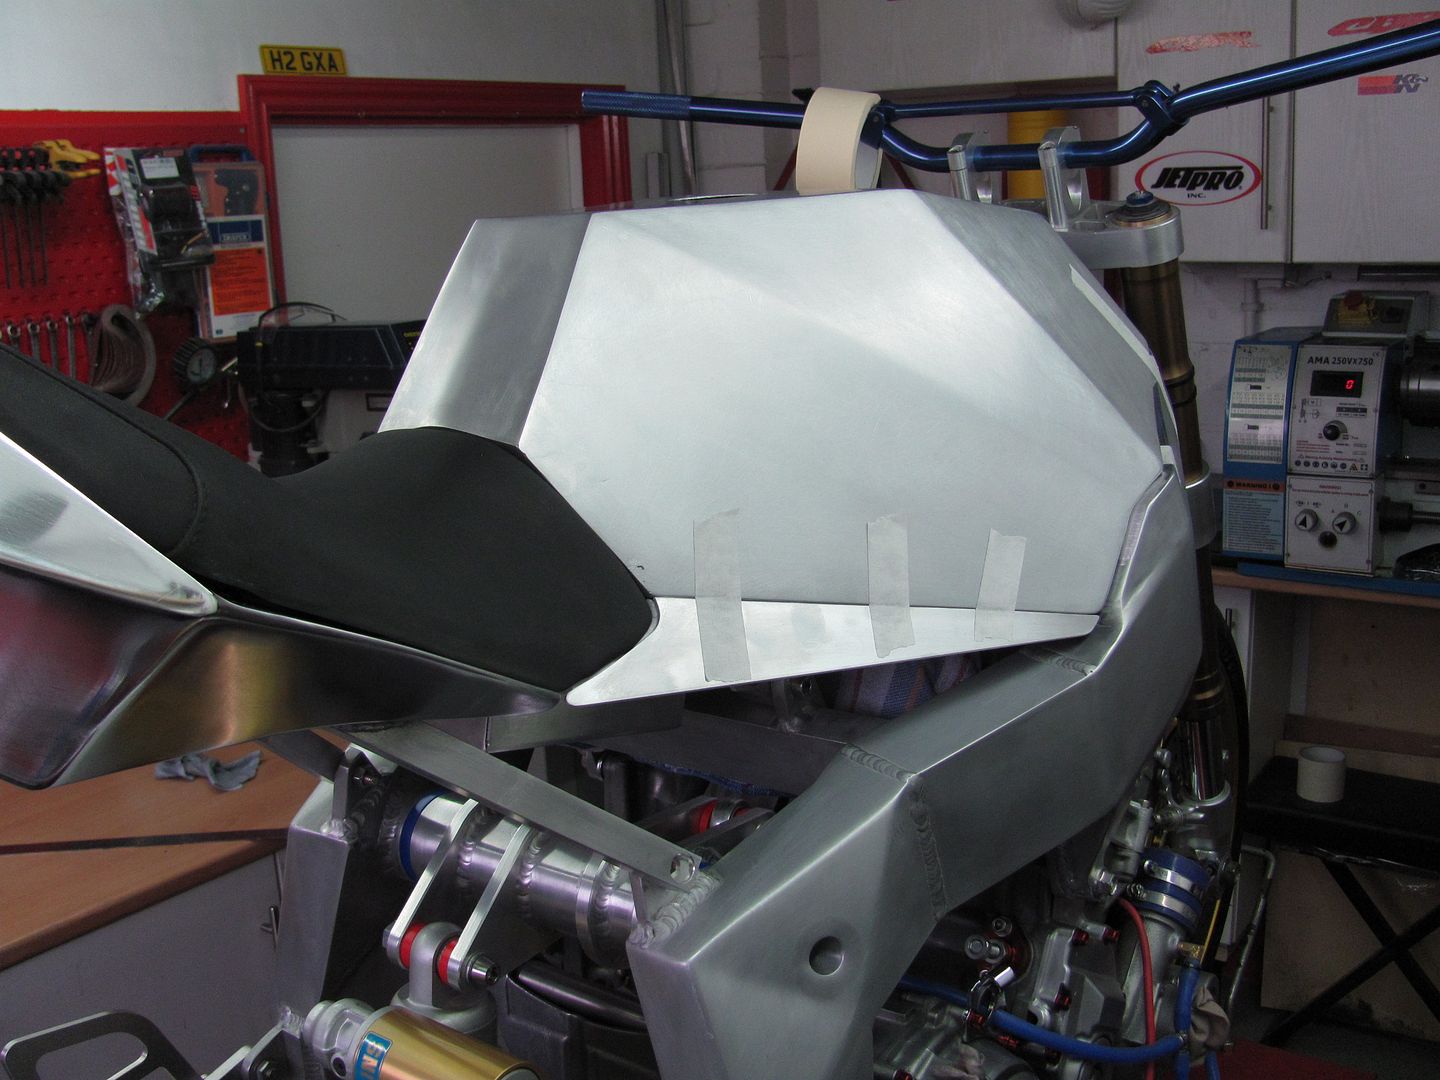
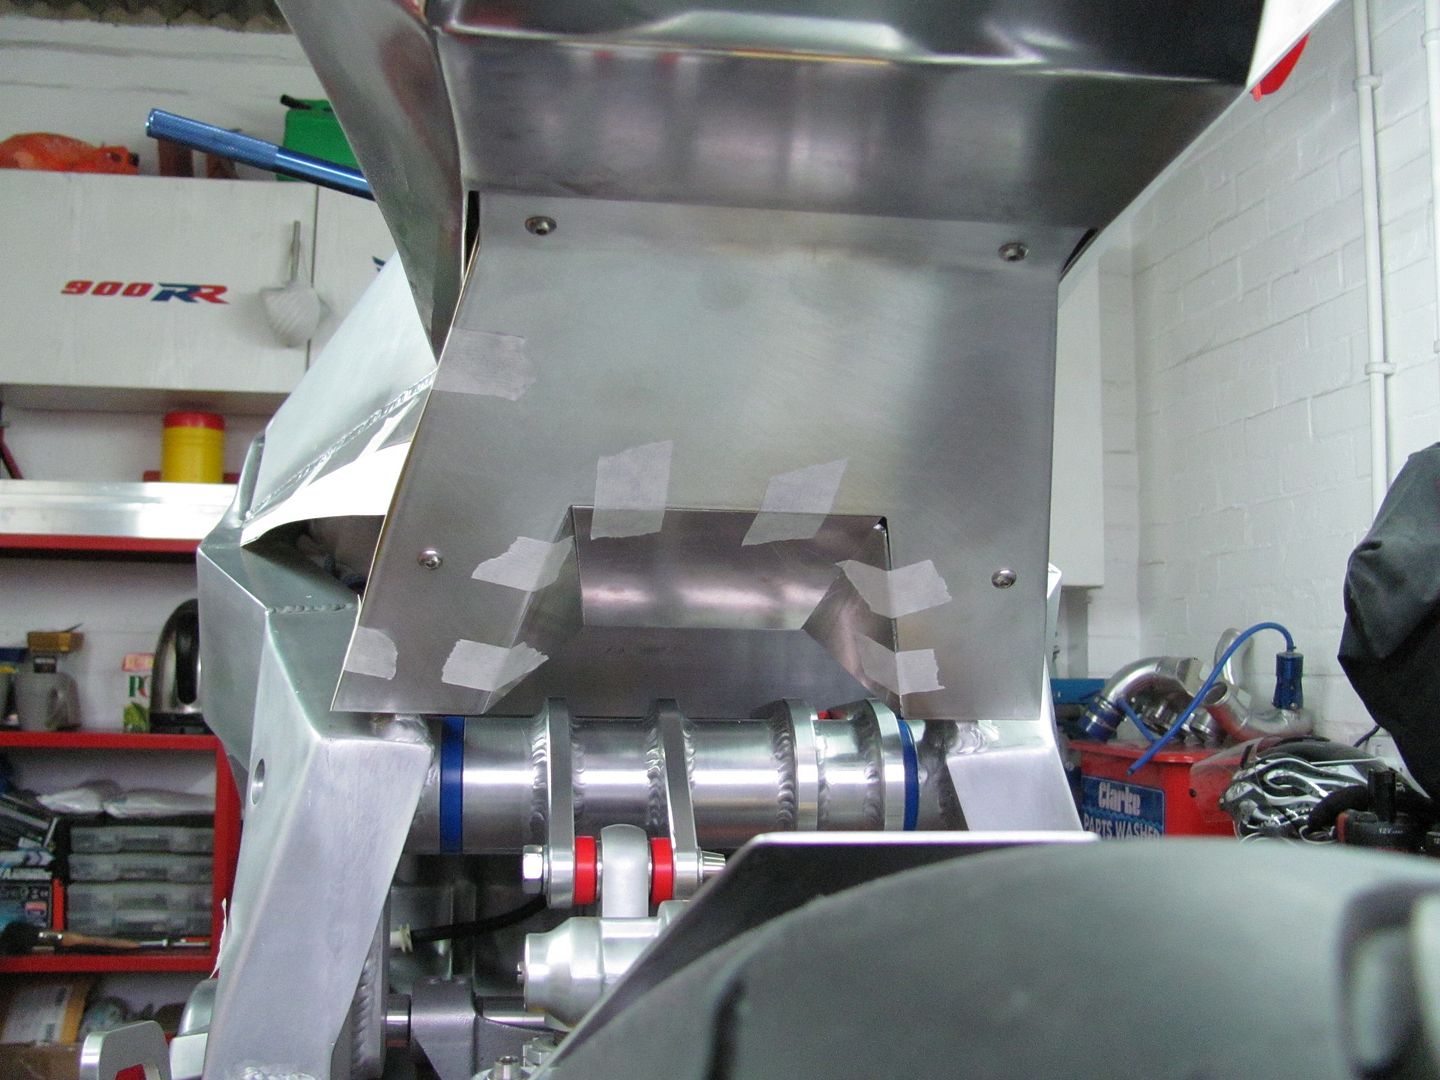
This might not look like much done here but I was really worrying over the last few weeks about finishing the tank, I knew getting all the internal welding done would warp the ally sheet of the bottom section, but getting one join welded then letting the piece cool down has worked, got all the internal welding done (just need to grind all the edges)
Name:  002-62.jpg
Views: 220
Size:  86.5 KB
And the top half tacked in place, tank fits perfect, will mack up the rear mounts tomorrow.
Name:  001-66.jpg
Views: 241
Size:  60.5 KB
 
Reply
Old Apr 5, 2012 | 03:08 PM
  #33  
cabbie's Avatar
Thread Starter
|
Member
Joined: Dec 2008
Posts: 67
Likes: 0
From:
Default

So here's the finished tank, welded together and sanded down, fits the bike superb too!!! nice.
Name:  001-67.jpg
Views: 206
Size:  46.3 KB
Name:  002-63.jpg
Views: 235
Size:  61.1 KB
 
Reply
Old Apr 6, 2012 | 11:34 AM
  #34  
cabbie's Avatar
Thread Starter
|
Member
Joined: Dec 2008
Posts: 67
Likes: 0
From:
Default

Got the tank mounts made and fitted (they will be welded in place and the screw holes filled)
Name:  001-68.jpg
Views: 242
Size:  64.0 KB
Name:  002-64.jpg
Views: 251
Size:  53.6 KB

Made the infill pieces for the tank bottom, will get all this welded up tomorrow.
Name:  004-30.jpg
Views: 272
Size:  58.1 KB
 
Reply
Old Apr 6, 2012 | 11:47 AM
  #35  
gotcbr's Avatar
Senior Member
Joined: Apr 2009
Posts: 6,494
Likes: 5
Default

First class metal work. Really nice looking tank.
 
Reply
Old Apr 6, 2012 | 02:30 PM
  #36  
JankCibberf2's Avatar
Senior Member
Joined: May 2011
Posts: 842
Likes: 4
Default

how do you test these tanks for leaks?
 
Reply
Old Apr 6, 2012 | 03:18 PM
  #37  
cabbie's Avatar
Thread Starter
|
Member
Joined: Dec 2008
Posts: 67
Likes: 0
From:
Default

Originally Posted by JankCibberf2
how do you test these tanks for leaks?
Put an airline in and pump it up, if you hear a hisssssssssssssssss, it will leak.
 
Reply
Old Apr 7, 2012 | 11:29 AM
  #38  
cabbie's Avatar
Thread Starter
|
Member
Joined: Dec 2008
Posts: 67
Likes: 0
From:
Default

Little update.

Got the tank skirts welded on and made the worlds smallest hugger
Name:  002-65.jpg
Views: 261
Size:  87.3 KB

Few pix of progress so far
Name:  006-11.jpg
Views: 263
Size:  117.9 KB
Name:  009-1.jpg
Views: 239
Size:  110.7 KB
Name:  004-31.jpg
Views: 238
Size:  129.0 KB
 
Reply
Old Apr 7, 2012 | 03:10 PM
  #39  
Burnupking's Avatar
Junior Member
Joined: Apr 2012
Posts: 5
Likes: 0
From: South Wales
Default

That look ace. Quality fabrication
 
Reply
Old Apr 9, 2012 | 12:13 PM
  #40  
cabbie's Avatar
Thread Starter
|
Member
Joined: Dec 2008
Posts: 67
Likes: 0
From:
Default

Made a start with the subframe cover, hope to get this finished tomorrow night and welded up Wednesday
Name:  003-43.jpg
Views: 249
Size:  63.8 KB

Name:  001-70.jpg
Views: 215
Size:  72.8 KB
 
Reply


All times are GMT -5. The time now is 12:04 PM.