

Having a carb issue! Tech support needed!
#11
 03-30-2013, 02:39 PM


Senior Member
Join Date: Sep 2006
Location: Preston, UK
Posts: 649
Likes: 0
Received 0 Likes
on
0 Posts
#13
03-30-2013, 03:12 PM

June 2013 ROTM
#14
04-01-2013, 09:09 AM

#15
04-01-2013, 11:30 AM
Senior Member
Join Date: Sep 2006
Location: Preston, UK
Posts: 649
Likes: 0
Received 0 Likes
on
0 Posts
The bubbling sound is fuel running down on to the back of the inlet valves (which are now hot) because the float needles are not stopping the fuel.
#16
04-01-2013, 11:53 AM
If you mean the bubbling issue just after it dies on you then it will be the float needles not sealing correctly - not a re-jetting required.
The bubbling sound is fuel running down on to the back of the inlet valves (which are now hot) because the float needles are not stopping the fuel.
The bubbling sound is fuel running down on to the back of the inlet valves (which are now hot) because the float needles are not stopping the fuel.
#17
04-01-2013, 12:06 PM
Senior Member
Join Date: Sep 2006
Location: Preston, UK
Posts: 649
Likes: 0
Received 0 Likes
on
0 Posts
How would I go about correcting this issue? Would I need to replace the float needles? I called a dealer, the shop manager, said that the best way would to do a dyno test to see if the pressure test could reveal the problems. Do you think that would be a feasible idea to try? I want to eliminate certain components out of the equation, so diagnosing the problem won't be so pricey and time consuming.
We got the same issue after buying an F4 that hadn't run for a while. Would start but not keep running.
When we stripped the carbs - we found crap in two of the float needles and partially blocked idle jets.
After a full clean with an aerosol of carb cleaner and making sure the idle and main jets were clear - it fired up and ran like a dream.
If you can find one before you strip the carbs - get a 0.4mm drill bit to run through the idle jets.
If it won't run - they will not even consider putting it on a dyno - pointless excercise cos they wont know what to adjust.
#18
04-03-2013, 05:49 PM
Well here is my 2cents, I am a mechanic and worked in a shop, 1st thing is that your bike starts with the choke out but left alone you must give it throttle to keep it running right, your slow circuit is plugged....if you haven't started it since you had it done last year and regular gas was sitting in the carbs then your carbs have been gummed up. gas has ethanol in it and if the bike sits for too long it get's gooey. i would think if your float needles are not sealing the float circuit then your carbs(bowls) would be would leak spilling gas on the engine(not what you want gas, heat well you understand) so too check your float needles,
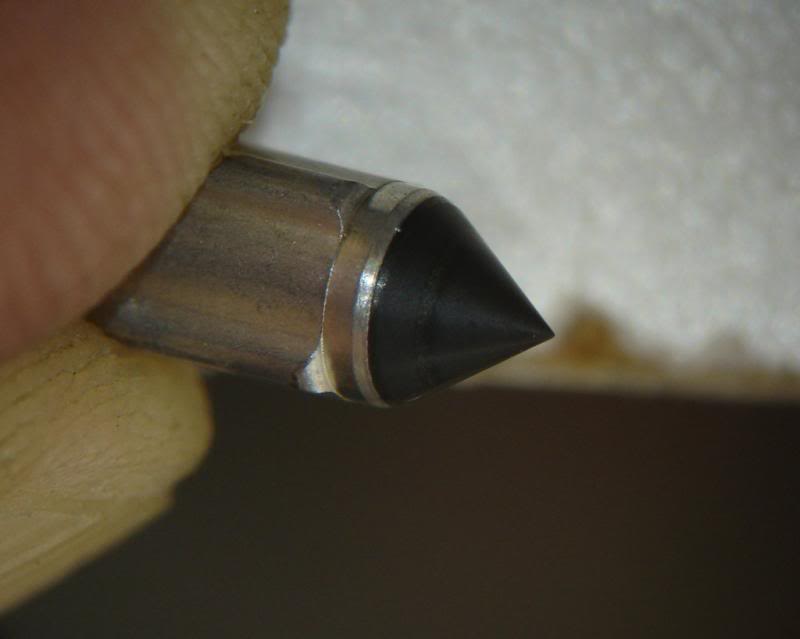
look closely at the end of the dowel where it is coned shaped and see if you see a shiny,smooth surface, if so the float needles are not sealing the circuit. replace them.....
To address the starting issue and not running on its own your slow/idle circuit is plugged, many times in the shop we would soak the pilots,needles all the parts in combustion cleaner better than carb cleaner, however if you cannot get any, carb cleaner will do over nite and find a very thin wire like a guitar string or thinner, I use to use wire from a cord spliced and pulled a copper strand from it to ream the whole to help dislodge any matter that was in there. Use the carb cleaner on the body of the carbs and ream all the holes too
make sure the carb cleaner blows thru all circuits and openings. ream the jet circuits with wire, hold firmly and blow cleaner thru them,......
then blow out with compressed air you can, use compressed air in a can, I used it but made sure I used my wire first to loosen build up and then used carb cleaner to blow thru it if it doesn't blow thru there it is still plugged. Hold jet up to a light and if you can see thru them they are clean....
once that is done put the carbs back together and bench test them before you put them back on the bike, this way you can ensure no leaks from float bowl. now you have to prop them on the bench like they sit on the bike so pay attention to how yhey sit on the manifold on your bike, attach a tube to it and fill up the float bowls, let it sit for about 15 in if it leaks you did something wrong or it is not sitting on the bench, like it would sit on the bike.
After this you should have no problems.......cost for chemicals 2 cans of carb cleaner, couple bucks for air in a can and time, some wood to prop the carbs and tubing....go at it.......Holla
Guess I should mention that I have had several f2's,with these similar issues, I am building cbr 9oorr with these issues and learned a great deal about the idle jet or slow jet being plugged after cleaning them several times so take your time and be thorough don't allow people to interrupt you while working it is easy to get lost........Now get to work....it's really easy when you understand what you are really doing
also when you put it back together make sure you have not pinched your fuel line and make sure all connections vacuum lines are properly connected
Last edited by IDoDirt; 04-06-2013 at 07:51 AM. Reason: Double Post
#19
04-07-2013, 12:36 PM

Super Moderator
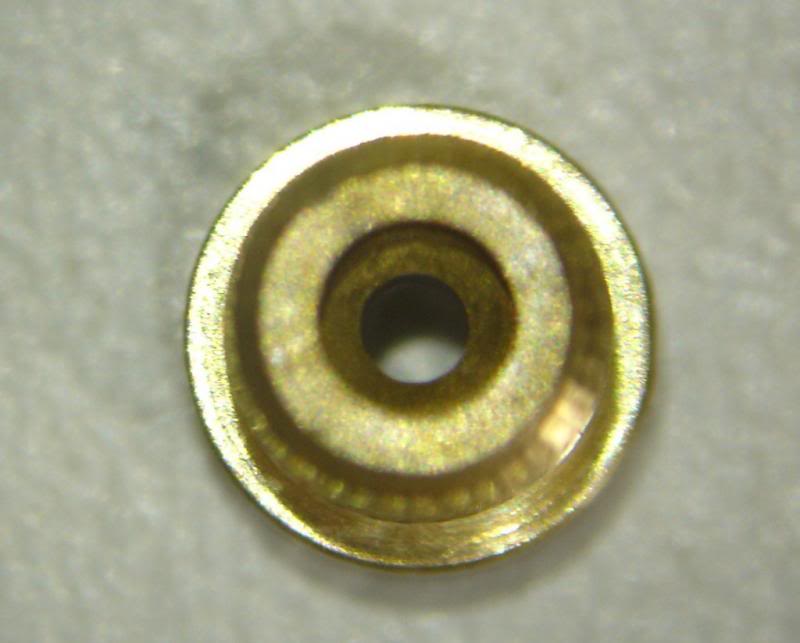
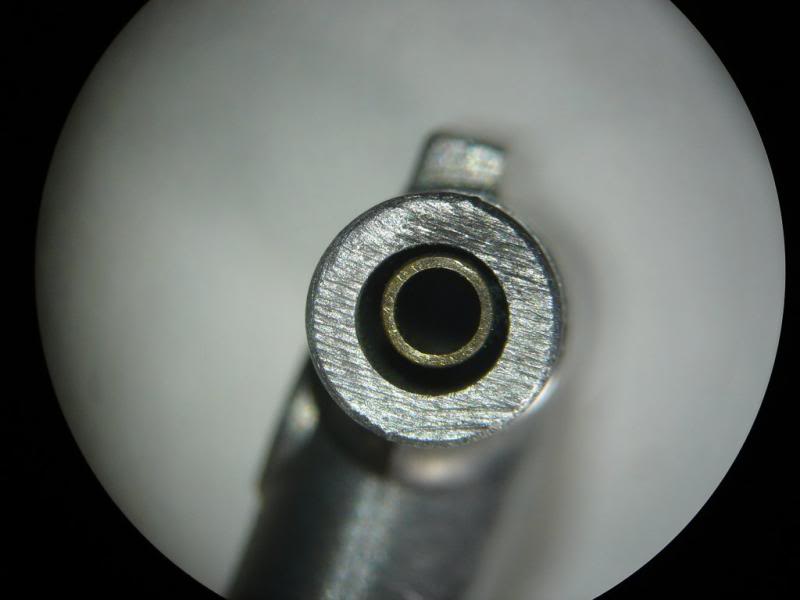
This is the slow jet from an F3.
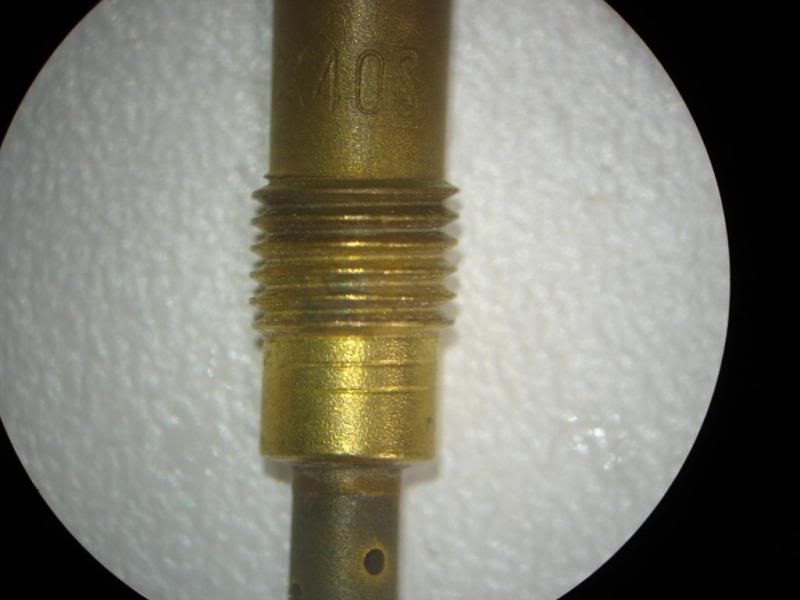
Here you can see the hole in it. Notice that it's round and symmetrical. It is a really tiny hole and difficult to see.
This is what the Float Valve looks like. This one is fine and working fine. There is a mark where it seats, but the rubber is still soft and pliable.
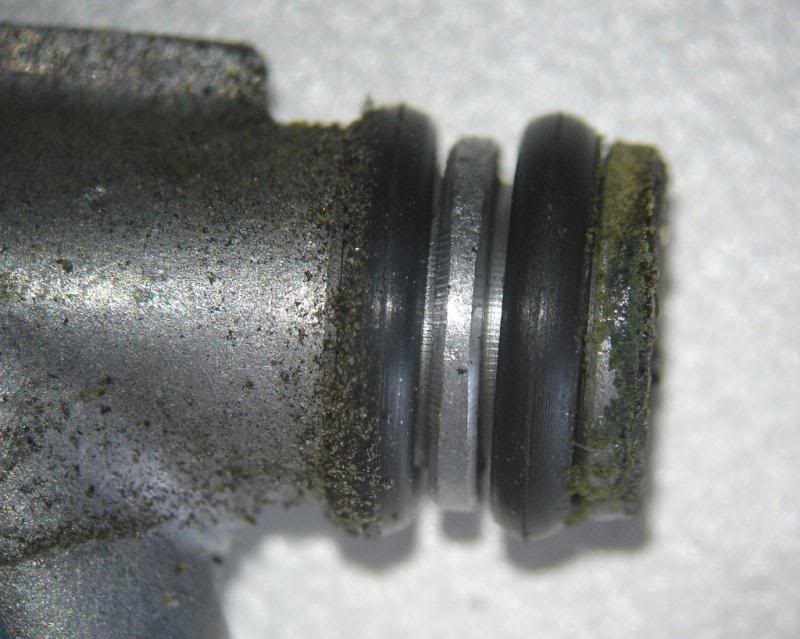
This is the water line "T" that sits in between carbs 1 and 2 as well as between 3 and 4. Being clogged up, it's not doing much. Notice that to the left and right of the O rings it's dirty, but in between them it's clean. The O rings are doing their job by keeping dirt out and liquids in.
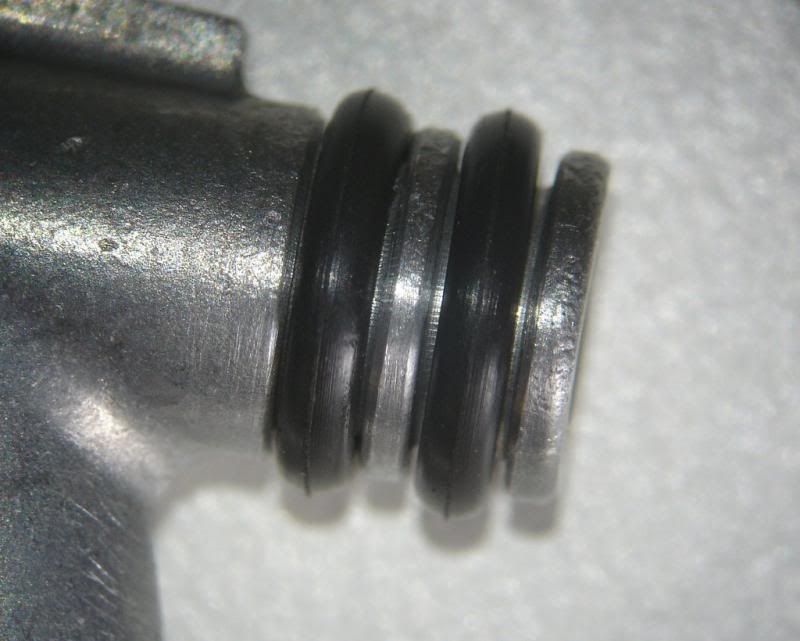
How they should look after cleaning.
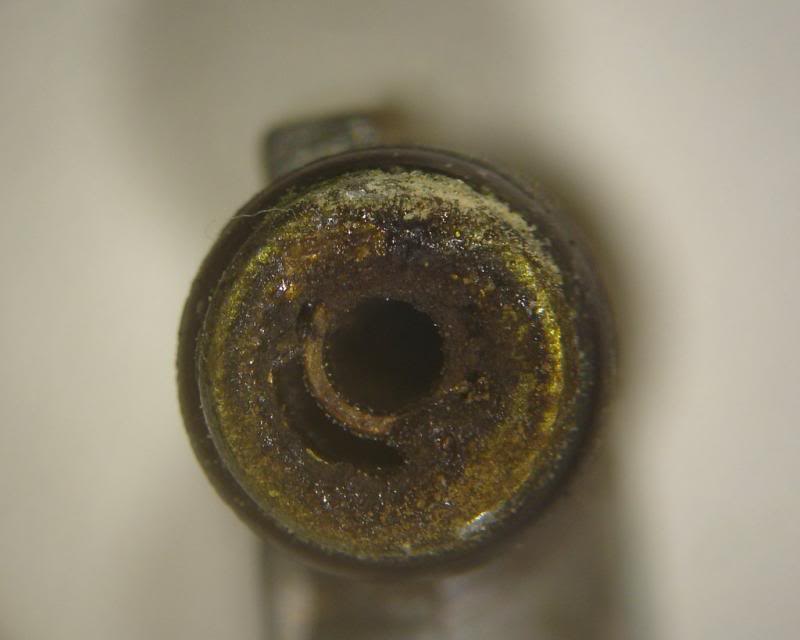
This is the fuel line "T" O ring that seals the fuel supply to the carburetors. The O ring is clean, however you can see that it's not larger than the diameter of the plastic fuel T. This one leaks. The O rings need to be replaced. The texture you see in the surface of the O ring is from corrosion that built up over time between the O ring and the carburetor body. Taking the carburetor apart and putting back together, and this won't seal properly.

I hope some of these photo's help you know what you're looking at and what to look for.
Here you can see the hole in it. Notice that it's round and symmetrical. It is a really tiny hole and difficult to see.
This is what the Float Valve looks like. This one is fine and working fine. There is a mark where it seats, but the rubber is still soft and pliable.
This is the water line "T" that sits in between carbs 1 and 2 as well as between 3 and 4. Being clogged up, it's not doing much. Notice that to the left and right of the O rings it's dirty, but in between them it's clean. The O rings are doing their job by keeping dirt out and liquids in.
How they should look after cleaning.
This is the fuel line "T" O ring that seals the fuel supply to the carburetors. The O ring is clean, however you can see that it's not larger than the diameter of the plastic fuel T. This one leaks. The O rings need to be replaced. The texture you see in the surface of the O ring is from corrosion that built up over time between the O ring and the carburetor body. Taking the carburetor apart and putting back together, and this won't seal properly.
I hope some of these photo's help you know what you're looking at and what to look for.
#20
04-09-2013, 09:39 AM

Thread
Thread Starter
Forum
Replies
Last Post