
Will this kit work on my bike?


Thread Starter
|
Member
Joined: May 2009
Posts: 42
Likes: 0
http://cgi.ebay.com/Slim-Ballast-Kit...item3ef7f7644b
also what K should i get 5 or 6 k?
thanks
Mike
also what K should i get 5 or 6 k?
thanks
Mike
Thread Starter
|
Member
Joined: May 2009
Posts: 42
Likes: 0
I have a red / silver bike. Is our bulb size h7? and how difficult is it to actually install?

April 2011 Ride of the Month
Joined: Jul 2009
Posts: 5,686
Likes: 0
ive never actually installed a pair myself.... but i found this write up... not any pictures which is disappointing but i think its pretty similar for all hid set ups
http://www.bandofriders.net/forums/s...ad.php?t=29907
thats the link there are a few more needless pics there.... i dont take credit for this write up.... just passing it on
http://www.bandofriders.net/forums/s...ad.php?t=29907
thats the link there are a few more needless pics there.... i dont take credit for this write up.... just passing it on
Last edited by __Z__; Mar 17, 2010 at 11:21 AM.
April 2011 Ride of the Month
Joined: Jul 2009
Posts: 5,686
Likes: 0
Alright, time for an update. I wanted to install a separate fusebox for stuff like power plugs, heated grips, possibly a Garmin hardwire. Since all the parts came in already, I've been fiddling for the last two days taking my time with the fuse box. Probably spent way more time that I should have, but it came out nice.
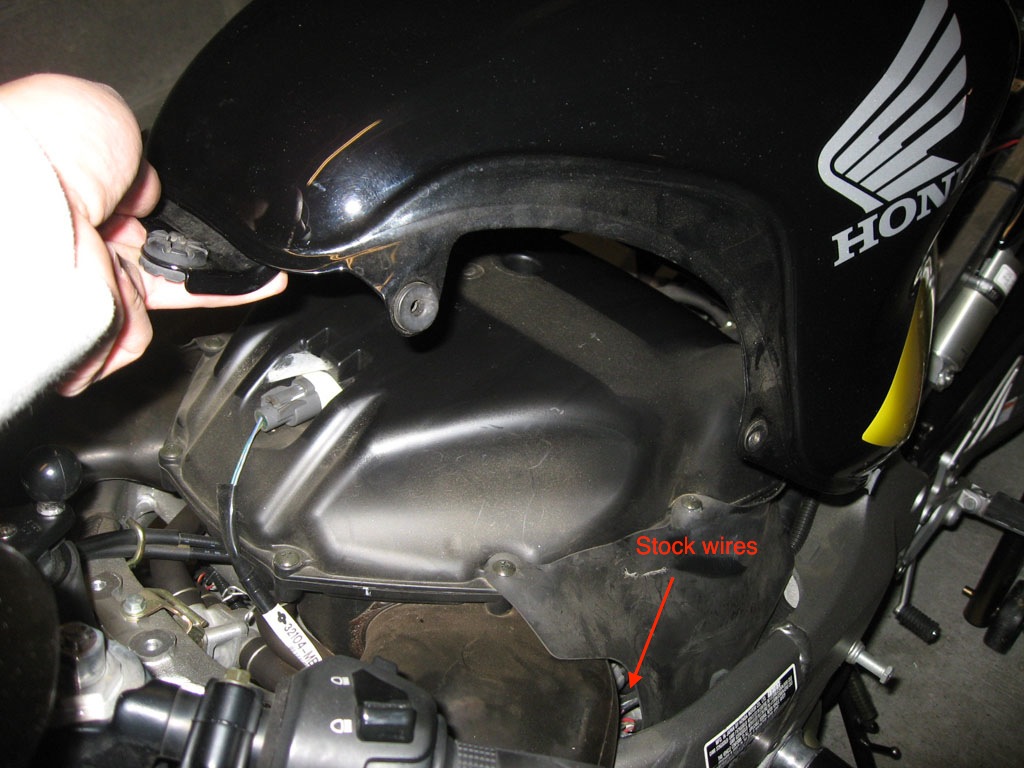
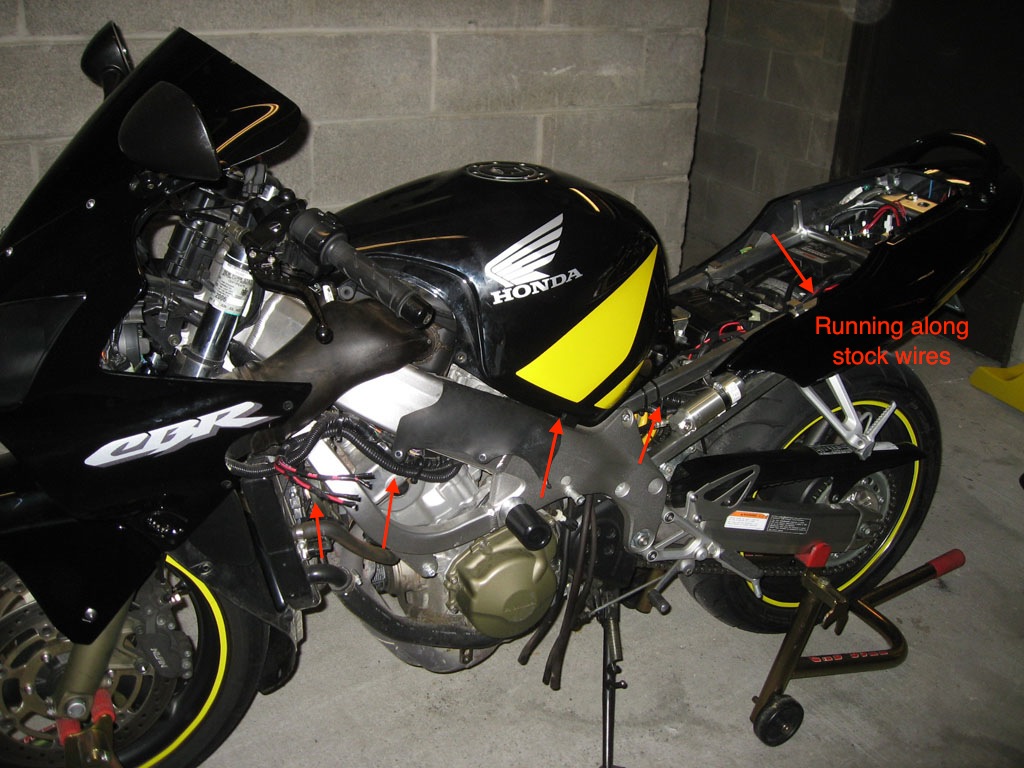
Bike, check. Tools, check. Fairings and plastics came off easy since I remembered everything from the the slider fiasco the other day. Lifting the tank a bit, I saw the stock wiring and decided to run my wires alongside.
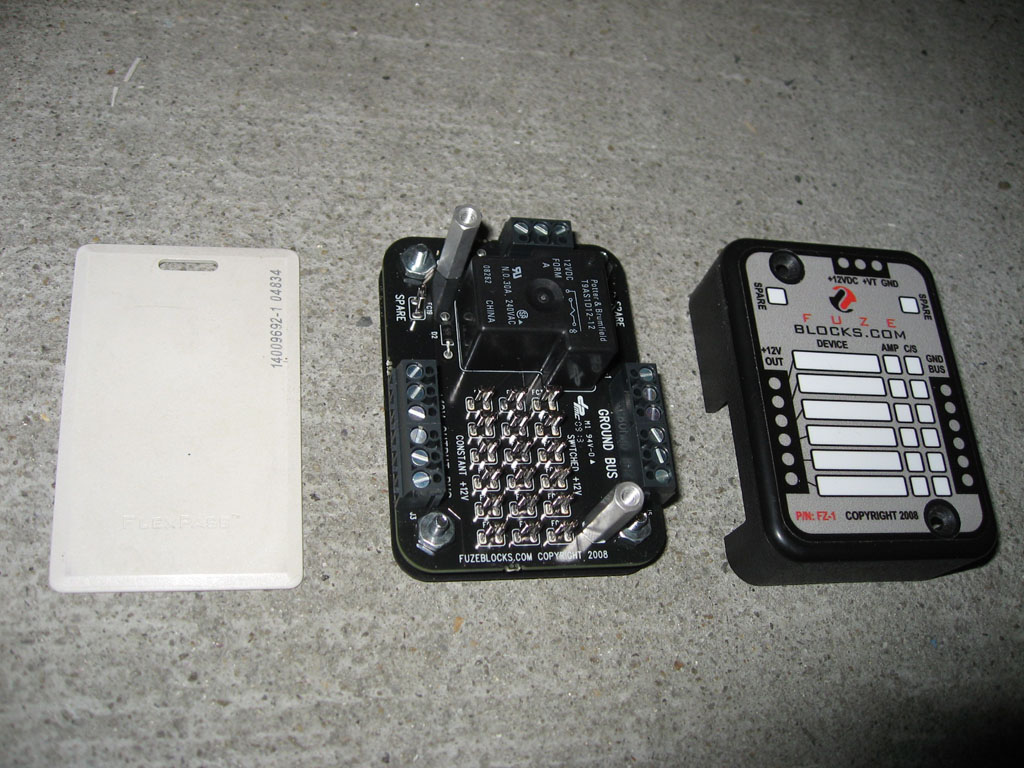
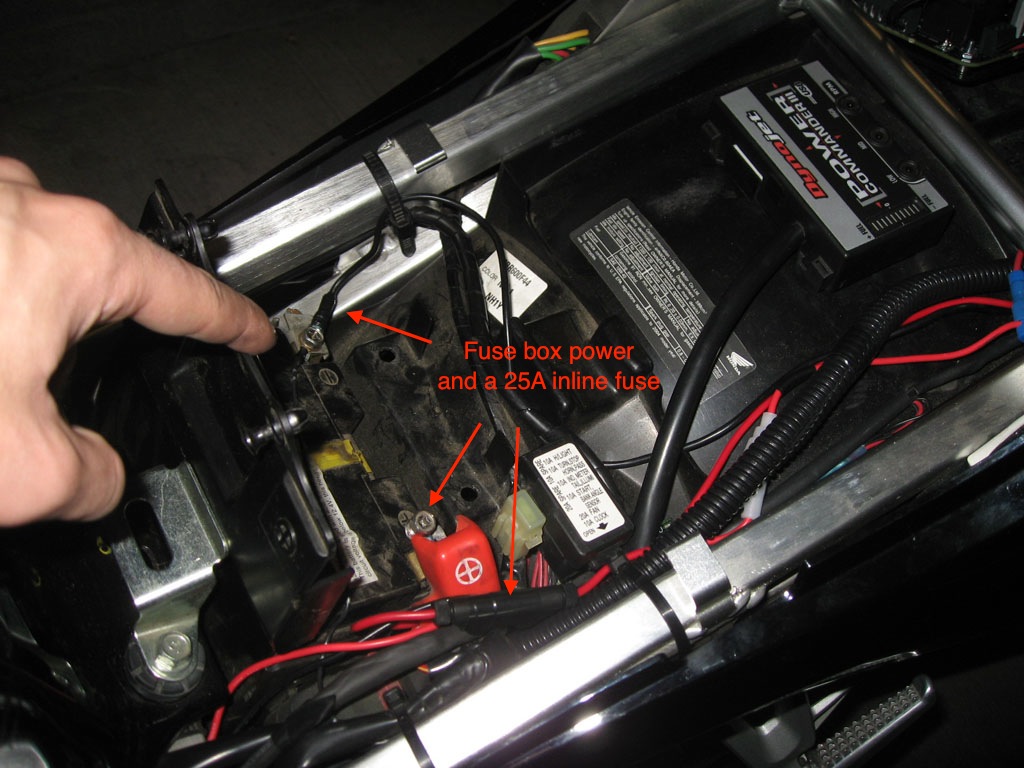
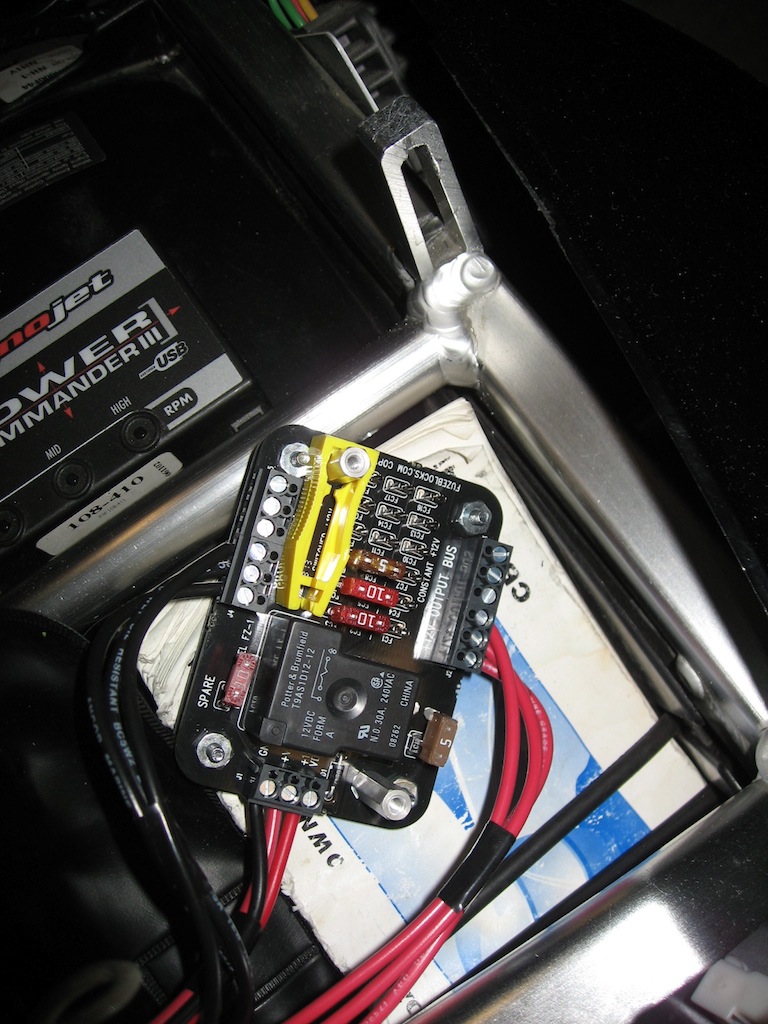
Now for the best part. It's the FZ-1 from http://fuzeblocks.com. A bit pricy at $80 but nice as hell. It's tiny, pretty sturdy (check their website for crash pics) and has two internal buses. One is on a direct feed from the battery and the other one is controlled via a switched relay. For each device (you can plug 6), simply choose whether you want it always on or only when the ignition is on. Then you put a fuse in the appropriate spot.
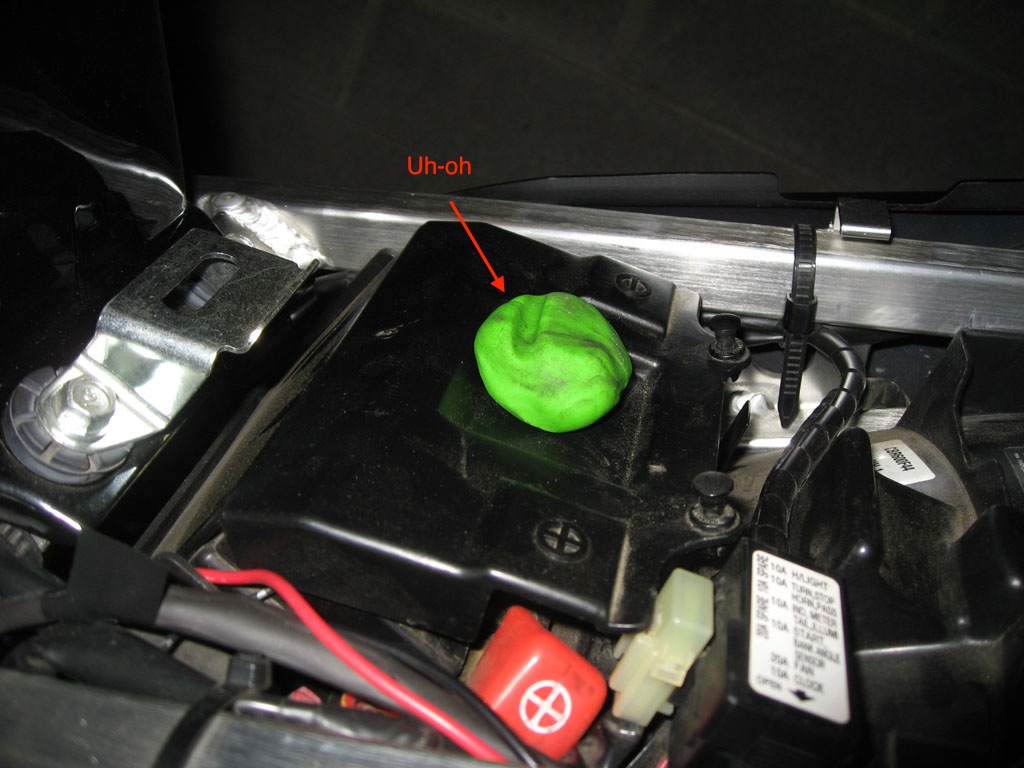
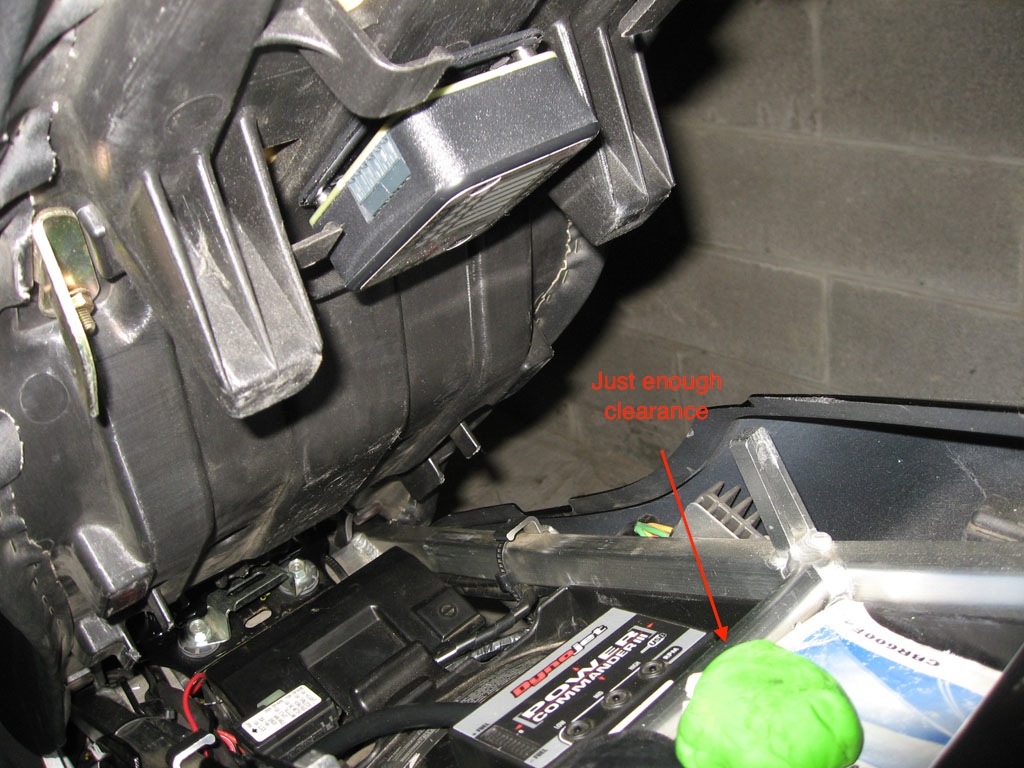
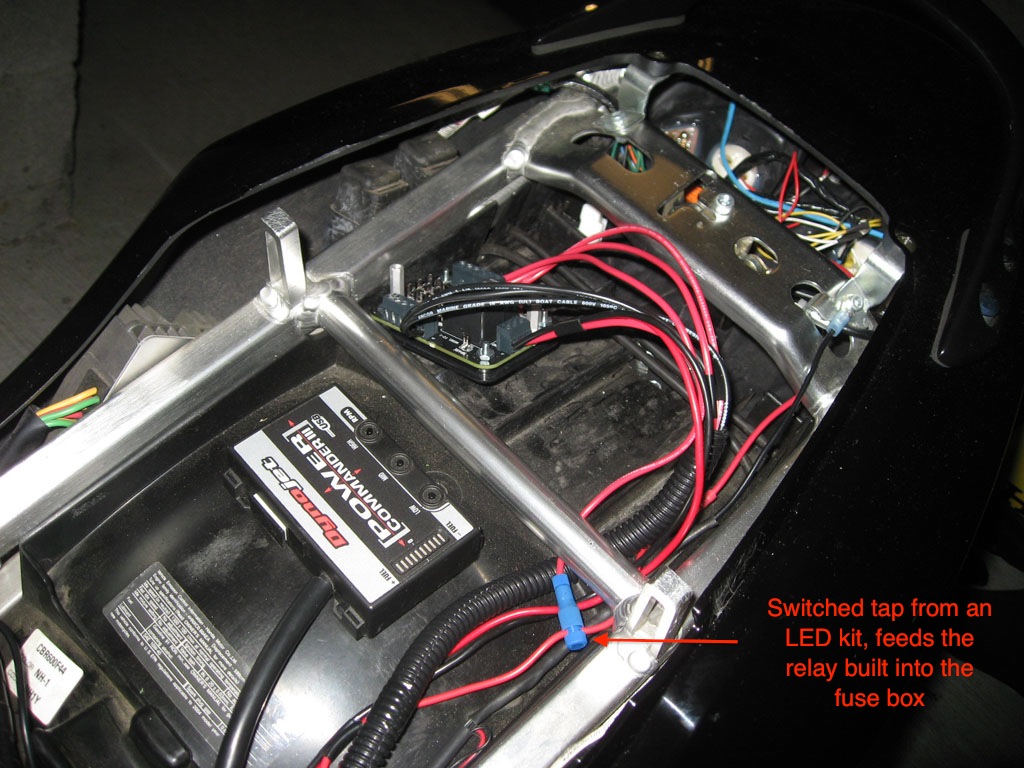
Even though this thing is small, I had trouble finding a place for it. So I used a piece of play-doh with approximately the height of the fuse box and after some experimenting with the seat, I figured out that the only place under the seat that can fit the fuse box is already taken by the Power Commander. Bummer. So I decided to mount the fuse box upside down with some velcro under the seat. This way, it will sit just above the owner's manual and tool box, with enough clearance.

Next, wiring -- flexible heat-resistant tubing, some 16-gauge heat/water/oil resistant boat wire, inline fuse, heat-shrink ring connectors and some posi-locks. By the way, http://www.posi-products.com ... it's the ****. This stuff makes me not want to touch another connector again.
So I went with 3 sets of wires -- one for a set of cigarette lighters (5A should be plenty, or I can install a bigger fuse), one for hardwiring a Garmin and one for heated grips.
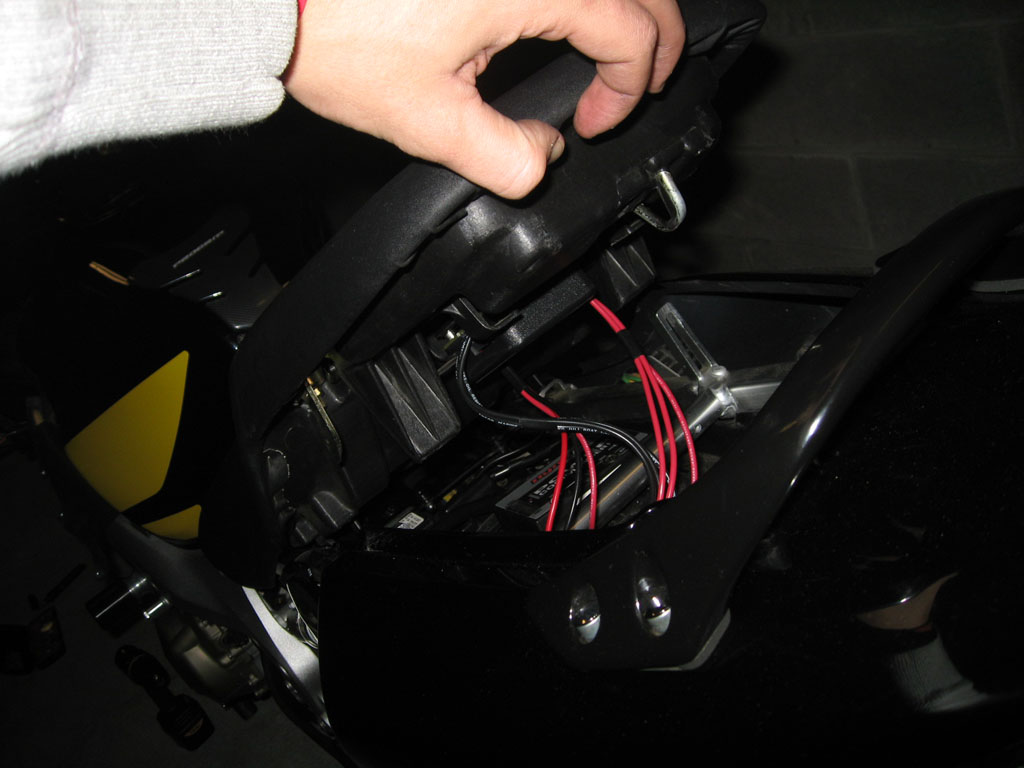
And back on the bike:

Done for the day, happy with the result! Bike's getting dusty, so a cleaning is in order then it's either HIDs or cigarette lighters.
Hope no one steals my fairings.
Thanks all. I don't have a cover yet but may get one for the winter.
Here's the next "mod" -- took a fuse puller tool, chopped one end off, trimmed it, drilled out the hole on one side and was able to fit it into the fuse box. Not my original idea but oh well
I also installed HIDs the other night, pics incoming soon.

So here's a little HID write-up. I am happy with the result, went with a DDM dual HID kit at 4500K. Looks pretty good, similar to the stock HIDs on my car. The ballasts are very slim and were easy to hide in the fairings. They emit a bit of a buzzing noise while on (louder when warming up, then they quiet down a bit). This is not a problem, there's no way I would hear them with the engine on.
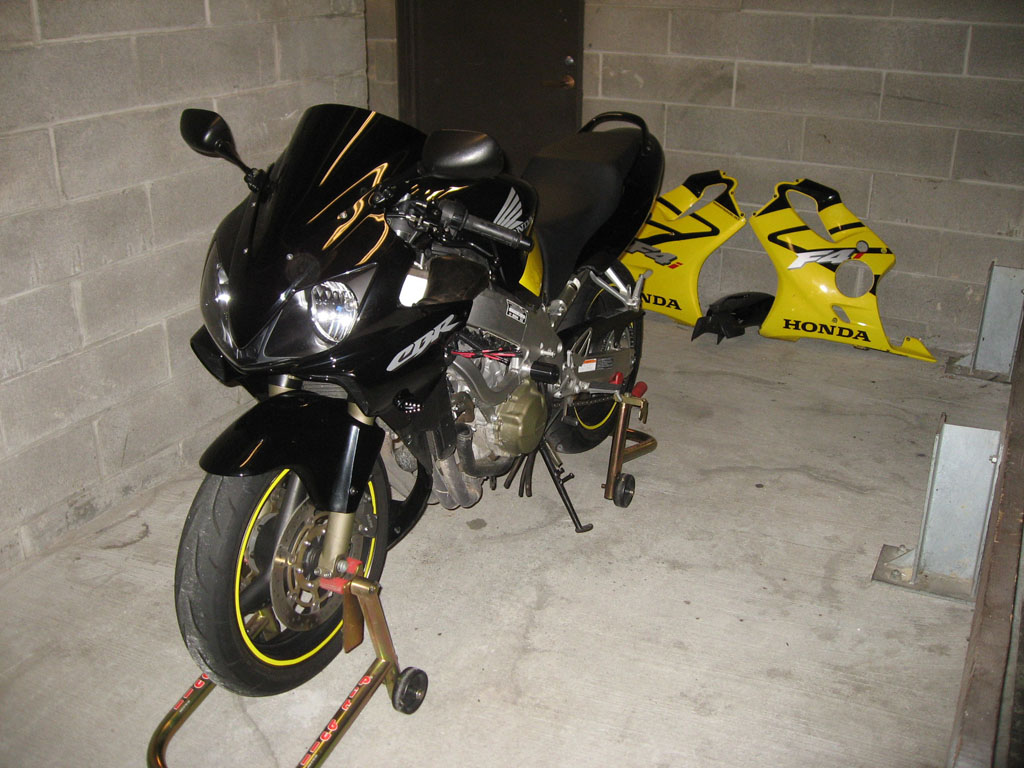
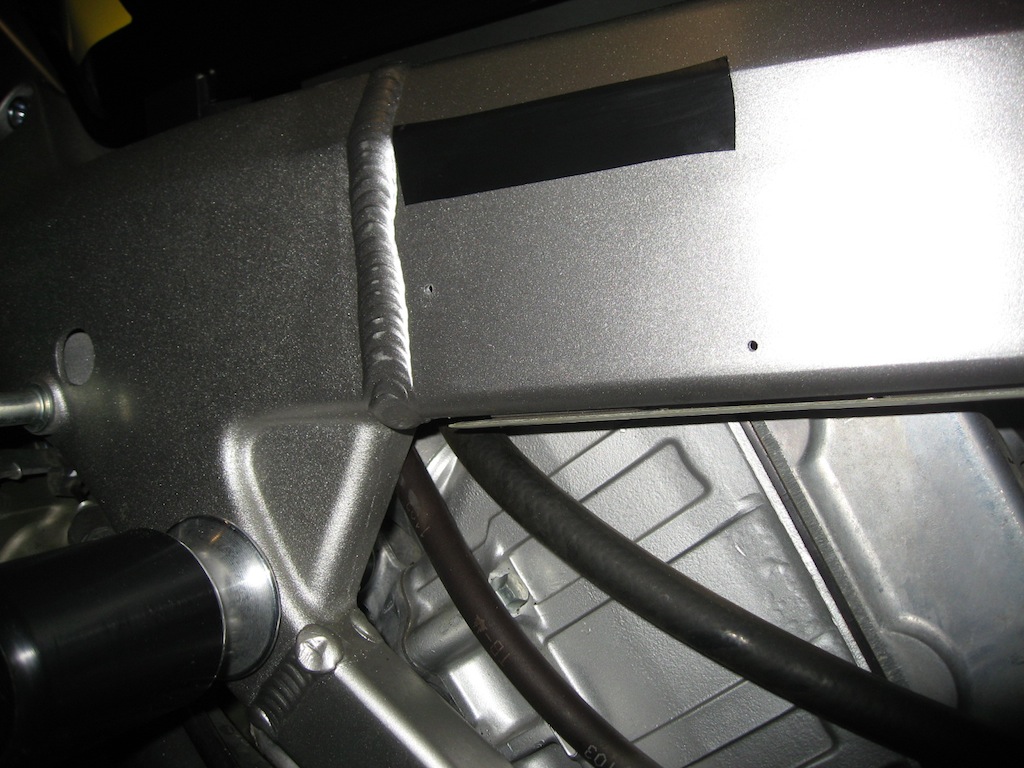
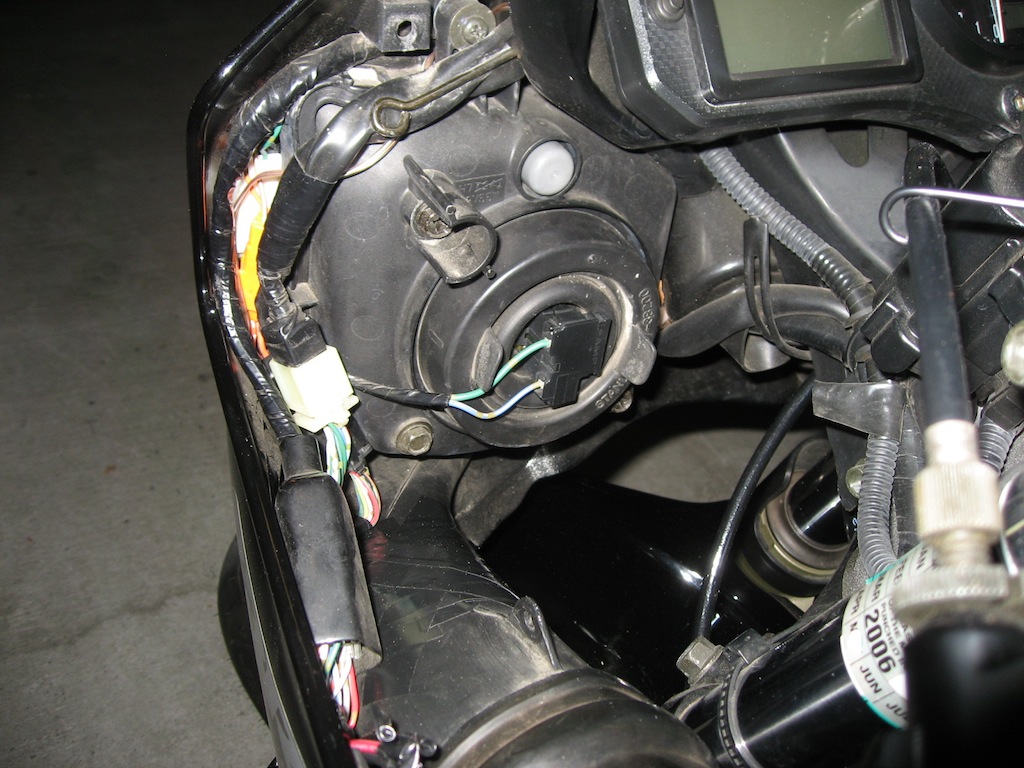
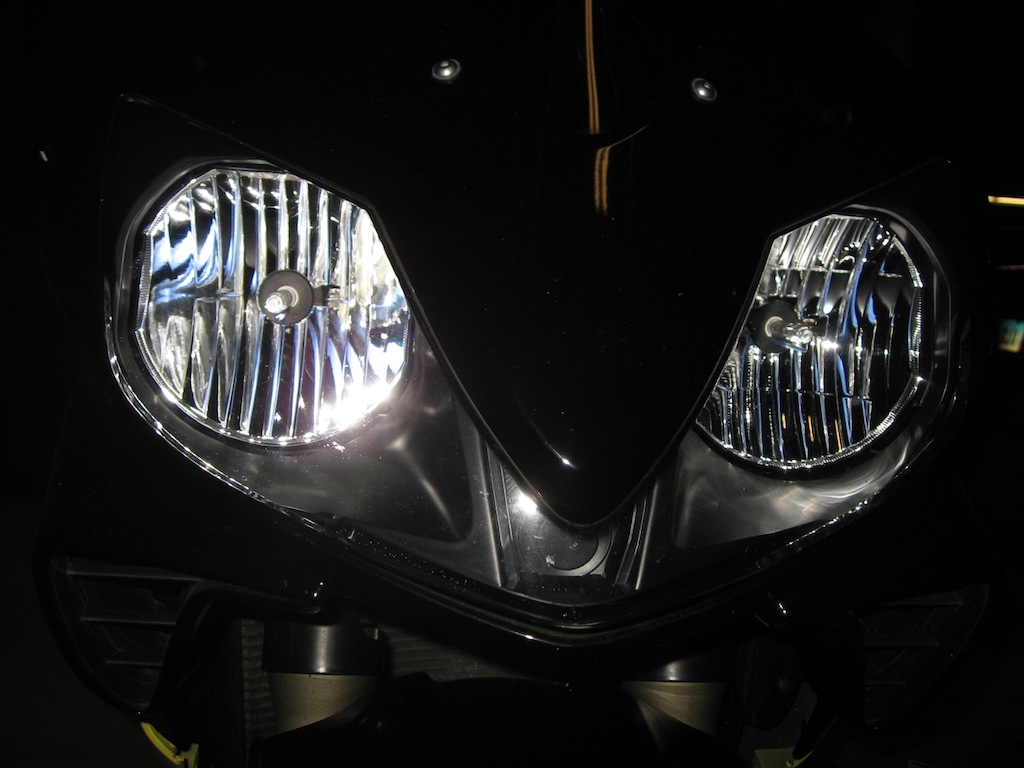
So.. starting clean:
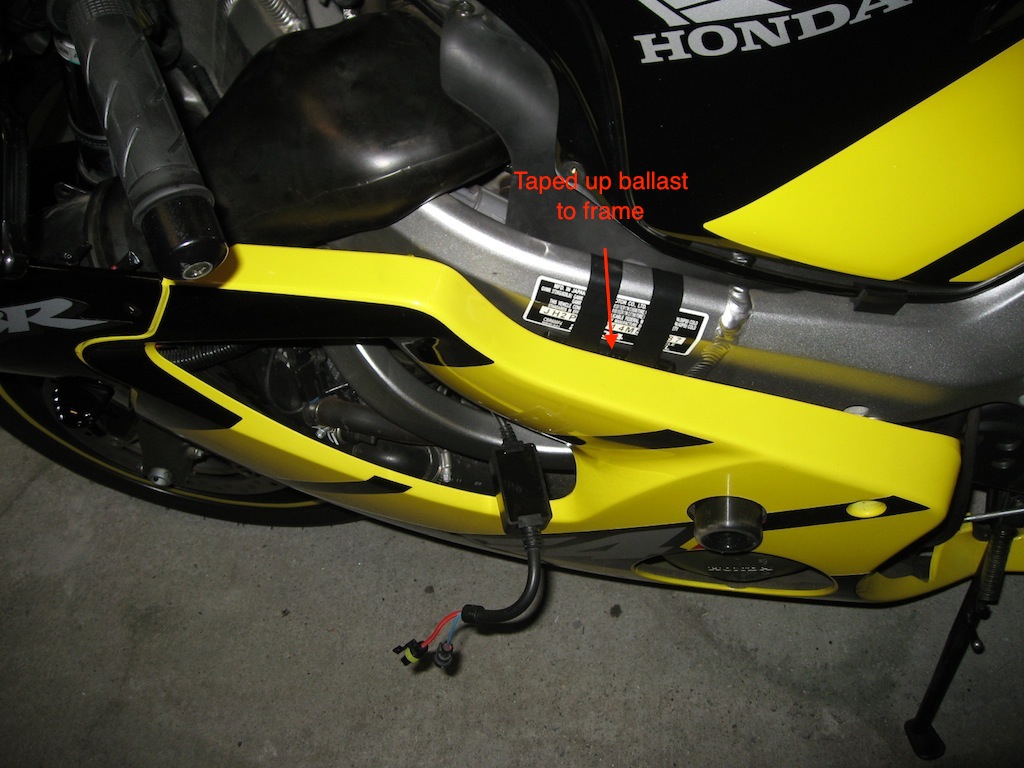
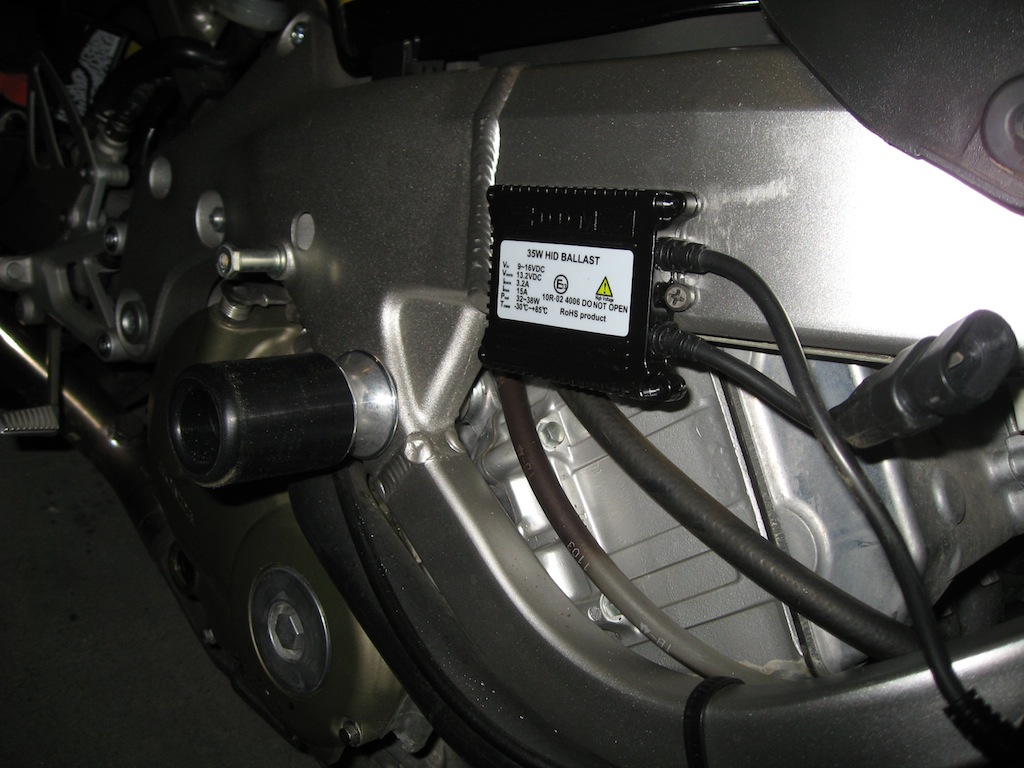
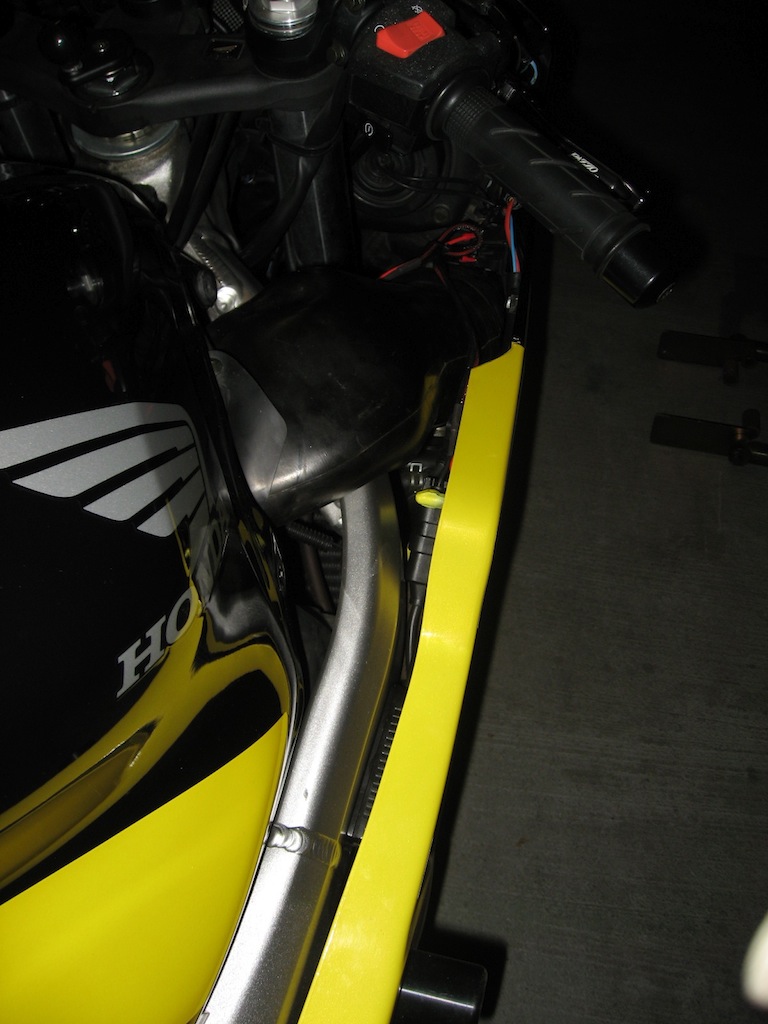
This was the best place for the ballasts so they wouldn't be too visible. Since only half the ballast would cover the frame, using 2-sided sticky pads wasn't an option, so I decided to drill. 2 small holes and they were on super tight.
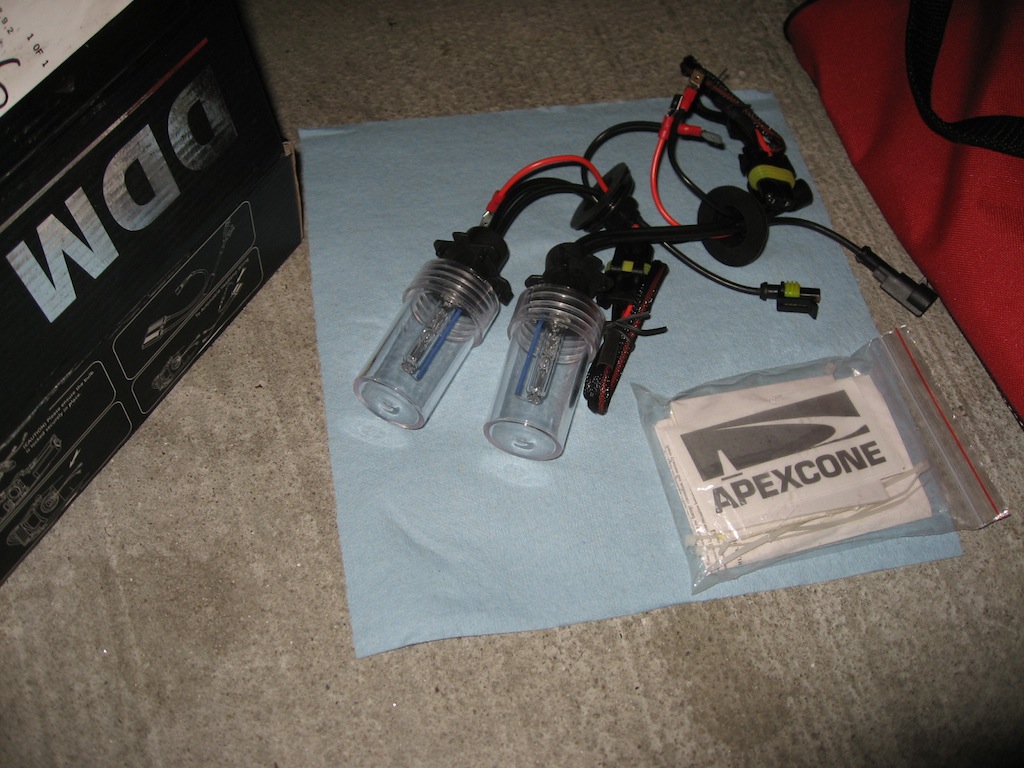
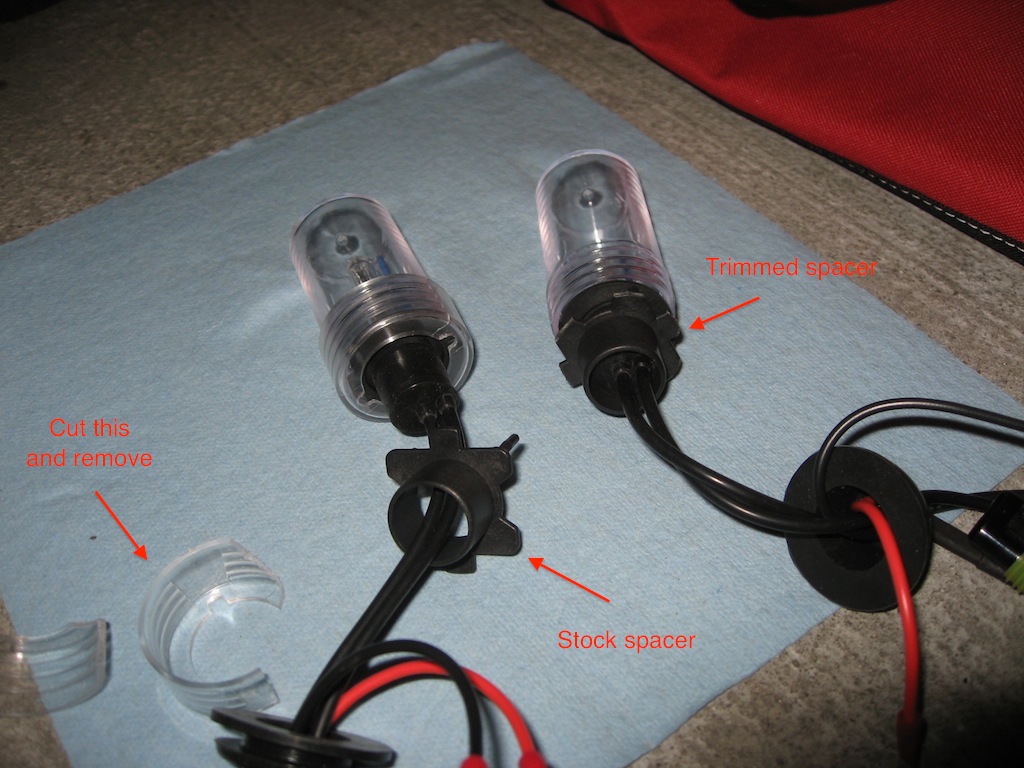
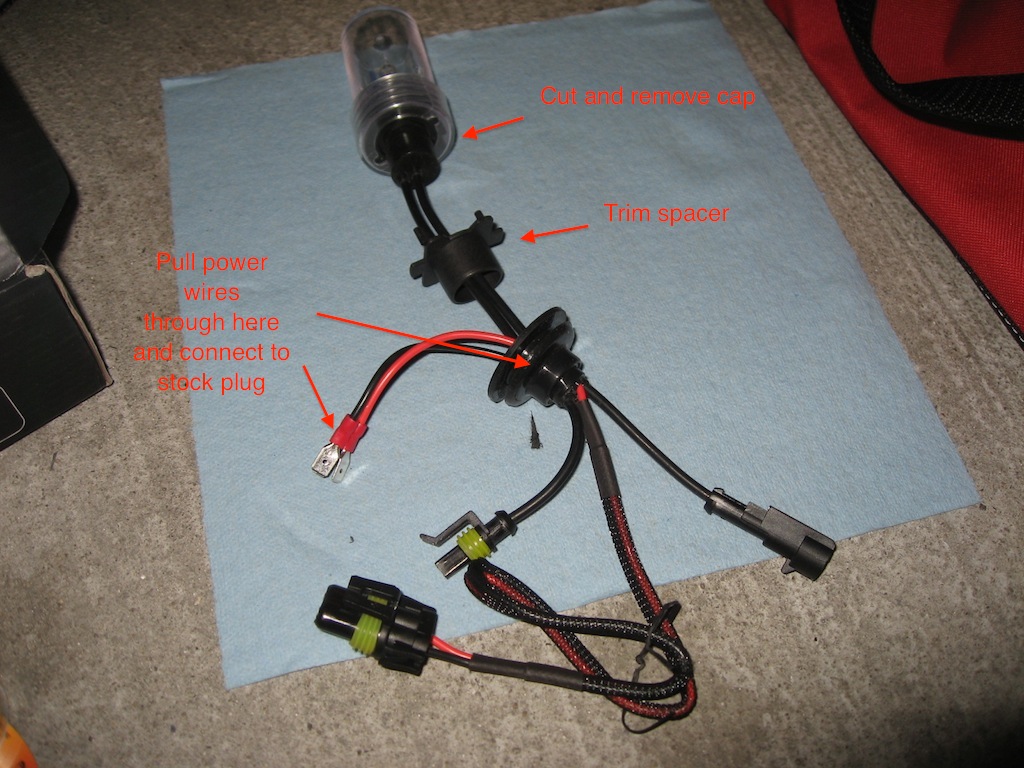
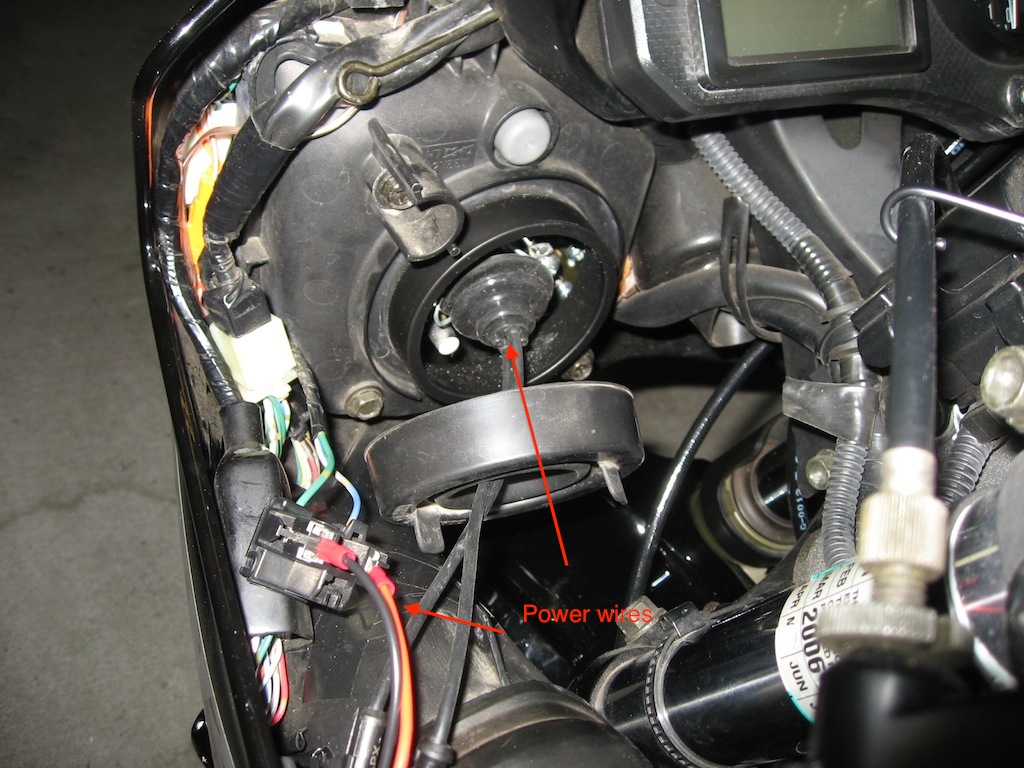
The DDM kit was easy to install, but I had to trim a plastic spacer. Since this is an universal H7 kit, some bikes may not even require this spacer, while others could use it without modification. On my bike, some cutting was required. Also, had to pull the power wires all the way out and connect them to the stock headlight plug.
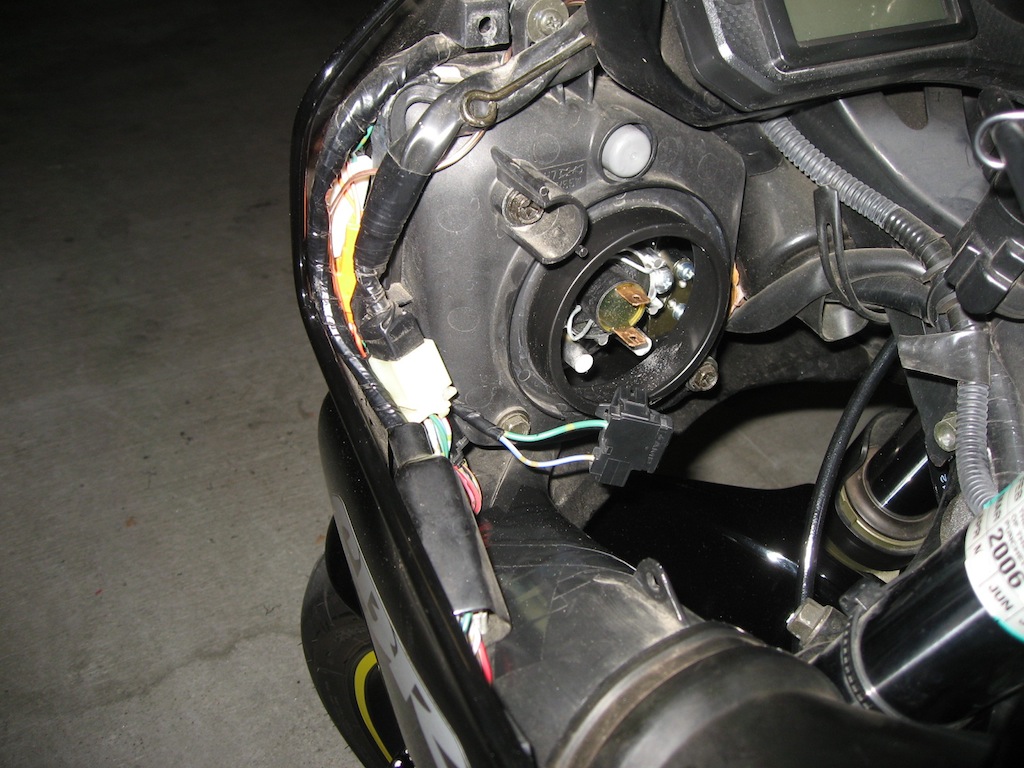
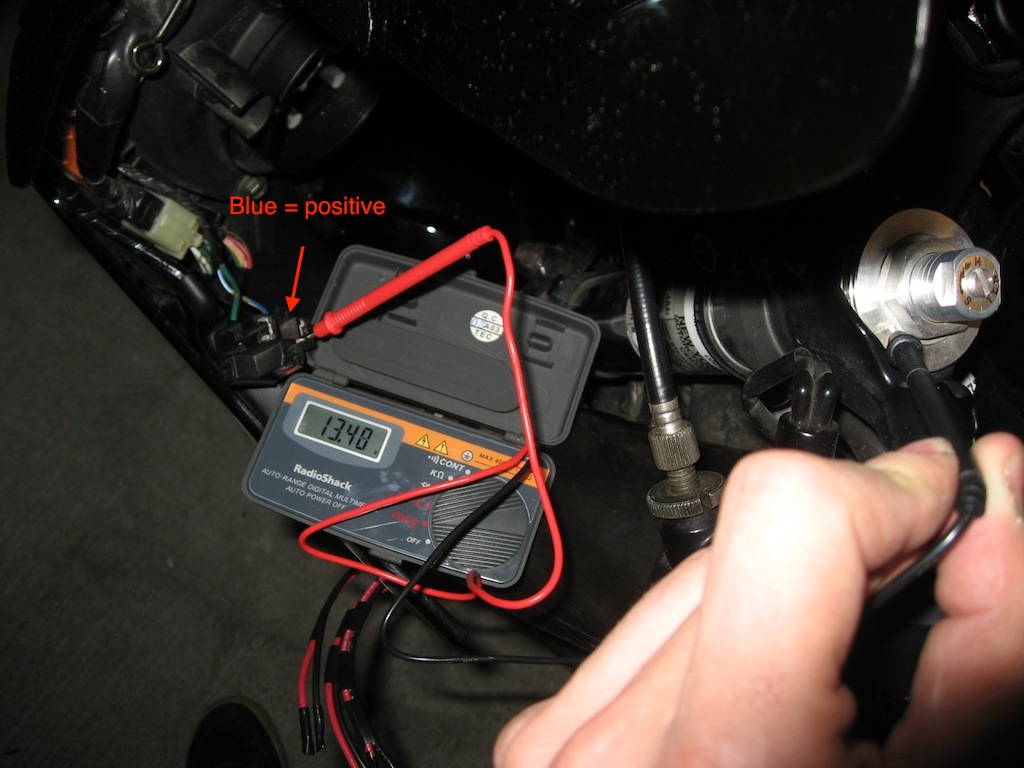
After that point, the install was pretty straightforward. I had to figure out which terminal was positive. The bulb doesn't care but the HID kit does.
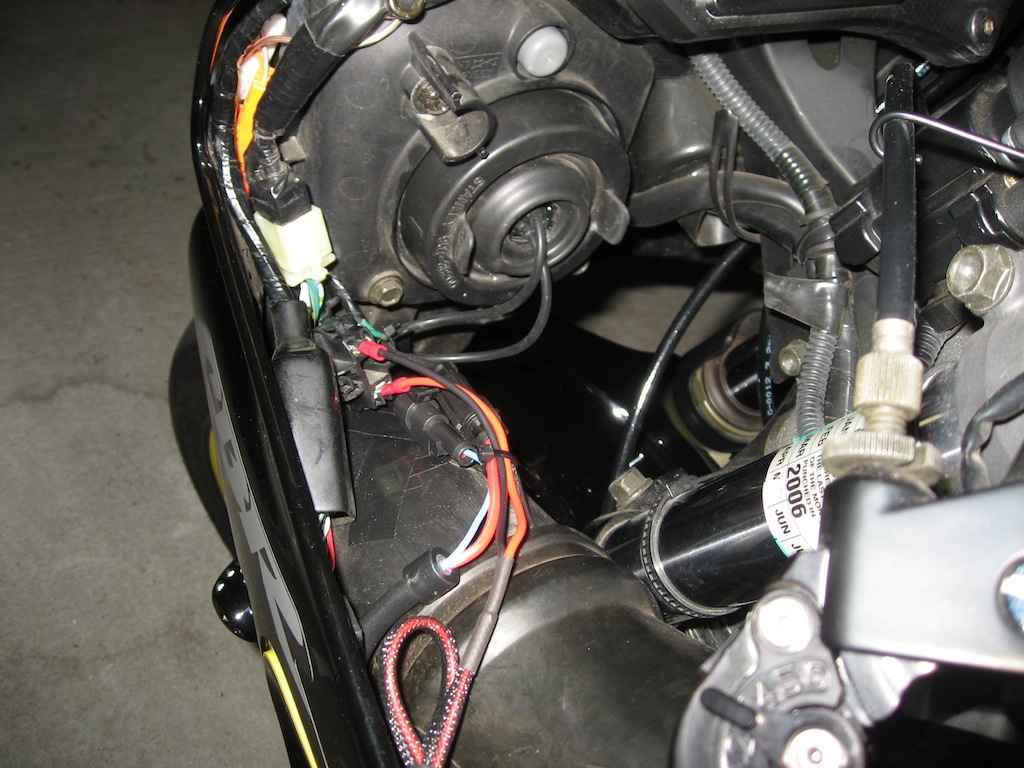
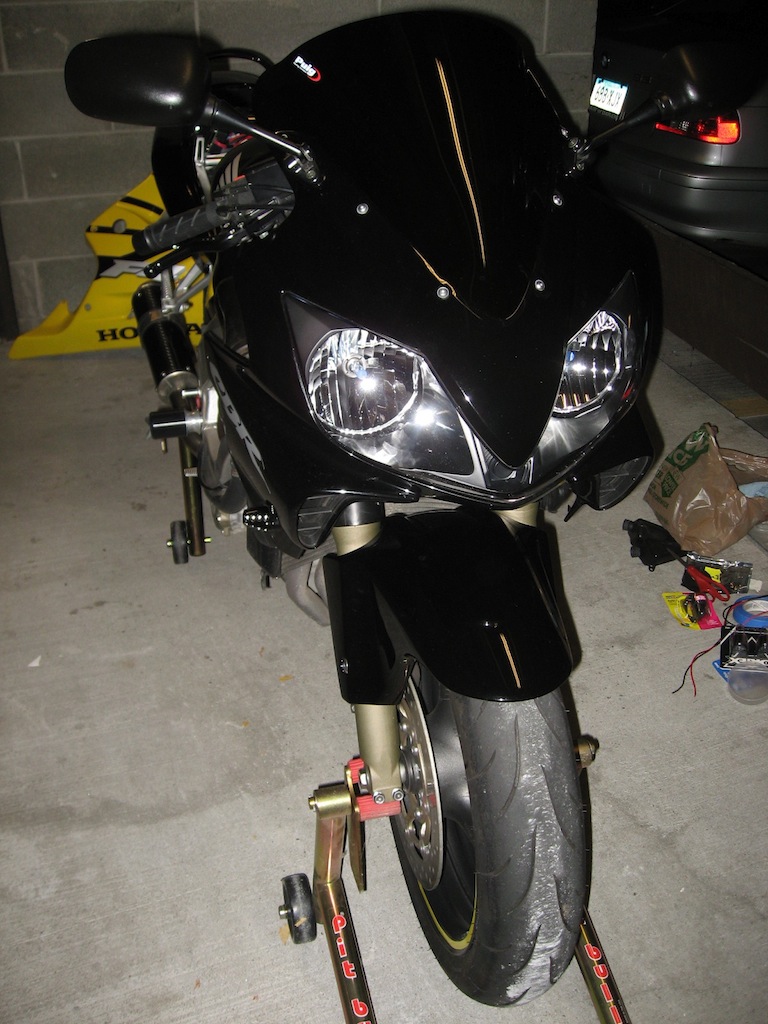
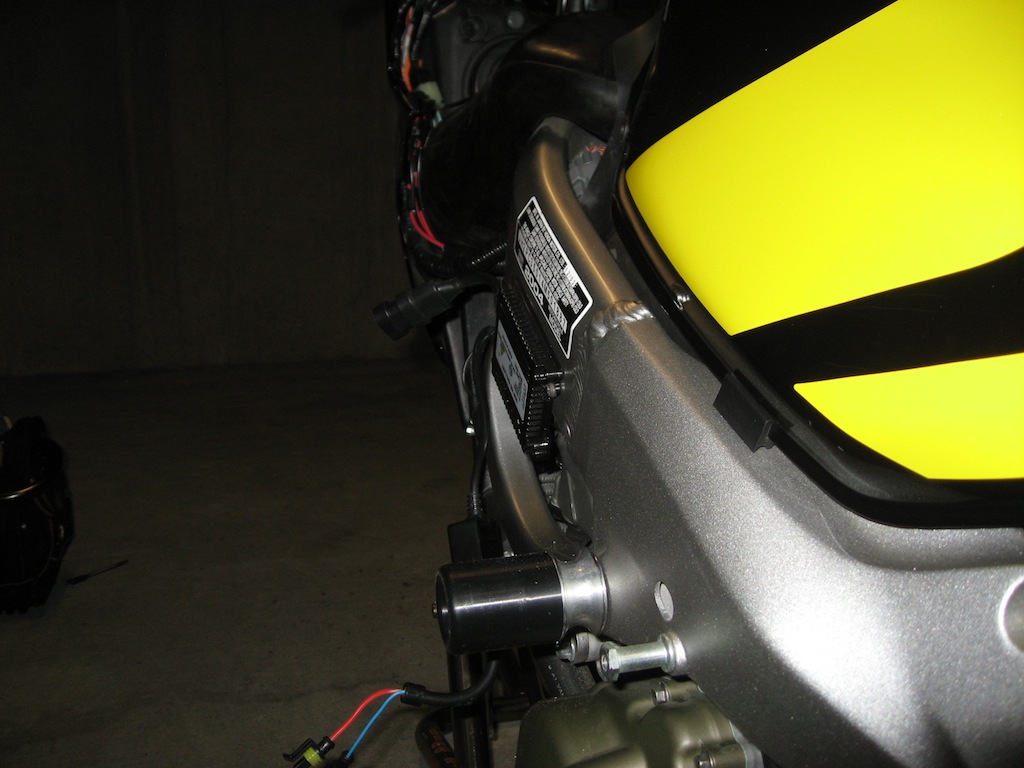
Finished product (ballasts are barely visible):
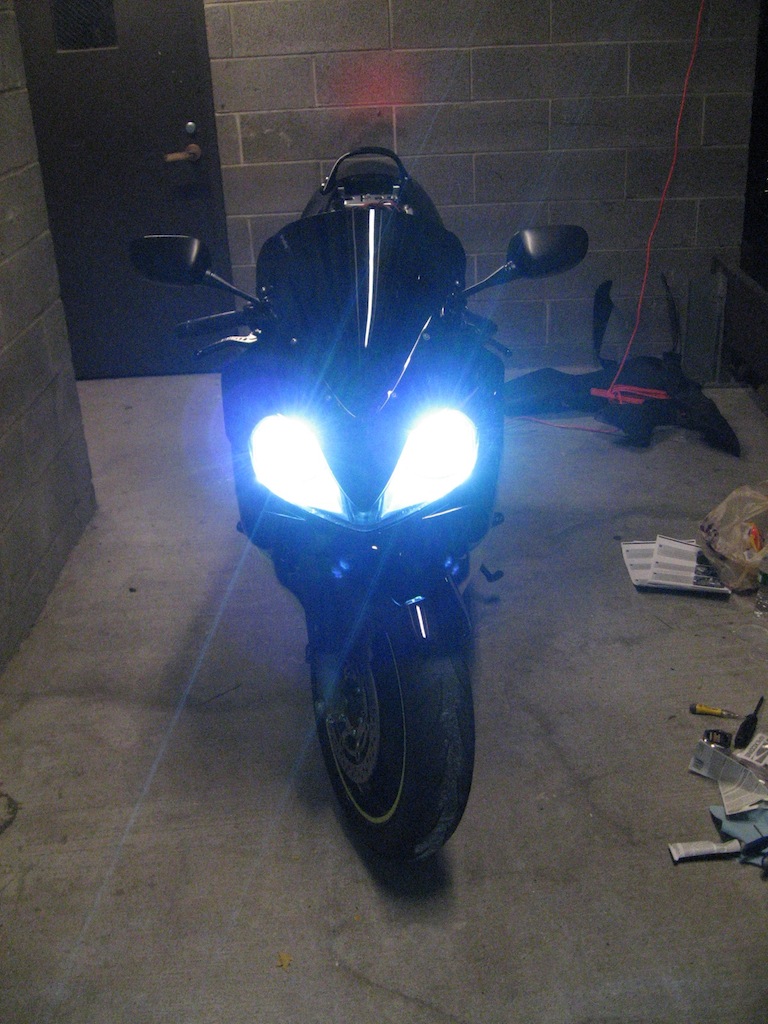
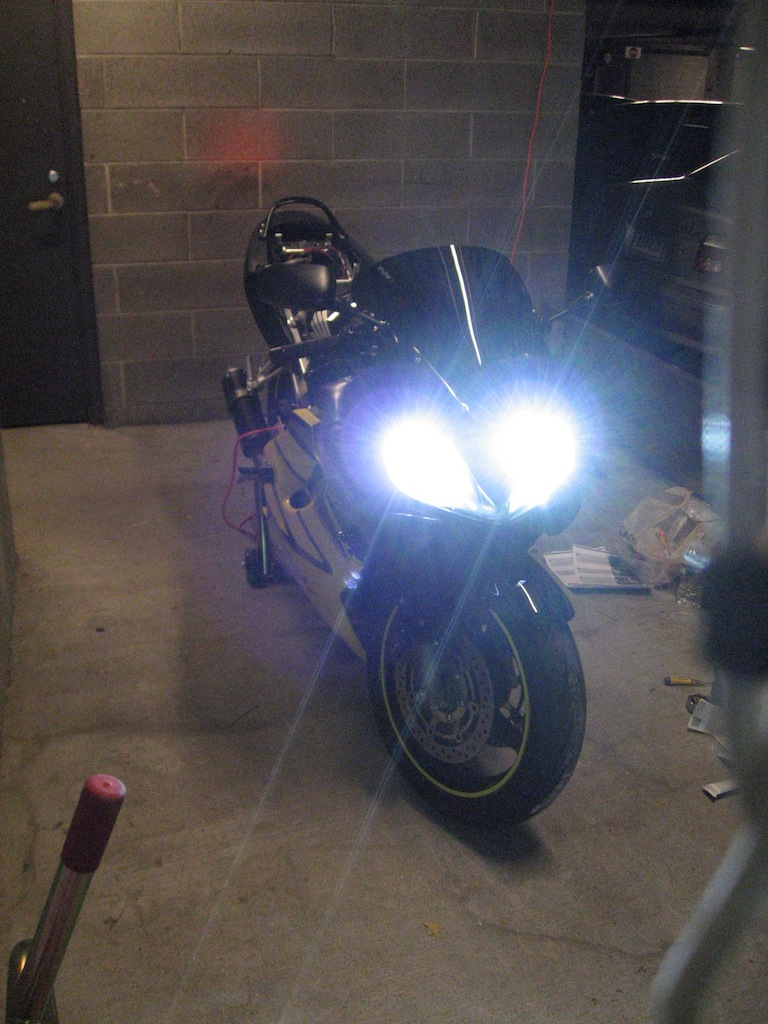
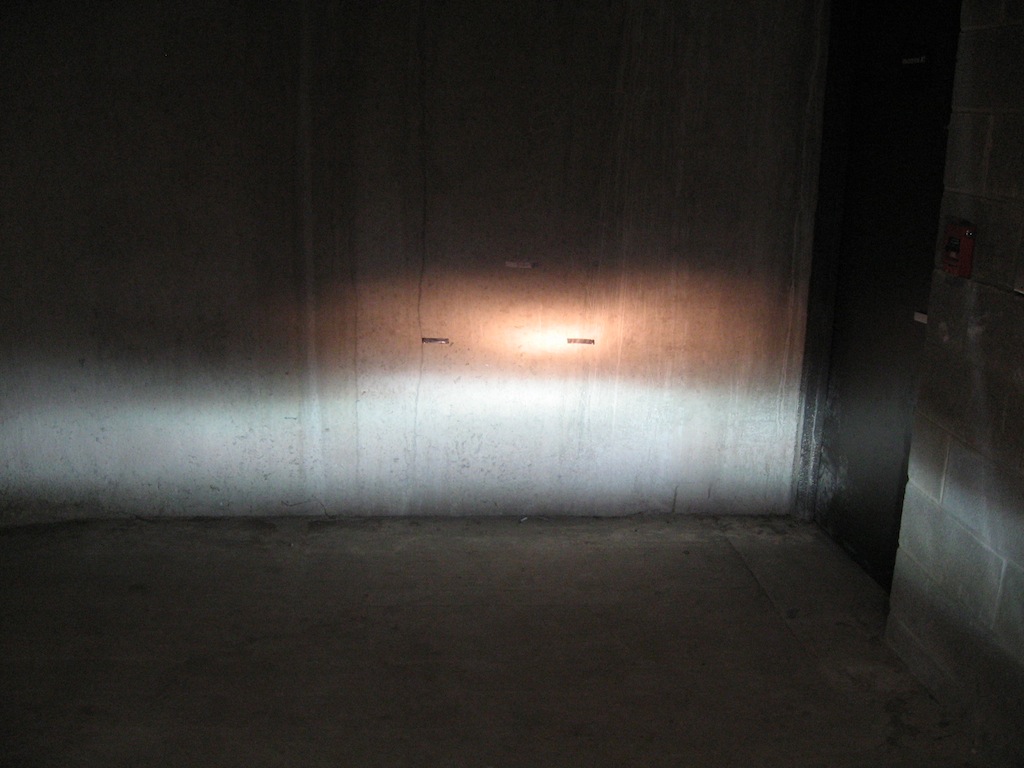
And some final shots. Considering that the bike was running PIAA's best bulb before (Xtreme White Plus), I like the end result. My camera's colors are slightly off -- the HIDs are whiter than in pictures (no blue tint) and the PIAA bulbs are a bit more yellow.
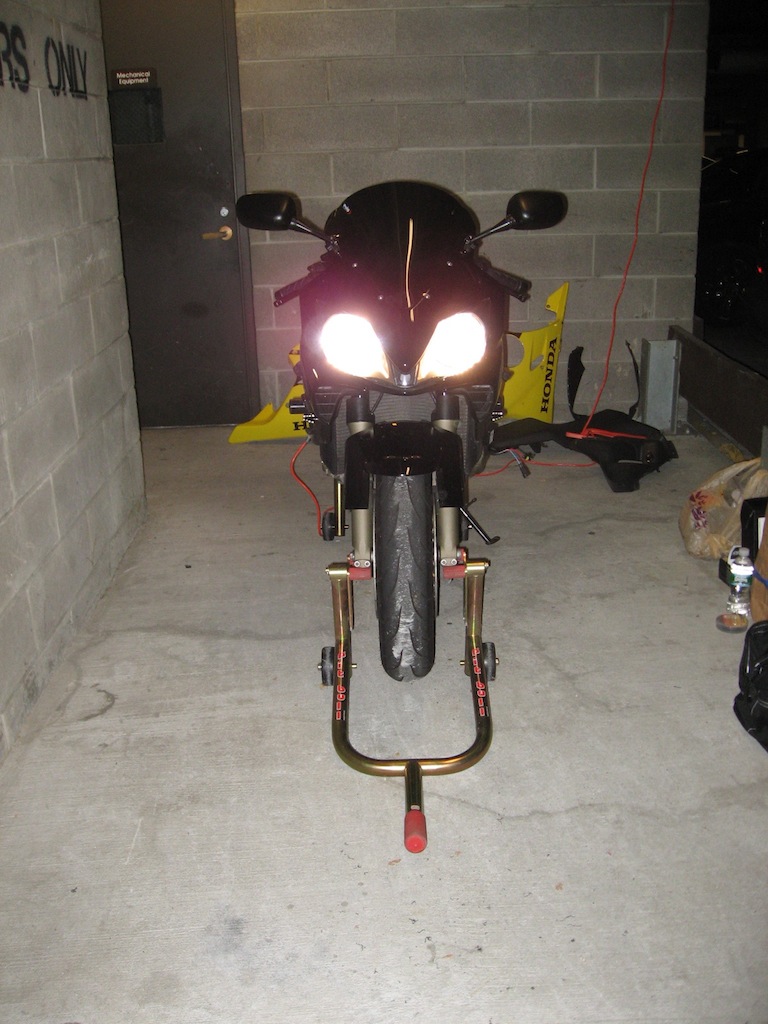
2 x PIAA:
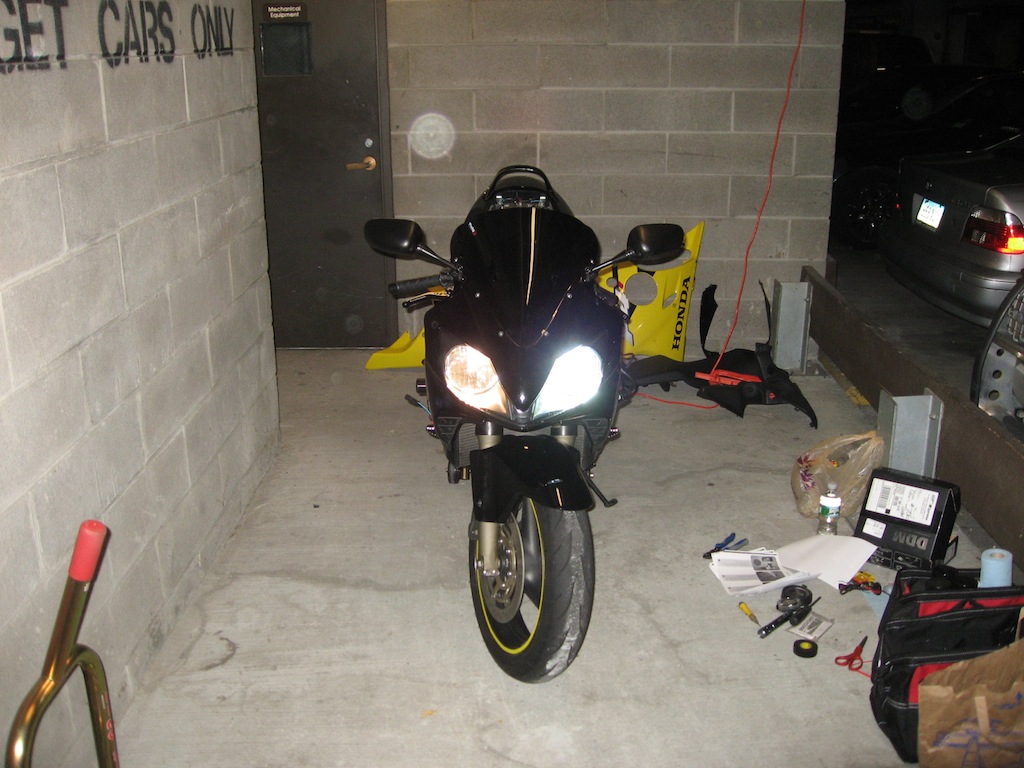
HID low, PIAA high:
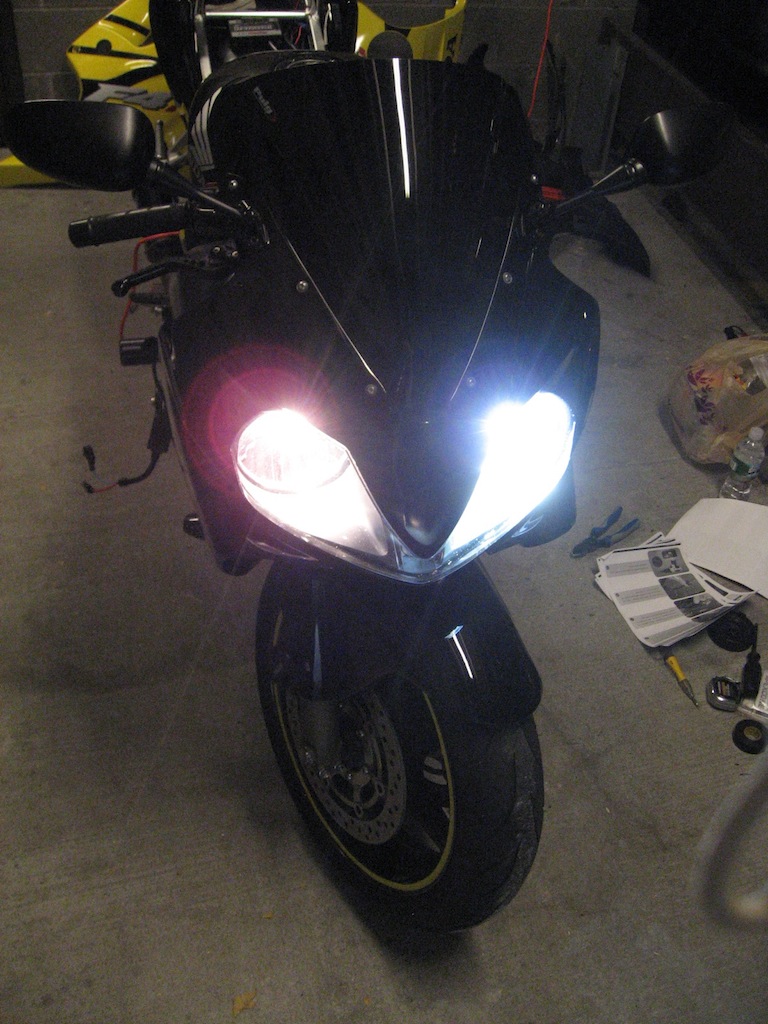
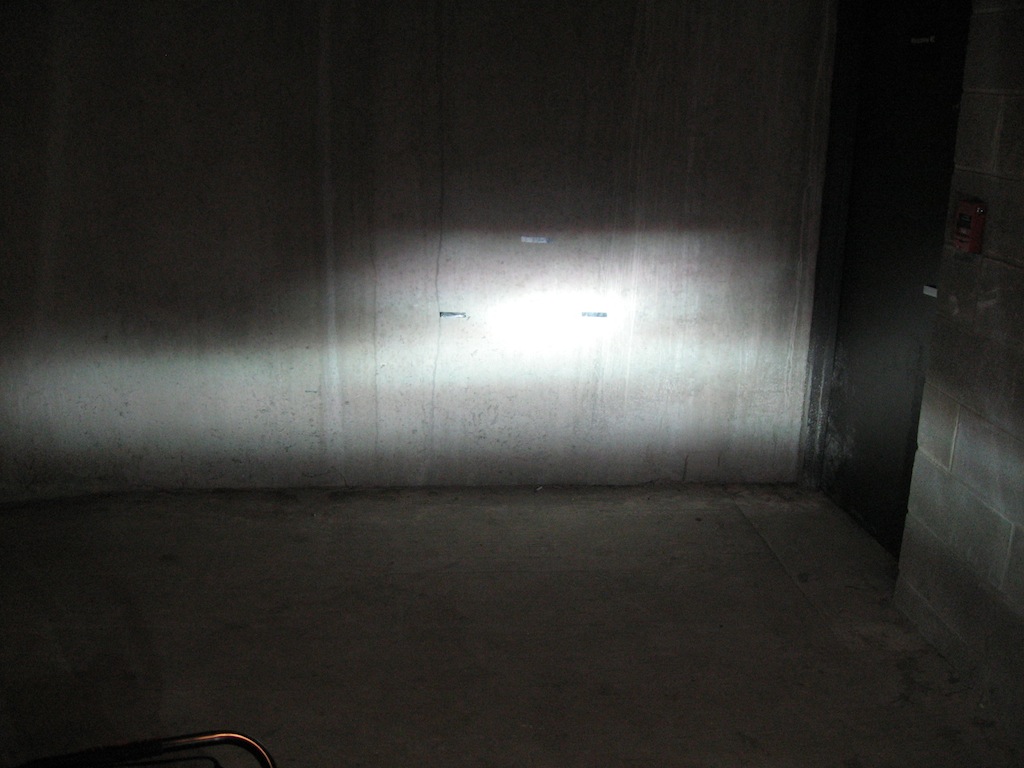
2 x HID:
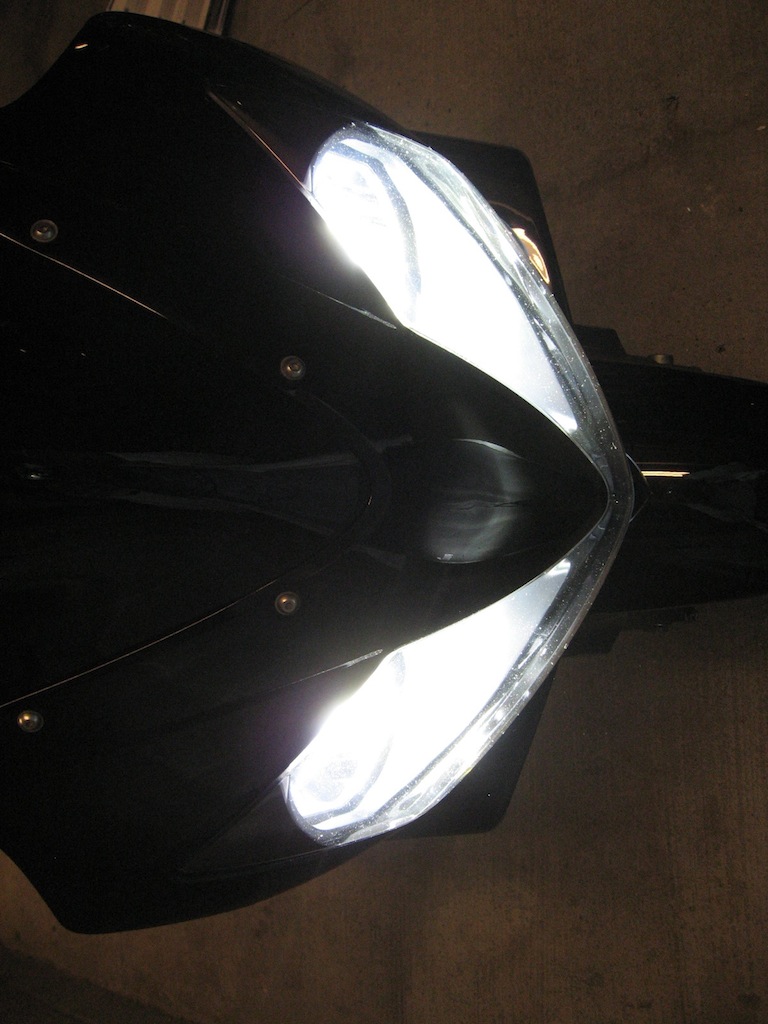
HID bulbs fit perfectly:
Finally, a direct comparison -- HID low/PIAA high vs HID/HID low/high:
Bike, check. Tools, check. Fairings and plastics came off easy since I remembered everything from the the slider fiasco the other day. Lifting the tank a bit, I saw the stock wiring and decided to run my wires alongside.
Now for the best part. It's the FZ-1 from http://fuzeblocks.com. A bit pricy at $80 but nice as hell. It's tiny, pretty sturdy (check their website for crash pics) and has two internal buses. One is on a direct feed from the battery and the other one is controlled via a switched relay. For each device (you can plug 6), simply choose whether you want it always on or only when the ignition is on. Then you put a fuse in the appropriate spot.
Even though this thing is small, I had trouble finding a place for it. So I used a piece of play-doh with approximately the height of the fuse box and after some experimenting with the seat, I figured out that the only place under the seat that can fit the fuse box is already taken by the Power Commander. Bummer. So I decided to mount the fuse box upside down with some velcro under the seat. This way, it will sit just above the owner's manual and tool box, with enough clearance.
Next, wiring -- flexible heat-resistant tubing, some 16-gauge heat/water/oil resistant boat wire, inline fuse, heat-shrink ring connectors and some posi-locks. By the way, http://www.posi-products.com ... it's the ****. This stuff makes me not want to touch another connector again.
So I went with 3 sets of wires -- one for a set of cigarette lighters (5A should be plenty, or I can install a bigger fuse), one for hardwiring a Garmin and one for heated grips.
And back on the bike:
Done for the day, happy with the result! Bike's getting dusty, so a cleaning is in order
then it's either HIDs or cigarette lighters.Hope no one steals my fairings.
Thanks all. I don't have a cover yet but may get one for the winter.
Here's the next "mod" -- took a fuse puller tool, chopped one end off, trimmed it, drilled out the hole on one side and was able to fit it into the fuse box. Not my original idea but oh well
I also installed HIDs the other night, pics incoming soon.
So here's a little HID write-up. I am happy with the result, went with a DDM dual HID kit at 4500K. Looks pretty good, similar to the stock HIDs on my car. The ballasts are very slim and were easy to hide in the fairings. They emit a bit of a buzzing noise while on (louder when warming up, then they quiet down a bit). This is not a problem, there's no way I would hear them with the engine on.
So.. starting clean:
This was the best place for the ballasts so they wouldn't be too visible. Since only half the ballast would cover the frame, using 2-sided sticky pads wasn't an option, so I decided to drill. 2 small holes and they were on super tight.
The DDM kit was easy to install, but I had to trim a plastic spacer. Since this is an universal H7 kit, some bikes may not even require this spacer, while others could use it without modification. On my bike, some cutting was required. Also, had to pull the power wires all the way out and connect them to the stock headlight plug.
After that point, the install was pretty straightforward. I had to figure out which terminal was positive. The bulb doesn't care but the HID kit does.
Finished product (ballasts are barely visible):
And some final shots. Considering that the bike was running PIAA's best bulb before (Xtreme White Plus), I like the end result. My camera's colors are slightly off -- the HIDs are whiter than in pictures (no blue tint) and the PIAA bulbs are a bit more yellow.
2 x PIAA:
HID low, PIAA high:
2 x HID:
HID bulbs fit perfectly:
Finally, a direct comparison -- HID low/PIAA high vs HID/HID low/high:
Last edited by __Z__; Mar 17, 2010 at 11:25 AM.

Thread
Thread Starter
Forum
Replies
Last Post
Harry_T_Hamster
CBR 1000F "Hurricane"
5
Aug 17, 2008 10:09 AM