
Question about homemade fender eliminator
#11
 03-14-2010, 03:57 PM


Thanks for all of the help. I probably will PM you, gotcbr, about more pics and some help if I need it. I may also ask about your split seat conversion, because I am thinking about doing that to my bike (not too sure when though).
I just picked up a 24 or 26 gauge sheet metal (12"x24") and a can of black paint from a local Home Depot. I will make this my project for after I graduate (in mid May) because with my hard classes, I won't be able to ride until then anyway.
Again, thanks everyone for all the help and pictures. I'll post some pics when I am done.
#12
03-14-2010, 08:56 PM

Member
Join Date: Feb 2010
Location: Minneapolis, MN
Posts: 65
Likes: 0
Received 0 Likes
on
0 Posts
Hey Snake - I just finished my homemade eliminator. I tried the Rustoleum flat black Enamel spray paint, but found it scratched really easy even with a couple coats of auto primer under it. Then I was at Walmart and found a spray can of "wheel well undercoating" for about 8 bucks. Looks great and has some better protective qualities. Just something to consider.
Do yourself a favor and get some construction paper and make a paper template of your undertail area to get the perfect size and shape. I used corrugated cardboard - it worked, but something like tagboard / posterboard paper would work better.
Also I used this step by step write up as a guide through the whole build:
http://cbrworld.net/forums/thread/109887.aspx
Last edited by Jinkin02; 03-14-2010 at 09:10 PM.
#13
03-16-2010, 09:44 PM
Member
Join Date: Feb 2010
Location: Minneapolis, MN
Posts: 65
Likes: 0
Received 0 Likes
on
0 Posts
#14
03-17-2010, 02:21 AM
Thanks, Jinkin02 for the advice.
I will use a piece of thin cardboard to do a mold/rough cutout before I actually cut into the sheet metal.
As for the paint, I just picked up a can of semi-glossy black while I was in HomeDepot. It was like 4.99 or something. If that won't work too well, I will buy a better can of spray paint or something (I'll keep yours in mind as I am close to like 4 Walmarts).
I've seen those directions plenty of times from cbrworld.net, but that is for an 01-03 (and I know that the concept for all F4i's are the same, just slightly different with the cutting away of the old fender and the slight difference with the seat).
Thanks.
#15
03-17-2010, 10:15 PM
Member
Join Date: Feb 2010
Location: Minneapolis, MN
Posts: 65
Likes: 0
Received 0 Likes
on
0 Posts
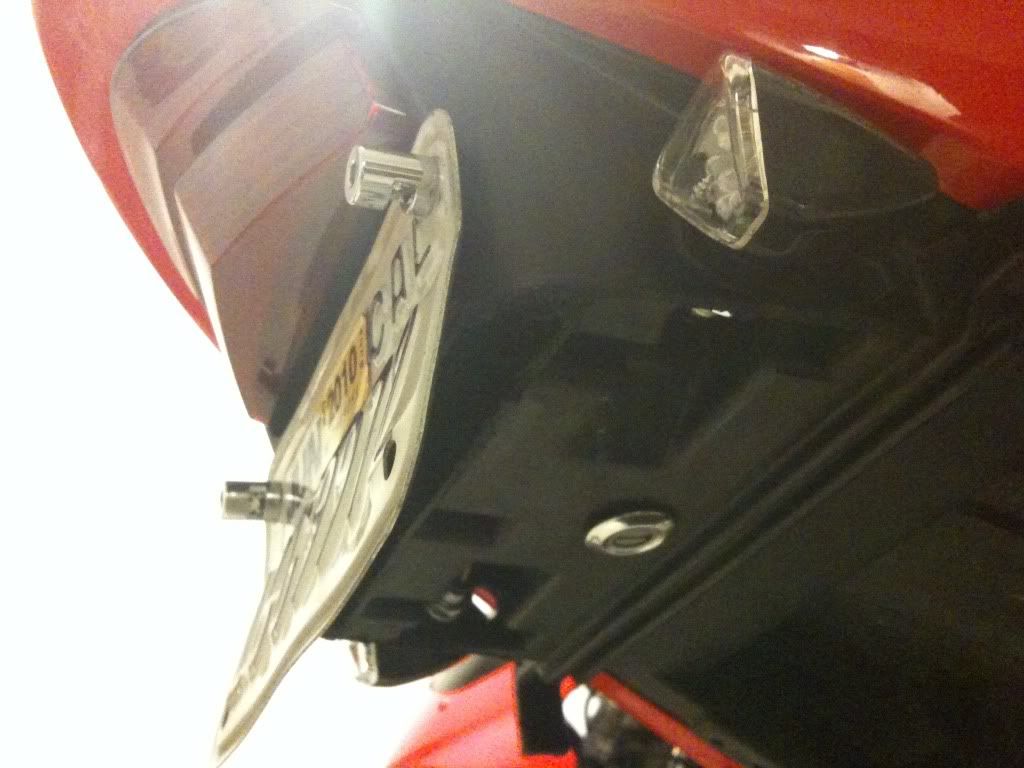
Just take it slow and you should be in good shape. I just posted pics of my finished project to another post: https://cbrforum.com/forum/f4i-main-forum-11/where-find-insturctions-diy-fender-eliminator-107322/
#16
03-19-2010, 03:00 AM
#17
03-22-2010, 08:00 PM

Senior Member
Join Date: Jun 2009
Location: Charlotte NC (Echo Base)
Posts: 160
Likes: 0
Received 0 Likes
on
0 Posts

is it ok if i PM you if i have any questions during my project and once again great pix and great info and RIDE SAFE
#18
03-27-2010, 09:27 PM
Okay, so I did my homemade fender eliminator today and I have to say that it is easier than though. I don't know if I will keep my first chopping of the sheet metal though, because I drilled an extra hole and the sides are not wide enough (as in the sides of the sheet metal is not fully under the rear cowl).
Since the sheet metal only costs 13.00, I might just do it again tomorrow.
I do have a question about the lock. How do you attach the lock to stay down?
Based on how I removed it, there is a little piece of metal that fit into groves from the original fender (it kept the lock in place) and I don't see how I could tack down the lock to the newly created fender.
Other than that, I am pretty happy with the way it looks and I will take pictures of the finished product. I couldn't today because I ran out of sunlight.
Thanks!
#19
03-28-2010, 12:02 PM
Member
Join Date: Feb 2010
Location: Minneapolis, MN
Posts: 65
Likes: 0
Received 0 Likes
on
0 Posts
#20
03-28-2010, 01:00 PM
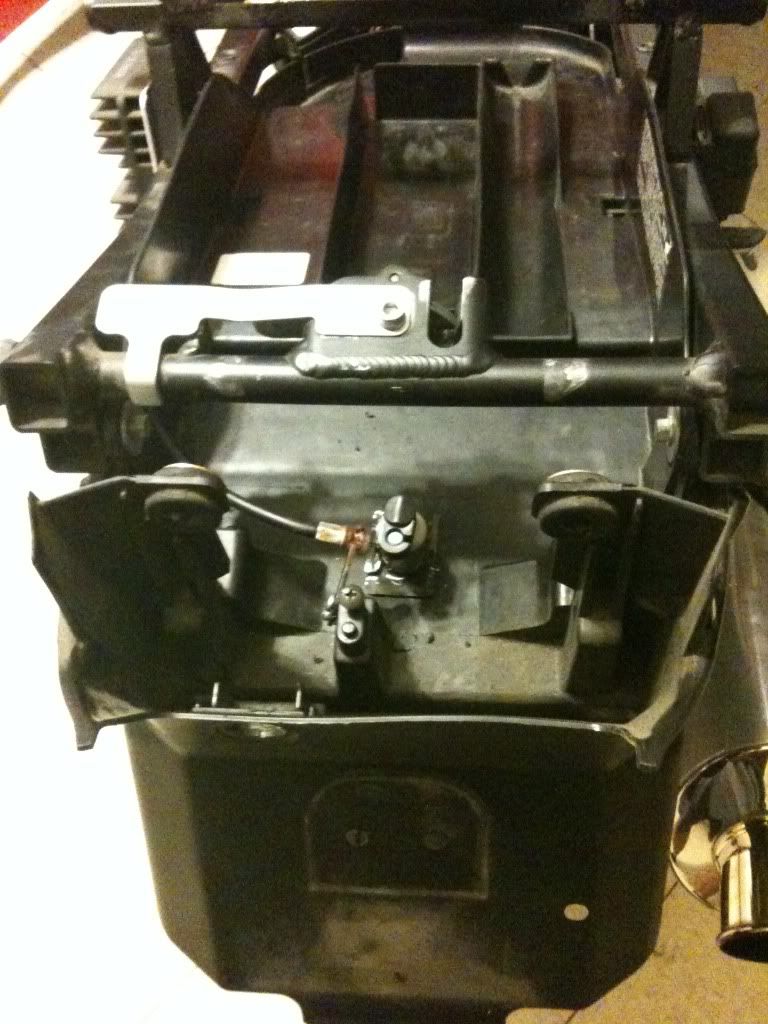
I was unsure how my lock relocation was going to happen too. I opted to do an electric remote trunk release and lose the keyhole all together. The power for the motor is tied into the license plate light so the key needs to be turned on to open the trunk. Works like a charm!
Thanks.