F4i cosmetic/performance bike makeover (a diary)...(PICS)
#21
 09-10-2007, 10:37 AM


#22
09-10-2007, 10:44 AM

Join Date: Jun 2007
Location: Chicago, IL (downtown)
Posts: 2,360
Likes: 0
Received 0 Likes
on
0 Posts
yeah thanks....that is really the purpose for the thread....i searched a lot on what i can do to make it "mine" and have a list compiled (not here) so the list will take a LONG time to get through...but i figure i can post it all here and people can pick and choose the stuff they want to do....at least it's a smattering of ideas....
anything people have questions on, please feel free to ask in the thread or PM....i love working on my bike....so i am always up to talking about it...
anything people have questions on, please feel free to ask in the thread or PM....i love working on my bike....so i am always up to talking about it...
#23
09-10-2007, 11:36 AM

ORIGINAL: ffingers
yeah the exact instructions they give you, are the ones you can download from the site...although i found them to be marginally helpful....(very helpful for wiring though....)
<snip>
yeah the exact instructions they give you, are the ones you can download from the site...although i found them to be marginally helpful....(very helpful for wiring though....)
<snip>
#24
09-10-2007, 02:38 PM

Senior Member
Join Date: Feb 2007
Location:
Posts: 173
Likes: 0
Received 0 Likes
on
0 Posts
#25
09-10-2007, 02:44 PM
Join Date: Jun 2007
Location: Chicago, IL (downtown)
Posts: 2,360
Likes: 0
Received 0 Likes
on
0 Posts
they just got sent out...i should have them in about a week or so....when i get them in, i will take pics of everything i got coated (got a real good price too, we'll see how the job went)....
i am also going to be doing a post about disassembling the rearsets too, maybe tonight...they aren't that bad...
like i said...don't have them in yet, but as soon as i do, expect photos of them apart, then reassembled, then on the bike, then maybe a before/after photo to see the impact....
i am also going to be doing a post about disassembling the rearsets too, maybe tonight...they aren't that bad...
like i said...don't have them in yet, but as soon as i do, expect photos of them apart, then reassembled, then on the bike, then maybe a before/after photo to see the impact....
#26
09-11-2007, 02:23 PM
Join Date: Jun 2007
Location: Chicago, IL (downtown)
Posts: 2,360
Likes: 0
Received 0 Likes
on
0 Posts
Rearsets Removal
Alright here's another update....yeah....
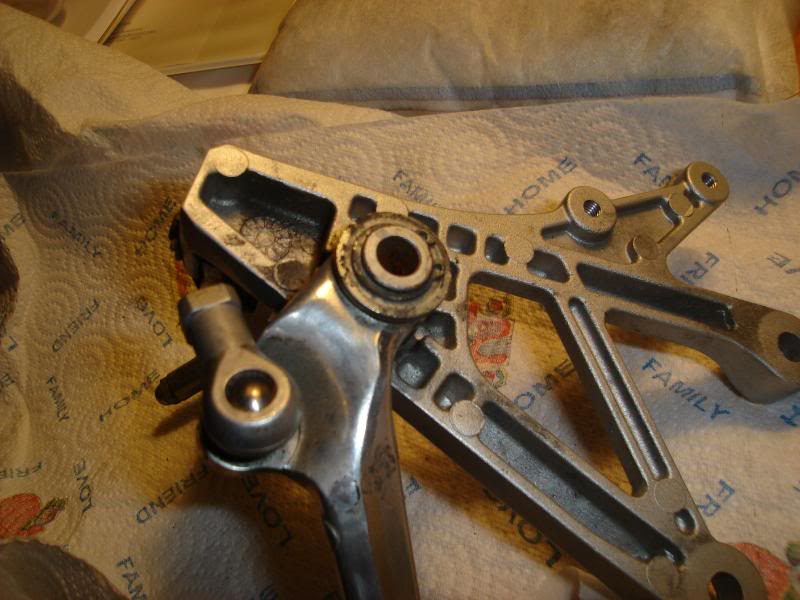
as i said before in the last post, taking off the pass. pegs was pretty easy...the rearsets are sort of that simple, but there are a few more things to remember and keep straight, especially since one side is your brake, the other the shifter...
so basically, there are two bolts (i think from memory) that hold the shifter side on....then of course there is the shifter rod that connects to the gear shift pedal link....
this is how i did it
- unscrew the rearset from the bike, and spin the rearset off the shift rod...
the interesting thing that you may not know or cared to look at is that black "boot" on your shifter rearset...that essentially covers a ball joint that allows the shiftroad to move freely rather than a hinge....the kicker about this though is that you can't disassemble that ball linkage...i looked at it and it seamed shut...so what i did was remove the black boot and shipped it that way...i figure if the coater says something, i will ask how the hell he removed it...here is a pic of the joint...
as you can see, there is no spring on the shifter side (i am pretty sure, i will double check tonight and post if it does) primarily because the gear shift assembly provides the push back on the shift lever....(if that makes any sense, if you take it apart you will understand what i mean)...in contrast to the brake side, which has two springs, one for the tailight switch and one for the brake....
onto the brake side....like i said, it has two springs on it so the most important thing is to remember where the damn springs go...i didn't take a picture of the light spring because it's obvious where it goes but i did take a pic of the big spring because there are a few possible places if you forget (this way i wouldn't forget)....when removing the brake side, the rear master cylinder is also bolted to the rearset so be aware...mine is left hanging (if you look closely at my tear down pics, you can see)....but long as you remember the spring locations, the brake side is essentially the same as the shifter side...here's a pic with the spring...
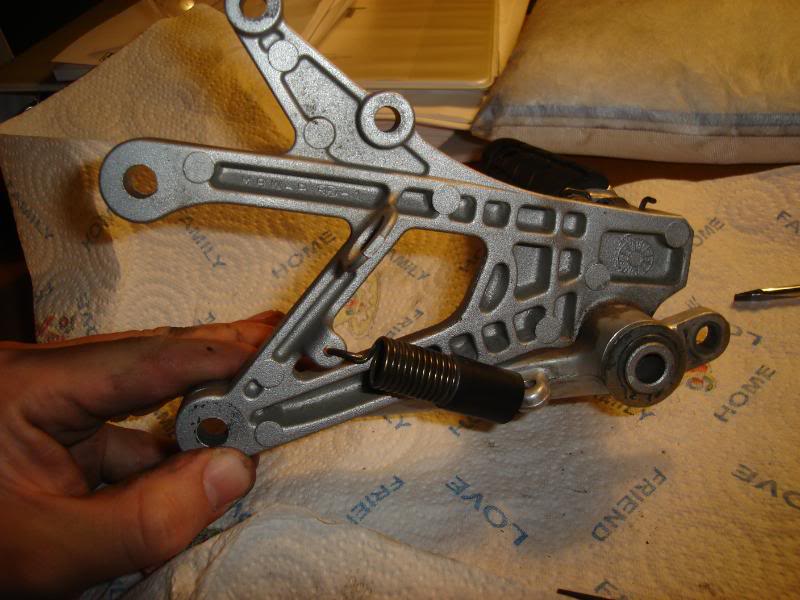
you can see the hole on the right, that is where the brake light spring attaches to (i am pretty sure, once again will confirm when i get home..99% though )
)
so those are the nuiances of each side...jointly....you have to take them apart....
first remove the foot rests....this is simple and is held together just like passenger pegs except that instead of having a ball and spring to lock them in place, you have a spring so that they stay down, but can flex upwards...the rubber that is attached to them is held on by a screw undenearth the peg, unscrew and the rubber comes off....here is a look at the footrest
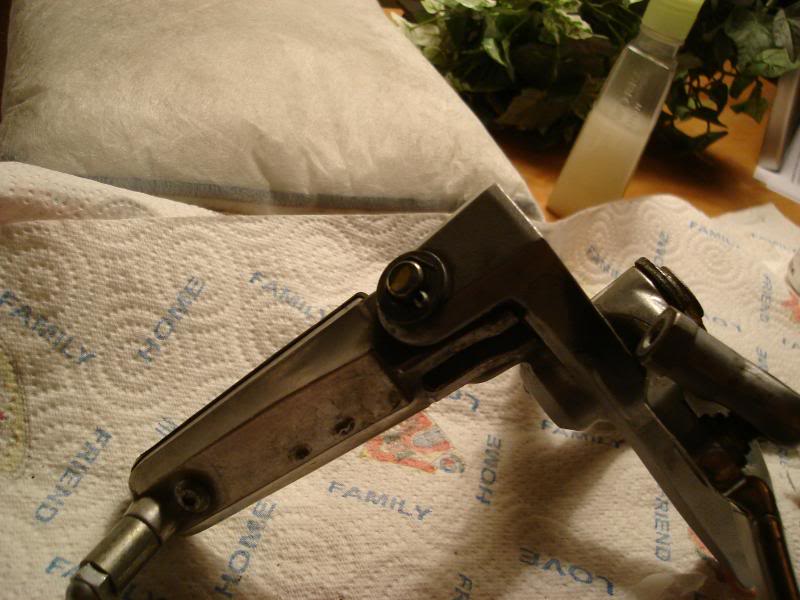
on the left you can see the washer, hitch pin and retaining wire used to hold it on the rearset (it's the same for both sides)....just remember how the spring goes...(thus the picture) (remember, i am forgetful)...
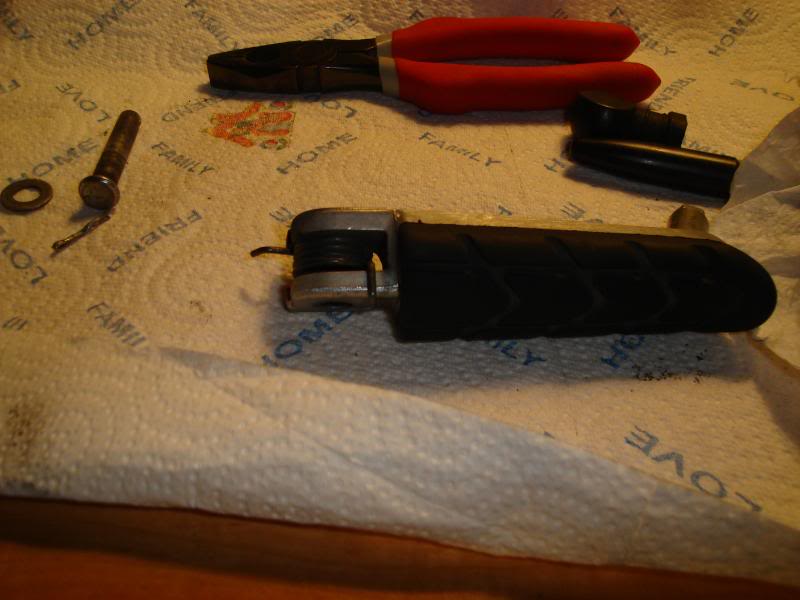
finally, you need to take off the clutch and brake lever...they are essentially held on the exact same way...they have a washer and...now here's the kicker...retaining clips...yeah...i didn't have retaining clip pliers so i had to go out and buy some...(i got internal/external so i wouldn't need another pair in the future, but it is an inter
Alright here's another update....yeah....
as i said before in the last post, taking off the pass. pegs was pretty easy...the rearsets are sort of that simple, but there are a few more things to remember and keep straight, especially since one side is your brake, the other the shifter...
so basically, there are two bolts (i think from memory) that hold the shifter side on....then of course there is the shifter rod that connects to the gear shift pedal link....
this is how i did it
- unscrew the rearset from the bike, and spin the rearset off the shift rod...
the interesting thing that you may not know or cared to look at is that black "boot" on your shifter rearset...that essentially covers a ball joint that allows the shiftroad to move freely rather than a hinge....the kicker about this though is that you can't disassemble that ball linkage...i looked at it and it seamed shut...so what i did was remove the black boot and shipped it that way...i figure if the coater says something, i will ask how the hell he removed it...here is a pic of the joint...
as you can see, there is no spring on the shifter side (i am pretty sure, i will double check tonight and post if it does) primarily because the gear shift assembly provides the push back on the shift lever....(if that makes any sense, if you take it apart you will understand what i mean)...in contrast to the brake side, which has two springs, one for the tailight switch and one for the brake....
onto the brake side....like i said, it has two springs on it so the most important thing is to remember where the damn springs go...i didn't take a picture of the light spring because it's obvious where it goes but i did take a pic of the big spring because there are a few possible places if you forget (this way i wouldn't forget)....when removing the brake side, the rear master cylinder is also bolted to the rearset so be aware...mine is left hanging (if you look closely at my tear down pics, you can see)....but long as you remember the spring locations, the brake side is essentially the same as the shifter side...here's a pic with the spring...
you can see the hole on the right, that is where the brake light spring attaches to (i am pretty sure, once again will confirm when i get home..99% though
)so those are the nuiances of each side...jointly....you have to take them apart....
first remove the foot rests....this is simple and is held together just like passenger pegs except that instead of having a ball and spring to lock them in place, you have a spring so that they stay down, but can flex upwards...the rubber that is attached to them is held on by a screw undenearth the peg, unscrew and the rubber comes off....here is a look at the footrest
on the left you can see the washer, hitch pin and retaining wire used to hold it on the rearset (it's the same for both sides)....just remember how the spring goes...(thus the picture) (remember, i am forgetful)...
finally, you need to take off the clutch and brake lever...they are essentially held on the exact same way...they have a washer and...now here's the kicker...retaining clips...yeah...i didn't have retaining clip pliers so i had to go out and buy some...(i got internal/external so i wouldn't need another pair in the future, but it is an inter
#27
09-11-2007, 04:28 PM

only thing you need now is a corbin seat! Trust, it looks better and feels so much better! It will look sharp on your bike, I got one a while back, I got if off ebay, but it was that or power commander, andlet me tell ya! after getting the power commander,, I could have done without! The seat, hecka no! best purchase so far!
#28
09-11-2007, 04:31 PM
Join Date: Jun 2007
Location: Chicago, IL (downtown)
Posts: 2,360
Likes: 0
Received 0 Likes
on
0 Posts
i was considering adding a corbin...i don't know...it's so expensive...i did find a place that does covers for the OEM seat for cheap and give a REAL nice custom look...right now, i don't mind the stock seat....when i really get sick of it (which i am assuming will be after one long trip) i will probably invest in it....
#29
09-11-2007, 04:33 PM
Join Date: Jun 2007
Location: Chicago, IL (downtown)
Posts: 2,360
Likes: 0
Received 0 Likes
on
0 Posts
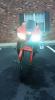
UPDATE:
I got in my street glow LED kit....i took a picture of the kit and will take some pictures of what came with it...i am going to start another thread on that install and link to it here....this is meant to be a synopsis, not necessarily a how to...so a detailed how to will be linked here....stay tuned...
I got in my street glow LED kit....i took a picture of the kit and will take some pictures of what came with it...i am going to start another thread on that install and link to it here....this is meant to be a synopsis, not necessarily a how to...so a detailed how to will be linked here....stay tuned...
#30
09-11-2007, 05:39 PM
Senior Member
Join Date: Jun 2006
Location: TN
Posts: 696
Likes: 0
Received 0 Likes
on
0 Posts
