
Minor problem
#11
 02-19-2012, 03:09 PM


Join Date: Jan 2012
Location: Sedro Woolley, Wa.
Posts: 49
Likes: 0
Received 0 Likes
on
0 Posts
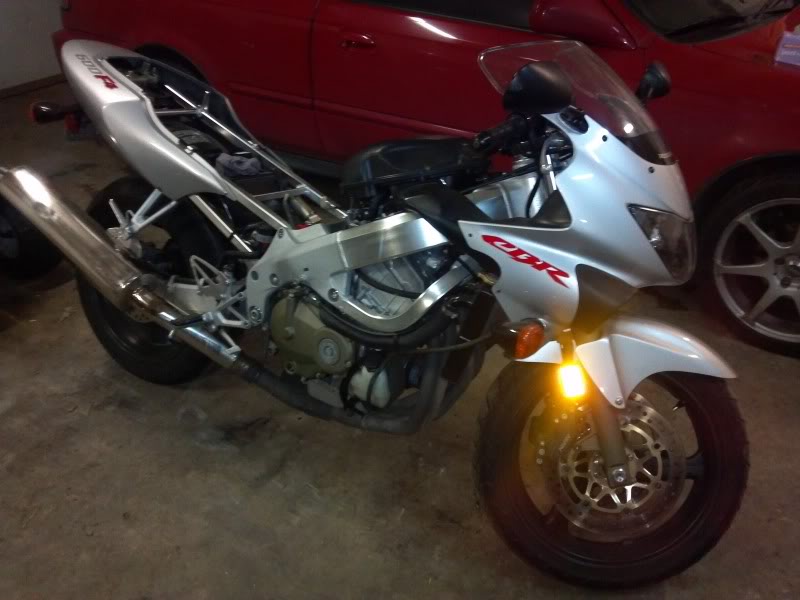
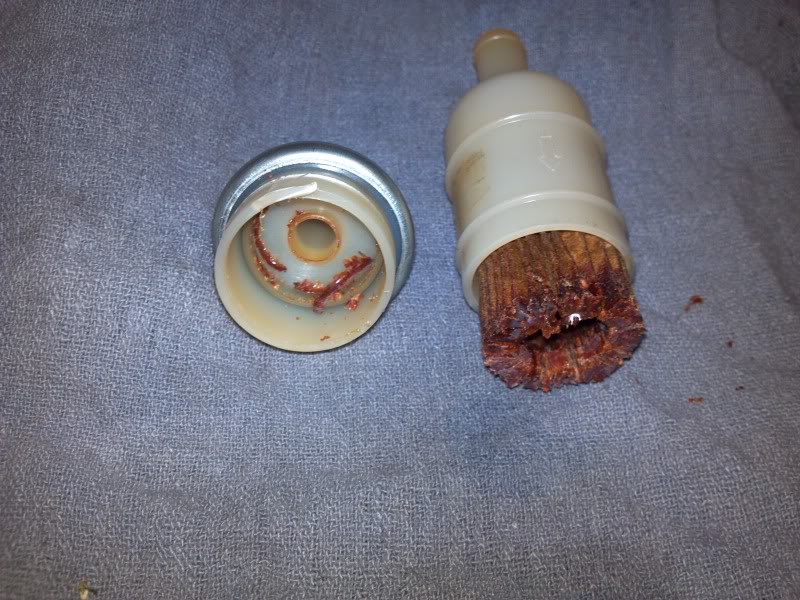
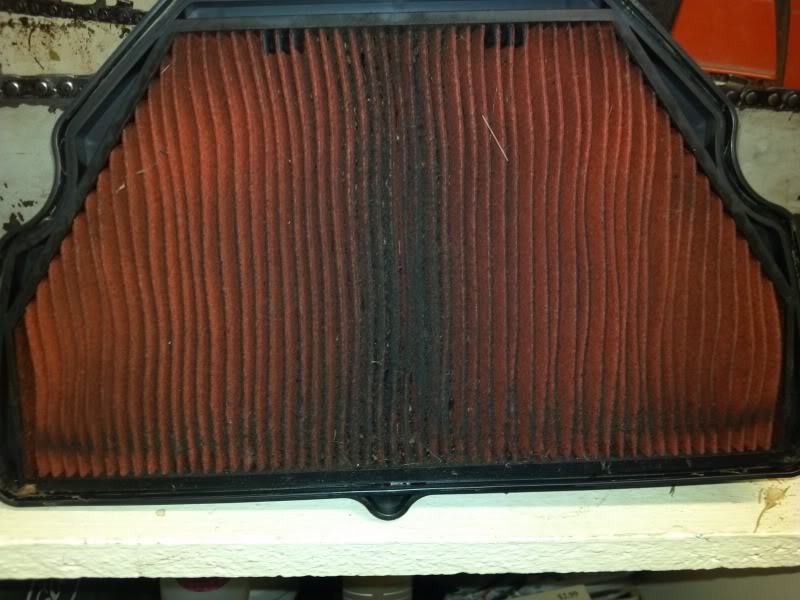

A few pictures, started tear down. Wasn't at all impressed with the fuel filter, parts and pieces of it HAD to have run through the system by the way it has separated.
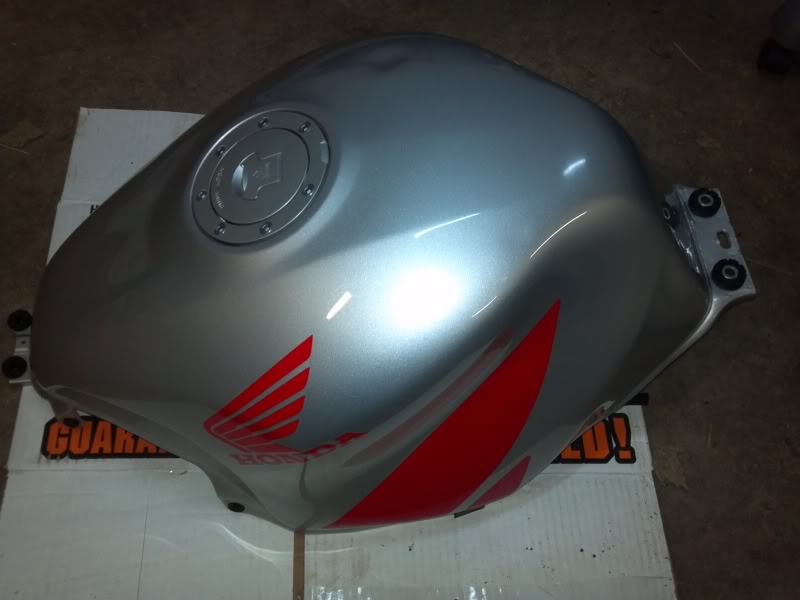
The last picture was just a a shot of "Honda love". Need to get the radiator out and plugs out.
One question I have, is it possible to pull the bowls off the carbs and the jets out WITHOUT pulling the carbs off the bike??
#12
02-19-2012, 04:27 PM

Retired Super Moderator - At large E=MC2
If it's like the f3, i'm betting it's possible, especially if you get your girl friend (or someone with little tenny hands) to do it for you. lol
But you still won't have access to the low-end jets. Those are the ones most likely clogged. The main pilots don't kick in till you come off idle, from my understanding.
From the look of the fuel filter, I would go ahead and do a full dis-mount and cleaning.
Why struggle to do a half job that might/might not fix the issue?
Good luck, Ern
#13
02-19-2012, 05:30 PM
Join Date: Jan 2012
Location: Sedro Woolley, Wa.
Posts: 49
Likes: 0
Received 0 Likes
on
0 Posts
If it's like the f3, i'm betting it's possible, especially if you get your girl friend (or someone with little tenny hands) to do it for you. lol
But you still won't have access to the low-end jets. Those are the ones most likely clogged. The main pilots don't kick in till you come off idle, from my understanding.
From the look of the fuel filter, I would go ahead and do a full dis-mount and cleaning.
Why struggle to do a half job that might/might not fix the issue?
Good luck, Ern
But you still won't have access to the low-end jets. Those are the ones most likely clogged. The main pilots don't kick in till you come off idle, from my understanding.
From the look of the fuel filter, I would go ahead and do a full dis-mount and cleaning.
Why struggle to do a half job that might/might not fix the issue?
Good luck, Ern

#15
02-24-2012, 08:37 PM
Join Date: Jan 2012
Location: Sedro Woolley, Wa.
Posts: 49
Likes: 0
Received 0 Likes
on
0 Posts
Had a short bit of time to pull the plugs, couple issues found 1) cheap Denso plugs 2) a gap that is about a mile wide. Wife stopped by trhe stealership and grabbed me some new NGK plugs and fuel filter.
Drained the carbs and found a slug of water, propped the tank in a manner that water should collect at the petcock (if water is there), will let it set over night and drain it tomorrow as well as instal the new plugs and fuel filter. Then instal the tank with some fresh super, instal battery (on the tender) prime the fuel system and give her a shot. It's a starting point and learning tons about these machines thanks to CBRF and reading the service manual front to back about 30 times. Will update when I get the above finished.
Drained the carbs and found a slug of water, propped the tank in a manner that water should collect at the petcock (if water is there), will let it set over night and drain it tomorrow as well as instal the new plugs and fuel filter. Then instal the tank with some fresh super, instal battery (on the tender) prime the fuel system and give her a shot. It's a starting point and learning tons about these machines thanks to CBRF and reading the service manual front to back about 30 times. Will update when I get the above finished.
#16
02-25-2012, 08:10 AM
Retired Super Moderator - At large E=MC2
Starting out right, at least you have the manual. If you've been a gear-head on cars,
for any length of time, you're miles ahead.
If you have found water in the gas (most likely condensation), inspect the fuel and pet-**** filters, as well.
If they've been doing their job, they probably can use a little TLC/attention.
As far as the carbs go, I've just recently started to explore the voodoo-science, myself.
It isn't extremely difficult, IF you pay attention on the front-end of the job. The
only adjustment is idle and pilot jet. Everything else is solid-state/non-adjusting.
If/when you do pull the carbs, before doing anything, mark the pilots so that you can
note position. Then gently seat them, write down exactly how many turns it took to do
so. Do this for each one, INDIVIDUALLY. That gives you a way to return them to their
previous state. A complete sync/idle adjust is always the better option, but this
should allow you to have a running bike, if you take a pass on doing so.
With that done, once they're on the bench, dis-assemble, clean and re-assemble each
in turn. Before moving on to the next. Yeah, it will take longer, but you won't mix up
parts and you still have the later ones to reference if you become confused about any
thing.
Never poke to clean the jet's orafices, use soaking and compressed air to clear
any obstructions. Otherwise, you risk damaging/enlarging them. If you don't have access
to a compressor, you can get the cans of dry-air used for cleaning computer/electronics
at an office supply. One can should be sufficent.
Avoid getting carb cleaner on any of the rubber
components/seals/gaskets, it will turn them to jelly. Then it gets expensive...
"They want HOW MUCH for the kit!? For ONE carb and I need FOUR!?"...You get the idea, lol.
Be gentle with the floats, don't bend the tabs they attach to. Make sure none are leaking
and have any fuel inside them. If so, they won't 'float' and shut off when the bowls are full.
These are the things I've figured out, hope it helps, if you do decide to venture into
the job.
Ern
Last edited by MadHattr059; 02-25-2012 at 08:18 AM. Reason: Clarity
#17
03-03-2012, 09:14 PM
Join Date: Jan 2012
Location: Sedro Woolley, Wa.
Posts: 49
Likes: 0
Received 0 Likes
on
0 Posts
Well, tonight she came to life.... Man the sound of that girl purring like a kitten... Tomorrow I'll get her dressed after giving her attire a thorough scrubbing.
Plugs in these bikes are a PITA.... Carbs cleaned and did a re-sync, a buddy had gauges that I borrowed. Tank flushed and refilled with super... So amped right now.....
Plugs in these bikes are a PITA.... Carbs cleaned and did a re-sync, a buddy had gauges that I borrowed. Tank flushed and refilled with super... So amped right now.....
#18
03-03-2012, 09:18 PM
Join Date: Jan 2012
Location: Sedro Woolley, Wa.
Posts: 49
Likes: 0
Received 0 Likes
on
0 Posts

Thread
Thread Starter
Forum
Replies
Last Post