
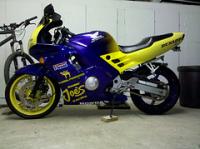
Project: CyBoRg (pic heavy)

Senior Member
Joined: May 2010
Posts: 1,753
Likes: 3
From: West Monroe,Louisiana
those bearings are only about $8 each OEM here in the states, if the shoulder portion is important.

Thread Starter
|
Retired Super Moderator, Tin Star Man & Hurricane Saloon Prospect, ROTM Feb 2015
Joined: Sep 2011
Posts: 2,382
Likes: 5
From: V��ksy, Finland
Only the driven flange bearing has one, those two are regular straight-thru`s. And I don`t think it would make any difference if there would not be the shoulder in that one, can`t really put my head around why it`s there in the first place and why the collar doesn`t just come through...
Last edited by Mattson; Jan 15, 2013 at 12:19 PM.
Thread Starter
|
Retired Super Moderator, Tin Star Man & Hurricane Saloon Prospect, ROTM Feb 2015
Joined: Sep 2011
Posts: 2,382
Likes: 5
From: V��ksy, Finland
Today at work when I was visiting this one machining shop I got into a conversation about different kind of bearings. As it happened, I had the flange bearing in my pocket cause I was going to press the collar out after work today. I gave it to the shop owner claiming there is some kind of a shoulder in the inside of the bearing track, what he thought to sound rather odd. I said the same, adding that there must be cause there`s just no way that collar could be so thin what shows from the other side. He went to his cabinet and gave me a punch and a counterpiece (?) to try and get the collar out. Getting used to stuck car parts I was prepared for a battle of epic proportions to get the collar off the bearing so I went to the heaviest steel table in the shop, got me a 1kg sledge to drop a massive blow on to the punch, got everything lined up, took one last little tap onto the punch to aim and heard a *clink*. WTF?
The collar literally dropped out of the bearing! I could probably have pulled it out if I would have gotten a good enough grip of it!
What I saw after that got me even more by surprise:

There is NOT any kind of shoulder inside the bearing, and that collar IS LESS THAN 1mm THICK! Cannot figure out how can that thing survive in there, but since it has for over 20 years and 100tkm:s I guess it continues to do so ever after...
So, that was basically really good news since now I have three perfectly standard bearings to find, AND the guy hinted me of another place where I probably will get them more surely than from the places I know of.
After that I went to the powdercoater to talk about the colors going onto the wheels. I took one sample plate with me to be compared to the tank and other parts. That color is from RAL chart, number 3002. Other possibilities will be 3000 which is a wee bit darker and a whisker more towards red wine, and another 3020 that is somewhat lighter and has a hair of orange tint in it to counter the fade in the paintwork. That was, according to my memory, the closest of the options, gotta go see probably tomorrow if it matches.
The collar literally dropped out of the bearing! I could probably have pulled it out if I would have gotten a good enough grip of it!
What I saw after that got me even more by surprise:
There is NOT any kind of shoulder inside the bearing, and that collar IS LESS THAN 1mm THICK! Cannot figure out how can that thing survive in there, but since it has for over 20 years and 100tkm:s I guess it continues to do so ever after...
So, that was basically really good news since now I have three perfectly standard bearings to find, AND the guy hinted me of another place where I probably will get them more surely than from the places I know of.
After that I went to the powdercoater to talk about the colors going onto the wheels. I took one sample plate with me to be compared to the tank and other parts. That color is from RAL chart, number 3002. Other possibilities will be 3000 which is a wee bit darker and a whisker more towards red wine, and another 3020 that is somewhat lighter and has a hair of orange tint in it to counter the fade in the paintwork. That was, according to my memory, the closest of the options, gotta go see probably tomorrow if it matches.
Last edited by Mattson; Jul 4, 2015 at 07:03 AM.
Thread Starter
|
Retired Super Moderator, Tin Star Man & Hurricane Saloon Prospect, ROTM Feb 2015
Joined: Sep 2011
Posts: 2,382
Likes: 5
From: V��ksy, Finland
Got a little work done today:

The front stand works like a charm, just put the right spacer pipes into the peg, eased it in, stomped it down and up it went. Bike feels really stable up there, had no problems bolting the front wheel off. Best 60e I`ve spent in a while.
I`m so used to battling with cars and especially my truck, that working on a bike seems so easy it`s almost therapeutic. Nothing`s seized, and everything is super easy to take apart.

The front wheel bearings were in even worse condition than the rear. Not as much slack, but the right side seal has failed at some point and the whole bearing was seized so bad I cannot turn it with my hands.

Close enough. Not 100% spot on, but that`s as close RAL colors will get.
That`s pretty much all I can do before getting the wheels back from the powdercoat, I`d reckon the rear fairing is not going to come anytime soon.
Probably next up is to order the new front lights but that`ll have to wait for a while, they aren`t exactly cheap so I have to spread the costs a bit.
A few questions came up when I was taking the front wheel apart. I noticed that between the brake discs and the wheel there are little washer type things but seems they are made of some kind of paper-type material.
1: Are they some kind of squeak/vibration dampers
2: Should I replace them
3: Can I reuse the old ones
4: Do they have to be there
5: Where can I get new ones? They seem like something that can only be acquired as OEM parts, and at least here every little pouch that has the wing logo costs an arm and a leg.
The front stand works like a charm, just put the right spacer pipes into the peg, eased it in, stomped it down and up it went. Bike feels really stable up there, had no problems bolting the front wheel off. Best 60e I`ve spent in a while.
I`m so used to battling with cars and especially my truck, that working on a bike seems so easy it`s almost therapeutic. Nothing`s seized, and everything is super easy to take apart.
The front wheel bearings were in even worse condition than the rear. Not as much slack, but the right side seal has failed at some point and the whole bearing was seized so bad I cannot turn it with my hands.
Close enough. Not 100% spot on, but that`s as close RAL colors will get.
That`s pretty much all I can do before getting the wheels back from the powdercoat, I`d reckon the rear fairing is not going to come anytime soon.
Probably next up is to order the new front lights but that`ll have to wait for a while, they aren`t exactly cheap so I have to spread the costs a bit.
A few questions came up when I was taking the front wheel apart. I noticed that between the brake discs and the wheel there are little washer type things but seems they are made of some kind of paper-type material.
1: Are they some kind of squeak/vibration dampers
2: Should I replace them
3: Can I reuse the old ones
4: Do they have to be there
5: Where can I get new ones? They seem like something that can only be acquired as OEM parts, and at least here every little pouch that has the wing logo costs an arm and a leg.
Last edited by Mattson; Jul 4, 2015 at 07:04 AM. Reason: fixed typo
Senior Member
Joined: May 2010
Posts: 1,753
Likes: 3
From: West Monroe,Louisiana
1: Are they some kind of squeak/vibration dampers
2: Should I replace them
3: Can I reuse the old ones
4: Do they have to be there
5: Where can I get new ones? They seem like something that can only be acquired as OEM parts, and at least here every little pouch that has the wing logo costs an arm and a leg.
2: Should I replace them
3: Can I reuse the old ones
4: Do they have to be there
5: Where can I get new ones? They seem like something that can only be acquired as OEM parts, and at least here every little pouch that has the wing logo costs an arm and a leg.
2) Probably, but most of us don't.
3) I did.
4) Hope not.
5)Bikebandit, Service Honda etc... If you're not in the states, I dunno.
Honestly -I'd reuse them if that's an option, but I wouldn't fret about them too much - I think they're primarily to keep steel rotors from reacting with the aluminum wheel and possibly corroding/siezing the bolt. Use Antisieze on the bolts and torque to spec.
Thread Starter
|
Retired Super Moderator, Tin Star Man & Hurricane Saloon Prospect, ROTM Feb 2015
Joined: Sep 2011
Posts: 2,382
Likes: 5
From: V��ksy, Finland
I did manage to pull all of them out unharmed so probably I'll just put those back. I'll ask Storm motor if they could get new ones when I take the rims to get the tires taken off.


Thread Starter
|
Retired Super Moderator, Tin Star Man & Hurricane Saloon Prospect, ROTM Feb 2015
Joined: Sep 2011
Posts: 2,382
Likes: 5
From: V��ksy, Finland
Requested and delivered. Now note a few things:
-When I was taking pictures I noticed the mount is slightly bent, possibly when the bike has been in a crash so all measurements are approximate values.
-All values are in millimeter so in case you need to convert I`ll leave that to you so you`ll get them right.
-If I was to start making one of these now I`d probably get my hands on a used passenger grab bar and splice that since the legs that secure it to the bike (to my knowledge) uses the same bolt holes and the pipes exiting the fairing holes would be at the right angle already.
Now, the pics:


Hope this helps, in case you have any other questions don`t hesitate to ask, I will answer as well as I can.
-When I was taking pictures I noticed the mount is slightly bent, possibly when the bike has been in a crash so all measurements are approximate values.
-All values are in millimeter so in case you need to convert I`ll leave that to you so you`ll get them right.
-If I was to start making one of these now I`d probably get my hands on a used passenger grab bar and splice that since the legs that secure it to the bike (to my knowledge) uses the same bolt holes and the pipes exiting the fairing holes would be at the right angle already.
Now, the pics:
Hope this helps, in case you have any other questions don`t hesitate to ask, I will answer as well as I can.
Last edited by Mattson; Jul 4, 2015 at 07:04 AM.
Thread Starter
|
Retired Super Moderator, Tin Star Man & Hurricane Saloon Prospect, ROTM Feb 2015
Joined: Sep 2011
Posts: 2,382
Likes: 5
From: V��ksy, Finland
The mail-lady brought me a big box today!

Seems pretty high quality. It`s thinner than I expected but it`s made of the braided type fiberglass mat so it should be strong enough even though it`s not that thick. Hopefully I could get to the garage soon to drill the holes and cut the tail light hole, i`ve been flu-ish for a few weeks and haven`t had any energy to do anything else than to drone on at work. This week`s been one hell with high fever peaking over 40c. Luckily it`s slowly starting to ease up and hopefully I could get back to work at monday.
When I saw the tail light hole`s not been cut I started thinking if I could find a pair of round lights for a reasonable price instead
The rims are sand blasted and waiting in the garage for me to go prep them for the powdercoat. I got a roll of hi-temp tape from the coater guy to cover the needed bits. Still no luck with the rear wheel bearings, if I can`t find them pretty soon I`m probably gonna have to order them abroad but that`ll be pretty costly with all the customs payments and taxes... Still got a few stores to ask from, gonna get back at that when I get back to work.
Speaking of lights, just remembered I still haven`t ordered the new headlight units, gotta do that too...
Seems pretty high quality. It`s thinner than I expected but it`s made of the braided type fiberglass mat so it should be strong enough even though it`s not that thick. Hopefully I could get to the garage soon to drill the holes and cut the tail light hole, i`ve been flu-ish for a few weeks and haven`t had any energy to do anything else than to drone on at work. This week`s been one hell with high fever peaking over 40c.
When I saw the tail light hole`s not been cut I started thinking if I could find a pair of round lights for a reasonable price instead
The rims are sand blasted and waiting in the garage for me to go prep them for the powdercoat. I got a roll of hi-temp tape from the coater guy to cover the needed bits. Still no luck with the rear wheel bearings, if I can`t find them pretty soon I`m probably gonna have to order them abroad but that`ll be pretty costly with all the customs payments and taxes... Still got a few stores to ask from, gonna get back at that when I get back to work.
Speaking of lights, just remembered I still haven`t ordered the new headlight units, gotta do that too...
Last edited by Mattson; Jul 4, 2015 at 07:05 AM.