Project: CyBoRg (pic heavy)


Thread Starter
|
Retired Super Moderator, Tin Star Man & Hurricane Saloon Prospect, ROTM Feb 2015
Joined: Sep 2011
Posts: 2,382
Likes: 5
From: V��ksy, Finland
THE PROJECT BEGINS!!!
Today I finally got around to get this project going. Basically the main delay so far has been uncertainty about am I going to keep this bike or can I swap it to something newer at the same time as getting a new car, but now that the situation has settled it seems I probably can get a newer car BUT I have to give the old one as deposit in order to be able to get a loan instead of swapping it to a bigger bike...
Right, enough of that, the F2 is staying and it`s about time to start making it more to my liking. Now in case someone is wondering about the project name it comes from two things. First of all I like to name my projects, that way it`s easier to arcive photos and other materials belonging to that certain project, and second, in case I can pull off my plans for the headlight unit it`s going to have this slightly cyborg-ish look when done. When I was thinking about a good name I suddenly realised the word cyborg actually holds the letters C,B and R in it, and so it was settled.
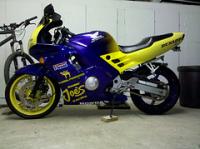
Where I am now:


Everyone with a pair of functioning eyes can see the first thing what`s wrong with these pictures. No, I don`t mean the snow. The bike`s reeeally DIRTY! I kind of delayed and delayed taking it to the garage in the fall, to the point that it actually started to snow and I couldn`t get it there anymore. (that`s my mom`s house where I grew up and now live about 1km away).
One morning when I was going to get my truck to move the bike, I noticed it`s raining and the snow had melted. I instantly jumped on the bike and drove it to the garage. At the second I got there the water turned back to sleety snow so I just pushed it in and leaved it there. It`s also covered in sawdust as I`ve been making a guitar in the same space without covering the bike...
Now, the TO DO -list:
-Bolt off those ugly aux hi beams I put in there to see in the fall
-take off the luggage box and the bar that holds the plate (done)
-Basic maintenance, oil change (have the oil, just got to change them)
-Take off the rims, gut them and get them sand blasted and powdercoated
-Maybe change the mirrors, just haven`t found ones that I`d like more than those
-Take out the front light and mold new brace out of fiberglass to house triple projector beams (one lo, twin hi`s)
-Kind of in between am I going to keep that exhaust or swap the Remus slipon back.
-Take the tail plastics off and swap them to an Airtech Single seat race unit (ordered, in queue)
-New grips, don`t like those.
Probably something got left out but that`s what I remember ATM. At least the rear swingarm could use a new coat too, but we`ll see...
My best friend in the garage during the snowy months:

Arcotherm GE20 Diesel heater. Gets that little side in the back nice and warm in minutes! Just gotta slide the door open, kick the heater on, let it blast for about 10mins and I`m good for an hour at a time.
Today I actually got done something to write about:

I took the rear tire off and gutted it from the bearings and such to get it ready for the sand blast. Left the rubber still on though, gonna go get them unmounted by a shop so I don`t nick the rims any more than they already are. Man, the bearings in there were DONE!
In case someone needs the info, and as a reminder for me:
Wheel bearings are SKF 6204-2RS1, or similiar.
The seals in front of the bearins are of unkown brand, but sized in/out/thickness 34/50/6mm.
Same in both sides so 2 of both when ordering new ones.
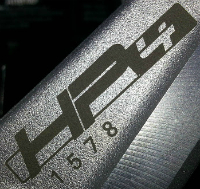
Now this little fella is a whole different case:


This is from the...sprocket pack? Don`t know the officcial name for it but that`s basically what it`s called in finnish.
Can anyone that has done this tell me does that "tube" come out of the bearing or is it a solid part of the inside track? There is a clear groove where the pipe part meets the bearing, but if that is an insert,either the part that`s inside the bearing is about 1mm thick tops, or there is a shoulder in the inner track, and both options seems really odd. There is no visible groove inside the hole.
The measurements for this bearing are (in mm):
Outside dia: 50,0 (49,97)
inside dia:20,0 (19,85-20,04)
Thickness of the outside track:14,0
Thickness (length) of the inside track:28,0
Don`t want to order OEM bearings cause they in general are stupidly expensive, and I can get the exact same bearings (make and all) ordered to a bearing shop (three in Lahti)
That`s it for today, I was planning to get the front rim off today too, but I`m a little feverish and had to leave as I was starting to feel a bit fuzzy... Plus I have to buy a stand to get the front rim out, there is a hook in the roof above the bike and I was trying to support the bike from it with a chain winch but apparently the bike`s too heavy cause the roof started to bow in so no lifting it from that... I would have to drill a hole through the roof and poke a long treaded bar from it to the attic and go bolt a big crossbeam to the other end, but that`s gotta happen in the summer...
Probaly gonna go back next weekend, as you can see the whole garage could use a proper cleanup...
Today I finally got around to get this project going. Basically the main delay so far has been uncertainty about am I going to keep this bike or can I swap it to something newer at the same time as getting a new car, but now that the situation has settled it seems I probably can get a newer car BUT I have to give the old one as deposit in order to be able to get a loan instead of swapping it to a bigger bike...
Right, enough of that, the F2 is staying and it`s about time to start making it more to my liking. Now in case someone is wondering about the project name it comes from two things. First of all I like to name my projects, that way it`s easier to arcive photos and other materials belonging to that certain project, and second, in case I can pull off my plans for the headlight unit it`s going to have this slightly cyborg-ish look when done. When I was thinking about a good name I suddenly realised the word cyborg actually holds the letters C,B and R in it, and so it was settled.
Where I am now:
Everyone with a pair of functioning eyes can see the first thing what`s wrong with these pictures. No, I don`t mean the snow. The bike`s reeeally DIRTY! I kind of delayed and delayed taking it to the garage in the fall, to the point that it actually started to snow and I couldn`t get it there anymore. (that`s my mom`s house where I grew up and now live about 1km away).
One morning when I was going to get my truck to move the bike, I noticed it`s raining and the snow had melted. I instantly jumped on the bike and drove it to the garage. At the second I got there the water turned back to sleety snow so I just pushed it in and leaved it there. It`s also covered in sawdust as I`ve been making a guitar in the same space without covering the bike...
Now, the TO DO -list:
-Bolt off those ugly aux hi beams I put in there to see in the fall
-take off the luggage box and the bar that holds the plate (done)
-Basic maintenance, oil change (have the oil, just got to change them)
-Take off the rims, gut them and get them sand blasted and powdercoated
-Maybe change the mirrors, just haven`t found ones that I`d like more than those
-Take out the front light and mold new brace out of fiberglass to house triple projector beams (one lo, twin hi`s)
-Kind of in between am I going to keep that exhaust or swap the Remus slipon back.
-Take the tail plastics off and swap them to an Airtech Single seat race unit (ordered, in queue)
-New grips, don`t like those.
Probably something got left out but that`s what I remember ATM. At least the rear swingarm could use a new coat too, but we`ll see...
My best friend in the garage during the snowy months:
Arcotherm GE20 Diesel heater. Gets that little side in the back nice and warm in minutes! Just gotta slide the door open, kick the heater on, let it blast for about 10mins and I`m good for an hour at a time.
Today I actually got done something to write about:
I took the rear tire off and gutted it from the bearings and such to get it ready for the sand blast. Left the rubber still on though, gonna go get them unmounted by a shop so I don`t nick the rims any more than they already are. Man, the bearings in there were DONE!
In case someone needs the info, and as a reminder for me:
Wheel bearings are SKF 6204-2RS1, or similiar.
The seals in front of the bearins are of unkown brand, but sized in/out/thickness 34/50/6mm.
Same in both sides so 2 of both when ordering new ones.
Now this little fella is a whole different case:
This is from the...sprocket pack? Don`t know the officcial name for it but that`s basically what it`s called in finnish.
Can anyone that has done this tell me does that "tube" come out of the bearing or is it a solid part of the inside track? There is a clear groove where the pipe part meets the bearing, but if that is an insert,either the part that`s inside the bearing is about 1mm thick tops, or there is a shoulder in the inner track, and both options seems really odd. There is no visible groove inside the hole.
The measurements for this bearing are (in mm):
Outside dia: 50,0 (49,97)
inside dia:20,0 (19,85-20,04)
Thickness of the outside track:14,0
Thickness (length) of the inside track:28,0
Don`t want to order OEM bearings cause they in general are stupidly expensive, and I can get the exact same bearings (make and all) ordered to a bearing shop (three in Lahti)
That`s it for today, I was planning to get the front rim off today too, but I`m a little feverish and had to leave as I was starting to feel a bit fuzzy... Plus I have to buy a stand to get the front rim out, there is a hook in the roof above the bike and I was trying to support the bike from it with a chain winch but apparently the bike`s too heavy cause the roof started to bow in so no lifting it from that... I would have to drill a hole through the roof and poke a long treaded bar from it to the attic and go bolt a big crossbeam to the other end, but that`s gotta happen in the summer...
Probaly gonna go back next weekend, as you can see the whole garage could use a proper cleanup...
Last edited by Mattson; Jul 4, 2015 at 07:01 AM.
Thread Starter
|
Retired Super Moderator, Tin Star Man & Hurricane Saloon Prospect, ROTM Feb 2015
Joined: Sep 2011
Posts: 2,382
Likes: 5
From: V��ksy, Finland
Ha!
Sitting on the computer, looking at the bearing on the table I suddenly remembered I have the workshop manual printed and neatly in a folder on the shelf. There it is, right on the page 13-3, rear wheel assembly picture. The "sprocket pack`s" real name seems to be the driven flange, and the flange collar (part no. 5) does seem to come out of the bearing. Gotta take it with me to work tomorrow and press it out in our depot where my hydraulic floor press is located.
Sitting on the computer, looking at the bearing on the table I suddenly remembered I have the workshop manual printed and neatly in a folder on the shelf. There it is, right on the page 13-3, rear wheel assembly picture. The "sprocket pack`s" real name seems to be the driven flange, and the flange collar (part no. 5) does seem to come out of the bearing. Gotta take it with me to work tomorrow and press it out in our depot where my hydraulic floor press is located.
Last edited by Mattson; Jan 13, 2013 at 03:02 PM.
Thread Starter
|
Retired Super Moderator, Tin Star Man & Hurricane Saloon Prospect, ROTM Feb 2015
Joined: Sep 2011
Posts: 2,382
Likes: 5
From: V��ksy, Finland
I was planning to go to the garage today to continue the disassembly but the flu got the better of me so I decided to wait till the weekend, BUT, I did manage to do something, and that is to get some new things:

A front stand to get the wheel off safely, this model also came with the "paddles" to be used as a rear stand aswell. Also got some number decal stickers, and that lil black box contains new front wheel bearings and seals. A full set for 27e so no point in hunting them around. The rear wheel set is out of stock from the whole country so those I might have to find separately.
IMO not a bad deal for a dual purpose stand to cost 60e. It`s a little crooked but it was the only one so I bought it anyway. It won`t affect it`s integrity, it`s purely a cosmetic issue. Did ask for a discount but the clerk said she doesn`t have the authority to do it, and as said it was the last one (anywhere) so it was a done deal even before that.
Just can`t figure out what those V-shaped things in the lower pipes are for...
Bums me a bit to for once be early to get the build going already and all the shops have is shelf by the meter...
Last edited by Mattson; Jul 4, 2015 at 07:02 AM.

Administrator, MVN / ROTM NOV 2012
Joined: Aug 2008
Posts: 11,003
Likes: 3
From: Republic of Boon Island
Maybe for tying , strapping or immobilizing the front end when elevated
Regular front stands the forks hold the front steady
BTW bearing #'s seem to be right there on the side
Looks like a common 6222LU... maybe lol
Regular front stands the forks hold the front steady
BTW bearing #'s seem to be right there on the side
Looks like a common 6222LU... maybe lol
Thread Starter
|
Retired Super Moderator, Tin Star Man & Hurricane Saloon Prospect, ROTM Feb 2015
Joined: Sep 2011
Posts: 2,382
Likes: 5
From: V��ksy, Finland
Dunno, those welds looked a bit dodgy plus they are just thrown in there, not aligned at all... First thing that popped into my mind is a place to put your axle when taking it off... Also good for busting up your knee when working around the wheel...
I believe those were the numbers stamped on the dustcover, gotta go asking around some day from the bearing shops. There apparently is a shoulder on the inside of the inner track however I'd reckon its not mandatory as the collar sits against the other side of the track and the spacer coming to the outside is wider than the track so even that wont be laying against it.
I believe those were the numbers stamped on the dustcover, gotta go asking around some day from the bearing shops. There apparently is a shoulder on the inside of the inner track however I'd reckon its not mandatory as the collar sits against the other side of the track and the spacer coming to the outside is wider than the track so even that wont be laying against it.
Thread Starter
|
Retired Super Moderator, Tin Star Man & Hurricane Saloon Prospect, ROTM Feb 2015
Joined: Sep 2011
Posts: 2,382
Likes: 5
From: V��ksy, Finland
...And at least the other two were standard SKF bearings straight off the shelf. 50/22/14 I believe was the size.