
1987 cbr600f


Senior Member
Joined: May 2011
Posts: 1,988
Likes: 439
From: Mesa, AZ
That's correct.
#1 is on left when sitting on bike.
Exhaust valves are at front of bike
Intake valves are behind engine.
Be sure to use torque-wrench on valve-adjuster lock-nut.
#1 is on left when sitting on bike.
Exhaust valves are at front of bike
Intake valves are behind engine.
Be sure to use torque-wrench on valve-adjuster lock-nut.

Thread Starter
|
Member
Joined: Dec 2022
Posts: 60
Likes: 37
From: Perth, Australia
Undo bottom bolt with fork springs installed and compressed with cap.
Make special tool by grinding 1mm off tip of allen key socket. This gives it nice sharp corners for good grip. I chopped off L-shaped allen key to make this socket.
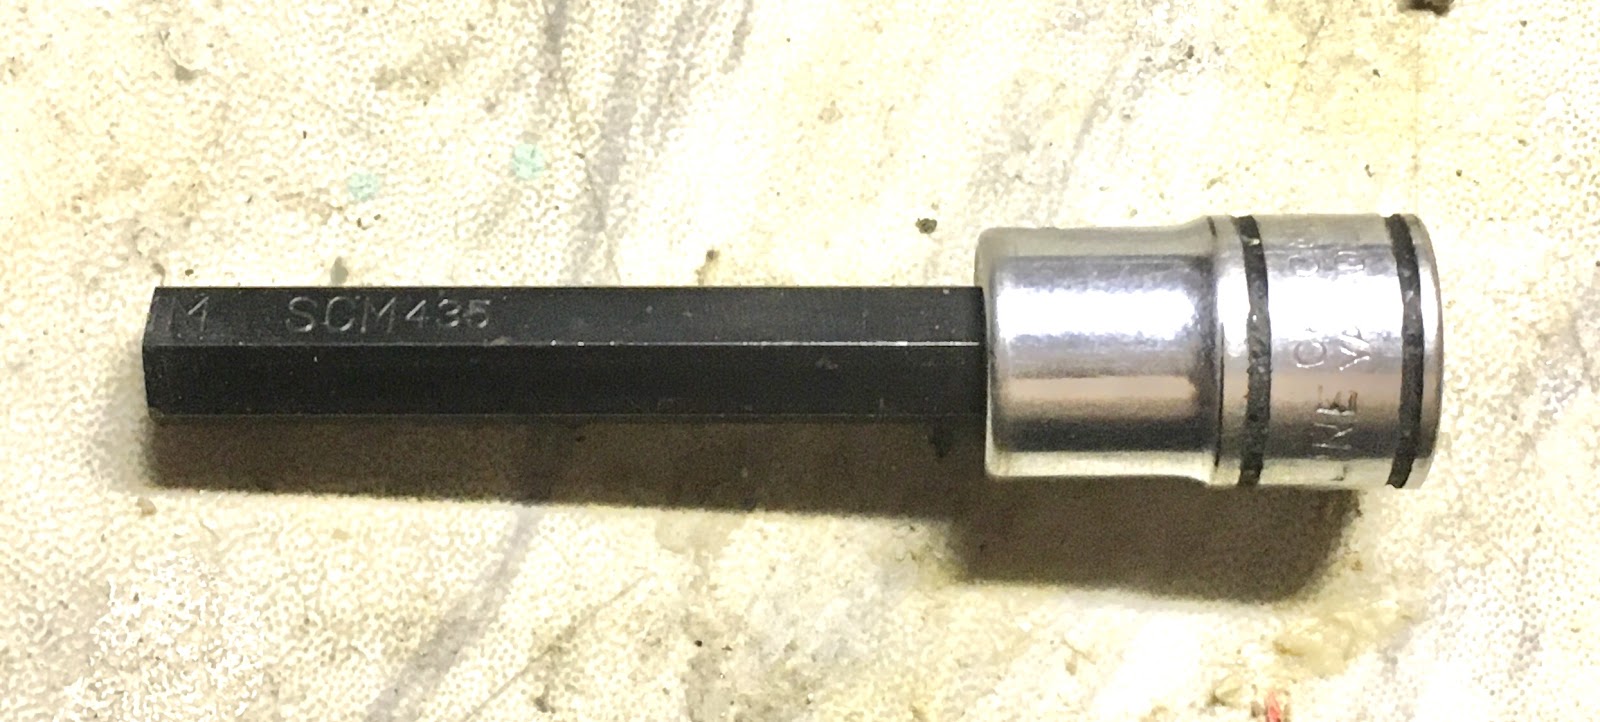
Don�t use impact drivers, spins too fast and will slip tool out of bolt and strip it. Use hammer impact screwdriver instead. Hammer force will keep allen bit inside bolt. Helical cam will convert downward motion into slow high torque to loosen toughest bolt.
https://www.harborfreight.com/6-bit-...ase-64812.html
Works great on carb float bowl and brake reservoir lid screws. Test on anvil of vise before using to confirm spin direction. Tool can also be set to tighten instead of loosening.
Make special tool by grinding 1mm off tip of allen key socket. This gives it nice sharp corners for good grip. I chopped off L-shaped allen key to make this socket.
Don�t use impact drivers, spins too fast and will slip tool out of bolt and strip it. Use hammer impact screwdriver instead. Hammer force will keep allen bit inside bolt. Helical cam will convert downward motion into slow high torque to loosen toughest bolt.
https://www.harborfreight.com/6-bit-...ase-64812.html
Works great on carb float bowl and brake reservoir lid screws. Test on anvil of vise before using to confirm spin direction. Tool can also be set to tighten instead of loosening.
After all parts accounted for, there is a spacer at the bottom of the fork leg.

Going to be an interesting tool that gets that out. Found it can wobble with a screw driver. Stopped doing that concerned about scoring the inner surface.
Thread Starter
|
Member
Joined: Dec 2022
Posts: 60
Likes: 37
From: Perth, Australia
Undo bottom bolt with fork springs installed and compressed with cap.
Make special tool by grinding 1mm off tip of allen key socket. This gives it nice sharp corners for good grip. I chopped off L-shaped allen key to make this socket.
Don�t use impact drivers, spins too fast and will slip tool out of bolt and strip it. Use hammer impact screwdriver instead. Hammer force will keep allen bit inside bolt. Helical cam will convert downward motion into slow high torque to loosen toughest bolt.
https://www.harborfreight.com/6-bit-...ase-64812.html
Works great on carb float bowl and brake reservoir lid screws. Test on anvil of vise before using to confirm spin direction. Tool can also be set to tighten instead of loosening.
After all parts accounted for, there is a spacer at the bottom of the fork leg.
Going to be an interesting tool that gets that out. Found it can wobble with a screw driver. Stopped doing that concerned about scoring the inner surface.
So ... tapered the end of ability of Al strap. Gently tapped it in. Recovered it, measured it. Found a matching concrete drill bit. Tapped that in, turned and extracted this 'spacer '. Ah, it was the short piece that goes in the bottom of the stantion. Installed UPSIDE DOWN.
That explains why the front end would bottom out under heavy braking. Into a corner, I'd swear under the helmet.
So my initial parts count was wrong!

Thread Starter
|
Member
Joined: Dec 2022
Posts: 60
Likes: 37
From: Perth, Australia
Looking forward to not getting that knock when you don't want to feel it!