
What have you done to your CBR 1000f today?
#1971
 09-21-2012, 06:36 PM


#1972
09-21-2012, 07:10 PM
Senior Member and Montana roustabout :)
Join Date: Aug 2012
Location: Flathead Lake, Montana
Posts: 410
Likes: 0
Received 0 Likes
on
0 Posts
#1974
09-22-2012, 12:28 AM

Banned
Took the side fairing off today to check my clutch slave cylinder out and I saw that several of the plastic mounts have broken away. The little brass female attachments that sit in the plastic mounts of the side fairing that take the screws from the front cowl that goes up behind the front wheel have remained attached to those screws. I have an idea how to fix them and will post a how to when I get time to fix them properly.
I also took the clutch slave off and had a look at it. There is a slight weep there that a new seal kit will fix. I also took the opportunity to use my Mity Vac to bleed the system and generally have a play with the Mity Vac. What a great piece of kit that is !!! I worked it while my son kept the master cylinder topped up. It worked a treat and I had it bled in 5 minutes. Its amazing how the right tools for the job make it so easy.
Anyway it was a productive few hours and I have my next project being the repair of the mounts on my side fairing when I get some time.
#1975
09-22-2012, 12:32 AM

Super Moderator
To stop thos tabs braking off Bordo, I use a little WD-40 on the rubber mount. Slips right in.
Wondering if alternatively a small smear of rubber grease would do.
Repairing the broken tabs, I tend to over compensate with araldite, cut up parts of wiper blades (the steel inserts) and sometimes use the soldering iron to hold things together at the back of the fairing.
Cheers, SB
Wondering if alternatively a small smear of rubber grease would do.
Repairing the broken tabs, I tend to over compensate with araldite, cut up parts of wiper blades (the steel inserts) and sometimes use the soldering iron to hold things together at the back of the fairing.
Cheers, SB

#1977
09-22-2012, 09:31 AM
Bordo - heavy duty two part epoxy will be your friend once everything
is thoroughly roughed up for adhesion and squeaky clean as in no
oily residue. Best to assemble both sides off the bike while the epoxy
sets up (bungy cords or similar help to keep fairings clamped together)
- the 24 hr stuff is best not the 5 min epoxy - basically a few more cents
for a better brand epoxy applies in this case
Took the side fairing off today to check my clutch slave cylinder out and I saw that several of the plastic mounts have broken away. The little brass female attachments that sit in the plastic mounts of the side fairing that take the screws from the front cowl that goes up behind the front wheel have remained attached to those screws. I have an idea how to fix them and will post a how to when I get time to fix them properly.
I also took the clutch slave off and had a look at it. There is a slight weep there that a new seal kit will fix. I also took the opportunity to use my Mity Vac to bleed the system and generally have a play with the Mity Vac. What a great piece of kit that is !!! I worked it while my son kept the master cylinder topped up. It worked a treat and I had it bled in 5 minutes. Its amazing how the right tools for the job make it so easy.
Anyway it was a productive few hours and I have my next project being the repair of the mounts on my side fairing when I get some time.
I also took the clutch slave off and had a look at it. There is a slight weep there that a new seal kit will fix. I also took the opportunity to use my Mity Vac to bleed the system and generally have a play with the Mity Vac. What a great piece of kit that is !!! I worked it while my son kept the master cylinder topped up. It worked a treat and I had it bled in 5 minutes. Its amazing how the right tools for the job make it so easy.
Anyway it was a productive few hours and I have my next project being the repair of the mounts on my side fairing when I get some time.
Last edited by Sprock; 09-22-2012 at 09:33 AM.
#1978
09-22-2012, 10:43 AM

Banned
Join Date: Jul 2012
Location: Bottom of a Bottle in RI US
Posts: 388
Likes: 0
Received 0 Likes
on
0 Posts
Took the side fairing off today to check my clutch slave cylinder out and I saw that several of the plastic mounts have broken away. The little brass female attachments that sit in the plastic mounts of the side fairing that take the screws from the front cowl that goes up behind the front wheel have remained attached to those screws. I have an idea how to fix them and will post a how to when I get time to fix them properly....
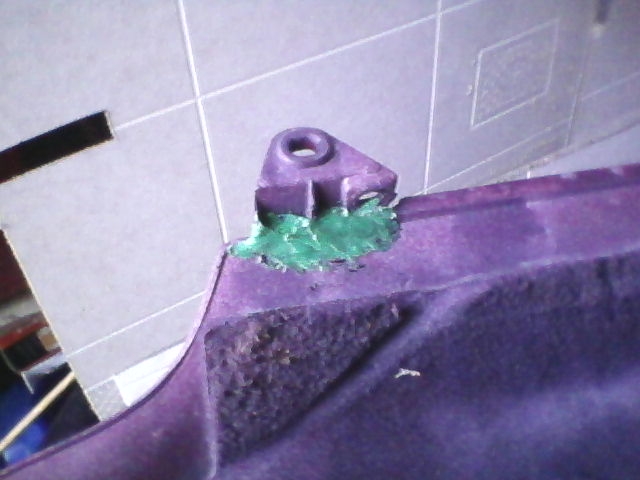
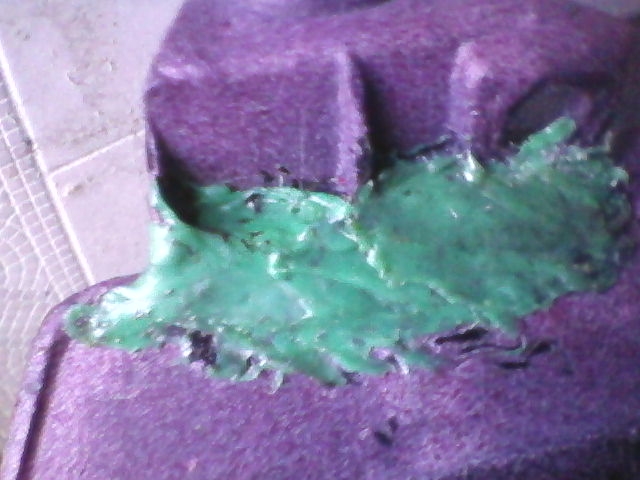
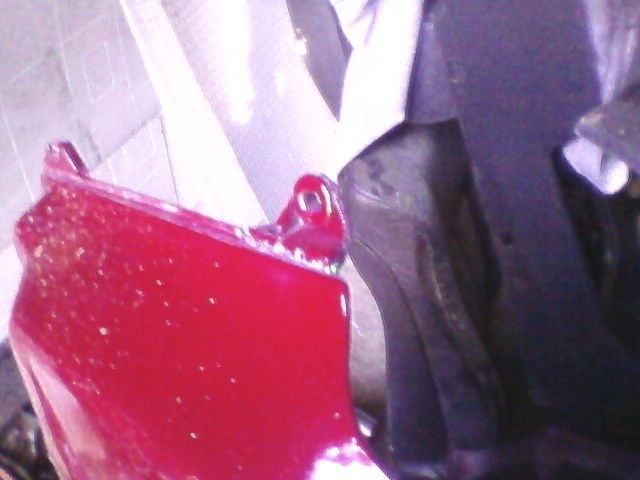
 My tab I repaired is far stronger than the original do to the addition of coat hanger supports!
Yup hit the spot on the fairing a few inches from the end of the flame until it smokes (not so much it melts or sags) and while you are holding the flame on the fairing with your other hand hold the tab end to the side of the flame to heat it as well. When the fairing is ready quickly put the end of the tab into the flame for a second and it will start to melt. Then remove the torch and quickly place the tab onto the fairing. Press it in so that both pieces meld and turn it in both directions and then while it is still mailable pull it out to it's original depth and hold for a few seconds until it cools (you can tell this by touching with your other finger and when it is no longer tacky. If it is not in the correct position and you need to adjust you can use a soldering gun to heat it up again. Then when it is in position I build up a base by filling in the surrounding area where the 4 supporting braces(yeah great design that was
") ) are with spare ABS plastic. For the extra plastic you can use anything that will mix with ABS (The blach plumbing pipe is abs: I use milk jugs:LDPE ). Also you can ct up a coat hanger and make braces. I did this on my side fairing tab (I have it off now and will go take some pictures| of course I had to fix it after I had it painted!) This is really easy as you can cut then how you want them and then hold them with needle nos pliers and hit them with a propane torch and then just push them into the plastic and then cover them with more plastic. Instant reinforcement. One of these days I should do a diy on this. If you look up my Side of the road thread I think I have pictures of the airbox I reassembled with a solder iron (I never sanded it though as the fix was behind the carbs :great place for a huge chunk to break off aye!).
) are with spare ABS plastic. For the extra plastic you can use anything that will mix with ABS (The blach plumbing pipe is abs: I use milk jugs:LDPE ). Also you can ct up a coat hanger and make braces. I did this on my side fairing tab (I have it off now and will go take some pictures| of course I had to fix it after I had it painted!) This is really easy as you can cut then how you want them and then hold them with needle nos pliers and hit them with a propane torch and then just push them into the plastic and then cover them with more plastic. Instant reinforcement. One of these days I should do a diy on this. If you look up my Side of the road thread I think I have pictures of the airbox I reassembled with a solder iron (I never sanded it though as the fix was behind the carbs :great place for a huge chunk to break off aye!).Also you can use Acrylic cement I have heard but never tried apparently it works just like the pvc cement by melting the pieces together. I am not a fan of using glue to fix anything that you can repentantly re bond with original material. Glue will never be as strong.
This is a fiberglass crack repair from the previous owner that I have to repair now after it just failed (I guess it didn't like 100mph+
)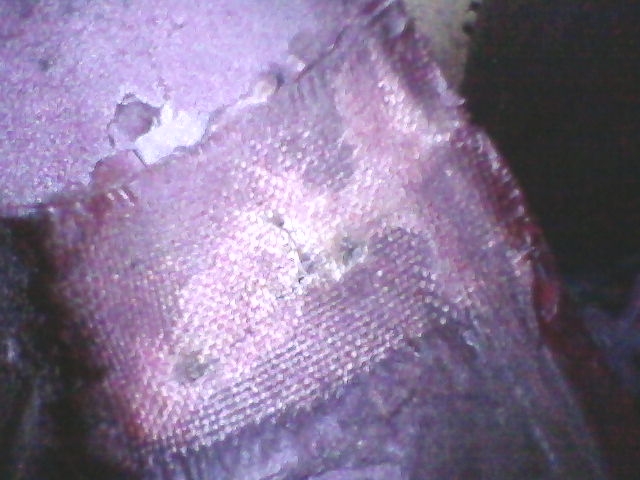
Here are my metal reinforced tab repair (Not pretty but it's all hidden so I did no body work afterwards) I can lift the entire fairing by this tab, I'd never do that with the other un-reinforced one!
Last edited by Hueristic; 09-22-2012 at 11:24 AM.
#1979
09-22-2012, 09:40 PM
Banned
Thanks for the ideas guys. Araldite has been my friend over many years with these old girls as well as scrap ABS plastic and a soldering iron. Its always a bonus when if what you build doesn't quite work you can melt it off and start again...lol. I'm thinking age is starting to catch up with the old girl in a few areas but that's ok as its only to be expected. A few seal kits here and there and some plastic repair will have her better than new soon. It's good I like working on these old bikes.