87 1000f rebuild: Project ugly girl
#71
 07-29-2010, 04:02 PM


#72
09-17-2010, 08:30 AM

Hello gents. Its been a while. No money...baby...newdog...blah blah blah. So I've spent a ton of time cleaning the head. I was going to port/polish it but after some research came to the conclusion that it is pointless without a flow bench. So two questions for the experts.
It looked like there was some silicone on the head gasket but the book doesn't call for it. When reassembling should I use it?
The head had a TON of carbon. anything I should look for? maybe the motor was just run to rich? Valve seats seem "ok".
Thanks
Pat
It looked like there was some silicone on the head gasket but the book doesn't call for it. When reassembling should I use it?
The head had a TON of carbon. anything I should look for? maybe the motor was just run to rich? Valve seats seem "ok".
Thanks
Pat
#73
09-21-2010, 01:22 AM

Hello gents. Its been a while. No money...baby...newdog...blah blah blah. So I've spent a ton of time cleaning the head. I was going to port/polish it but after some research came to the conclusion that it is pointless without a flow bench. So two questions for the experts.
It looked like there was some silicone on the head gasket but the book doesn't call for it. When reassembling should I use it?
The head had a TON of carbon. anything I should look for? maybe the motor was just run to rich? Valve seats seem "ok".
Thanks
Pat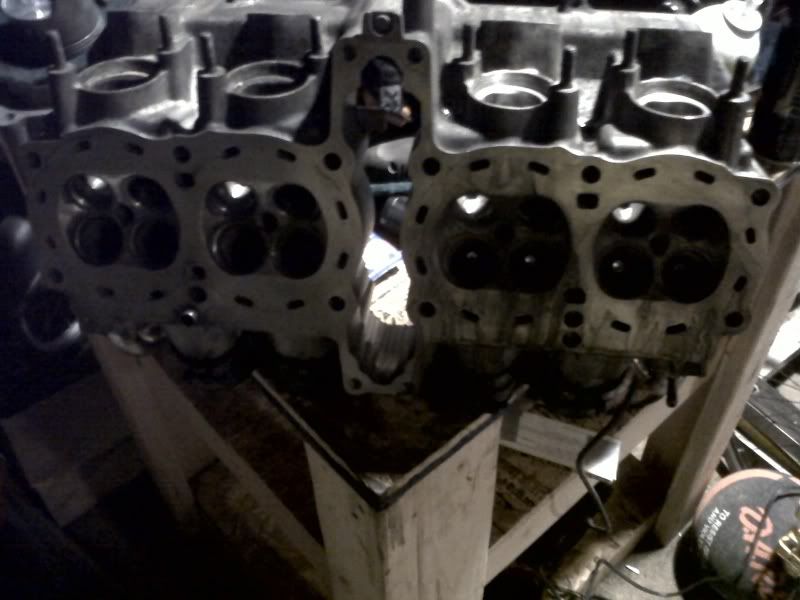
It looked like there was some silicone on the head gasket but the book doesn't call for it. When reassembling should I use it?
The head had a TON of carbon. anything I should look for? maybe the motor was just run to rich? Valve seats seem "ok".
Thanks
Pat
use this miracle water for cleaning, i did use it for cleaning my rusted gas tank inside and i was amaze with the result.
http://www.evaporust.com/
#74
09-23-2010, 08:10 AM
#75
09-24-2010, 02:25 AM

Senior Member
pgmc; Baby and new dog? You're a glutton for punishment mate!
 I've never used any 'product' on head gaskets. IMO, if the head is true and the surfaces are completely clean there's no need. You're just making more work for the next time it gets pulled apart, having to clean off all that crap. Just be really patient when you tighten the head down. Follow the correct sequence and start with finger tight, then take painfully long and feel what you are doing with the wrench to get everything firm. Then finish off tightening with your torque wrench, again in the correct sequence, perhaps in a couple of stages.
On the port and polish subject; I once took to the head on my Z650 with this kind of thing in mind. My old man (much to my mother's concern) helped me get a few of my bikes to go a bit harder. He looked at the head and suggested that the valve guides protruded further than needed into the intakes. I drilled them back almost flush to the head then hit them with a drill mounted grinder. Next, the emery cloth came out for several hours. My Dad said that I shouldn't make it all too smooth because some roughness aided fuel atomisation, but the castings were a bit crude and some improvement could be had. All the work was done by feel with no flow bench and the thing hammered!!
DISCLAIMER: At the time, a good second hand head for a Z650 cost thirty quid so, if one farked it up, no big deal. I'm not sure what the heads for our bikes are worth and I also think they go hard enough as they are
 .
. Keep us posted with the progress on your bike (with plenty of pics) because it's a credit to you how far you've got from what you started with, especially with a baby in the family...most of us know how hard that is.
Last edited by davethepom; 09-24-2010 at 02:41 AM. Reason: Afterthought.

#77
09-24-2010, 03:08 PM
Senior Member
Worth every cent too mate!! My boy's 14, girl's 12. There are also 4 dogs sucking the life out of us. Once the bank have their portion too, it's hard to have too much spare dosh for toys. I don't mind though, it's all good!.
BTW. Boxers are cool dogs! Boundless energy, gentle and great with kids. Good times ahead at your place for sure.
. Once the bank have their portion too, it's hard to have too much spare dosh for toys. I don't mind though, it's all good!.BTW. Boxers are cool dogs! Boundless energy, gentle and great with kids. Good times ahead at your place for sure
.
Last edited by davethepom; 09-24-2010 at 03:12 PM.
#78
10-14-2010, 07:55 AM
This thread should have been titled how not to rebuild your hurricane.
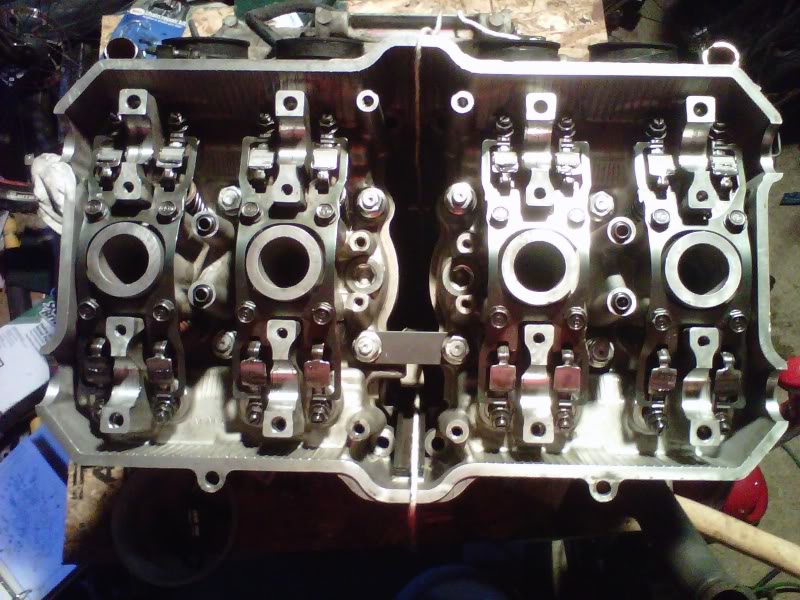
I finally got the head clean (so long mud wasp nest) and reassembled. I followed the directions on how to set the cams and coated them with molybdenum disulfide paste. It was great until I realized that the cam chain tensioner has to go in first so.....out with the cams.
Then I decided to just put the head on the motor and go from there. Seated the head perfect and realized the front cam chain guide has to go on between the case and the head so...off with the head.
This is how she’s sitting now. Head is on and set to torque...Thanks for the help Dave...hopefully there will be no more do over’s but I doubt it.
#79
10-14-2010, 08:29 AM

Member
Join Date: Oct 2010
Location: Long Eaton,Nottingham.UK
Posts: 40
Likes: 0
Received 0 Likes
on
0 Posts
#80
10-14-2010, 09:40 AM

Senior Member
Join Date: Mar 2009
Location: Central Indiana, USA
Posts: 119
Likes: 0
Received 0 Likes
on
0 Posts
The main reason you don't put any kind of sealant or silicon on the head is that there is a chance you can block the oil passages that are around the head bolts. You notice how the head bolts have that spiral pattern on them that is for the oil to climb up them into the cam bearings and valve surfaces. Just a dab of silicon can block your oil flow and as you know that is not good.