
thirdgen's massive F4i rebuild thread.... pix intense!!


Well... I just uploaded 265 pictures to photobucket, won't be posting every one of them, but just be warned.... this is gonna be a looooong thread with ALOT of pictures!! LOL
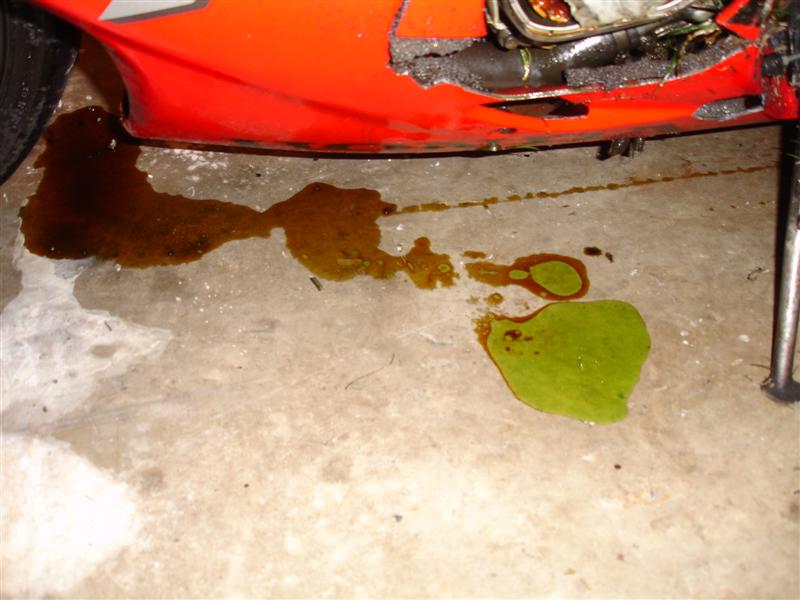
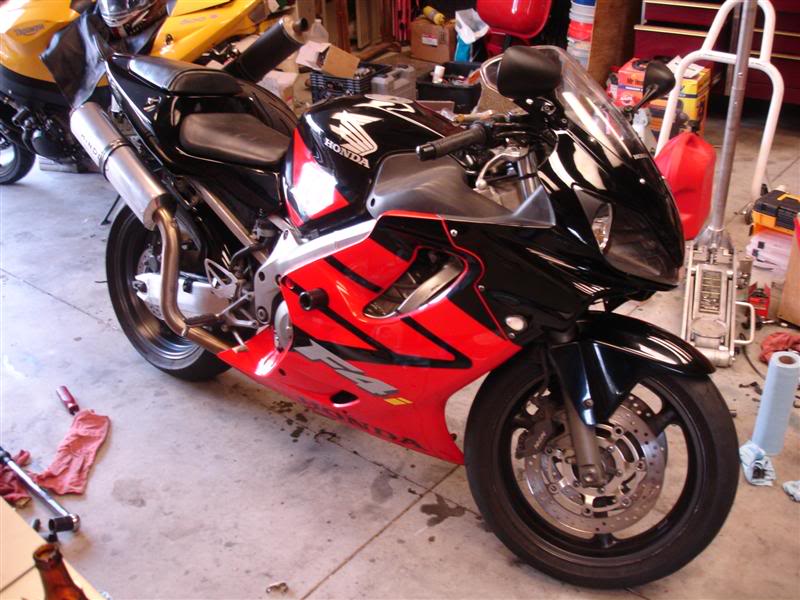
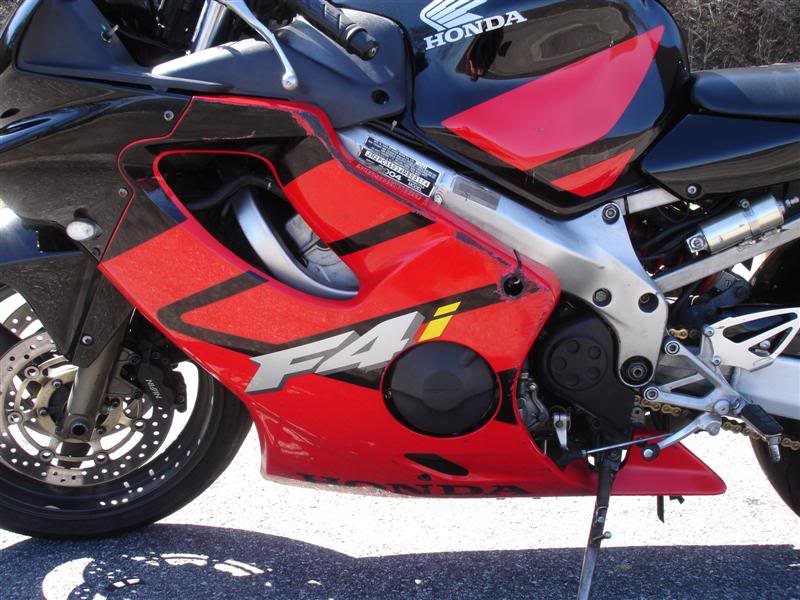
Anyways, some may remember I went down back in Dec and the whole ordeal that followed. For those that don't.... back on Dec 17th I was on my way to work and while veering off on a road to the left, I hit a patch of oil/diesel fuel/antifreeze/something slippery, and lowsided at about 25 mph. All was fine until the bike slid into the curb, did a little highside and then rolled over itself into the grass. I got right up, not even so much as a scratch on me, thank god (leathers FTMFW!!), went over to the bike and it was completely covered in engine oil. Not a good sign already!
Luckily another guy from work was several cars behind me when this happened, so he saw it and recognized it as being me, and pulled right into the parking lot there and made sure I was OK. Luckily he had his pickup and an empty bed, so we lifted the bike into the bed of his truck and off to work we went
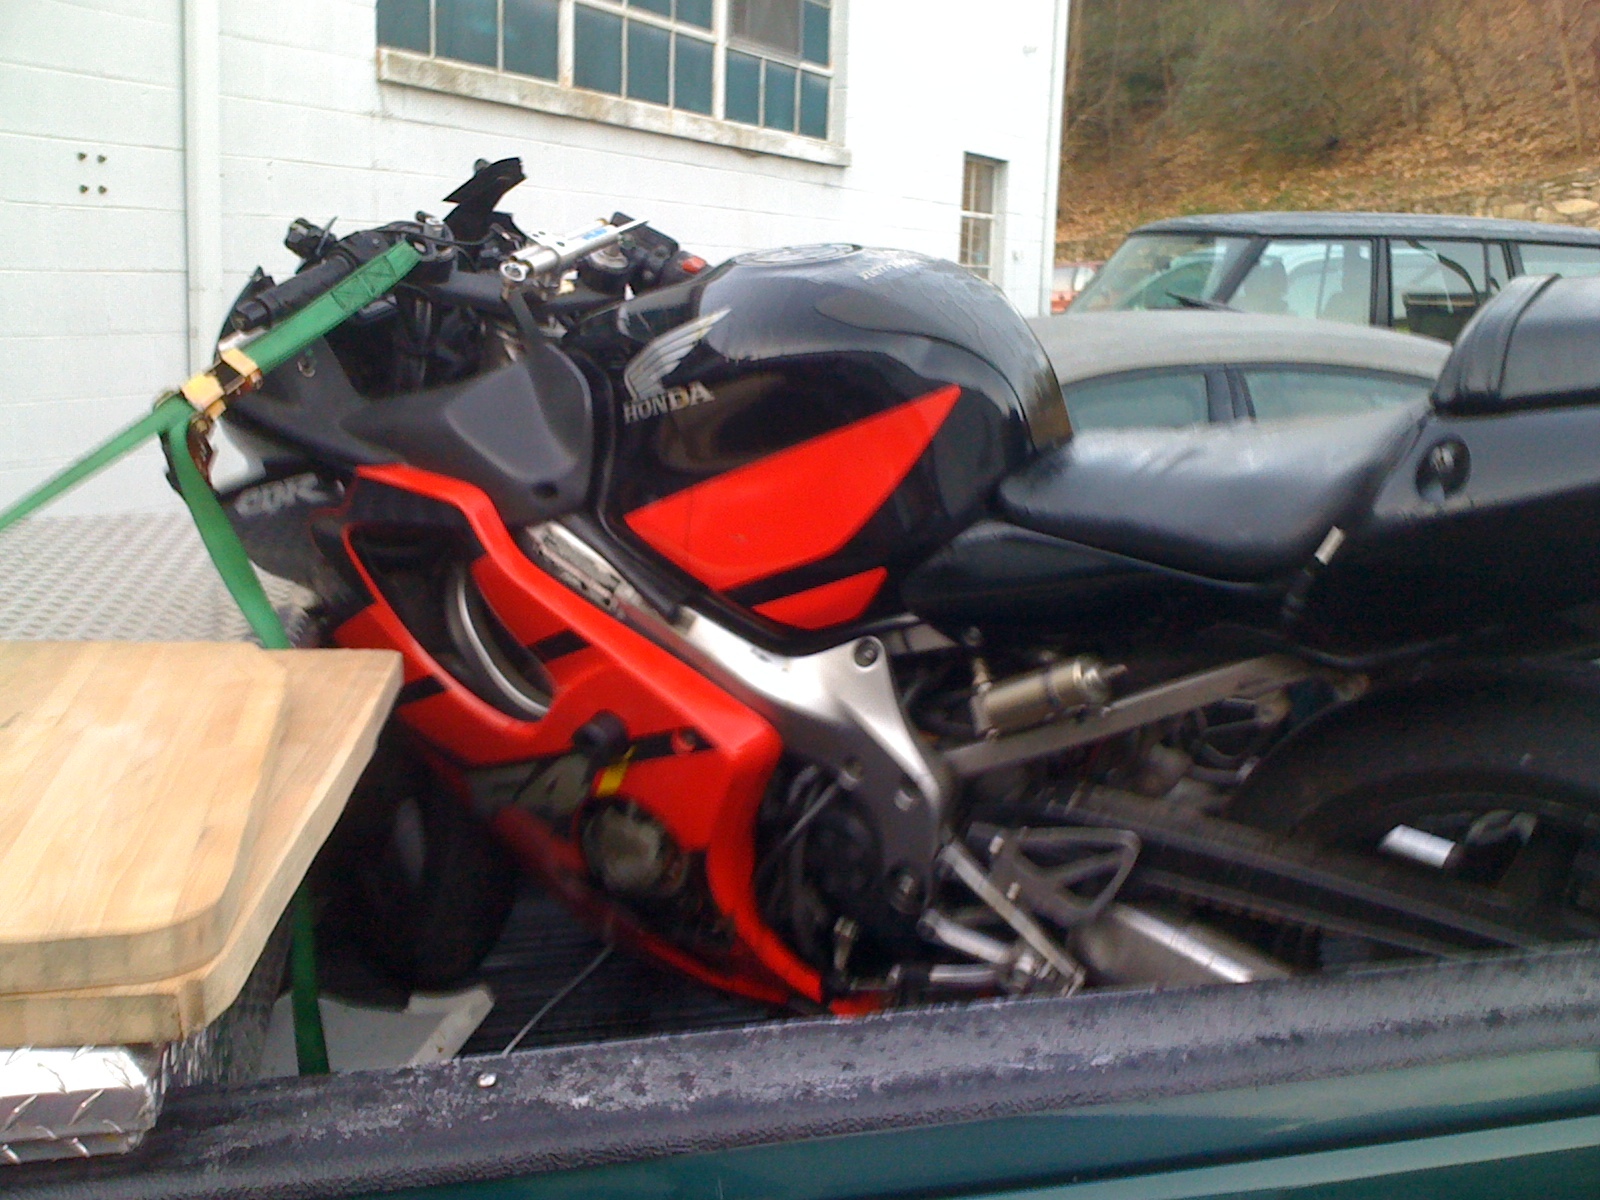
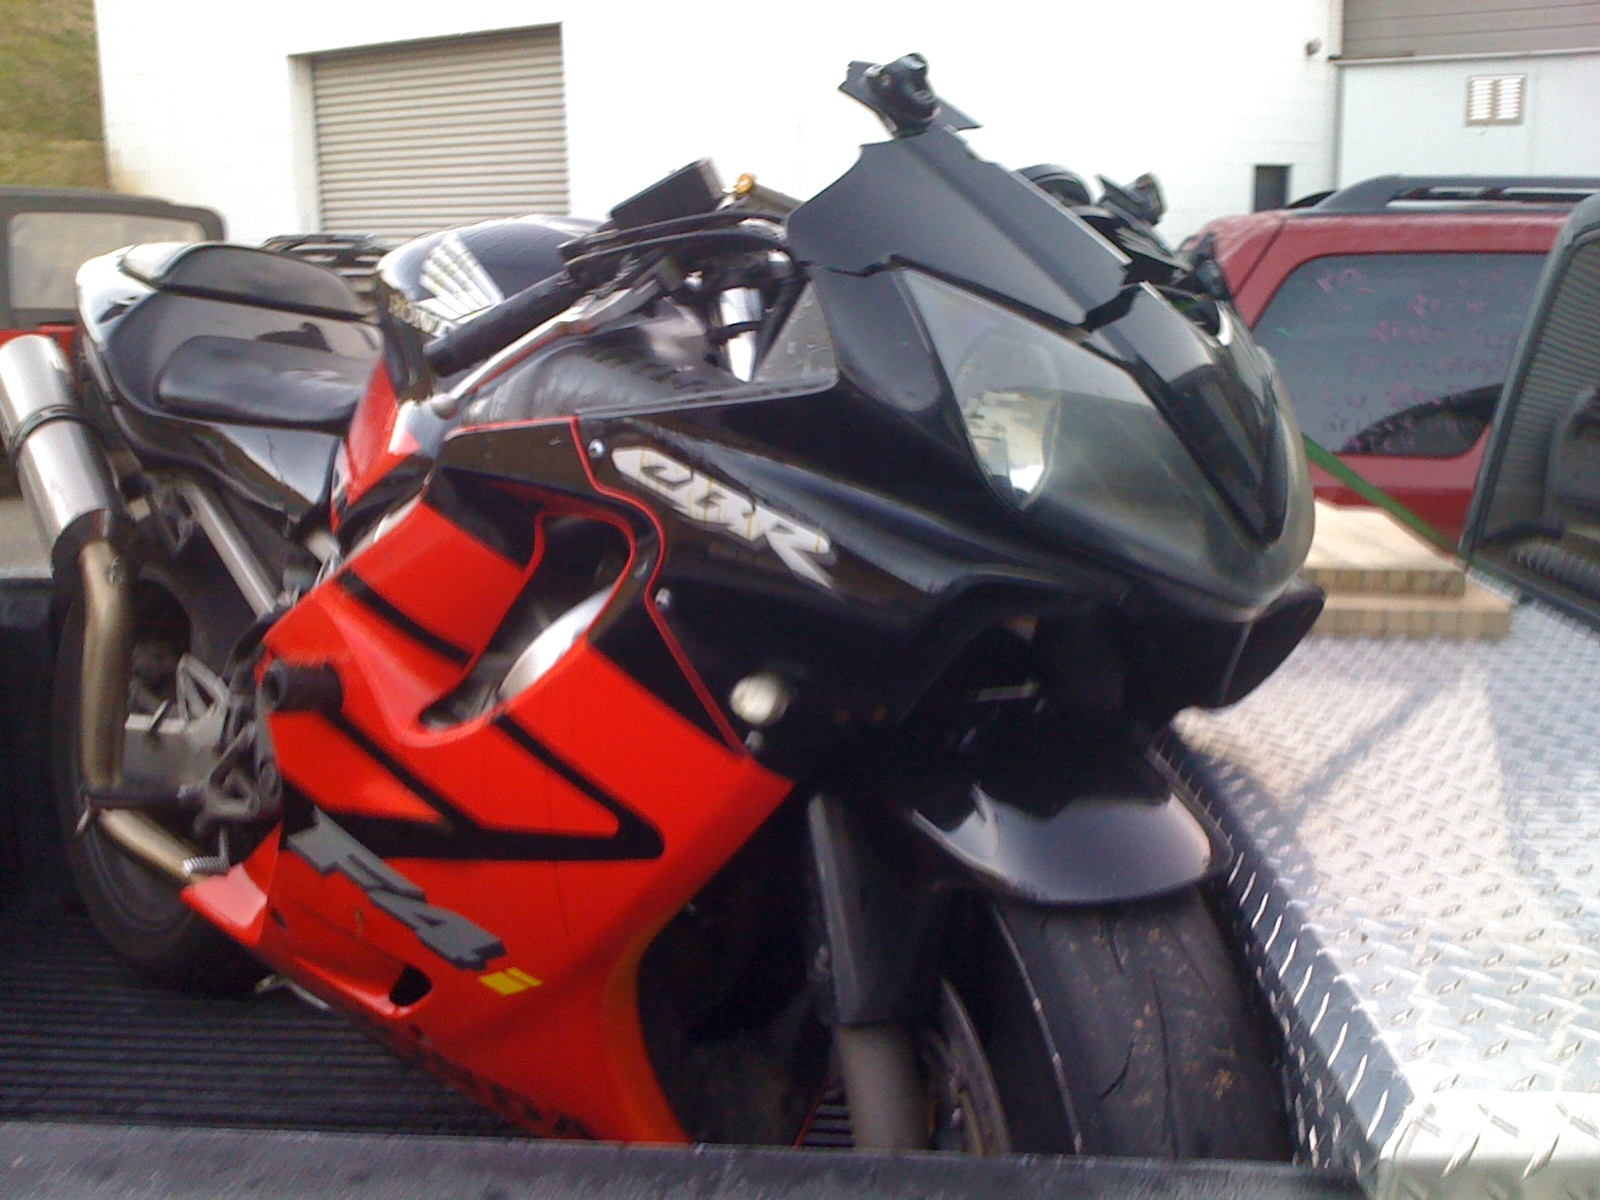
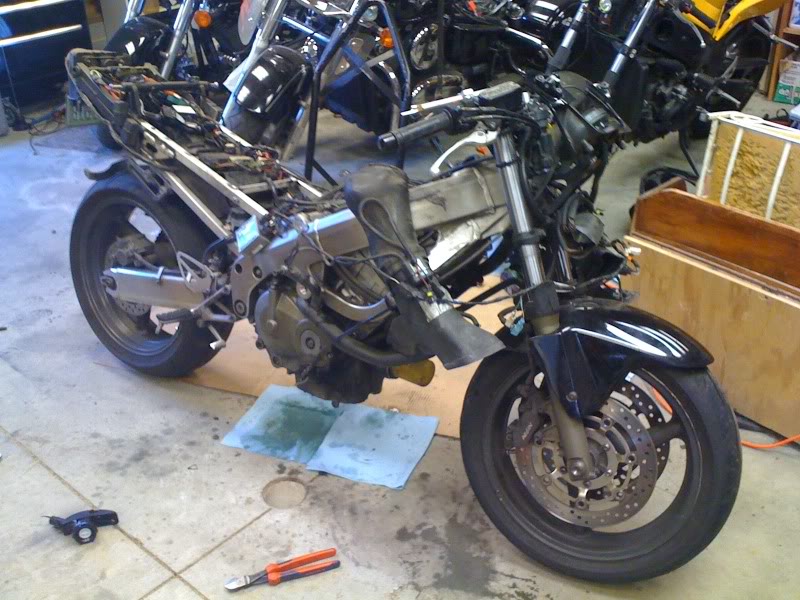
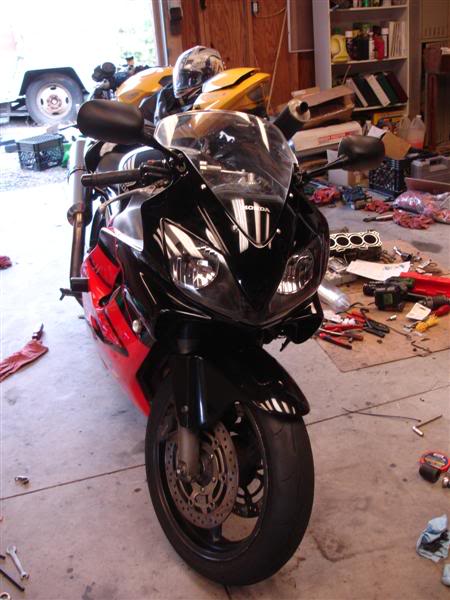
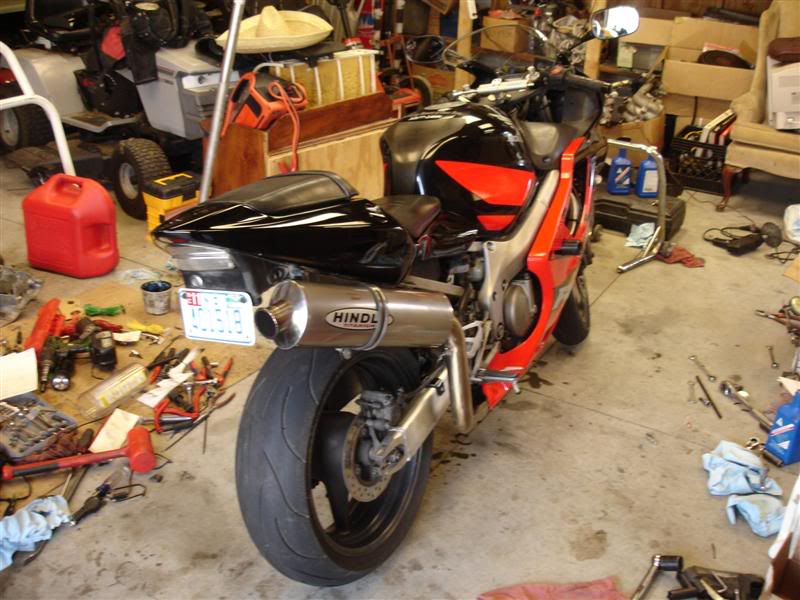
He gave me a ride home after work and we unloaded the bike into the garage. I was able to get a little better analysis of the damages
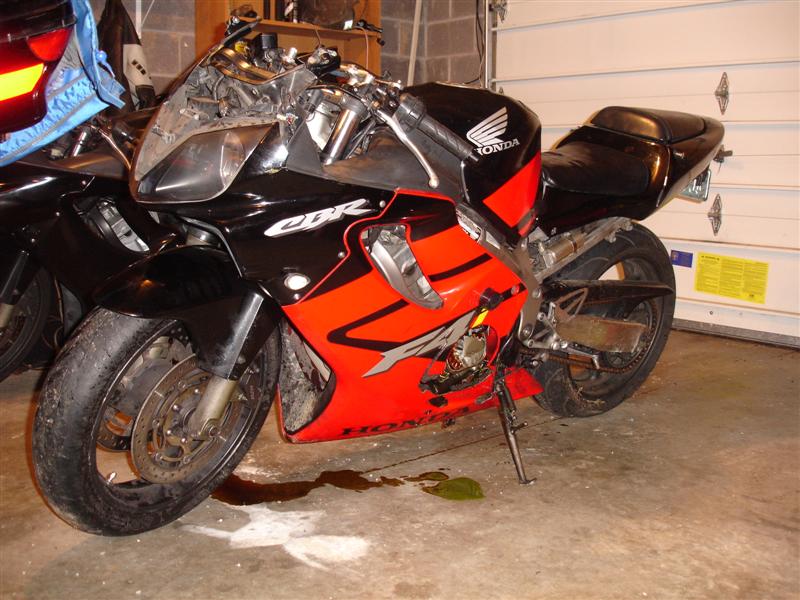
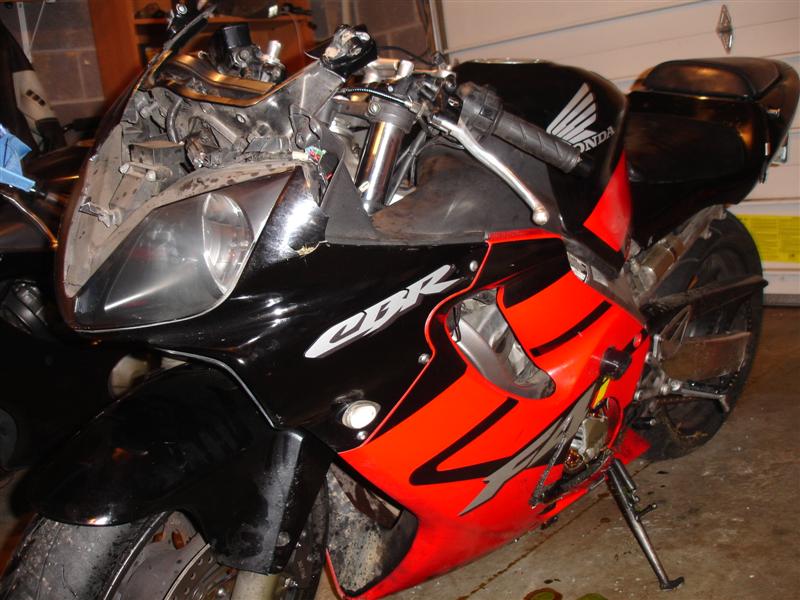
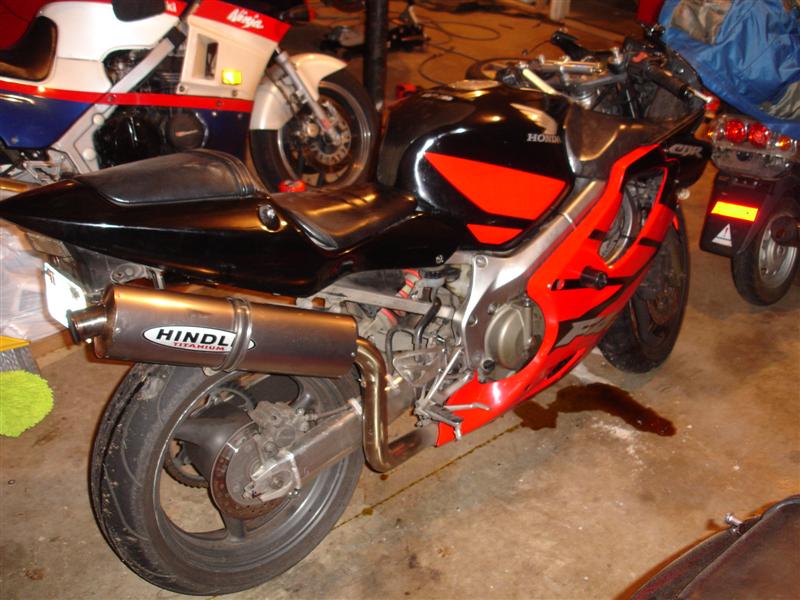
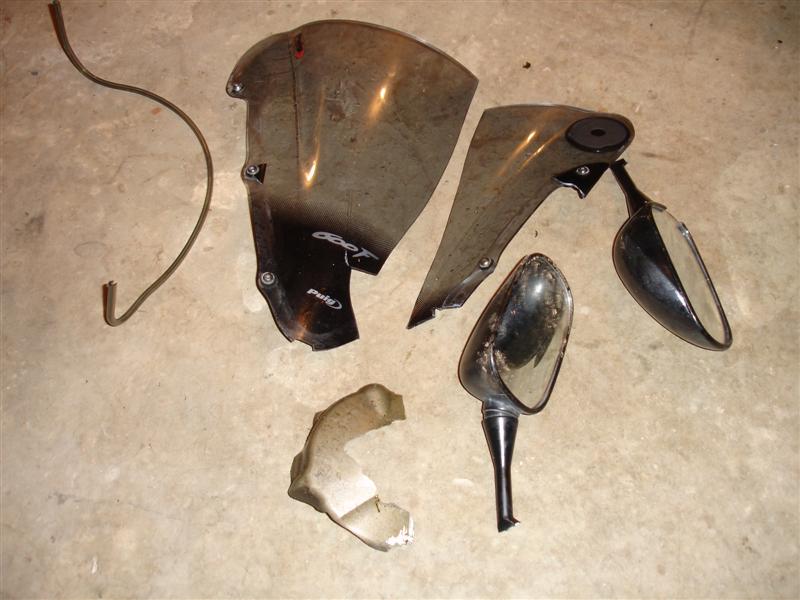
Right side didn't really get much at all

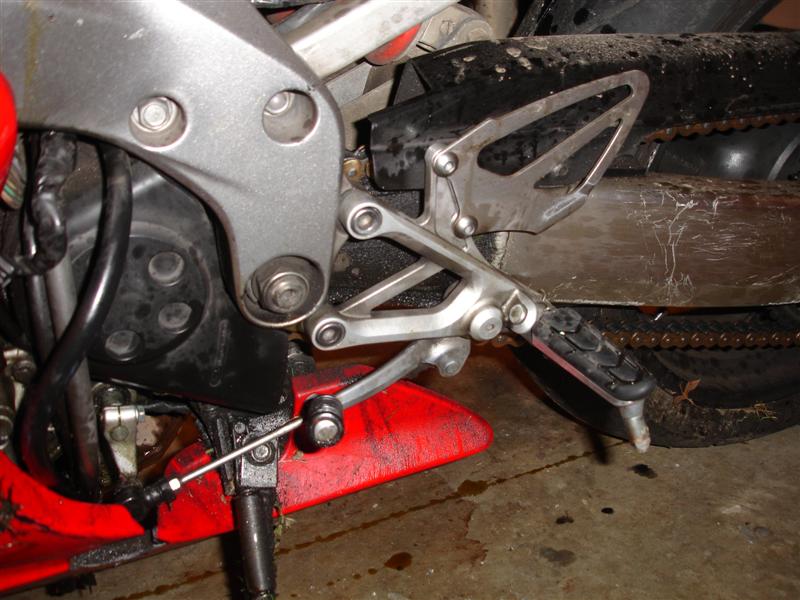
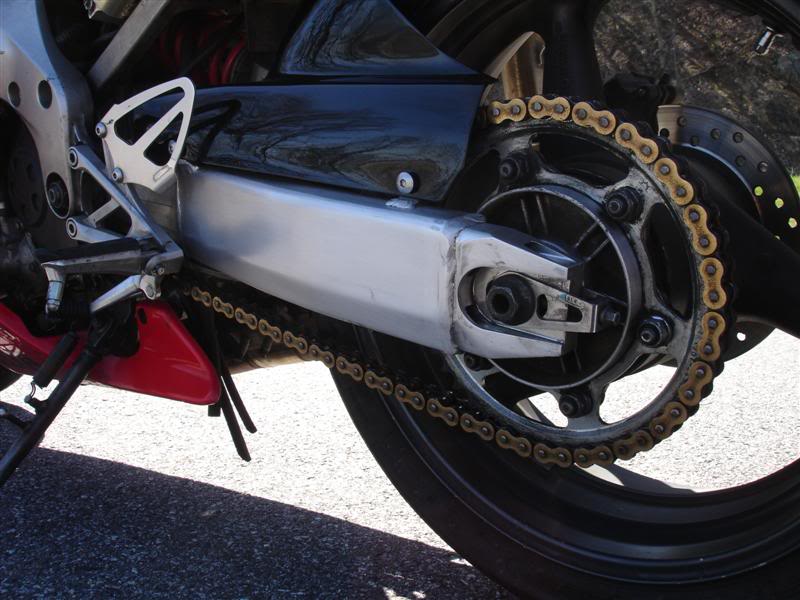
Swingarm got gouged up pretty good

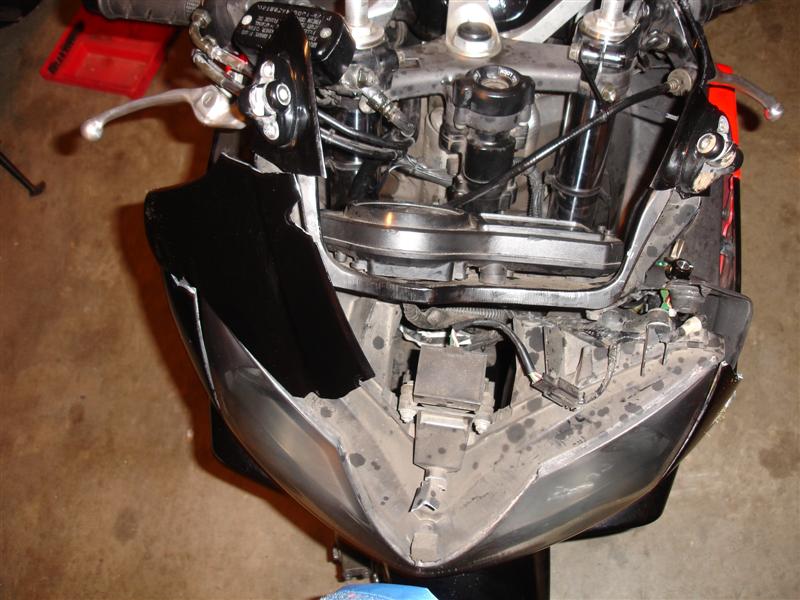
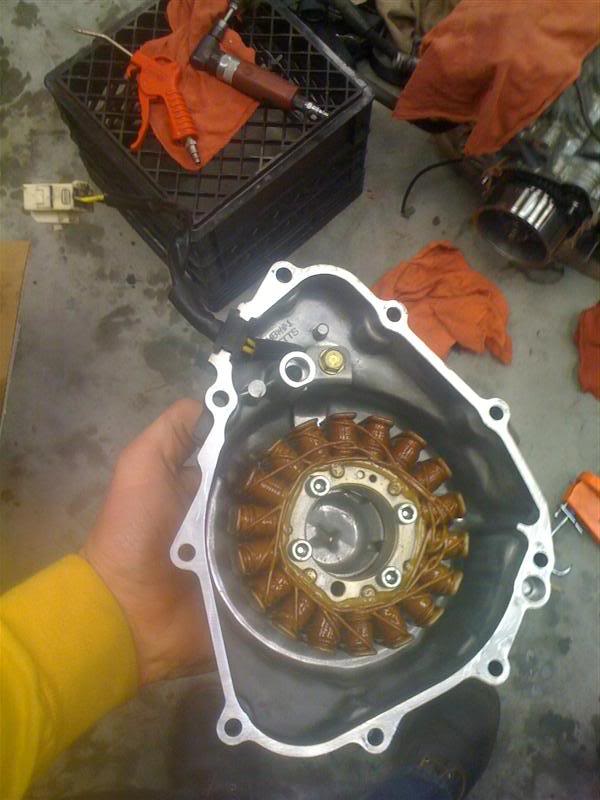
Now for the really bad part.... when it slid, the flywheel took a hard and direct hit with the curb
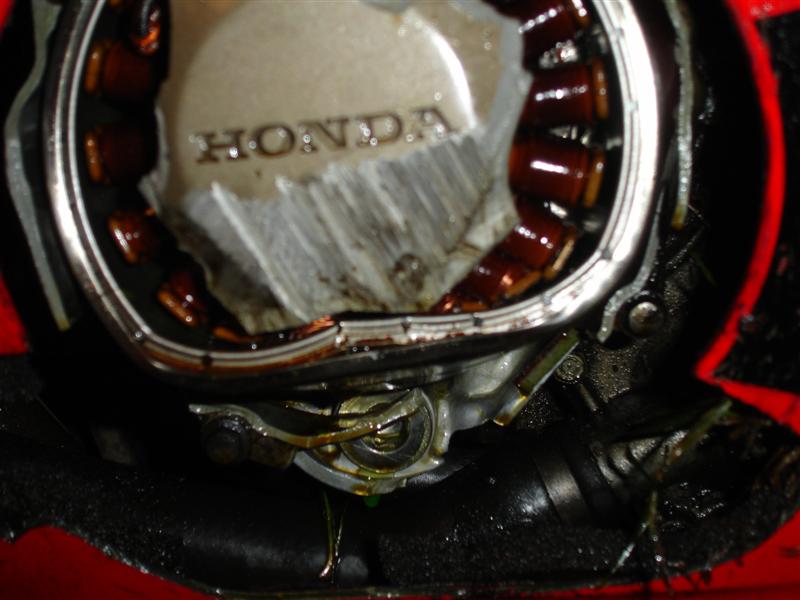
Took a good size chunk out of the lower crankcase
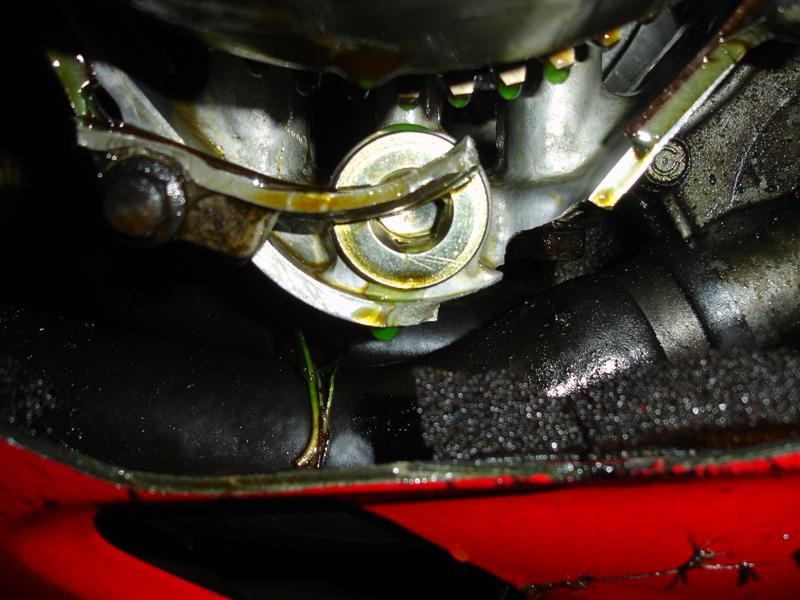
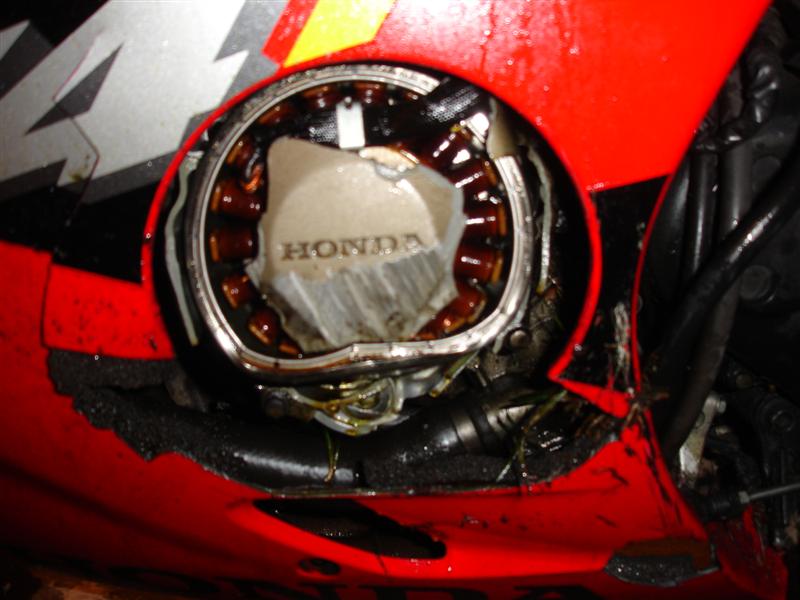
All that was left of my stator cover
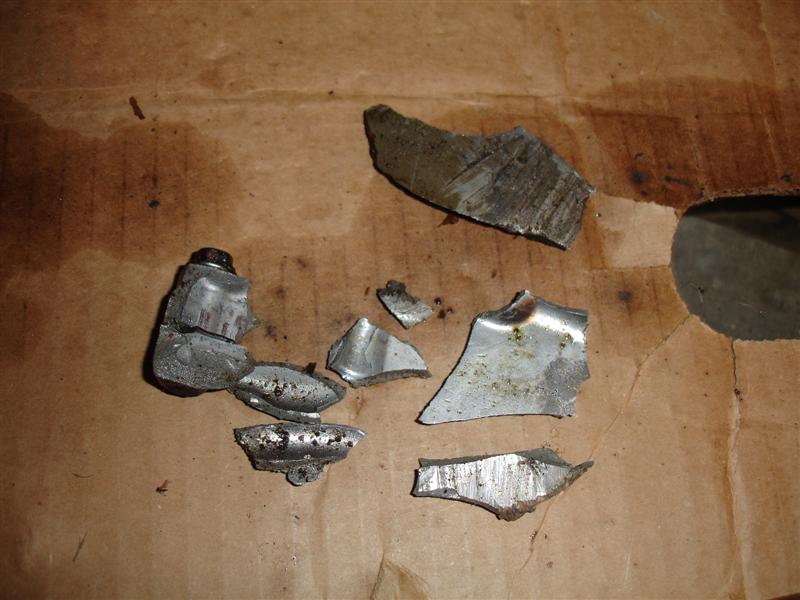
Definitely not a good sign there!
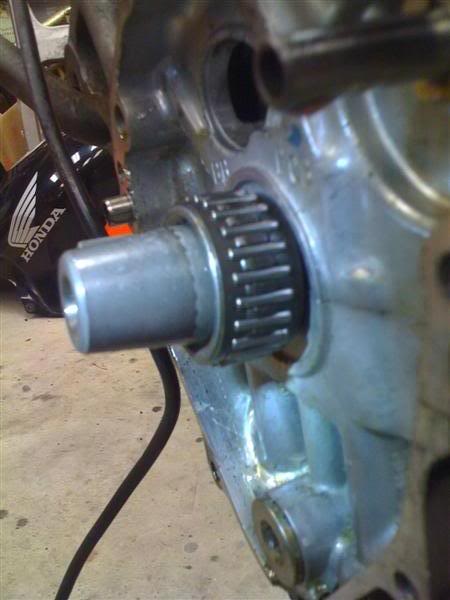
A couple weeks later, after much persuasion with a pry bar I was able to get the mangled stator out of the flywheel. Thanks to a generous member of 600rr.net for loaning me the OEM flywheel puller tool, I was finally able to remove the flywheel and inspect behind it. I was quite sad with what I found
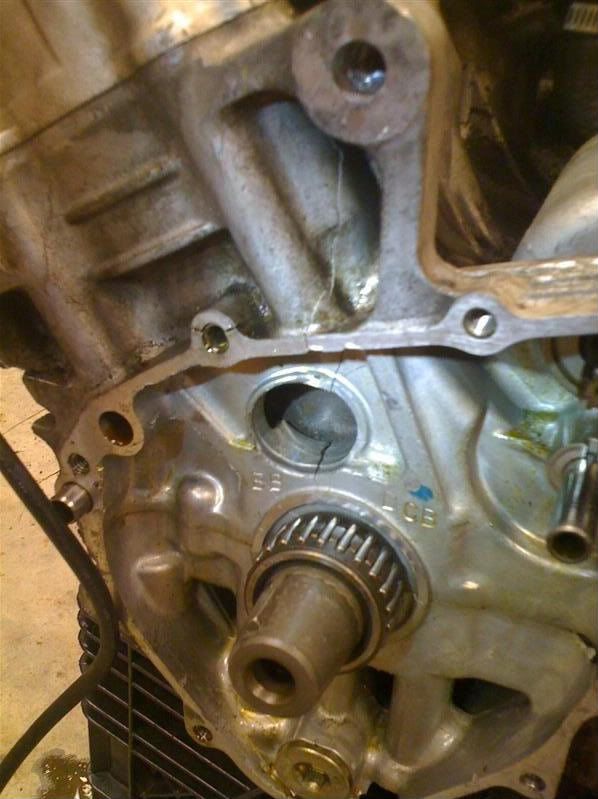
Crank was definitely bent
The crack in the case was also worse that I had originally seen
Several weeks went by waiting for the insurance adjuster to come out to the house and look at it. I already knew they were gonna total it, but it was pretty much my only option at this point. They finally came out and looked at it, then had to wait another couple of weeks for them to process everything. Contrary to everyone else telling me "don't bother, it's not worth anything anyways", I'm glad I didn't listen, cuz the insurance company thought otherwise. They valued the bike at $4400, subtract $500 deductible and we're at $3900.... then the buy back was $600, and I went ahead and did just that. So I kept the bike, and got a check for $3300. For a bike with 177k miles on it, can't really complain at all
I was in the process of moving at the time, so I didn't really have much of any time to work on it, plus I didn't want to tear it apart before I moved, then end up having to move it in pieces and loosing stuff. I moved the bike over to my new residence and it sat there for another couple of weeks. My buddy Matt's boss down in Greenville, SC is an engineer with a full machine shop, CNC machines, welders, lathes, etc. He said he might be able to fix it, so he said bring it on down and we'll tear it open and have a look
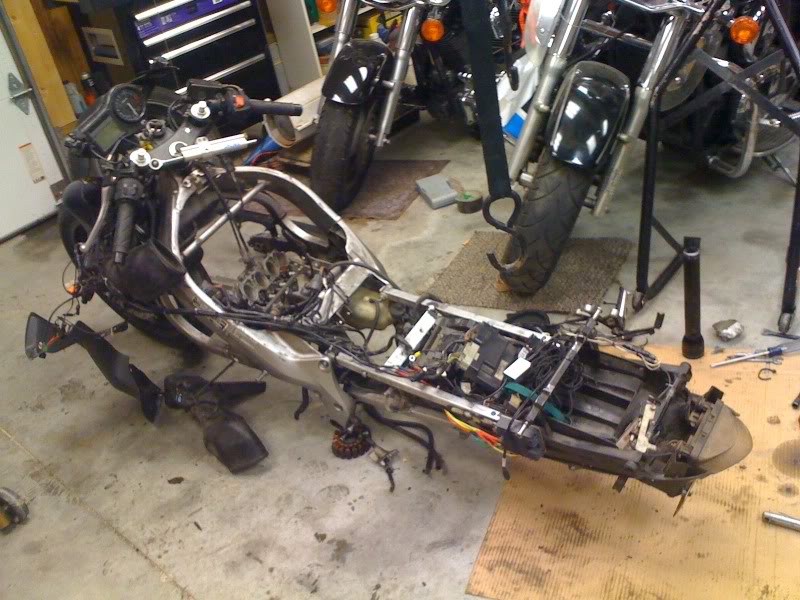
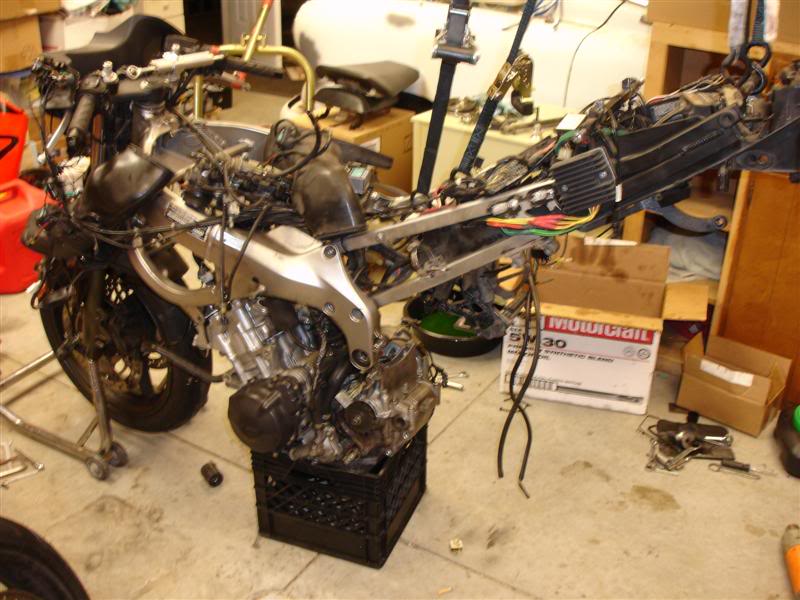
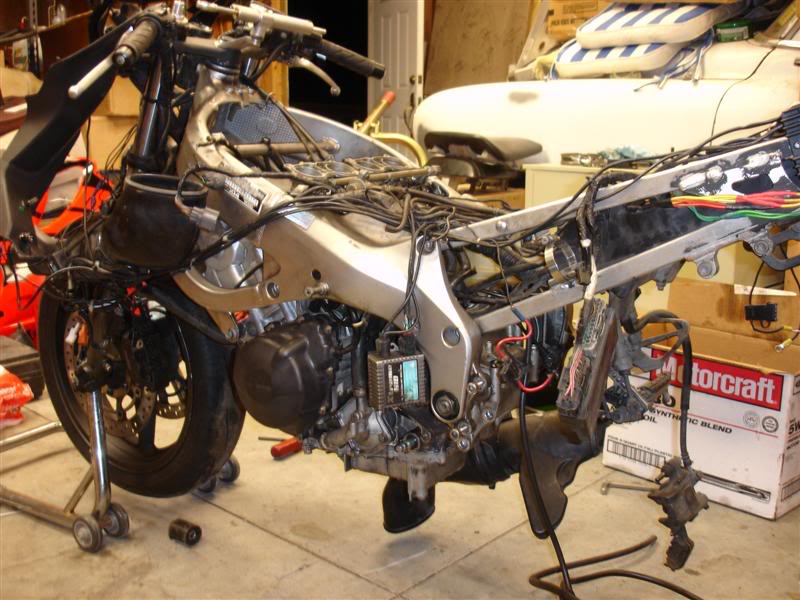
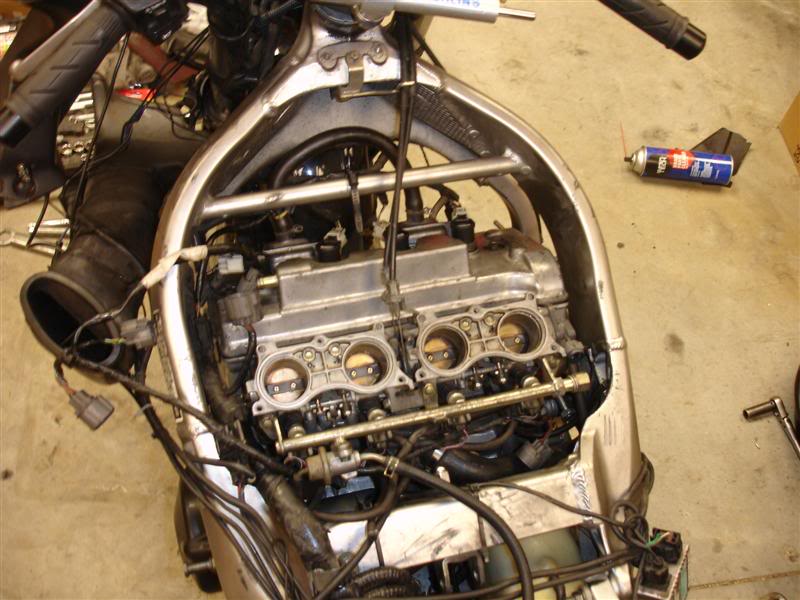
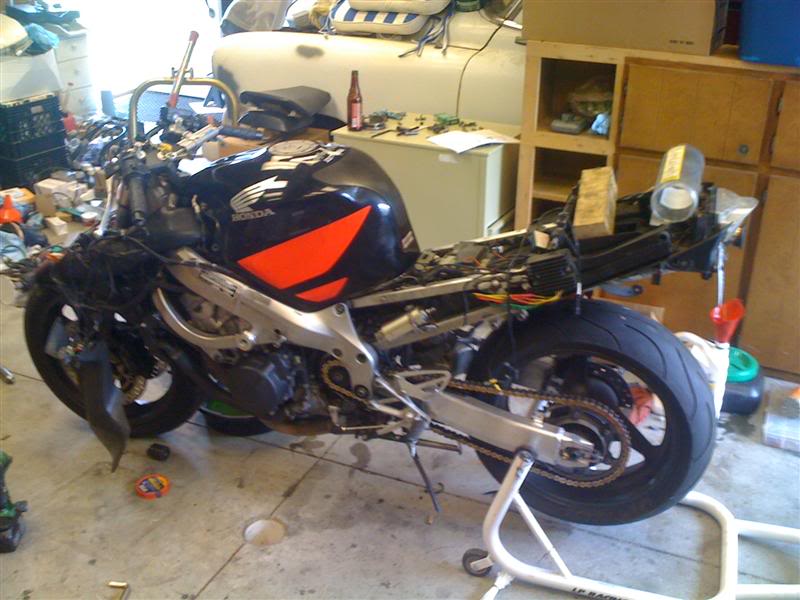
Finally by the end of Feb, I was settled into my new place and had some time to work on the bike. I quickly got to work tearing it down
Rafters and ratchet straps are a godsend!!
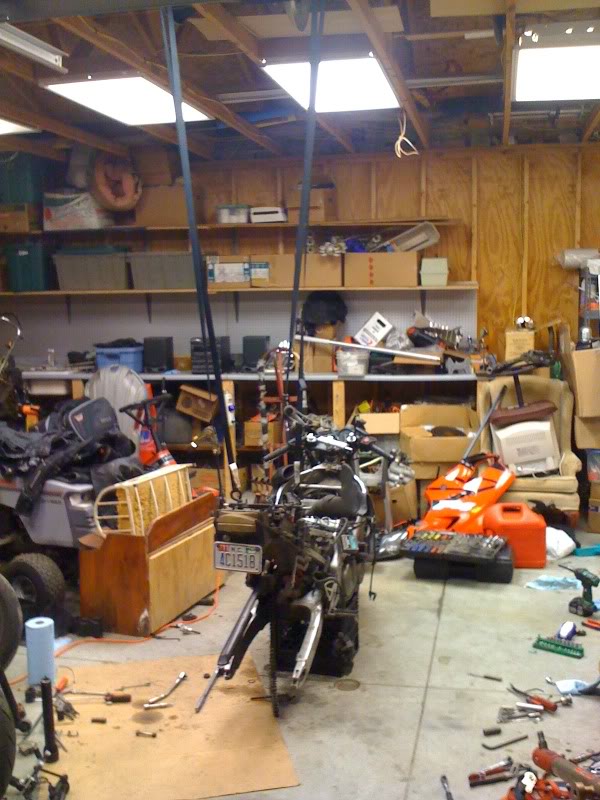
And milk crates too, hahah
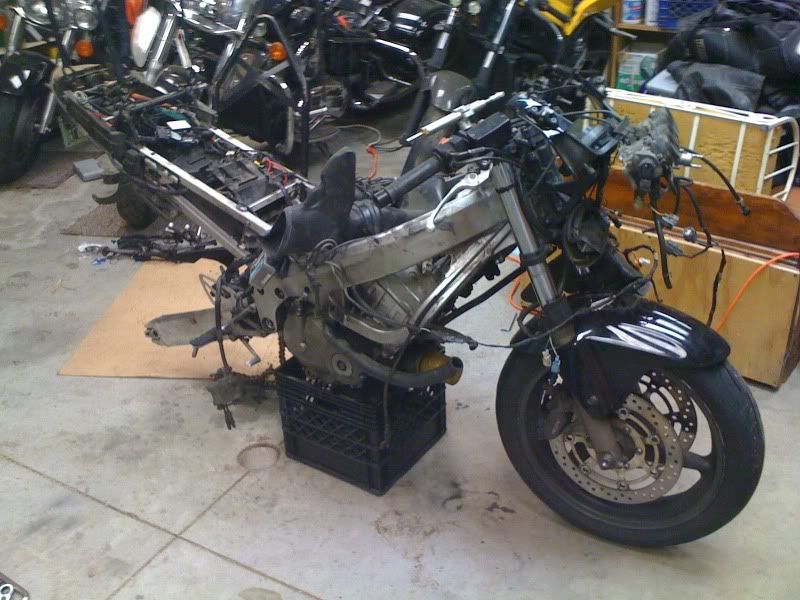
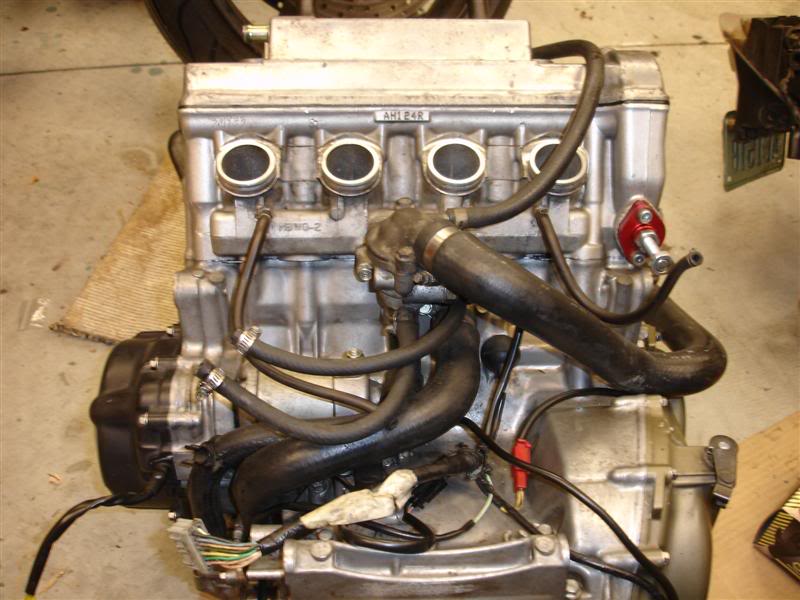
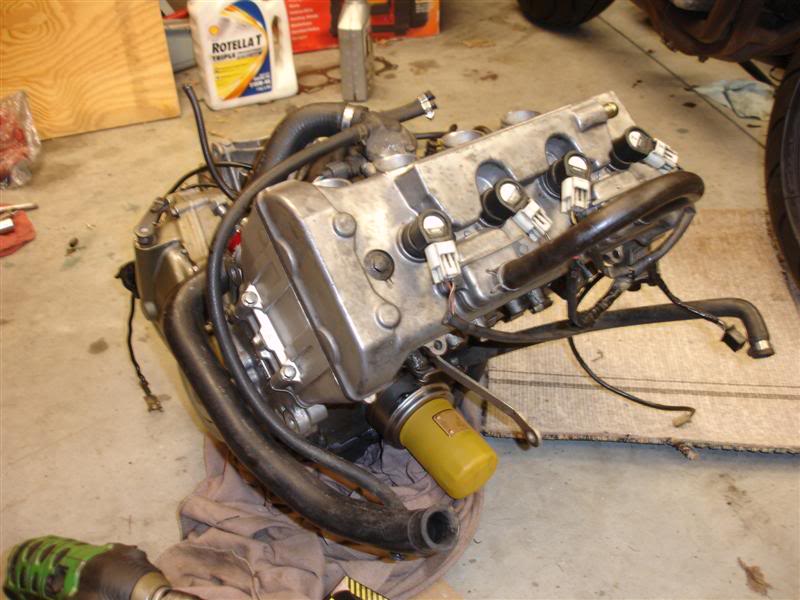
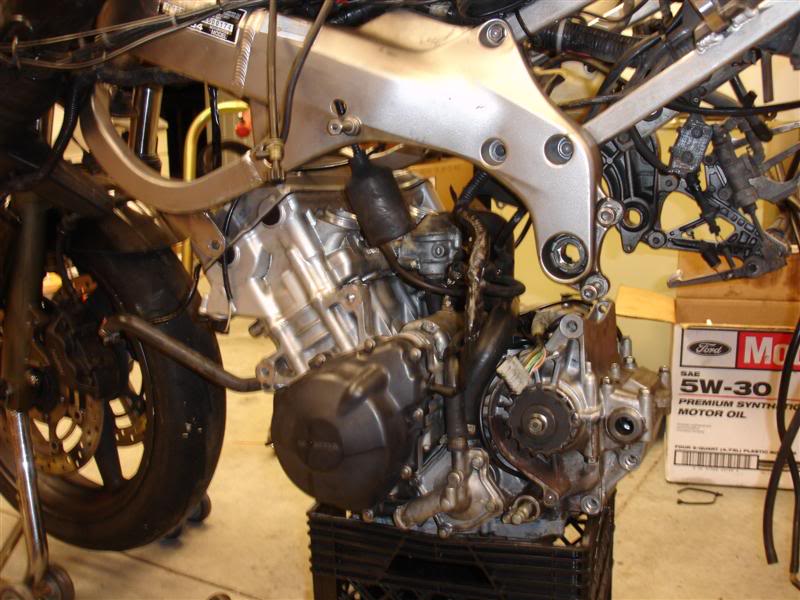
Had the engine out shortly after
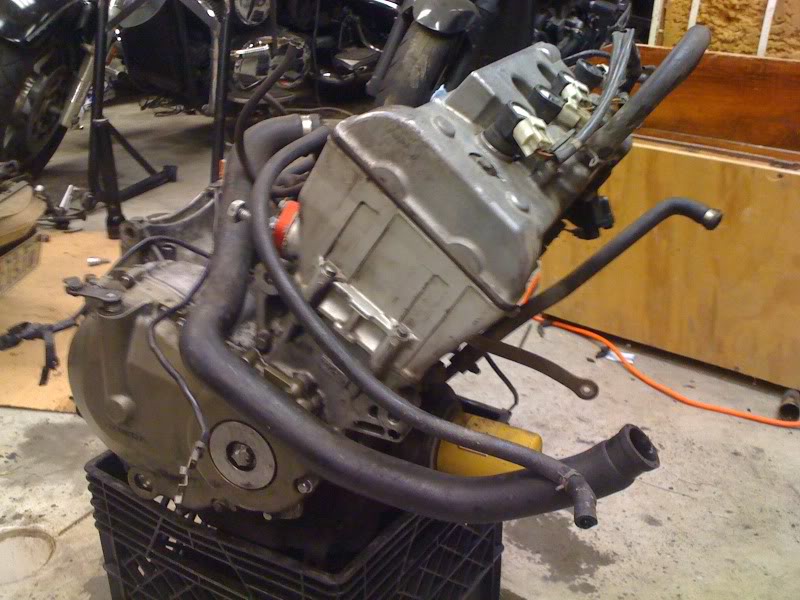
After 177k miles, she's a little dirty, as one might imagine
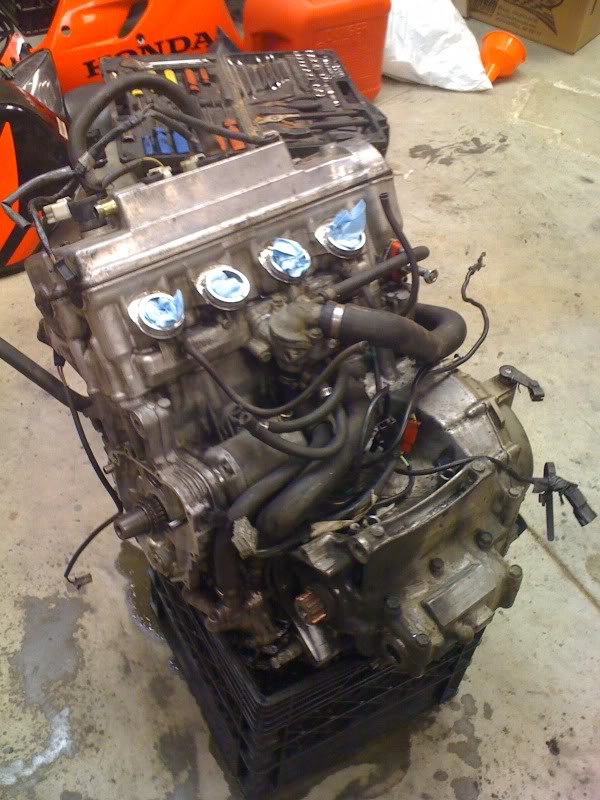
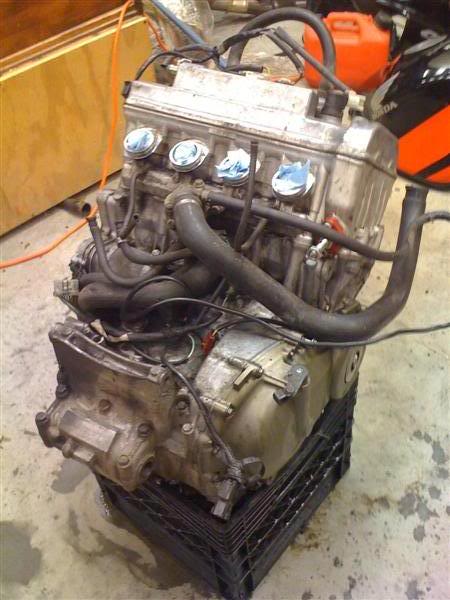
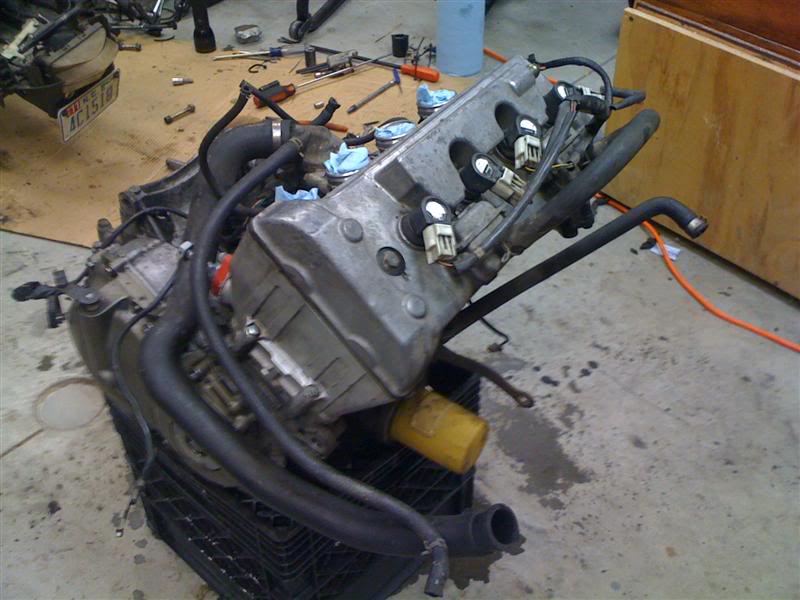
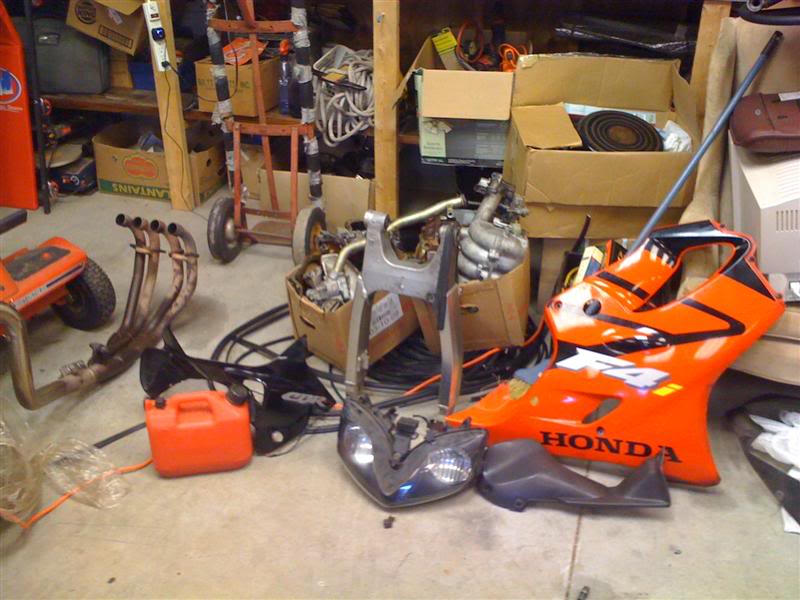
Wasn't much left of her after that
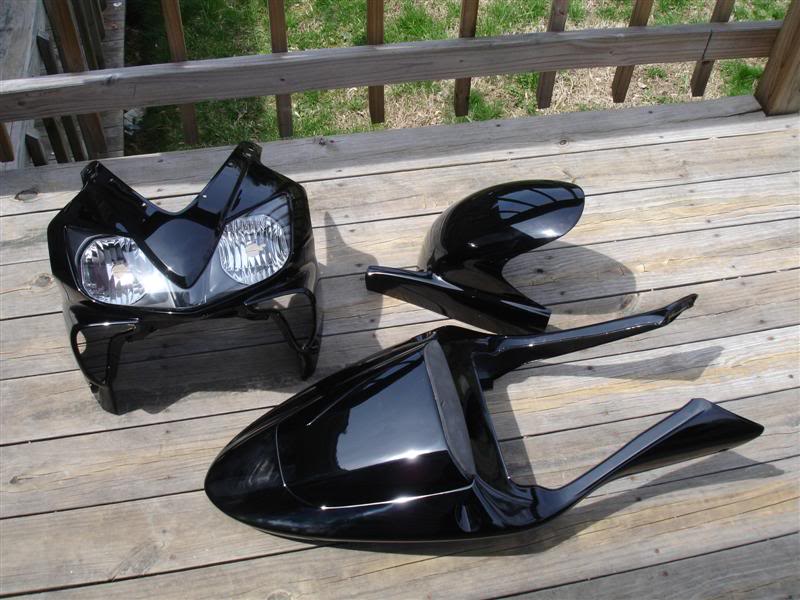
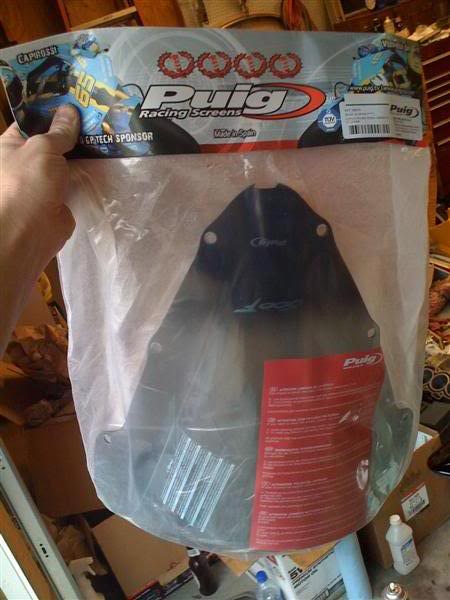
Oh and around this time, I came across this little gem on ebay so I picked it up for a steal ($300 for both). I asked the guys in the body shop at my work if they could paint it up and fix a small crack, and they said sure, so I dropped it off ever there. Also took my tail section which had a few scratches and cracks, and a few other goodies I bought as well (you'll see those at the end)
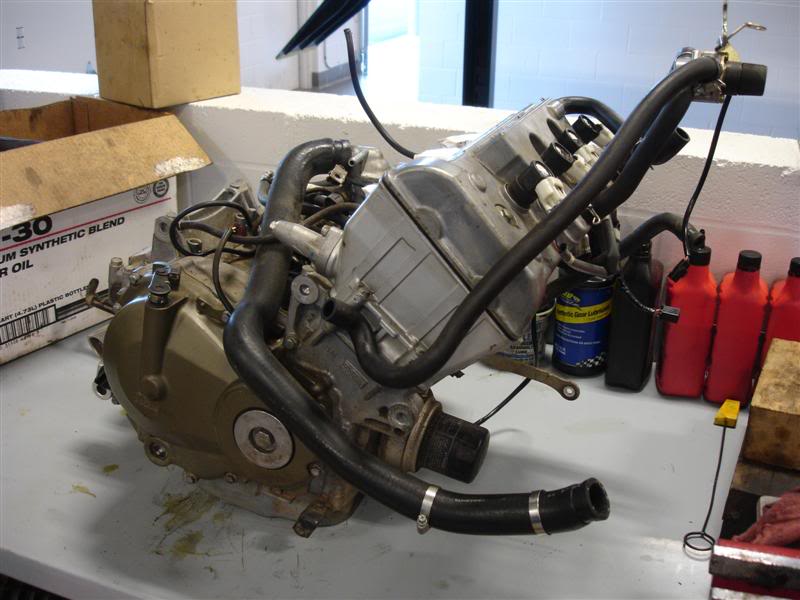
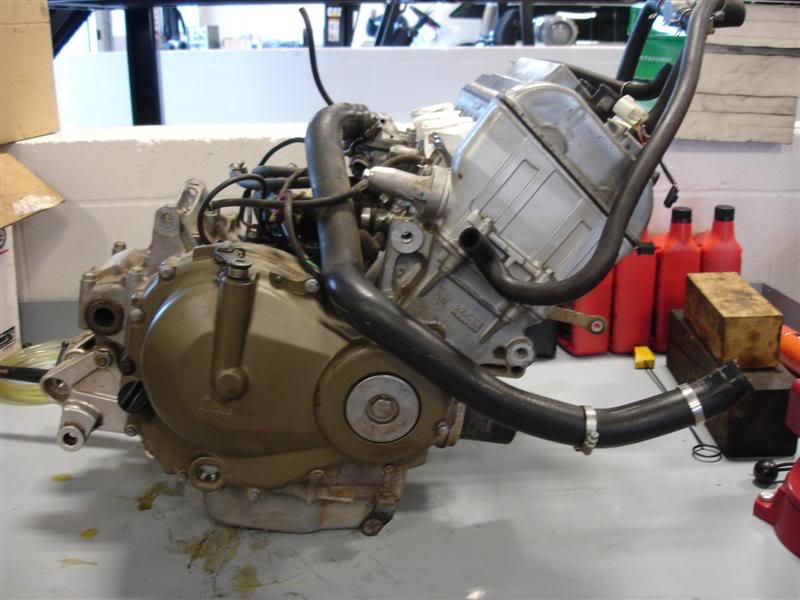
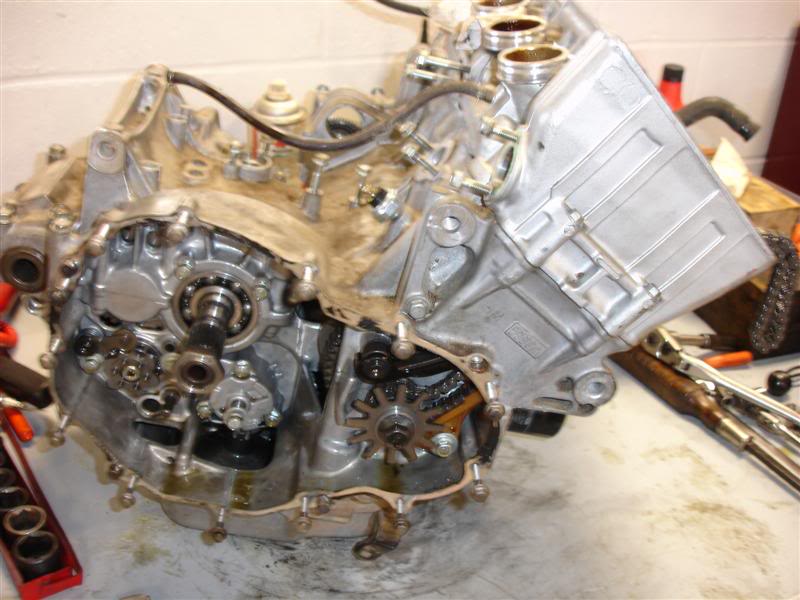
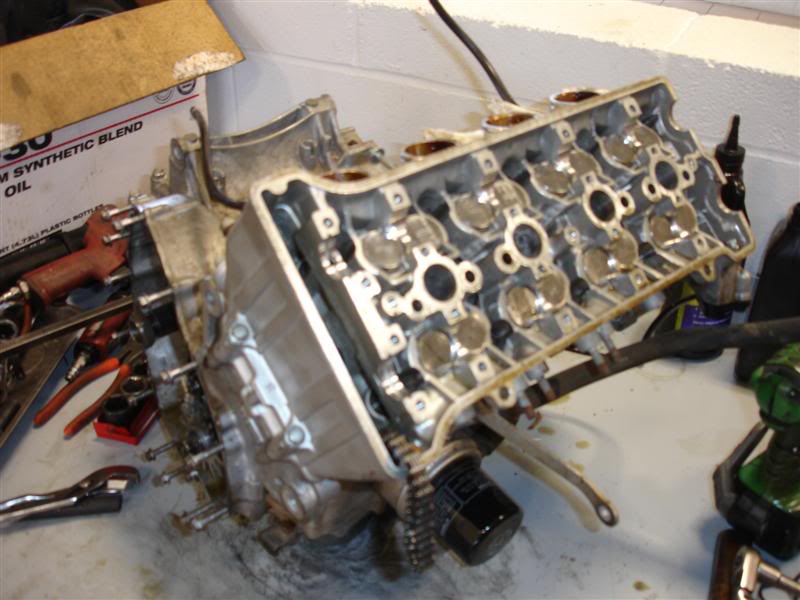
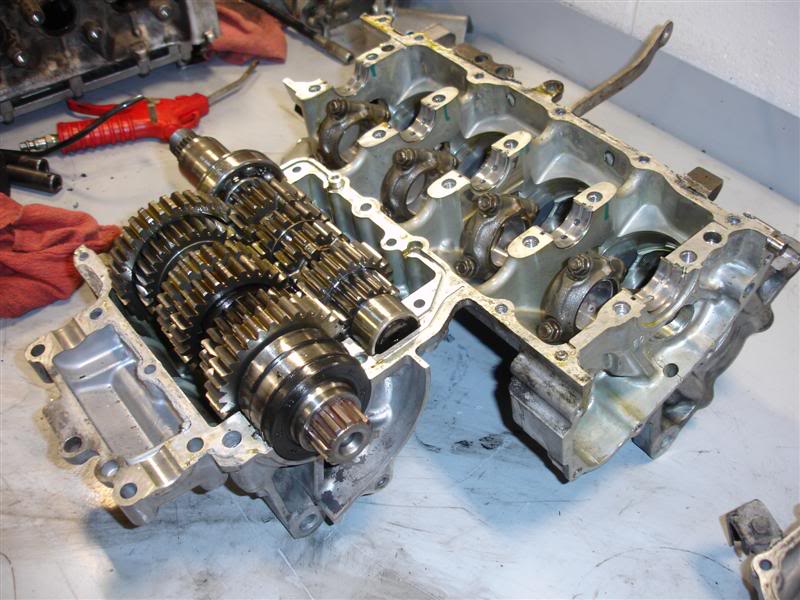
So in March our schedules finally work out and I take it down to Greenville, SC and have my buddies boss take a look. We start tearing the engine open. Nothing has been cleaned in these pics, it's exactly as we tore it apart
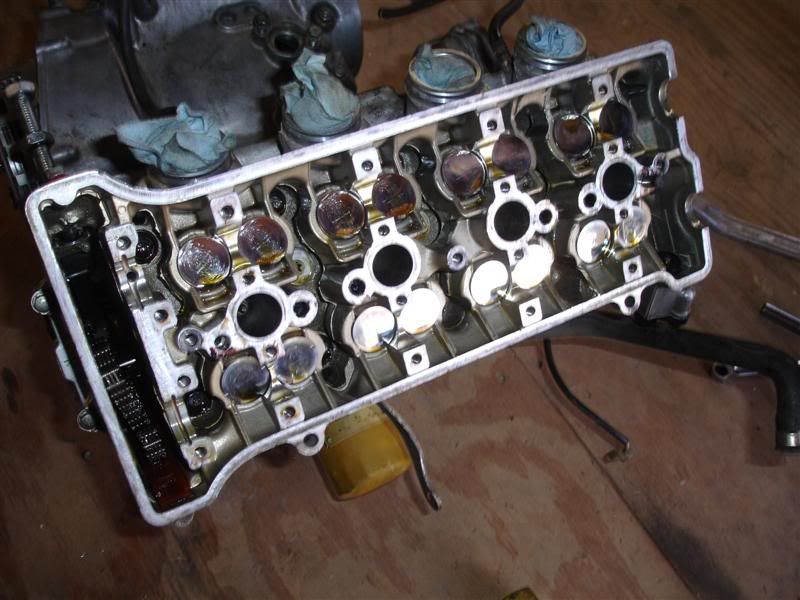
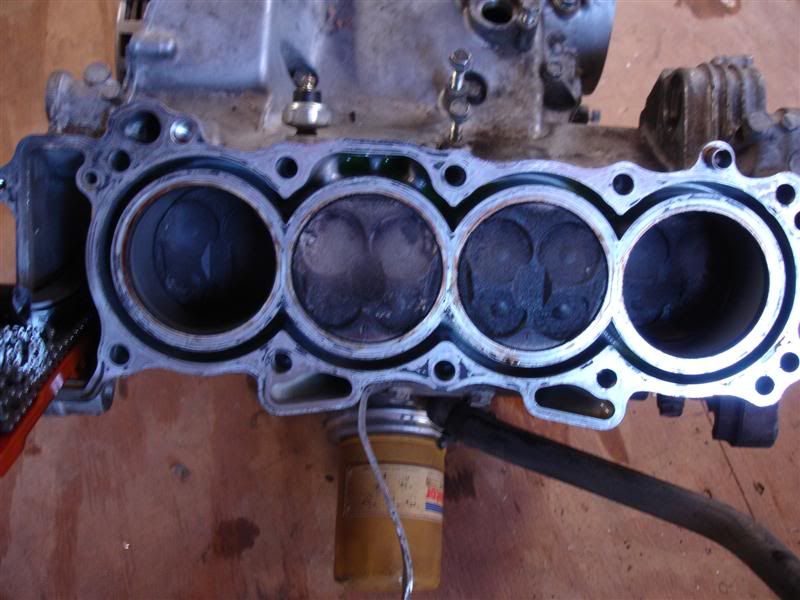
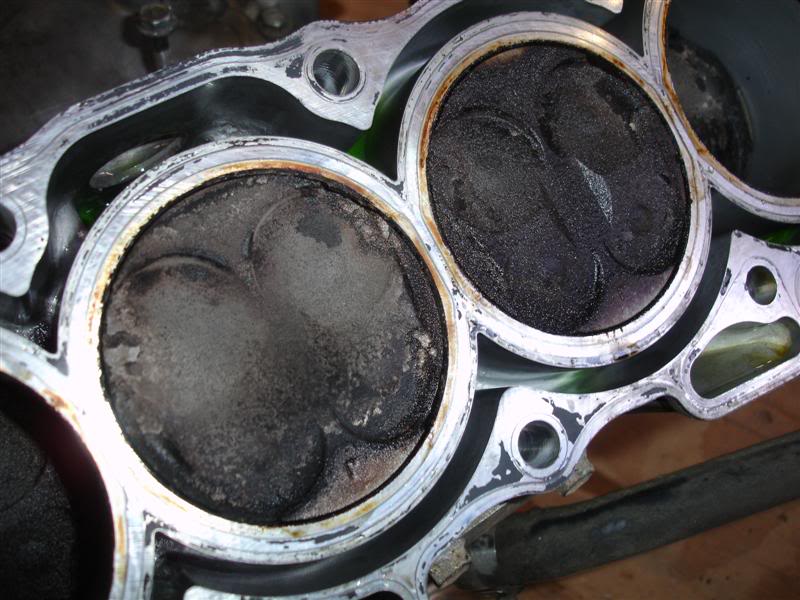
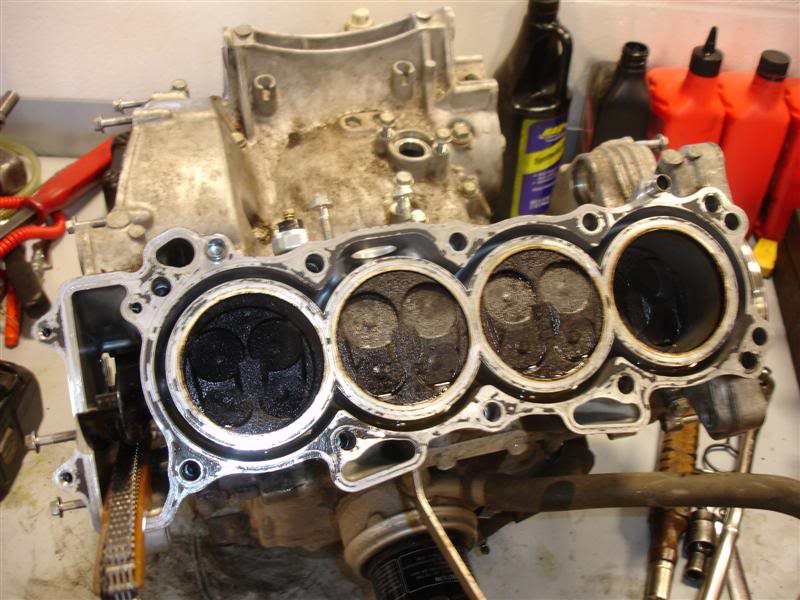
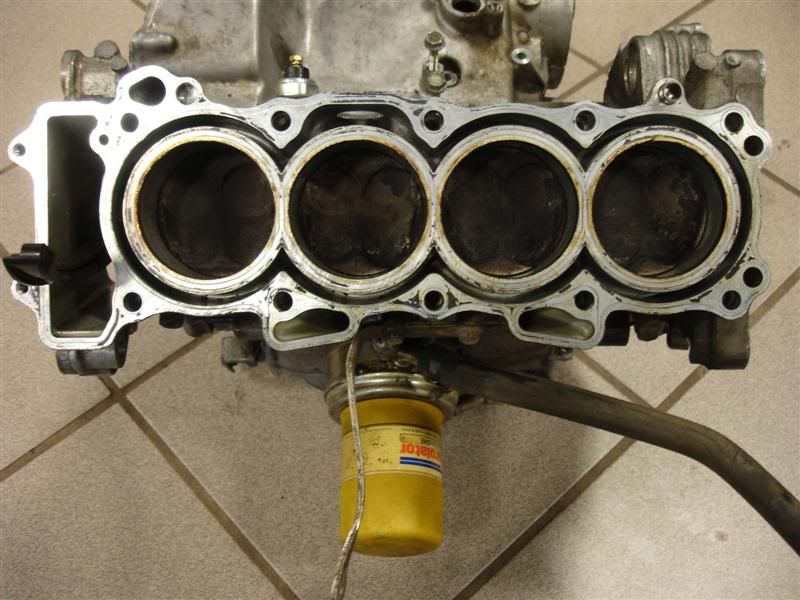
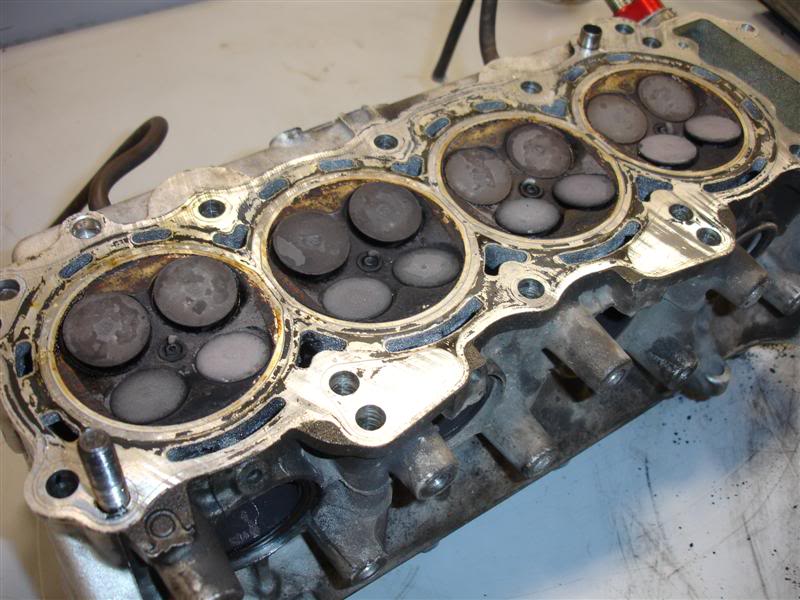
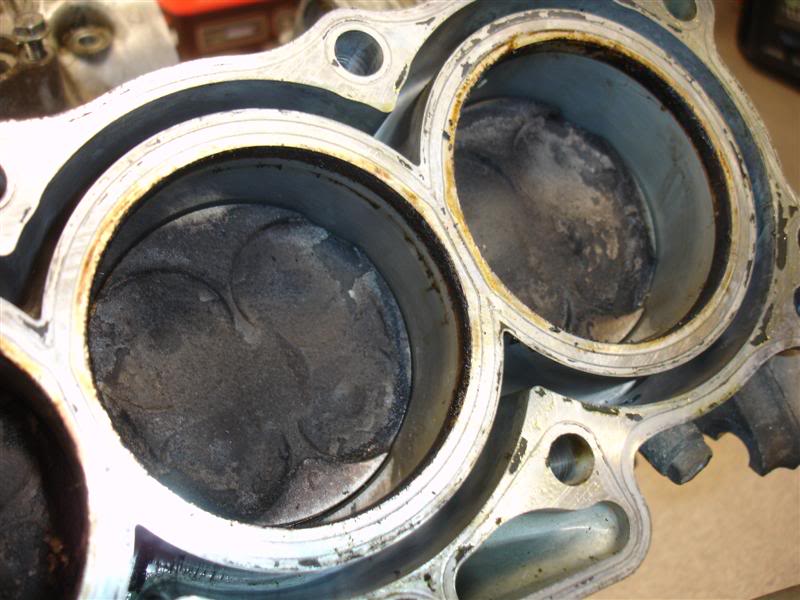
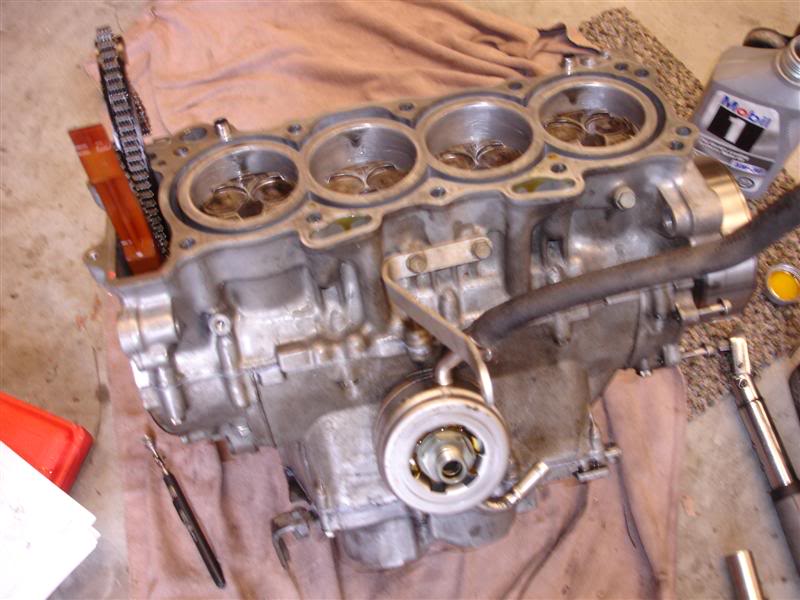
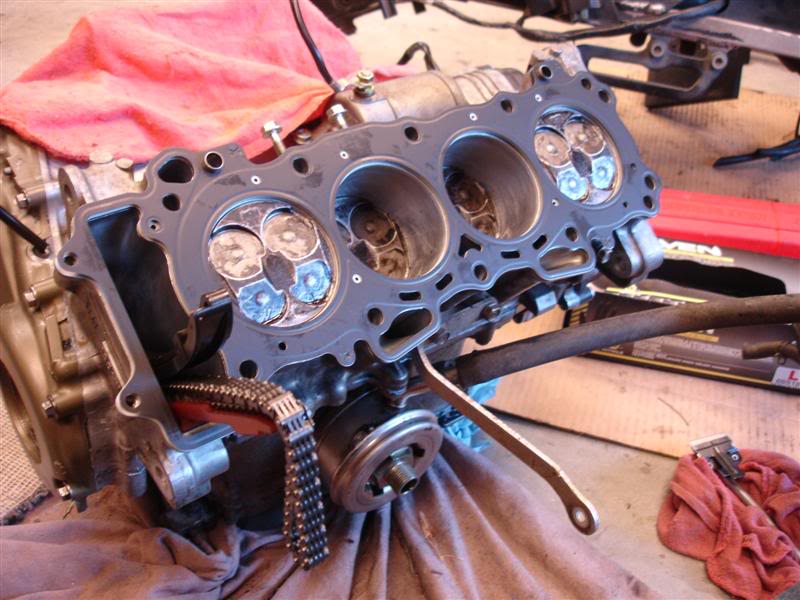
Remove the cyl head (first time ever been off).... pistons have a little carbon buildup, but nothing major
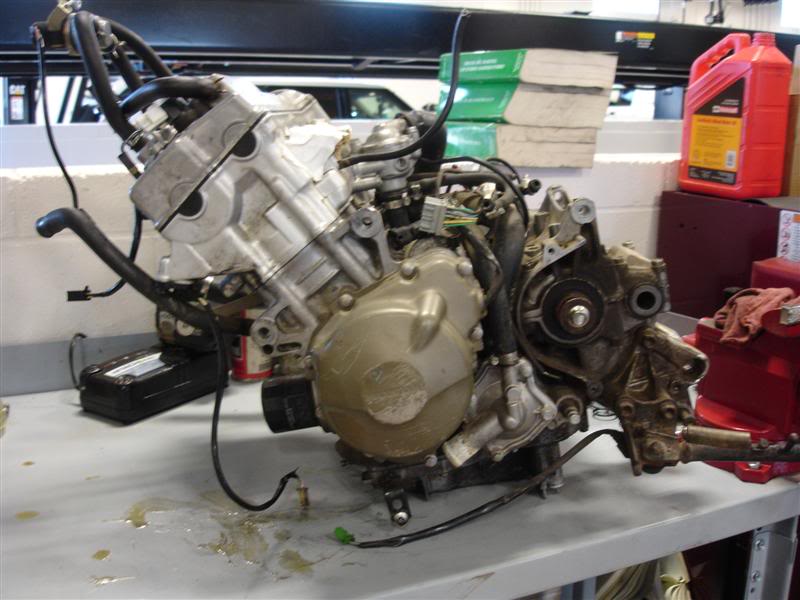
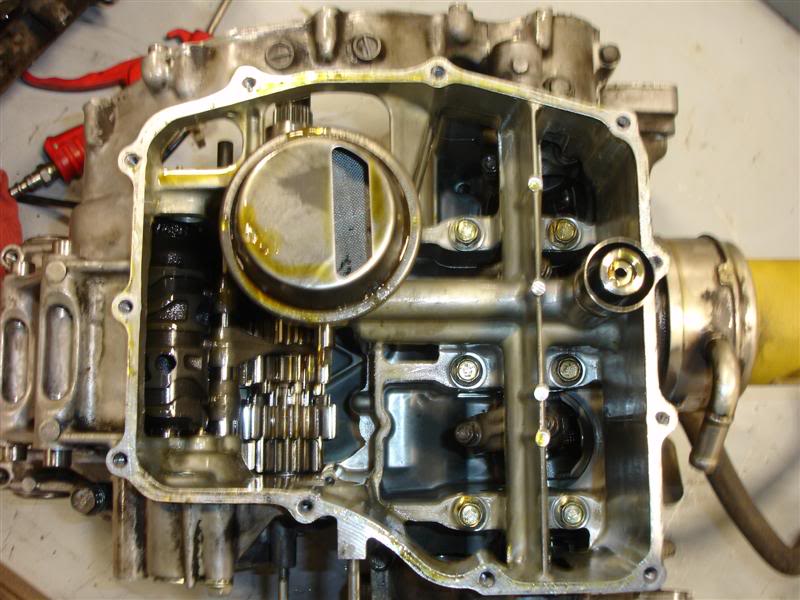
Flip it upside down and remove the oil pan so we can split the cases
Engine is spotless inside
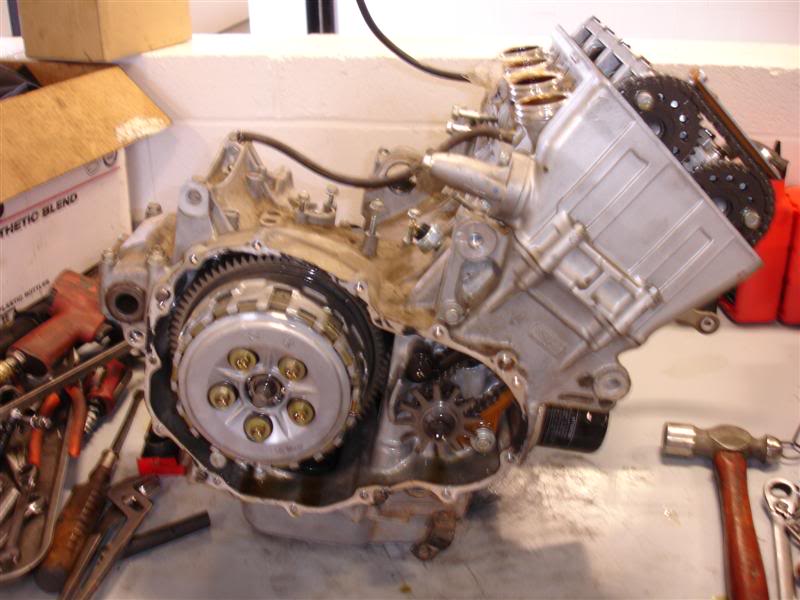
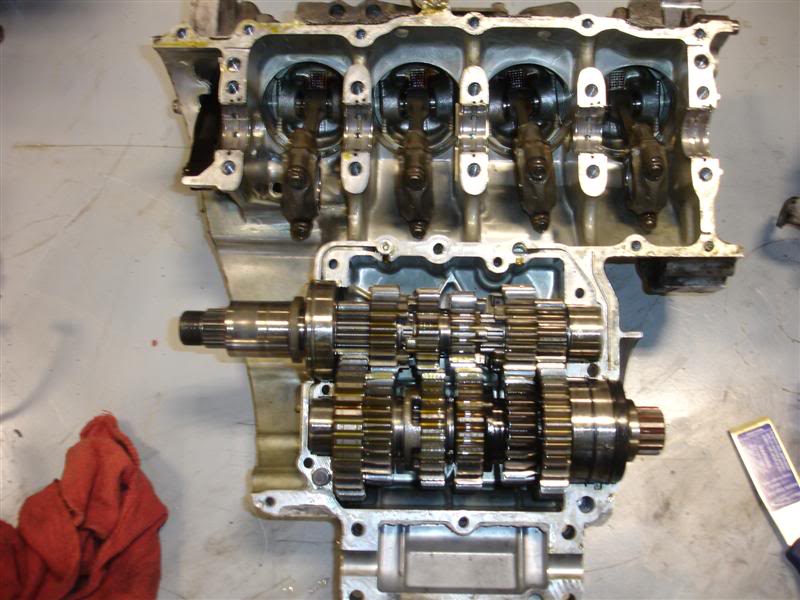
Lower crankcase removed
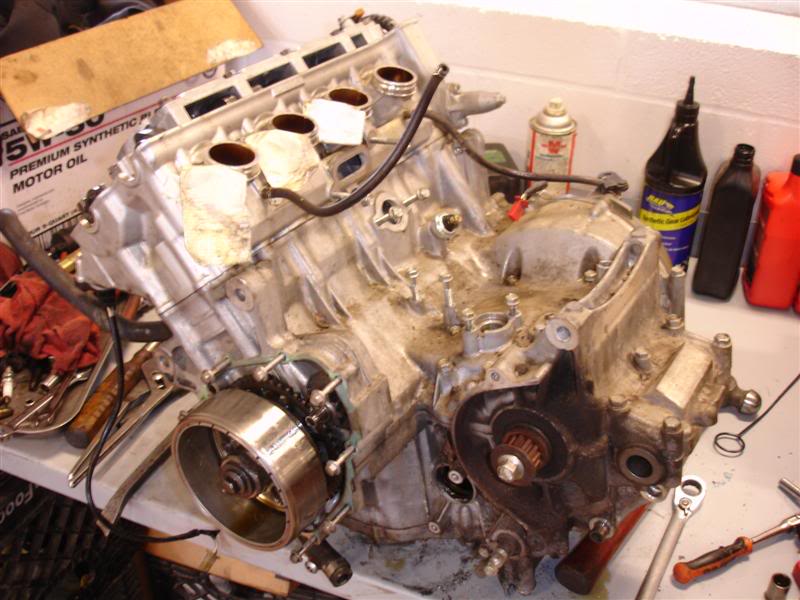
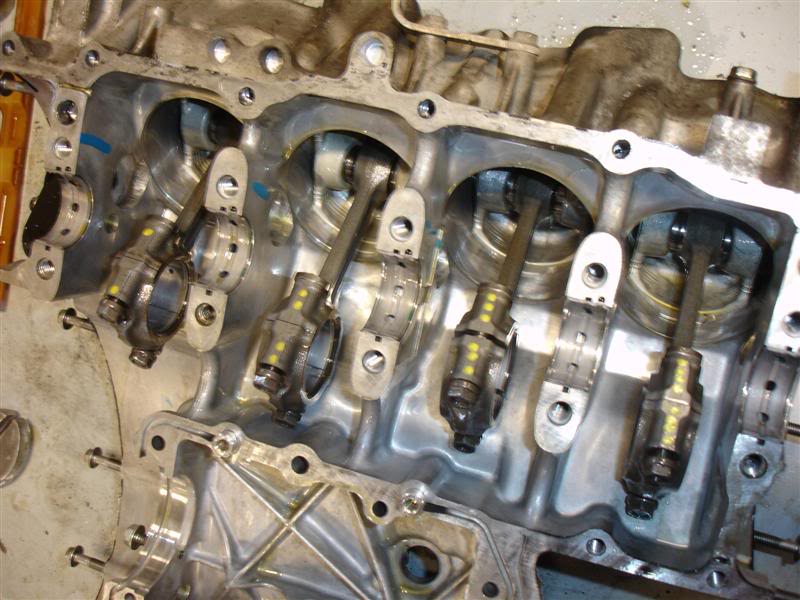
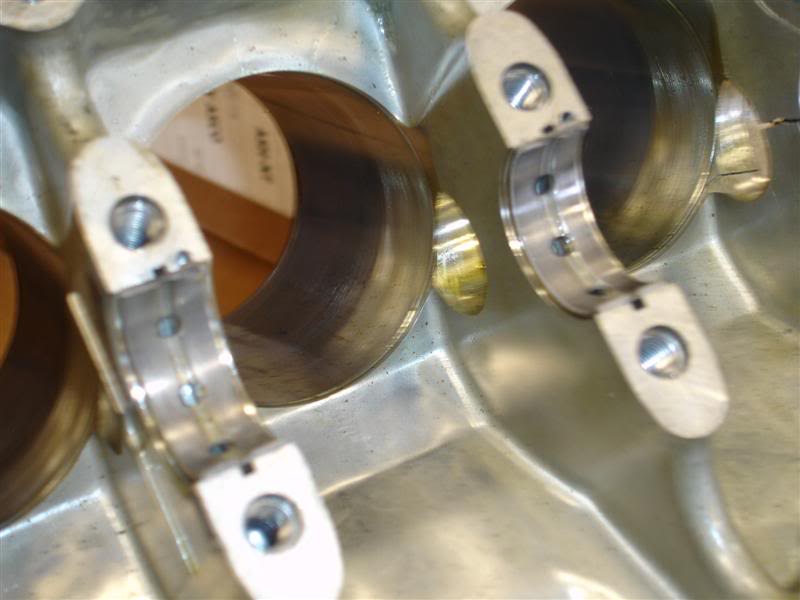
Crank journals and bearings still looked brand new
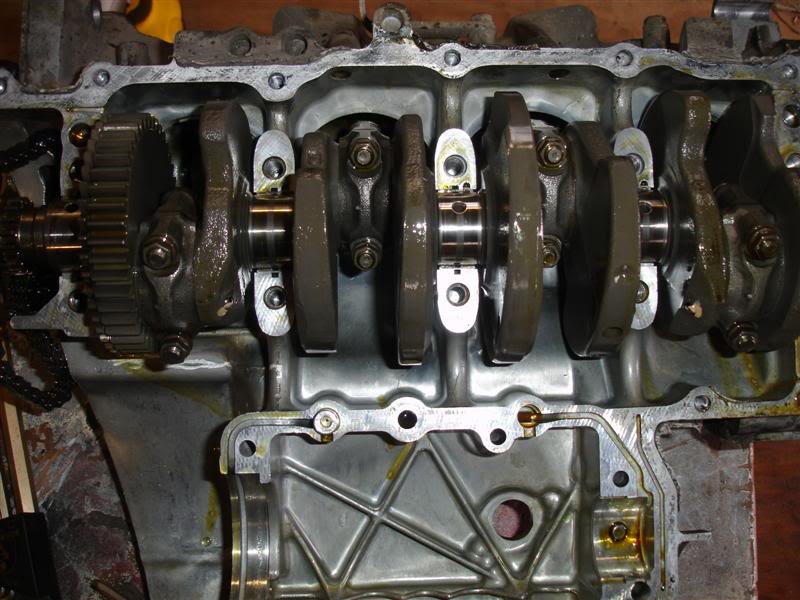
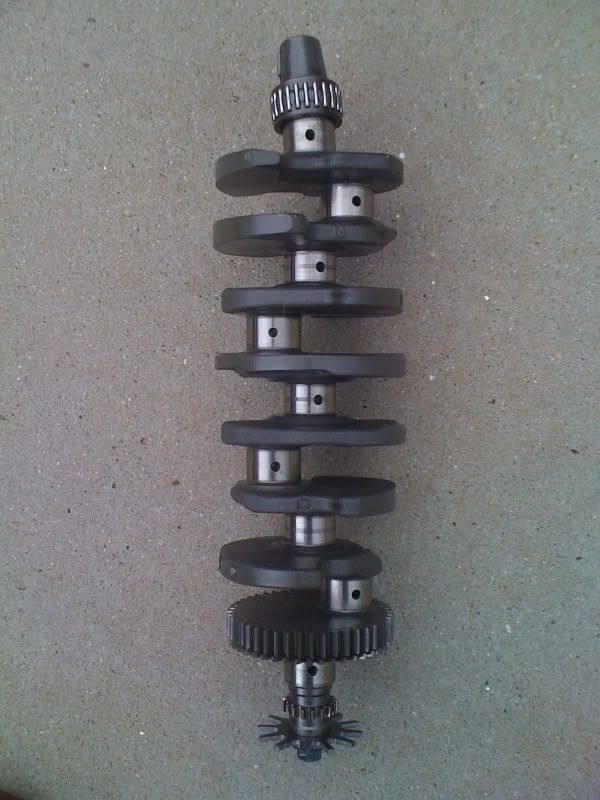
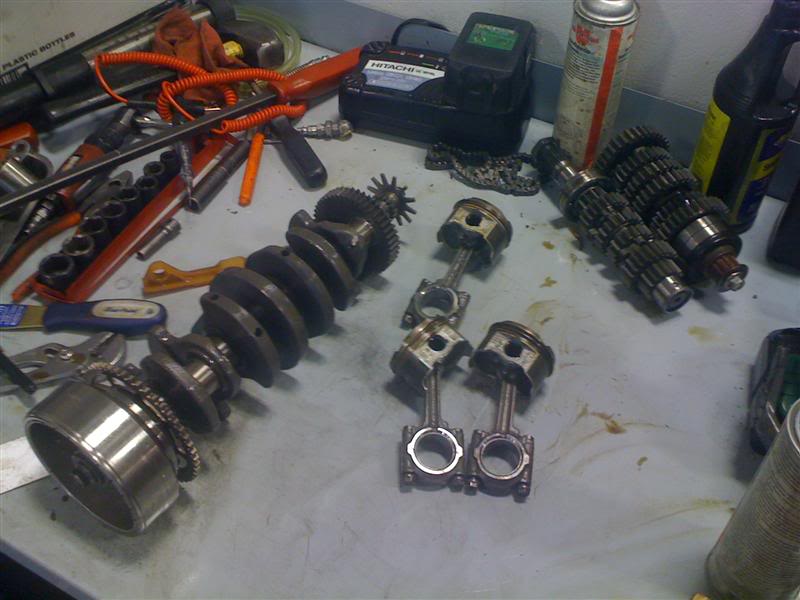
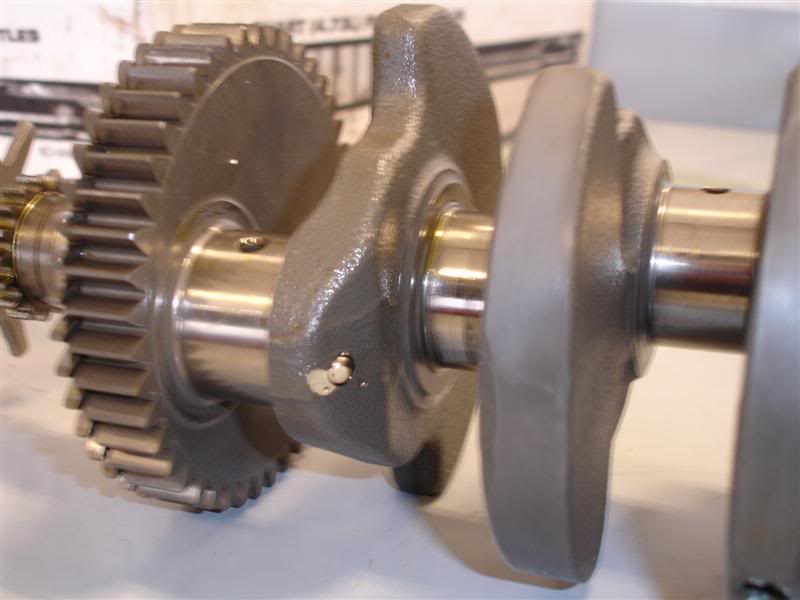
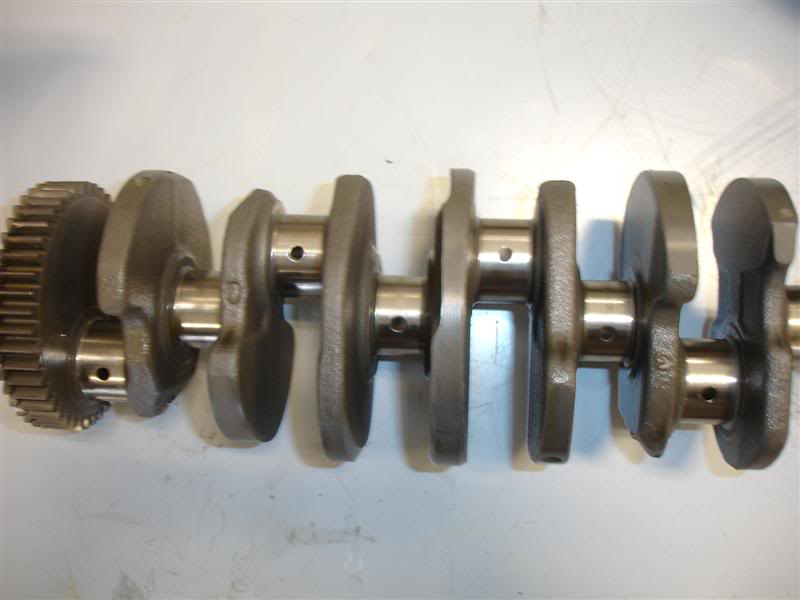
We pull the crankshaft out, and sure enough, just as we thought. Bent beyond any conceivable repair
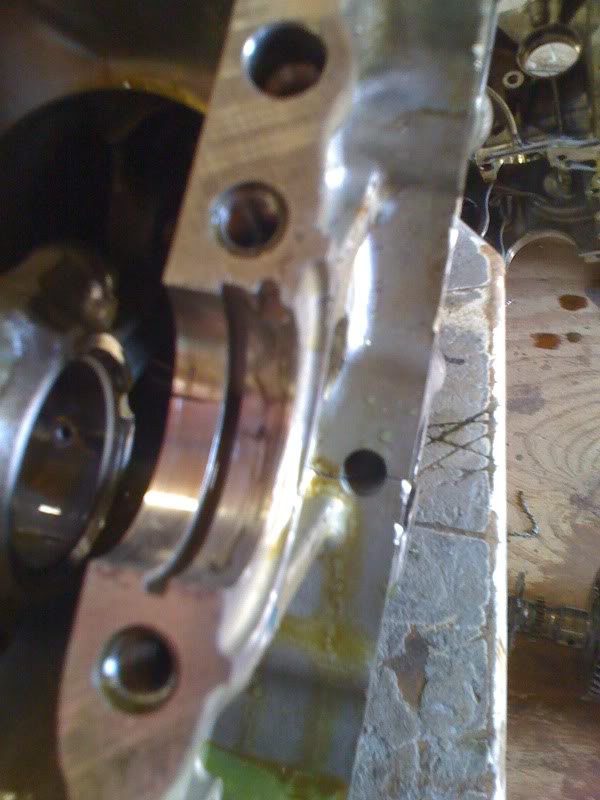
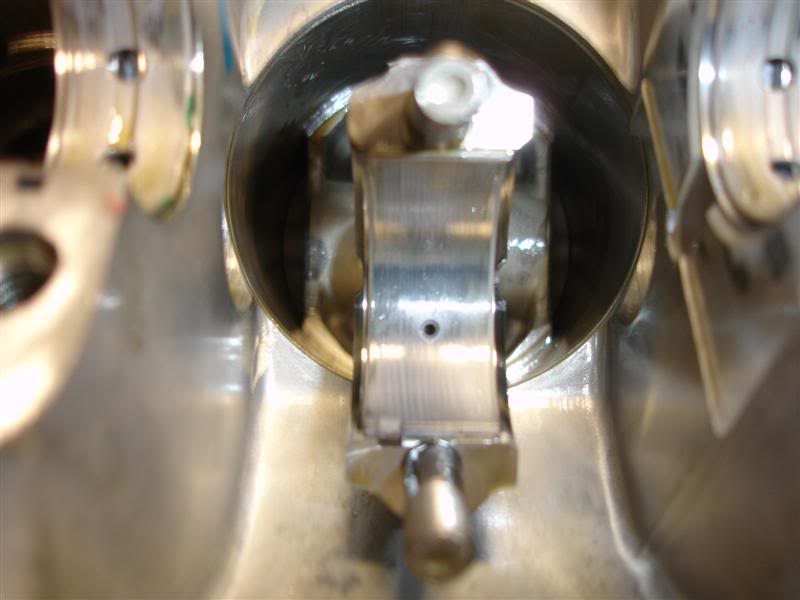
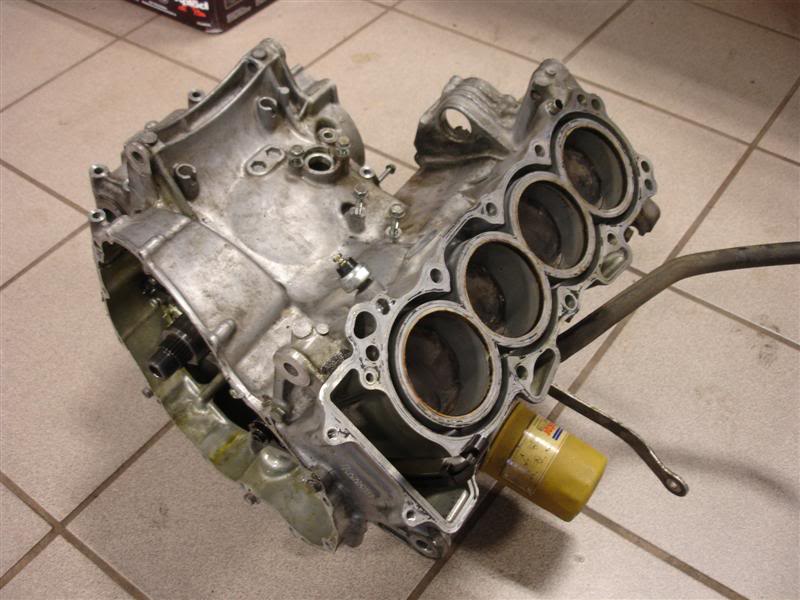
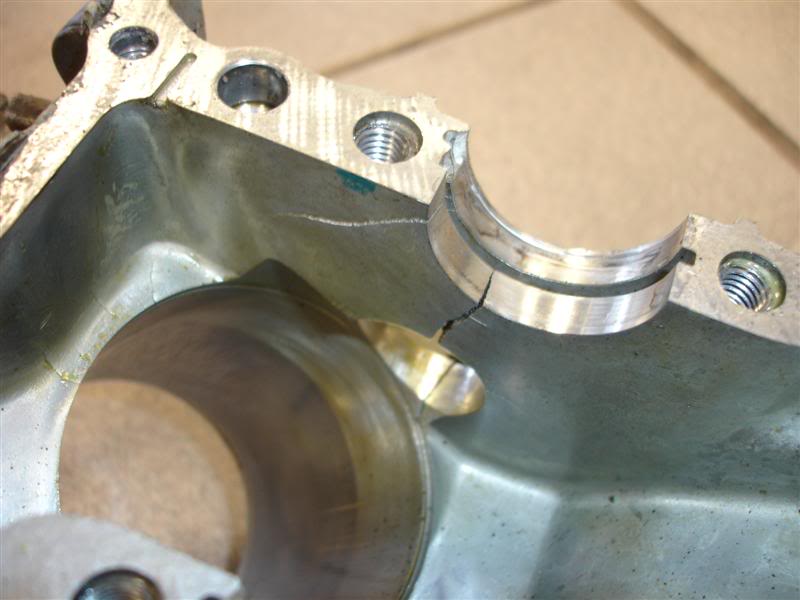
The case was severely cracked under the end crank journal bearing
So.... I wasn't too happy at this point. This was the last little bit of hope I was hanging onto to possibly fix my original engine. But, not gonna happen. I gave it some thought, and pretty much my only option at this point was another engine. The timing could not have been better, as I quickly went on ebay and found a 2004 F4i engine with 15,000 miles. It was at $200 with no reserve, only catch was he wouldn't ship it, pick up only in Atlanta, GA. I watched the auction like a hawk, nobody was bidding on it for several days so I thought I was in the clear. I sit there and watch it in the final several minutes, and lets just say I won the auction in a furious snipe at about 5 sec remaining, outbidding someone else who had the same idea, hahaha. Ended up getting it for $256.... hell of a deal!
So that weekend I hop in the trusty Accord and make my way down to Atlanta, GA from Asheville, NC
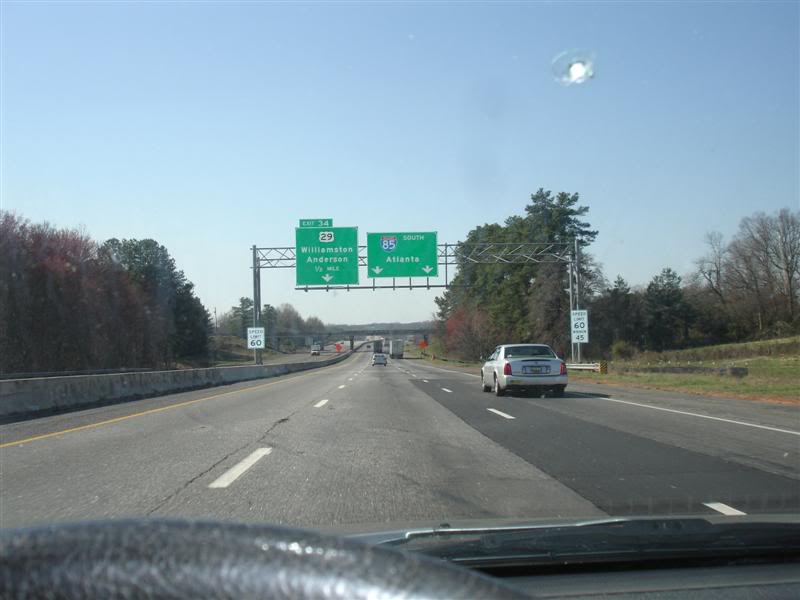
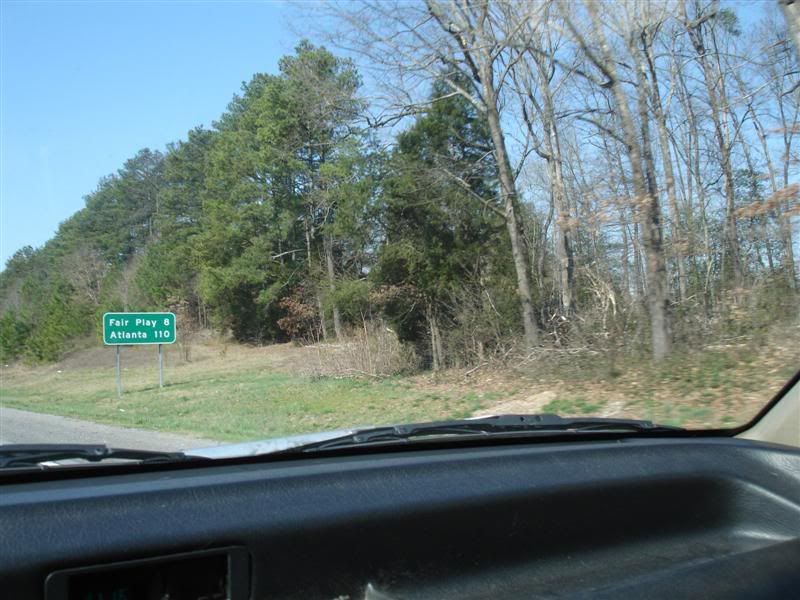
Getting closer!
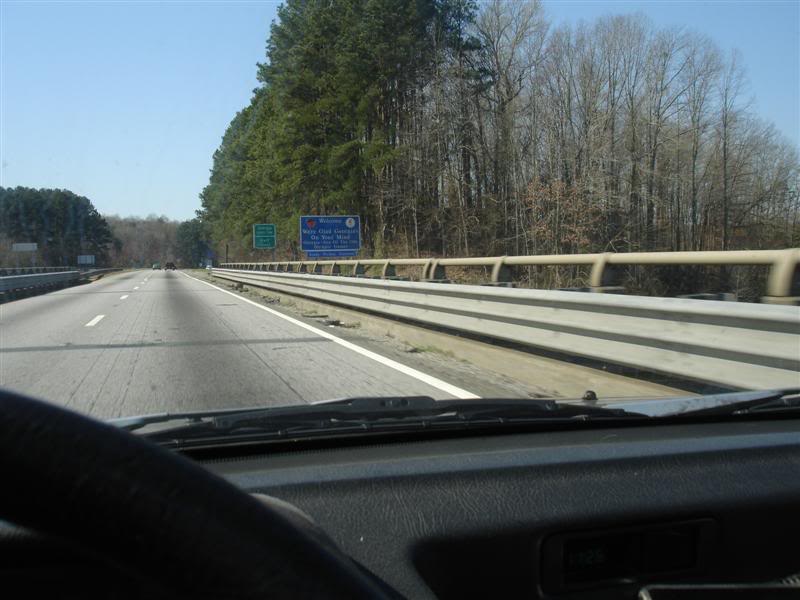
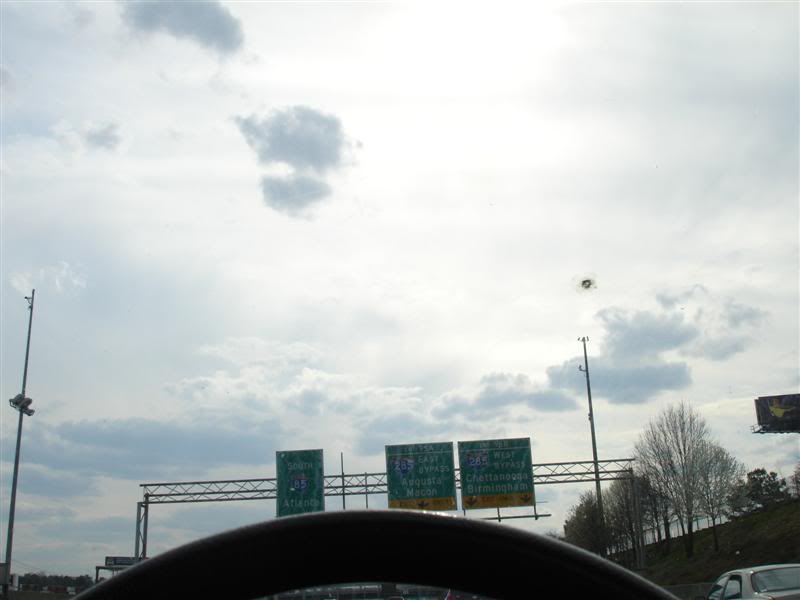
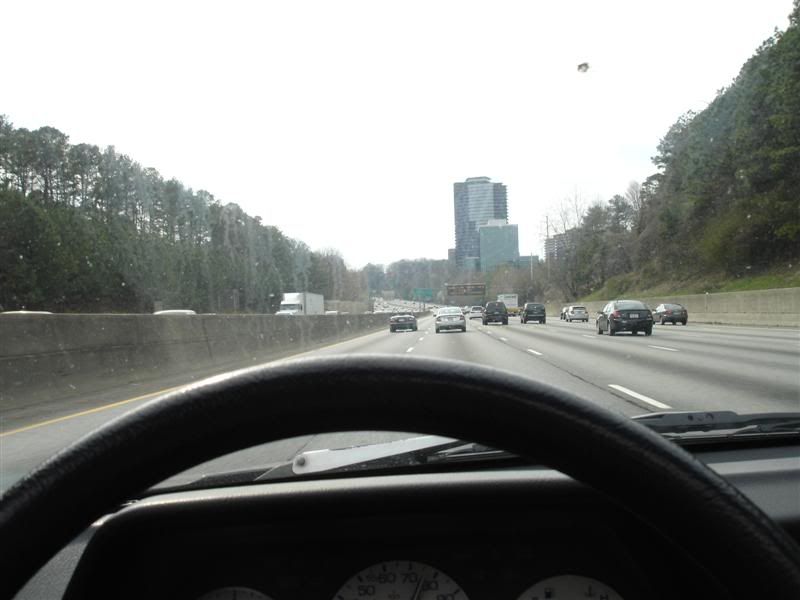
As I'm approaching Atlanta, I tighten my seatbelt and say a little prayer for my life as I merge onto, what I always appropriately like to call, the "I-285 GP". Wow..... I was quickly reminded just why I hate driving in Atlanta....ever!!
I make my way into the city, where I'd meet up with a guy named Sean. We met up at the Cycle Gear since we both knew right where it was
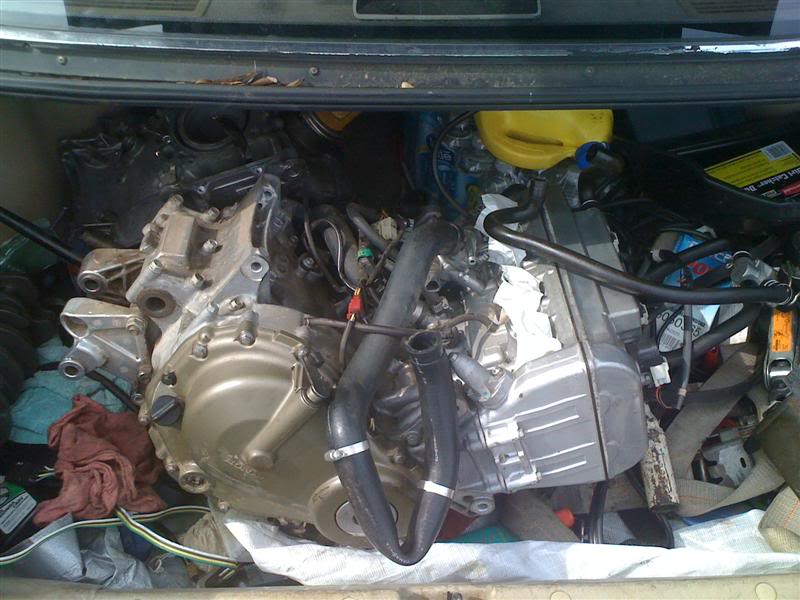
Picked up the engine and stuffed it in my trunk, right next to my old engine
Went over to my buddy Kevin's house north of Atlanta where I'd crash for the night. We took the new engine out and did a valve check on it just to see where it was at, and how it looked
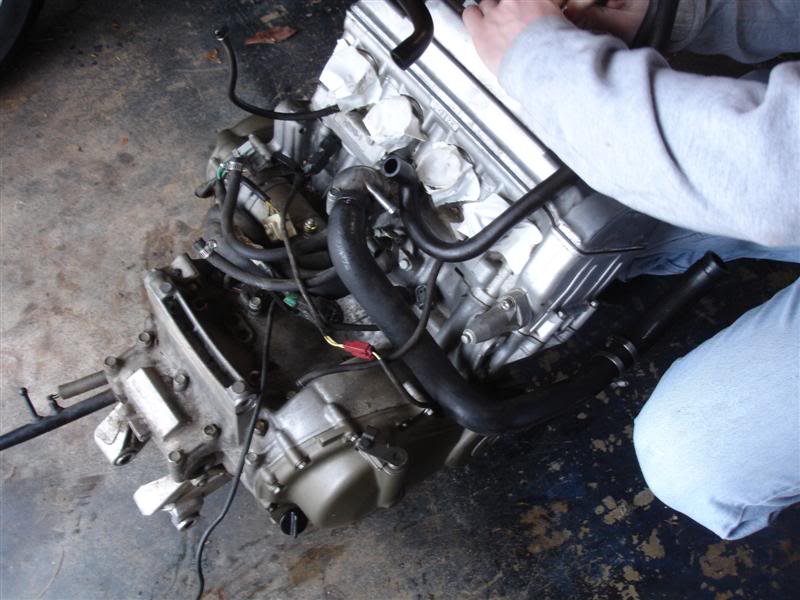
Had 2 valves that were slightly out of spec. One was loose, one was tight, so we were able to swap shims and got both in spec. Everything else looked pretty good, and clean
Anyways, some may remember I went down back in Dec and the whole ordeal that followed. For those that don't.... back on Dec 17th I was on my way to work and while veering off on a road to the left, I hit a patch of oil/diesel fuel/antifreeze/something slippery, and lowsided at about 25 mph. All was fine until the bike slid into the curb, did a little highside and then rolled over itself into the grass. I got right up, not even so much as a scratch on me, thank god (leathers FTMFW!!), went over to the bike and it was completely covered in engine oil. Not a good sign already!
Luckily another guy from work was several cars behind me when this happened, so he saw it and recognized it as being me, and pulled right into the parking lot there and made sure I was OK. Luckily he had his pickup and an empty bed, so we lifted the bike into the bed of his truck and off to work we went
He gave me a ride home after work and we unloaded the bike into the garage. I was able to get a little better analysis of the damages
Right side didn't really get much at all
Swingarm got gouged up pretty good
Now for the really bad part.... when it slid, the flywheel took a hard and direct hit with the curb
Took a good size chunk out of the lower crankcase
All that was left of my stator cover
Definitely not a good sign there!
A couple weeks later, after much persuasion with a pry bar I was able to get the mangled stator out of the flywheel. Thanks to a generous member of 600rr.net for loaning me the OEM flywheel puller tool, I was finally able to remove the flywheel and inspect behind it. I was quite sad with what I found
Crank was definitely bent
The crack in the case was also worse that I had originally seen
Several weeks went by waiting for the insurance adjuster to come out to the house and look at it. I already knew they were gonna total it, but it was pretty much my only option at this point. They finally came out and looked at it, then had to wait another couple of weeks for them to process everything. Contrary to everyone else telling me "don't bother, it's not worth anything anyways", I'm glad I didn't listen, cuz the insurance company thought otherwise. They valued the bike at $4400, subtract $500 deductible and we're at $3900.... then the buy back was $600, and I went ahead and did just that. So I kept the bike, and got a check for $3300. For a bike with 177k miles on it, can't really complain at all
I was in the process of moving at the time, so I didn't really have much of any time to work on it, plus I didn't want to tear it apart before I moved, then end up having to move it in pieces and loosing stuff. I moved the bike over to my new residence and it sat there for another couple of weeks. My buddy Matt's boss down in Greenville, SC is an engineer with a full machine shop, CNC machines, welders, lathes, etc. He said he might be able to fix it, so he said bring it on down and we'll tear it open and have a look
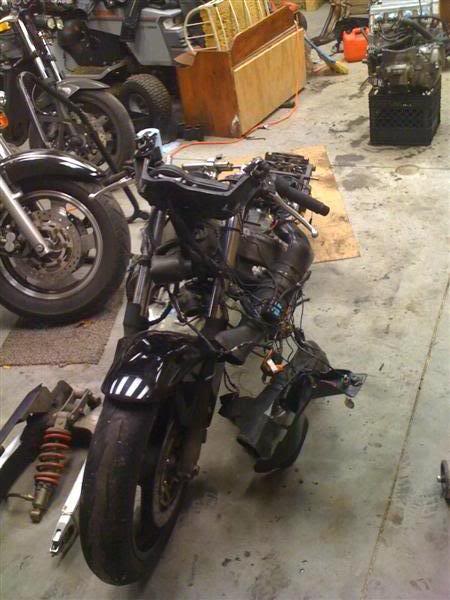
Finally by the end of Feb, I was settled into my new place and had some time to work on the bike. I quickly got to work tearing it down
Rafters and ratchet straps are a godsend!!
And milk crates too, hahah
Had the engine out shortly after
After 177k miles, she's a little dirty, as one might imagine
Wasn't much left of her after that
Oh and around this time, I came across this little gem on ebay so I picked it up for a steal ($300 for both). I asked the guys in the body shop at my work if they could paint it up and fix a small crack, and they said sure, so I dropped it off ever there. Also took my tail section which had a few scratches and cracks, and a few other goodies I bought as well (you'll see those at the end)
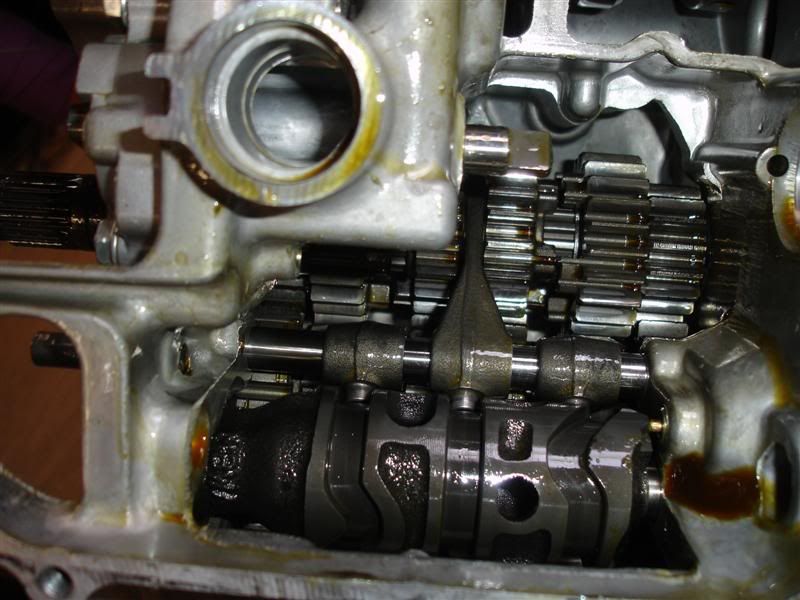
So in March our schedules finally work out and I take it down to Greenville, SC and have my buddies boss take a look. We start tearing the engine open. Nothing has been cleaned in these pics, it's exactly as we tore it apart
Remove the cyl head (first time ever been off).... pistons have a little carbon buildup, but nothing major
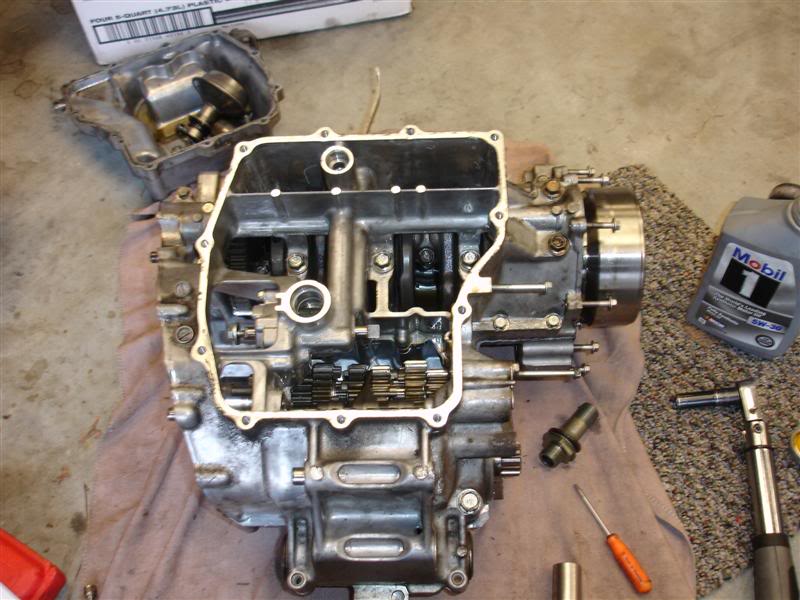
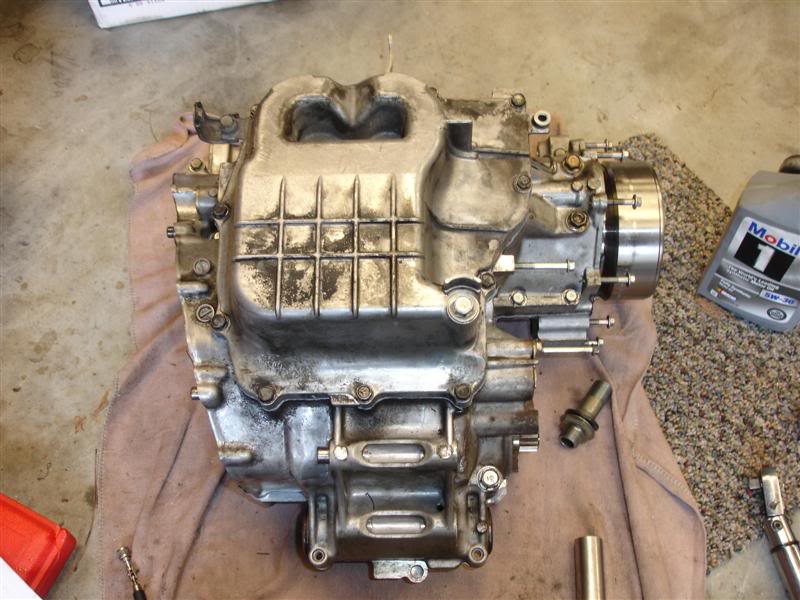
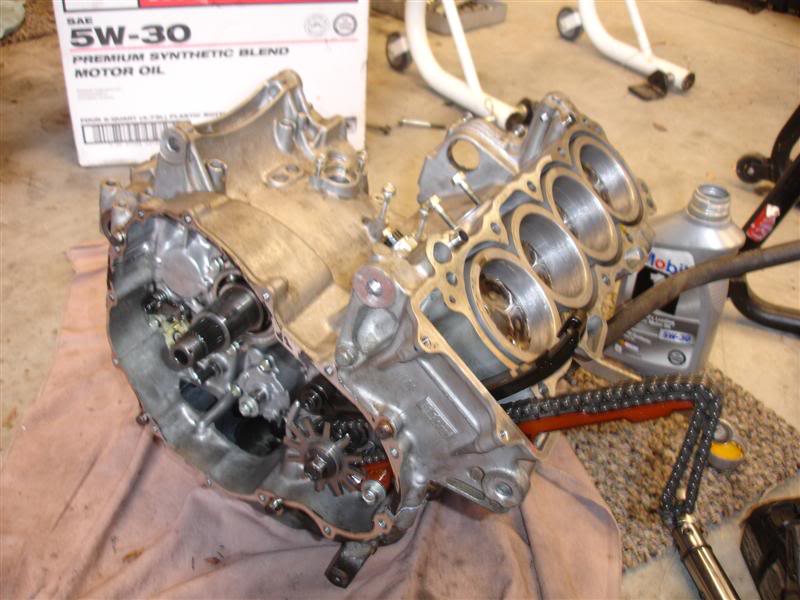
Flip it upside down and remove the oil pan so we can split the cases
Engine is spotless inside
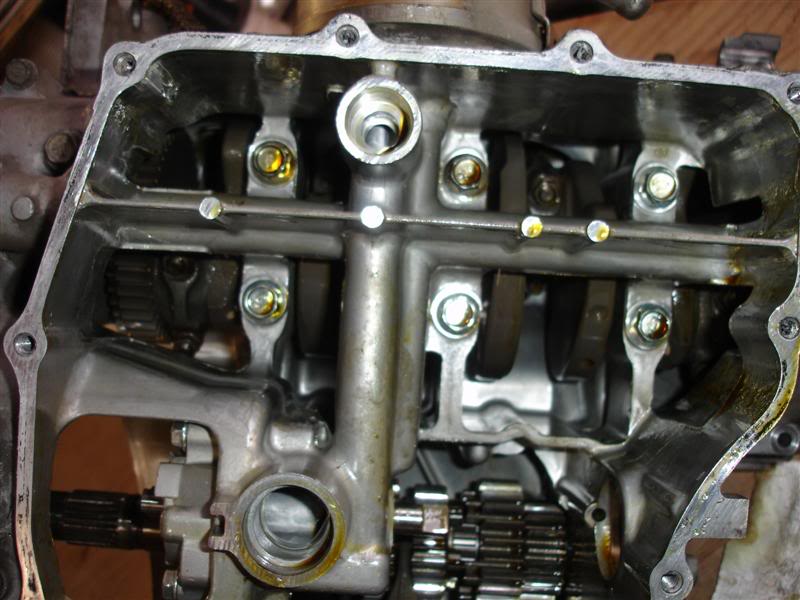
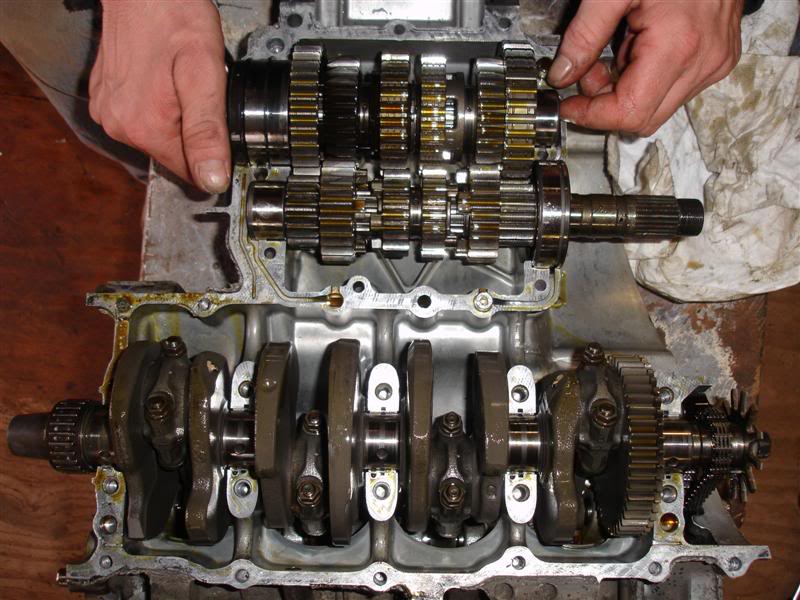
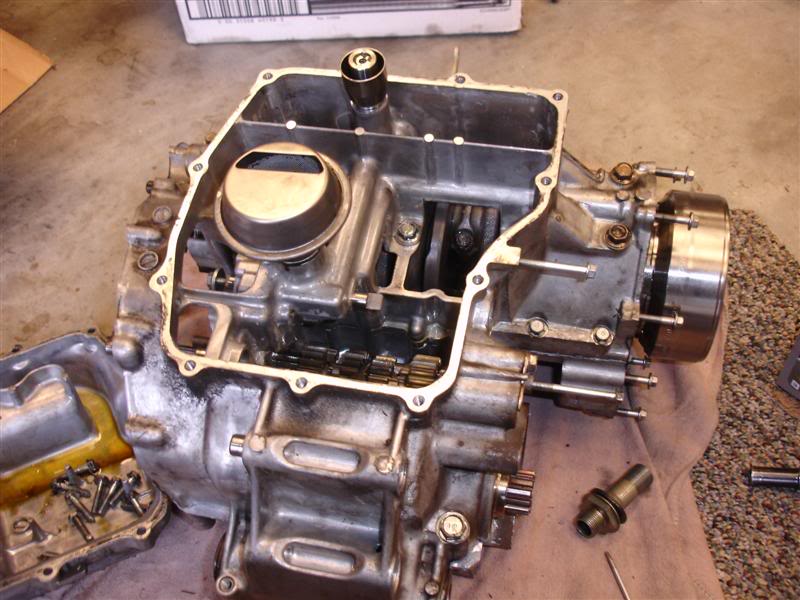
Lower crankcase removed
Crank journals and bearings still looked brand new
We pull the crankshaft out, and sure enough, just as we thought. Bent beyond any conceivable repair
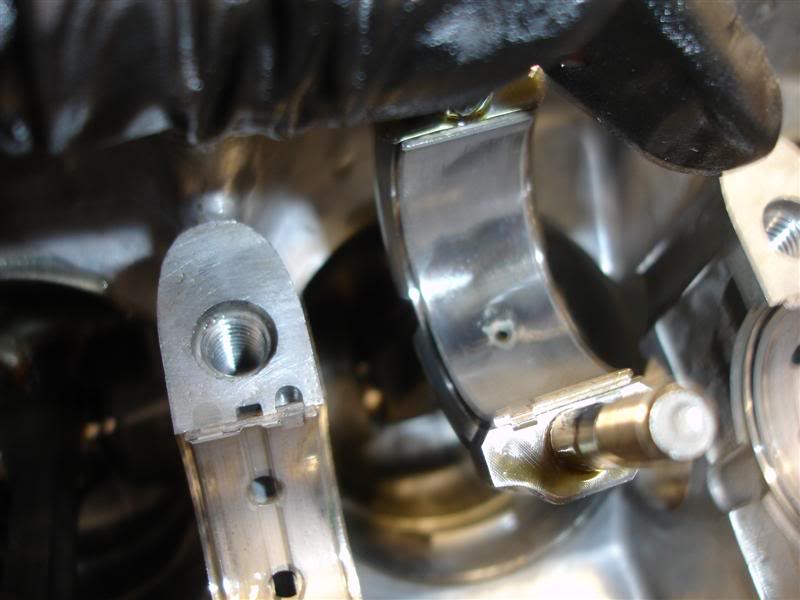
The case was severely cracked under the end crank journal bearing
So.... I wasn't too happy at this point. This was the last little bit of hope I was hanging onto to possibly fix my original engine. But, not gonna happen. I gave it some thought, and pretty much my only option at this point was another engine. The timing could not have been better, as I quickly went on ebay and found a 2004 F4i engine with 15,000 miles. It was at $200 with no reserve, only catch was he wouldn't ship it, pick up only in Atlanta, GA. I watched the auction like a hawk, nobody was bidding on it for several days so I thought I was in the clear. I sit there and watch it in the final several minutes, and lets just say I won the auction in a furious snipe at about 5 sec remaining, outbidding someone else who had the same idea, hahaha. Ended up getting it for $256.... hell of a deal!
So that weekend I hop in the trusty Accord and make my way down to Atlanta, GA from Asheville, NC
Getting closer!
As I'm approaching Atlanta, I tighten my seatbelt and say a little prayer for my life as I merge onto, what I always appropriately like to call, the "I-285 GP". Wow..... I was quickly reminded just why I hate driving in Atlanta....ever!!
I make my way into the city, where I'd meet up with a guy named Sean. We met up at the Cycle Gear since we both knew right where it was
Picked up the engine and stuffed it in my trunk, right next to my old engine
Went over to my buddy Kevin's house north of Atlanta where I'd crash for the night. We took the new engine out and did a valve check on it just to see where it was at, and how it looked
Had 2 valves that were slightly out of spec. One was loose, one was tight, so we were able to swap shims and got both in spec. Everything else looked pretty good, and clean
The next night I make my way back home to Asheville, NC, driving through some of the worst rain I've driven through in YEARS, might I add, lol. On the nice 5 hour drive home I gave the whole situation lots of thought. Me being the stubborn SOB that I am, still wasn't truly happy with just replacing the engine. I kept thinking...there's GOTTA be a way to keep at least part of it original. Then... DUH.... *lightbulb*
So I took the new engine into work the next morning
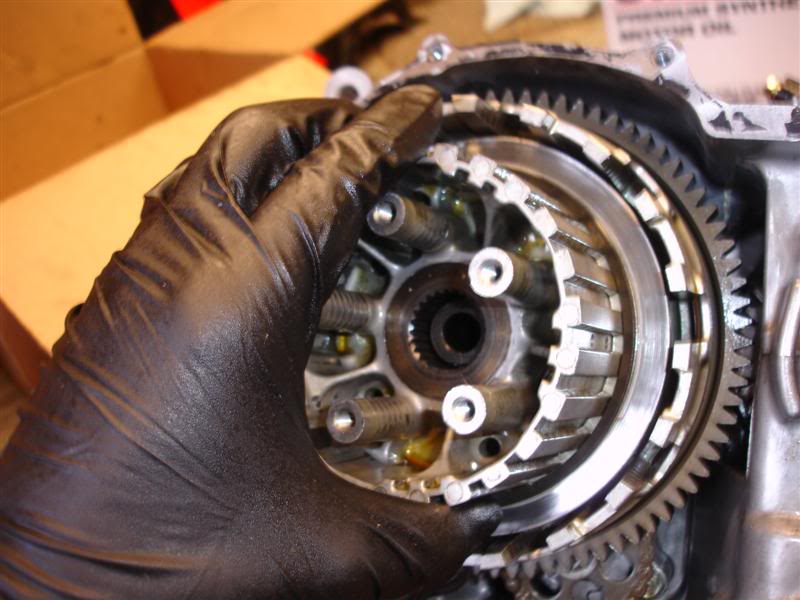
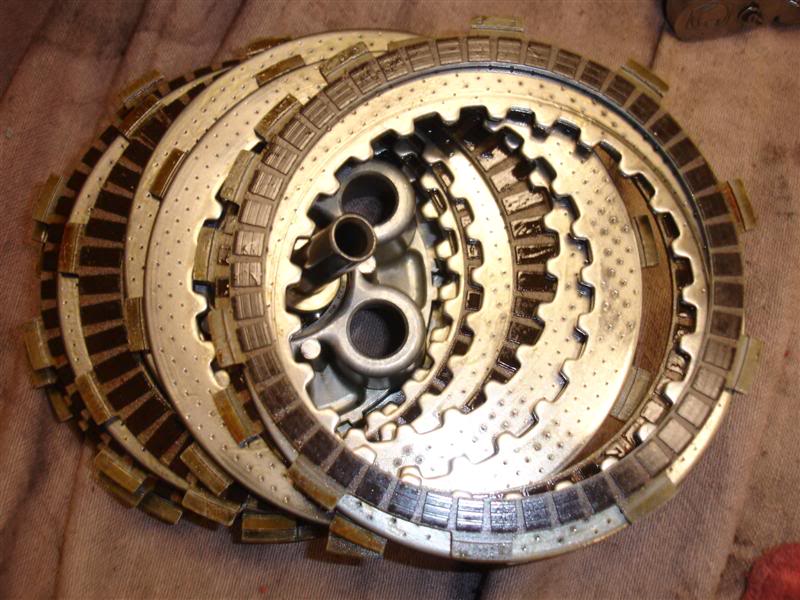
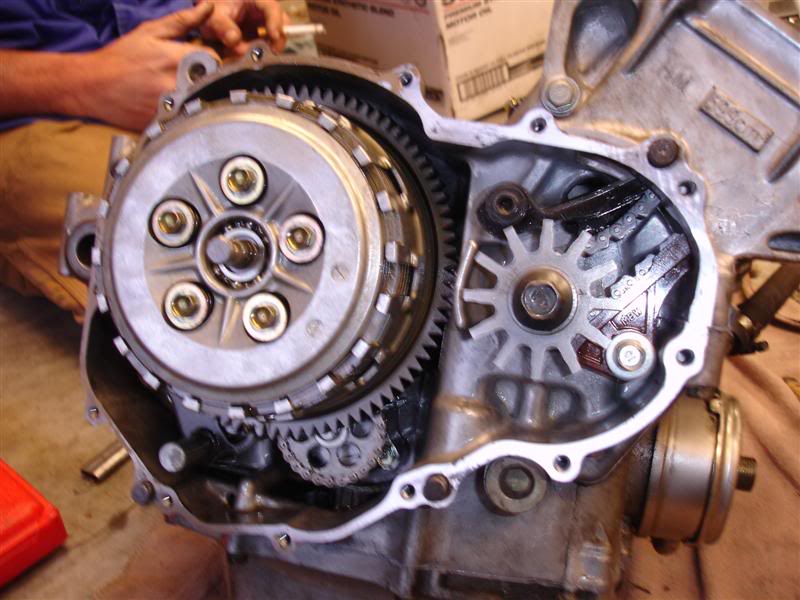
I needed to take the clutch out anyways to swap my Factory Pro shift star and detent spring I had put in mine awhile back
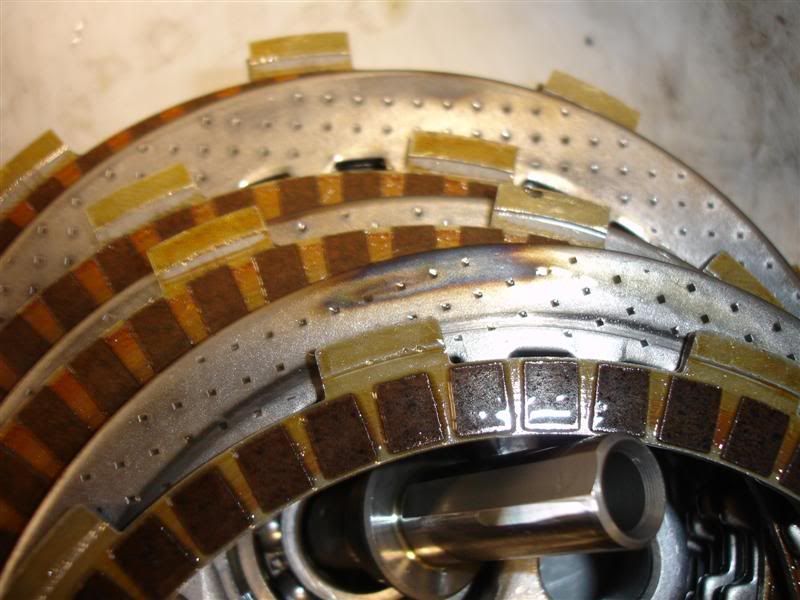
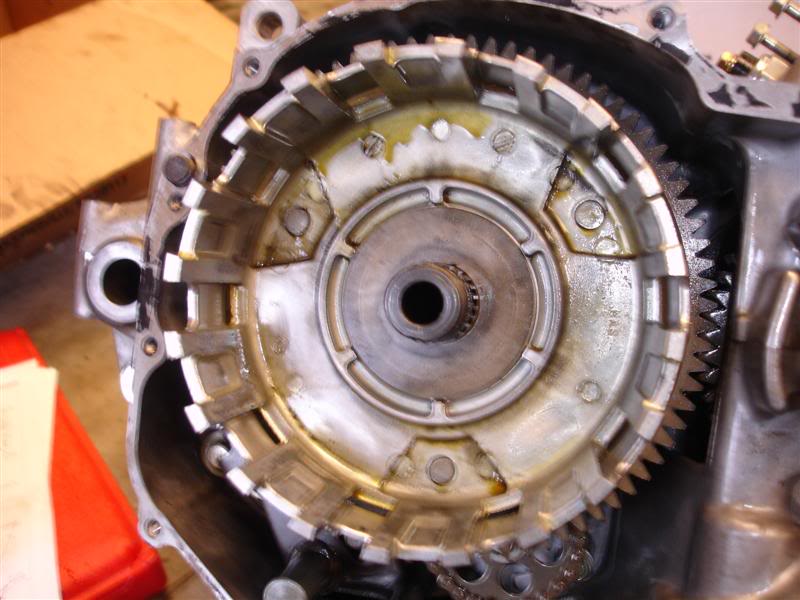
Got the clutch out, and wasn't too happy with what I saw. Had some pretty good bluing and burn marks on the clutch plates, as well as some pretty deep grooves in the ears on the inner and outer clutch baskets. RED FLAG!!
Now that my suspicions are raised, I keep digging a little further. By now my decision was pretty much made up as to just what I was gonna do
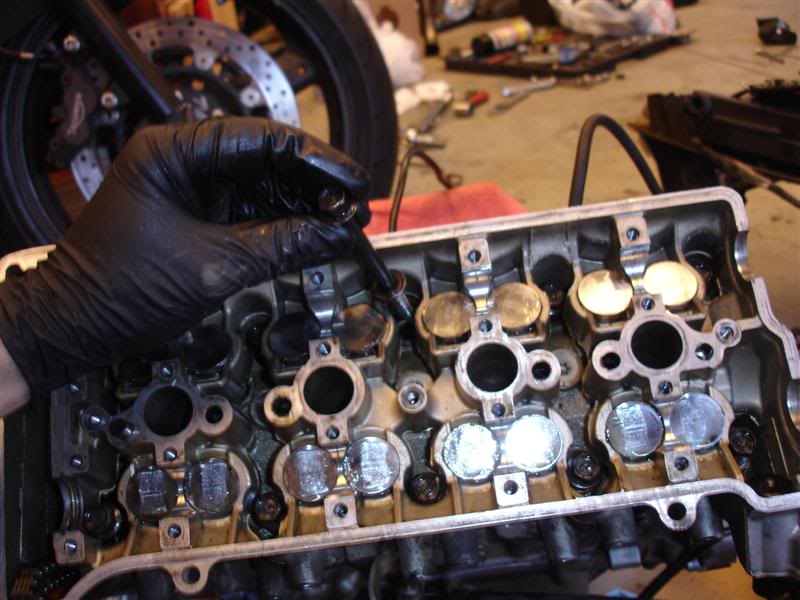
About the same amount of carbon buildup on the pistons as mine had.... not too bad
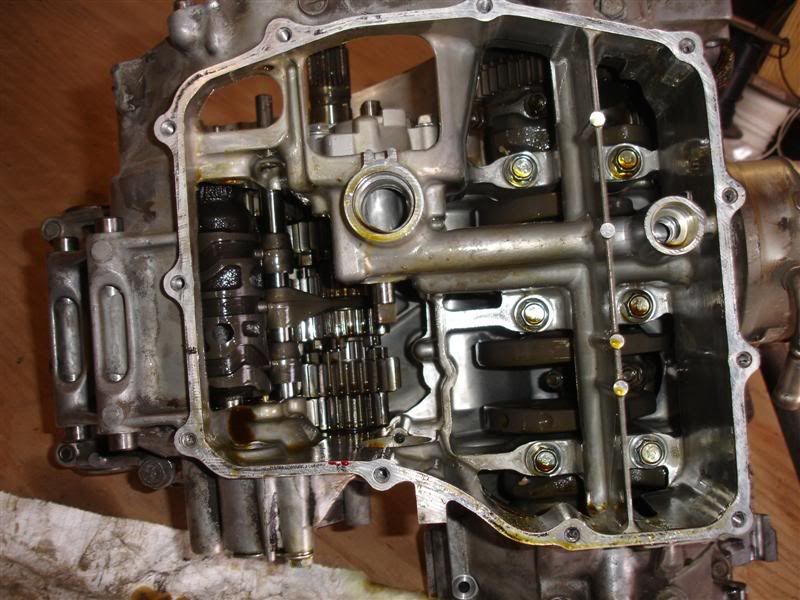
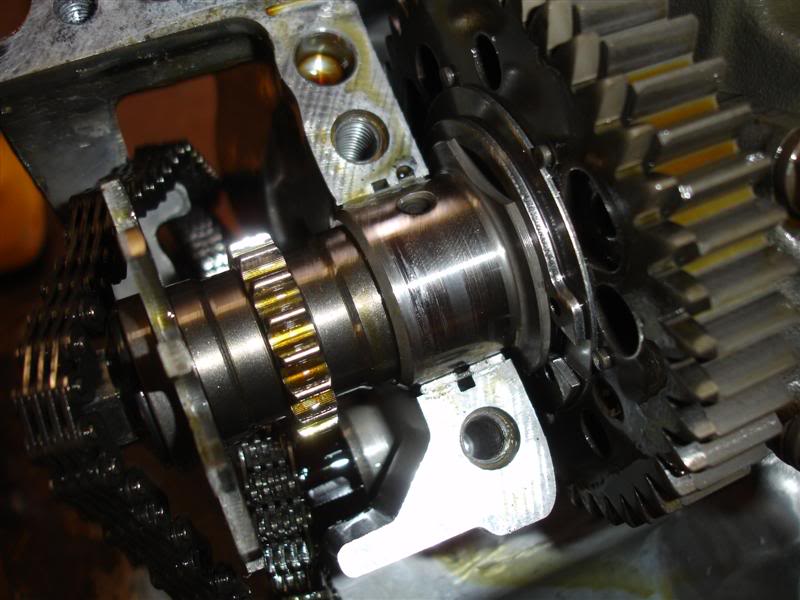
Split the cases and take a look inside. Overall it was clean and didn't look too bad. Some of the edges of the gear dogs in the transmission had some wear


Numbered the pistons on the new engine and popped them out
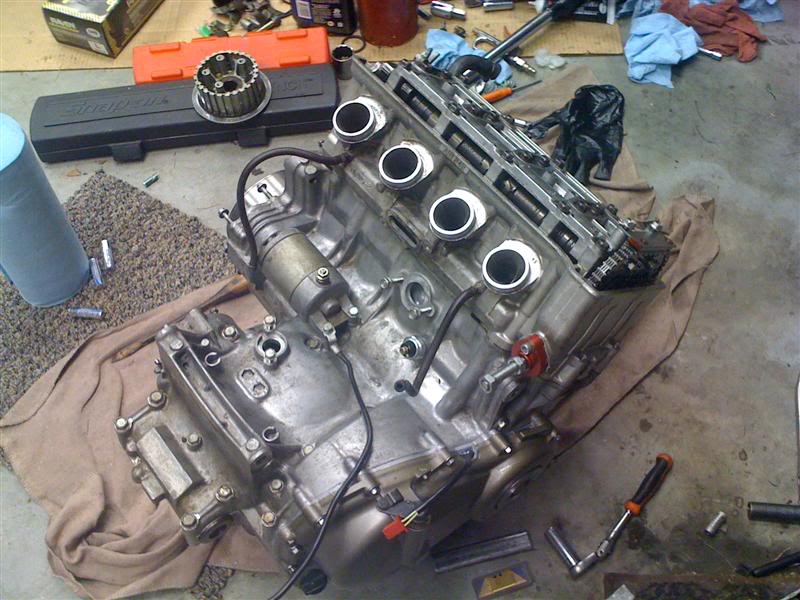
Within an hour or so, had the new engine town down to nothing but a bare block
Then I brought out my original engine and started to tear it fully down
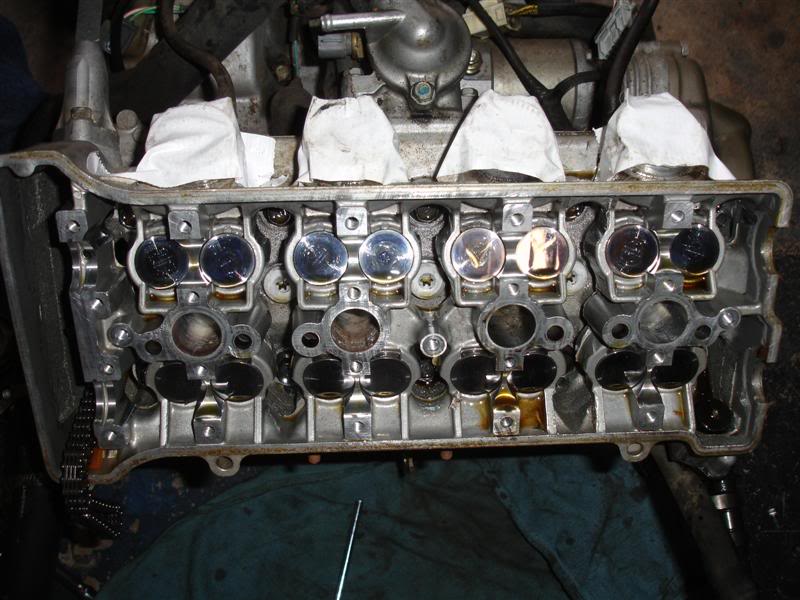
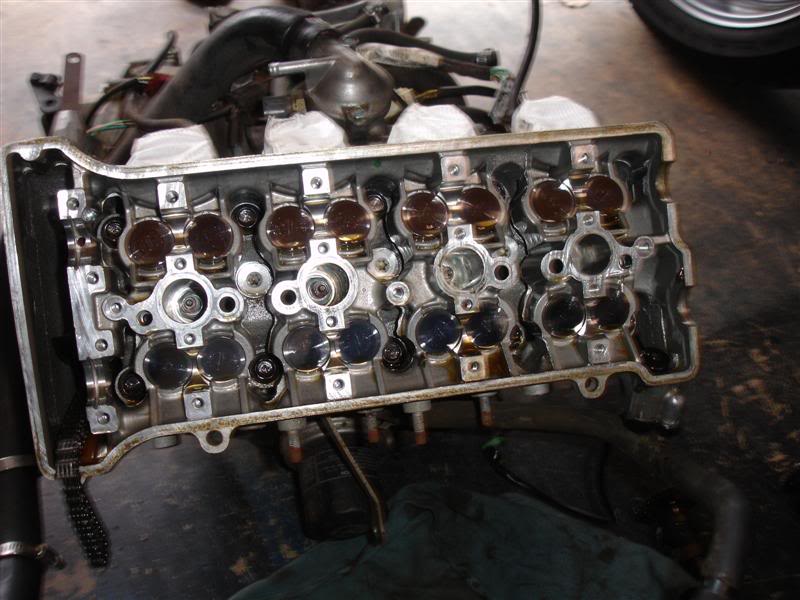
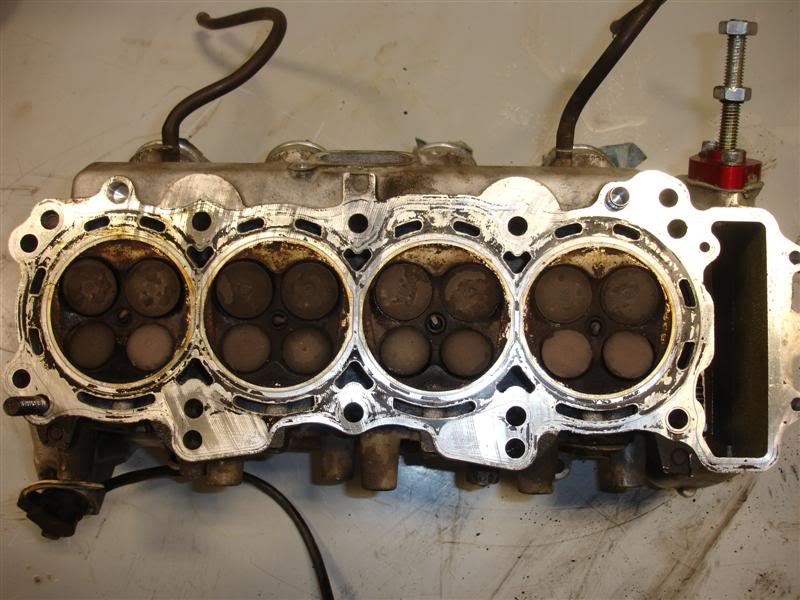
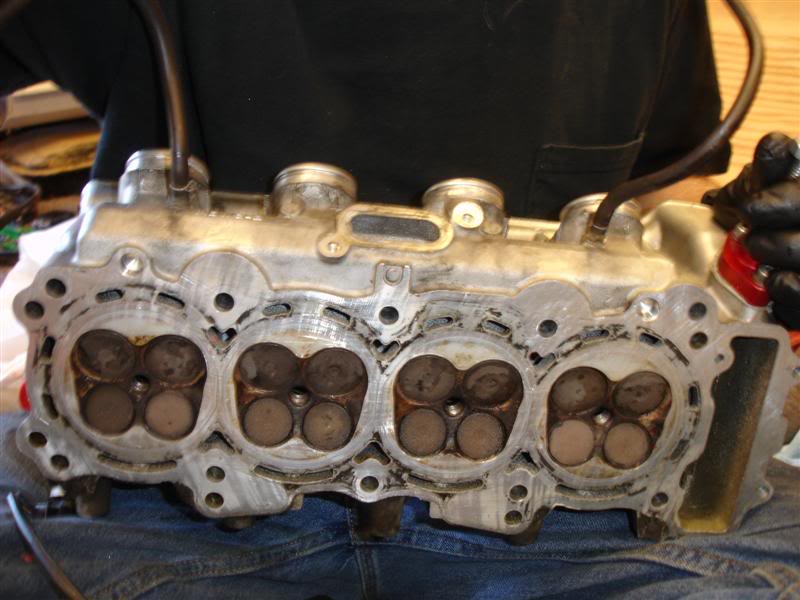
My cylinder head had a little carbon as well, but overall not bad at all.... all valves and seats were in great shape
Stripped it down to the bare block as well

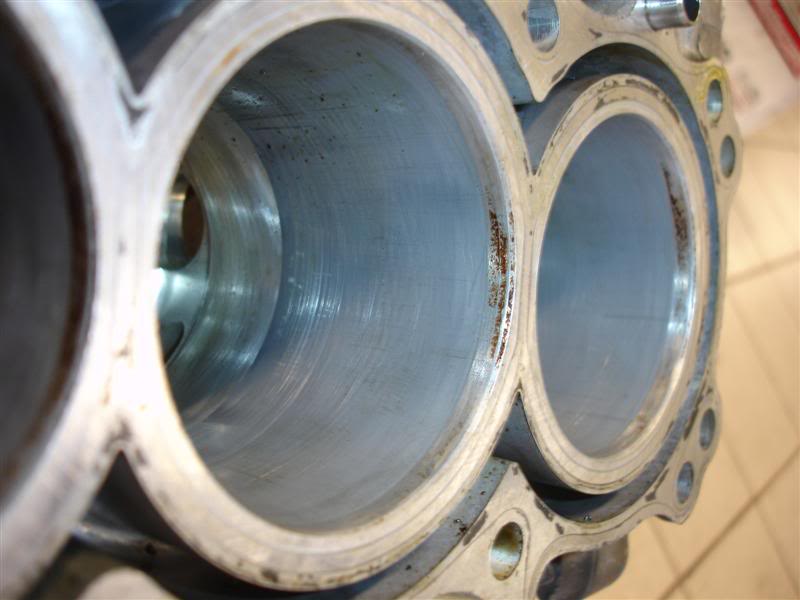
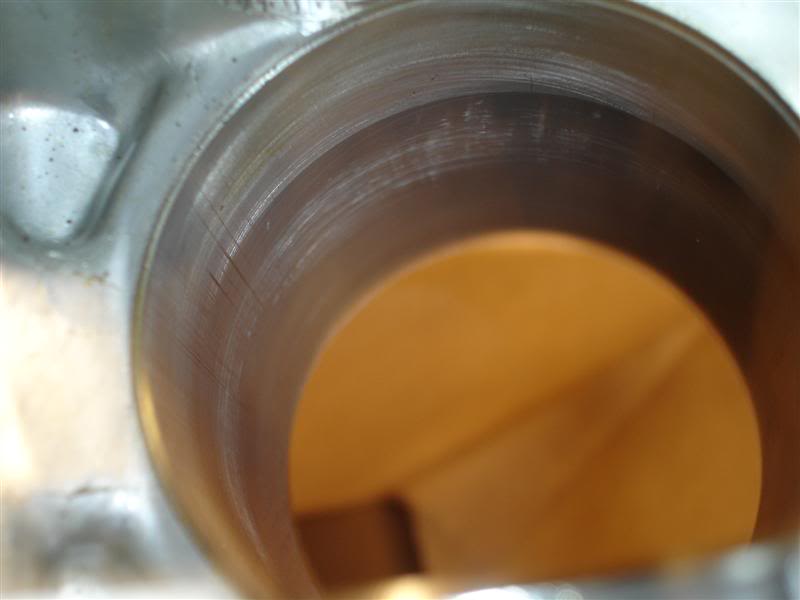
Now here's the pretty amazing part.... hard to see in the pics, but believe it or not, after 177,428 miles, all 4 cylinder walls still have PERFECT crosshatch. No joke!
Crank bearings.... perfect
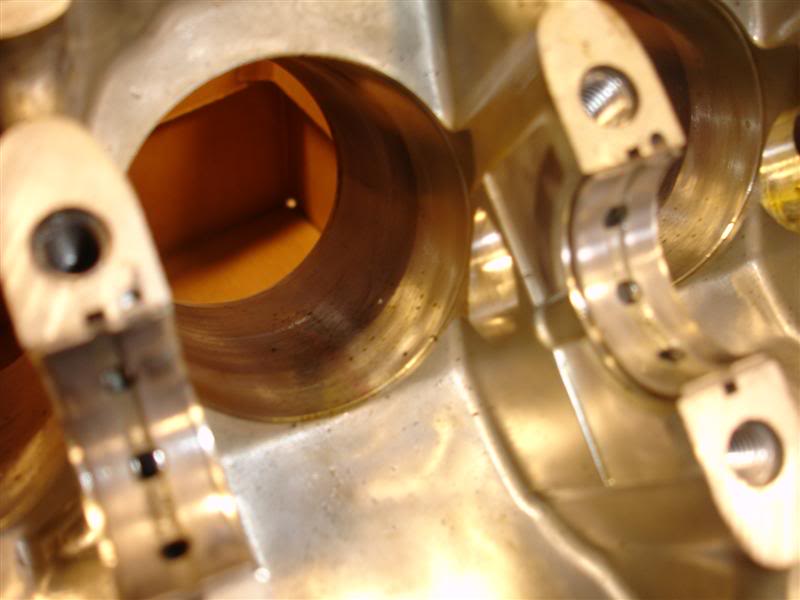
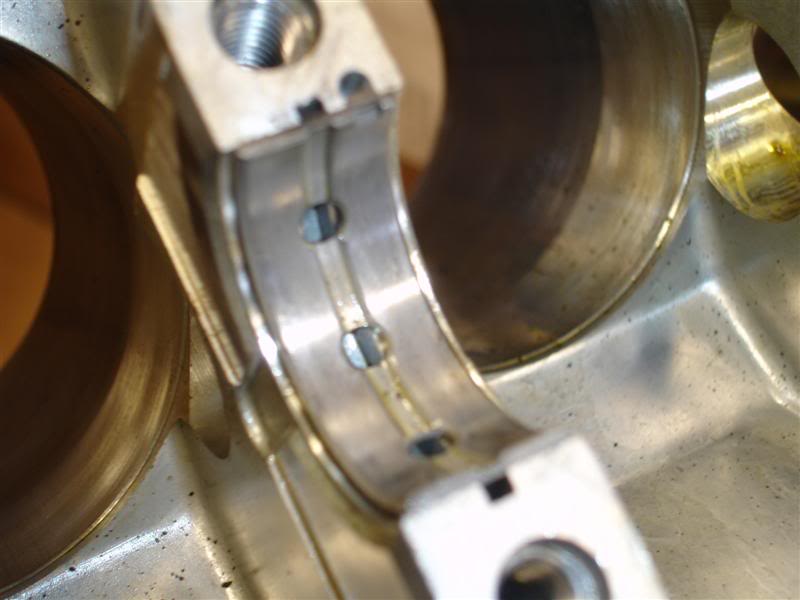
Here's a better pic of the crack in the block. It took a smack for sure!
Bent crank
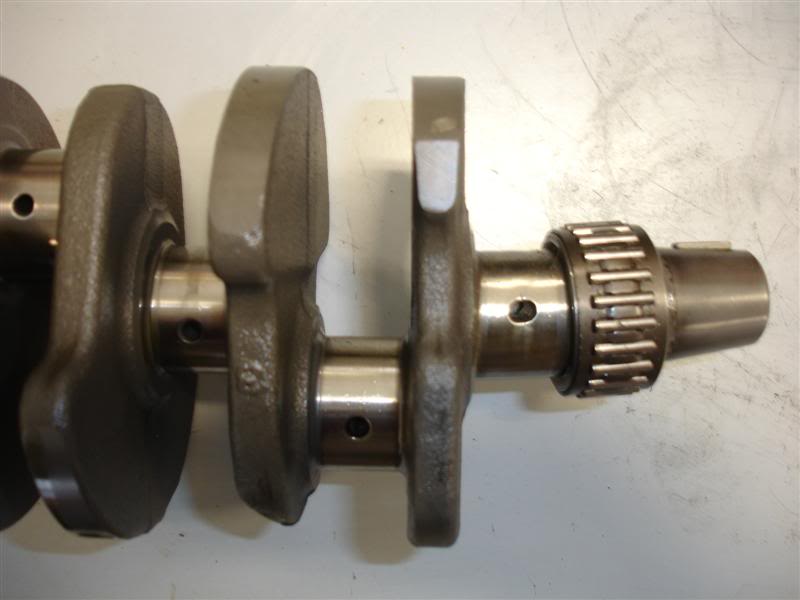
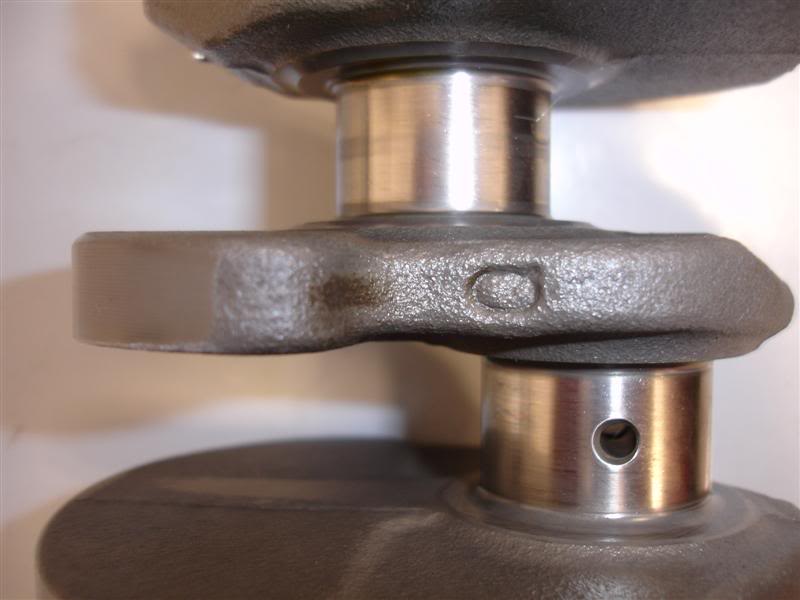
It bent so much that it actually squished and buckled the metal on the one side...
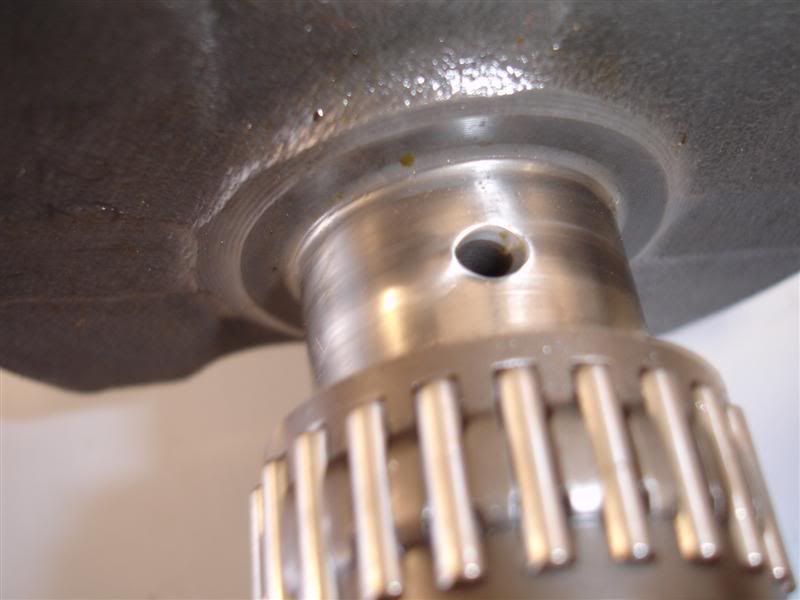
...And stretched it on the other side
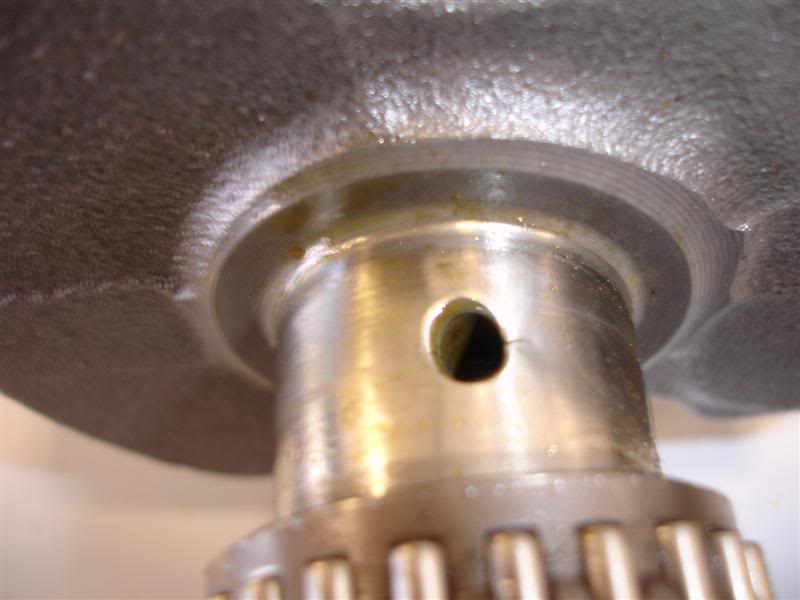
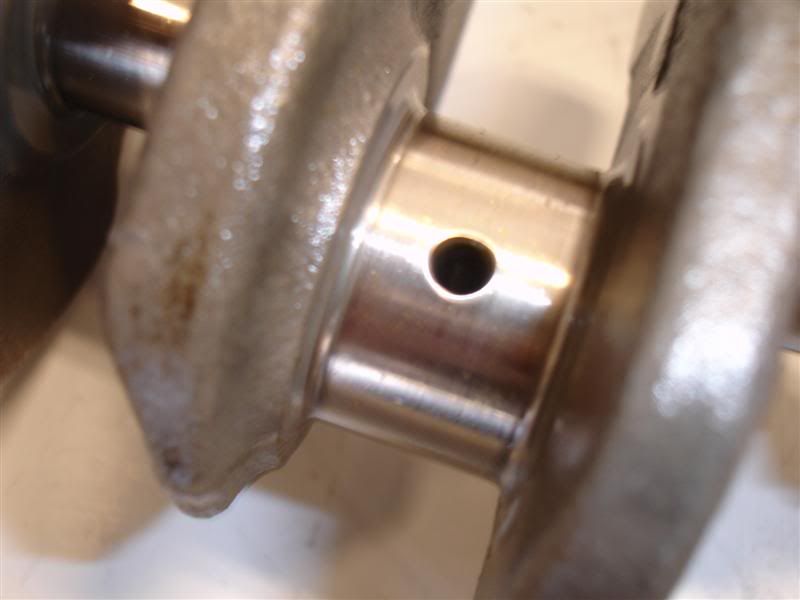
As for the crank journals themselves... perfect
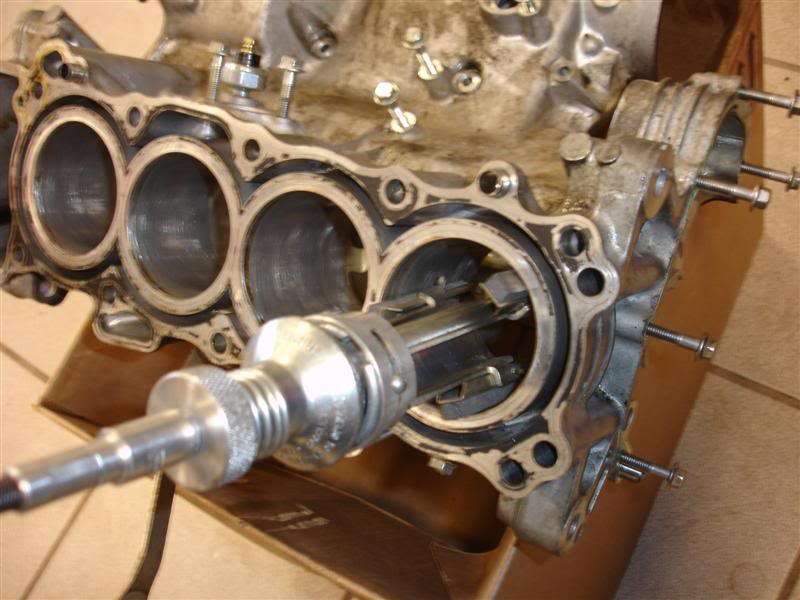
Time to start assembling the "new" engine. I hone out the cylinders real good on the new block to deglaze them
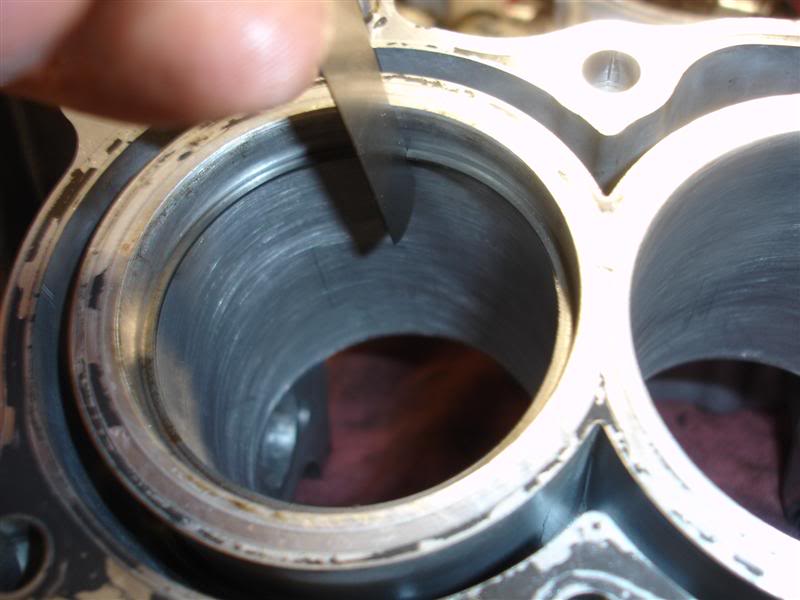
Now here's another little interesting tidbit. I start measuring ring gap, and I'm curious how my 177k mile engine compares to this 15k mile engine (which I now believe was run a bit hard). The service limit on the upper ring is 0.40mm. So using cylinder 1 in the new block, I take the upper ring from both cylinder 1 pistons of the new engine and my old engine. The ring from the new engine is right at the 0.40mm service limit. My 177k mile ring measured 0.27mm. Yea..... figure that one out!
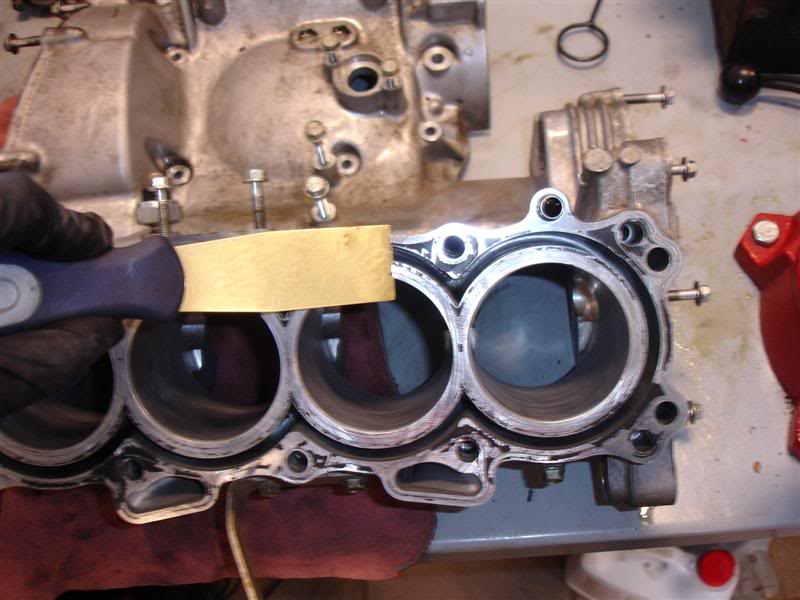
Used a brass scraper to clean the surface of the block up
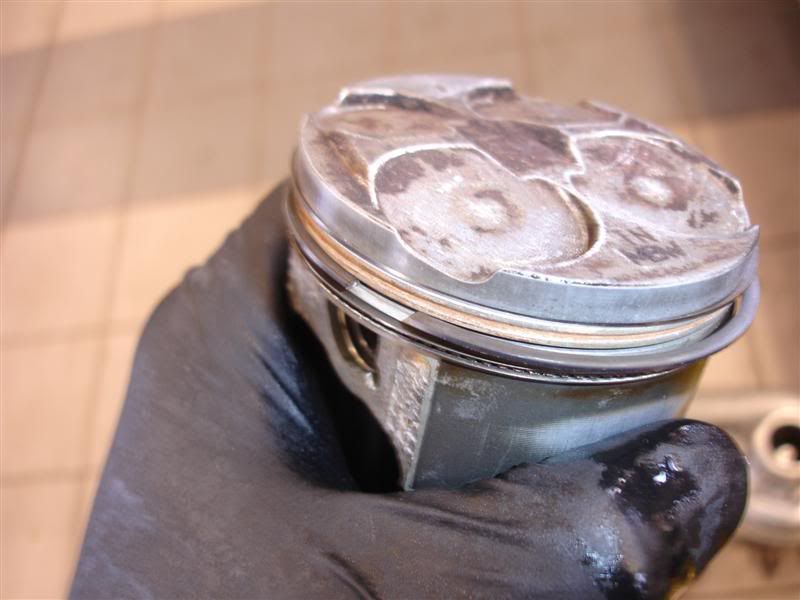
After cleaning the carbon off the pistons and making sure the ring grooves are nice and clean, gotta index the rings before reinstalling each piston (each ring gap has to be facing a certain way)
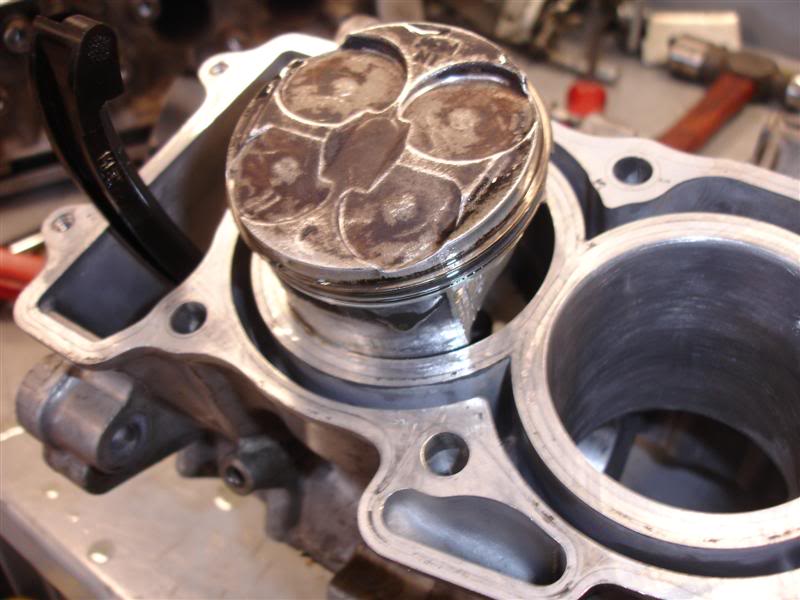
Install each piston
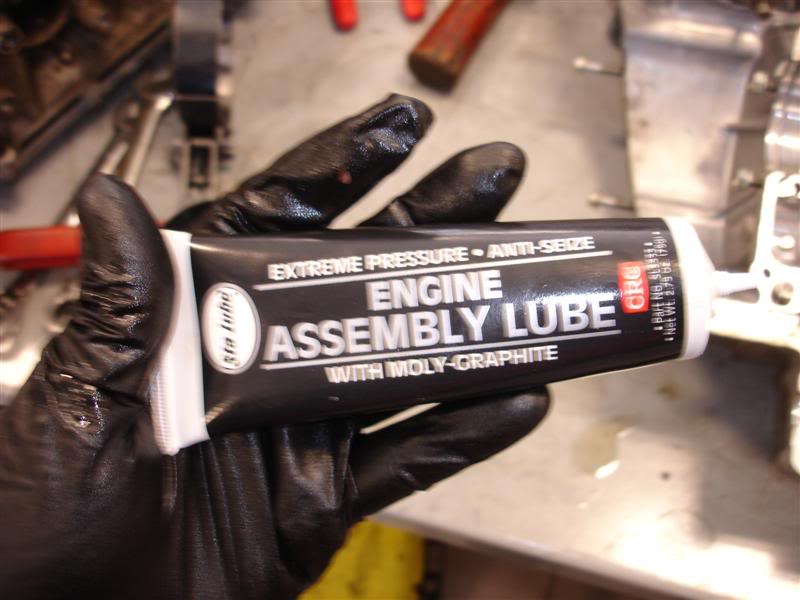
Use lots of this stuff!!
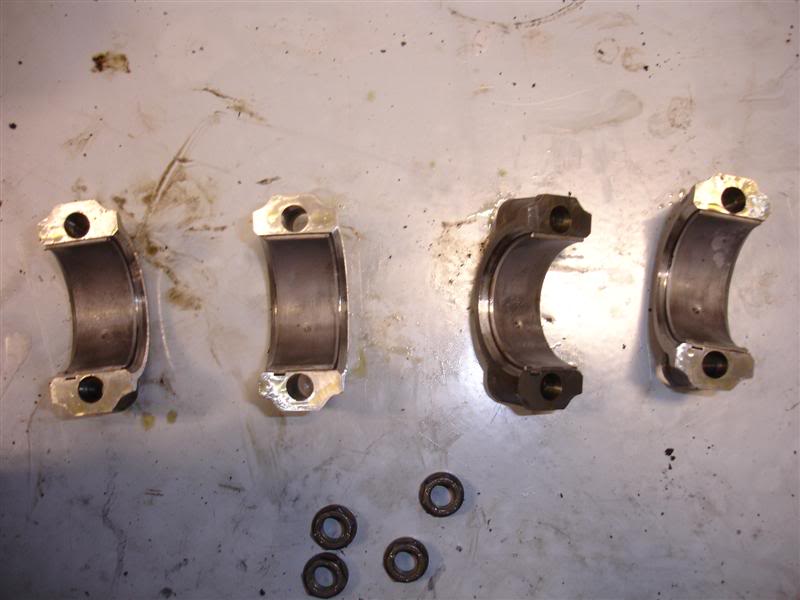
My original rod bearings.... perfect
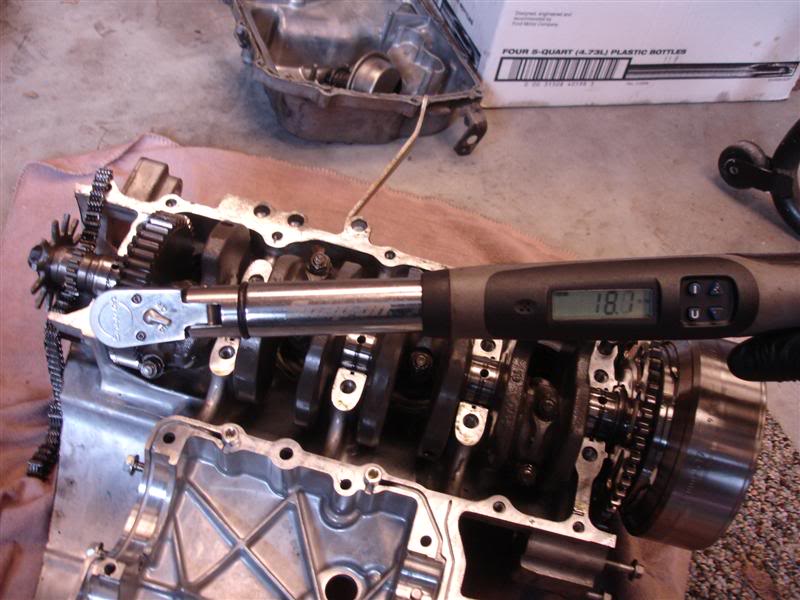
After several gradual steps, make my way to 19 lb.ft on the rod caps
Hard to see in the pics, but the lighter color timing chain guide on the left has more wear than the one on the right. One on the left is out of the 15k mile engine, one on the right is my original. I put my original back in

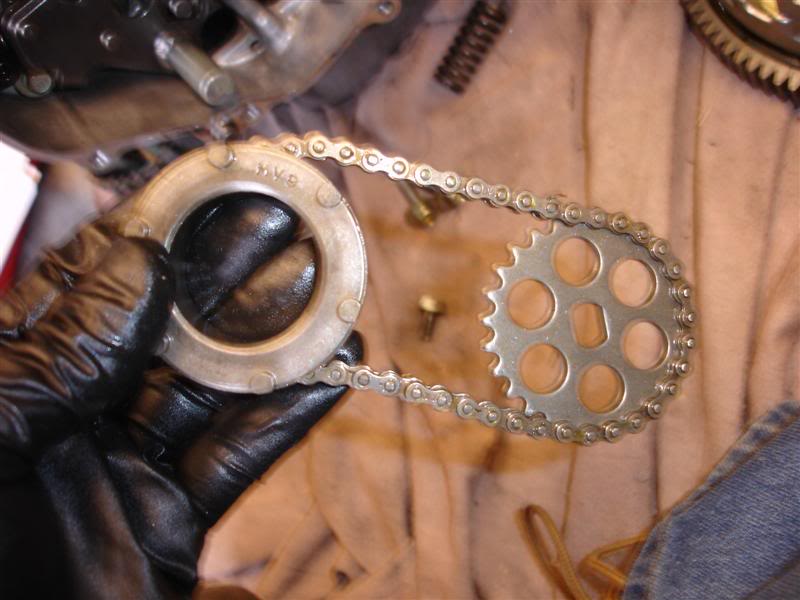
Finally installed the new timing chain that I've had sitting in my toolbox since.... 2005?? LOL


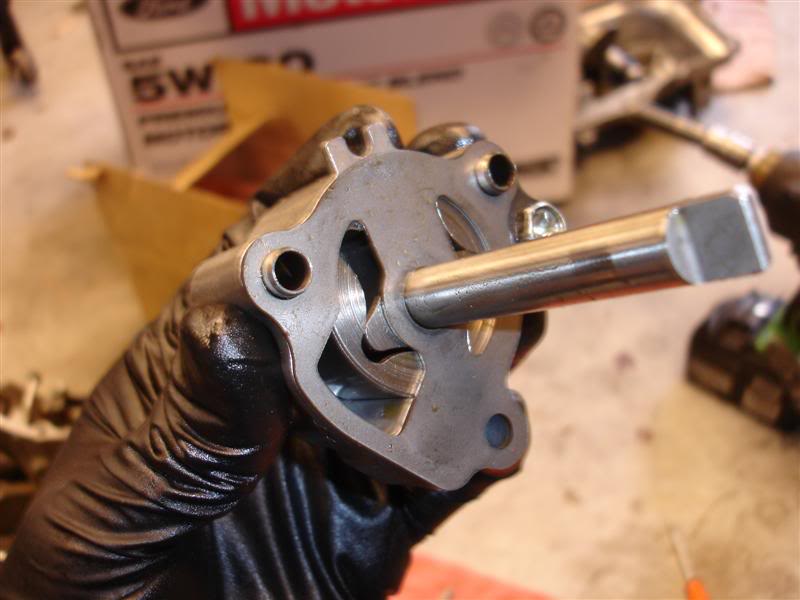
Used my original oil pump
So I took the new engine into work the next morning
I needed to take the clutch out anyways to swap my Factory Pro shift star and detent spring I had put in mine awhile back
Got the clutch out, and wasn't too happy with what I saw. Had some pretty good bluing and burn marks on the clutch plates, as well as some pretty deep grooves in the ears on the inner and outer clutch baskets. RED FLAG!!
Now that my suspicions are raised, I keep digging a little further. By now my decision was pretty much made up as to just what I was gonna do
About the same amount of carbon buildup on the pistons as mine had.... not too bad
Split the cases and take a look inside. Overall it was clean and didn't look too bad. Some of the edges of the gear dogs in the transmission had some wear
Numbered the pistons on the new engine and popped them out
Within an hour or so, had the new engine town down to nothing but a bare block
Then I brought out my original engine and started to tear it fully down
My cylinder head had a little carbon as well, but overall not bad at all.... all valves and seats were in great shape
Stripped it down to the bare block as well
Now here's the pretty amazing part.... hard to see in the pics, but believe it or not, after 177,428 miles, all 4 cylinder walls still have PERFECT crosshatch. No joke!
Crank bearings.... perfect
Here's a better pic of the crack in the block. It took a smack for sure!
Bent crank
It bent so much that it actually squished and buckled the metal on the one side...
...And stretched it on the other side
As for the crank journals themselves... perfect
Time to start assembling the "new" engine. I hone out the cylinders real good on the new block to deglaze them
Now here's another little interesting tidbit. I start measuring ring gap, and I'm curious how my 177k mile engine compares to this 15k mile engine (which I now believe was run a bit hard). The service limit on the upper ring is 0.40mm. So using cylinder 1 in the new block, I take the upper ring from both cylinder 1 pistons of the new engine and my old engine. The ring from the new engine is right at the 0.40mm service limit. My 177k mile ring measured 0.27mm. Yea..... figure that one out!
Used a brass scraper to clean the surface of the block up
After cleaning the carbon off the pistons and making sure the ring grooves are nice and clean, gotta index the rings before reinstalling each piston (each ring gap has to be facing a certain way)
Install each piston
Use lots of this stuff!!
My original rod bearings.... perfect
After several gradual steps, make my way to 19 lb.ft on the rod caps
Hard to see in the pics, but the lighter color timing chain guide on the left has more wear than the one on the right. One on the left is out of the 15k mile engine, one on the right is my original. I put my original back in
Finally installed the new timing chain that I've had sitting in my toolbox since.... 2005?? LOL
Used my original oil pump
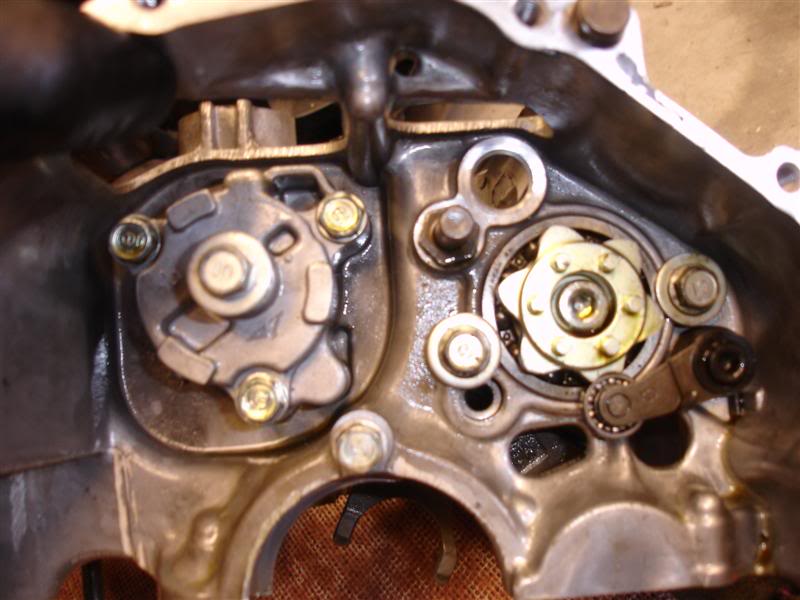
Installed oil pump and my Factory Pro roller bearing detent spring
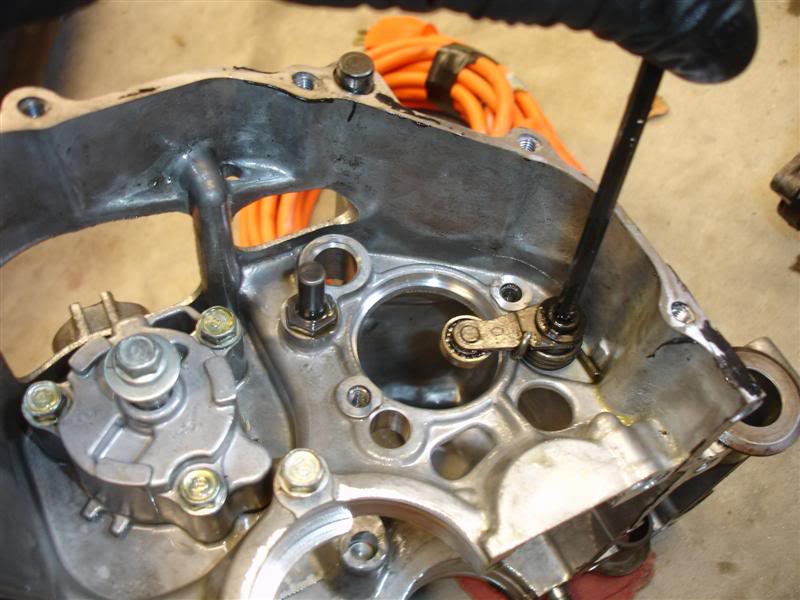
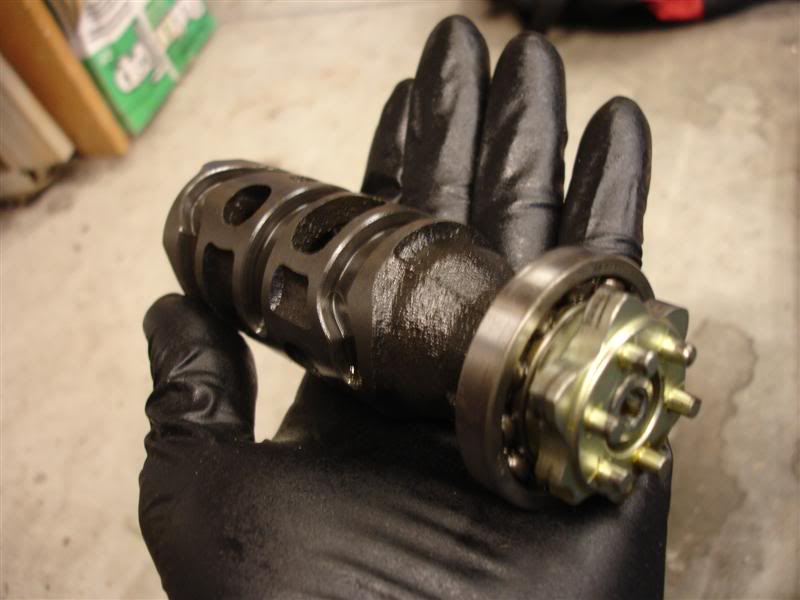
Installed my original shift drum with the Factory Pro shift star
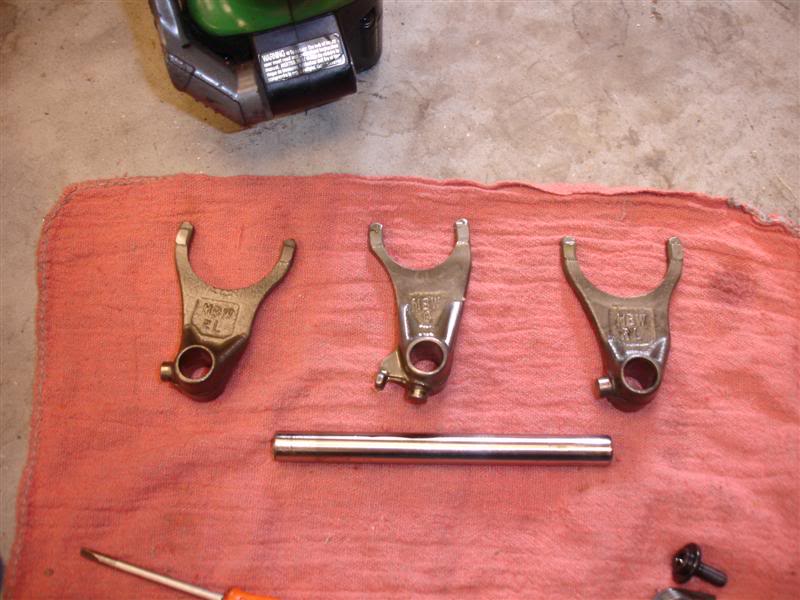
My shift forks were still in perfect shape, so reused those too
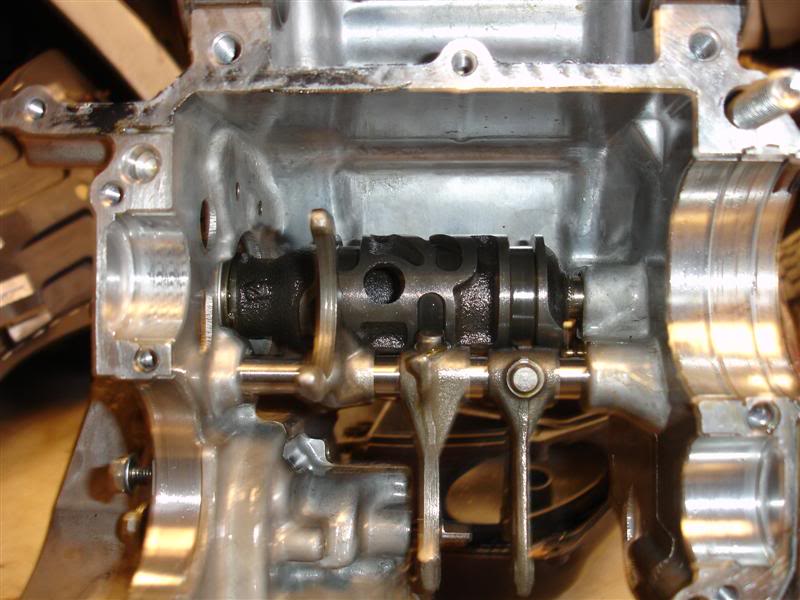
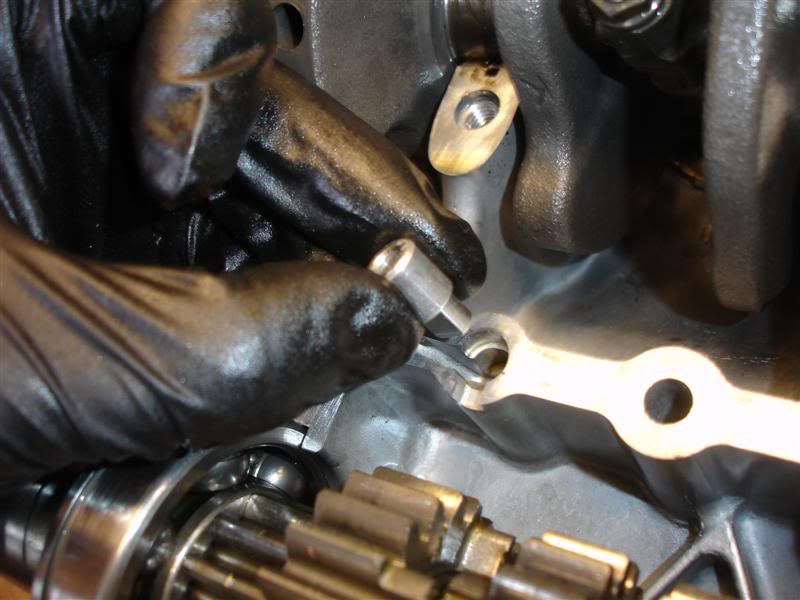
Can't forget the oil control orifices! That would be a very bad thing to leave out
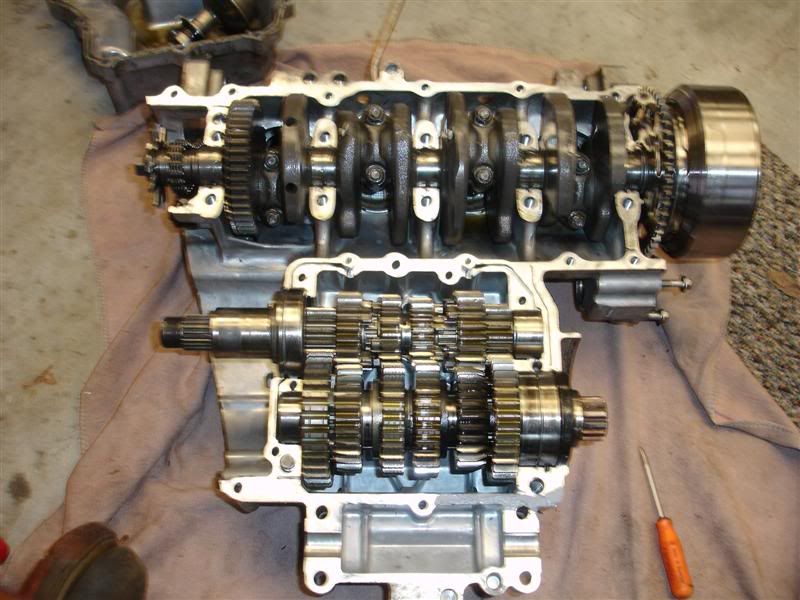
Bottom end... complete!
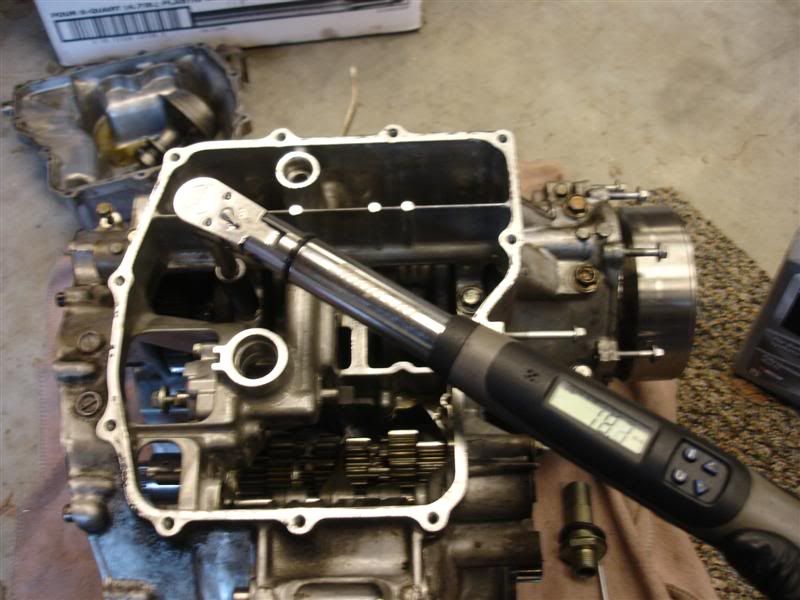
After applying some assembly lube on all the crank bearings, install the lower crankcase

Torque all case bolts down to spec
Install oil pick-up and pressure release valve
Oil pan
Flip over and install oil cooler
Install shift shaft
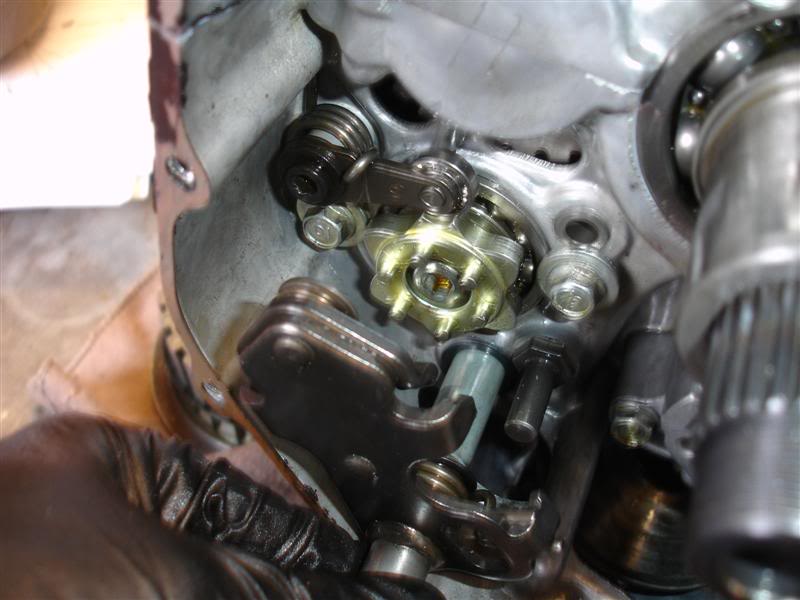
Oil pump drive chain and sprockets
Install the outer clutch basket
Then the inner hub, then tighten the nut (94 lb. ft = FUN when the engine is out, lol)
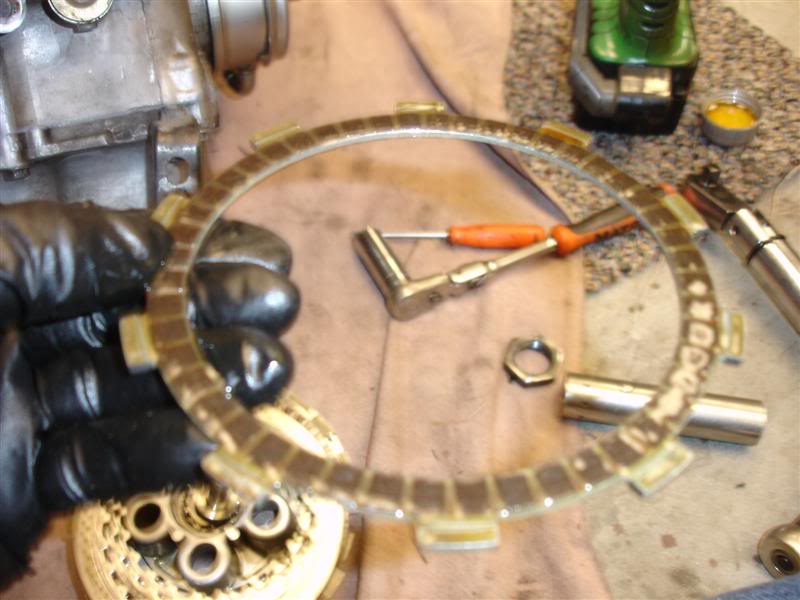
My original (yes 177k mile original) clutch was still in great shape, so I reused it
Coat all the clutch friction and steel plates with clean engine oil before install
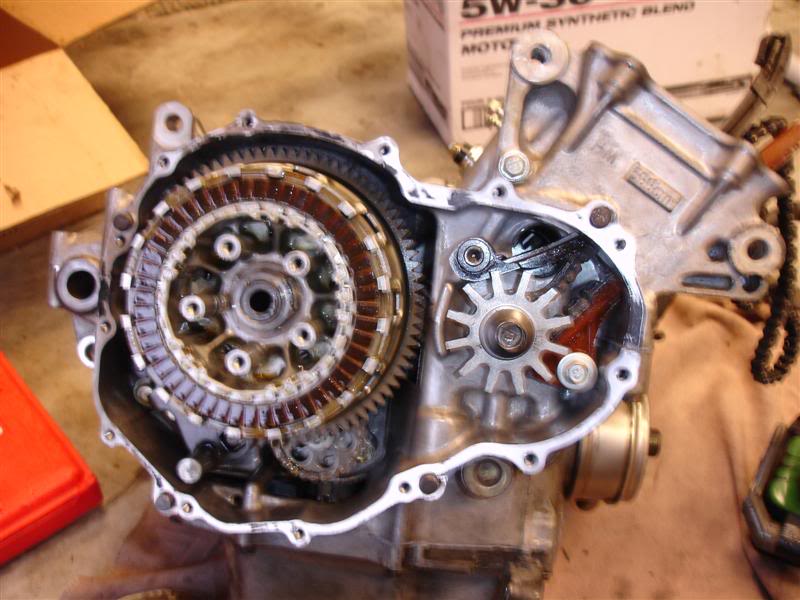
Install clutch pressure plate and springs, tighten to 9 lb.ft
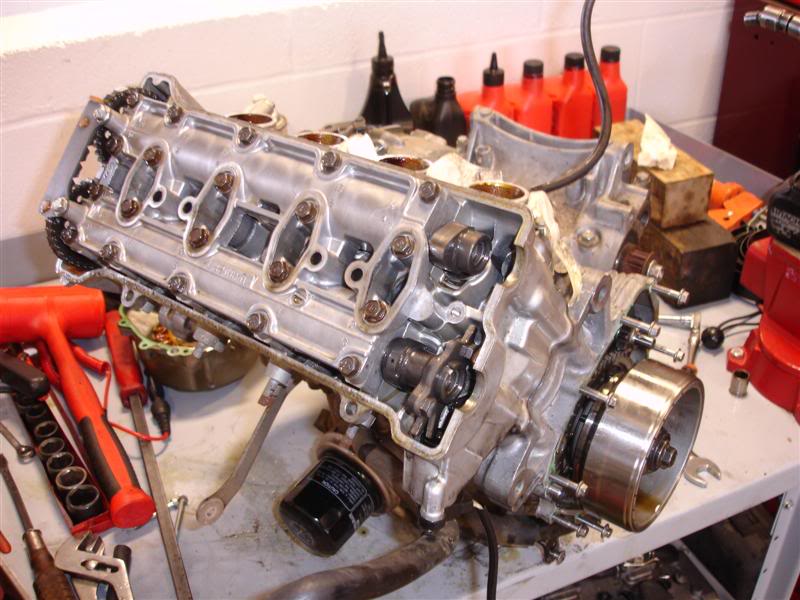
Time to button up the top end

Cleaned the carbon off my original head and it cleaned up nicely
Easy does it when it comes to torquing a head. Lots of small increments is my preferred method
Final torque of 35 lb. ft (much better than the 245 lb. ft for the ARP head studs I usually do on the diesels, lol)
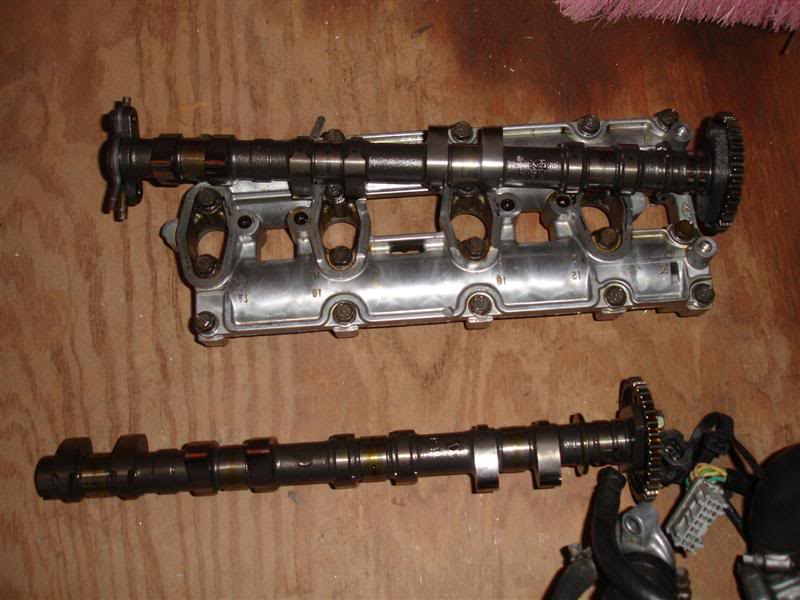
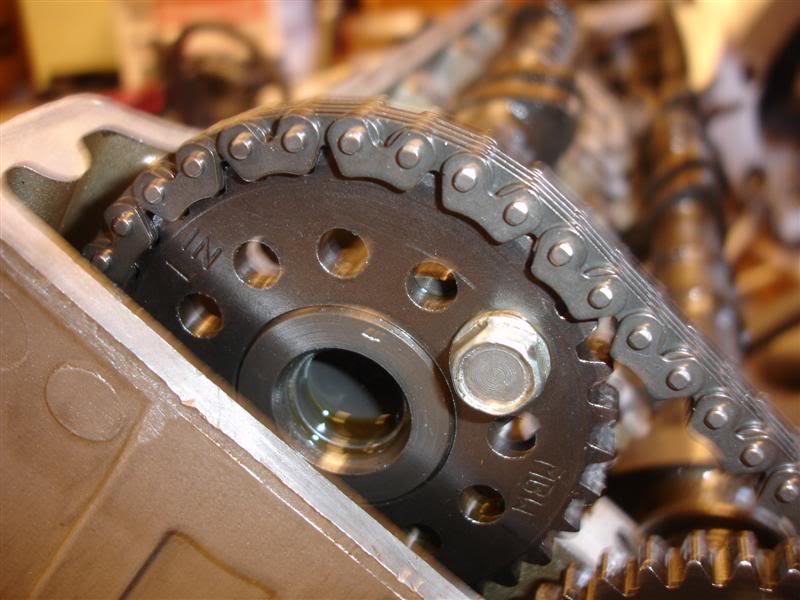
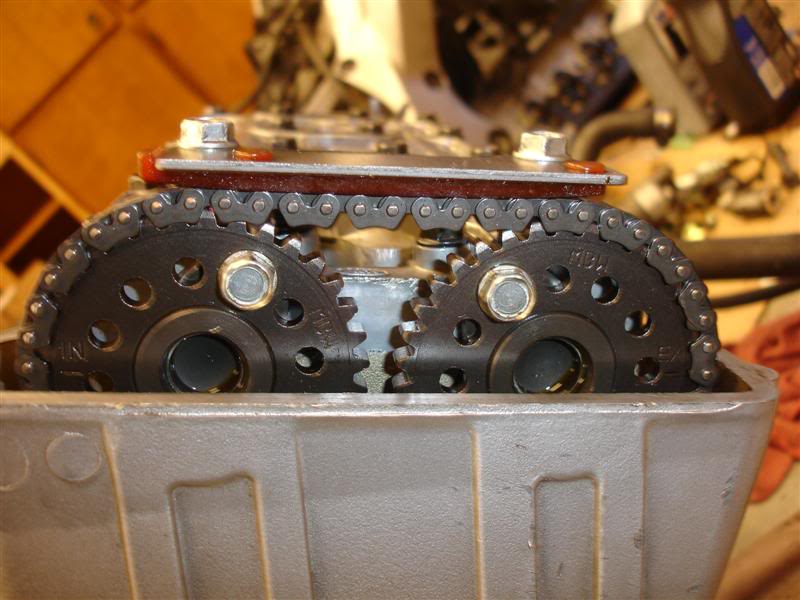
Install exhaust camshaft and line up timing marks
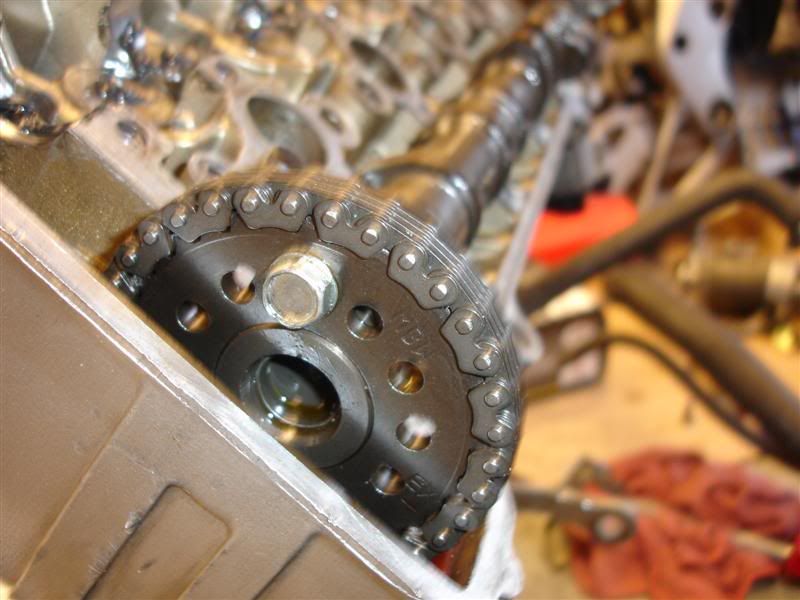
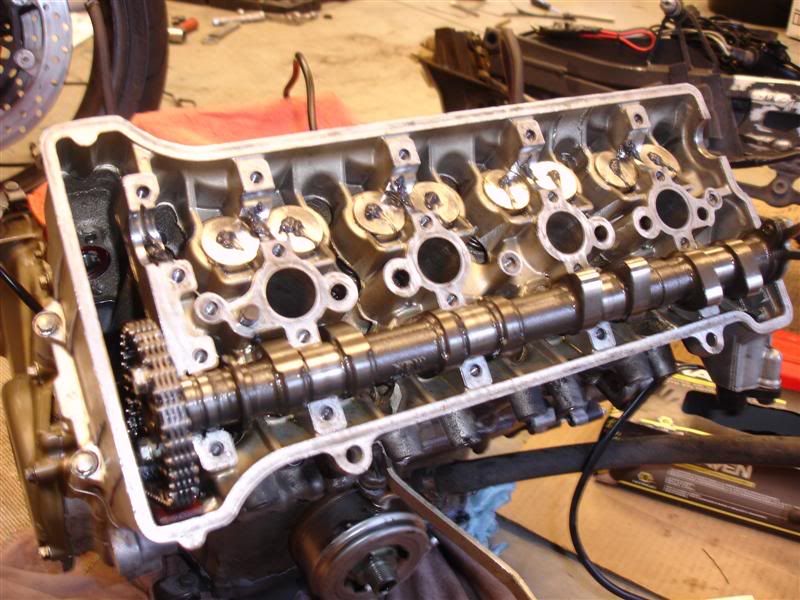
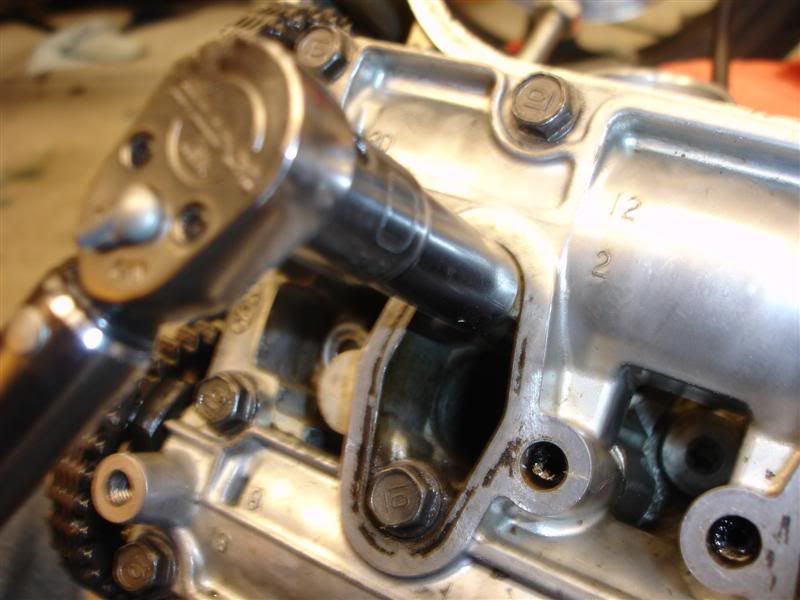
Install intake camshaft and line up timing marks
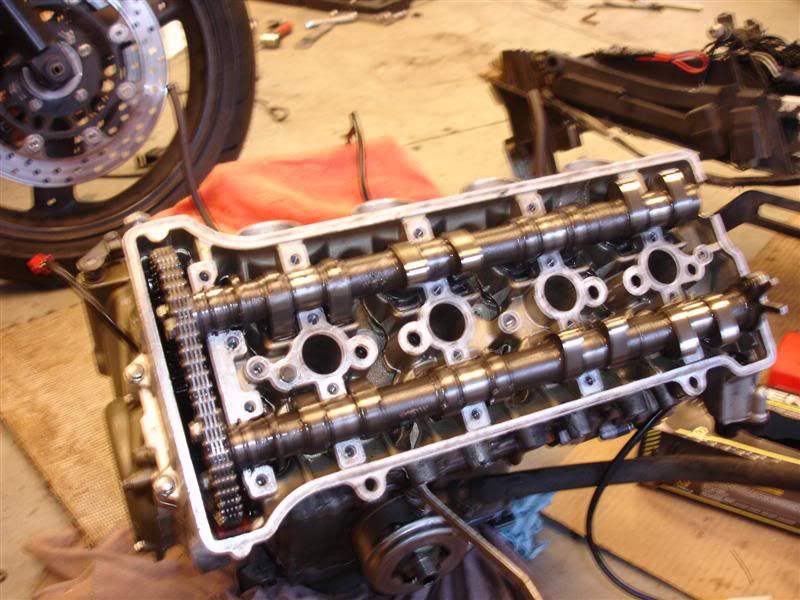
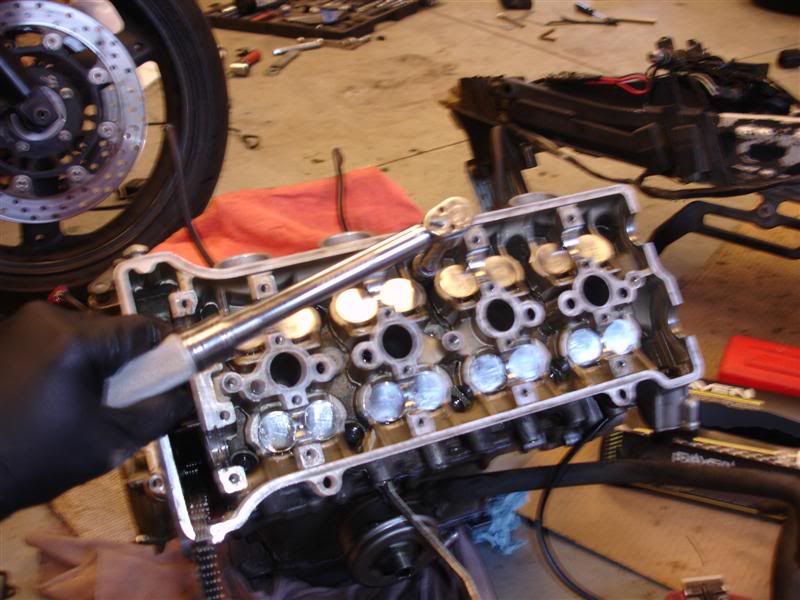
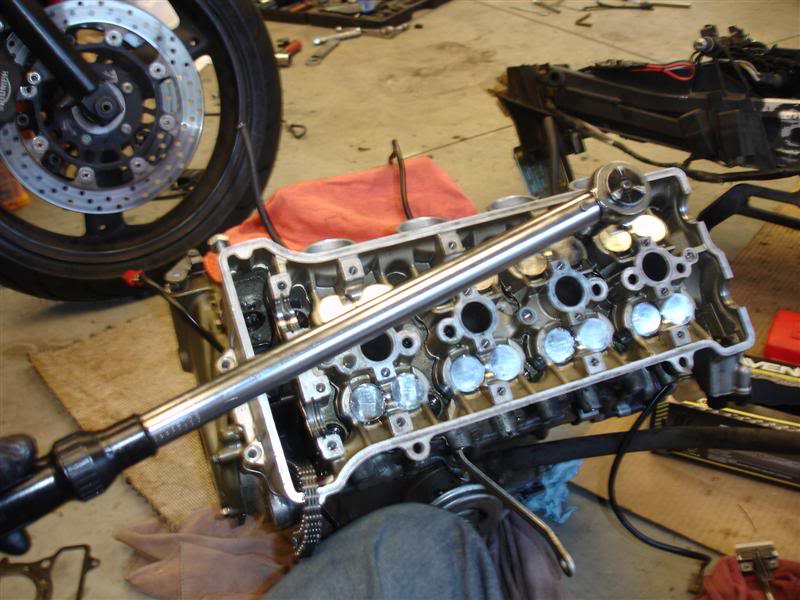
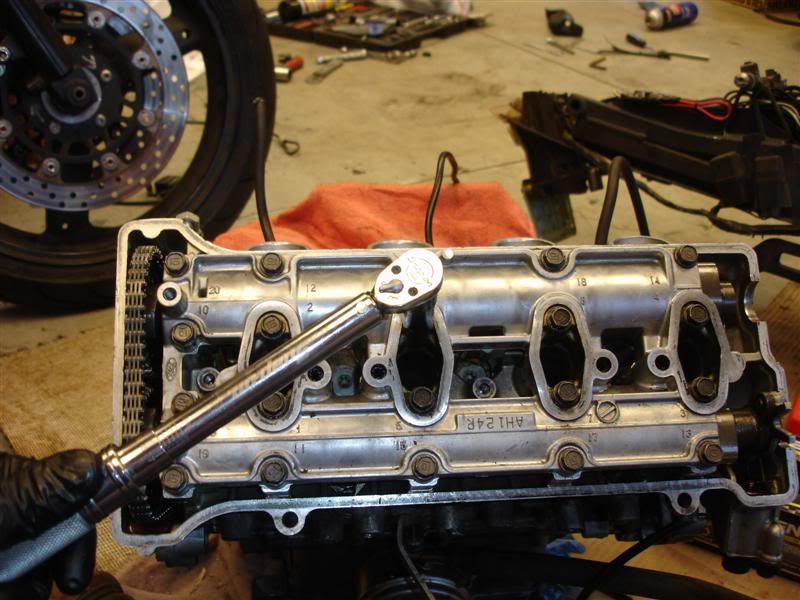
Gotta torque the cam hold down plate in the EXACT sequence numbered on the plate
Installed my original shift drum with the Factory Pro shift star
My shift forks were still in perfect shape, so reused those too
Can't forget the oil control orifices! That would be a very bad thing to leave out
Bottom end... complete!
After applying some assembly lube on all the crank bearings, install the lower crankcase
Torque all case bolts down to spec
Install oil pick-up and pressure release valve
Oil pan
Flip over and install oil cooler
Install shift shaft
Oil pump drive chain and sprockets
Install the outer clutch basket
Then the inner hub, then tighten the nut (94 lb. ft = FUN when the engine is out, lol)
My original (yes 177k mile original) clutch was still in great shape, so I reused it
Coat all the clutch friction and steel plates with clean engine oil before install
Install clutch pressure plate and springs, tighten to 9 lb.ft
Time to button up the top end
Cleaned the carbon off my original head and it cleaned up nicely
Easy does it when it comes to torquing a head. Lots of small increments is my preferred method
Final torque of 35 lb. ft (much better than the 245 lb. ft for the ARP head studs I usually do on the diesels, lol)
Install exhaust camshaft and line up timing marks
Install intake camshaft and line up timing marks
Gotta torque the cam hold down plate in the EXACT sequence numbered on the plate
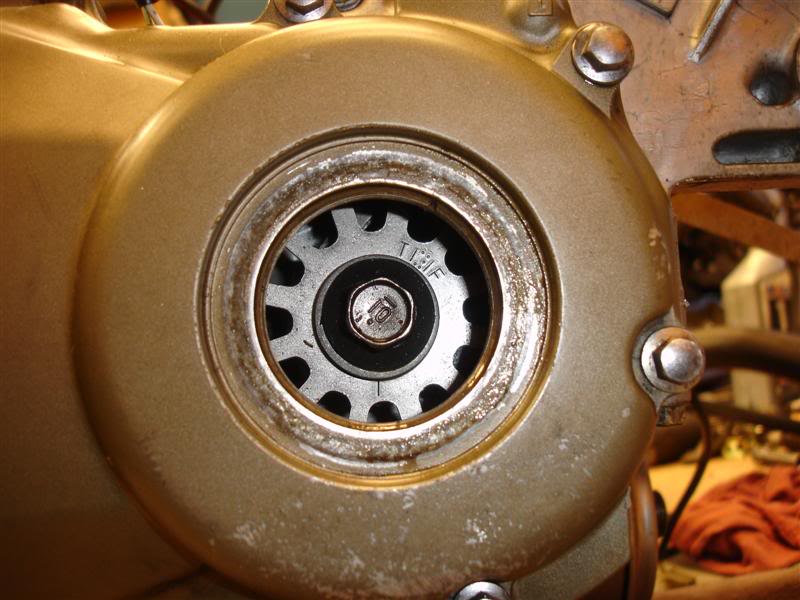
Rotate the engine slowly by hand to make sure no problems, then recheck timing to make sure it's dead on
And at the crank too
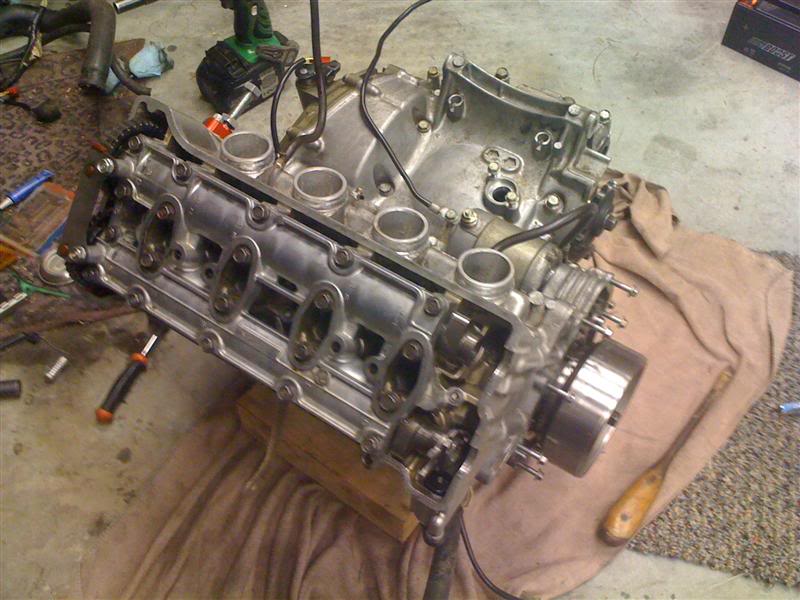
Looking like an engine again!
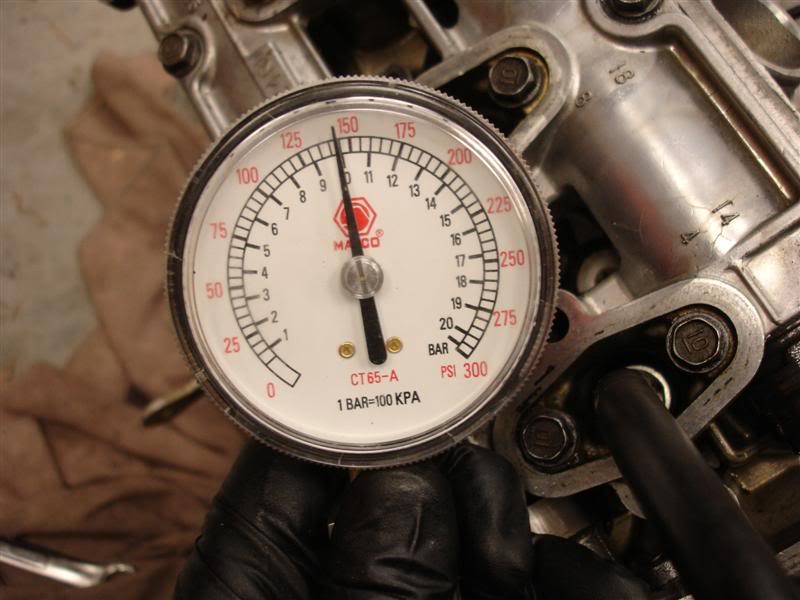
Do a quick compression test just to make sure no major problems. Not perfect, but for an engine that is cold (supposed to do it warm) and hasn't run yet, that's still pretty damn good
Install spark plugs

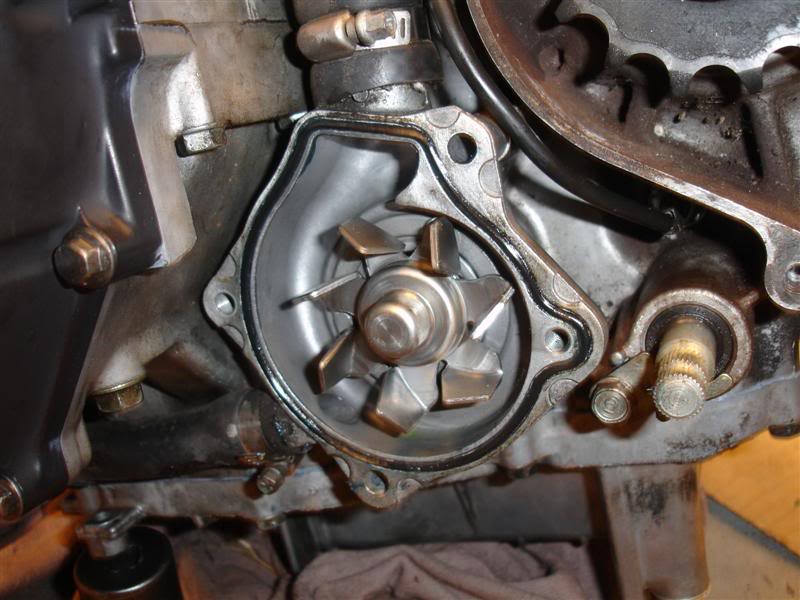
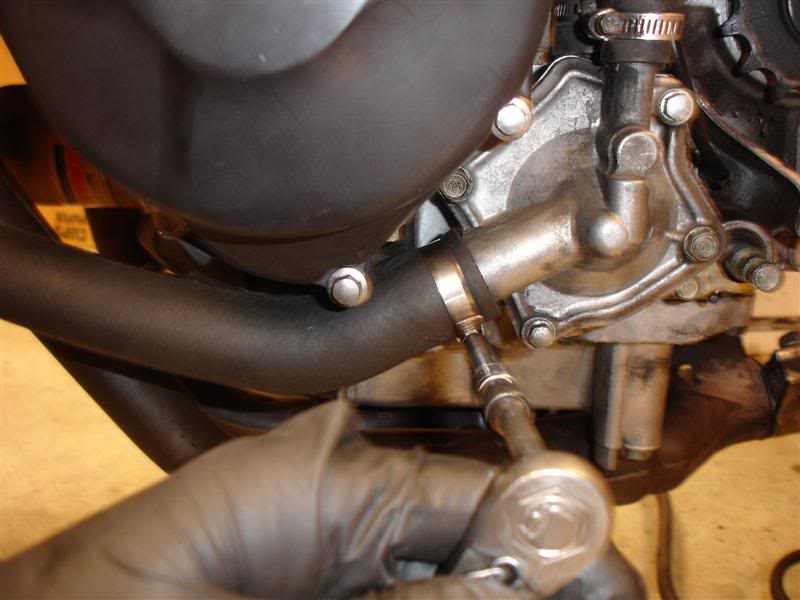
Reused my original water pump
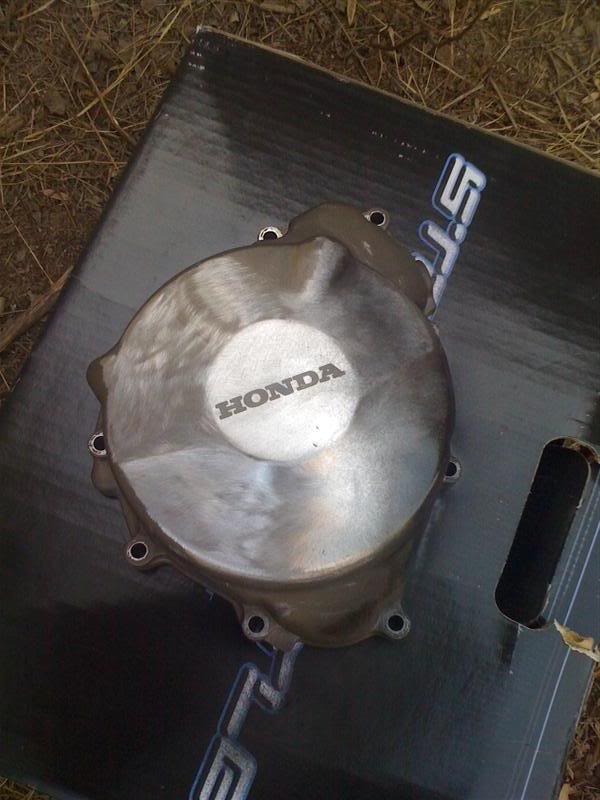
The stator cover that came on the new engine had some rash, so I sanded it down to remove the scratches
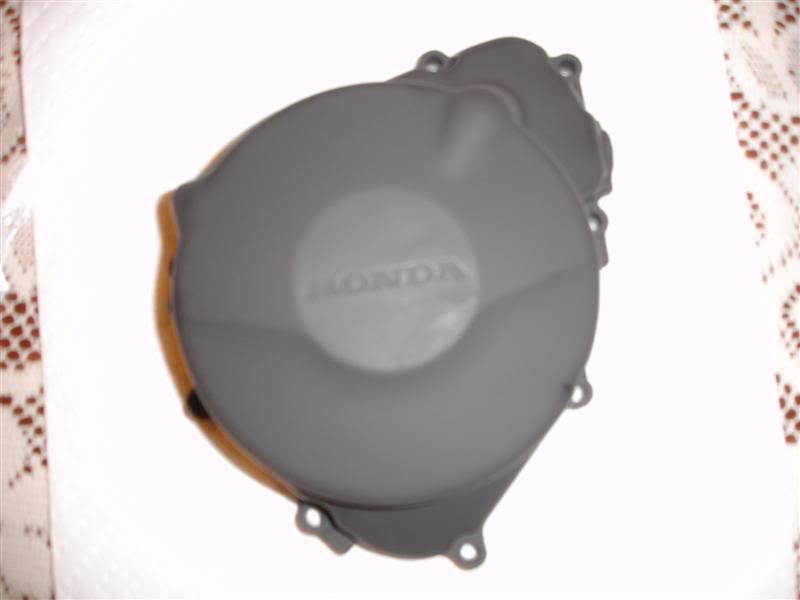
Then just painted it flat black with some hi-temp paint
Install the stator back in the cover
Install the stator and cover, valve cover, and thermostat housing and hoses, and she's complete, ready to go back in!

So I hung the ratchet straps from the rafters once again, and wheeled the bike into position

Get the engine into position
Slowly lower the frame down onto the engine
Annnnd.... she's in!
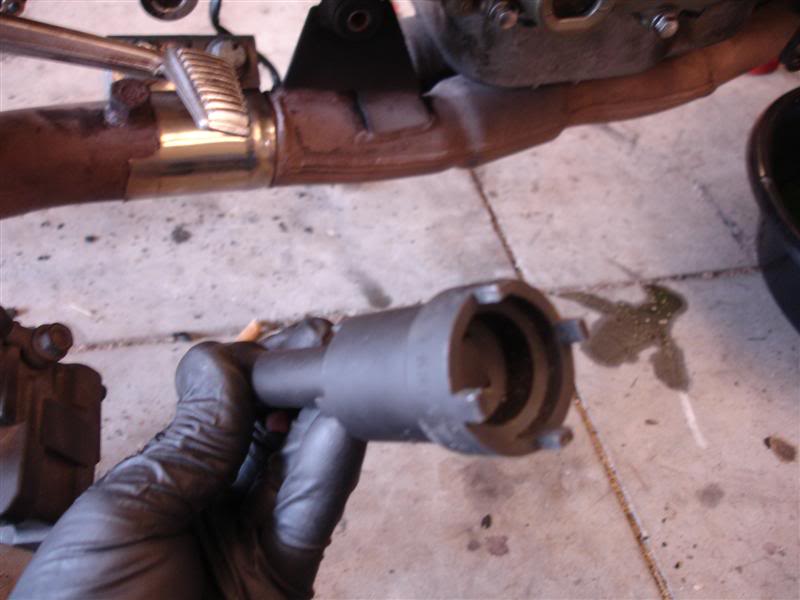
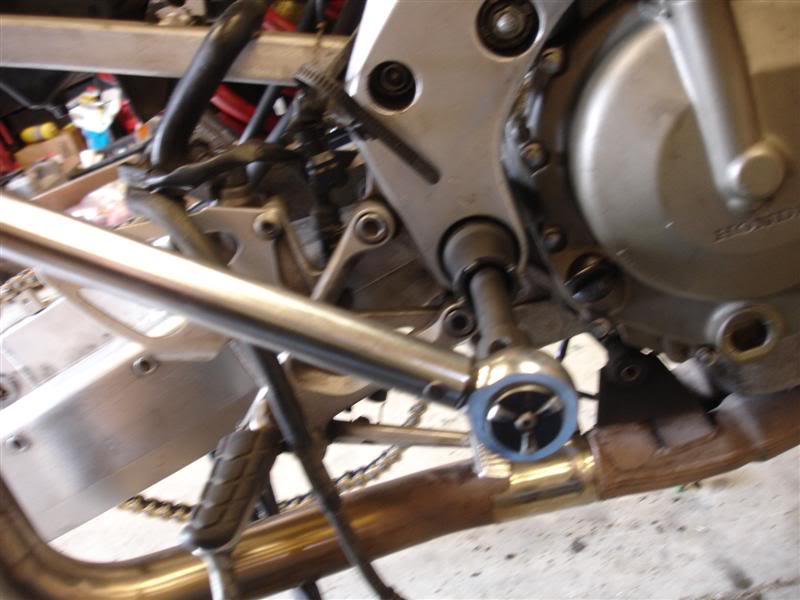
Gotta tighten the engine mount bolts in a certain sequence to center the engine, then use the special tool to tighten the adjuster lock nuts on the right side
Install the radiator
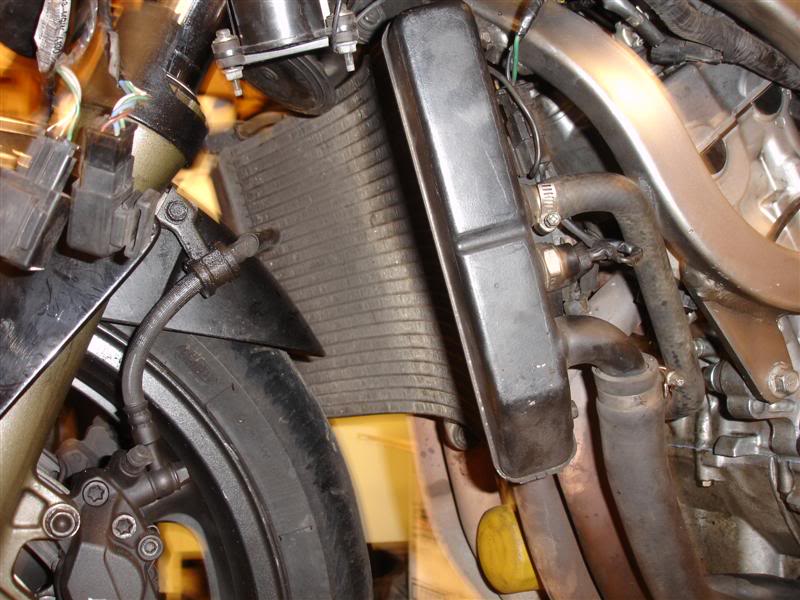
Tighten all coolant hose clamps
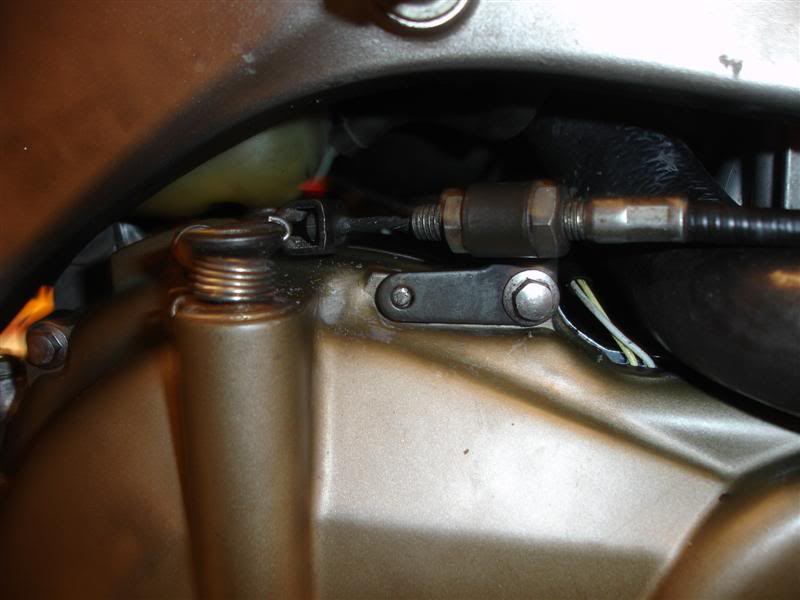
Attach clutch cable
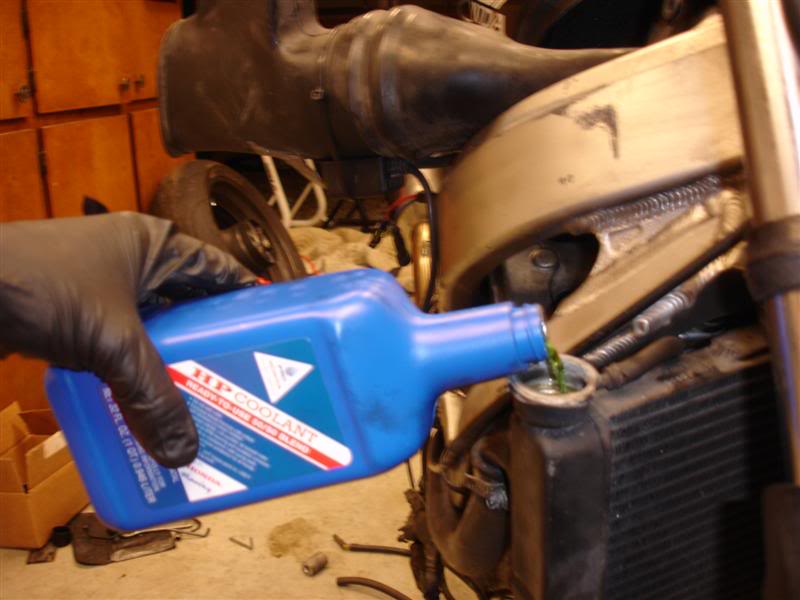
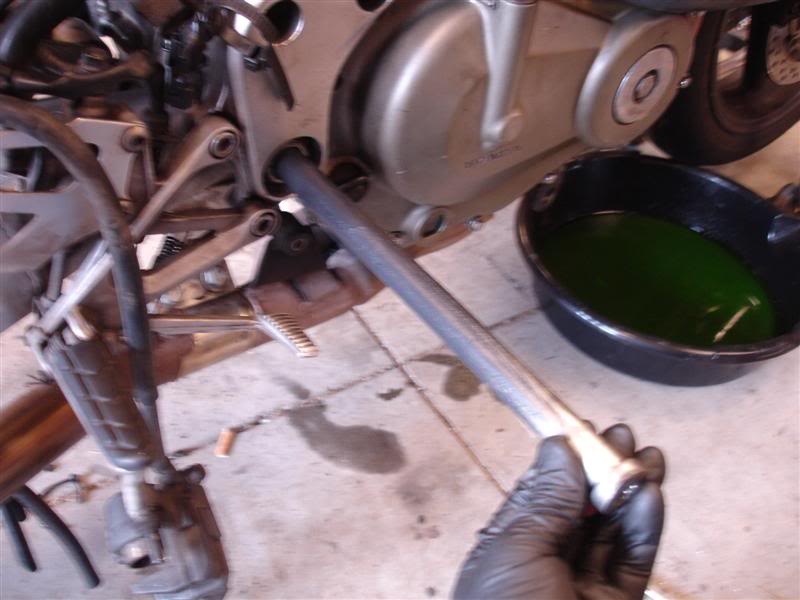
Fill it up with quality cooling juices
Never forget the lube
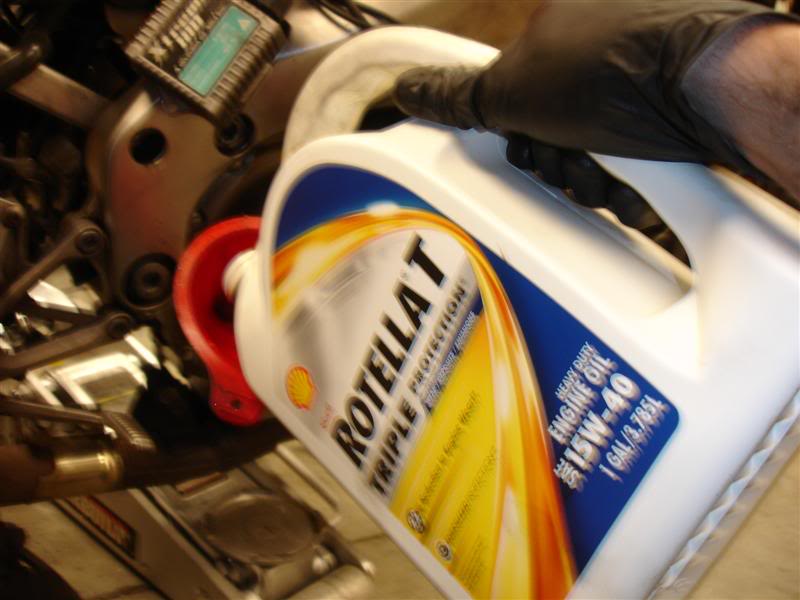
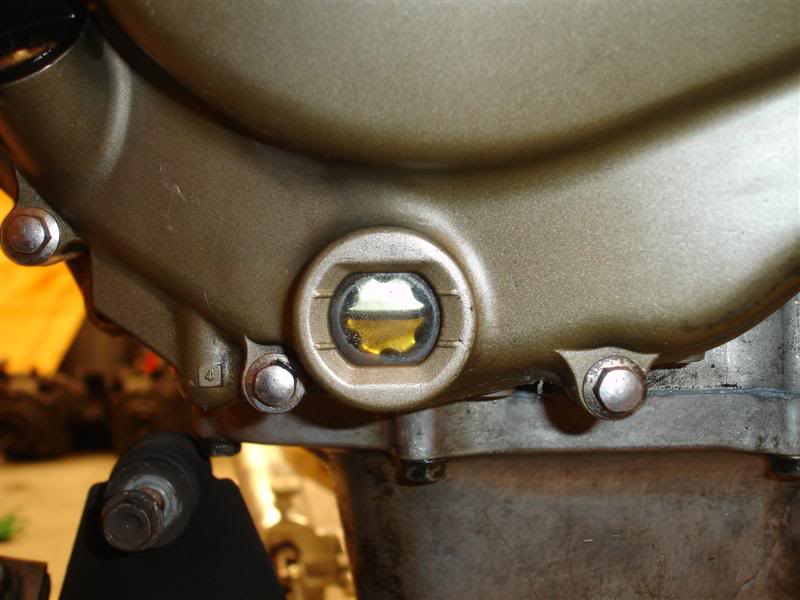
Double check level.... it takes a little more oil after a major surgery
By this point, the anticipation was absolutely KILLING me!! For the past 4 months, all I wanted to do was hear her run again. Cosmetics or anything else I wasn't worried about, I just wanted to hear her run. So I stopped there, made sure I had everything connected engine wise, bolted the exhaust on, and stuck the gas tank on. Had a gas can with a little bit of gas in it so I poured a little bit in the tank. I was just saying a prayer.... pleeeeeease start up, please start up! There were so many things running through my mind... "did I tighten that?".... "Did I remember to put that piece in?".... "Did I leave anything loose?"..... "I did put oil in right?"..... "What if it doesn't start?". Seriously all the "what if's" running through my mind at 100 mph. But, I connect the battery and all the lights come on and the fuel pump primes. I switch it off and on several times to fill up the lines with fuel. I had my fingers crossed and made this video..... it is indeed the very first attempt to start it. Watch and see!
YouTube - MOV01897.MPG
WoooooooooHooooooo!! Success!! Seriously, words can't describe how happy I was to hear her start right up and run.... perfectly. Both a huge sigh of relief, as well as a huge feeling of accomplishment, I was almost crying happy tears just to hear her run again, and something I assembled piece by piece with my own two hands. It's a feeling like no other!
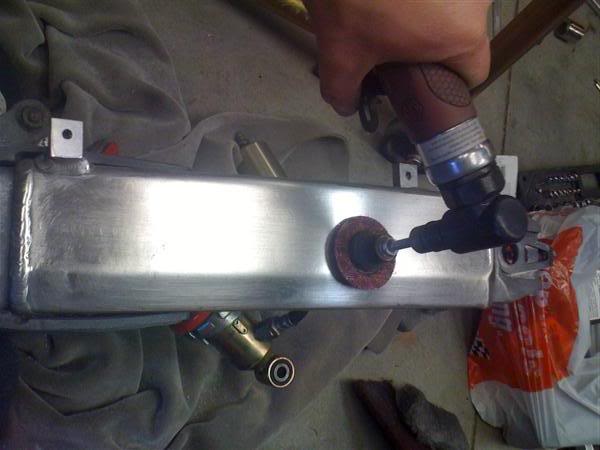
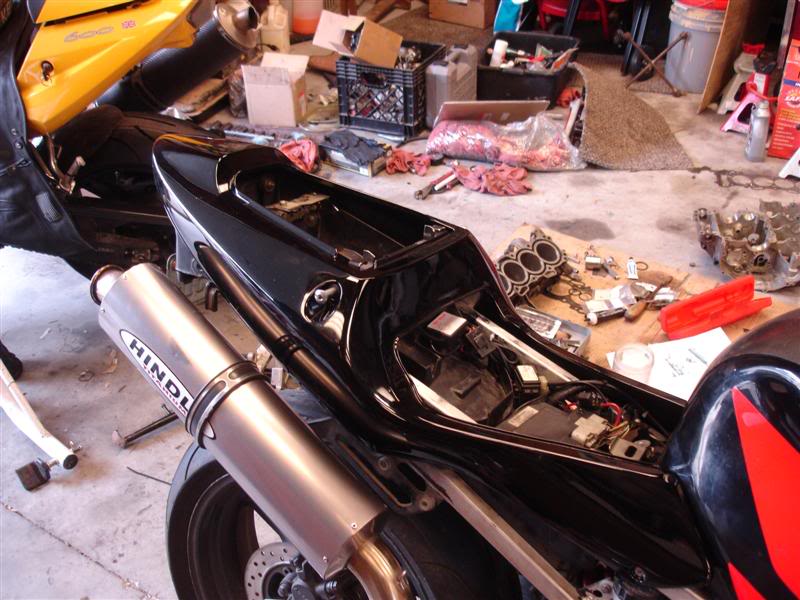
So.... after she was running like a champ, I moved on to other stuff. Remember the swingarm that was all rashed up??
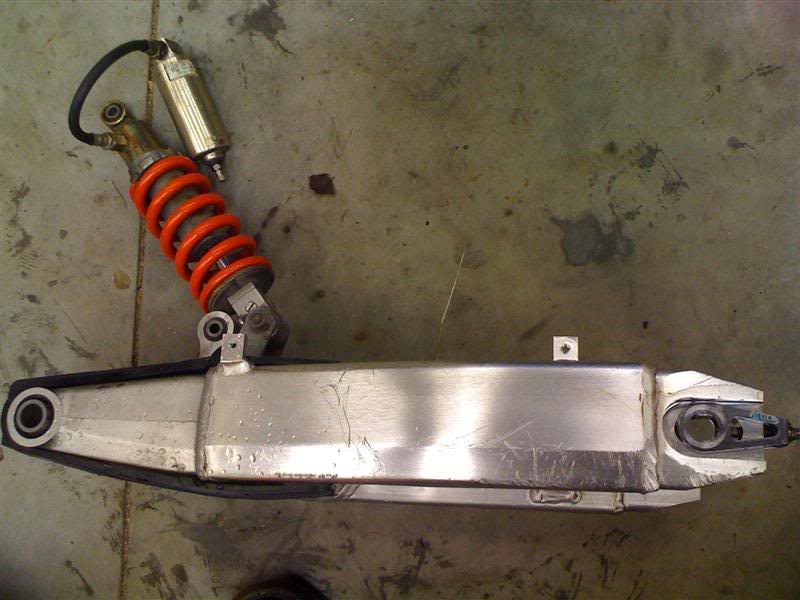
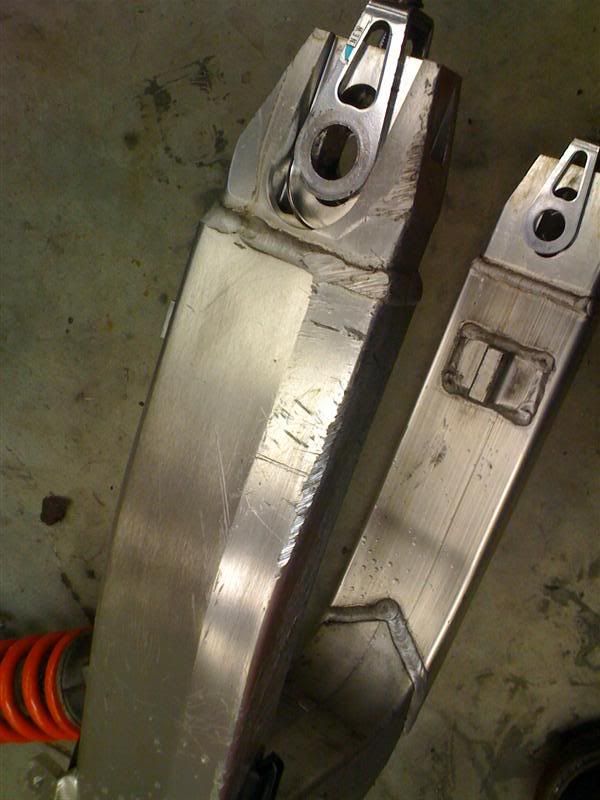
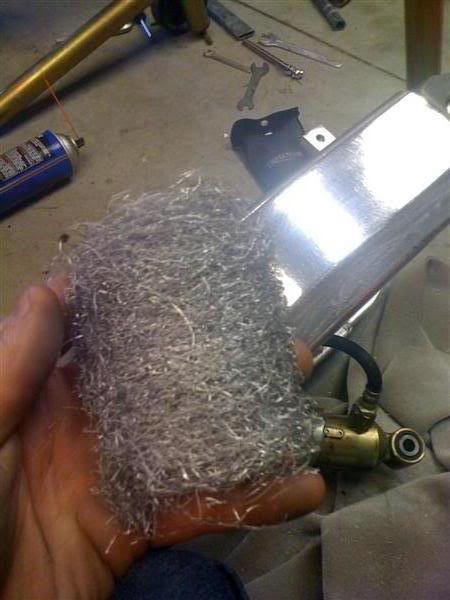
I sanded it down with my whiz wheel (same as the stator cover). It slowly shaves the metal down and removes the scratches little by little until they're gone
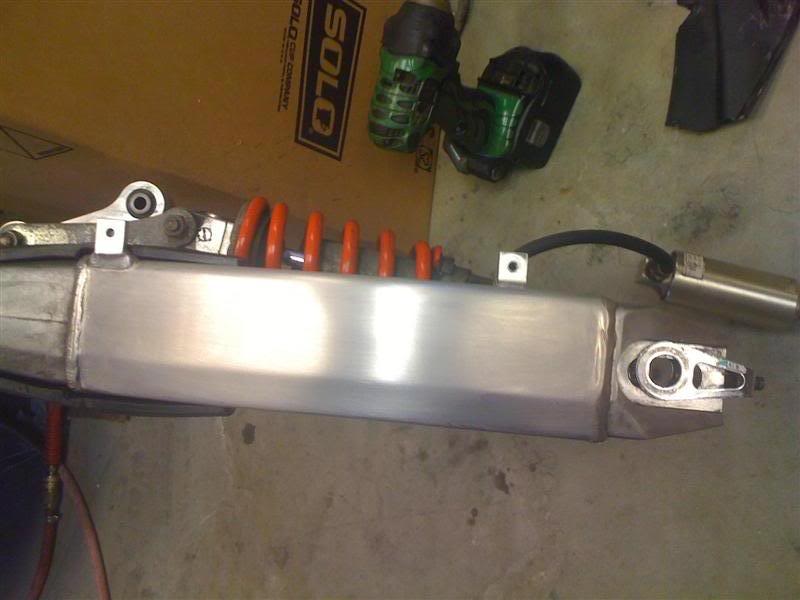
I then used some Mothers metal polish and an orbital buffer to smooth it down to a nice shine

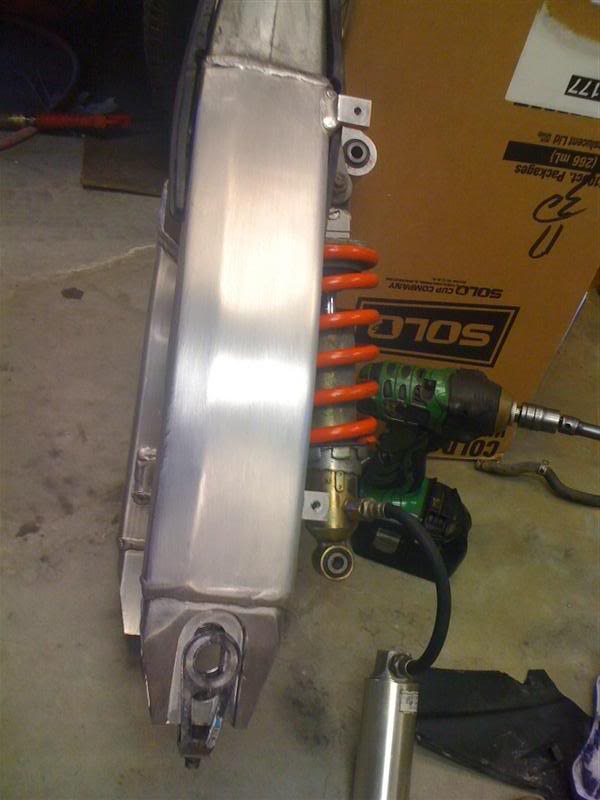
I then used course steel wool and hand sanded for about 3 hours, slowly removing any little scratches from the sanding, and giving it that brushed aluminum finish that was on it originally
It turned out pretty damn good if I do say so myself!
And at the crank too
Looking like an engine again!
Do a quick compression test just to make sure no major problems. Not perfect, but for an engine that is cold (supposed to do it warm) and hasn't run yet, that's still pretty damn good
Install spark plugs
Reused my original water pump
The stator cover that came on the new engine had some rash, so I sanded it down to remove the scratches
Then just painted it flat black with some hi-temp paint
Install the stator back in the cover
Install the stator and cover, valve cover, and thermostat housing and hoses, and she's complete, ready to go back in!
So I hung the ratchet straps from the rafters once again, and wheeled the bike into position
Get the engine into position
Slowly lower the frame down onto the engine
Annnnd.... she's in!
Gotta tighten the engine mount bolts in a certain sequence to center the engine, then use the special tool to tighten the adjuster lock nuts on the right side
Install the radiator
Tighten all coolant hose clamps
Attach clutch cable
Fill it up with quality cooling juices
Never forget the lube
Double check level.... it takes a little more oil after a major surgery
By this point, the anticipation was absolutely KILLING me!! For the past 4 months, all I wanted to do was hear her run again. Cosmetics or anything else I wasn't worried about, I just wanted to hear her run. So I stopped there, made sure I had everything connected engine wise, bolted the exhaust on, and stuck the gas tank on. Had a gas can with a little bit of gas in it so I poured a little bit in the tank. I was just saying a prayer.... pleeeeeease start up, please start up! There were so many things running through my mind... "did I tighten that?".... "Did I remember to put that piece in?".... "Did I leave anything loose?"..... "I did put oil in right?"..... "What if it doesn't start?". Seriously all the "what if's" running through my mind at 100 mph. But, I connect the battery and all the lights come on and the fuel pump primes. I switch it off and on several times to fill up the lines with fuel. I had my fingers crossed and made this video..... it is indeed the very first attempt to start it. Watch and see!
YouTube - MOV01897.MPG
WoooooooooHooooooo!! Success!! Seriously, words can't describe how happy I was to hear her start right up and run.... perfectly. Both a huge sigh of relief, as well as a huge feeling of accomplishment, I was almost crying happy tears just to hear her run again, and something I assembled piece by piece with my own two hands. It's a feeling like no other!
So.... after she was running like a champ, I moved on to other stuff. Remember the swingarm that was all rashed up??
I sanded it down with my whiz wheel (same as the stator cover). It slowly shaves the metal down and removes the scratches little by little until they're gone
I then used some Mothers metal polish and an orbital buffer to smooth it down to a nice shine
I then used course steel wool and hand sanded for about 3 hours, slowly removing any little scratches from the sanding, and giving it that brushed aluminum finish that was on it originally
It turned out pretty damn good if I do say so myself!
There's still a small bit of rash at the very bottom.... it was too deep I'd have to sand too much. It's alot better than it was though
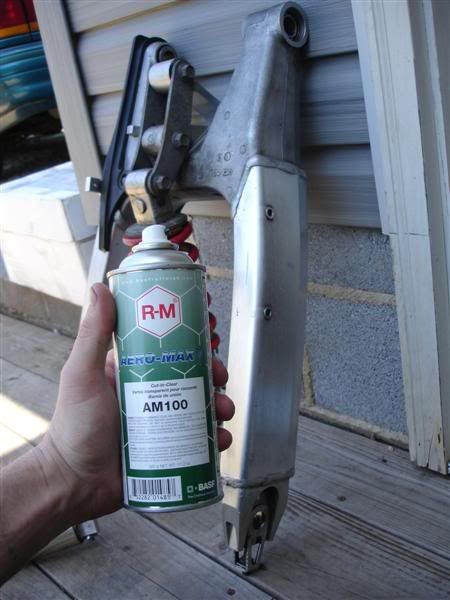
Apply several coats of commercial grade clear coat to protect the metal
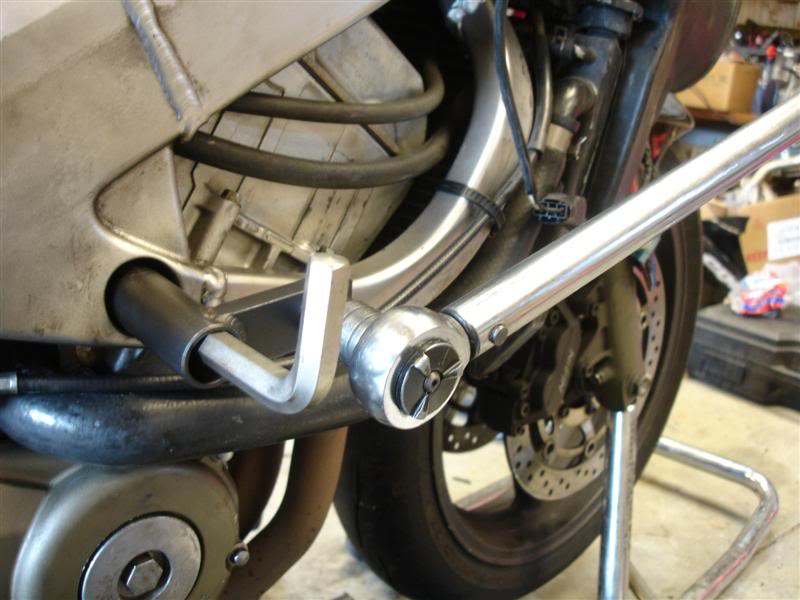
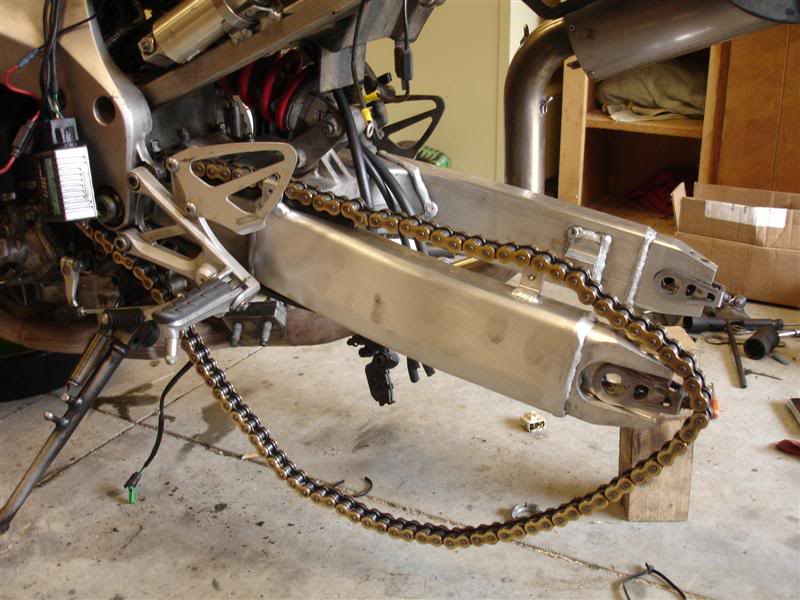
Install the swingarm on the bike
Hey sometimes you gotta get creative when you don't have a big enough hex bit, haha
Hey whatever works, right??
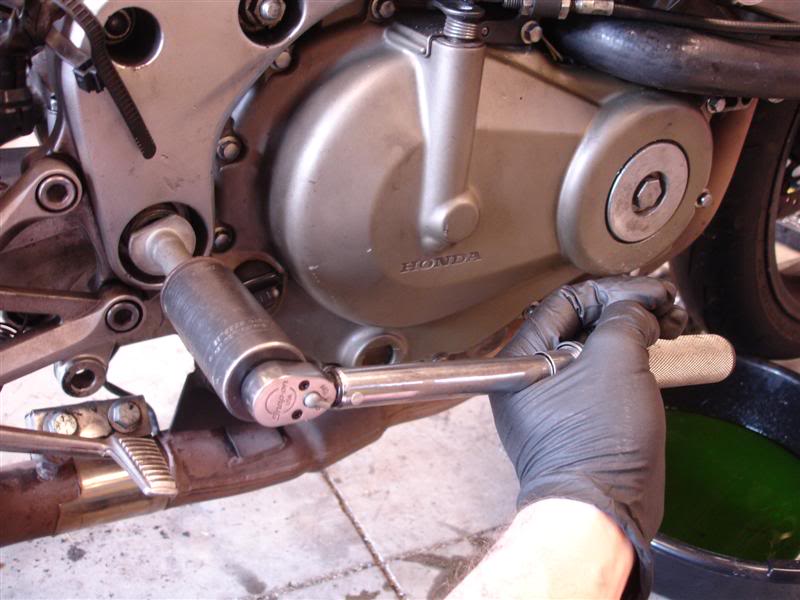
After centering the swingarm, use the special tool to tighten the adjuster lock nuts
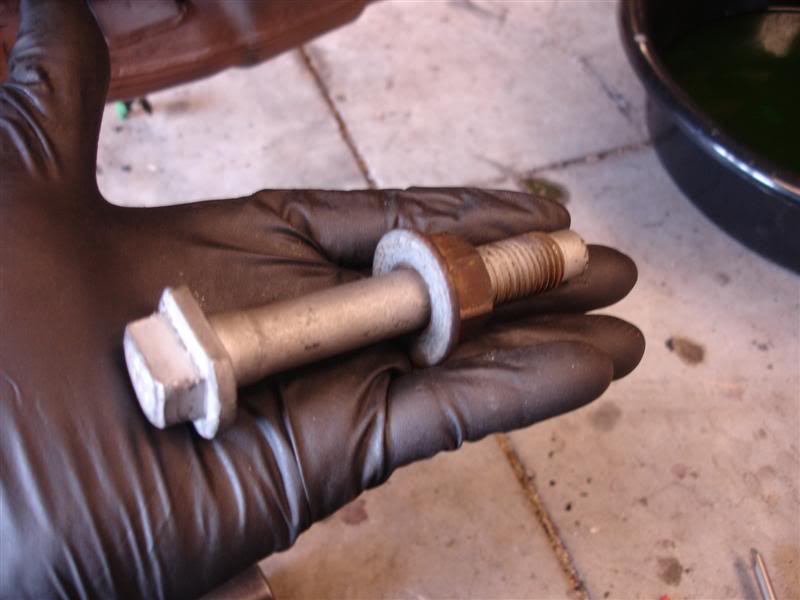
And of course the pivot bolt
Install rear wheel and rear brake caliper
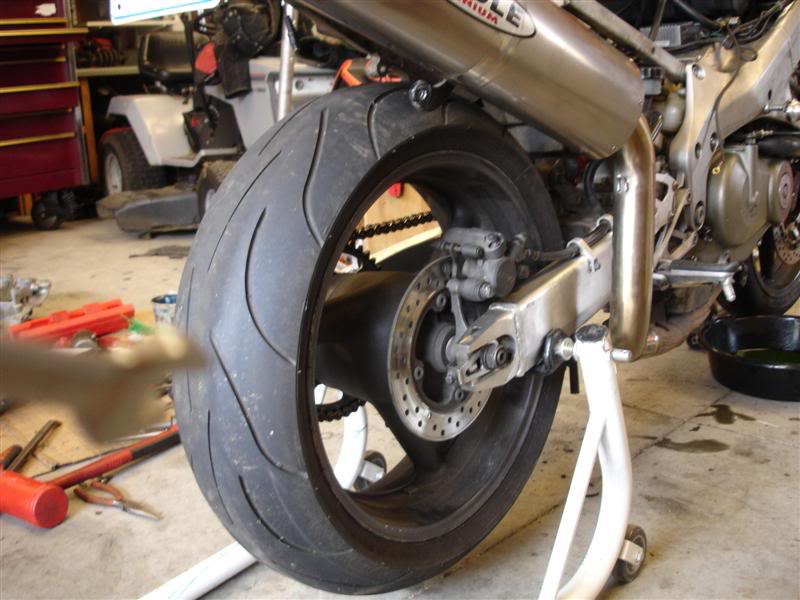
OMG... starting to look like a bike again!
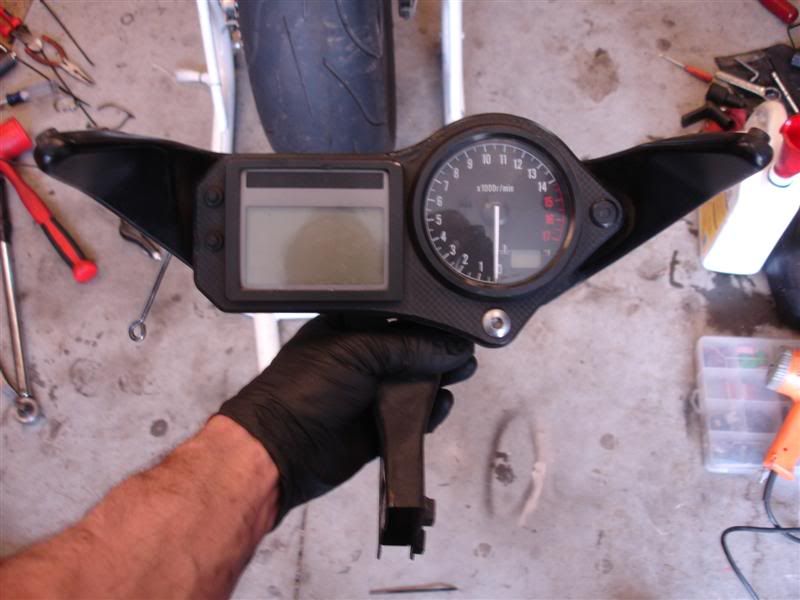
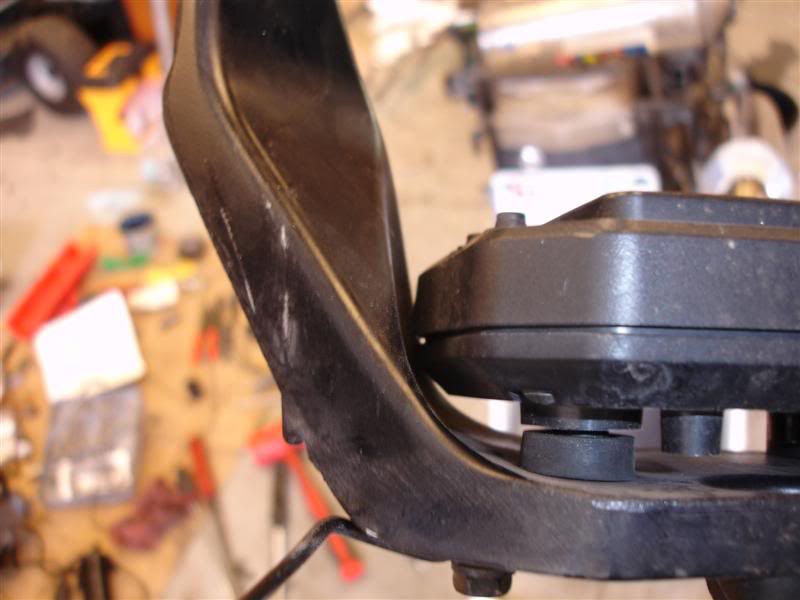
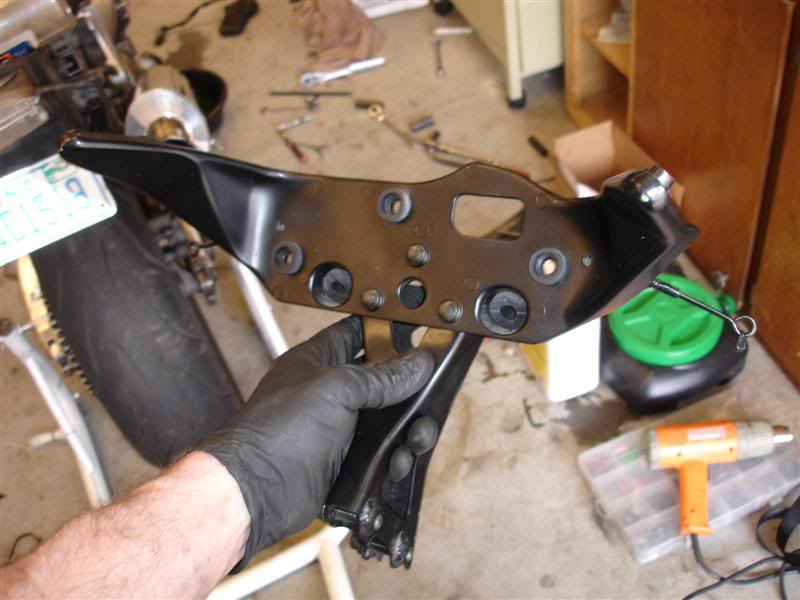
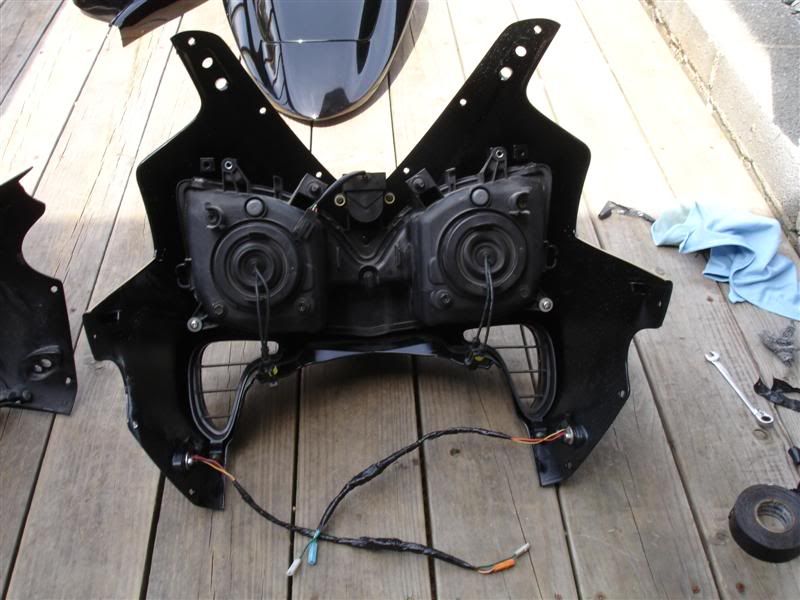
My fairing stay was tweaked just a little bit, mostly on the left side
So I replaced that too
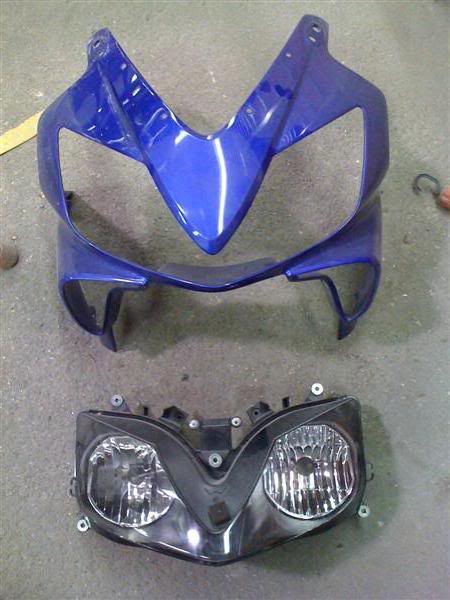
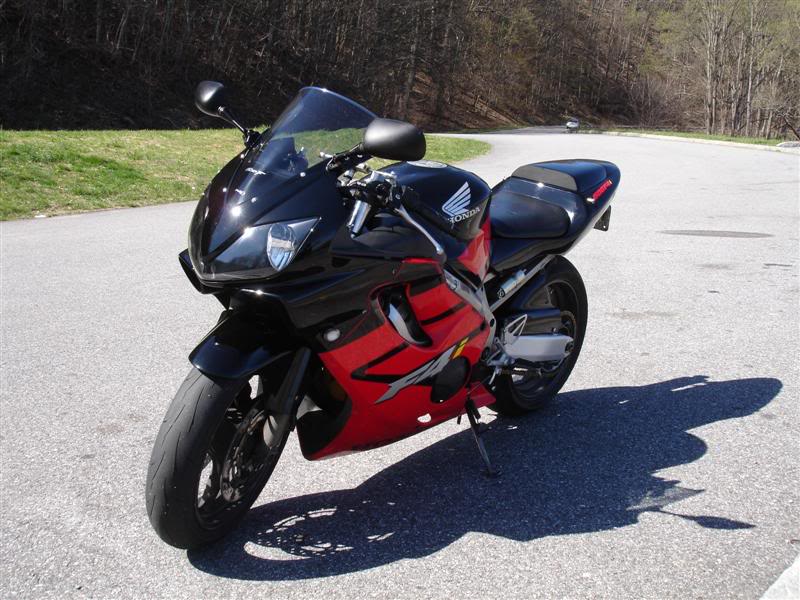
Now.... my plastics!! I got them back from the body shop, and they turned out fantastic! They repaired the small crack in the upper fairing, fixed some rash and cracks in the tail fairing, and fixed a big rock chip in the hugger, then painted them all black. The headlight had a tiny scratch so he sanded that down and got it nice and clear again. Solo seat cowl was red prior, they painted that black too. All of this cost me.... nothing. I tried to pay them, they don't take it, not even for paint. Good thing for having buddies in the body shop who are also riders themselves, huh?? LOL

Got my HID bulbs and Proton flushies transferred over to the new headlight
Front and side fairings installed
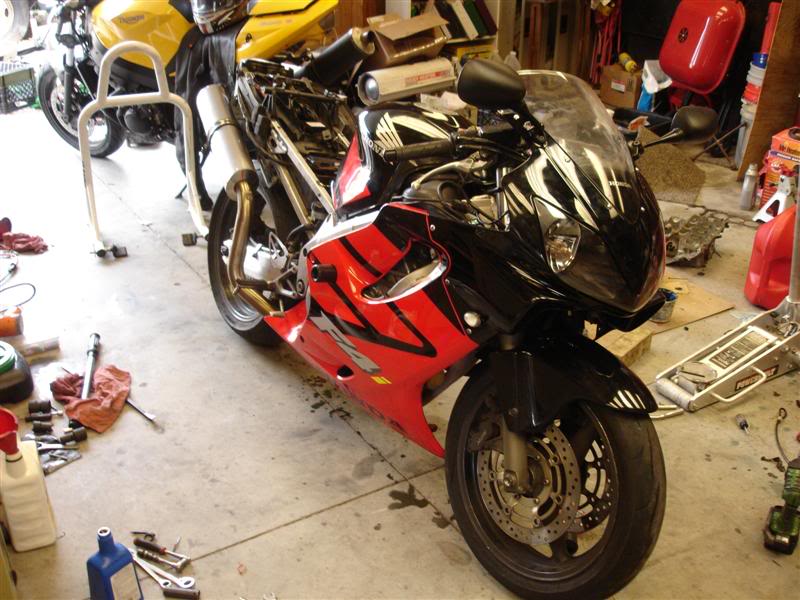
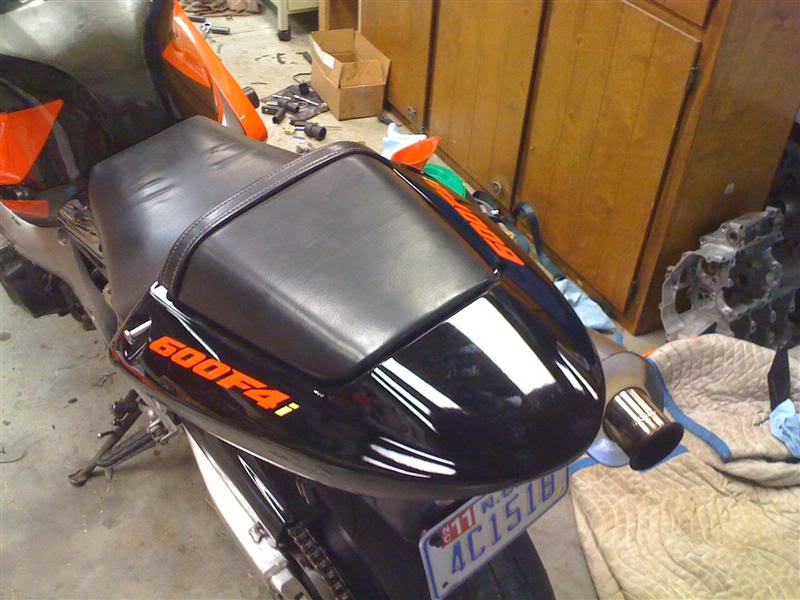
Tail installed
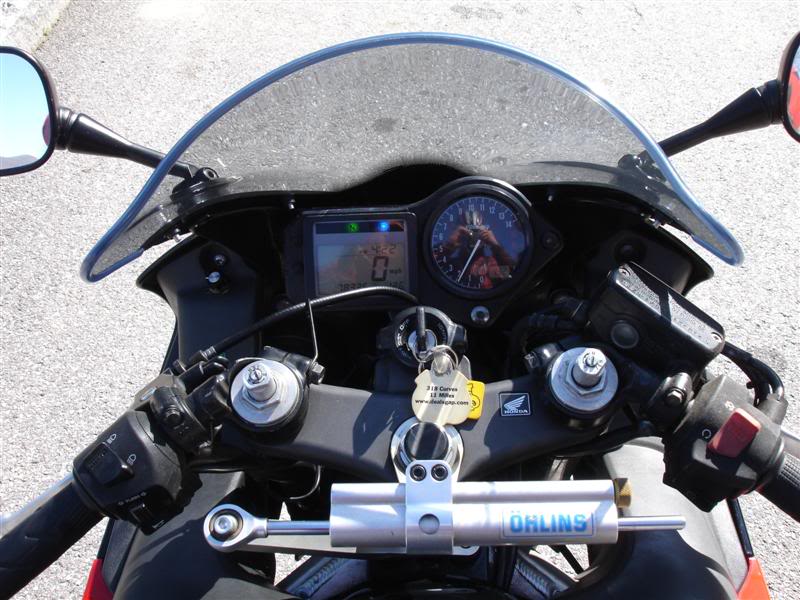
Well... she's back together!! Only things I was missing here were my Puig DB windscreen and the left side fairing. Waiting for both of them to arrive in the mail, but damn it I wanted to go ride! Still had my stock windscreen so I put that on, and everything was tight enough without the left side fairing, so screw it, lol. So... Sat April 3rd around 5pm or so, letting her warm up, about to go take our maiden voyage!

Rode around town staying close to home just to be safe, incase anything went wrong. Everything was perfect though.... temp was staying where it should, plenty of power, everything was smooth and crisp, no vibrations... nothing. So I get on the highway for a short bit...all good there! Make my way up to the Blue Ridge Parkway. Made a quick video just to show how good she's running. Ended up logging 110 miles before the night was over
YouTube - MOV01943.MPG
Several days later my windscreen and left fairing show up in the mail
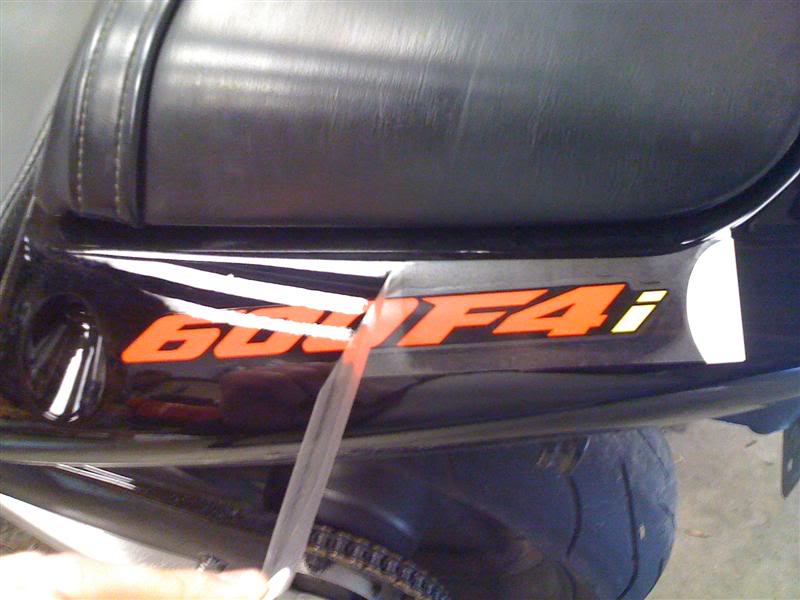
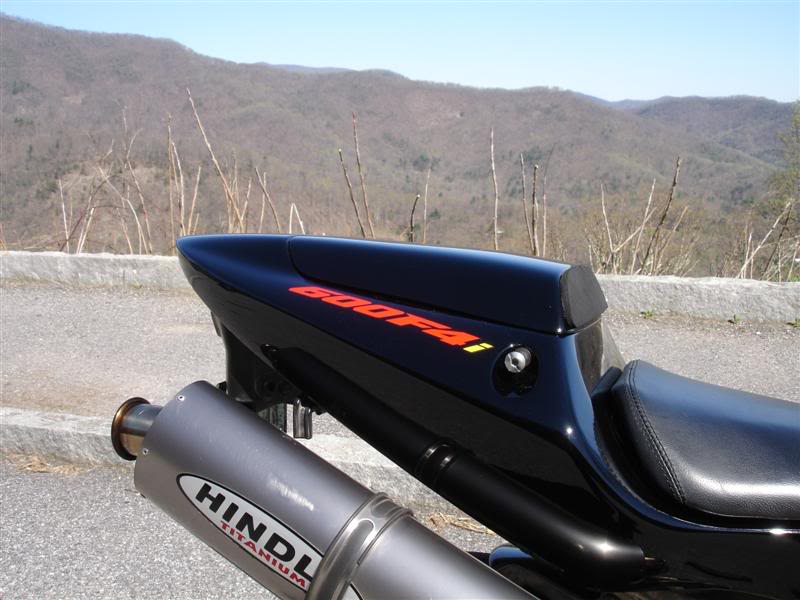
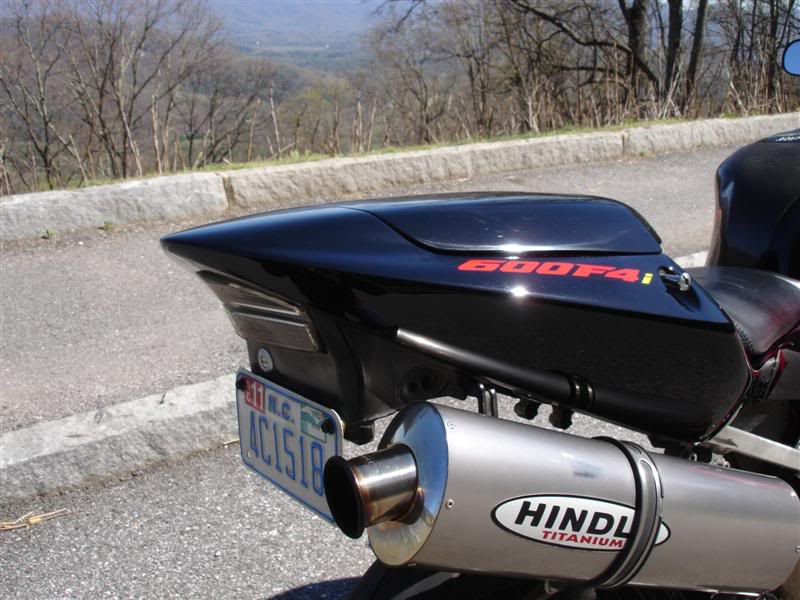
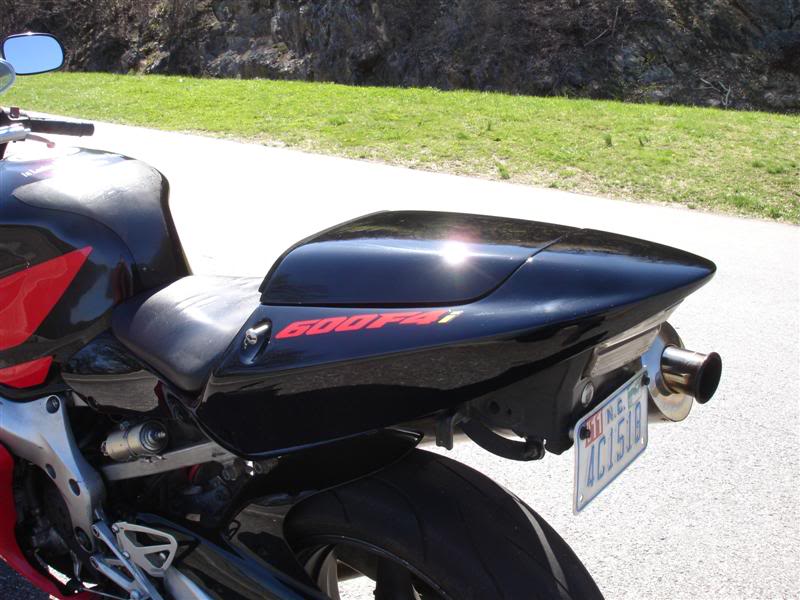
I've always been one for a clean stock look, so I put the decals back on (still waiting on the ones for the front upper... they were on backorder)
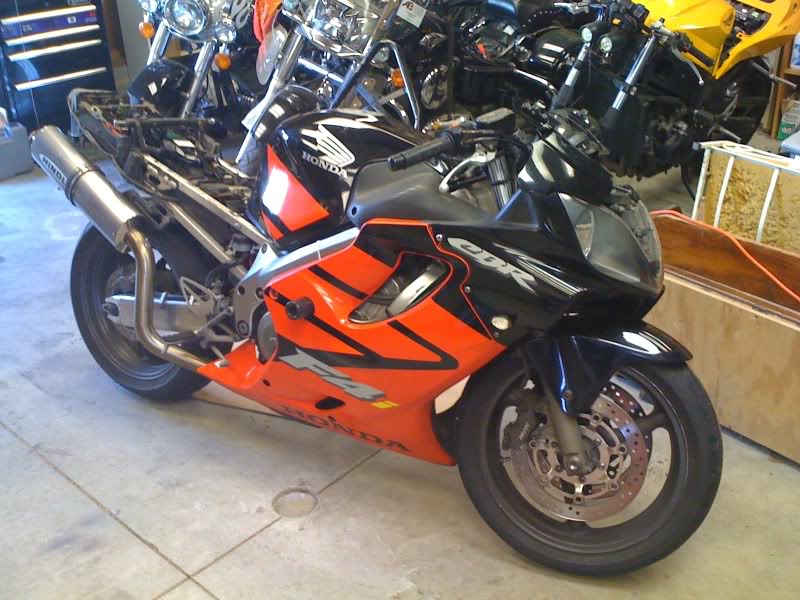
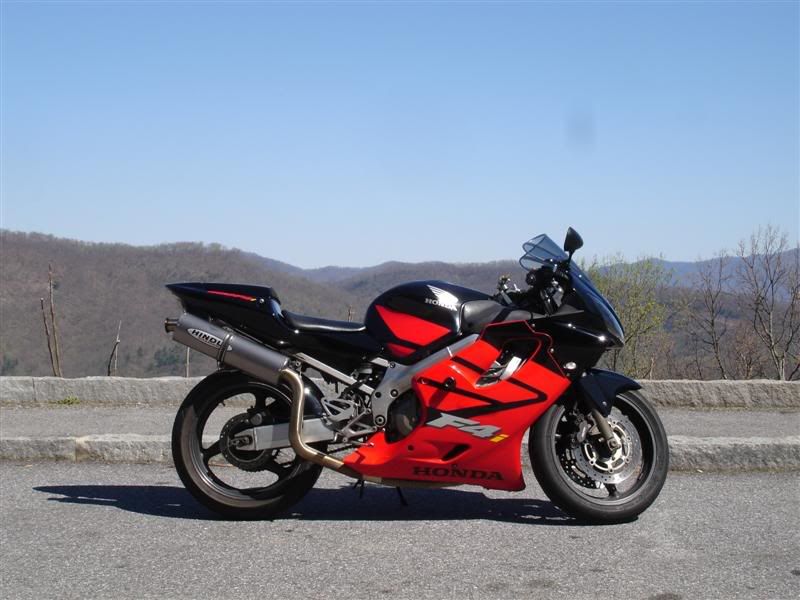
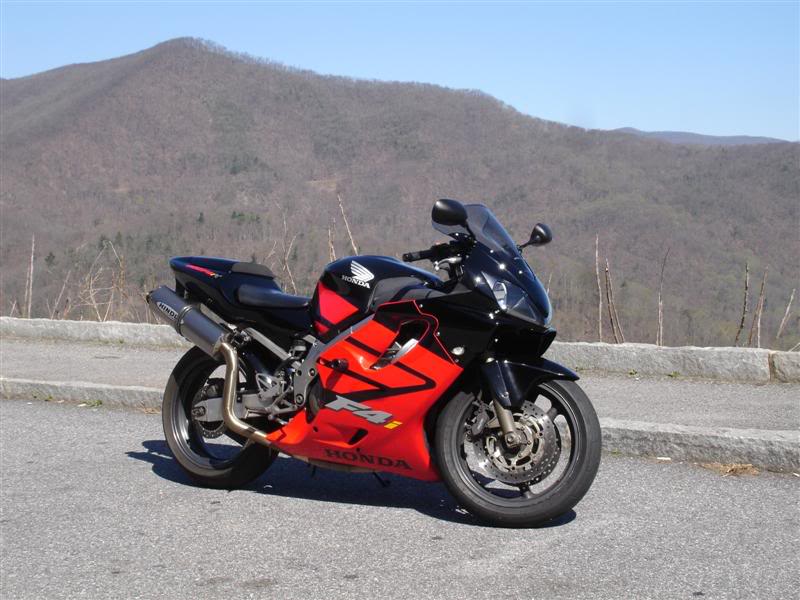
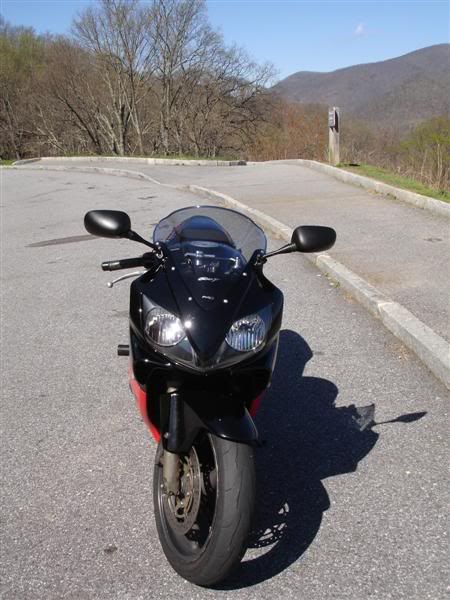
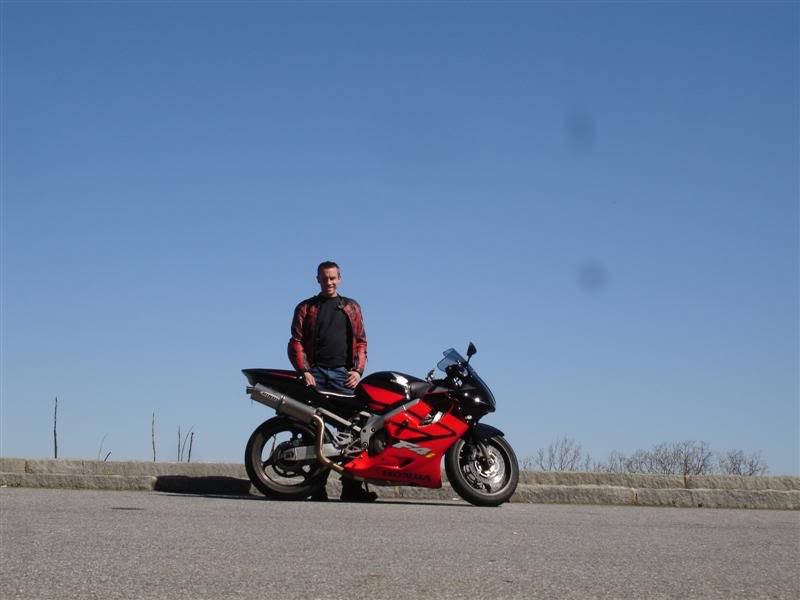
So today I had everything all done and got her all cleaned up. I took her up to that special place up on the BRP for some quality pix. Here's the ending result of my past 4 months of work
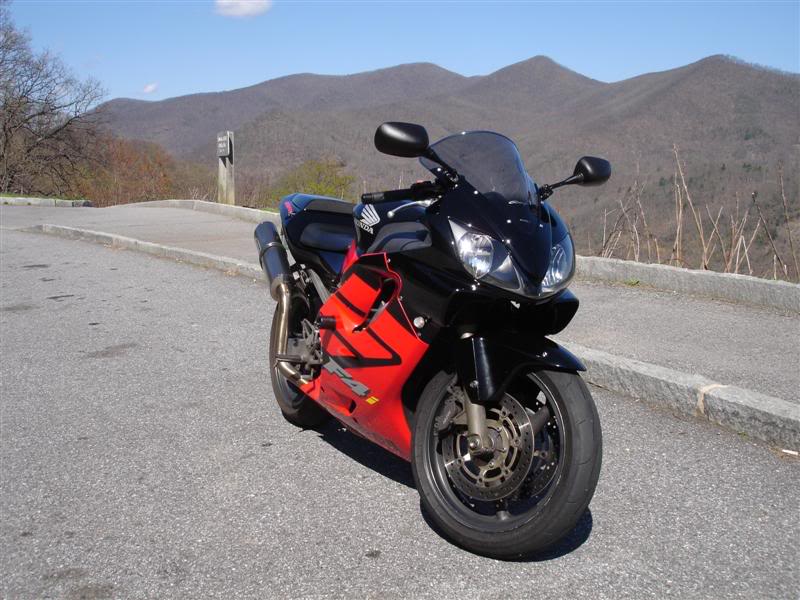
I still need to get a 'new' left side fairing... this was just a cheapo ebay one to cover it up for now. Couldn't spend the $400 right now, ugh
I'm damn proud of how well the swingarm came out, hahah
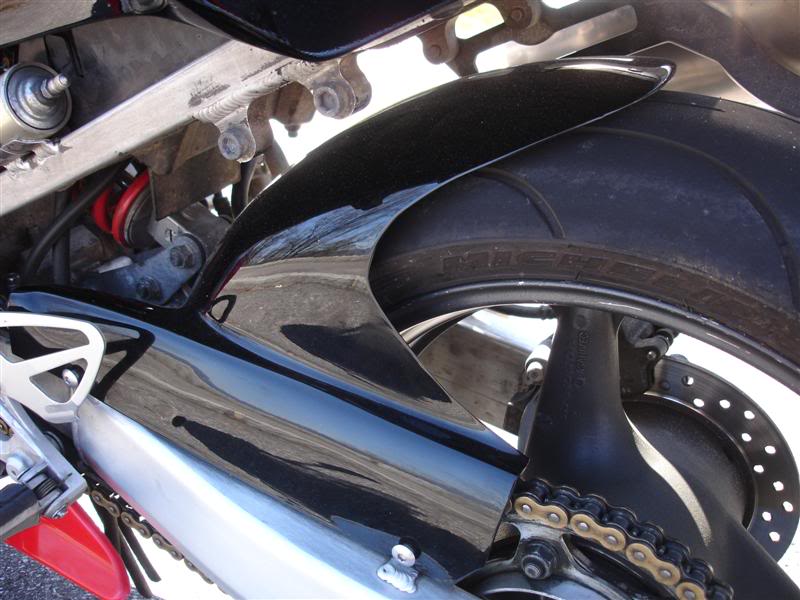
New rear hugger.... been wanting one of these forever

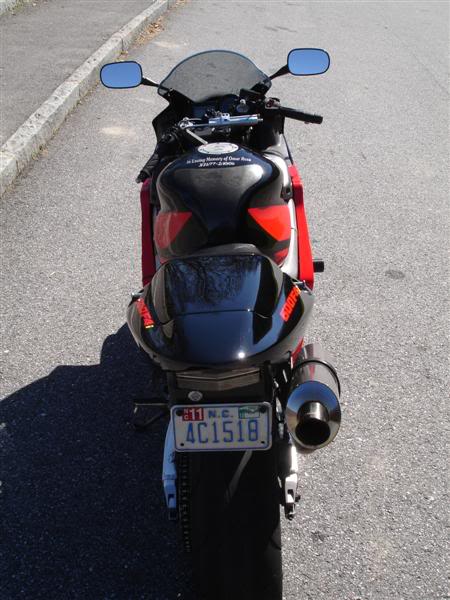
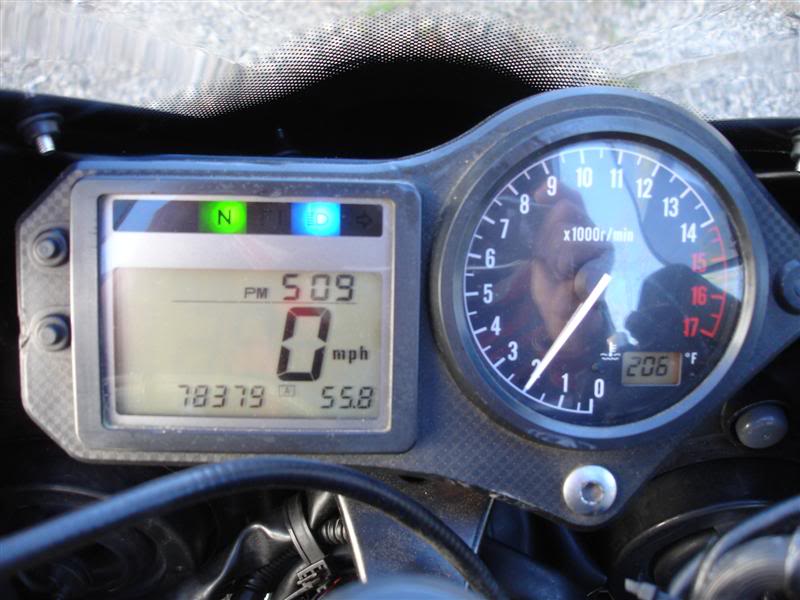
The wreck happened at exactly 177,428 miles..... been riding her for about 5.5 days now and logged exactly 951 miles. Still running absolutely perfect, and haven't had a single problem! First full tank of fuel I burned through I got 42.87 MPG, so I would venture to say she's running pretty good!
And last but not least..... one INCREDIBLY happy thirdgenlxi
Phew.... that's all the pics! Thank god, I've been typing this for about 5 hours now, and really getting a headache, lol. But yea, everything ended up working out in the end, and I'm just happy to have my baby back, and still running on about 95% of her original engine. I swapped EVERYTHING from my old engine to the new block, everything down to the neutral indicator switch, oil pressure sensor, and thermostat housing. Only parts used from the new engine were the block, crank and crank bearings, and starter (mine started giving probs after I took it out). Every other part in or on the engine.... original. It may not be 100% anymore like it was, but hey, given the situation I think it's the best solution I had to keep her as original as I possibly could. And it worked! And for all the people that kept telling me it wasn't worth it, and it was gonna cost more to fix it than it would be to buy a new bike, hear this: Grand total for EVERYTHING I did was right at $1100. I used the remaining $2200 to pay off a $2200 credit card debt that's been hanging over my head for waaaayyyy too long now, so it's completely gone. So now I have MY bike back, and no debt at all.... I think I like my way of handling this situation a little better than alot of the responses I got, lol. Plus I've got a box full of engine parts to sell, maybe make a few bucks back!
Anyways, hope you all enjoyed the pics! Sorry if I made your computer crash. Roadtrip pics will be soon to follow!
Apply several coats of commercial grade clear coat to protect the metal
Install the swingarm on the bike
Hey sometimes you gotta get creative when you don't have a big enough hex bit, haha
Hey whatever works, right??
After centering the swingarm, use the special tool to tighten the adjuster lock nuts
And of course the pivot bolt
Install rear wheel and rear brake caliper
OMG... starting to look like a bike again!
My fairing stay was tweaked just a little bit, mostly on the left side
So I replaced that too
Now.... my plastics!! I got them back from the body shop, and they turned out fantastic! They repaired the small crack in the upper fairing, fixed some rash and cracks in the tail fairing, and fixed a big rock chip in the hugger, then painted them all black. The headlight had a tiny scratch so he sanded that down and got it nice and clear again. Solo seat cowl was red prior, they painted that black too. All of this cost me.... nothing. I tried to pay them, they don't take it, not even for paint. Good thing for having buddies in the body shop who are also riders themselves, huh?? LOL
Got my HID bulbs and Proton flushies transferred over to the new headlight
Front and side fairings installed
Tail installed
Well... she's back together!! Only things I was missing here were my Puig DB windscreen and the left side fairing. Waiting for both of them to arrive in the mail, but damn it I wanted to go ride! Still had my stock windscreen so I put that on, and everything was tight enough without the left side fairing, so screw it, lol. So... Sat April 3rd around 5pm or so, letting her warm up, about to go take our maiden voyage!
Rode around town staying close to home just to be safe, incase anything went wrong. Everything was perfect though.... temp was staying where it should, plenty of power, everything was smooth and crisp, no vibrations... nothing. So I get on the highway for a short bit...all good there! Make my way up to the Blue Ridge Parkway. Made a quick video just to show how good she's running. Ended up logging 110 miles before the night was over
YouTube - MOV01943.MPG
Several days later my windscreen and left fairing show up in the mail
I've always been one for a clean stock look, so I put the decals back on (still waiting on the ones for the front upper... they were on backorder)
So today I had everything all done and got her all cleaned up. I took her up to that special place up on the BRP for some quality pix. Here's the ending result of my past 4 months of work
I still need to get a 'new' left side fairing... this was just a cheapo ebay one to cover it up for now. Couldn't spend the $400 right now, ugh
I'm damn proud of how well the swingarm came out, hahah
New rear hugger.... been wanting one of these forever
The wreck happened at exactly 177,428 miles..... been riding her for about 5.5 days now and logged exactly 951 miles. Still running absolutely perfect, and haven't had a single problem! First full tank of fuel I burned through I got 42.87 MPG, so I would venture to say she's running pretty good!
And last but not least..... one INCREDIBLY happy thirdgenlxi
Phew.... that's all the pics! Thank god, I've been typing this for about 5 hours now, and really getting a headache, lol. But yea, everything ended up working out in the end, and I'm just happy to have my baby back, and still running on about 95% of her original engine. I swapped EVERYTHING from my old engine to the new block, everything down to the neutral indicator switch, oil pressure sensor, and thermostat housing. Only parts used from the new engine were the block, crank and crank bearings, and starter (mine started giving probs after I took it out). Every other part in or on the engine.... original. It may not be 100% anymore like it was, but hey, given the situation I think it's the best solution I had to keep her as original as I possibly could. And it worked! And for all the people that kept telling me it wasn't worth it, and it was gonna cost more to fix it than it would be to buy a new bike, hear this: Grand total for EVERYTHING I did was right at $1100. I used the remaining $2200 to pay off a $2200 credit card debt that's been hanging over my head for waaaayyyy too long now, so it's completely gone. So now I have MY bike back, and no debt at all.... I think I like my way of handling this situation a little better than alot of the responses I got, lol. Plus I've got a box full of engine parts to sell, maybe make a few bucks back!
Anyways, hope you all enjoyed the pics! Sorry if I made your computer crash. Roadtrip pics will be soon to follow!

Senior Member
Joined: Nov 2009
Posts: 374
Likes: 0
From: Wisconsin Rapids, Wi
I was hoping that bike would get back on the road one of these days. I don't think my first bike will last that long though, already has a few nails in the coffin, bad maintainance from a previous owner and the tranny is starting to act up.

Super Moderator and Official Welcome Crew Yeti
Joined: Jun 2005
Posts: 2,066
Likes: 6
From: Souf Cackilack
tg - good to hear she's back up and running. that old workhorse deserved a fresh lease on life  . great seeing all the detailed pics along the way too. here's to another 177k miles!
. great seeing all the detailed pics along the way too. here's to another 177k miles!

Official Welcome Crew
Joined: Nov 2009
Posts: 1,641
Likes: 2
From: Long Island, New York
What an awesome write up! I have torn down a few car engines, but never a bike.. so for me it was very cool to 'see inside'. The bike came out great.. maybe better than before....
With those tail decals, did you get new stock ones or did you go aftermarket like replicals or xtremedecals or tapeworx? I'm curious because I want to replace mine (PO took them off).
Adam
With those tail decals, did you get new stock ones or did you go aftermarket like replicals or xtremedecals or tapeworx? I'm curious because I want to replace mine (PO took them off).
Adam
Senior Member
Joined: Jul 2009
Posts: 4,471
Likes: 4
From: West Philly, PA!
Eye-opening. Much much much further into the engine than I'd dare to go. And seeing how the 177k engine was equal / better shape than the 15k one in so many areas.
Ever thought of opening your own shop? Just on the weekends or whenever you felt like working? Pretty sure people would gladly sit on a waiting list for the 2 hrs a month you decided to open it.
Ever thought of opening your own shop? Just on the weekends or whenever you felt like working? Pretty sure people would gladly sit on a waiting list for the 2 hrs a month you decided to open it.