
The story of one neglected Triumph...


Super Moderator
Joined: Mar 2013
Posts: 7,178
Likes: 404
From: Alabama
I kinda like your ebay option better than what you currently have on the bike. Like you said, the existing one has a little bit of a steam punk thing happening, which isn't bad. But I don't think it blends very well with the rest of what you are building.

Thread Starter
|
Retired Super Moderator, Tin Star Man & Hurricane Saloon Prospect, ROTM Feb 2015
Joined: Sep 2011
Posts: 2,382
Likes: 5
From: V��ksy, Finland
Yea I guess sometimes it`s just better to admit defeat, count your losses and move on... I did lose two functioning mufflers when I chopped them apart but the first one where the sleeve was from, was already a half of a double barrel muffler, and the OEM one that I ordered from the UK was ridiculously big, like a field gun strapped to my side! And hey, never try, never learn.
I did some more research on the Danmoto exhaust and found some videos to take comparison. The few Triumph vids I found were so poor quality you cannot make anything of them but this one fitted on a CBR600 F4 gives you a very good idea of the exhaust. It`s a little bigger than I thought which is not a bad thing at all as I was fearing it would look like something that fell off a 150cc Hyosung or something, I really like the look, and I really like the throaty rumble it makes, but from the vid it seems to be quite loud. I went through quite a few of the ads in ebay as there seems to be a new trend how to lure customers which is promise free delivery for example for all inland UK deliveries, but when you take a closer look the item is sent from chinchong, Tzatzikistan. Anyway I do remember seeing someone offering a baffle as an accessory which I`d probly need so I gotta either order the can from someone that offers that too, or order one straight from danmoto. Or make one myself, it`s not hard but a ready one made-to-fit would always look better...
Here`s some ear-candy for your listening pleasure:
Last edited by Mattson; Jan 11, 2015 at 03:45 PM.
Thread Starter
|
Retired Super Moderator, Tin Star Man & Hurricane Saloon Prospect, ROTM Feb 2015
Joined: Sep 2011
Posts: 2,382
Likes: 5
From: V��ksy, Finland
One step forward two steps back...
I finally figured out how to make the speedo to work, or rather why it did not work before even though all the wires were connected as instructed. Or so I thought. One wire was missing completely as it came from the oem gauge cluster, and that wire happened to be the power supply for the hall-sensor in the front wheel. I managed to find a wiring diagram of the original cluster from my collections, and from that I saw that being an injected bike the speed signal does not come to the gauge from the front wheel as it takes a little detour through the ECM changing color on the fly. Now everything is connected as it should and the speedo is working even though the original power supply to the hall-sensor gave out 12v and the one coming from the Koso gauge only supplies 5v.
Now the next problem are the other gauges. I can`t start the engine as is so I don`t know if the tach works or not. If I try to connect the coolant temperature wire to the gauge it immediately slams to 120c and starts blinking the warning lights even if I unplug the sensor so clearly it doesn`t understand the signal. I wonder if I could make it work with a resistor, I just don`t have the slightest clue what kind of value should it have. The original cluster doesn`t have a fuel gauge, just a low fuel light, gonna experiment with that a little later. There also would be an option for an oil temp sensor but I`m not sure does my bike even have one. The easiest way to make the temp gauge working would probly be to install the Koso sensor somewhere, but where? I can`t delete the original one as the ECM needs the data and there doesn`t seem to be a place to put the aftermarket sensor if I don`t make one somewhere. Really not comfortable with the idea of drilling and tapping into the cyl block so the bottom of the radiator maybe? Probly would have to weld a nut there and naturally get the weld watertight as well...
EDIT: Found the answer. Why make it hard if you can just order one of these from ebay:
http://www.ebay.com/itm/161183673300...%3AMEBIDX%3AIT
The only silver one in the net so had to order it from the US so the shipping cost more than the part but still under 20e combined so should come through customs without VAT payments.
Would have wanted a 19mm one to fit into the upper watre hose but apparently none exist so had to order the 24mm which apparently are rare too, and put it here:

Also had a bit of a faceplam- moment figuring out that the arrowed hose is most probably on backwards. It fits there just as well both ways but looks much cleaner when the angle is inwards.
I finally figured out how to make the speedo to work, or rather why it did not work before even though all the wires were connected as instructed. Or so I thought. One wire was missing completely as it came from the oem gauge cluster, and that wire happened to be the power supply for the hall-sensor in the front wheel. I managed to find a wiring diagram of the original cluster from my collections, and from that I saw that being an injected bike the speed signal does not come to the gauge from the front wheel as it takes a little detour through the ECM changing color on the fly. Now everything is connected as it should and the speedo is working even though the original power supply to the hall-sensor gave out 12v and the one coming from the Koso gauge only supplies 5v.
Now the next problem are the other gauges. I can`t start the engine as is so I don`t know if the tach works or not. If I try to connect the coolant temperature wire to the gauge it immediately slams to 120c and starts blinking the warning lights even if I unplug the sensor so clearly it doesn`t understand the signal. I wonder if I could make it work with a resistor, I just don`t have the slightest clue what kind of value should it have. The original cluster doesn`t have a fuel gauge, just a low fuel light, gonna experiment with that a little later. There also would be an option for an oil temp sensor but I`m not sure does my bike even have one. The easiest way to make the temp gauge working would probly be to install the Koso sensor somewhere, but where? I can`t delete the original one as the ECM needs the data and there doesn`t seem to be a place to put the aftermarket sensor if I don`t make one somewhere. Really not comfortable with the idea of drilling and tapping into the cyl block so the bottom of the radiator maybe? Probly would have to weld a nut there and naturally get the weld watertight as well...
EDIT: Found the answer. Why make it hard if you can just order one of these from ebay:
http://www.ebay.com/itm/161183673300...%3AMEBIDX%3AIT
The only silver one in the net so had to order it from the US so the shipping cost more than the part but still under 20e combined so should come through customs without VAT payments.
Would have wanted a 19mm one to fit into the upper watre hose but apparently none exist so had to order the 24mm which apparently are rare too, and put it here:
Also had a bit of a faceplam- moment figuring out that the arrowed hose is most probably on backwards. It fits there just as well both ways but looks much cleaner when the angle is inwards.
Last edited by Mattson; Jan 14, 2015 at 03:27 PM.

Welcome Crew and ROTY 2014
Joined: Dec 2010
Posts: 2,059
Likes: 6
From: Kansas
Stayed up till 3am sitting at the computer yesterday, was waay past getting cross-eyed finding nothing to my liking until I stumbled upon this:
Jisu Danmoto Exhaust Triumph Daytona T 509 595 955i 97 01 1997 2001 EX689 | eBay ...
Jisu Danmoto Exhaust Triumph Daytona T 509 595 955i 97 01 1997 2001 EX689 | eBay ...
Thread Starter
|
Retired Super Moderator, Tin Star Man & Hurricane Saloon Prospect, ROTM Feb 2015
Joined: Sep 2011
Posts: 2,382
Likes: 5
From: V��ksy, Finland
I`m even more anxious to HEAR it, don`t want it to be too loud but would prefer SOME noise of it as that was the reason -along with the looks- for me to go double on the CBR as well... Gonna hold back on the ordering a bit longer so I won`t scratch the new can while hovering around the bike, and for one other reason as well:

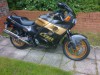
I got the OEM footpegs mounted yesterday, got lucky with making the sleeves for them as I got a piece of SS tube for free from one metal shop that has an inner diameter so close to the footpeg that it fits completely snug over the axle part without any free play in between. I actually figured out accidentally how to make the cuts 100% straight: I cut a piece that was intentionally a little too long and slipped it over the footpeg that was mounted on a vice. I then took an angle grinder and a flap disc starting to try to get the pipe level with the footpeg. I found that if I keep the disc in one spesific place it makes the tube spin wildly around the axel self-leveling itself when I grinded them to the right length. I also found the original aluminum sleeve from the left side but decided to make two so they would be the same on both sides. One of those things that no one else would definitely never notice but I`d know.

When I bolted the pegs in place I tried to tackle the little issue with the riding position as well: it is too cramped for me as it is a pretty long bike with a long tank, so I`m leaning forward against the handlebars a bit more than my wrists and shoulder blades feel comfortable. so I wanted to try what it does if I drop the footpegs from the highest setting that they are in, to the lowest, and it immediately made the bike feel much better as I now can support my weigth better with my legs. Of course as the rear wheel is hoisted up I couldn`t get a true feel to what it really does but it was a clear improvement. However the reason why the pegs have been in the highest setting thus far is visible in the picture: the brake pedal will not clear the exhaust. It might just and just do it if I wiggle the pipe around, but it could not be pressed down at all. So when I get the new muffler I was thinking of cutting the original pipe from around where the clamp is now, take a legth of 2" straight exhaust pipe, fabricate a jig using an angle grinder and a mig welder, send it to an exhaust specialist and have them bend me a custom midpipe. Might cost some but that`s one of the things I cannot get to look nice myself so IMO it`s worth the splurge.
I was thinking to drop the exhaust manifold and try to get that yellow-ish brown color off of it, does anyone have any tips on how to proceed with it? I assume it`s SS so I was thinking of a red scotchbrite disc on a drill maybe? Not looking to mirror polish it, just make it lighter color with a brushed finish. Was just thinking if I do it how fast will it darken again IOW is it worth the trouble?

Went to do a bit of shopping today to get the harness nice and tidy so I bought a bunch of these connectors. Ended up costing me quite a bit as the shop sells different width models for different pin counts so you have to buy a bag of male casings, a bag of female casings and two bags of the connector pins so the connectors ended up costing a bit over 4eur a piece BUT if put together correctly they should be 100% splashproof. I`ve crimped probly a bucket full of normal "abiko" connectors in my life, but I`ve only used the pliers needed for the inner pins once before and that`s about 15 years ago so it took a few practice runs to get them right but I quickly picked up what I learned in school as a kid and once I figured how the locking sleeves work inside the connectors I started to get things forward. Quite finicky work to crimp the pins as you have to apply proper pressure so the wings grab the wire but not too much or you`ll bend and ruin the pin.

One finished parking bulb. Good luck trying to find one of those from the store

I re-routed the wires through the opening in the frame where they`re gonna be going once finished to see if some wires need to be lengthened but everything seems to sit quite well in place. The harness is still open as the last few things need to be figured out but the side is starting to tidy up a bit.

The same can`t really be said about the front... Dunno, even though all of the wires ae bundled up the front end STILL looks pretty crowded from up front with the crossing cables and all, but don`t really know what else to do with it other than get used to it... One of the down sides of the completely exposed front is that nothing can be tucked away behind anything...
Gotta order new front indicators tomorrow, those look suped dumb...
I got the OEM footpegs mounted yesterday, got lucky with making the sleeves for them as I got a piece of SS tube for free from one metal shop that has an inner diameter so close to the footpeg that it fits completely snug over the axle part without any free play in between. I actually figured out accidentally how to make the cuts 100% straight: I cut a piece that was intentionally a little too long and slipped it over the footpeg that was mounted on a vice. I then took an angle grinder and a flap disc starting to try to get the pipe level with the footpeg. I found that if I keep the disc in one spesific place it makes the tube spin wildly around the axel self-leveling itself when I grinded them to the right length. I also found the original aluminum sleeve from the left side but decided to make two so they would be the same on both sides. One of those things that no one else would definitely never notice but I`d know.
When I bolted the pegs in place I tried to tackle the little issue with the riding position as well: it is too cramped for me as it is a pretty long bike with a long tank, so I`m leaning forward against the handlebars a bit more than my wrists and shoulder blades feel comfortable. so I wanted to try what it does if I drop the footpegs from the highest setting that they are in, to the lowest, and it immediately made the bike feel much better as I now can support my weigth better with my legs. Of course as the rear wheel is hoisted up I couldn`t get a true feel to what it really does but it was a clear improvement. However the reason why the pegs have been in the highest setting thus far is visible in the picture: the brake pedal will not clear the exhaust. It might just and just do it if I wiggle the pipe around, but it could not be pressed down at all. So when I get the new muffler I was thinking of cutting the original pipe from around where the clamp is now, take a legth of 2" straight exhaust pipe, fabricate a jig using an angle grinder and a mig welder, send it to an exhaust specialist and have them bend me a custom midpipe. Might cost some but that`s one of the things I cannot get to look nice myself so IMO it`s worth the splurge.
I was thinking to drop the exhaust manifold and try to get that yellow-ish brown color off of it, does anyone have any tips on how to proceed with it? I assume it`s SS so I was thinking of a red scotchbrite disc on a drill maybe? Not looking to mirror polish it, just make it lighter color with a brushed finish. Was just thinking if I do it how fast will it darken again IOW is it worth the trouble?
Went to do a bit of shopping today to get the harness nice and tidy so I bought a bunch of these connectors. Ended up costing me quite a bit as the shop sells different width models for different pin counts so you have to buy a bag of male casings, a bag of female casings and two bags of the connector pins so the connectors ended up costing a bit over 4eur a piece BUT if put together correctly they should be 100% splashproof. I`ve crimped probly a bucket full of normal "abiko" connectors in my life, but I`ve only used the pliers needed for the inner pins once before and that`s about 15 years ago so it took a few practice runs to get them right but I quickly picked up what I learned in school as a kid and once I figured how the locking sleeves work inside the connectors I started to get things forward. Quite finicky work to crimp the pins as you have to apply proper pressure so the wings grab the wire but not too much or you`ll bend and ruin the pin.
One finished parking bulb. Good luck trying to find one of those from the store
I re-routed the wires through the opening in the frame where they`re gonna be going once finished to see if some wires need to be lengthened but everything seems to sit quite well in place. The harness is still open as the last few things need to be figured out but the side is starting to tidy up a bit.
The same can`t really be said about the front... Dunno, even though all of the wires ae bundled up the front end STILL looks pretty crowded from up front with the crossing cables and all, but don`t really know what else to do with it other than get used to it... One of the down sides of the completely exposed front is that nothing can be tucked away behind anything...
Gotta order new front indicators tomorrow, those look suped dumb...
Last edited by Mattson; Jan 16, 2015 at 05:37 PM.
Thread Starter
|
Retired Super Moderator, Tin Star Man & Hurricane Saloon Prospect, ROTM Feb 2015
Joined: Sep 2011
Posts: 2,382
Likes: 5
From: V��ksy, Finland

So today I decided to play chemist for a bit. The exhaust manifold has taken a pretty serious tan on it over the ten years of abuse the bike has had to withstand before I bought it so I gave it a try to see if I can get it any lighter.

First I gave it a proper scrub with this stuff...

...which removed quite a lot of dirt but as expected did nothing to the metal color.

I`ve read before that drain opener fluid could be used to clean stainless steel because it has sodium hyrdoxide, or lye as the reacting agent, so I went to the store to buy a bottle. Finding out that the solution strength is only 10% lye I wasn`t exactly expecting it to explode the grime away...

...whic is exactly what it did not do
20 mins of soaking did absolutely precisely bupkis to the exhaust, in fact it is burnt so bad that even about 10 mins of vigorous scrubbing with a soapy steel wool pad didn`t do anything at all to it.
I was able to do that with a cordless drill and that red scotchbrite thingy in front of the vat, it gets clean allright but the drill bit leaves longitudinal scratches so you see what direction the pipe has been scrubbed, of course I can`t get all the nooks and crannies done the same way so I need to figure out some other way to do it. It was also the stroke of midnight and the sound of the drill carries to next door so couldn`t continue.
I happened to find a bottle of granulated 100% lye from the shelf so decided to give it one last go.

I filled the vat and poured the remains of the drain cleaner bottle in the water. To beef up the mix I took a 5 liter plastic can and poured about half of the lye granule bottle in there. I can`t get hot water from the garage so I went inside to the downstairs toilet to get the can filled. Now the readers that know more about chemistry than me probably can guess what happened next. I kinda forgot that adding water to lye creates a fairly aggressive exothermic reaction, in other words it gets very, very hot very, very quickly. The can started to hiss and fizz like the wizard`s cauldron spewing hot steam all over the tiny toilet! Burned my hand trying to carry it out and had to run to my clothes cabinet to grab a glove to guard my hand hauling the can outside. Luckily nothing bad hapened but there were ingredients for destruction in the air. After I got more water into the can the reaction calmed down and I was able to add the solution to the vat as well, tomorrow we`ll see if it did anything or not when I go flip it to get the non-submerged parts to soak.
Thread Starter
|
Retired Super Moderator, Tin Star Man & Hurricane Saloon Prospect, ROTM Feb 2015
Joined: Sep 2011
Posts: 2,382
Likes: 5
From: V��ksy, Finland

So, after about 20h of being in the lye-bath absolutely diddly has happened to the exhaust. The lye seems to react with the already exposed parts of the pipe as little bubbles have gathered on those parts but to actually clean the manifold either the concentration or exposure time would need to be much greater. But it did not go to waste as the lye has seemed to dislodge quite a lot of soot from inside the manifold, there was a lot of little black flakes simming around the water and a proper gush of them came out of the pipe when I rinsed the insides, but the one thing I was trying to remove -the heat discoloration- it did nothing to.

We went to visit my mom today so I got a change to go rummaging the old cabinets in "my" old garage and found this tube. It`s kind of inferited from my late grandmom and considerably older than me, could not find any info on it what so ever from the net but decided to give it a go nonetheless.

After rinsing and drying the lye off...

..and the same after 15 mins of semi serious scrubbing by hand. Don`t know has the lye been able to get the color to loosen it`s grip or not but became quite clear that rubbing compound is the highway to happiness here. Not a lot left in the tube so gotta go buy some more, but enough to convince me of it`s functionality. Just gotta order a can of this as well:

I also managed to get the fuel gauge working. Turned out that even though there is a sensor in the tank capable of monitoring the fuel level the whole way down, the data goes to the ECU that ONLY sends the low fuel warning signal to the gauge cluster, which IMO is just a wee bit dumb. One tech wiz from a Triumph forum instructed me to cut the original wires that go to the fuel level sensor and bypass it with a ~70ohm resistor (sensor ranges from 13 to 91ohm) so the ecu thinks there`s a sensor and fuel in the tank. Then I just route a new wire from the Koso gauge and ground it via the sensor and everything works perfectly. That way the cluster does not only show me the low level warning, but give me a fully functioning fuel gauge.
Last edited by Mattson; Jan 18, 2015 at 03:17 PM.
Welcome Crew
Joined: Dec 2012
Posts: 1,830
Likes: 1
From: newbury u.k
that's a nice looking pipe, here`s another link for exhaust bits it may be of help
PJ Engineering - Products Page - Manufacturers & suppliers of High Temp. Carbon Fibre, Stainless & Titanium Tubes and Performance Motorcycle Exhaust parts in Lincolnshire, UK
PJ Engineering - Products Page - Manufacturers & suppliers of High Temp. Carbon Fibre, Stainless & Titanium Tubes and Performance Motorcycle Exhaust parts in Lincolnshire, UK
Thread Starter
|
Retired Super Moderator, Tin Star Man & Hurricane Saloon Prospect, ROTM Feb 2015
Joined: Sep 2011
Posts: 2,382
Likes: 5
From: V��ksy, Finland
Thanks for the tip! Was thinking of tacking a jig pipe together from leftover pieces and send that to Martelius Exhausts so they'll make me a custom midpipe for it but always helps to know of these firms in case I need something later on. I have to make an extra bend in the pipe so it will go round the right rearset a little further away but also have to watch out for the rear swing, not a whole lotta spare room but it's doable. Not gonna sweat over that just yet as I have a list the length of my leg to do before that, lucky most of it is either electrical work or bolting on parts that I already have.