
How To Rebuild / Clean / Overhaul Your Calipers With Fresh Seals *PICS*


Thread Starter
|
Senior Member
Joined: Aug 2009
Posts: 207
Likes: 0
From: Setubal,Portugal
Ok guys, since I was going to rebuild, clean and change the seals in my brake calipers, I thought I'd make this tutorial.
Everyone has his own way but this is mine and I'm sticking to it.
It might come in handy for those who never done it or are having problems with their brakes.
It might be a sticking piston, a leaking seal or a sticking floating button and without digging in you can never know.
In my case I had a sticking piston on the left caliper that was causing some vibration and unbalance when coming to a stop.
This is specifically for the F4i but all opposed pistons calipers will be pretty much the same.
*Old tooth brush
*T45 Torx key
*8mm for bleeder nipple
*12mm wrench for caliper bracket bolt
*14mm for banjo bolt
*Torque wrench
* Allen key to remove brake pads/dust shields
*Precision screwdriver or similar,preferably plastic
*Wire brush
Consumables
*Rubber gloves
*2 Small Plastic bags
*2 pieces of corrugated cardboard
*Rags
*Brake fluid
*Brake Cleaner Spray
*Silicone paste/Rubber grease
*Loctite for bolts
*Seals if replacing (f4i part# 06451-MCJ-405/06451-MBW-405)
Everyone has his own way but this is mine and I'm sticking to it.
It might come in handy for those who never done it or are having problems with their brakes.
It might be a sticking piston, a leaking seal or a sticking floating button and without digging in you can never know.
In my case I had a sticking piston on the left caliper that was causing some vibration and unbalance when coming to a stop.
This is specifically for the F4i but all opposed pistons calipers will be pretty much the same.
Ok, first the tools to get the job done:
*Old tooth brush
*T45 Torx key
*8mm for bleeder nipple
*12mm wrench for caliper bracket bolt
*14mm for banjo bolt
*Torque wrench
* Allen key to remove brake pads/dust shields
*Precision screwdriver or similar,preferably plastic
*Wire brush
Consumables
*Rubber gloves
*2 Small Plastic bags
*2 pieces of corrugated cardboard
*Rags
*Brake fluid
*Brake Cleaner Spray
*Silicone paste/Rubber grease
*Loctite for bolts
*Seals if replacing (f4i part# 06451-MCJ-405/06451-MBW-405)
Last edited by Slick 6; May 5, 2011 at 01:54 PM. Reason: added right part#
Thread Starter
|
Senior Member
Joined: Aug 2009
Posts: 207
Likes: 0
From: Setubal,Portugal
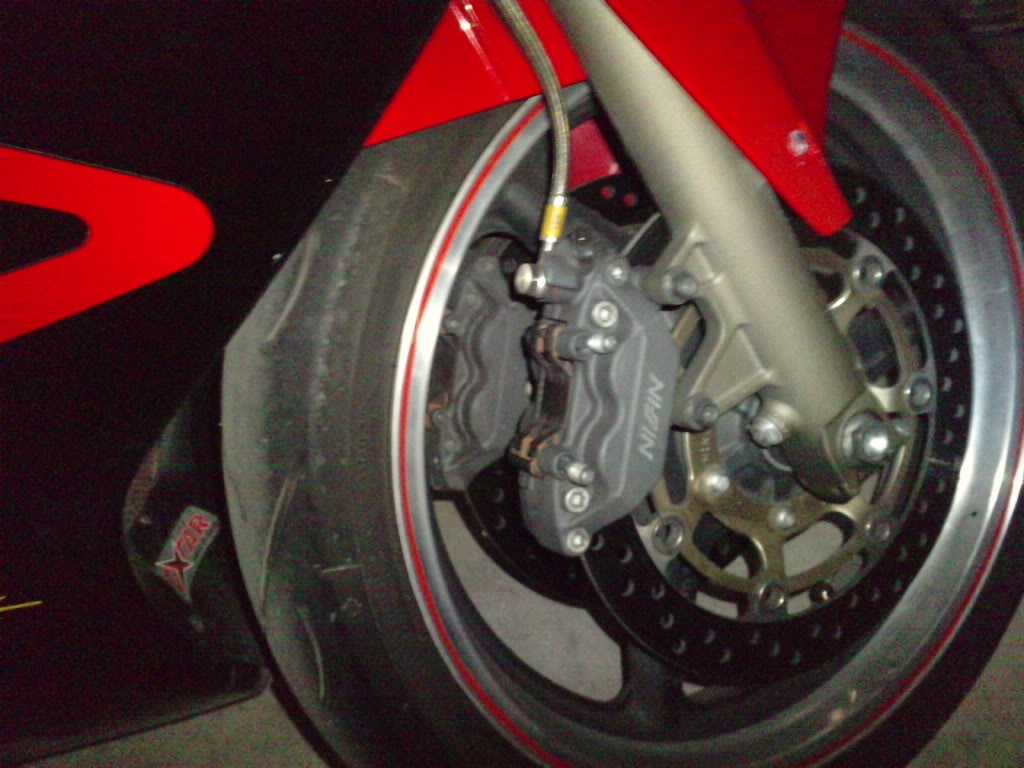
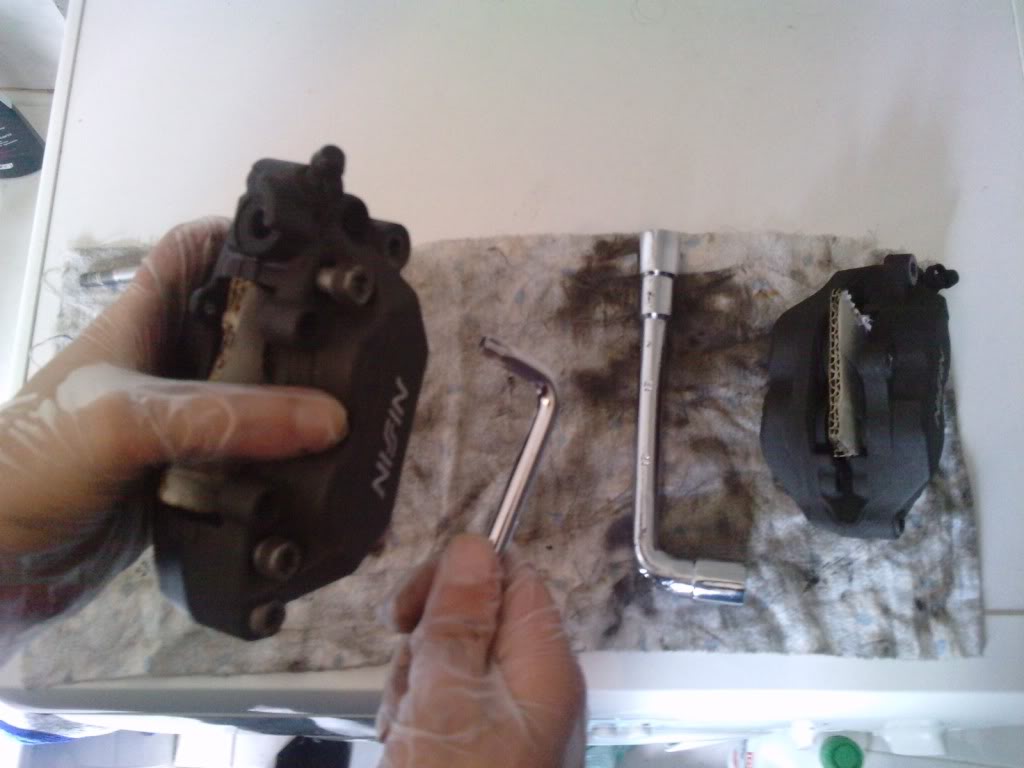
Ready?
Ok, the first thing you want to do is to remove the pins that hold the dust shields from the calipers.
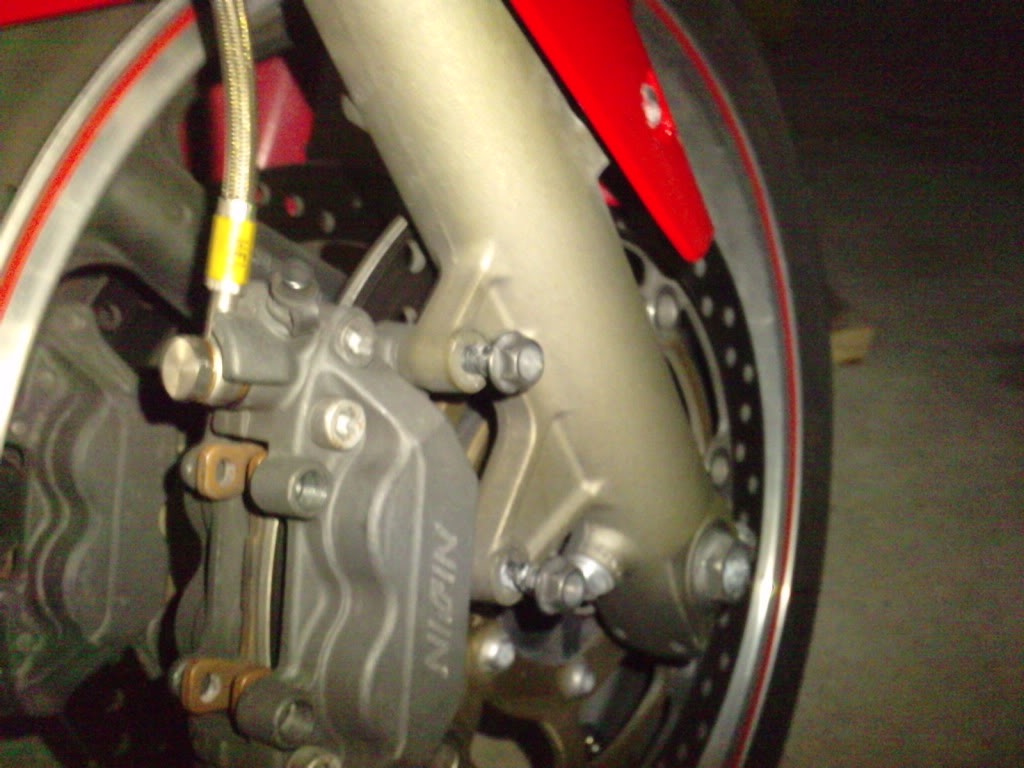
At this point, I slightly unscrew the banjo bolts at the caliper but leave it tight.
Also, with the Torx key, slacken the 4 calliper bolts that hold the halves together, cuz' it�s much easier to do while attached to the forks than on a work bench. Not all the way out, just enough to brake the seal that has formed
Unbolt the bracket bolts and grab the caliper
Put a piece of corrugated cardboard in the middle of the caliper between the pistons
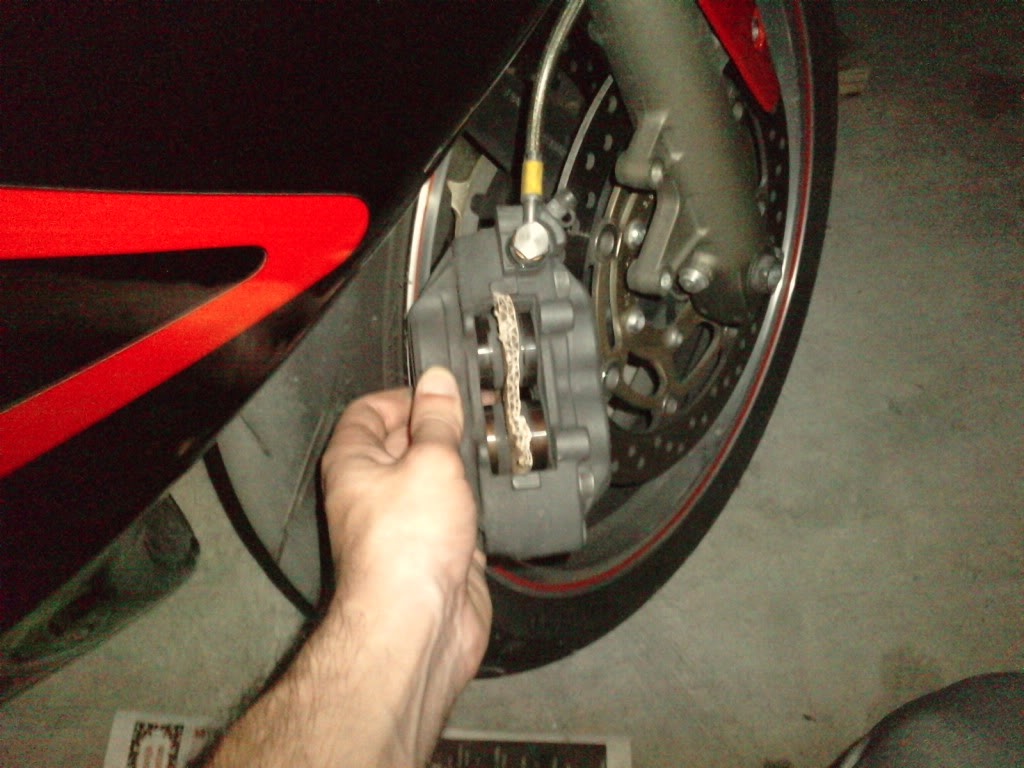
Grab the front brake and pump it until the pistons grab the cardboard and stay there tight. I do it like this cuz' it's easyer to pull the pistons out when you split the caliper halves.
Now, grab one bag and put it around the caliper
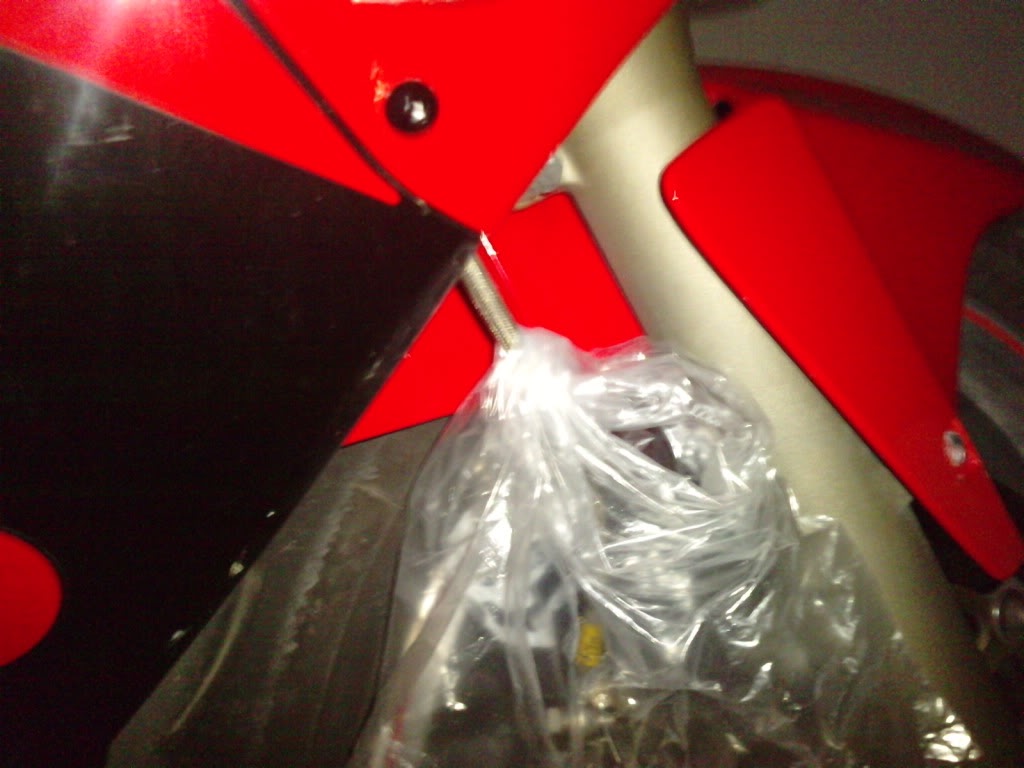
Unbolt the banjo bolts completely, remove the caliper and leave the bag wrapped around the line, catching all the brake fluid
Repeat on the other side.
Now, take your caliper to the work bench it's cleaning time.
Ok, the first thing you want to do is to remove the pins that hold the dust shields from the calipers.
At this point, I slightly unscrew the banjo bolts at the caliper but leave it tight.
Also, with the Torx key, slacken the 4 calliper bolts that hold the halves together, cuz' it�s much easier to do while attached to the forks than on a work bench. Not all the way out, just enough to brake the seal that has formed
Unbolt the bracket bolts and grab the caliper
Put a piece of corrugated cardboard in the middle of the caliper between the pistons
Grab the front brake and pump it until the pistons grab the cardboard and stay there tight. I do it like this cuz' it's easyer to pull the pistons out when you split the caliper halves.
Now, grab one bag and put it around the caliper
Unbolt the banjo bolts completely, remove the caliper and leave the bag wrapped around the line, catching all the brake fluid
Repeat on the other side.
Now, take your caliper to the work bench it's cleaning time.
Thread Starter
|
Senior Member
Joined: Aug 2009
Posts: 207
Likes: 0
From: Setubal,Portugal
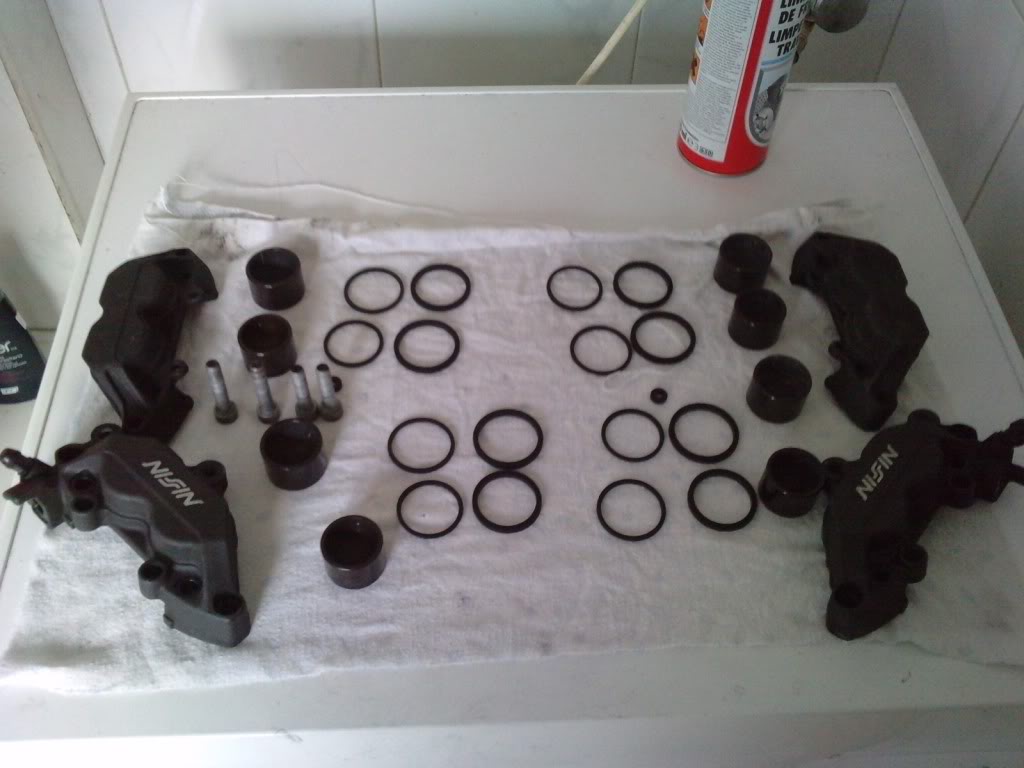
Take your calipers to the work bench and completely remove the 4 bolts
Watch out for the small seal between the 2 halves
Depending on how bad your pistons are, they might come out with your hand, sometimes I’ve had to use pliers.
If you need to do this, use electrical tape to tape around the teeth a few times so as not to damage them and also wrap a cloth around the pistons and pliers.
Try to grab as little as you can on the piston.
Hold the calliper half and use the pliers to grip the piston and rotate it in the calliper whilst pulling at the same time. It can take a while, but it will eventually come out.
Repeat the process for the other pistons.
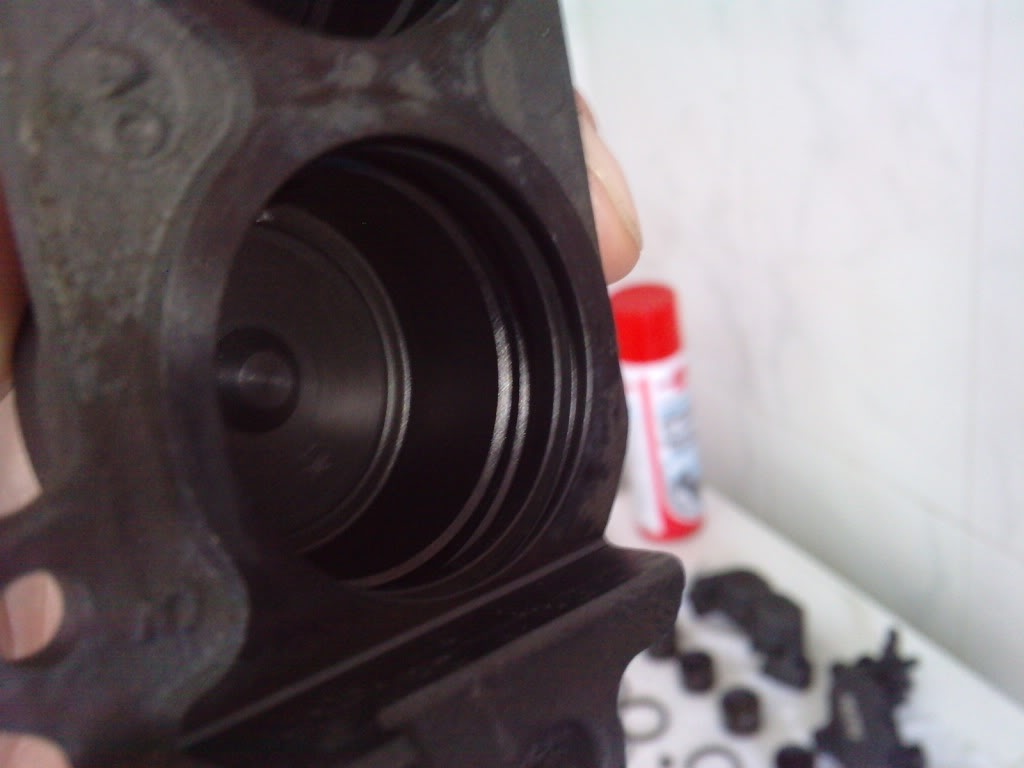
When you see the seals, remove them very carefully and bin them if you have new ones.
Cleaning time
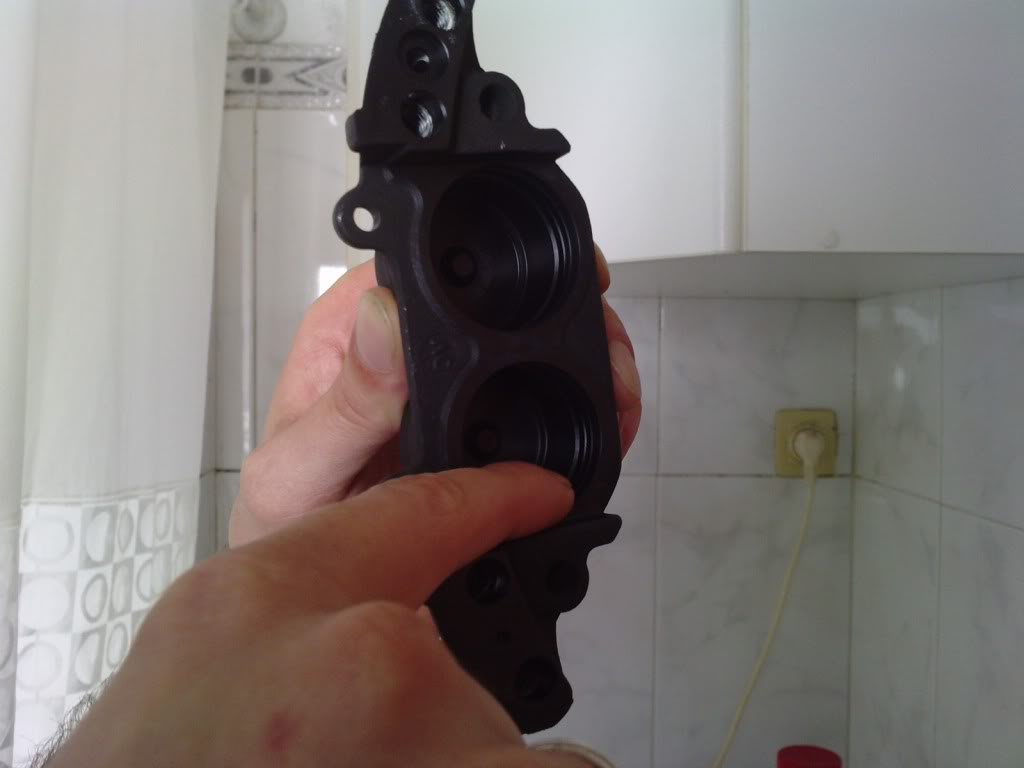
With some brake fluid and the toothbrush, soak the calipers and clean them, especially the seal gooves
Clean seals if you are reusing them
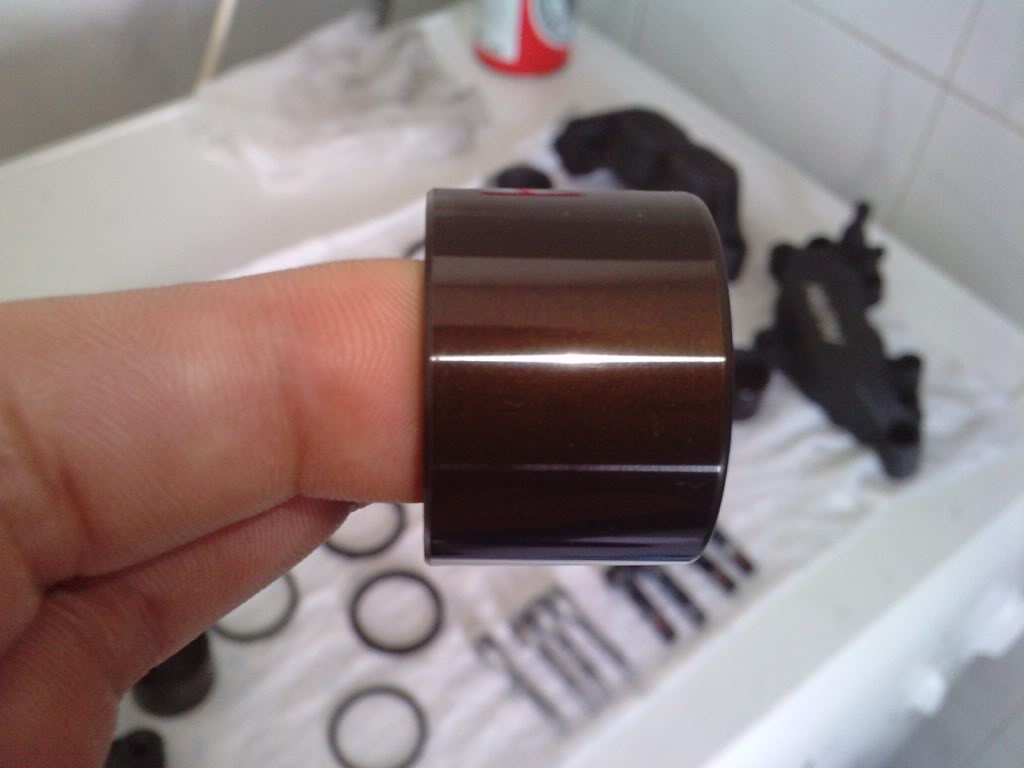
Clean the pistons thoroughly
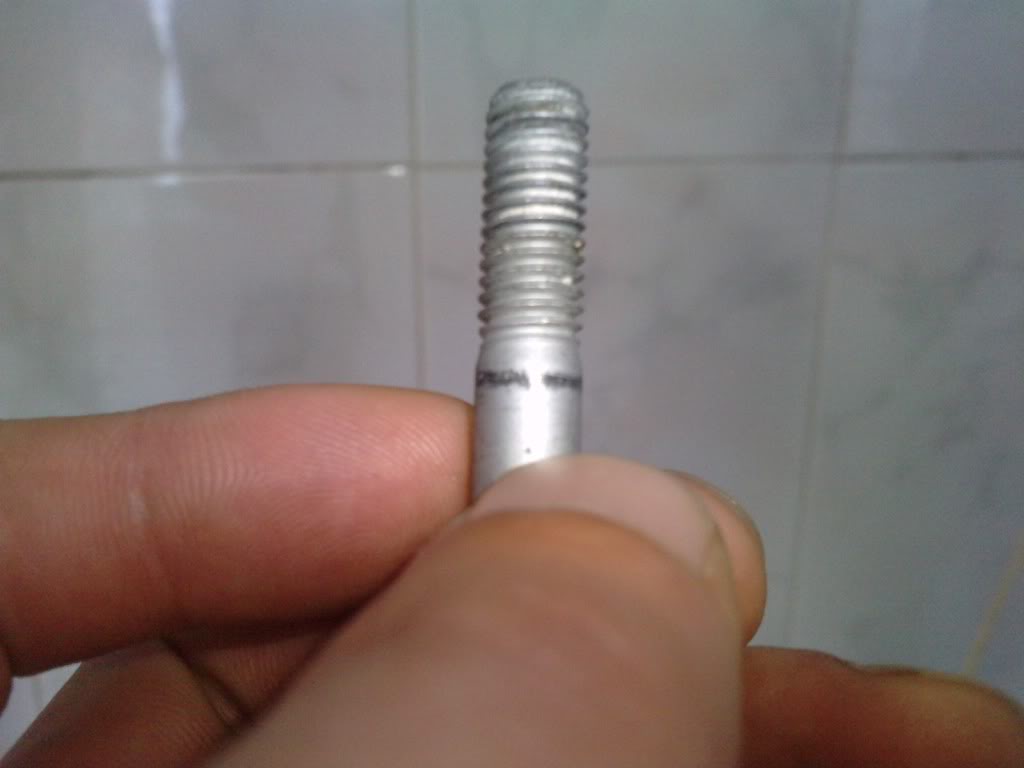
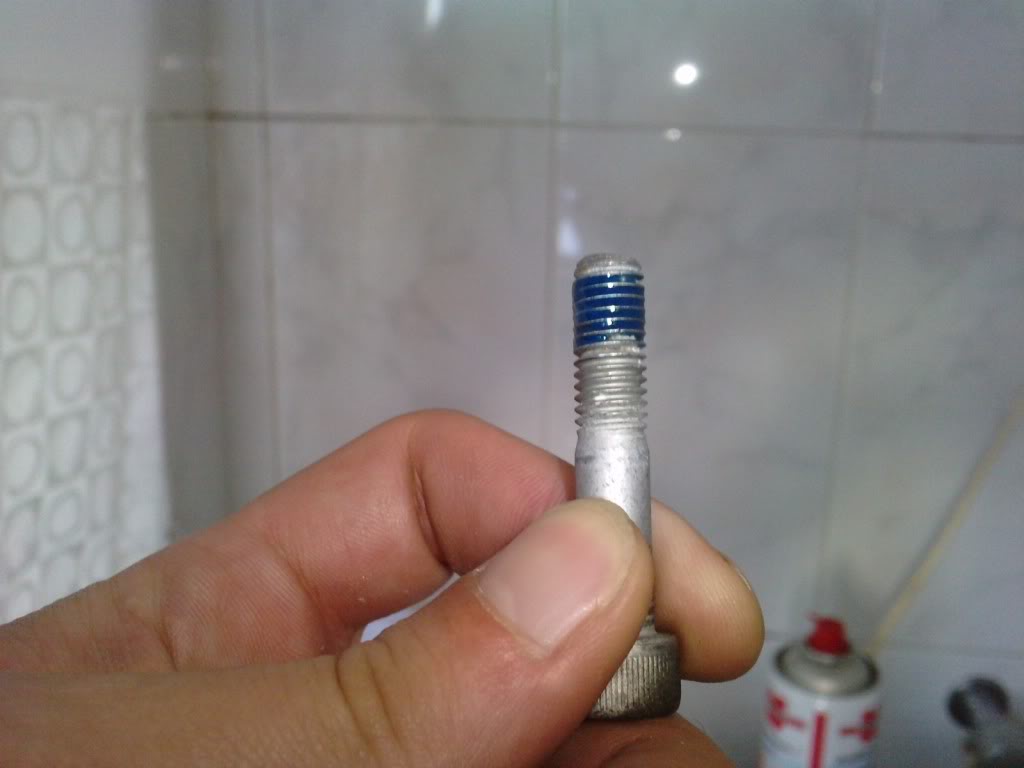
Also, clean the calliper bolts with a wire brush
Clean bleed nipples
Rinse everything with hot water
This is what it should like after cleaned
After all is cleaned, grab your brake cleaner spray and give it a blast on the calipers to remove anything that might have been left behind. It also helps to remove any moisture and water.
If you have access to an air supply, now it's a good time to blow on them
Pack the seal grooves with some rubber grease and fit the seals.
Remove any excess grease
Once they are all cleaned, dip a finger into the old brake fluid and coat the piston chamber and seals in the calliper halves, then dip the piston into the fluid and coat them before refitting to the piston chambers. This will help them slip past the seals with ease.
Refit the small calliper half seals, again coating the seals in the brake fluid
Apply some Loctite to the threads
Make sure the seals are seated correctly before joining the calliper halves.
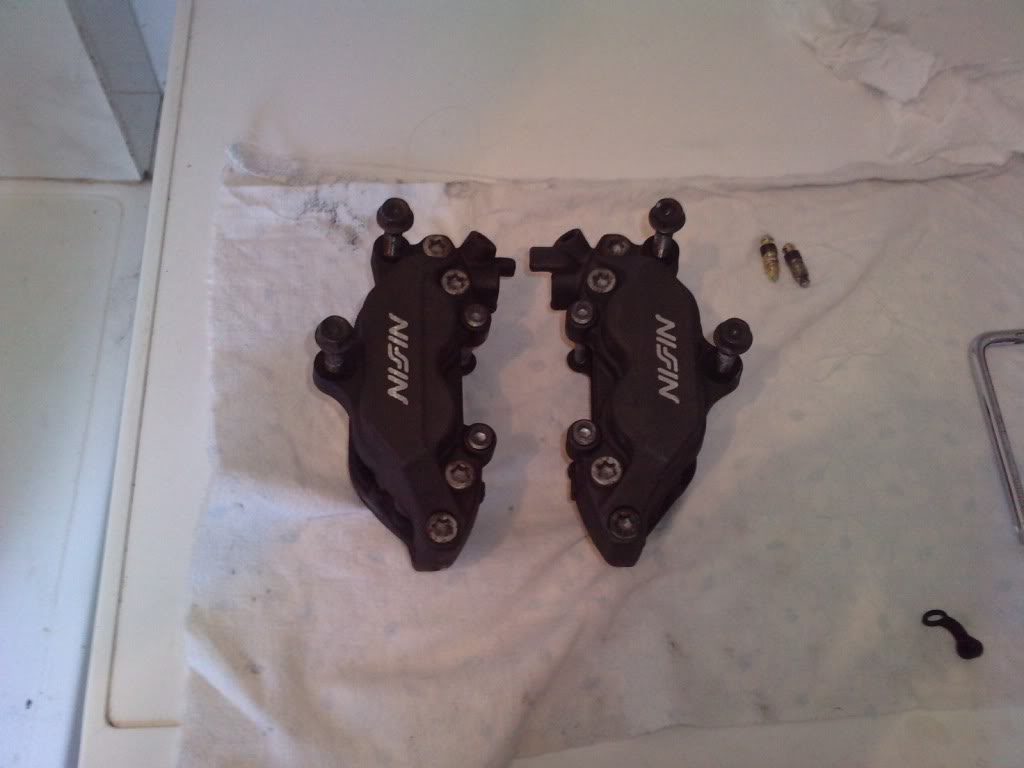
Screw the halves together, but don’t over tighten.
I leave the torqueing for after they're fitted to the bike, it's much easyer.
That's it, you now have fresh brakes! Just install in reverse order.
At this time I usually clean and oil up my floating rotor buttons, cuz'if they start to stick you might warp your rotors.
Watch out for the small seal between the 2 halves
Depending on how bad your pistons are, they might come out with your hand, sometimes I’ve had to use pliers.
If you need to do this, use electrical tape to tape around the teeth a few times so as not to damage them and also wrap a cloth around the pistons and pliers.
Try to grab as little as you can on the piston.
Hold the calliper half and use the pliers to grip the piston and rotate it in the calliper whilst pulling at the same time. It can take a while, but it will eventually come out.
Repeat the process for the other pistons.
When you see the seals, remove them very carefully and bin them if you have new ones.
Cleaning time
With some brake fluid and the toothbrush, soak the calipers and clean them, especially the seal gooves
Clean seals if you are reusing them
Clean the pistons thoroughly
Also, clean the calliper bolts with a wire brush
Clean bleed nipples
Rinse everything with hot water
This is what it should like after cleaned
After all is cleaned, grab your brake cleaner spray and give it a blast on the calipers to remove anything that might have been left behind. It also helps to remove any moisture and water.
If you have access to an air supply, now it's a good time to blow on them
Pack the seal grooves with some rubber grease and fit the seals.
Remove any excess grease
Once they are all cleaned, dip a finger into the old brake fluid and coat the piston chamber and seals in the calliper halves, then dip the piston into the fluid and coat them before refitting to the piston chambers. This will help them slip past the seals with ease.
Refit the small calliper half seals, again coating the seals in the brake fluid
Apply some Loctite to the threads
Make sure the seals are seated correctly before joining the calliper halves.
Screw the halves together, but don’t over tighten.
I leave the torqueing for after they're fitted to the bike, it's much easyer.
That's it, you now have fresh brakes! Just install in reverse order.
At this time I usually clean and oil up my floating rotor buttons, cuz'if they start to stick you might warp your rotors.
Last edited by Slick 6; May 4, 2011 at 03:15 PM.


Thread Starter
|
Senior Member
Joined: Aug 2009
Posts: 207
Likes: 0
From: Setubal,Portugal
If you're powdercoating them be sure to seal off the working parts really good, you do not want paint in there.
I was thinking of that too but my brother can't do it now so it will stay for another time. Shows us the the result after, bro.
I was thinking of that too but my brother can't do it now so it will stay for another time. Shows us the the result after, bro.

Hey Slick,
What kind of rubber grease are you using? Also, how long after applying the Loctite do I have before torquing down the bolts? I assume I can't let it sit for a week or two before reinstalling them?
Edit: Is there a difference between 06451-MCJ-405 and 06451-MCJ-751, besides the price? RonAyers has both listed for the same seal, but it looks like it's going to be somewhere between $80 - $150 to redo all three brake calipers, depending on which seals are acceptable.
Last edited by vegas_rebel; May 9, 2011 at 02:30 PM. Reason: Additional Question
Thread Starter
|
Senior Member
Joined: Aug 2009
Posts: 207
Likes: 0
From: Setubal,Portugal
Hey Slick,
What kind of rubber grease are you using? Also, how long after applying the Loctite do I have before torquing down the bolts? I assume I can't let it sit for a week or two before reinstalling them?
Edit: Is there a difference between 06451-MCJ-405 and 06451-MCJ-751, besides the price? RonAyers has both listed for the same seal, but it looks like it's going to be somewhere between $80 - $150 to redo all three brake calipers, depending on which seals are acceptable.
What kind of rubber grease are you using? Also, how long after applying the Loctite do I have before torquing down the bolts? I assume I can't let it sit for a week or two before reinstalling them?
Edit: Is there a difference between 06451-MCJ-405 and 06451-MCJ-751, besides the price? RonAyers has both listed for the same seal, but it looks like it's going to be somewhere between $80 - $150 to redo all three brake calipers, depending on which seals are acceptable.
Maybe some other user can chime in on brands...?
Regarding the Loctite, it should be used immediately before assembly and you do have the chance to torque it after a while but I wouldn't recommend that long. 48h tops.
I had the same question as you, it seems the seals are listed as being the same but they're actually not.
Talked to a friend that work for Honda dealer and unfortunately, the cheaper ones are for the F4 up to 2000. He just doesn't know what the differences are but he thinks that Honda revised the thickness of the rubber
You can do the same as I did.
Remove all seals and dispose of the dust seals. Clean and inspect the oil seals and if they look ok, not ripped or streched, it'll be safe to reuse them. But at least get the dust seals, those are the ones that get "abused". The ones closer to the out side of the caliper.
Hope it helps...