How To: F3 HID Install


Thread Starter
|
Member
Joined: Feb 2010
Posts: 70
Likes: 0
From: Vancouver, WA
Alright so here goes, finally got around to doing this write up. Did the install a couple months ago so lets hope i don't forget anything. 
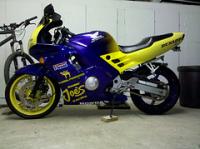
Bike: 1996 CBR600F3
Kit: DDM Tuning Hi/Low H4 35W 6000K
ETA: This write up took longer than the actual install
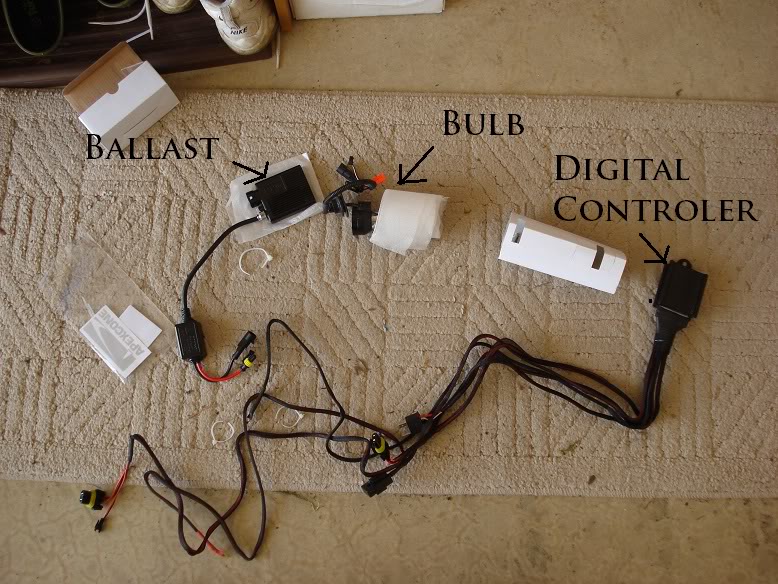
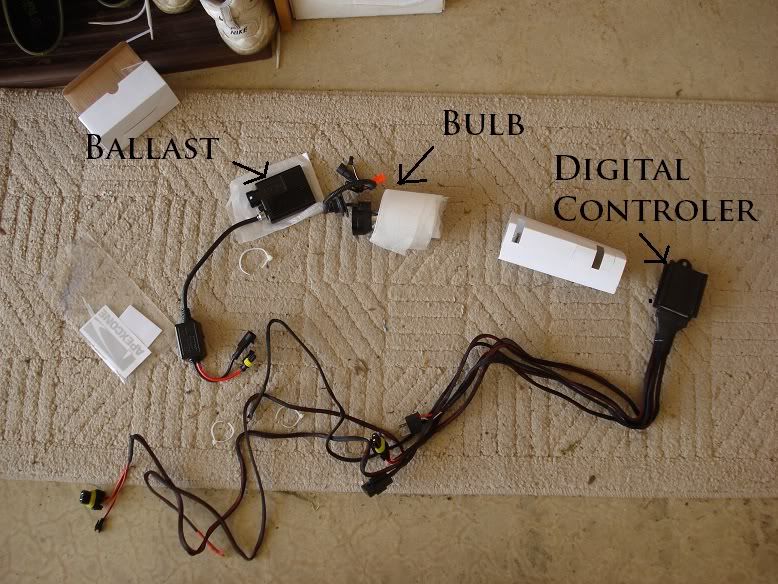
First things first, open up your kit and make sure everything is there. There should be one (1) Bulb, one (1) ballast, and one (1) Digital Control Unit (DCU). It also came with one small square of double sided sticky stuff, but I would suggest getting more. Did I mention that it did NOT come with any instructions! great, good thing I'm electrically inclined and good for you I'm writing this.
From reading reviews it would appear that sometimes they don't send all the stuff. but are super fast in sending replacements or if anything is missing since it has a LIFETIME warranty.
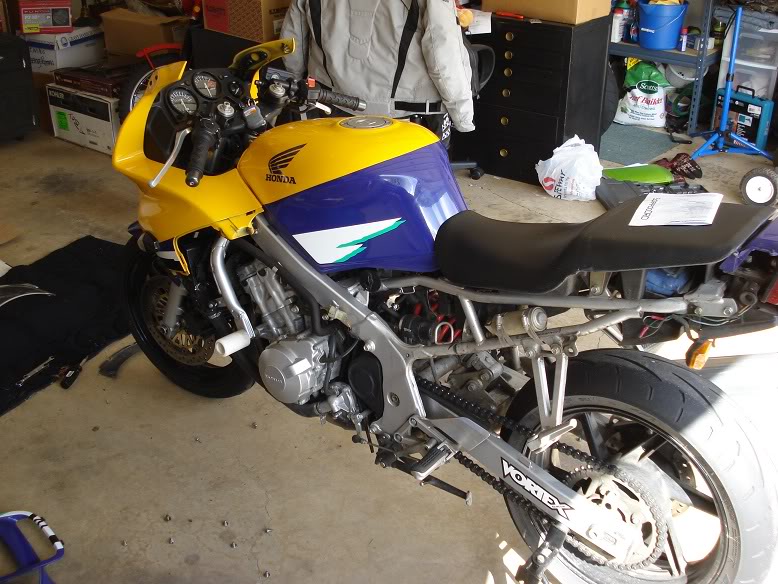
Okay now comes the tedious part, removal of all the fairings. You don't HAVE to remove the gauges and front fairing, but it makes things A LOT simpler and easier to get to. If you've never don't thiatbefore, don't worry, just try not to break anything.
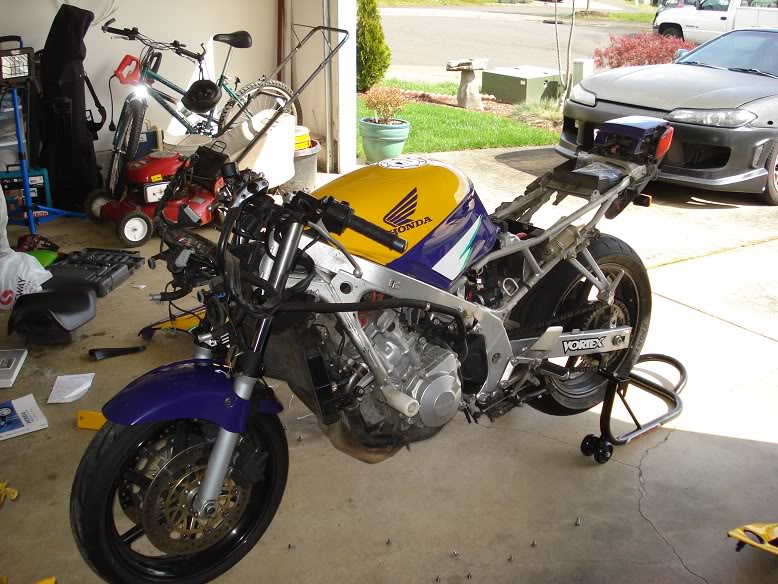
You'll need to remove both side fairings in order to get to the screws to remove both lower fairings, in order to get to the two (2) screws holding on your front faring. Also this would be a good time to remove the seat in order to get to the battery.
NOTE: before removing the front fairing you will need to remove both mirrors and the windscreen. And PLEASE don't forget to disconnect the wires for both turn signals and to unplug the headlight.
Once all the fairings are off remove the three screws holding on your gauge cluster and GENTLY unplug the two plugs from the back. Set that aside for now.
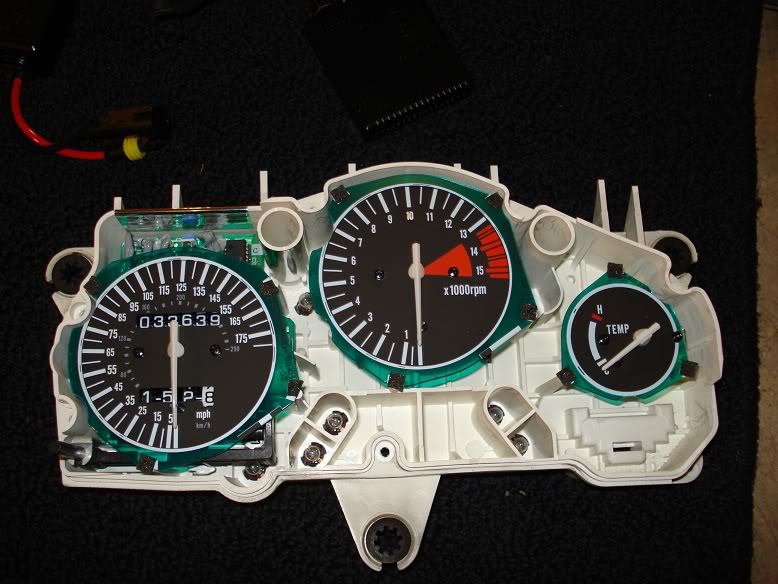
Also I might add that this would be a good time to replace any burnt out bulbs or upgrade to LED's like I did. I ordered mine from SuperBrightLEDs.com, make sure you order the twist lock T1.5 series instrument cluster bulbs. They come with the twist lock or the bulbs come out and you can put them in the OEM ones, but they are a bit loose if you use the OEM twist locks. You'll need, 4 white, 3 orange, one blue, one red, and one green. Definitely use the same color bulb for the same color lens. I tried one of the white ones in the turn signal which is an orange lens and it came out looking **** yellow.
Okay back to the HID install. DISCONNECT THE BATTERY!!! once that is done take the Digital Control unit and position it near the fuse box.
Then run the positive and negative wires along the frame using existing wiring paths and into the battery holder box.

It's not pictured but i stuffed the positive wire terminal though the back of that red rubber cover. once that is done go ahead and tuck the in-line fuse somewhere along the frame.
Next comes the bulb. undo the clip holding in the stock bulb and take it out. The bulb that comes in the HID has a metal cover on it.
!!!DO NOT TOUCH THE GLASS PART OF THE BULB!!!
hold onto the cover and twist the bulb CCW and separate it from the metal cover.
Put the metal cover in the headlight housing and clip it into place.
Then line up the groves on the bulb and twist it back into the metal cover.
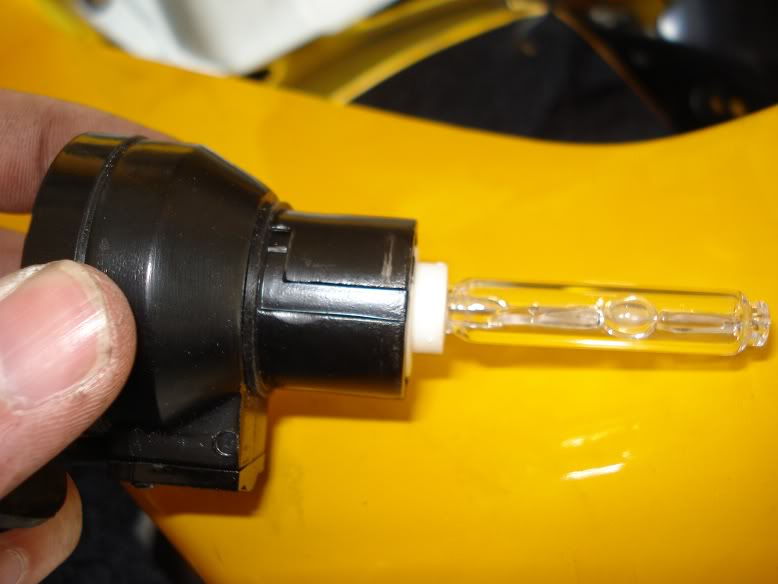
Should look like this
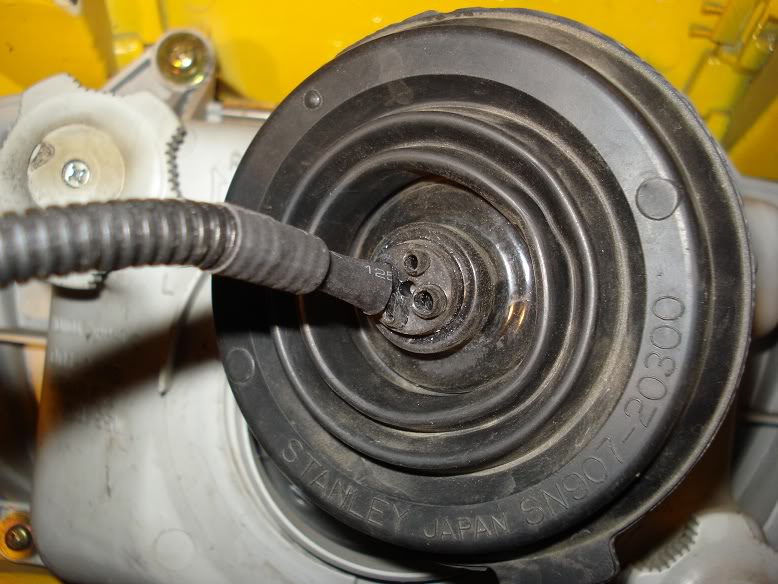
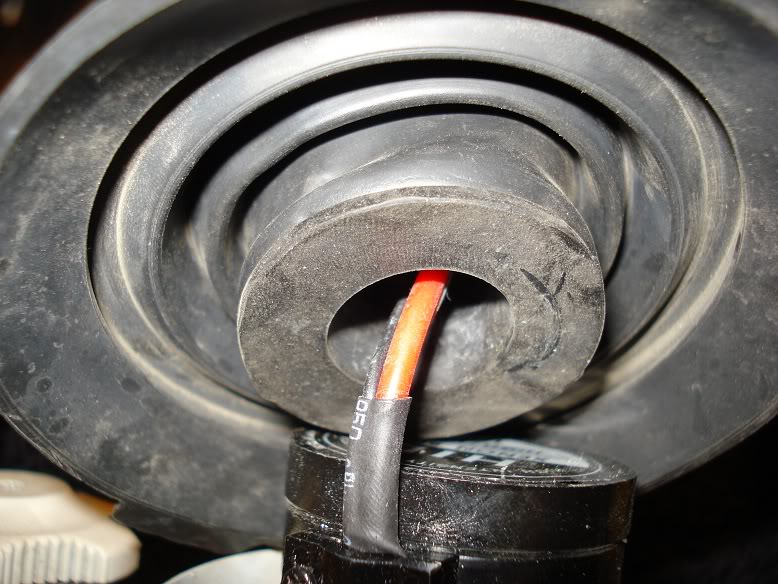
Now comes the only modification I had to do to install this Kit. The rubber grommet that comes on the wires with the HID bulb doesn't want to fit in the hole in the factory rubber headlight housing cover. So we're going to modify it, a nice sharp exacto knife or box cuter works best. It's hard to explain so just see the pic below.
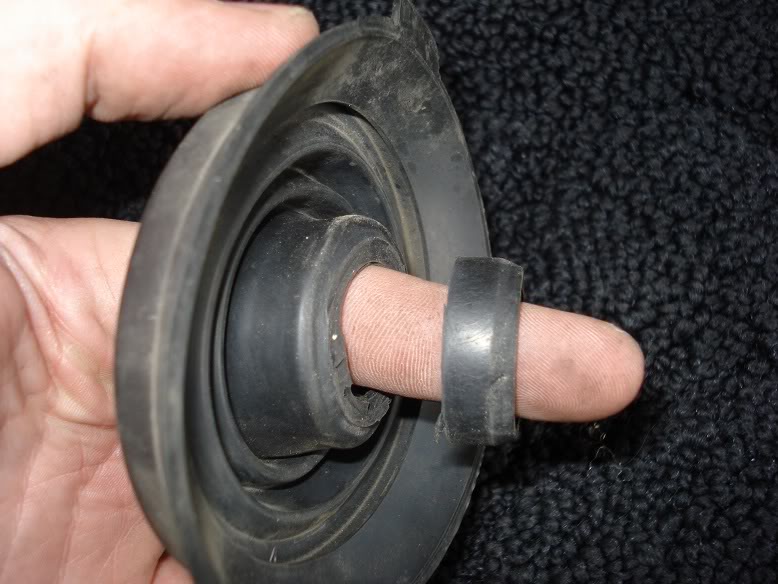
By cutting off the nipple of the rubber cover the grove in the grommet should now fit perfecting in the grove in the hole of the cover.
and from the other side (I can't remember if this pic was before or after I cut off the covers nipple)
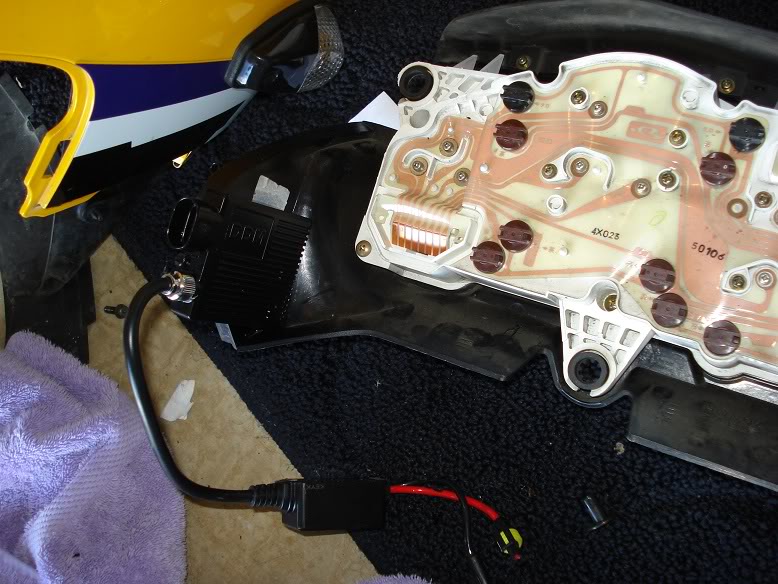
Now for mounting the Ballast. Assuming the double sided stick pad they sent is the same size as the one I got, cut it in half and used just enough to cover the back of the ballast. When looking at the back of the gauge cluster, mount the ballast on the left hand corner.
You cannow remount the gauge cluster on the bike and don't forget to re-attach the two plugs BEFORE you bolt it down, learned that one the hard way.
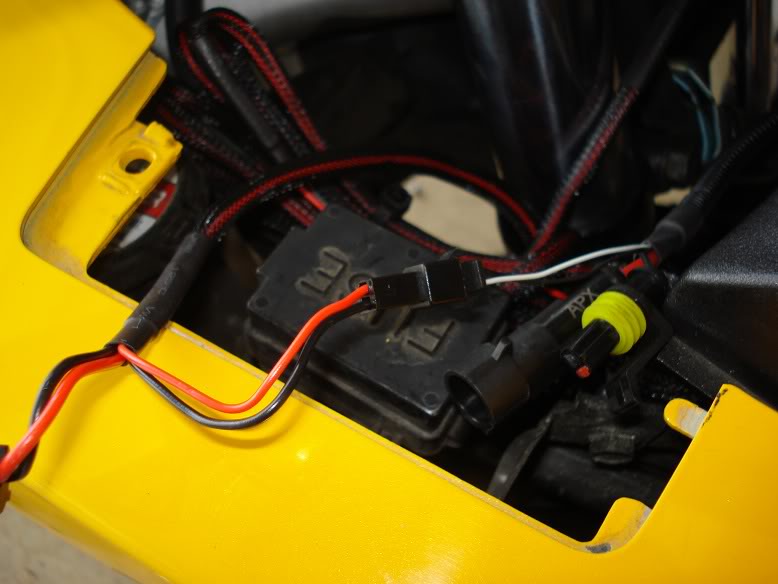
OK now we need to mount the black box connect to the ballast, this is where the extra sticky tape comes in hand as there are three things to be mounted and only one square left.
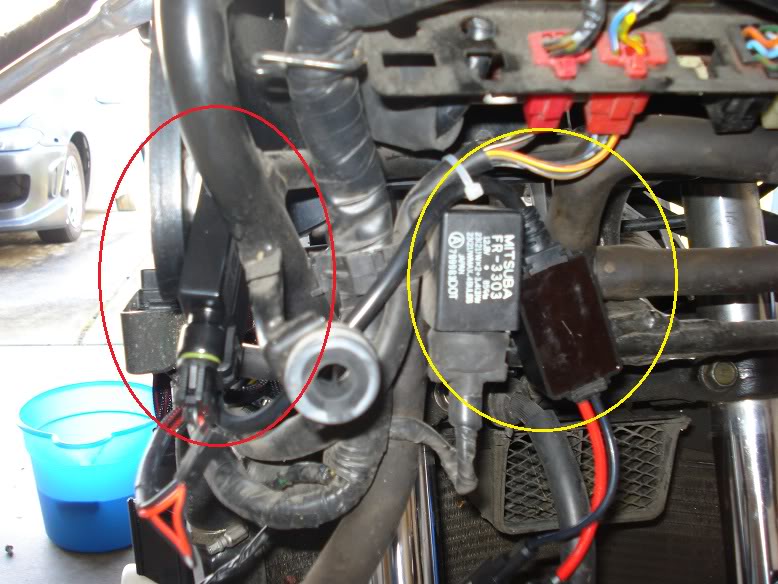
Pictured and circled in red is the ballast and circled in yellow is the in-line box, it's not shown in the picture but i mounted it to the relay switch that is right next to it. I also zip tied the wire to the harness wires right above that.
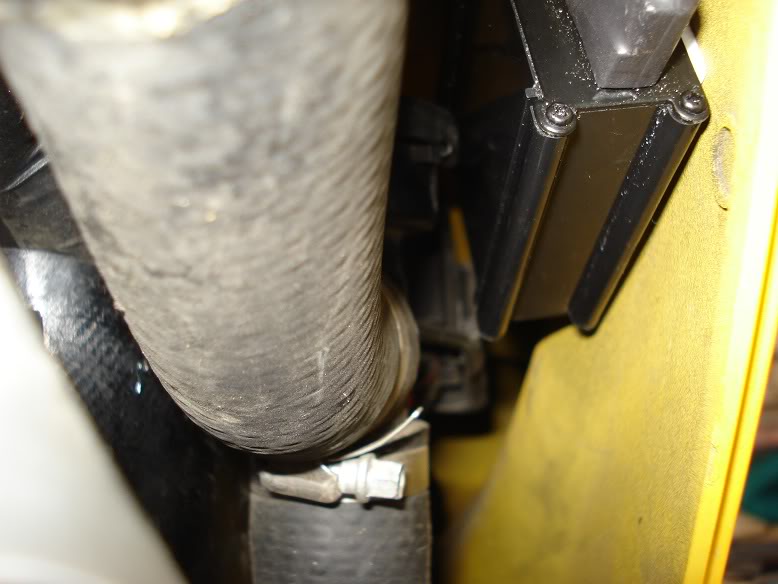
Now run the wires through toward the fuse box, I ran them along the rubber intake whose but you might find a better path. Pretty much I just played with different ways of tucking the wires once the fairings are back on which best hides them.
Next, there are two sets of wires coming off the Digital Control Unit, one is longer than the other. I used the shorter one since it's all so close. Take the plug that was plugged into the OEM headlight bulb and plug it into its matching connector from the DCU. Plug the big black plug from the DCU into the ballast. There are three plugs coming from the HID bulb. Two of them plug into their matching connectors coming from the ballast with the in-line box mounted to the relay switch. The smallest plug coming from the HID bulb connects to its matching wire coming from the DCU. Now take the longer set of wires from the DCU and fold them together and zip tie them together, leave some slack for the DCU to be mounted below the radiator cap. I tucked the big bunch of wires on the right side of the fuse holder and between the fairing.
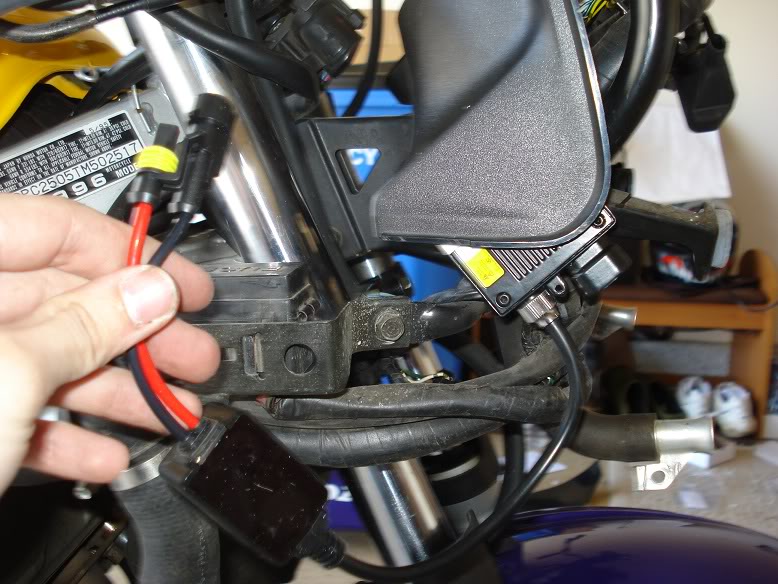
Mounting the DCU is tricky, I still haven't mounted it properly. This was my initial spot, but it didn't feel like staying there so it kind of flops around and just hangs there.
And that's it. connect the battery, turn the key and make sure it is working properly before putting all the fairings back on. The bulb will seem dim when first fired but it will warm up in about a minute.
If it doesn't come on, make sure everything is plugged in correctly.
Well thanks for reading and I hope this helps, feel free to ask any questions or if I left anything out.
Bike: 1996 CBR600F3
Kit: DDM Tuning Hi/Low H4 35W 6000K
ETA: This write up took longer than the actual install
First things first, open up your kit and make sure everything is there. There should be one (1) Bulb, one (1) ballast, and one (1) Digital Control Unit (DCU). It also came with one small square of double sided sticky stuff, but I would suggest getting more. Did I mention that it did NOT come with any instructions! great, good thing I'm electrically inclined and good for you I'm writing this.
From reading reviews it would appear that sometimes they don't send all the stuff. but are super fast in sending replacements or if anything is missing since it has a LIFETIME warranty.
Okay now comes the tedious part, removal of all the fairings. You don't HAVE to remove the gauges and front fairing, but it makes things A LOT simpler and easier to get to. If you've never don't thiatbefore, don't worry, just try not to break anything.
You'll need to remove both side fairings in order to get to the screws to remove both lower fairings, in order to get to the two (2) screws holding on your front faring. Also this would be a good time to remove the seat in order to get to the battery.
NOTE: before removing the front fairing you will need to remove both mirrors and the windscreen. And PLEASE don't forget to disconnect the wires for both turn signals and to unplug the headlight.
Once all the fairings are off remove the three screws holding on your gauge cluster and GENTLY unplug the two plugs from the back. Set that aside for now.
Also I might add that this would be a good time to replace any burnt out bulbs or upgrade to LED's like I did. I ordered mine from SuperBrightLEDs.com, make sure you order the twist lock T1.5 series instrument cluster bulbs. They come with the twist lock or the bulbs come out and you can put them in the OEM ones, but they are a bit loose if you use the OEM twist locks. You'll need, 4 white, 3 orange, one blue, one red, and one green. Definitely use the same color bulb for the same color lens. I tried one of the white ones in the turn signal which is an orange lens and it came out looking **** yellow.
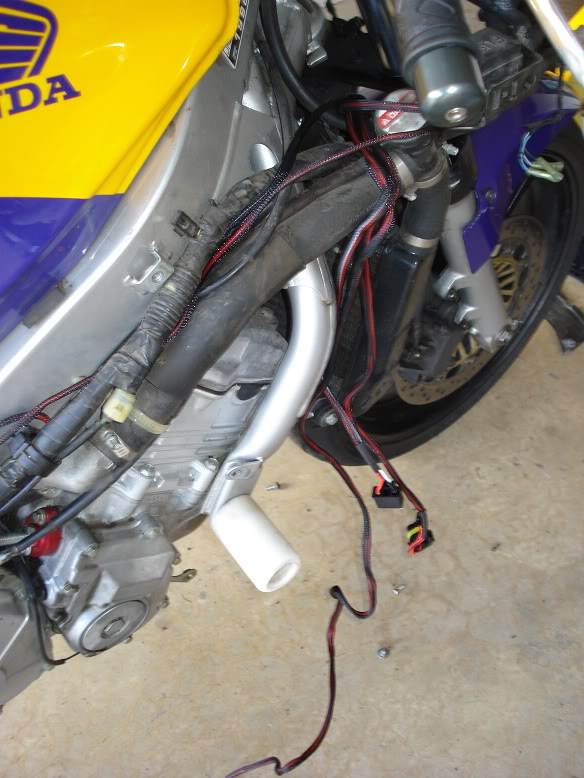
Okay back to the HID install. DISCONNECT THE BATTERY!!! once that is done take the Digital Control unit and position it near the fuse box.
Then run the positive and negative wires along the frame using existing wiring paths and into the battery holder box.
It's not pictured but i stuffed the positive wire terminal though the back of that red rubber cover. once that is done go ahead and tuck the in-line fuse somewhere along the frame.
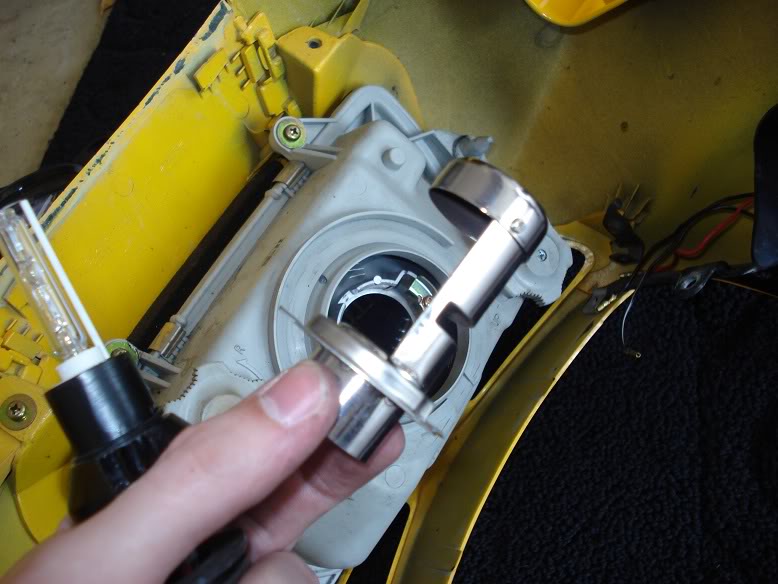
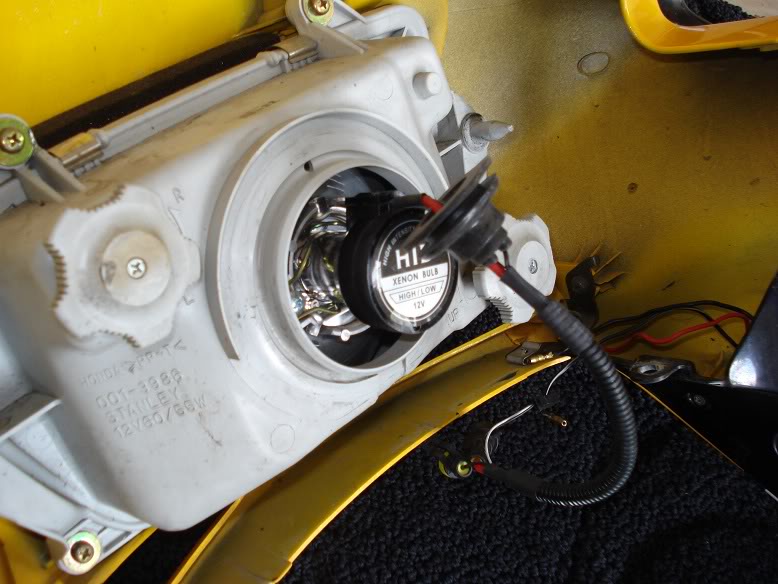
Next comes the bulb. undo the clip holding in the stock bulb and take it out. The bulb that comes in the HID has a metal cover on it.
!!!DO NOT TOUCH THE GLASS PART OF THE BULB!!!
hold onto the cover and twist the bulb CCW and separate it from the metal cover.
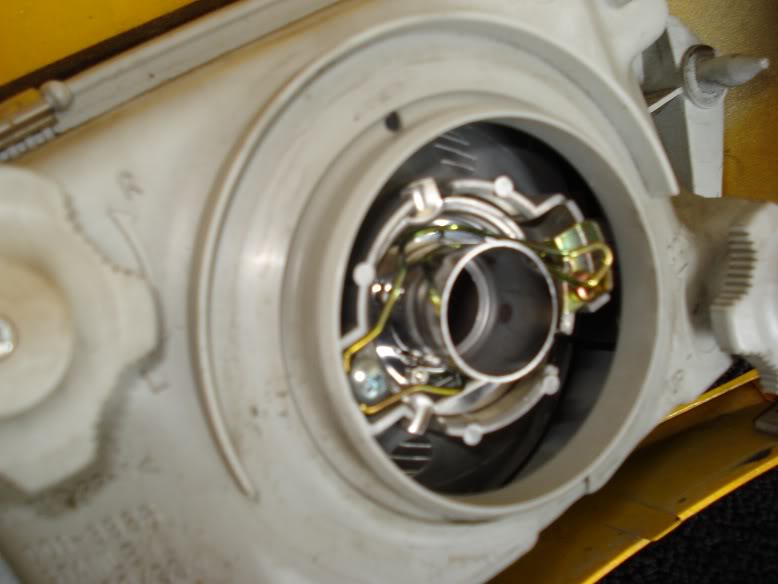
Put the metal cover in the headlight housing and clip it into place.
Then line up the groves on the bulb and twist it back into the metal cover.
Should look like this
Now comes the only modification I had to do to install this Kit. The rubber grommet that comes on the wires with the HID bulb doesn't want to fit in the hole in the factory rubber headlight housing cover. So we're going to modify it, a nice sharp exacto knife or box cuter works best. It's hard to explain so just see the pic below.
By cutting off the nipple of the rubber cover the grove in the grommet should now fit perfecting in the grove in the hole of the cover.
and from the other side (I can't remember if this pic was before or after I cut off the covers nipple)
Now for mounting the Ballast. Assuming the double sided stick pad they sent is the same size as the one I got, cut it in half and used just enough to cover the back of the ballast. When looking at the back of the gauge cluster, mount the ballast on the left hand corner.
You cannow remount the gauge cluster on the bike and don't forget to re-attach the two plugs BEFORE you bolt it down, learned that one the hard way.
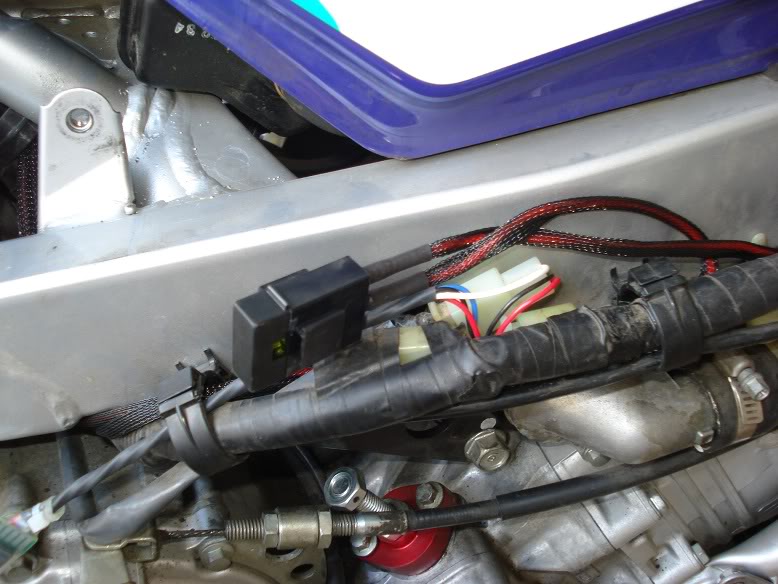
OK now we need to mount the black box connect to the ballast, this is where the extra sticky tape comes in hand as there are three things to be mounted and only one square left.
Pictured and circled in red is the ballast and circled in yellow is the in-line box, it's not shown in the picture but i mounted it to the relay switch that is right next to it. I also zip tied the wire to the harness wires right above that.
Now run the wires through toward the fuse box, I ran them along the rubber intake whose but you might find a better path. Pretty much I just played with different ways of tucking the wires once the fairings are back on which best hides them.
Next, there are two sets of wires coming off the Digital Control Unit, one is longer than the other. I used the shorter one since it's all so close. Take the plug that was plugged into the OEM headlight bulb and plug it into its matching connector from the DCU. Plug the big black plug from the DCU into the ballast. There are three plugs coming from the HID bulb. Two of them plug into their matching connectors coming from the ballast with the in-line box mounted to the relay switch. The smallest plug coming from the HID bulb connects to its matching wire coming from the DCU. Now take the longer set of wires from the DCU and fold them together and zip tie them together, leave some slack for the DCU to be mounted below the radiator cap. I tucked the big bunch of wires on the right side of the fuse holder and between the fairing.
Mounting the DCU is tricky, I still haven't mounted it properly. This was my initial spot, but it didn't feel like staying there so it kind of flops around and just hangs there.
And that's it. connect the battery, turn the key and make sure it is working properly before putting all the fairings back on. The bulb will seem dim when first fired but it will warm up in about a minute.
If it doesn't come on, make sure everything is plugged in correctly.
Well thanks for reading and I hope this helps, feel free to ask any questions or if I left anything out.

Senior Member
Joined: May 2010
Posts: 234
Likes: 0
From: Minnesota
I can't get my Hi/Low function working. Where is that black and red wire coming from in your pic? I have the black and white wire connection but I don't see where to connect it. Right now I just have the black and white wire capped off so it don't get wet. Did the black and red wires come from the DDM Tuning kit or is that something you added in? I know my kit didn't have that black and red wire hook up. If it is from the kit you would be my hero if you can tell me where it is located so I can splice in to it to get it working.
Moses

Moses
Thread Starter
|
Member
Joined: Feb 2010
Posts: 70
Likes: 0
From: Vancouver, WA
At the time i was afraid the 55w would be too bright at night and the headlight wouldn't have enough cut off. After installing I kinda wish i would have gotten the 55w, its plenty bright and i still blind people (the cut off is to high and i'm just too lazy to adjust the beam) but at the same time it could be a little brighter. Also i was concerned about the 55w puting out more heat and i wasn't sure how small of a space the inside of the housing was. it's definitely NOT too small, a 55w bulb would do fine, plenty of space.
Senior Member
Joined: May 2010
Posts: 1,753
Likes: 3
From: West Monroe,Louisiana
sounds good. noticed that my temp gauge light is out last night, so the tip on the LED replacements came in handy as well.
with the majority of the numbering on our gauges being white, how do you think the UV-Blacklight bulbs would show up on the 4 main gauges @ night? @ $1.79 each I might just get a couple to try out.
with the majority of the numbering on our gauges being white, how do you think the UV-Blacklight bulbs would show up on the 4 main gauges @ night? @ $1.79 each I might just get a couple to try out.
Thread Starter
|
Member
Joined: Feb 2010
Posts: 70
Likes: 0
From: Vancouver, WA
sounds good. noticed that my temp gauge light is out last night, so the tip on the LED replacements came in handy as well.
with the majority of the numbering on our gauges being white, how do you think the UV-Blacklight bulbs would show up on the 4 main gauges @ night? @ $1.79 each I might just get a couple to try out.
with the majority of the numbering on our gauges being white, how do you think the UV-Blacklight bulbs would show up on the 4 main gauges @ night? @ $1.79 each I might just get a couple to try out.