
HID headlights


Thread Starter
|
Senior Member
Joined: Dec 2005
Posts: 200
Likes: 0
From: Tempe, Arizona
I'm thinking about getting a HID kit. Another post suggested xenonking but I was wondering if
BOTH bulbs on our bikes are H7? I'd like to have both on like I've seen somewhere on this website but want to make sure before I order. Thanks.


Joined: Feb 2006
Posts: 6
Likes: 0
From:
XTRALIGHTS.COM...top of the line stuff. I have htree other kits for varius toys the oldest being over 3 years old and no complaints so far "except for people on the other side of the lights" but even thats rare. Plug and play to thats always nice.

www.hidynamic.com or on ebay the guys user ID is "timerivers". I've got the 6000K kit on my bike and it's awsome!! People call my bike the 2nd sun when I have the high beams on... you can see everything!!. Got mine off ebay for $255 and it comes with everything you need... you just get the fun part of trying to squeeze the damn ballasts and ignitors in there, lol.
I can try and take some pics (if I can get my digicam to work) if you'd like to see them... let me know
I can try and take some pics (if I can get my digicam to work) if you'd like to see them... let me know

Joined: Dec 2005
Posts: 854
Likes: 0
From:
ORIGINAL: thirdgenlxi
www.hidynamic.com or on ebay the guys user ID is "timerivers". I've got the 6000K kit on my bike and it's awsome!! People call my bike the 2nd sun when I have the high beams on... you can see everything!!. Got mine off ebay for $255 and it comes with everything you need... you just get the fun part of trying to squeeze the damn ballasts and ignitors in there, lol.
I can try and take some pics (if I can get my digicam to work) if you'd like to see them... let me know
If you can get your cam to work I'd like to see. Also if you can take some pics of where you have everything installed I'd appreciate it.
-Jesse-
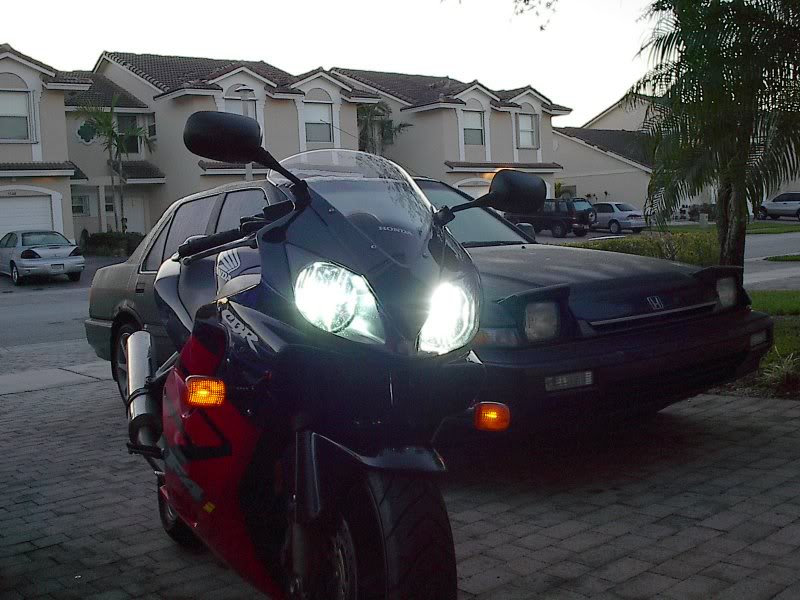
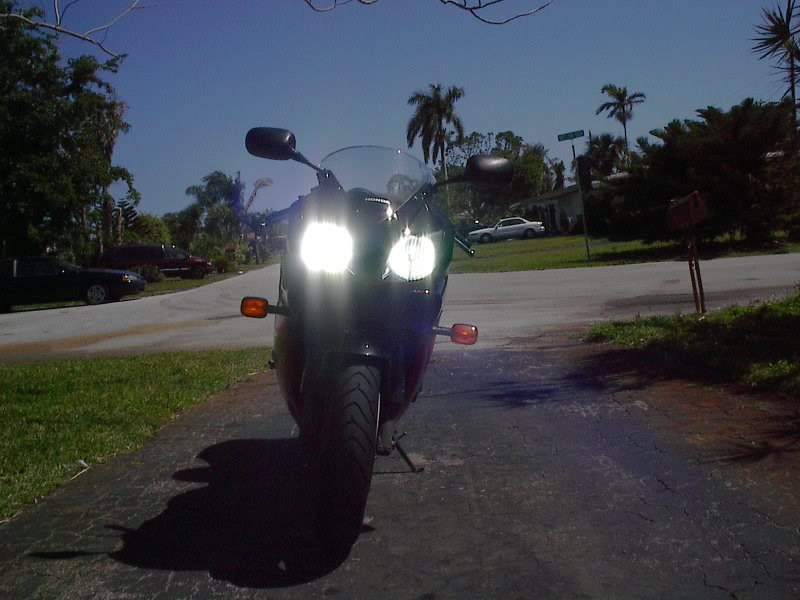
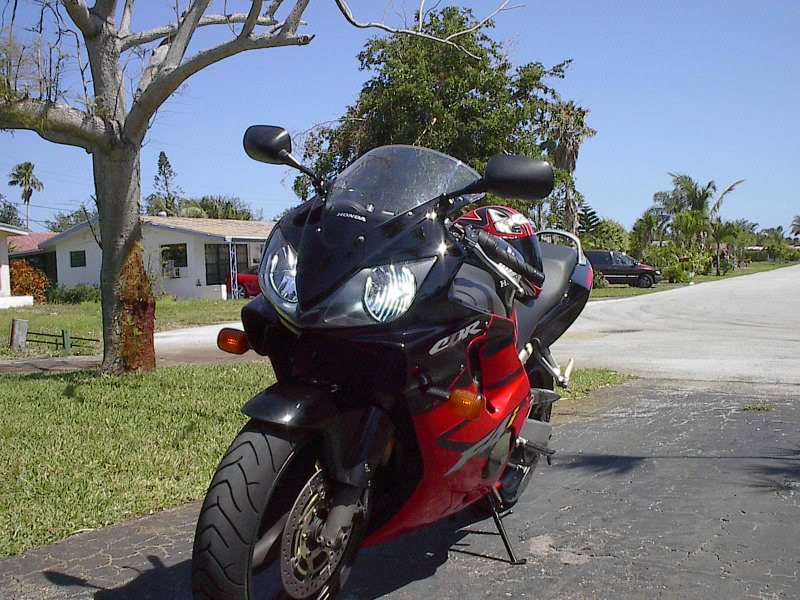
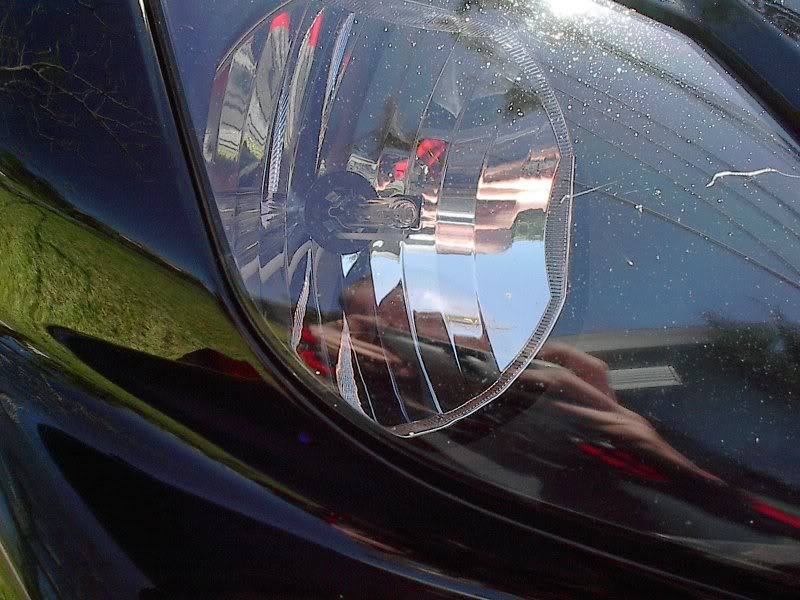
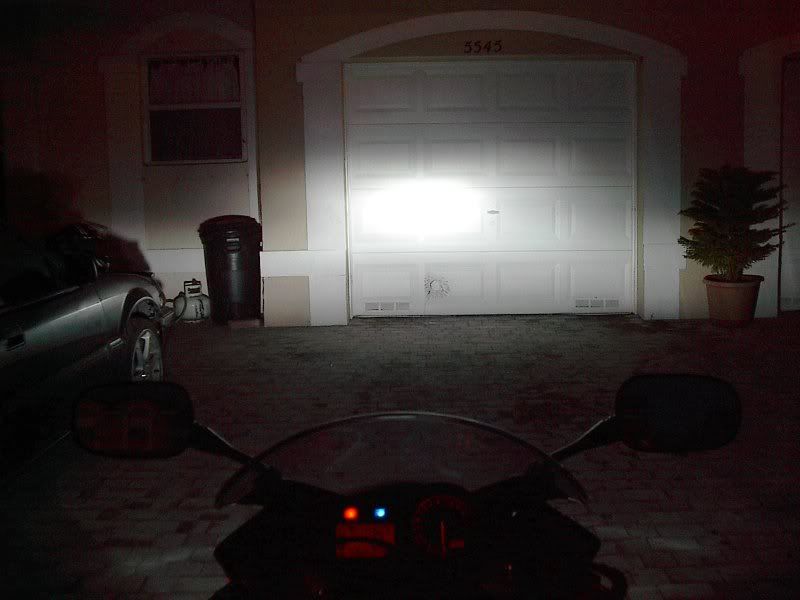
Ok here's some pics of my lights.... took them today at different times of the day cuz it's hard taking pictures of lights! A couple from early morning as I was leaving for work, a couple midday lunchbreak shots, and a couple night shots after I got home.
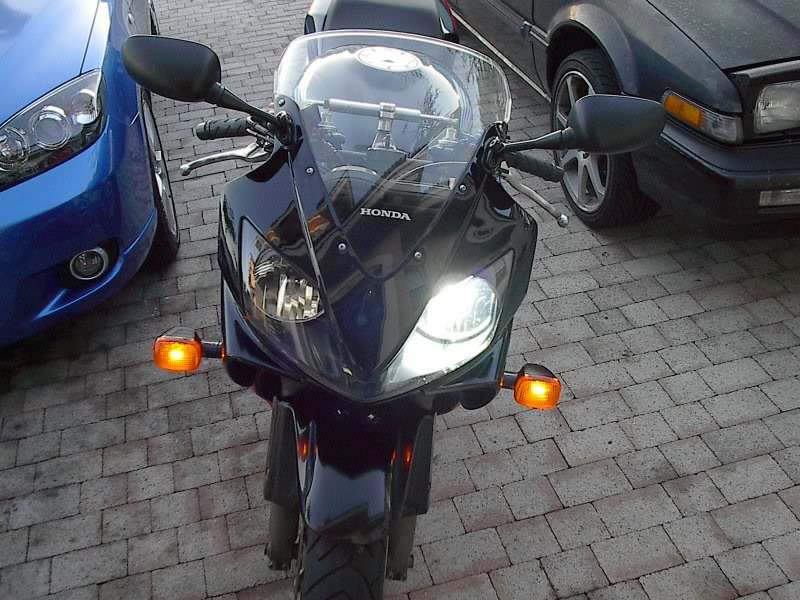
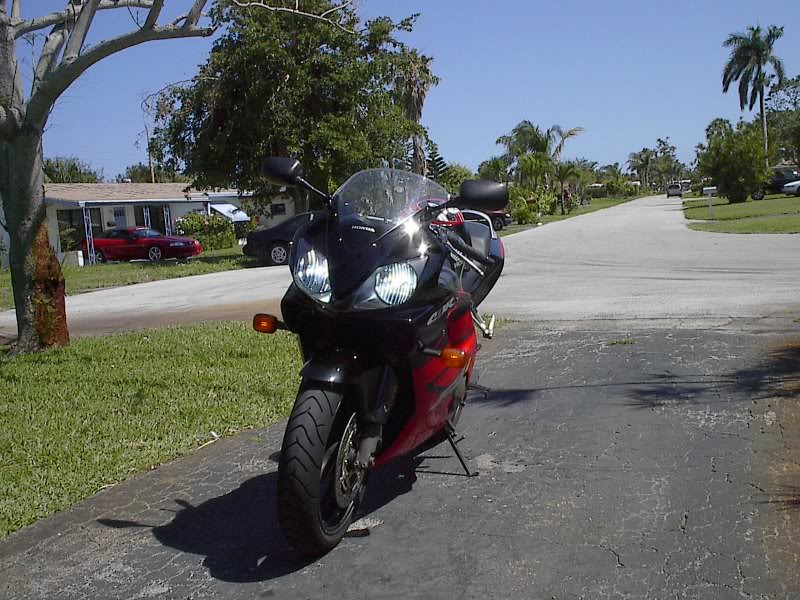
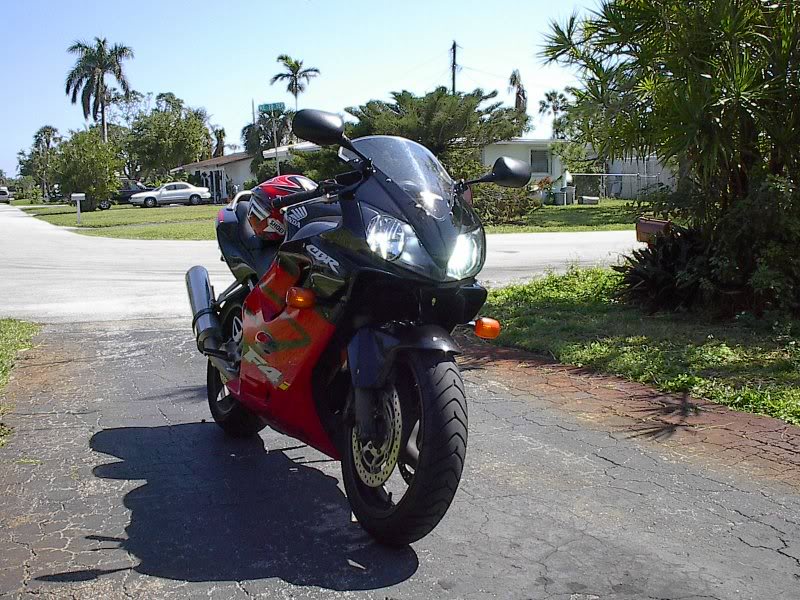
LOW BEAM
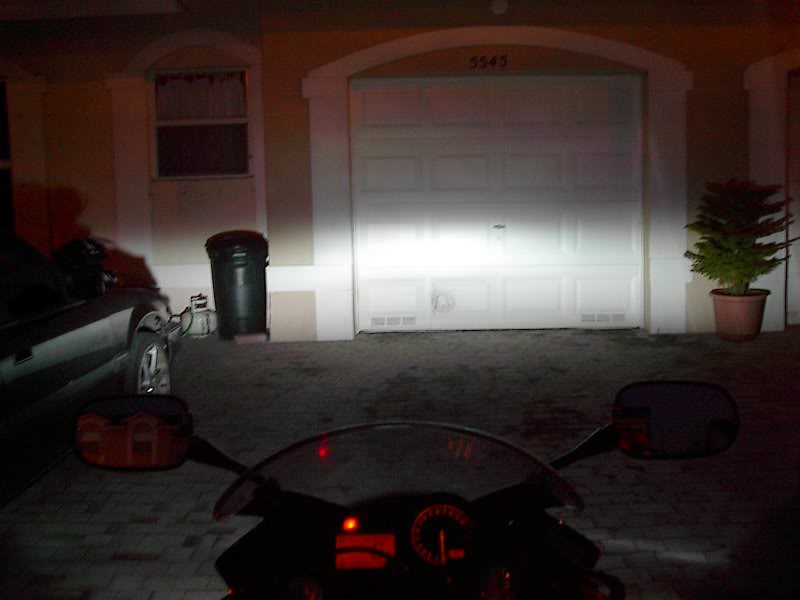
HIGH BEAM
Sorry I don't have any installation pictures of mounting the ballasts and ignitors. I had some and they seem to have disappeared, must have been accidently deleted or something. Anyways, a few tips on installing these bad boys....
1) Ballasts and ignitors: Good luck, that's all I'm gonna say!! hahah Naw they're a bitch but it can be done. This particular kit has seperate ignitors whereas some other kits have built in ignitors into the ballasts. Either way both work fine. What I ended up doing to mount mine was take off the grey intake tubing covers (the ones right under the clip-ons), and under there each intake tube has a baffle (kind of a triangluar plastic piece) sticking up under the cover up by the front cowl. These baffles are only there to reduce intake noise, so they're really not necessary. I ripped them out, they're only held in by a rubber grommet and a plastic drive pin. I then put some good strong tape over the holes left in the intake tubes so water doesn't get in (remember to clean real good before taping), then mount the ballasts and ignitors under the grey covers where the baffles once were. It BARELY fits so you just kinda have to play with it until you find exactly the right position of the ballast and ignitor that will allow the cover to fit back on properly, and it will you just have to keep playing with it. Kinda frusterating but persistance pays off. I used a few zip ties to keep all the wiring neat and out of the way. The wiring that goes into the stock headlight plus is just two bare prongs that stick into the slots on the stock connector. I just stuck them in there and taped them real good to keep them from coming out or touching other thigs.
2) If you've ever changed an F4i headlight bulb before you know that the stock harness doesn't plug directly into the H7 bulb, Honda has their own little connector that plugs onto the H7 bulb on one side and the wiring harness on the other. The HID bulbs have their own wiring pigtails so you don't need to worry about that, BUT that little black connector also works as a spacer to hold the bulb into the lens housing. If you try and put any H7 size bulb into the lens housing without that connector, the wire clamp used to lock it in place won't touch the bulb and the bulb will be loose and flopping around, plus water can get in. Here's what I did... I had an extra set of bulbs with those little black connectors, so I took my dremel with the cut off wheel and cut about 1/10 inch from the back of the connector where the prongs stick out. This takes off all the epoxy holding the prongs in place. Once that is off, gently tap the prongs from the outside and they'll push right out. I then took drill bit, drilled right down the middle and hollowed out the whole connector as close to the edges as I could without going through (although you really have to go through in at least one spot to make it fit). The sides are go
LOW BEAM
HIGH BEAM
Sorry I don't have any installation pictures of mounting the ballasts and ignitors. I had some and they seem to have disappeared, must have been accidently deleted or something. Anyways, a few tips on installing these bad boys....
1) Ballasts and ignitors: Good luck, that's all I'm gonna say!! hahah Naw they're a bitch but it can be done. This particular kit has seperate ignitors whereas some other kits have built in ignitors into the ballasts. Either way both work fine. What I ended up doing to mount mine was take off the grey intake tubing covers (the ones right under the clip-ons), and under there each intake tube has a baffle (kind of a triangluar plastic piece) sticking up under the cover up by the front cowl. These baffles are only there to reduce intake noise, so they're really not necessary. I ripped them out, they're only held in by a rubber grommet and a plastic drive pin. I then put some good strong tape over the holes left in the intake tubes so water doesn't get in (remember to clean real good before taping), then mount the ballasts and ignitors under the grey covers where the baffles once were. It BARELY fits so you just kinda have to play with it until you find exactly the right position of the ballast and ignitor that will allow the cover to fit back on properly, and it will you just have to keep playing with it. Kinda frusterating but persistance pays off. I used a few zip ties to keep all the wiring neat and out of the way. The wiring that goes into the stock headlight plus is just two bare prongs that stick into the slots on the stock connector. I just stuck them in there and taped them real good to keep them from coming out or touching other thigs.
2) If you've ever changed an F4i headlight bulb before you know that the stock harness doesn't plug directly into the H7 bulb, Honda has their own little connector that plugs onto the H7 bulb on one side and the wiring harness on the other. The HID bulbs have their own wiring pigtails so you don't need to worry about that, BUT that little black connector also works as a spacer to hold the bulb into the lens housing. If you try and put any H7 size bulb into the lens housing without that connector, the wire clamp used to lock it in place won't touch the bulb and the bulb will be loose and flopping around, plus water can get in. Here's what I did... I had an extra set of bulbs with those little black connectors, so I took my dremel with the cut off wheel and cut about 1/10 inch from the back of the connector where the prongs stick out. This takes off all the epoxy holding the prongs in place. Once that is off, gently tap the prongs from the outside and they'll push right out. I then took drill bit, drilled right down the middle and hollowed out the whole connector as close to the edges as I could without going through (although you really have to go through in at least one spot to make it fit). The sides are go
Thread Starter
|
Senior Member
Joined: Dec 2005
Posts: 200
Likes: 0
From: Tempe, Arizona
Damn Jared, you rock. Thanks for the write up and pics. Not sure if I'm down to undertake such a mod. Wish I could just take somewhere and have them do it cause I'm sure I'd screw something up. Had no idea so much was involved!