
Fork Seal Leak - Rebuild (Completed)


Thread Starter
|
Super Moderator
Joined: Aug 2006
Posts: 5,304
Likes: 512
From: South Florida, USA
Well, I noticed last week that the fork seals on the wife's F4i were leaking so I figured I'd go ahead and rebuild them. I haven't rebuilt forks before, so I figured it was about time I did a pair. I'll describe the process as best I can and any observations along the way. I'm not going to go into the process of how to remove the fairings, brake calipers, or wheel. I figure most of you can figure that part out.
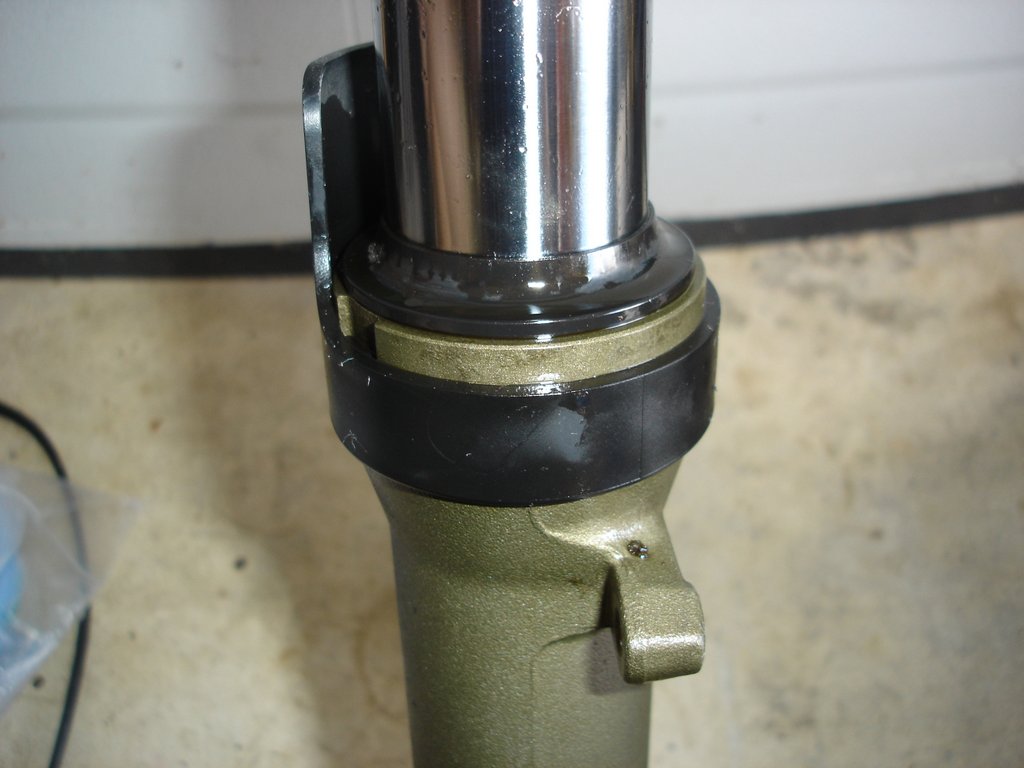
Here you can see the symptoms of leaking seals.
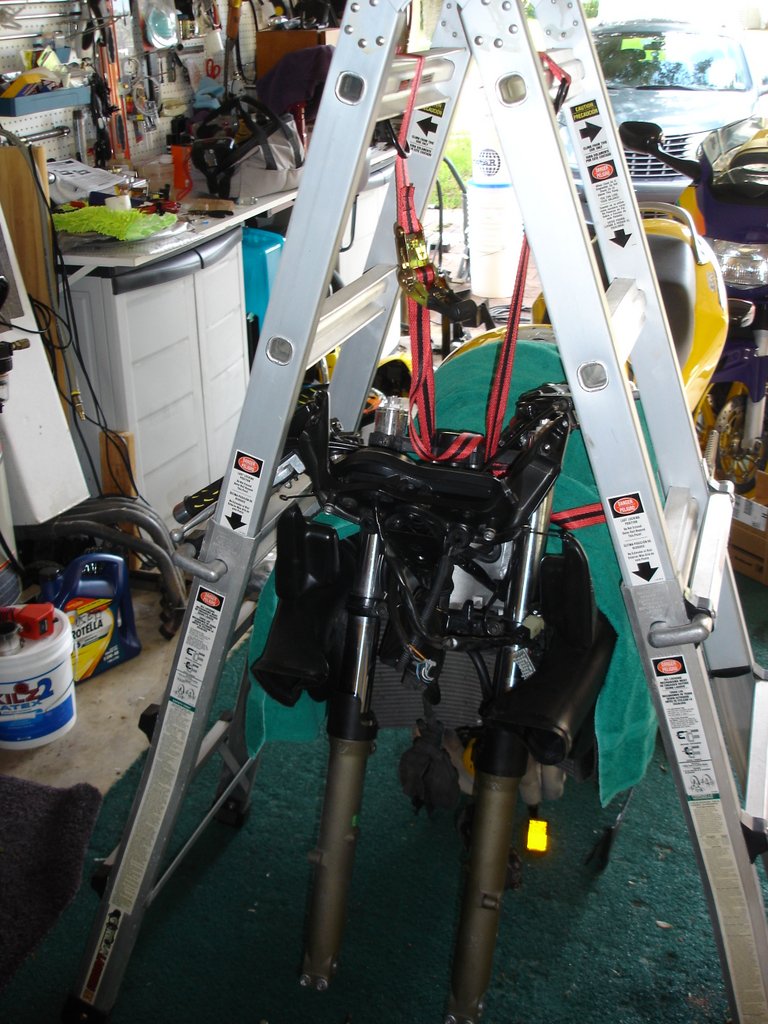
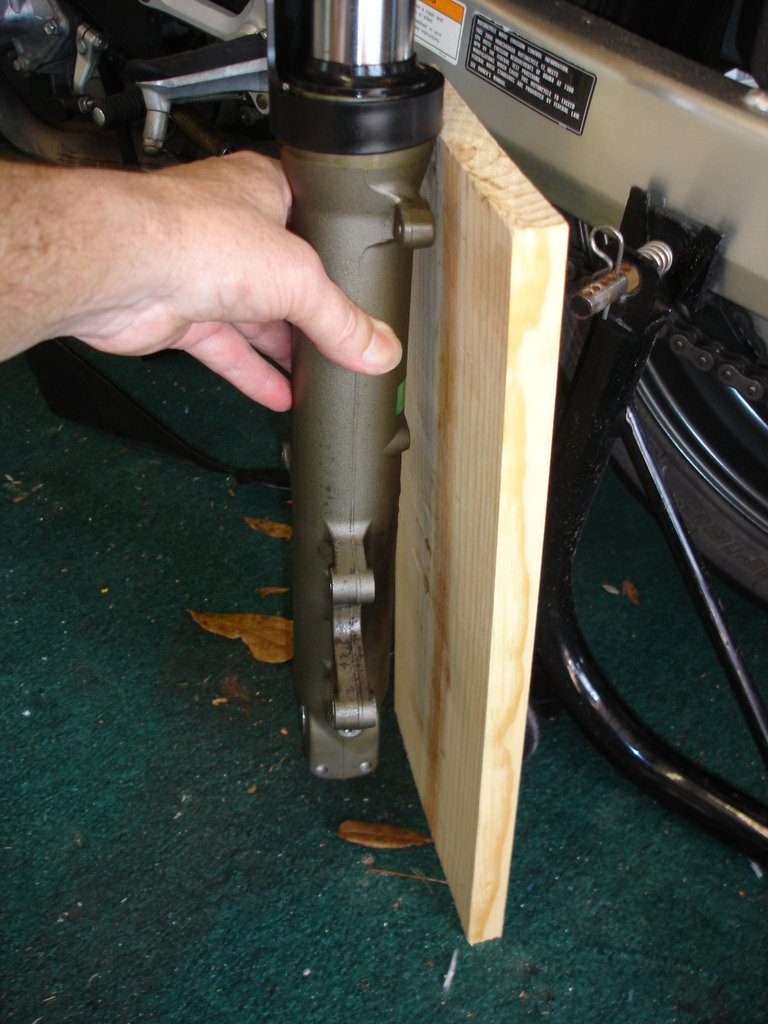
I don't have paddock stands that support from the tripple tree, so I used the classic A frame method and used a ladder to support the front end. A single tie down strap was enough to hold the front end off the ground. You don't have to raise the front end any higher than the amount that a normal paddock stand would raise the front wheel. Just a couple inches was enough to be able to remove the fork tubes.
I'd suggest breaking loose the Fork Cap nut prior to removing from the tripple tree's. This will make dissassembly easier.
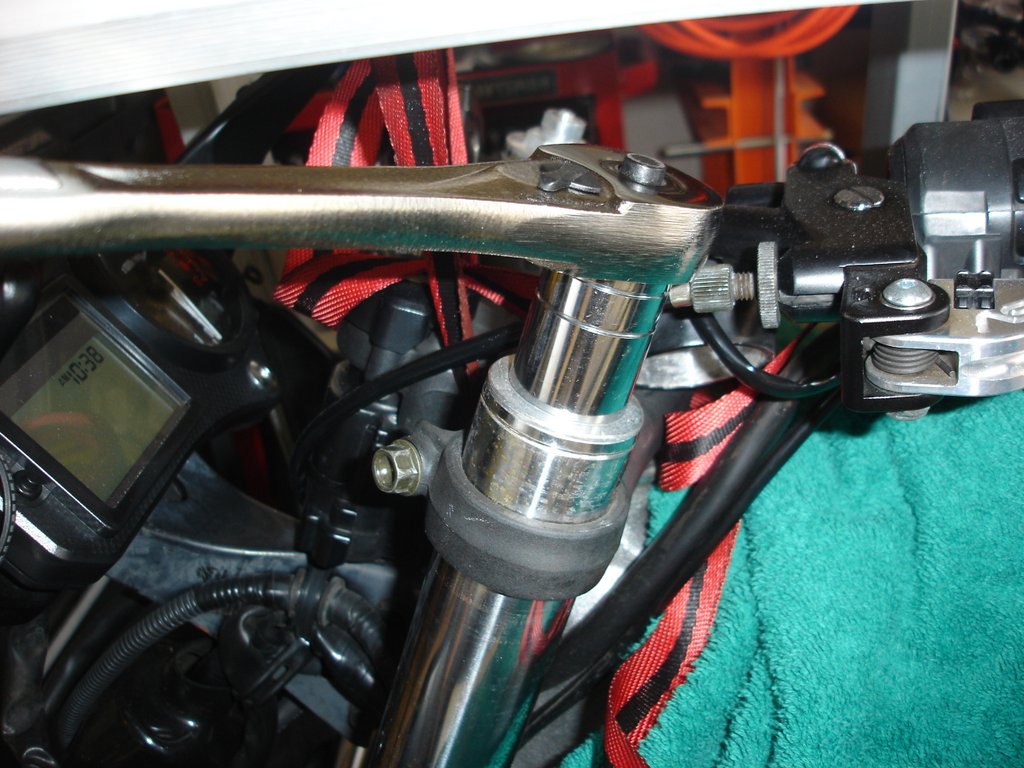
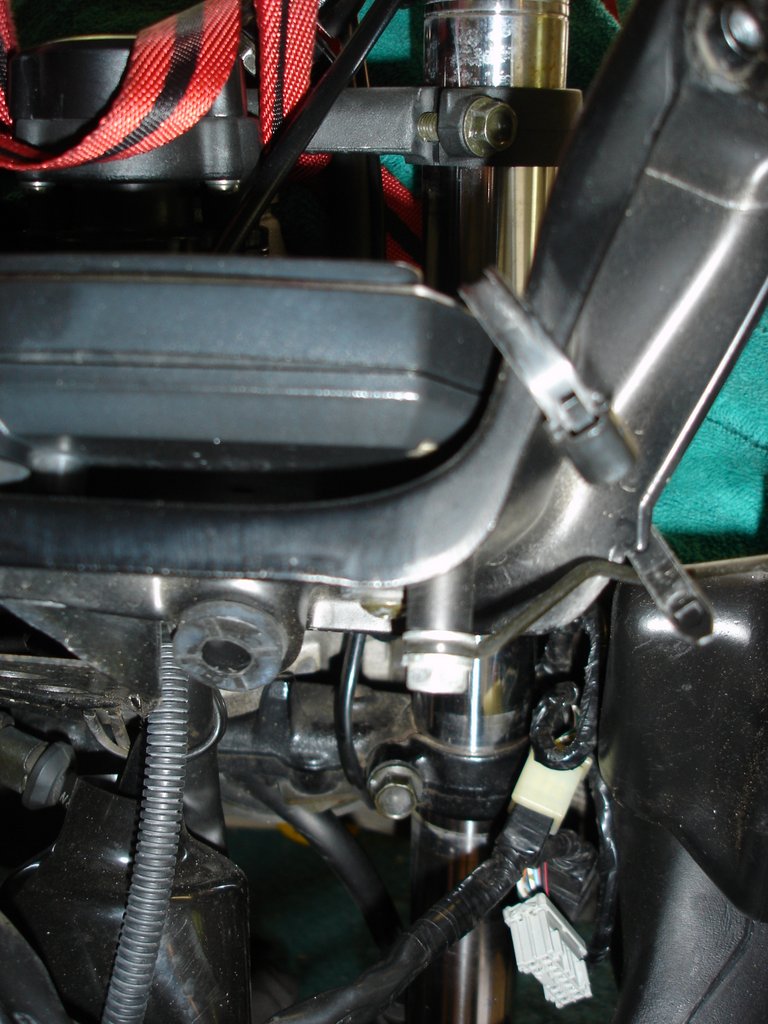
Here you can see the pinch bolts. Once you loosen these up, the fork tube will slide right out (almost too easily).
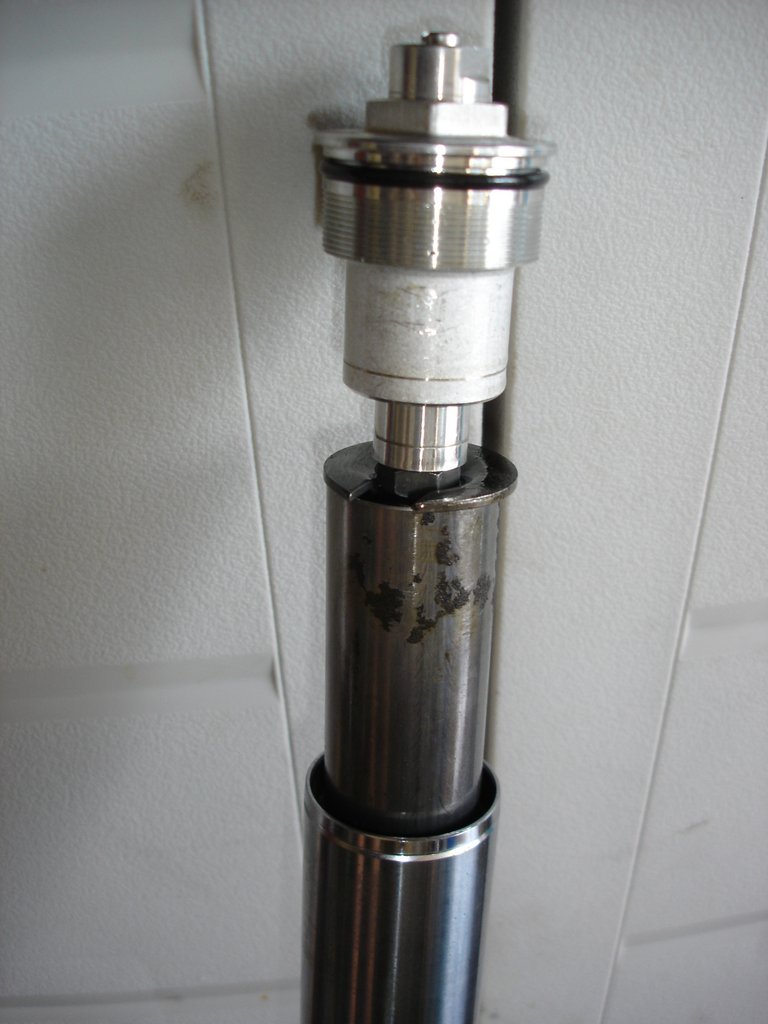
I loosened the Fork Tube Cap from the top of the fork tube until I could lower the fork tube exposing the spacer and seat stopper. After removing the fork tube cap nut I was able to remove the fork spacer and spring. Then just dump the oil out.
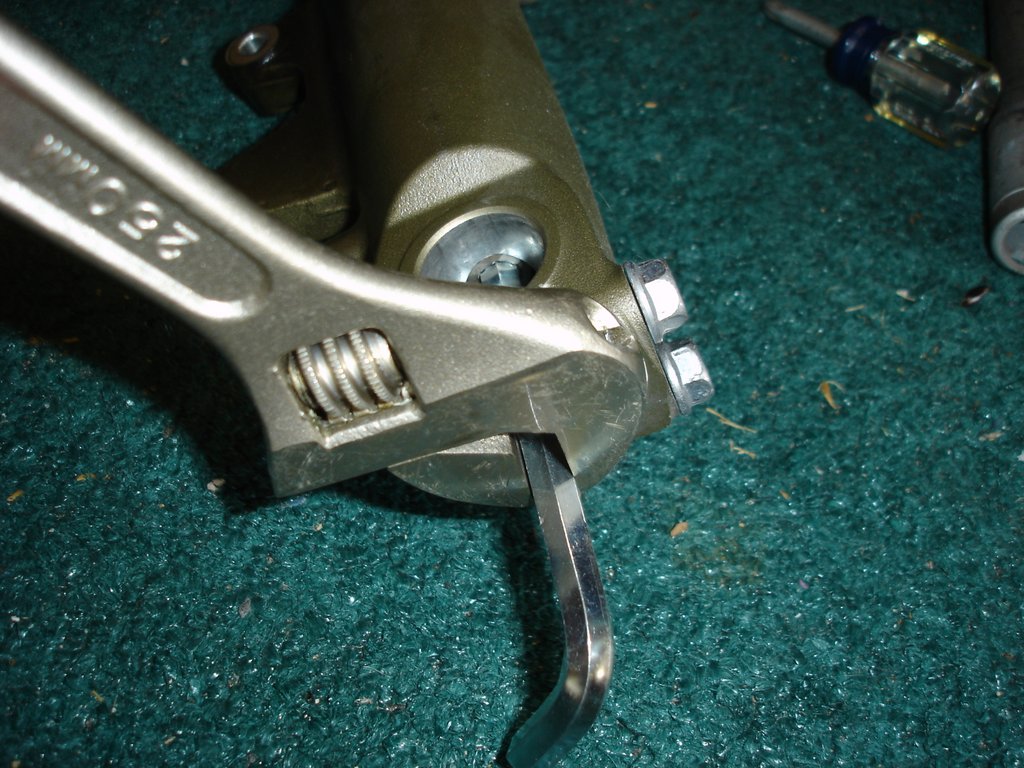
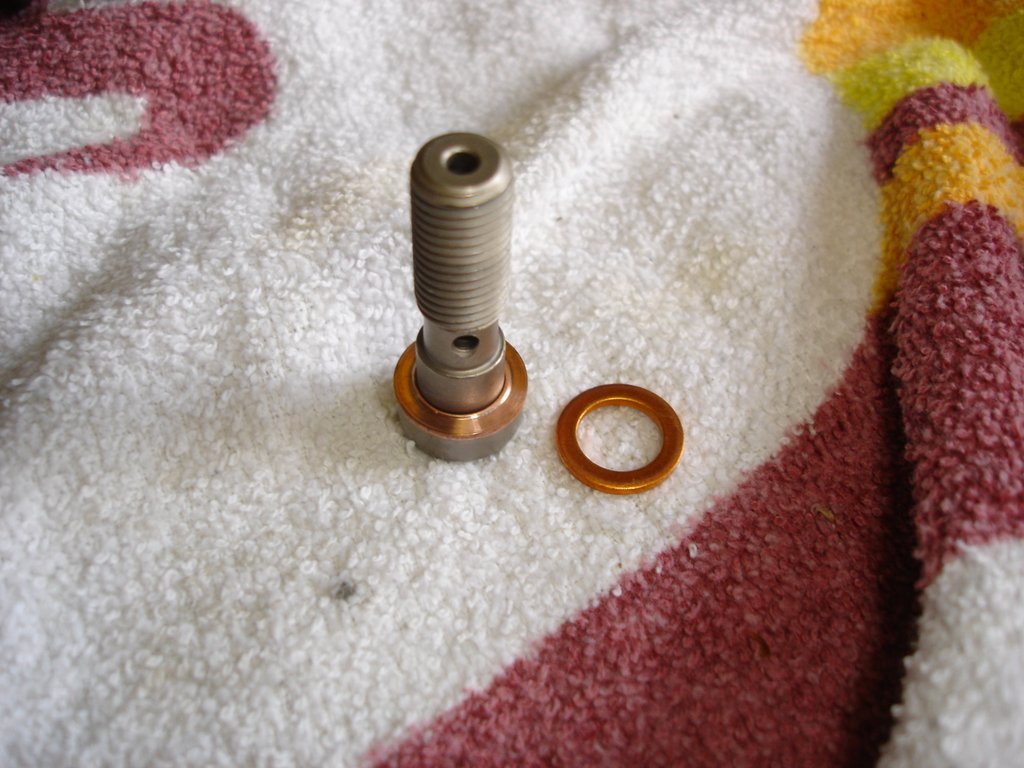
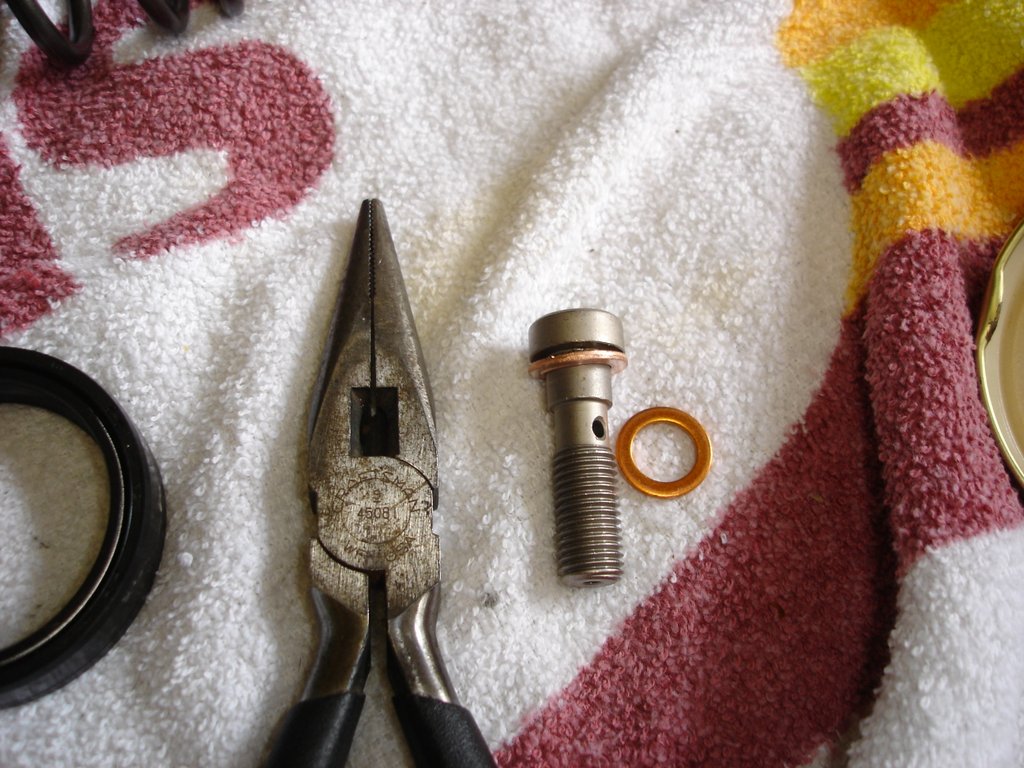
At the bottom of the fork tube there is an 8mm allen head screw that's in fairly tight, and it holds the internal shaft. I'd recommend loosening it before taking the fork tube out of the triple tree, or you could end up wrestling it out like this by standing on the ground trying to keep it from rotating. Removing that bolt will allow any remaining oil to come out the bottom. There is a copper washer that you'll want to replace. It's similar to the washers you see on the banjo bolts for brake lines.
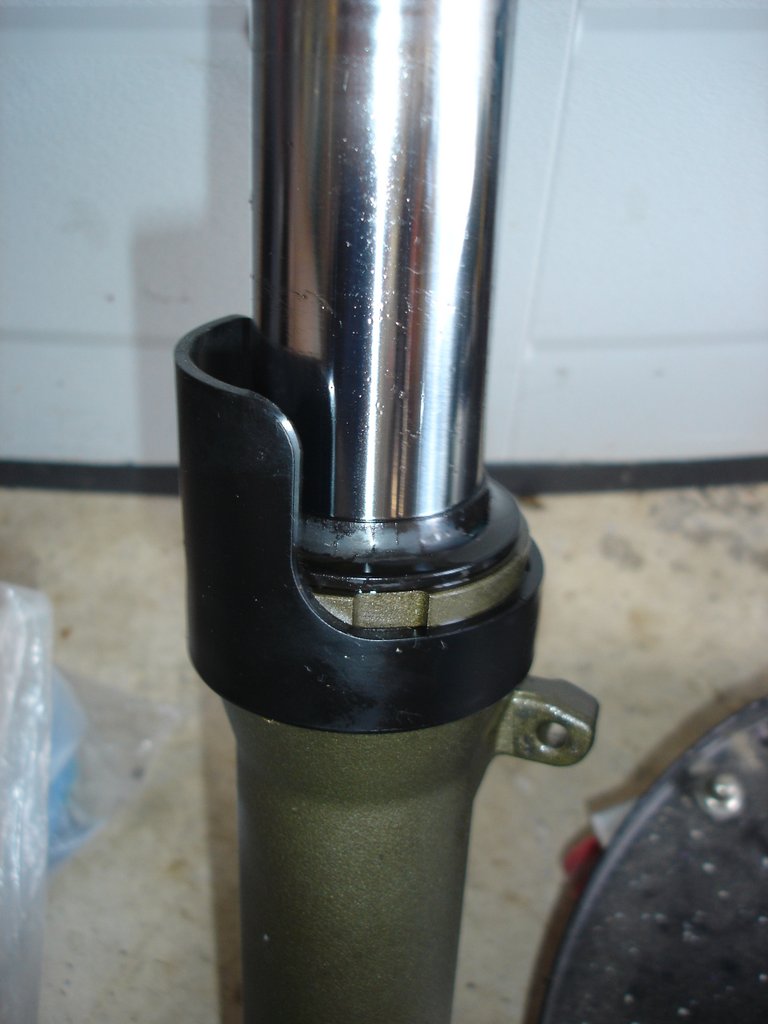
Once I had the internals removed I removed the fork protector. It's snapped into a groove around the upper part of the Fork Slider. I simple used a piece of wood that was a little longer than the fork slider. I placed the wood under it and then tapped the entire assembly against the ground. The weight of the fork tube helped drive it off. After each tap against the ground, I would rotate the fork tube about 90 degrees and tap it again.
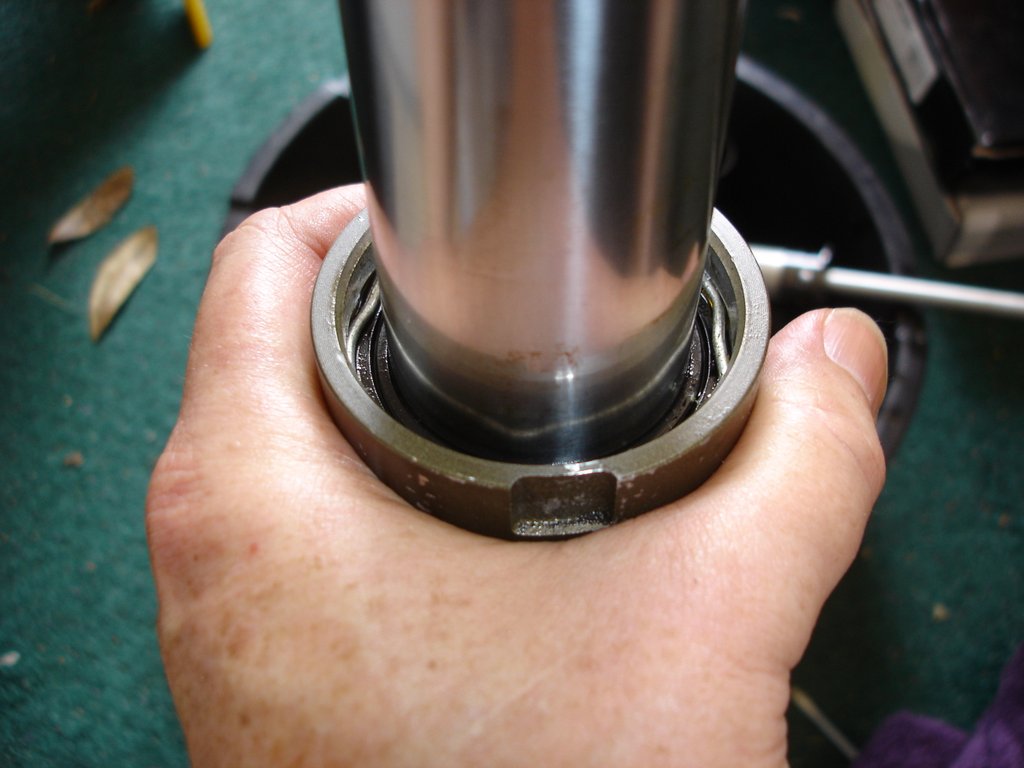
Once the protector is off you can remove the dust seal by inserting a screwdriver under the lip and gently prying it up. It comes up pretty easily.
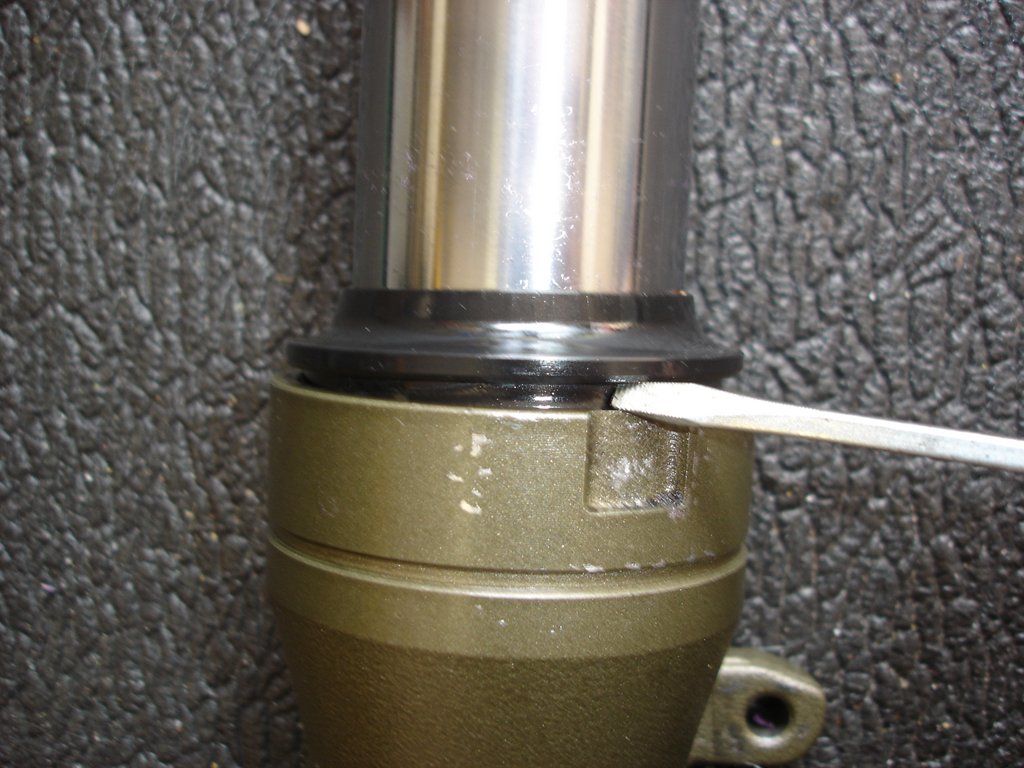
Below that there is a retaining ring/snap ring that prevents the oil seal from coming out. It comes out pretty easily with a small screwdriver.
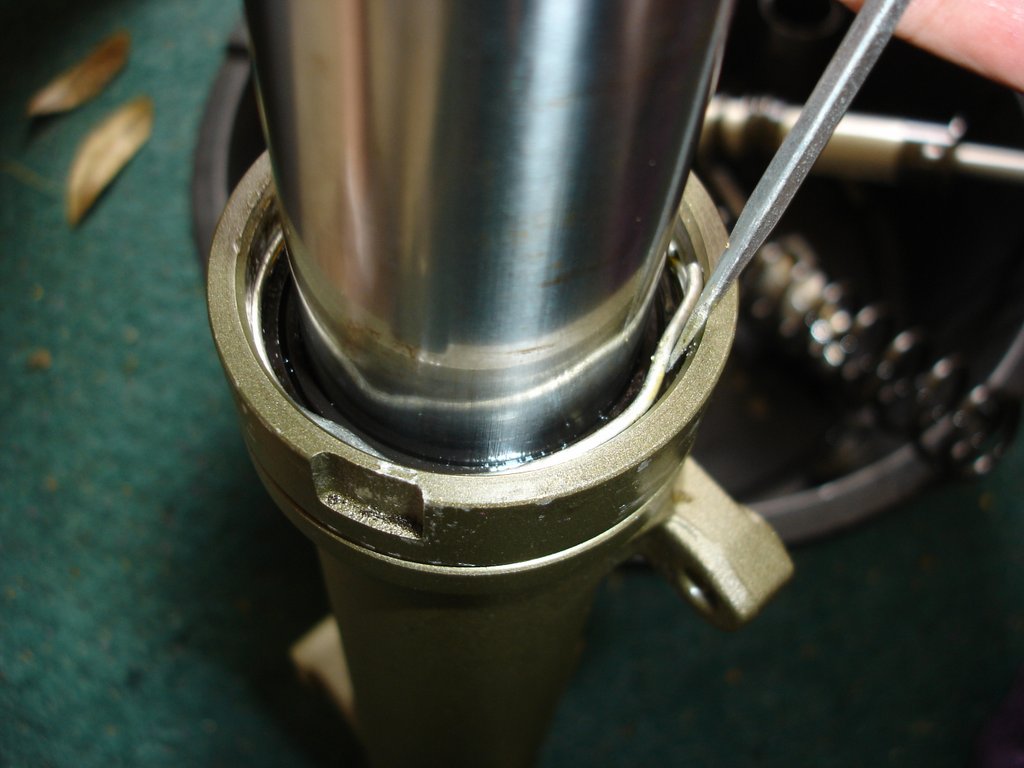
After that it's a matter of sliding the fork tube upward rapidly until it stops. It's like using a slide hammer to remove a dent.
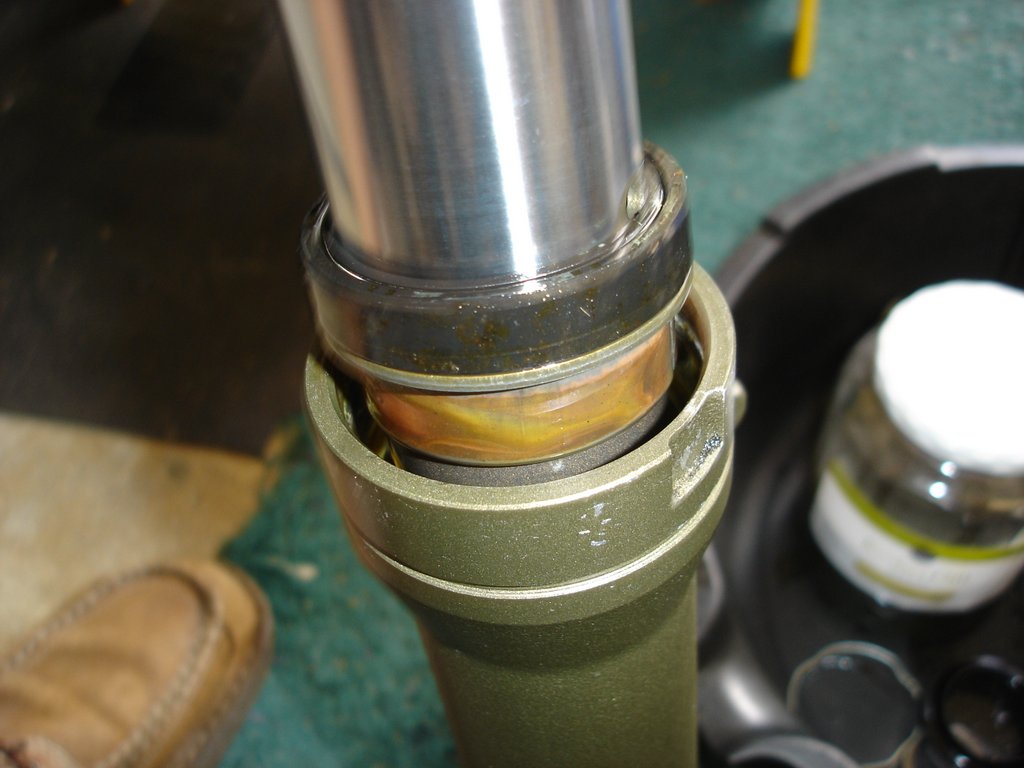
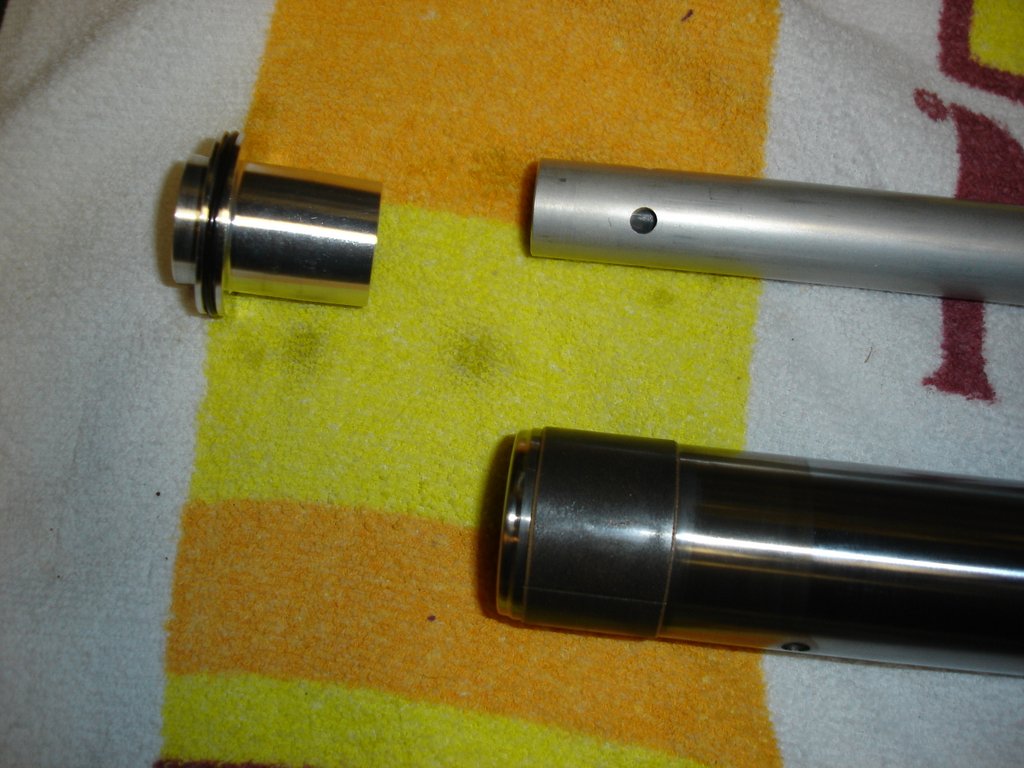
When you get the for tube out it will probably look like the image below. Most likely the Oil Lock Piece will still be in the bottom of the Fork Slider. It has an O ring around it and it's not going to slide out easily.
The Oil Lock Piece is the Top Hat looking part in the upper left of this photo.
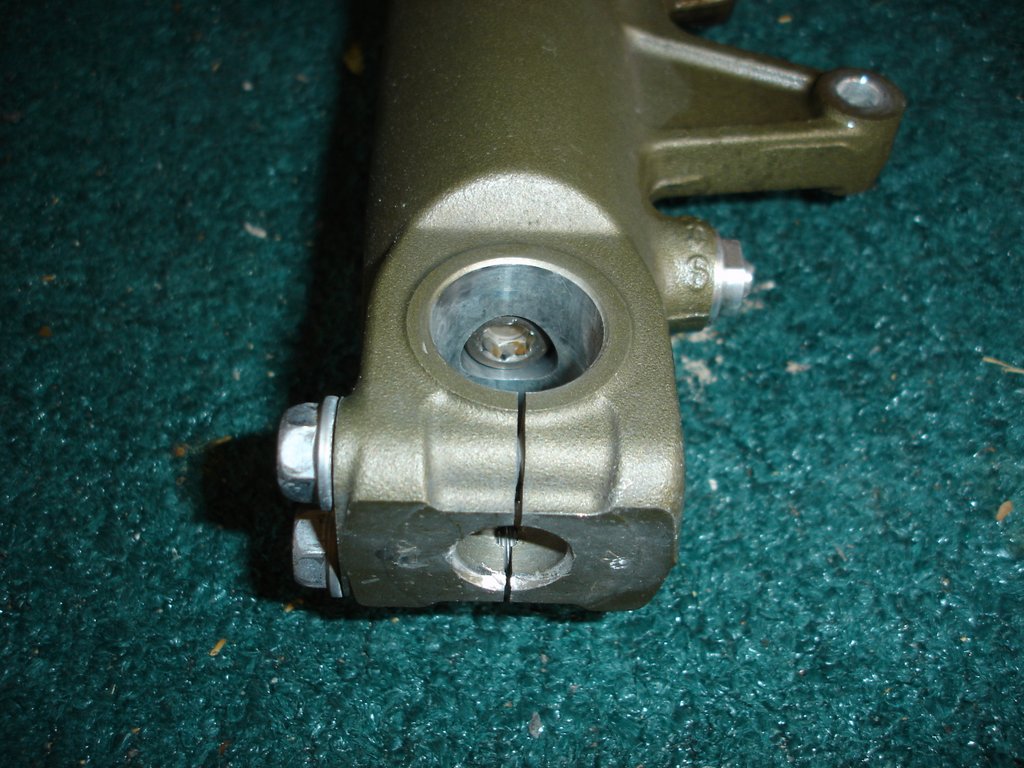
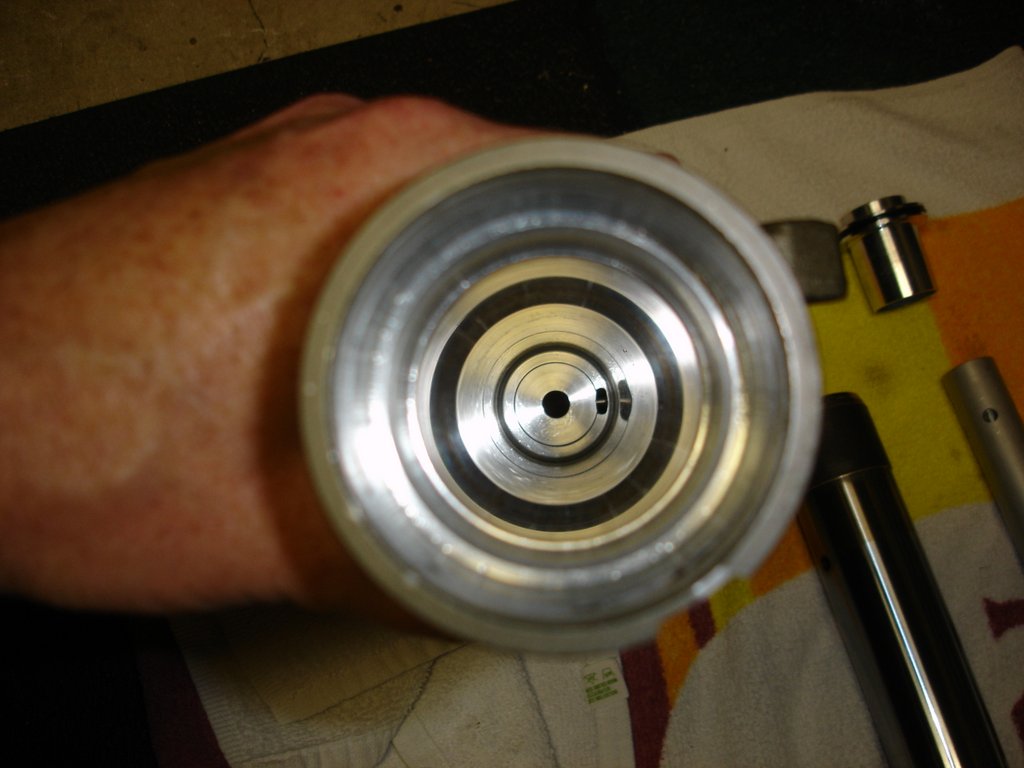
If you look down inside your Fork Slider and after you clean it out, it looks like this with the 3 holes arranged like this, then the Oil Lock Piece is still in there.

The only way I could get it out was by putting a large folded up towel on the ground for some thick padding, and then turned the Fork Slider upside down and slammed it down against the towel to get the part to slide down the inside to the open end. After you get it out, it will look like this inside.
Now clean all the parts. I used Break-Clean. It cleans well and evaporates fast and doesn't leave any residue. It's recommended that you replace the O rings, items #25, 26, and 27. Also replace the Oil Seal and Dust Seal item # 16 which includes both of them. Item #8 and 9 are the parts that wear. They are teflon coated. I replaced both of them.

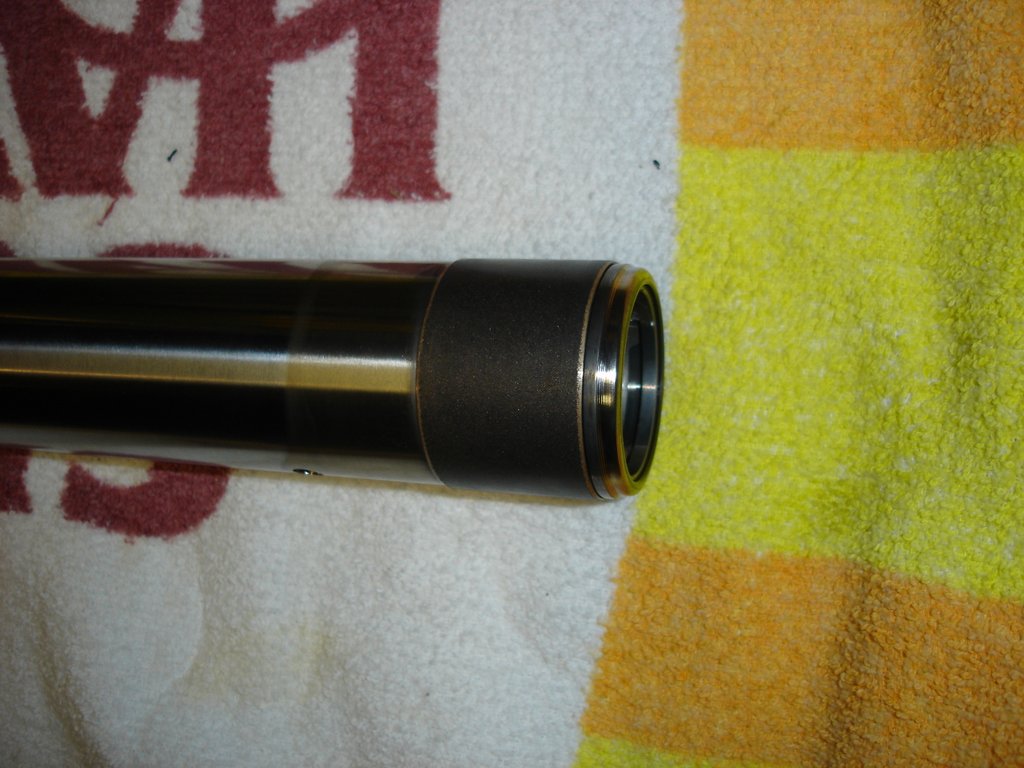
This was item #8

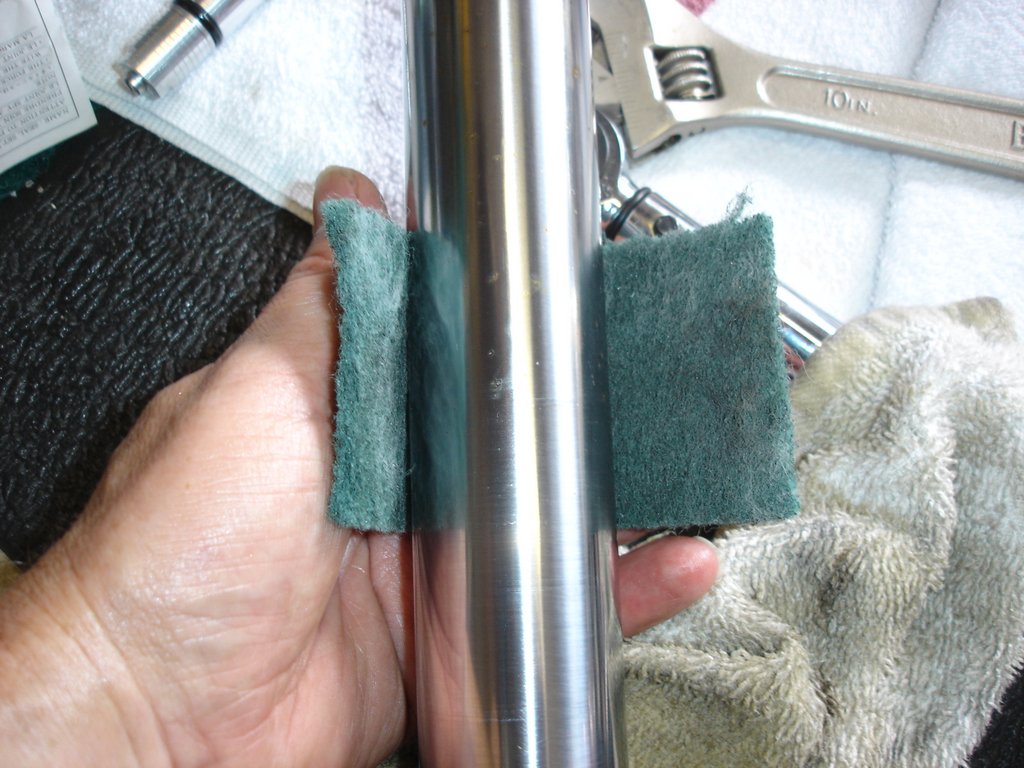
I used a Scotch Brite pad to remove any bit's of rust on the upper portion of the Fork Tube. I used it by rotating the Fork Tube in my hand while holding the pad against the tube. I didn't slide the pad up and down the tube because I wanted to avoid any vertical scratchs in surface.
During reassembly, I used the old Oil Seal as a driving surface to push the new seal into place. I just slid the old seal on top of the new one, placed a board against it and hit it with a large hammer. I would rotate the fork tube around and strike it again. Having the proper tool I'm sure would have been the better way to go, but I didn't have one and didn't want to spend the time trying to locate a piece of PVC tubing that I could cut up and fashion one out of.
After getting the Oil Seal back in and the snap ring, the Dust Seal goes in easily. Next I had to put the 8mm Allen screw back in and torque it to 25 ft lbs. I had to get the old copper washer off and the new on on. The old one was on there pretty good. I had to drive a screwdriver under it to get it off.
I had to cut one of my old 8mm Allen wrenches because I didn't have a 3/8" drive one that was long enough. I tried for about 5 minutes with the hacksaw, but was getting no where fast. The air grinder/cutter did it in about 1 min.
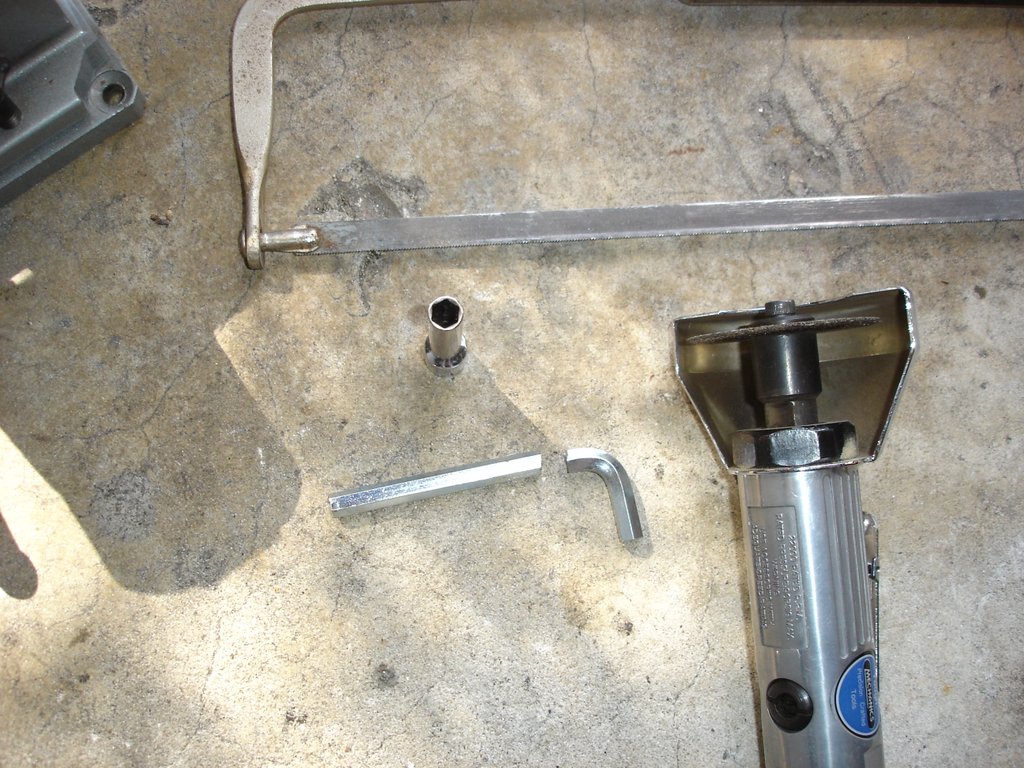
I put an 8 mm socket over it and I was good to go.
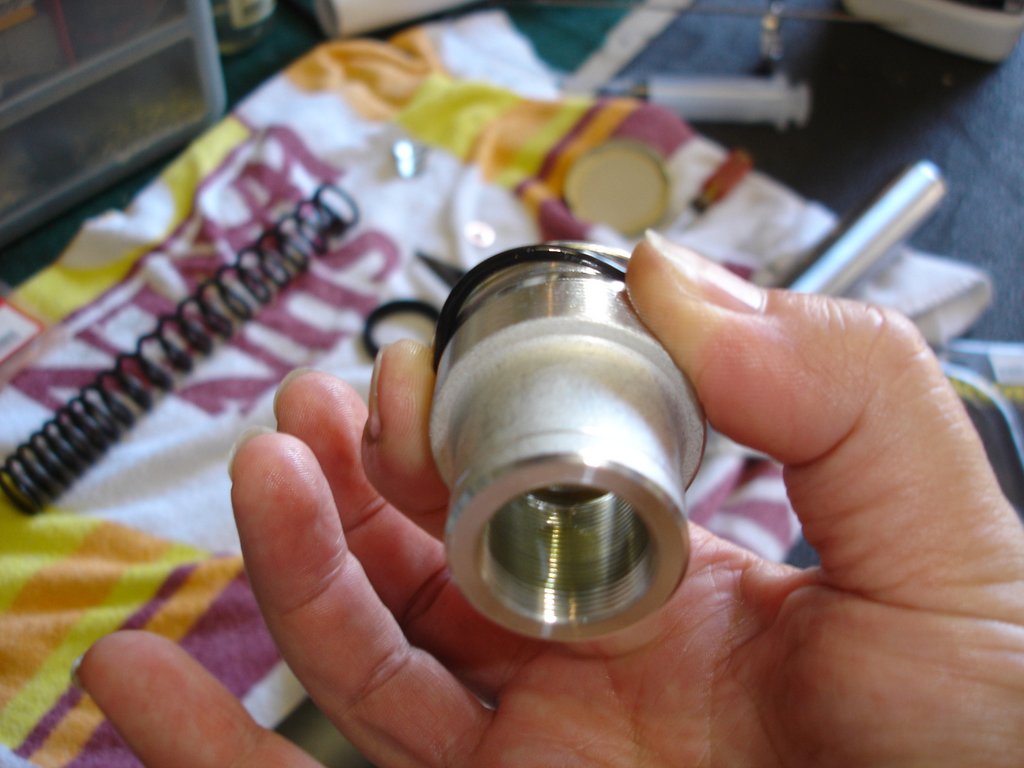
This is item #14 which is the Fork Tube Cap. It has an O ring around top that you want to clean. Not only clean the O ring, but the groove it sits in. To remove, grip it on opposite sides with your thumb and forefinger and then try to slide your fingers together. As you do, the O ring with bulge outward where you can grab it and pull it off. Try to avoid being tempted to use a screwdriver or sharp metal object to get in under the O ring. The cap is aluminum and easily scratched which would promote a leak.
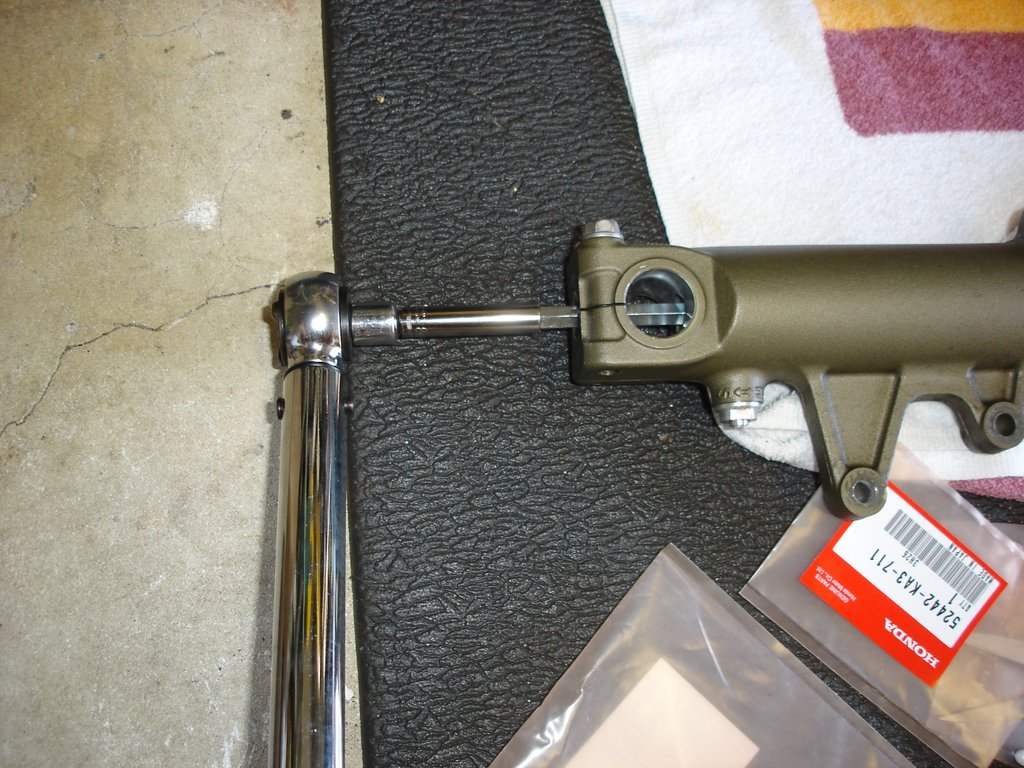
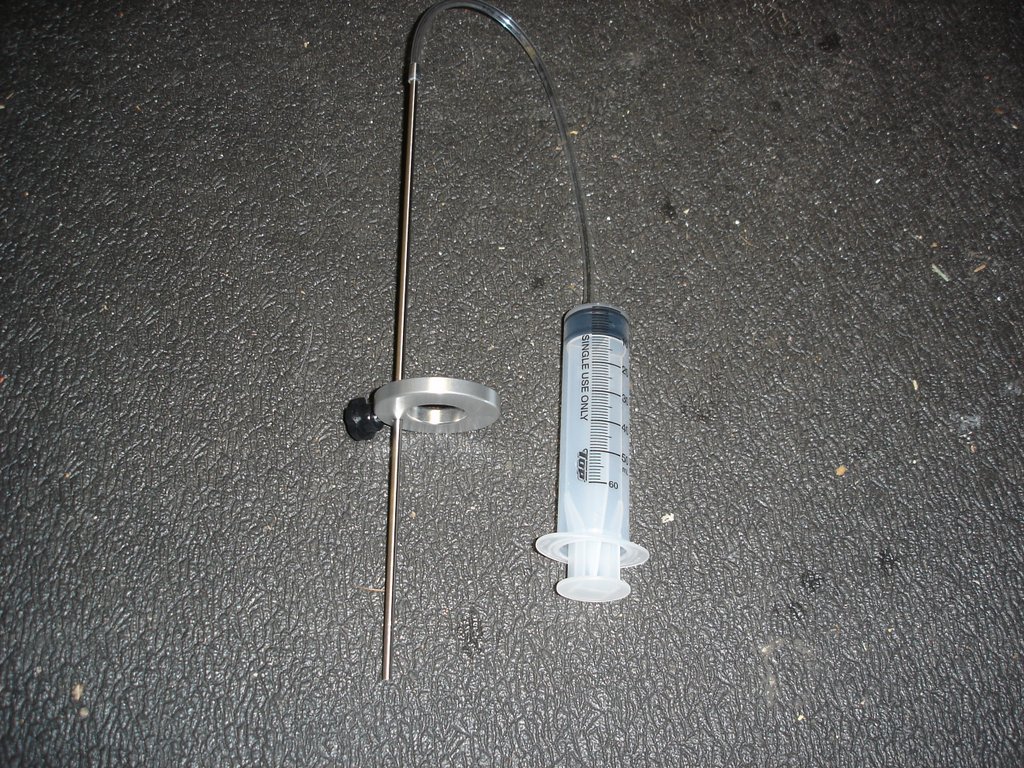
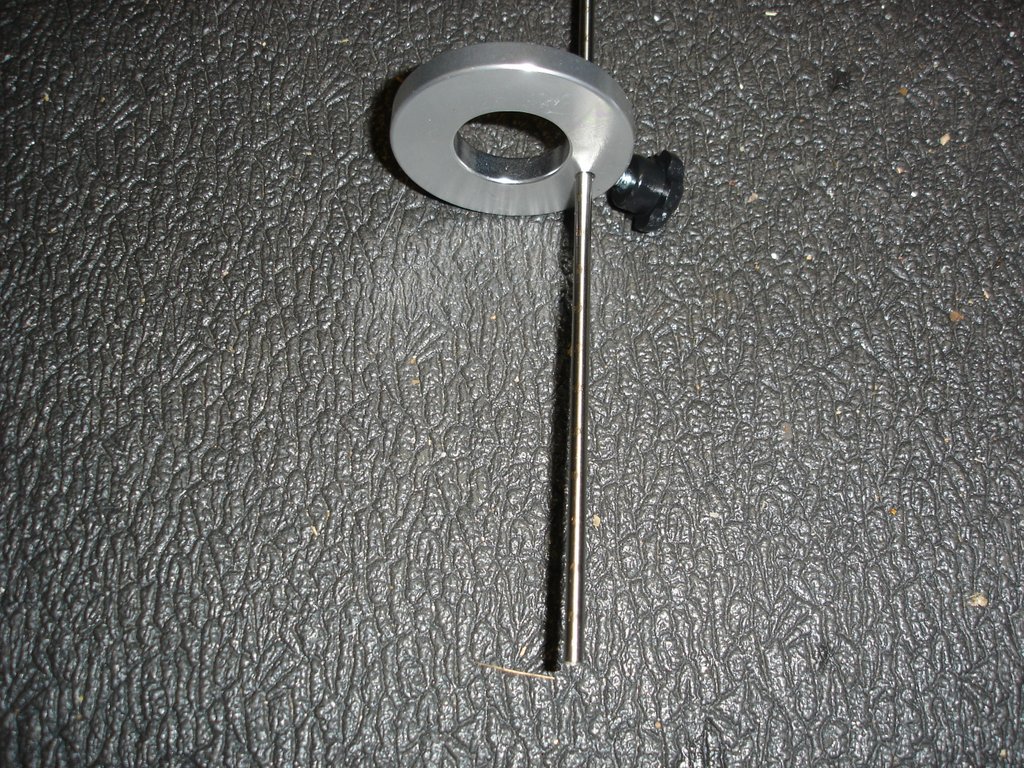
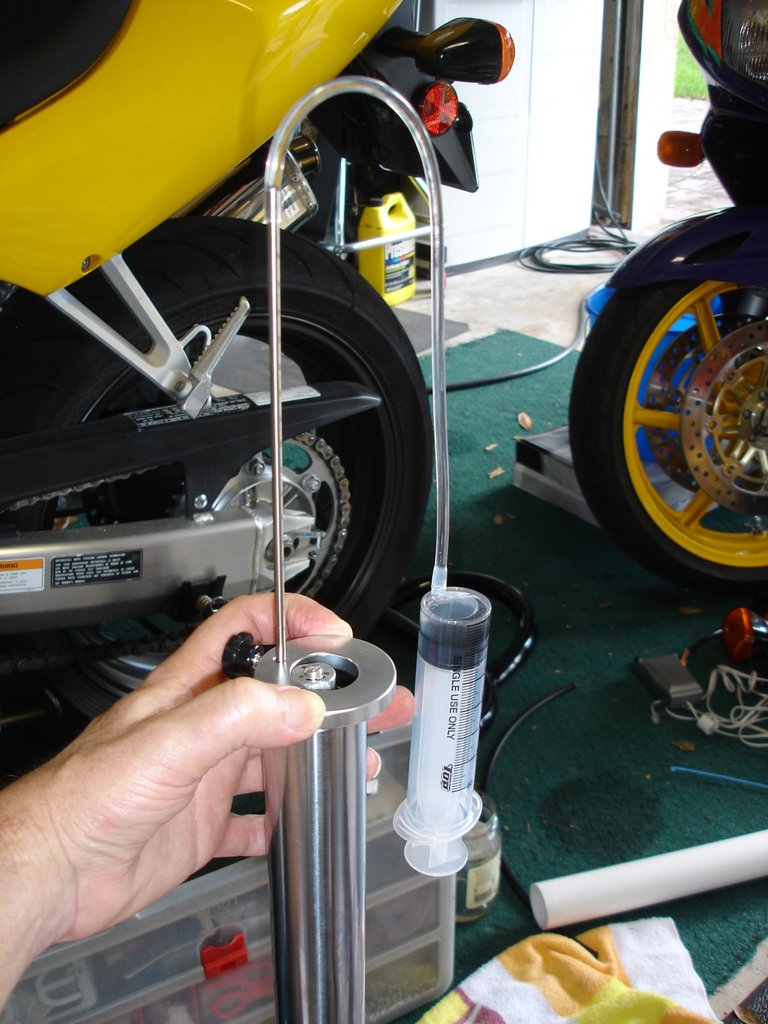
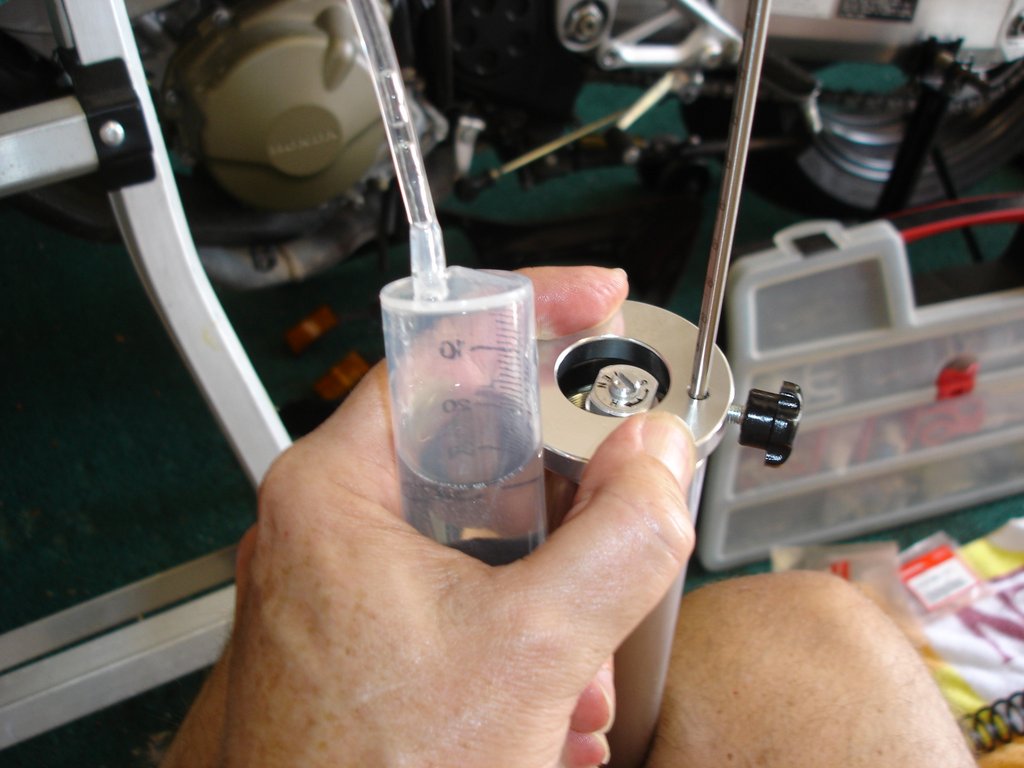
They tell you that you're supposed to fill the fork with 15.6 oz +-.08. Seriously, I mean really... who's going to measure it out that precisely. The nice thing is that they tell you the fluid should be 116mm from the top of the Fork Tube with the spring still out. After putting about 16 or 17 oz's of Fork Oil in it. Pump the center part up and down a few times to get the bubbles out of it. With this tool you measure 116mm of tube to extend below the ring. Then insert it into the Fork. Then you pull on the syringe plunger and it sucks out the excess Fork Oil until the level is 116mm from the top of the tube. When it starts sucking air, you know it's at the right level.
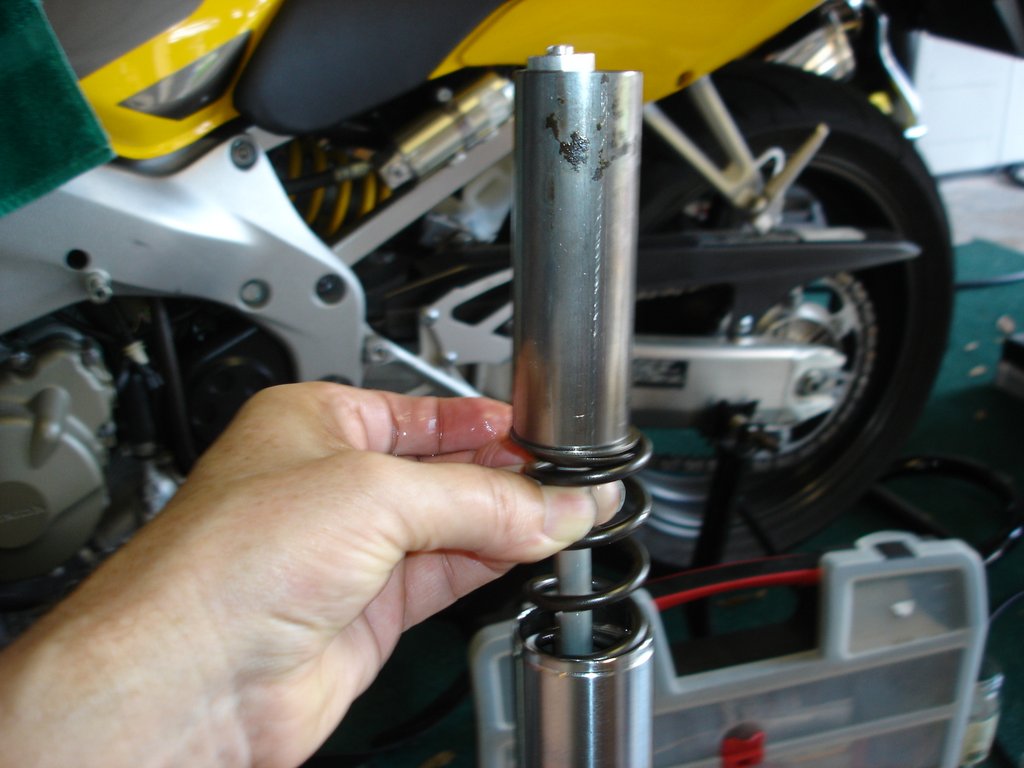
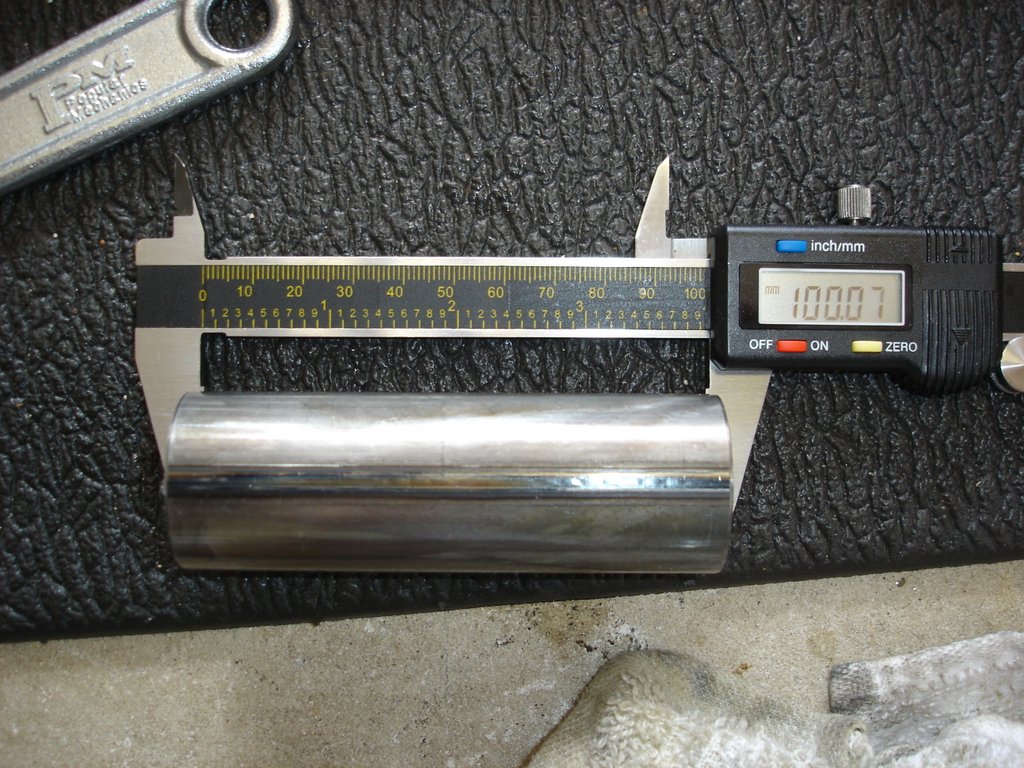
Once the fluid is at the right level, you're going to put the spring back in with the tapered end and tighter wound coils first towards the bottom. Then the washer, the 100mm tube spacer and the retainer clip.
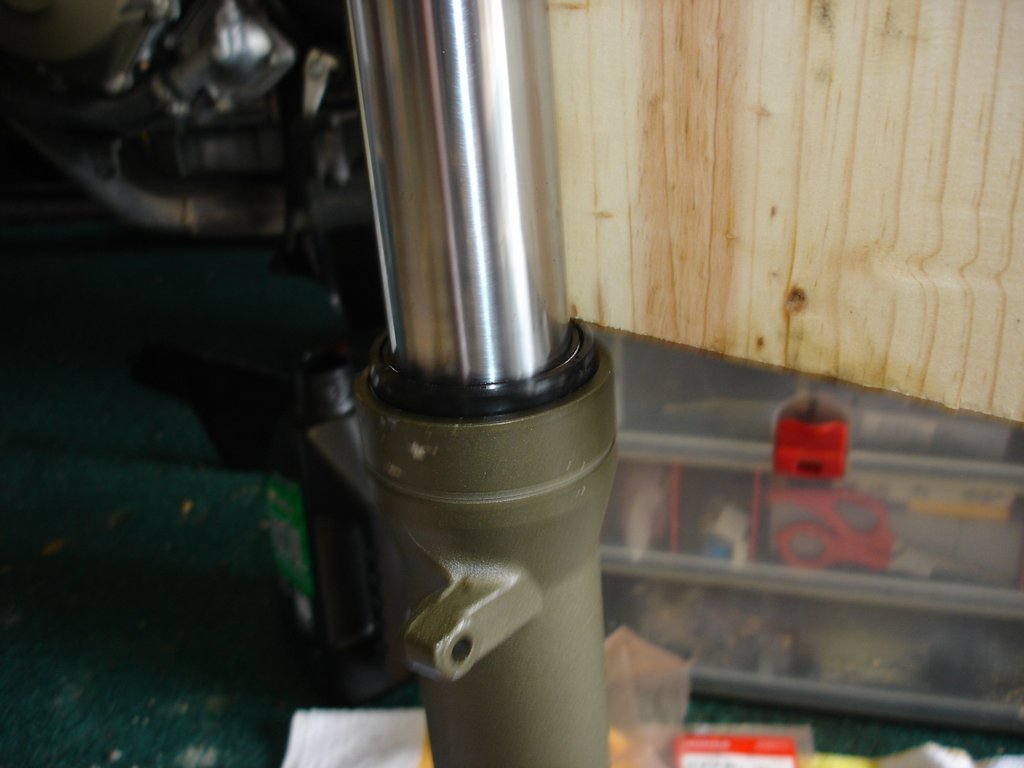
Here we are back at the top with it ready to be screwed back together. I wasn't too concerned about tightening the cap bolt here, I'll do that once they're back on the bike and torqued down. Then you're just going to insert it back onto the triple trees and tighten the pinch bolts to 17 ft.lb. on top and 29 ft.lb. on the bottom.
Well, now to do the other side. Feel free to ask any questions about my experience. I know that now that I've done these on this bike, I don't have any hesitation about doing it again on my other bikes, the F3's.
Here you can see the symptoms of leaking seals.
I don't have paddock stands that support from the tripple tree, so I used the classic A frame method and used a ladder to support the front end. A single tie down strap was enough to hold the front end off the ground. You don't have to raise the front end any higher than the amount that a normal paddock stand would raise the front wheel. Just a couple inches was enough to be able to remove the fork tubes.
I'd suggest breaking loose the Fork Cap nut prior to removing from the tripple tree's. This will make dissassembly easier.
Here you can see the pinch bolts. Once you loosen these up, the fork tube will slide right out (almost too easily).
I loosened the Fork Tube Cap from the top of the fork tube until I could lower the fork tube exposing the spacer and seat stopper. After removing the fork tube cap nut I was able to remove the fork spacer and spring. Then just dump the oil out.
At the bottom of the fork tube there is an 8mm allen head screw that's in fairly tight, and it holds the internal shaft. I'd recommend loosening it before taking the fork tube out of the triple tree, or you could end up wrestling it out like this by standing on the ground trying to keep it from rotating. Removing that bolt will allow any remaining oil to come out the bottom. There is a copper washer that you'll want to replace. It's similar to the washers you see on the banjo bolts for brake lines.
Once I had the internals removed I removed the fork protector. It's snapped into a groove around the upper part of the Fork Slider. I simple used a piece of wood that was a little longer than the fork slider. I placed the wood under it and then tapped the entire assembly against the ground. The weight of the fork tube helped drive it off. After each tap against the ground, I would rotate the fork tube about 90 degrees and tap it again.
Once the protector is off you can remove the dust seal by inserting a screwdriver under the lip and gently prying it up. It comes up pretty easily.
Below that there is a retaining ring/snap ring that prevents the oil seal from coming out. It comes out pretty easily with a small screwdriver.
After that it's a matter of sliding the fork tube upward rapidly until it stops. It's like using a slide hammer to remove a dent.
When you get the for tube out it will probably look like the image below. Most likely the Oil Lock Piece will still be in the bottom of the Fork Slider. It has an O ring around it and it's not going to slide out easily.
The Oil Lock Piece is the Top Hat looking part in the upper left of this photo.
If you look down inside your Fork Slider and after you clean it out, it looks like this with the 3 holes arranged like this, then the Oil Lock Piece is still in there.
The only way I could get it out was by putting a large folded up towel on the ground for some thick padding, and then turned the Fork Slider upside down and slammed it down against the towel to get the part to slide down the inside to the open end. After you get it out, it will look like this inside.
Now clean all the parts. I used Break-Clean. It cleans well and evaporates fast and doesn't leave any residue. It's recommended that you replace the O rings, items #25, 26, and 27. Also replace the Oil Seal and Dust Seal item # 16 which includes both of them. Item #8 and 9 are the parts that wear. They are teflon coated. I replaced both of them.
This was item #8
I used a Scotch Brite pad to remove any bit's of rust on the upper portion of the Fork Tube. I used it by rotating the Fork Tube in my hand while holding the pad against the tube. I didn't slide the pad up and down the tube because I wanted to avoid any vertical scratchs in surface.
During reassembly, I used the old Oil Seal as a driving surface to push the new seal into place. I just slid the old seal on top of the new one, placed a board against it and hit it with a large hammer. I would rotate the fork tube around and strike it again. Having the proper tool I'm sure would have been the better way to go, but I didn't have one and didn't want to spend the time trying to locate a piece of PVC tubing that I could cut up and fashion one out of.
After getting the Oil Seal back in and the snap ring, the Dust Seal goes in easily. Next I had to put the 8mm Allen screw back in and torque it to 25 ft lbs. I had to get the old copper washer off and the new on on. The old one was on there pretty good. I had to drive a screwdriver under it to get it off.
I had to cut one of my old 8mm Allen wrenches because I didn't have a 3/8" drive one that was long enough. I tried for about 5 minutes with the hacksaw, but was getting no where fast. The air grinder/cutter did it in about 1 min.
I put an 8 mm socket over it and I was good to go.
This is item #14 which is the Fork Tube Cap. It has an O ring around top that you want to clean. Not only clean the O ring, but the groove it sits in. To remove, grip it on opposite sides with your thumb and forefinger and then try to slide your fingers together. As you do, the O ring with bulge outward where you can grab it and pull it off. Try to avoid being tempted to use a screwdriver or sharp metal object to get in under the O ring. The cap is aluminum and easily scratched which would promote a leak.
They tell you that you're supposed to fill the fork with 15.6 oz +-.08. Seriously, I mean really... who's going to measure it out that precisely. The nice thing is that they tell you the fluid should be 116mm from the top of the Fork Tube with the spring still out. After putting about 16 or 17 oz's of Fork Oil in it. Pump the center part up and down a few times to get the bubbles out of it. With this tool you measure 116mm of tube to extend below the ring. Then insert it into the Fork. Then you pull on the syringe plunger and it sucks out the excess Fork Oil until the level is 116mm from the top of the tube. When it starts sucking air, you know it's at the right level.
Once the fluid is at the right level, you're going to put the spring back in with the tapered end and tighter wound coils first towards the bottom. Then the washer, the 100mm tube spacer and the retainer clip.
Here we are back at the top with it ready to be screwed back together. I wasn't too concerned about tightening the cap bolt here, I'll do that once they're back on the bike and torqued down. Then you're just going to insert it back onto the triple trees and tighten the pinch bolts to 17 ft.lb. on top and 29 ft.lb. on the bottom.
Well, now to do the other side. Feel free to ask any questions about my experience. I know that now that I've done these on this bike, I don't have any hesitation about doing it again on my other bikes, the F3's.
Last edited by IDoDirt; Sep 28, 2013 at 07:43 AM. Reason: Complete the post.


Thread Starter
|
Super Moderator
Joined: Aug 2006
Posts: 5,304
Likes: 512
From: South Florida, USA
Thanks I appreciate that. No, I didn't really consider any upgrades. This is the wife's bike and any performance enhancements would be lost on her. She's not an agressive rider by any stretch. I'm fairly certain that there's a F4i in my not too distant future so, who knows about next time.

Senior Member
Joined: Jun 2010
Posts: 110
Likes: 2
From: Leeds - England
Great write up, For people looking how to Reposition the rebound adjuster (Top Adjuster) within the fork cap as follows:
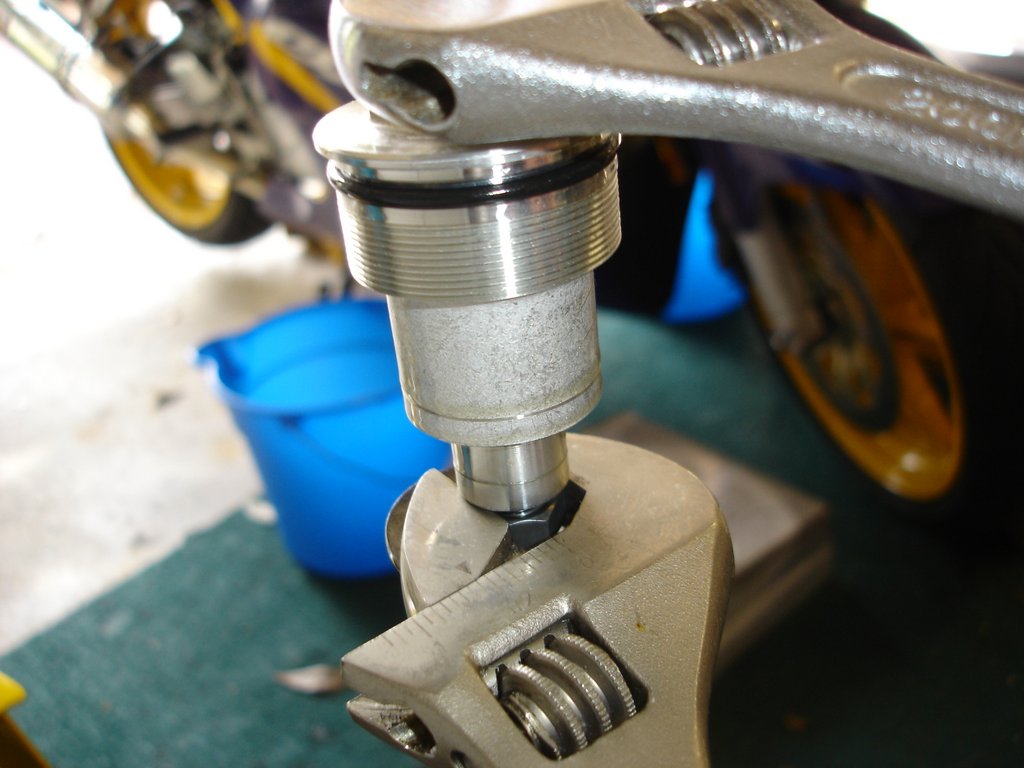
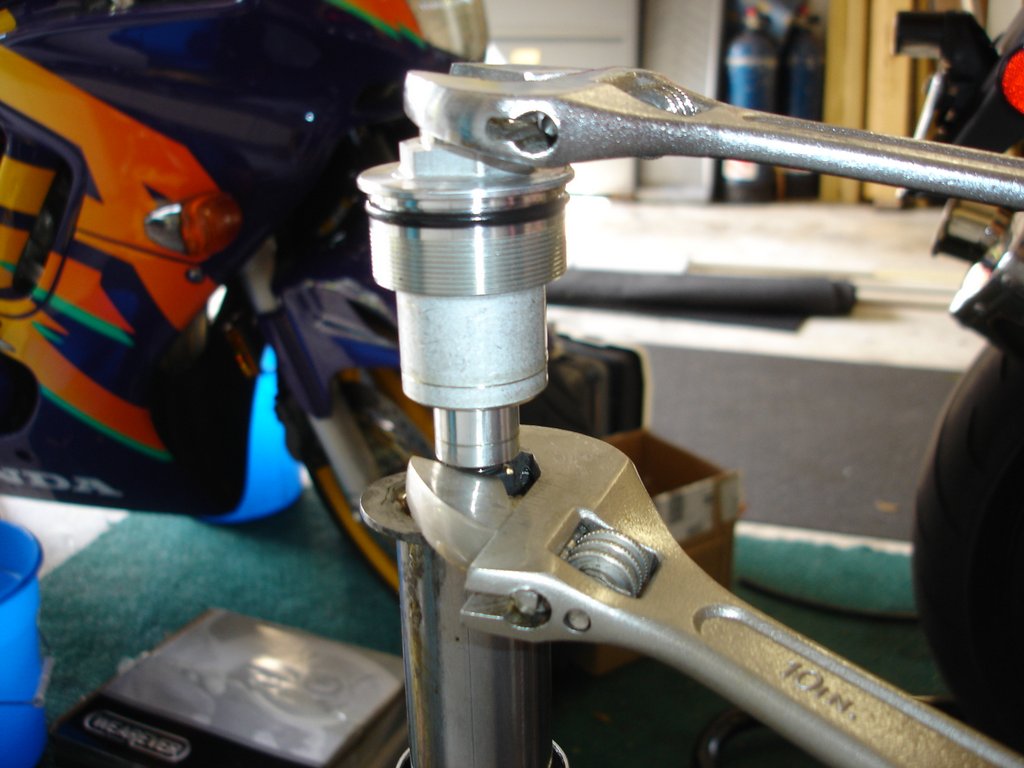
Screw the fork cap assembly onto the fork damper until it seats against the damper rod, not against the locknut . Install a 14mmopen end wrench on the damper rod locknut, and secure the fork cap. Tighten the locknut securely.
- Turn the locknut all the way down on the damper rod until it stops
- Use a small narrow blade screwdriver and turn the adjuster counterclockwise until it lightly seats.
- Turn the adjuster clockwise three complete turns, then stop.
Screw the fork cap assembly onto the fork damper until it seats against the damper rod, not against the locknut . Install a 14mmopen end wrench on the damper rod locknut, and secure the fork cap. Tighten the locknut securely.

Junior Member
Joined: Jan 2023
Posts: 11
Likes: 1
From: Swansea
Great write up, For people looking how to Reposition the rebound adjuster (Top Adjuster) within the fork cap as follows:
Screw the fork cap assembly onto the fork damper until it seats against the damper rod, not against the locknut . Install a 14mmopen end wrench on the damper rod locknut, and secure the fork cap. Tighten the locknut securely.
- Turn the locknut all the way down on the damper rod until it stops
- Use a small narrow blade screwdriver and turn the adjuster counterclockwise until it lightly seats.
- Turn the adjuster clockwise three complete turns, then stop.
Screw the fork cap assembly onto the fork damper until it seats against the damper rod, not against the locknut . Install a 14mmopen end wrench on the damper rod locknut, and secure the fork cap. Tighten the locknut securely.

Thread
Thread Starter
Forum
Replies
Last Post
driyac
General Tech
0
Jul 11, 2010 02:40 AM