
600rr swing arm conversion.... Undertail pipe... Help Me Out


Thread Starter
|
April 2011 Ride of the Month
Joined: Jul 2009
Posts: 5,686
Likes: 0
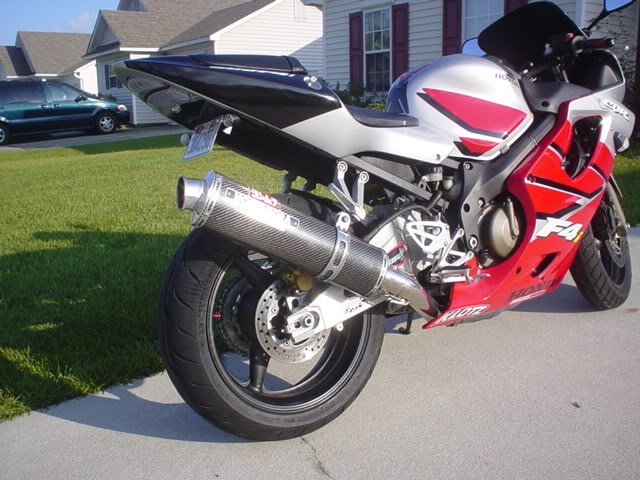
Anyone know why a 1000rr rear shock must be used? Also are there any dis advantages to doing this? I am mostly thinking about doint the mod so it would be easier and cleaner for me to do the udertail gpr exhaust i wanted to do (look at my other threads) thanks for any help.....
F4i to 600RR swingarm conversion.
This is for informational purposes only. I am not responsible for any errors in this guide. I am in no way encouraging any modification to your motorcycle. Honda spends a lot of money on testing to put out a safe product. This modification may result in injury or death.
Please read all instructions carefully before starting.
Now that that is out of the way�
Items you need to purchase for this conversion.
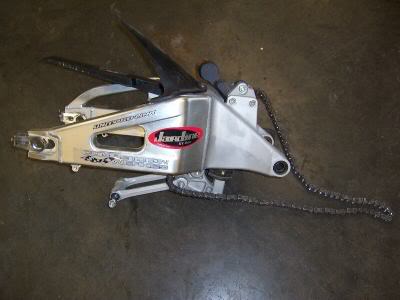
1. 03-04 600RR swingarm.
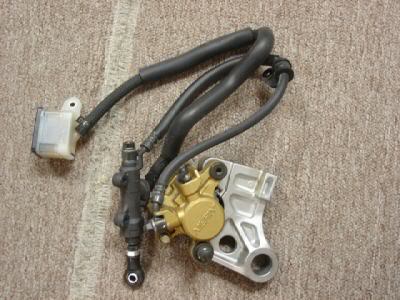
2. 03-04 600RR Rear Caliper and Bracket (You will also need the brake line from the master cylinder to the caliper, as the F4i one is not long enough)
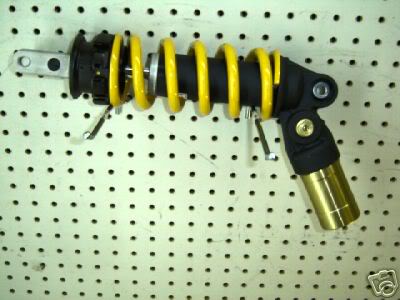
3. 1000RR Rear Shock
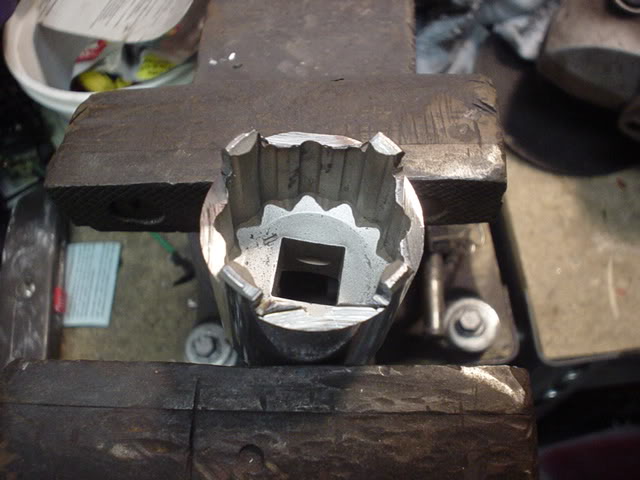
4. You also need a Honda tool # 07908-4690003 to remove the retaining rings in the swingarm� OR, you can make your own. I made one from an old 1-1/4" socket I had in my toolbox. I�ve heard that you can also make one from a 1-1/8" socket that will work just as well. You can use the locknut itself as a template and grind the socket with a dremel tool or any other tool that will give you the same profile.
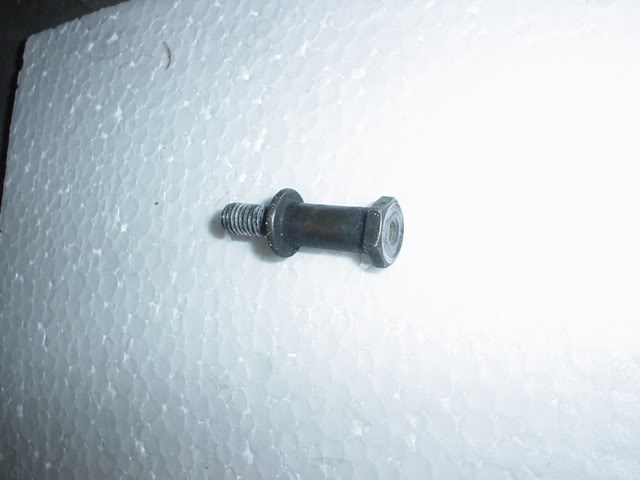
5. 6" long 3/8 bolt (Grade 8) with nut and lock washer (or lock nut) and some locktite.
6. Steel tubing to make sleeves (about 20mm ID and I think 25mm OD)
7. Grinder (with cutoff wheel and flap wheel)
8. Standard tools required to remove swingarm, axle, tank, etc.
9. Some way to lift the bike off the ground while keeping swingarm free to be removed.
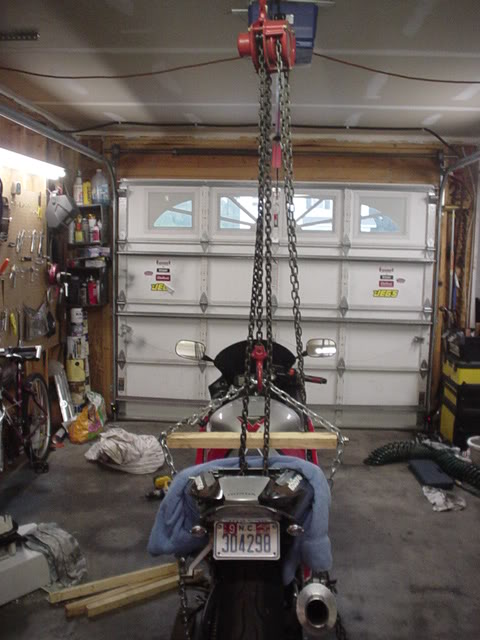
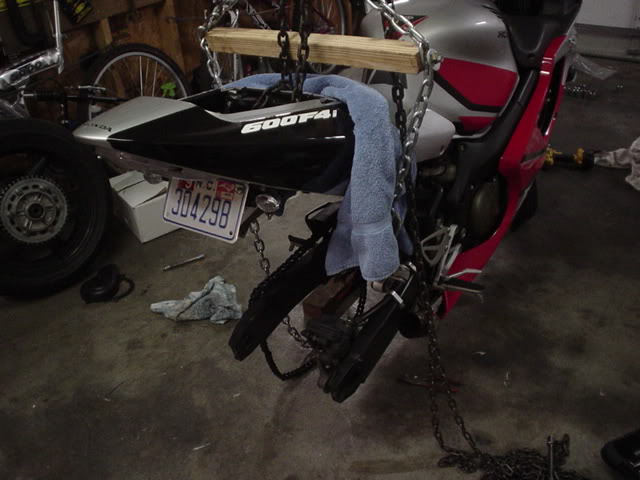
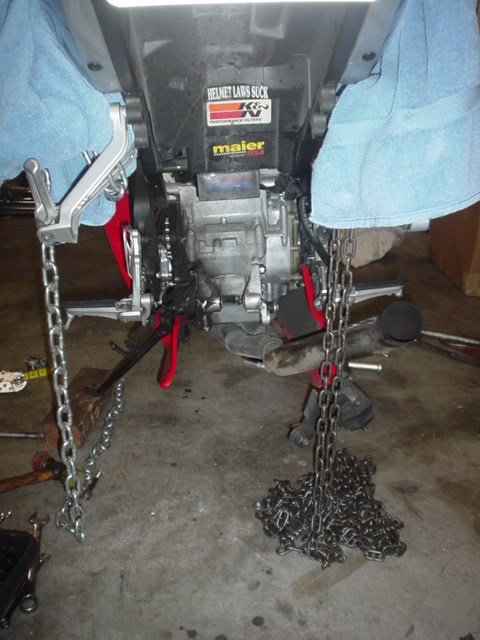
First thing to do is figure out how to support the back of the bike with the back tire raised off the ground, but keeping the swingarm free.
Now on to the disassembly
1. Remove seat
2. Remove slip on
3. Remove rear wheel and caliper
4. Remove hose clamp holding shock reservoir to subframe
5. Remove upper shock mount (If you unbolt the gas tank and prop up the rear it will help you gain access to this bolt)
6. Remove Swingarm
A. This is where your home made tool, or Honda tool # 07908-4690003 is used to remove the retaining rings from the swingarm bolt.
B. Once the rings are removed and the swingarm bolt is removed you may need a large hex wrench (Or the correct sized lugnut and vicegrips, hay don�t laugh, it worked) and loosen the adjusters that the retaining rings came off of.
C. The swingarm should now come out along with the shock.
Now that the swingarm is out you can prep the 600RR swingarm for instillation.
1. Remove 600RR shock from swingarm
2. Remove the 4 bolts holding the top shock mount to the swingarm
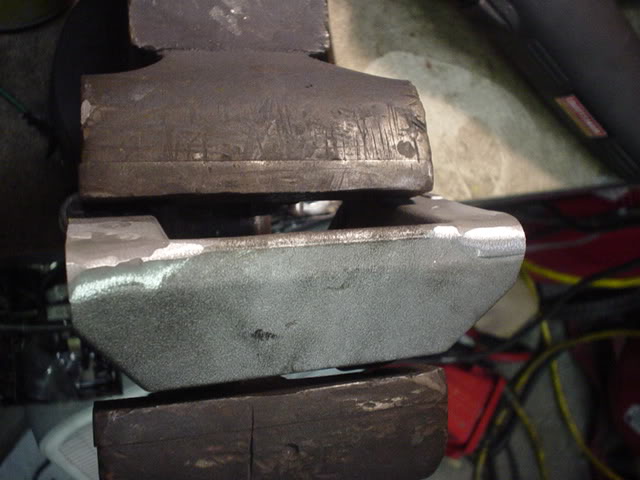
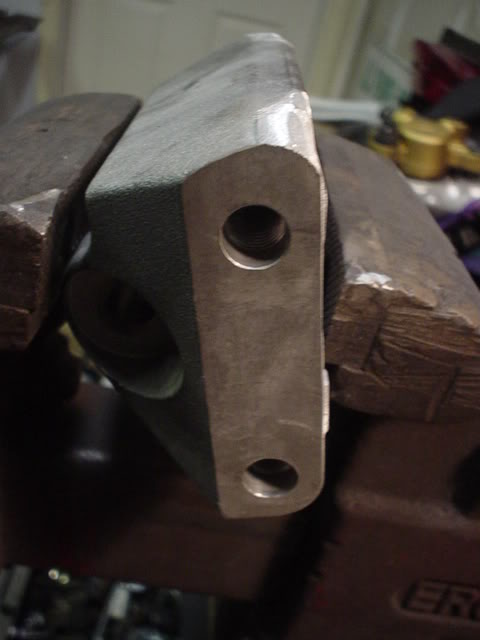
3. The top shock mount must be spun around so the opening is facing the front of the bike, this piece will need to be slightly modified, or it will not fit. If you look at the front and back of the upper shock mount, you will see that one side is rounded on the corners a bit. You must do the same to the other side. A grinder with a flap wheel made quick work of it. When fitting be careful not to force the bolts, it is only aluminum and will strip easily.
4. Once the swingarm is prepped you can install the 1000RR shock with the reservoir facing the front.
5. Remove the chain adjusters from the F4i swingarm and install on the 600RR swingarm
The swing arm is now ready to install.
1. Go ahead and throw the swingarm up in place and just slide the bolt in, and snug the swingarm centering adjusters (large hex the swingarm bolt slides through and the retaining rings thread onto.)
2. Take the lower linkage arm and swing it foreword under the bike. It should swing up into the center stand slot (of course the F4i don�t have a center stand, but the brackets are there)
3. If the linkage swings up and in move to step 5
4. If the linkage don�t fit you will need to move the swingarm centering adjusters to center the arm.
5. Once the swingarm is centered you can go ahead and tighten everything up on the swingarm pivot.
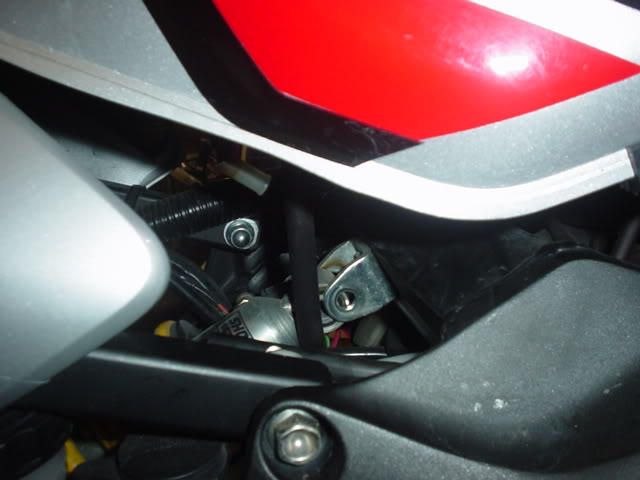
6. Remove the left rear lower fairing hex bolt.
7. Remove the threaded extension behind the bolt.
8. The hole that the extension came out of must be drilled out to accept a 3/8 bolt. (Drill straight)
9. Now you can use a 6 inch long, grade 8, 3/8 bolt with a lock nut/nut & lock washer and some locktite for good measure and bolt the swingarm linkage up between the center stand mounts. DO NOT OVERTIGHTEN!!
Almost there.. Now it�s on to the back wheel.
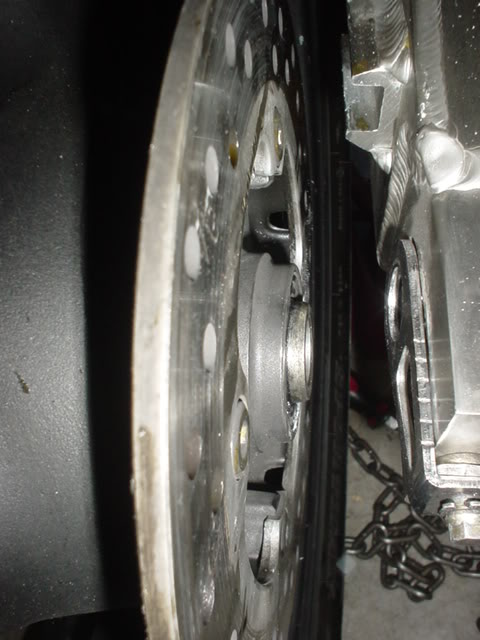
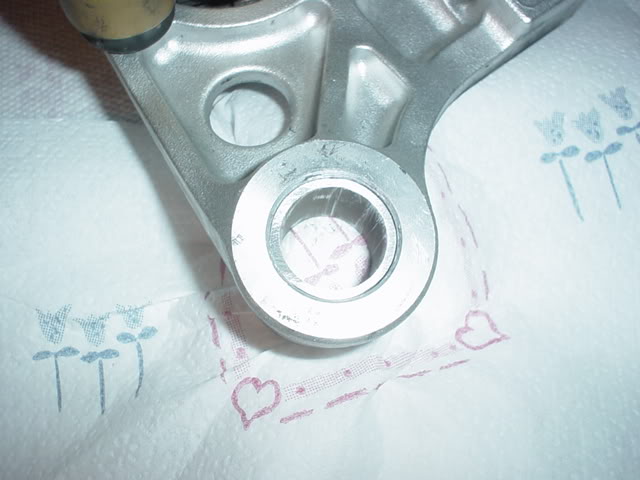
1. Look at the right side of the wheel, in the axle hole you will see a spacer, mark the spacer where the seal and spacer meet.
2. Remove the spacer and cut, or grind the space almost up to that line, leaving approximately 1/16�-1/8� or so. (If this is not done the inner edge of the caliper bracket will it the rear disk once the axle is tightened) It is better to sneak up on this and trial fit a few times if needed, if you remove too much material you are on your own.
Before
After
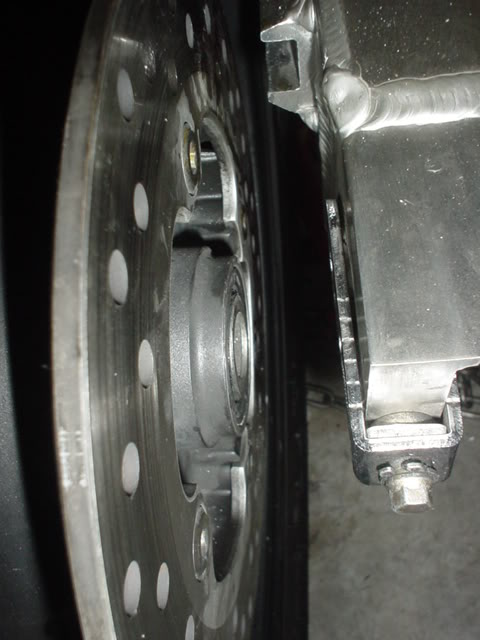
3. Remove the caliper from its bracket and install the rear wheel and bracket for a trial fit. When you install everything use the stock washer from the axle and slide it between the caliper bracket and swingarm.
4. Tighten the axle, if the disk is not touching the caliper bracket you are good, if it is remove a little more material from the wheel spacer.
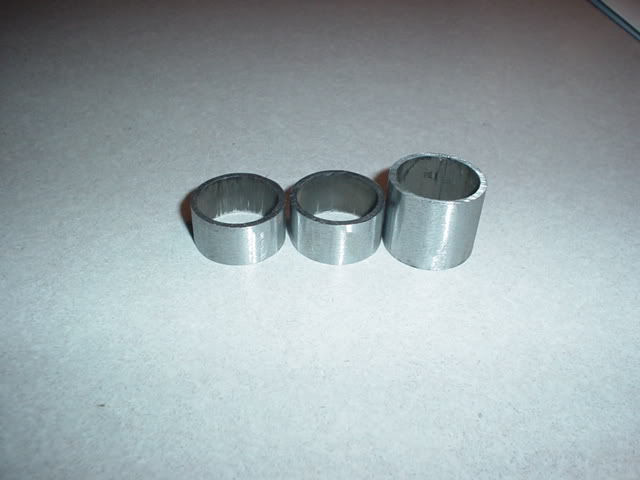
5. Next thing I did was make some sleeves. The 600RR axle is thicker than the F4i so the caliper bracket is loose on the axle and will move when the brakes are applied. I took a piece of black steel pipe, approximately 20mm ID and I think about 25mm OD (I had to bring the OD of the pipe down a bit to fit) I cut 2 sleeves about 1/2 inch wide to take up the extra room in the swingarm (The chain adjusters hold these in place, and I did have to remove about 1/8 of material from the adjusting bolt in the adjusters so the sleeves would not interfere with the axle) I took another piece and cut it the width of the caliper bracket to take up the slop in the caliper bracket.
6. Once the sleeves were made you can bolt the rear wheel on for the final time. (you will need to find a new washer to go behind the axle nut, size is not too critical, but if you want a stock one the part number is 90401-MAS-000 (washer 20X31.5X2)
7. Tighten chain (I was able to use the stock 600RR chain, but I am down 1 tooth in the front on my F4i so your results may vary.) Check your manual for amount of slack you should have when tight.
Only thing left is brakes.
1. Bolt the caliper back on.
2. Remove the old master cylinder to caliper brake line and replace with the 600RR hose
3. Bleed brakes.
4. Reinstall slip-on
5. Reinstall seat
6. Recheck all bolts!!!
7. Recheck all bolts again!!!
8. Did you recheck all the bolts?
Step back and check it out.
Now clean up and go show your friends.
I wanted to thank F4IDoner for the original tutorial
F4i to 600RR swingarm conversion.
This is for informational purposes only. I am not responsible for any errors in this guide. I am in no way encouraging any modification to your motorcycle. Honda spends a lot of money on testing to put out a safe product. This modification may result in injury or death.
Please read all instructions carefully before starting.
Now that that is out of the way�
Items you need to purchase for this conversion.
1. 03-04 600RR swingarm.
2. 03-04 600RR Rear Caliper and Bracket (You will also need the brake line from the master cylinder to the caliper, as the F4i one is not long enough)
3. 1000RR Rear Shock
4. You also need a Honda tool # 07908-4690003 to remove the retaining rings in the swingarm� OR, you can make your own. I made one from an old 1-1/4" socket I had in my toolbox. I�ve heard that you can also make one from a 1-1/8" socket that will work just as well. You can use the locknut itself as a template and grind the socket with a dremel tool or any other tool that will give you the same profile.
5. 6" long 3/8 bolt (Grade 8) with nut and lock washer (or lock nut) and some locktite.
6. Steel tubing to make sleeves (about 20mm ID and I think 25mm OD)
7. Grinder (with cutoff wheel and flap wheel)
8. Standard tools required to remove swingarm, axle, tank, etc.
9. Some way to lift the bike off the ground while keeping swingarm free to be removed.
First thing to do is figure out how to support the back of the bike with the back tire raised off the ground, but keeping the swingarm free.
Now on to the disassembly
1. Remove seat
2. Remove slip on
3. Remove rear wheel and caliper
4. Remove hose clamp holding shock reservoir to subframe
5. Remove upper shock mount (If you unbolt the gas tank and prop up the rear it will help you gain access to this bolt)
6. Remove Swingarm
A. This is where your home made tool, or Honda tool # 07908-4690003 is used to remove the retaining rings from the swingarm bolt.
B. Once the rings are removed and the swingarm bolt is removed you may need a large hex wrench (Or the correct sized lugnut and vicegrips, hay don�t laugh, it worked) and loosen the adjusters that the retaining rings came off of.
C. The swingarm should now come out along with the shock.
Now that the swingarm is out you can prep the 600RR swingarm for instillation.
1. Remove 600RR shock from swingarm
2. Remove the 4 bolts holding the top shock mount to the swingarm
3. The top shock mount must be spun around so the opening is facing the front of the bike, this piece will need to be slightly modified, or it will not fit. If you look at the front and back of the upper shock mount, you will see that one side is rounded on the corners a bit. You must do the same to the other side. A grinder with a flap wheel made quick work of it. When fitting be careful not to force the bolts, it is only aluminum and will strip easily.
4. Once the swingarm is prepped you can install the 1000RR shock with the reservoir facing the front.
5. Remove the chain adjusters from the F4i swingarm and install on the 600RR swingarm
The swing arm is now ready to install.
1. Go ahead and throw the swingarm up in place and just slide the bolt in, and snug the swingarm centering adjusters (large hex the swingarm bolt slides through and the retaining rings thread onto.)
2. Take the lower linkage arm and swing it foreword under the bike. It should swing up into the center stand slot (of course the F4i don�t have a center stand, but the brackets are there)
3. If the linkage swings up and in move to step 5
4. If the linkage don�t fit you will need to move the swingarm centering adjusters to center the arm.
5. Once the swingarm is centered you can go ahead and tighten everything up on the swingarm pivot.
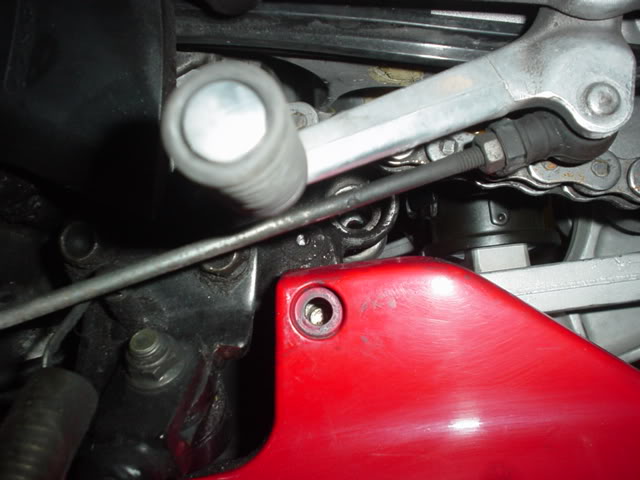
6. Remove the left rear lower fairing hex bolt.
7. Remove the threaded extension behind the bolt.
8. The hole that the extension came out of must be drilled out to accept a 3/8 bolt. (Drill straight)
9. Now you can use a 6 inch long, grade 8, 3/8 bolt with a lock nut/nut & lock washer and some locktite for good measure and bolt the swingarm linkage up between the center stand mounts. DO NOT OVERTIGHTEN!!
Almost there.. Now it�s on to the back wheel.
1. Look at the right side of the wheel, in the axle hole you will see a spacer, mark the spacer where the seal and spacer meet.
2. Remove the spacer and cut, or grind the space almost up to that line, leaving approximately 1/16�-1/8� or so. (If this is not done the inner edge of the caliper bracket will it the rear disk once the axle is tightened) It is better to sneak up on this and trial fit a few times if needed, if you remove too much material you are on your own.
Before
After
3. Remove the caliper from its bracket and install the rear wheel and bracket for a trial fit. When you install everything use the stock washer from the axle and slide it between the caliper bracket and swingarm.
4. Tighten the axle, if the disk is not touching the caliper bracket you are good, if it is remove a little more material from the wheel spacer.
5. Next thing I did was make some sleeves. The 600RR axle is thicker than the F4i so the caliper bracket is loose on the axle and will move when the brakes are applied. I took a piece of black steel pipe, approximately 20mm ID and I think about 25mm OD (I had to bring the OD of the pipe down a bit to fit) I cut 2 sleeves about 1/2 inch wide to take up the extra room in the swingarm (The chain adjusters hold these in place, and I did have to remove about 1/8 of material from the adjusting bolt in the adjusters so the sleeves would not interfere with the axle) I took another piece and cut it the width of the caliper bracket to take up the slop in the caliper bracket.
6. Once the sleeves were made you can bolt the rear wheel on for the final time. (you will need to find a new washer to go behind the axle nut, size is not too critical, but if you want a stock one the part number is 90401-MAS-000 (washer 20X31.5X2)
7. Tighten chain (I was able to use the stock 600RR chain, but I am down 1 tooth in the front on my F4i so your results may vary.) Check your manual for amount of slack you should have when tight.
Only thing left is brakes.
1. Bolt the caliper back on.
2. Remove the old master cylinder to caliper brake line and replace with the 600RR hose
3. Bleed brakes.
4. Reinstall slip-on
5. Reinstall seat
6. Recheck all bolts!!!
7. Recheck all bolts again!!!
8. Did you recheck all the bolts?
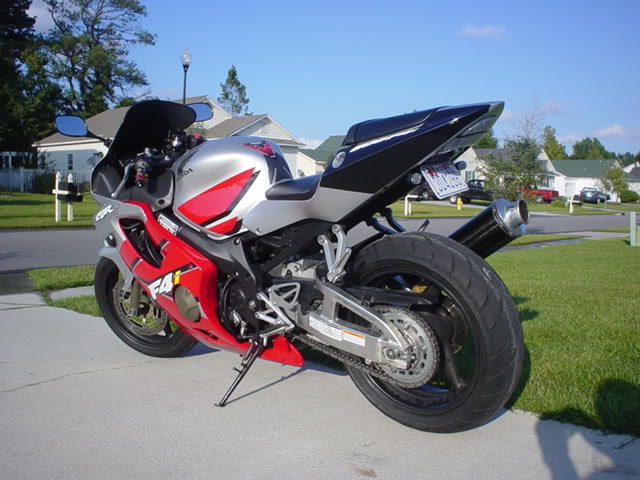
Step back and check it out.
Now clean up and go show your friends.
I wanted to thank F4IDoner for the original tutorial


May 2009 ROTM
Joined: Mar 2009
Posts: 52
Likes: 0
From: IE
You have to use the 1000RR shock because this the position of the resevior. The 600RR faces to the side and the 1000RR faces straight up.
Using the 600RR shock would create issues with the arm compressed inward. Hope this helps. I did it on mine and loved the results. I am looking to add the undertail exhaust also. Something modded.
Using the 600RR shock would create issues with the arm compressed inward. Hope this helps. I did it on mine and loved the results. I am looking to add the undertail exhaust also. Something modded.
Thread Starter
|
April 2011 Ride of the Month
Joined: Jul 2009
Posts: 5,686
Likes: 0
You have to use the 1000RR shock because this the position of the resevior. The 600RR faces to the side and the 1000RR faces straight up.
Using the 600RR shock would create issues with the arm compressed inward. Hope this helps. I did it on mine and loved the results. I am looking to add the undertail exhaust also. Something modded.
Using the 600RR shock would create issues with the arm compressed inward. Hope this helps. I did it on mine and loved the results. I am looking to add the undertail exhaust also. Something modded.

that covers all the way around the exhuast but ide make mine outa sheet aluminum.... still trying to figure out how exhaustly i wanna custom do the led lights... possibly turn signals in passanger foot pegs and use two peices of angle aluminum mount them on the bottom and run them from by the exhaust down like a foot....with like say 30-40 leds in each side.... idk... thanks for the reason behind the 1000rr shock though....


Thread
Thread Starter
Forum
Replies
Last Post