
R/R


Thread Starter
|
Member
Joined: Sep 2009
Posts: 68
Likes: 1
From: Oregon
Had a great ride today, headed home. As I pulled in my driveway, complete electrical failure.
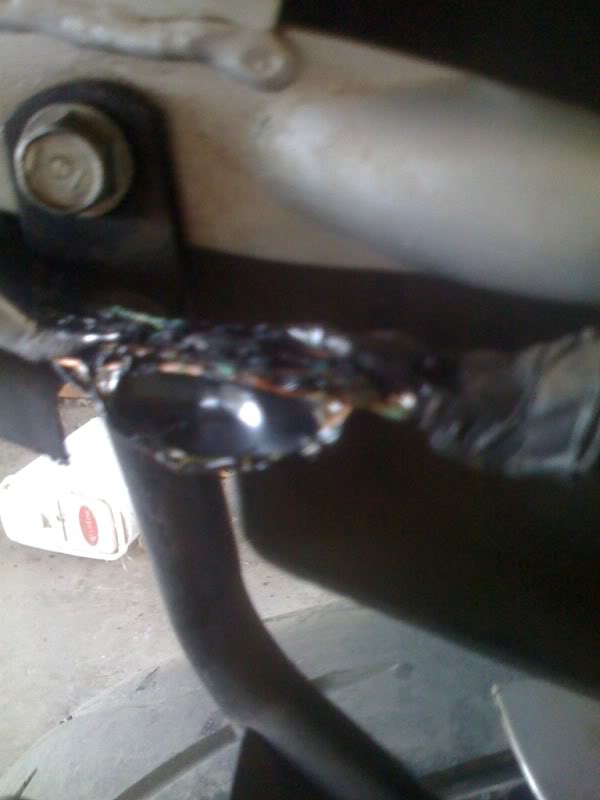
Fuses are fine battery is brand new. I did notice that I had significant heat coming from the the area of the R/R. Enough that it was uncomfortable when going slow.
Bikes at around 19k miles. Did my R/R fry?
Fuses are fine battery is brand new. I did notice that I had significant heat coming from the the area of the R/R. Enough that it was uncomfortable when going slow.
Bikes at around 19k miles. Did my R/R fry?


Senior Member
Joined: Oct 2011
Posts: 610
Likes: 0
From: Dirty South, SC
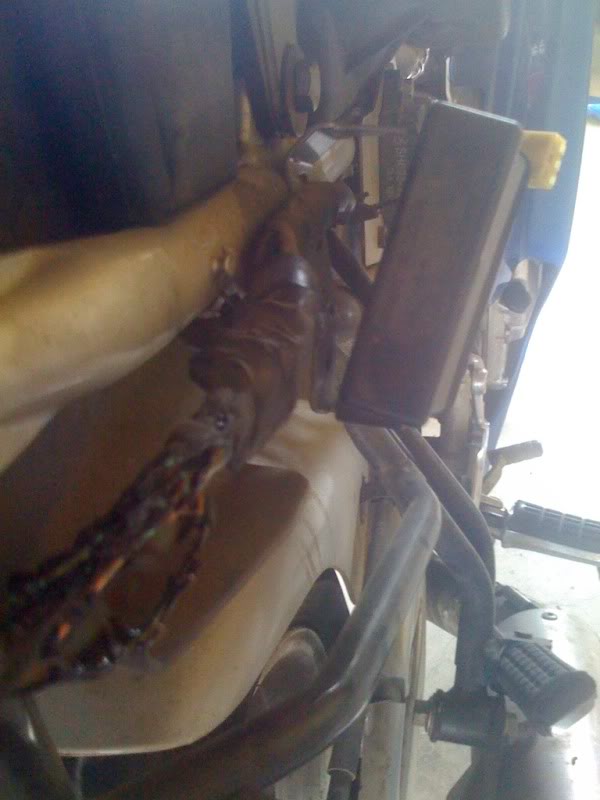
ok, we are about to have some fun, o joy! for sure we now know there is a shorted, grounded, or loose connection some where and looks to be from the r/r, stator, and or battery area (charging system). check the wiring and connector from the stator to r/r for any freys, cuts, corrosion or burnt color. next the r/r. take it off look and smell for that burnt electrical smell.look for a black tar looking stuff on or around it or on the frame area. which indicates a melted burnt r/r. follow the neg and posi off the r/r going to the battery. check for cuts, freys, or burnt, brown looking wires. then check the battery posi and neg connections for the same.
what i did to mine for a stronger, more reliable, longer lasting charging system, i replaced r/r, and of coarse, replaced all wires that were burnt really bad. for some wires that in the charging system that are not burnt, still checked em. i cut them back a couple inches from the connection ends to check the individual wire strands and make sure they are not a burnt color or have greenish color that indicates corrosion within the strands. then i replaced ALL connections with new butt connectors. cutting off a inch or two on the ends of each connection will cut out burnt and corroded copper that is common on old wiring.
if ya wanna go the extra mile and have a super duper reliable charging system, on the stator, cut out the factory connector, you can straight wire the stator wires to the r/r. solder it, then use heat shrink tubing at the solder points. then straight wire the r/r to the battery with a inline 30 amp fuse on the posi side (carry a few extra 30 amp fuses just to be on safe side). before you attach the new r/r back to the frame take a file or steel wire brush and clean the frame and back of the r/r really well to get a fresh metal to metal contact. bolt down really snug to the frame and make sure its exactly flat, preferably back were you got it from. double check and clean the ground wires on batt and the r/r. then go over the whole electrical system, checking and cleaning connections, check all male and female connector ends, make sure they are tight and snug. use a wire brush, contact cleaner, then die electric grease.
for added protection, i put wire loom over my electrical charging system wires and attached a cpu fan to the r/r. on the fan i ran posi wire to the rear running light, ground the neg wire to the sub frame with no probs. i straight wired and soldered my fuel pump wires too. to help me monitor my system while i ride i installed a koso digital voltage meter. it helps by letting me know when the charging starts to act up BEFORE it starts frying expesive electrical parts.
its a good place to start, hope that helps
Last edited by cBrentb; Sep 17, 2012 at 04:43 PM.