
New Project

Thread Starter
|
Member
Joined: Jan 2017
Posts: 77
Likes: 1
From: Allyn, WA USA
Looking good! I don't know how strict your state is, but I was planning on using motorcycle "driving lights". They are led, very bright, and generally used on adventure bikes crash guards as extra lights for when they are off the beaten path. May want to check those out!
Thread Starter
|
Member
Joined: Jan 2017
Posts: 77
Likes: 1
From: Allyn, WA USA
An update on the project:
Had a delay on the paint, had a weird reaction with one of the final coats of white that caused the paint to wrinkle. Even after letting it cure and sanding it down, any paint would cause the same reaction. Ended up sanding the tank to metal, and upper and tail to plastic. Whatever it was managed to get into the plastic as well, because as soon as primer hit the tail it reacted again. The tank took primer no problem and is salvageable. I have a new upper and tail ordered and just waiting on them to get here. (As an aside, I hate the fact that most tails available for this model have the holes in them for the European grab handle.)
While riding the bike before I stripped it down I noticed an ugly, but relatively quiet, rattling. Turns out a common problem for the early CBRs is their automatic cam chain tensioners stick and don't keep tension. Fortunately, it's an easy fix with the tank off.
Had to take the wheel off to get the front fender off and found no grease on the axle. That will change when it goes back on. Brakes look good, but I will probably upgrade the pads. And am doing an oil change, even though it was recently done, to get rid of the K&N oil filter and replace it with a good HiFlo one.
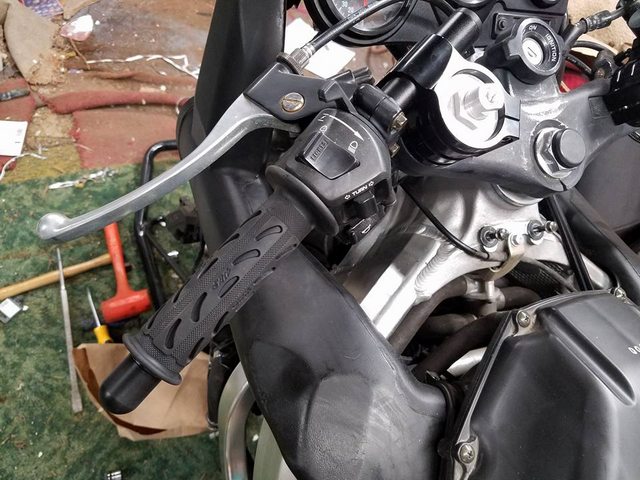
Plus, started getting in other goodies for it, including new OEM levers, ProGrip grips, new throttle tube, new flush mount front turn signals, new clip ons, New double bubble windshield, and complete fairing bolt set (since son-in-law lost all the others). New short stalk rear signals are on their way.
Had a delay on the paint, had a weird reaction with one of the final coats of white that caused the paint to wrinkle. Even after letting it cure and sanding it down, any paint would cause the same reaction. Ended up sanding the tank to metal, and upper and tail to plastic. Whatever it was managed to get into the plastic as well, because as soon as primer hit the tail it reacted again. The tank took primer no problem and is salvageable. I have a new upper and tail ordered and just waiting on them to get here. (As an aside, I hate the fact that most tails available for this model have the holes in them for the European grab handle.)
While riding the bike before I stripped it down I noticed an ugly, but relatively quiet, rattling. Turns out a common problem for the early CBRs is their automatic cam chain tensioners stick and don't keep tension. Fortunately, it's an easy fix with the tank off.
Had to take the wheel off to get the front fender off and found no grease on the axle. That will change when it goes back on. Brakes look good, but I will probably upgrade the pads. And am doing an oil change, even though it was recently done, to get rid of the K&N oil filter and replace it with a good HiFlo one.
Plus, started getting in other goodies for it, including new OEM levers, ProGrip grips, new throttle tube, new flush mount front turn signals, new clip ons, New double bubble windshield, and complete fairing bolt set (since son-in-law lost all the others). New short stalk rear signals are on their way.
An update on the project:
Had a delay on the paint, had a weird reaction with one of the final coats of white that caused the paint to wrinkle. Even after letting it cure and sanding it down, any paint would cause the same reaction. Ended up sanding the tank to metal, and upper and tail to plastic. Whatever it was managed to get into the plastic as well, because as soon as primer hit the tail it reacted again. The tank took primer no problem and is salvageable. I have a new upper and tail ordered and just waiting on them to get here. (As an aside, I hate the fact that most tails available for this model have the holes in them for the European grab handle.)
While riding the bike before I stripped it down I noticed an ugly, but relatively quiet, rattling. Turns out a common problem for the early CBRs is their automatic cam chain tensioners stick and don't keep tension. Fortunately, it's an easy fix with the tank off.
Had to take the wheel off to get the front fender off and found no grease on the axle. That will change when it goes back on. Brakes look good, but I will probably upgrade the pads. And am doing an oil change, even though it was recently done, to get rid of the K&N oil filter and replace it with a good HiFlo one.
Plus, started getting in other goodies for it, including new OEM levers, ProGrip grips, new throttle tube, new flush mount front turn signals, new clip ons, New double bubble windshield, and complete fairing bolt set (since son-in-law lost all the others). New short stalk rear signals are on their way.
Last edited by Pugheaven; Jun 29, 2017 at 07:41 AM.
Thread Starter
|
Member
Joined: Jan 2017
Posts: 77
Likes: 1
From: Allyn, WA USA
Still haven't figured out the cause. But yeah, bugs me to have lost all that time. Now just waiting on bodywork to get here to finish it up. Have to say the that lowers turned out fantastic (at least in this temporary color scheme), and can't wait to get the rest done. Should have the upper here this weekend so that will be good.
Super Moderator
Joined: Oct 2016
Posts: 2,519
Likes: 8
From: Lancs ,UK
Thread Starter
|
Member
Joined: Jan 2017
Posts: 77
Likes: 1
From: Allyn, WA USA
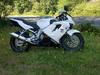
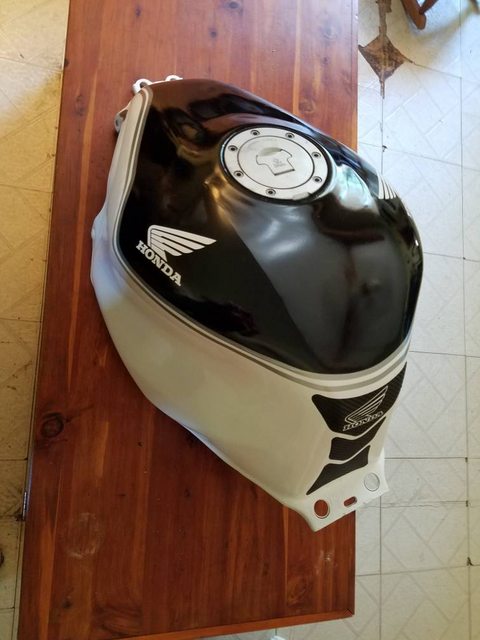
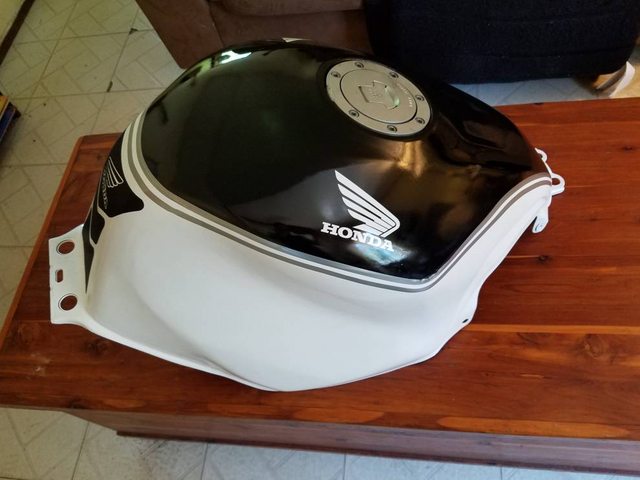
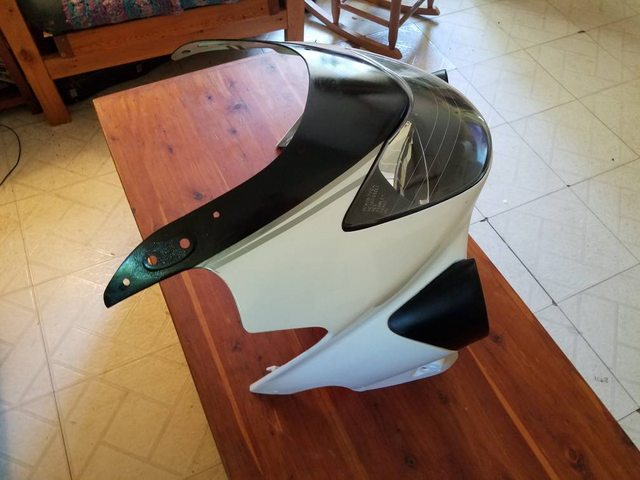
SO here's a teaser of the temporary paint scheme I'm going with. The lowers are done, other than a last coat of clear. Good news is that the tank has now taken primer and all coats of white with zero reaction. Now to wait a few days to mask and paint the top of it black.
Thread Starter
|
Member
Joined: Jan 2017
Posts: 77
Likes: 1
From: Allyn, WA USA
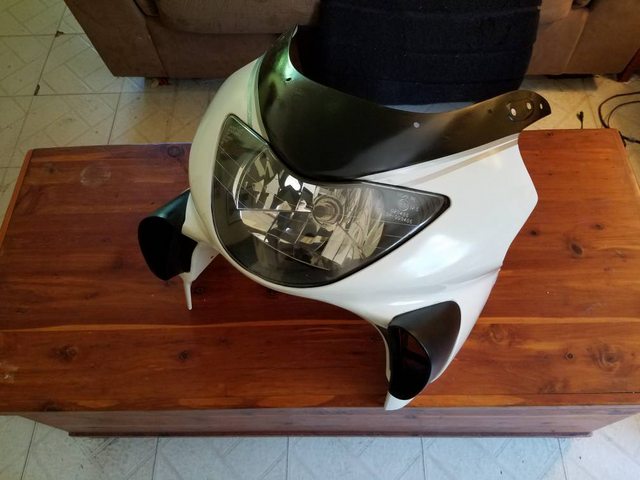
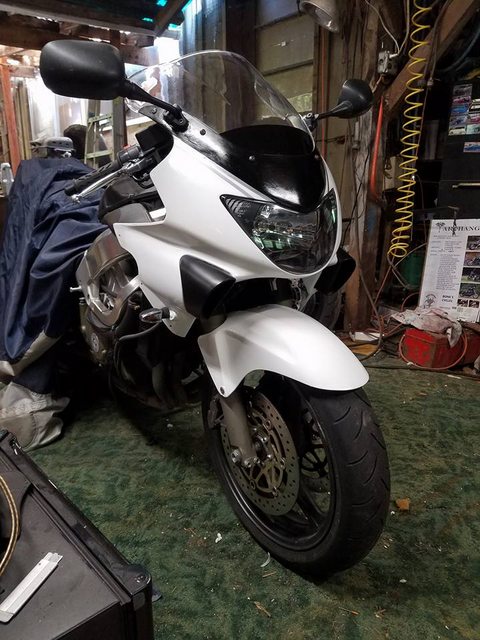
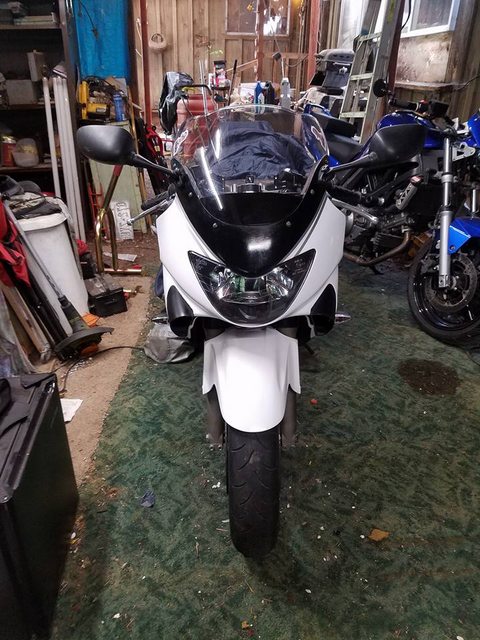
Progress. Fender and upper fairing installed, along with new windshield. Also installed are new clip-ons, grips and throttle tube. Also got all the new turn signals installed and wired. Starting to look like a bike again. Still waiting on the new tail to show up.
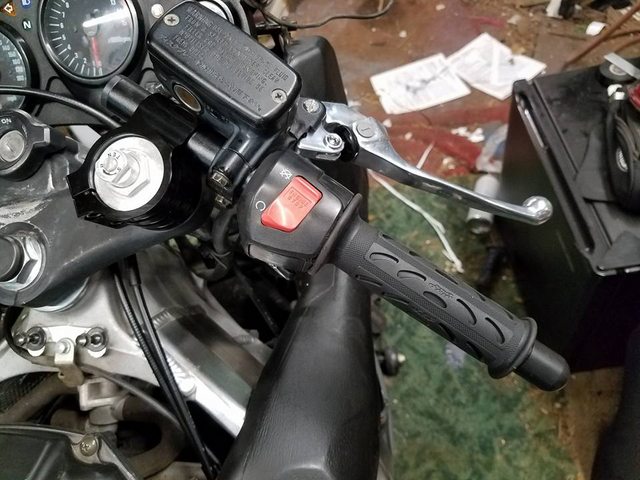
And just a reminder of what the old grips looked like:
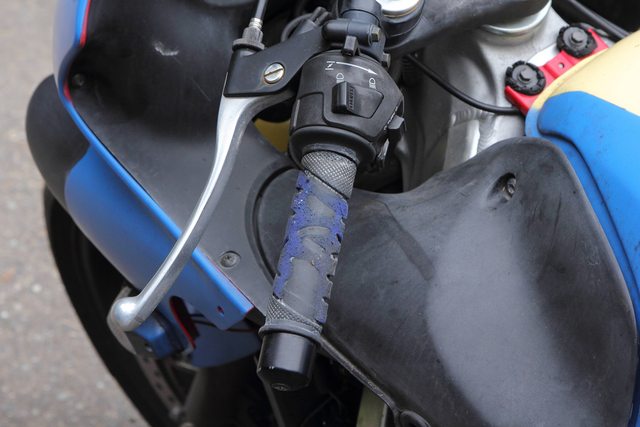
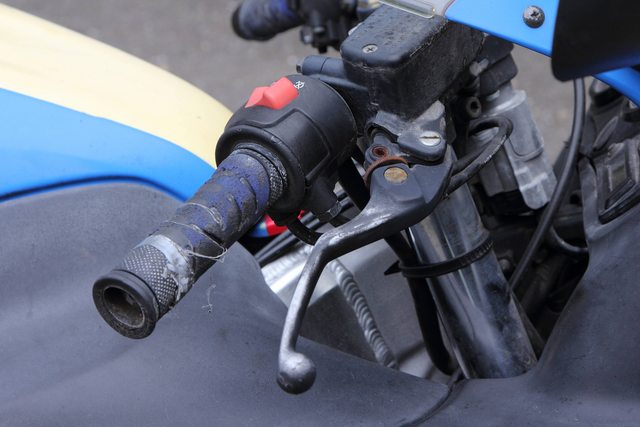
And just a reminder of what the old grips looked like: