
View Poll Results: Which Design Should I lean towards
Image 1


0
0%
Image 2


0
0%
Image 3


2
100.00%
I don't care


0
0%
Voters: 2. You may not vote on this poll
98 CBR F3 Project Bike (SSSA, Car Rim, R1 Tail, F4i front)


As for the wiring mess, yes, its a nest all right. I will likely disconnect and label everything so i know how it all goes together... as for the Ziploc bags... yep, have three of them with bots and stuff. It's not a very complicated bike... there are really only 4-5 bolt sizes that are used.
I got the new swing arm bolt machined and re-threaded by a local stunt shop, 50$, which seems a little high, but manageable as Im really not doing anything else except welding my shock mounts.
But it was a perfect fit, and the threading was exact. You get what you pay for I suppose.
Now the chore will be to get the new f4i gauges installed. But wiring is easy work for me. specially when there are so many how-to's already.

if you wanna make wiring the gauges easier to remove if for any reason you ever have to, what i did was went to my local stereo shop and got the male and female portions of an aftermarket radio harness and wired one end into the bike and the other to the gauges and now I can just plug and unplug them if I need to remove them instead of cutting them or anything else of that nature

if you wanna make wiring the gauges easier to remove if for any reason you ever have to, what i did was went to my local stereo shop and got the male and female portions of an aftermarket radio harness and wired one end into the bike and the other to the gauges and now I can just plug and unplug them if I need to remove them instead of cutting them or anything else of that nature
Agreed.
But I can do it much simpler. I was just going to make a harness out of an old IDE hard drive ribbon (male and female ends). I can easily find that kind of stuff at my local electronics depot. It's where i got my digital calliper.
The reality is that i can probably match up the plastic ends of the stock f4i gauge plugs with their corresponding plastic male/female parts. Less cutting.
so all i have to do is match the f3 wires with the appropriate f4i wires, plug in and done.
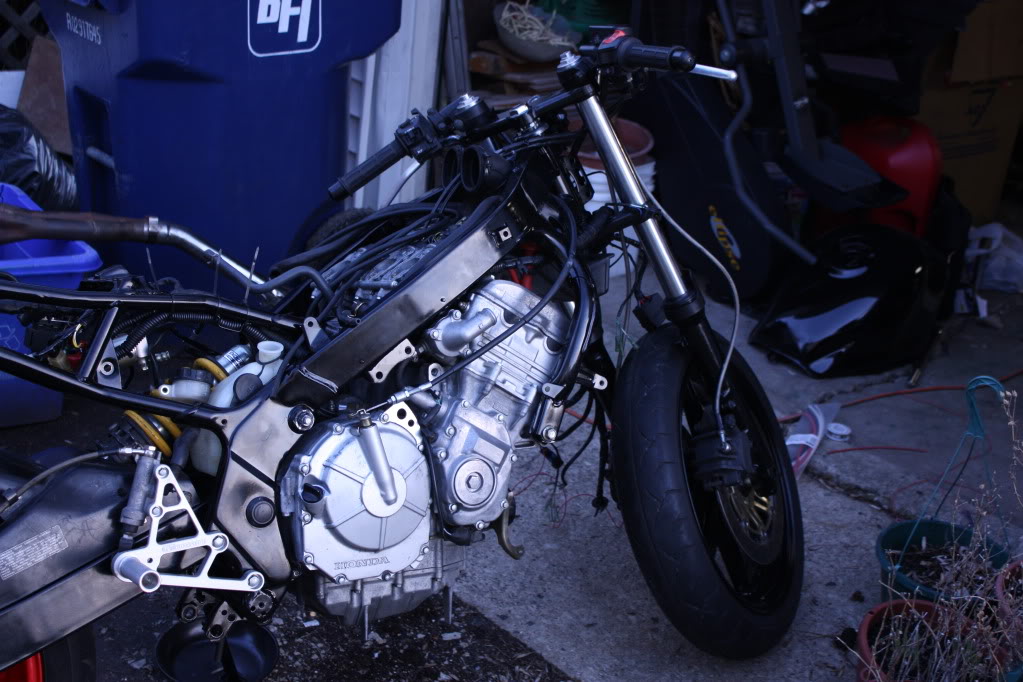
However, i have this one set of wires that goes under the frame and around the air intake. I was trying to trace where it goes, but it splits off to the rad fan, and presumably someplace else.

As pictured above, its the small bundle that goes down from the main line. I can snip this and put a harness here, but would rather not if I didn't need to.
As a question, did you have to take your tank off to run the wires?
The secondary thought i had was to snip the main line closer to the bottom of the engine frame, put a "quick connect" harness there, and then the rest of the line would be accessible for me to run under the tank.
I'm just not sure how to proceed without clipping some wires... if in fact i have to?
She's looking kinda streetfigher now.

Last edited by nvanvlymen; May 9, 2013 at 11:17 PM.
when I re-did mine I didn't not remove the tank...on that side of the bike you can kind of slip the harness through that arm for the motor mount closest to the radiator...As for snipping that part of the harness after I got the f4i fairings mocked up I realized that I could leave it there because the fairings covered it up perfectly. Still looks just as clean and less work

Senior Member
Joined: Apr 2010
Posts: 484
Likes: 0
From: Chicago, IL
yes, tank and airbox have to be off.
You pull the front cables to the back by the battery box and pull it to the side of the carbs and down by the engine, everything will reach and work go into place to be connected.
that's what it looks like if you tuck it behind the frame next to the carb.
You pull the front cables to the back by the battery box and pull it to the side of the carbs and down by the engine, everything will reach and work go into place to be connected.
that's what it looks like if you tuck it behind the frame next to the carb.
Last edited by kerosene; Apr 10, 2011 at 02:36 PM.