
redbull china kit


Thread Starter
|
Senior Member
Joined: Jan 2014
Posts: 140
Likes: 1
well it arrived and what a load of rubbish !!
almost all of the panels had chips when I unpacked them. there is some bad paint and the fit is just dreadful.
I have tried everything to get this kit on and i just cant get the panels to line up and the tail section is a mess :-(.
Looks like I will have to start an ebay case.
almost all of the panels had chips when I unpacked them. there is some bad paint and the fit is just dreadful.
I have tried everything to get this kit on and i just cant get the panels to line up and the tail section is a mess :-(.
Looks like I will have to start an ebay case.

Welcome Crew and ROTY 2014
Joined: Dec 2010
Posts: 2,059
Likes: 6
From: Kansas
Yeah, these kits can be a royal pain! 
Jamie, did you look over some of the threads, including my build threads, to get an idea of what to expect with these kits?
The issues with the finish totally suck, and you'll have to show pictures, and hopefully you'll get it replaced, but if you're not ready to deal with some mild-to-serious fitment issues, you might just shoot for a refund, and do something different, because you WILL have to do a lot of work to get the fitment right ... the are not plug-N-play, for sure.
I'm on my second kit, and with both of them, if you just tried to bolt the pieces right up, they would definitely not fit... with both kits, I've had to drill out most of the holes, to allow for positioning adjustment, and break off and re-glue tabs, to get them in the right place, both with regards to forward and back alignment, AND with the pieces "sucking in" to the right place, like the issue with your tail.
Which seller did you get this one from? My first kit (black/red/silver) was from Neverland Moto, and the Repsol kit was from Add Moto R.
It sucks, I know, but I hope you get it worked out - if you were close to me, AND the kit didn't have issues with the finish, I'd be more than happy to show you tricks to get these things to work!
Jamie, did you look over some of the threads, including my build threads, to get an idea of what to expect with these kits?
The issues with the finish totally suck, and you'll have to show pictures, and hopefully you'll get it replaced, but if you're not ready to deal with some mild-to-serious fitment issues, you might just shoot for a refund, and do something different, because you WILL have to do a lot of work to get the fitment right
I'm on my second kit, and with both of them, if you just tried to bolt the pieces right up, they would definitely not fit... with both kits, I've had to drill out most of the holes, to allow for positioning adjustment, and break off and re-glue tabs, to get them in the right place, both with regards to forward and back alignment, AND with the pieces "sucking in" to the right place, like the issue with your tail.
Which seller did you get this one from? My first kit (black/red/silver) was from Neverland Moto, and the Repsol kit was from Add Moto R.
It sucks, I know, but I hope you get it worked out - if you were close to me, AND the kit didn't have issues with the finish, I'd be more than happy to show you tricks to get these things to work!
Last edited by JNSRacing; May 14, 2014 at 01:36 PM.
Thread Starter
|
Senior Member
Joined: Jan 2014
Posts: 140
Likes: 1
thanks JNS
I was prepared for the hard work and spent a long time looking through threads to see if I was prepared to take on the work. I did order knowing cheap meant PITA.
But with having pieces missing, some incorrectly supplied (F3 bits with F2 kit) and chips all over the place I got really annoyed!.
Thanks for the offer of help, it would be really good if anyone was in the UK / within a hundred miles I would be able to swing in or trailer the bike up as the is no replacement for experience.
I ordered from NeedJustMoto on ebay and have asked for bits to replace the missing or damaged items and they have told me i am lying and they wouldn't be in business if they supplied the wrong bits. Nothing like customer is king hey :-).
Because I can't help myself I am going to have another stab at playing around with these armed with dremmel and beer. Not sure if I will be happy but worth a shot.

Junior Member
Joined: Oct 2013
Posts: 25
Likes: 0
JNS nailed it with respect to fitment. Also if your bike has been dropped sometimes the frame connectors (on the side of the engines for example) can get bent in and make fitment even worse. I had to bend one of mine outward as it was bent in significantly compared to the other side.
I bought mine on ebay from Selinamoto mostly based on reviews and a youtube user that has a video with a review of his Repsol kit. The paint is much better than expected but the holes barely line up for any bolt. I used a drill with a small bit in some cases to make a small hole and increased the bit size to get the 'right' fit. This often merged though with the original hole however. Also had to adjust a few tabs on the tail section pieces to fit in the rubber grommets. Also didn't come with the small chin piece under the headlight and was told the kit didn't have that yet I know another user's kit from same seller that did. I just reused the one I had.
The end result is better than I expected but I don't know if I was expecting much given what I paid. I think sometimes it's a coin toss with these things.
Good luck with your fairings!
https://cbrforum.com/forum/cbr-600f2-16/jaycbrs-94-f2-151784/
Welcome Crew and ROTY 2014
Joined: Dec 2010
Posts: 2,059
Likes: 6
From: Kansas
I mean... wow, that is unbelievable! I will not forget THAT seller... NeedJustMoto... will definitely steer clear.
Welcome Crew and ROTY 2014
Joined: Dec 2010
Posts: 2,059
Likes: 6
From: Kansas
You might be able to use that to your advantage, even if the fairing stay is perfectly straight... I moved those brackets just a wee smidge, to aid me when putting on the Repsol kit.
Jamie, I wish you luck, and maybe you better arm yourself with something North of 80-Proof, rather than just beer!

Thread Starter
|
Senior Member
Joined: Jan 2014
Posts: 140
Likes: 1
I have given it another shot and snapped off the fittings for the tail section the bonded them back in a better position.
The tank is a terrible fit and sits much higher at the back leaving quite a big gap between it and the real tank. Sadly there isn't much I can do about that.
Good advice on bending the stays I will give keep it in mind that it could be the bike as well.
I think I may have worked out a way to pull the bits together and reduce gaps. Our engineers use these: Cable Tie Adhesive Base 20 X 20mm Natural Pack of 100 - 180-230 - Nylon Cable Ties - Install Accessories
When cabling with zip ties so I am going to grab a load and bond one to the back of either side of ajoining pieces. I can then thread a tie through and kind og stitch the pieces together slightly which should reduce the gaps.
It will make maintenance a royal PITA so I will keep it to a minimum but I think its worth a shot.
Just checked the oil and I think it is possibly loosing some so I will do an oil and filter change before doing a final fit. if it is loosing oil I will just ignore it and ride in a state of ignorance and bliss :-).


Thread Starter
|
Senior Member
Joined: Jan 2014
Posts: 140
Likes: 1
10 hour ride and was all still attached so my bodging must not be that bad. I can't get these bits to line up:
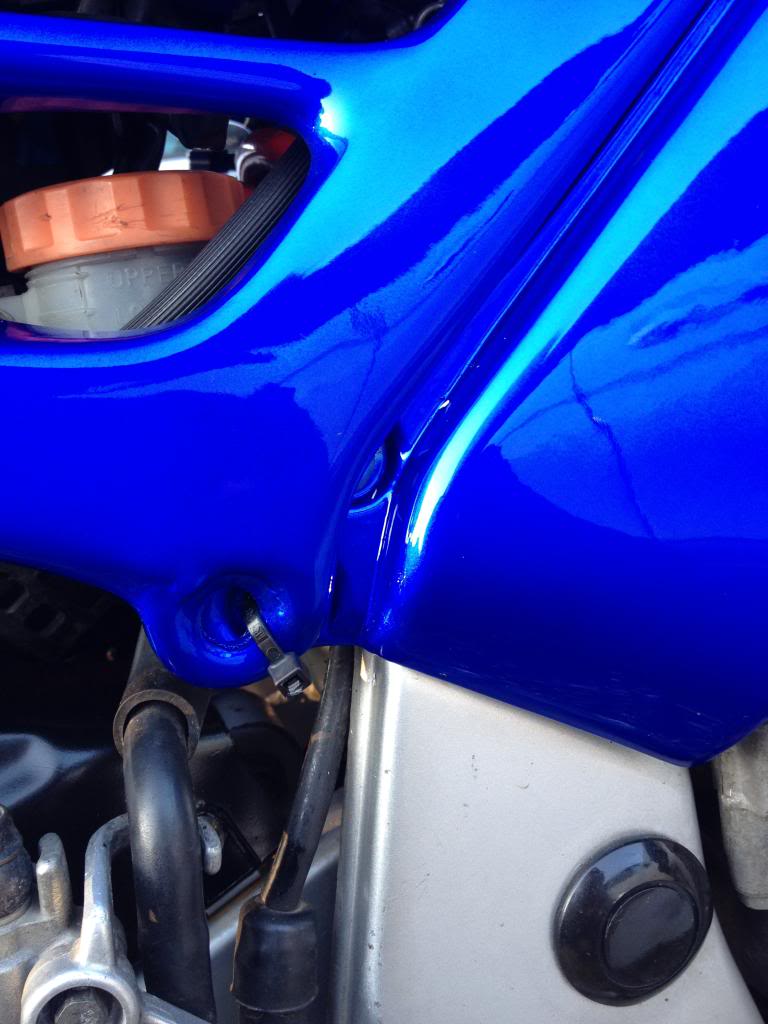
and the tail end is a bit of a mess but they didnt ship the tail piece so I will wait and see if I can get it off them.
I couldn't source the quick fixings that screw in the side panels in place so I bonded some screws to the rear and attached the nuts from the front. not ideal but with some captive nuts it will look tidy enough.
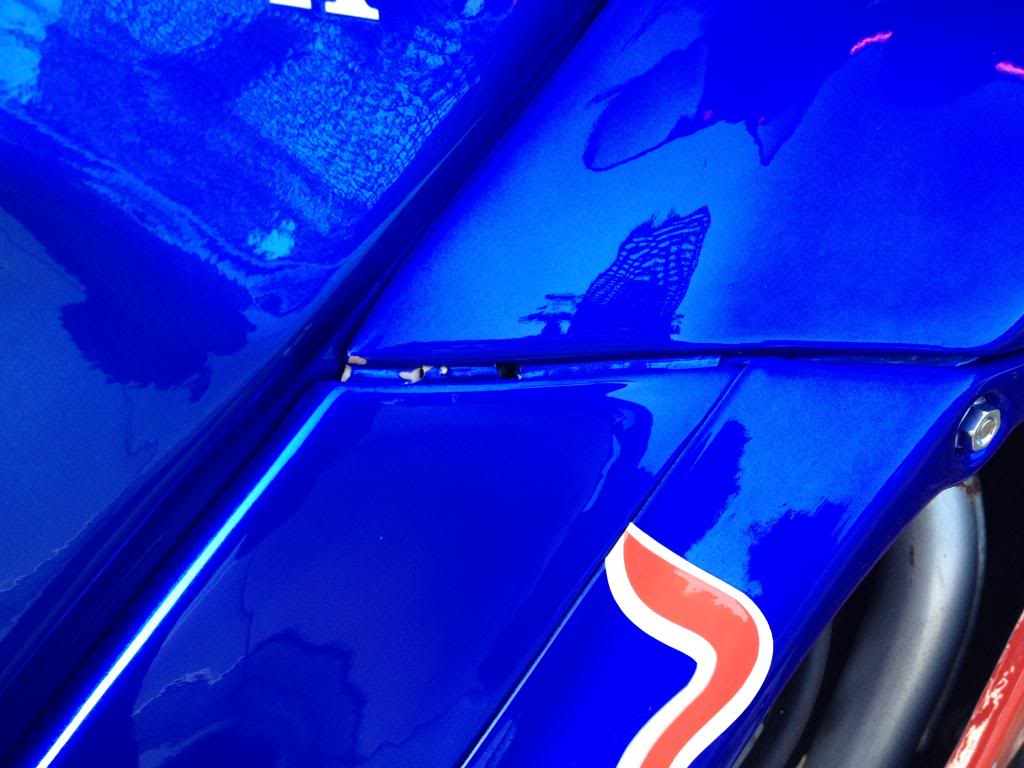
shame about the gap but I will work on that.
Welcome Crew and ROTY 2014
Joined: Dec 2010
Posts: 2,059
Likes: 6
From: Kansas
On the fasteners for the inspection panels, what you need is the 1/4 turn screws and the plastic washers - here's the Honda part numbers:
64507-MN4-000 X 4
64509-KE8-700 X 8
These are on this fiche: LOWER COWL - F2 - 91-94
As for the receiving end of those, you need this style of Dzus fastener, which will need to be riveted to the upper and lower cowling: kurveygirl.com - Dzus, Vesrah, Brembo, Spring Clips and More - Spare Parts: 1 Rivet on Retainer
Or, you could use a kit like this, which would get you everything you need, albeit with a D-Ring screw, rather than Phillips, and this will be cheaper all around: kurveygirl.com - Dzus, Vesrah, Brembo, Spring Clips and More - DRZ-400 - Replacement Dzus Kit - OEM Silver Finish
If you've still got your old fairings, the cheapest route of course, would be to drill out the rivets, and re-use the items... then all you'll need are new rivets.

Thread
Thread Starter
Forum
Replies
Last Post
Ho-Made
F4i - Main Forum
11
Jul 6, 2012 08:59 AM