
Project: Downtime
#1
 09-11-2012 | 11:30 PM

Thread Starter
|
Junior Member
Joined: Sep 2012
Posts: 13
Likes: 0
So I recently moved to Northern California with my job. After getting here and seeing the number of bikes here I worked out a deal with my wife to get me a project. I'm waiting on some training to start so I have about 2 months of nothing to do. In the mean time I purchased a 1992 CBR600F2 for $400. It's been laid over into a tree, and needs some serious TLC.

This is how I picked it up:

I immediately started the tear down/ inspection phase. I started by giving the bike a very detailed look over to determine the major parts I would need to get the bike street legal. Here are some preliminary pics


Some of the major components I found are:
Headlight
Gauges
Radiator
Turn signals
Tank
Rearsets
Start switches
Brake connection
Clutch handle
Those are the items I know for certain I'm going to need. The bike runs... but it needs a new throttle tube so it starts out fine and slowly revs up on its own. I've had the battery out so I cant mess with the cables right now. Most of the work I've done has been primarily cleaning and inspection for further damage.
I've found a number of hack job fixes and some minor mods as well. The front brake lines are a set of SS braided lines and equal length dual lines. The rear brake line is also been replaced. This weekend I spent a lot of time removing the front brakes and lines cleaning them and checking the their functionality. I've also noticed copious amounts of grease and gunk all over the forks. Enough talk here's a few pics.
Here are the brakes and lines
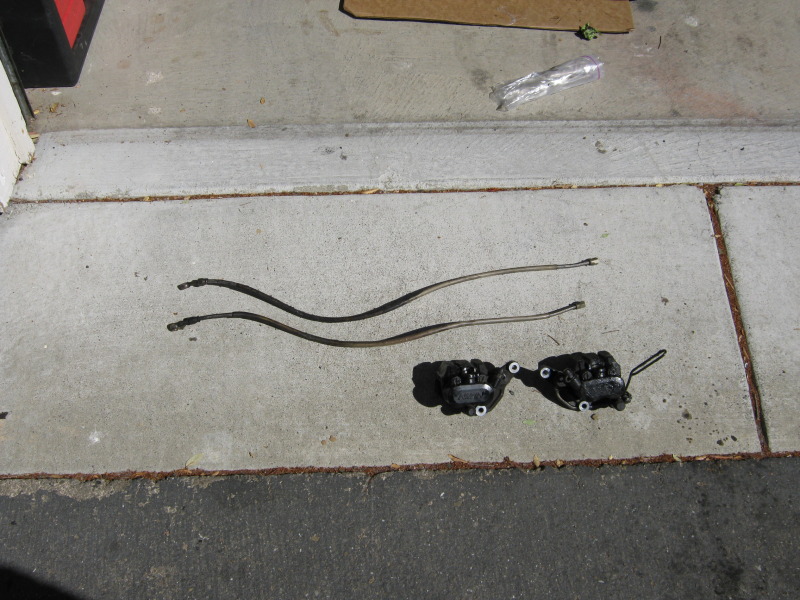


This is after I cleaned the lines and removed the dried out clear coverings

I cleaned and painted the right side caliper, and pictured the left one for comparison

These are the forks before cleaning

And after


I also drained the oil which obviously needed changing

I was wondering if I need to replace this waterpump or if it can be cleaned up and used?

Also, is this right? it looks like the stay should fit in that slot but, I'm not sure?

I'll try to keep this updated as much as possible.
This is how I picked it up:
I immediately started the tear down/ inspection phase. I started by giving the bike a very detailed look over to determine the major parts I would need to get the bike street legal. Here are some preliminary pics
Some of the major components I found are:
Headlight
Gauges
Radiator
Turn signals
Tank
Rearsets
Start switches
Brake connection
Clutch handle
Those are the items I know for certain I'm going to need. The bike runs... but it needs a new throttle tube so it starts out fine and slowly revs up on its own. I've had the battery out so I cant mess with the cables right now. Most of the work I've done has been primarily cleaning and inspection for further damage.
I've found a number of hack job fixes and some minor mods as well. The front brake lines are a set of SS braided lines and equal length dual lines. The rear brake line is also been replaced. This weekend I spent a lot of time removing the front brakes and lines cleaning them and checking the their functionality. I've also noticed copious amounts of grease and gunk all over the forks. Enough talk here's a few pics.
Here are the brakes and lines
This is after I cleaned the lines and removed the dried out clear coverings
I cleaned and painted the right side caliper, and pictured the left one for comparison
These are the forks before cleaning
And after
I also drained the oil which obviously needed changing
I was wondering if I need to replace this waterpump or if it can be cleaned up and used?
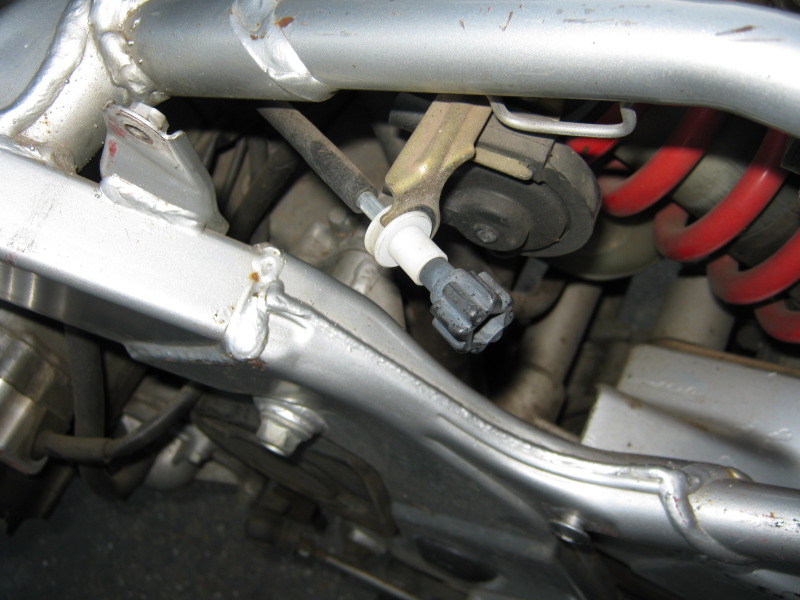
Also, is this right? it looks like the stay should fit in that slot but, I'm not sure?
I'll try to keep this updated as much as possible.
#2
09-12-2012 | 04:36 AM

#3
09-12-2012 | 10:13 AM

Welcome Crew and ROTY 2014
Joined: Dec 2010
Posts: 2,059
Likes: 4
From: Kansas
You've definitely got some work ahead of you... good luck!
If you pull the back wheel, and loosen and remove the lower, rear-most bolt on the caliper, you can locate the square boss on the caliper carrier, in the slot on the swing arm, and just pivot the caliper/pads up and out of the way, while you put the wheel back on. It can seem like kinda of a pain at first, since that carrier unit also acts as a wheel spacer - in other words, if you cuss, you WILL cuss a bit the first time you get it back together, but the more you do it, the quicker and more proficient you'll become.
Also, welcome to the site - you'll find a lot of good info/ideas, and there are a lot of us who have had significant experience with the F2, who can answer some questions.
#4
09-12-2012 | 10:30 AM

Yes, more than willing to help with getting you the right info with others on getting this rolling. Is the frame straight or look straight?
But I disagree with Frank though, get a 'Honda F2 Service Manual', you can find them on Amazon or ebay. The torque specs are usually off on secondary manuals(Clymers & Haynes) and more detailed description in the Honda Service Manual.
But I disagree with Frank though, get a 'Honda F2 Service Manual', you can find them on Amazon or ebay. The torque specs are usually off on secondary manuals(Clymers & Haynes) and more detailed description in the Honda Service Manual.
#5
09-12-2012 | 11:58 AM
Thread Starter
|
Junior Member
Joined: Sep 2012
Posts: 13
Likes: 0
#6
09-12-2012 | 12:08 PM

#10
09-12-2012 | 09:23 PM