
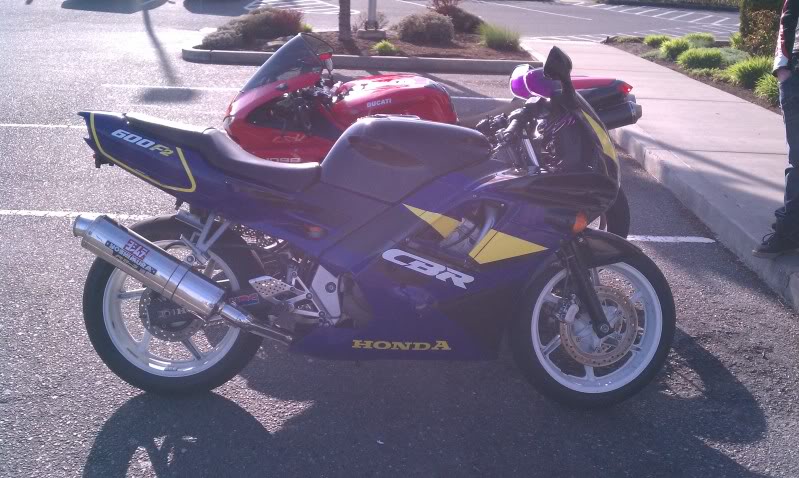
My CBR mods!


Either your forkseals or your springs are worn out and/or your wheel is unbalanced. A stabilizer can only do so much and still be able to transfer the vibrations via handlebars though.

That's all certainly a possibility seeing as the PO didnt seem to know how to take care of the thing. Maybe ill drop by cycle barn and see if they can check the wheel balance for me. Don't really wanna tear the forks apart =\
Alright, got some work done this weekend! I'll post some pictures on my lunch (10ish p.s.t.) its going rather well. The hardest part seems to be finding nuts and bolts. Think I may stop by harbor freight and pick up a pack of different sizes to make my life easier. Also...bought a solo seat cowl off eBay for $30 since my girlfriend doesn't have a helmet yet. Trying to make sure the back can support her though. Alright, hope you all look forward to the pics
so photobucket is taking forever to upload so this is gonna be a slow process, but here are a couple pics
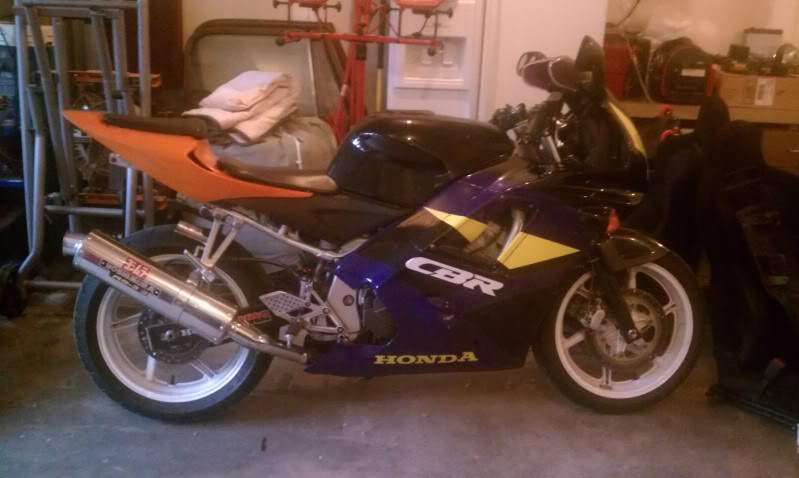
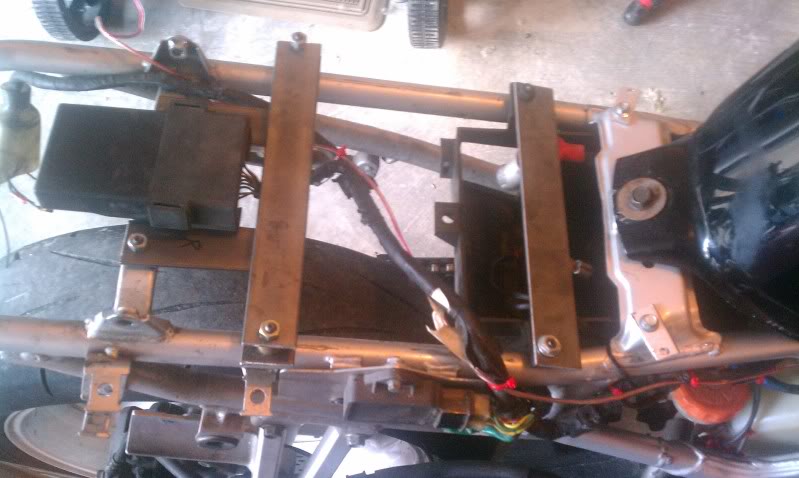
what it started as...
this was once i set everything on it when i was done for the night. front seat is fully fastened.
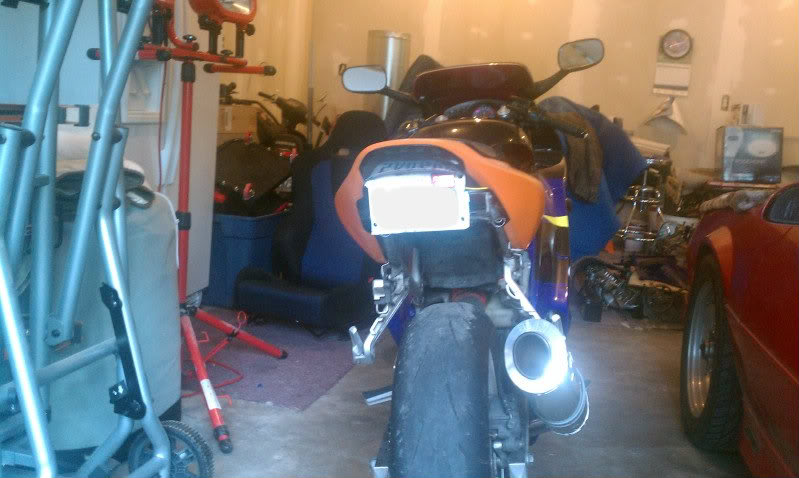
here is a view from behind. none of the wires are hooked up but i tucked em all away how they are gonna be. i think it will look nice. i like the plate placement.
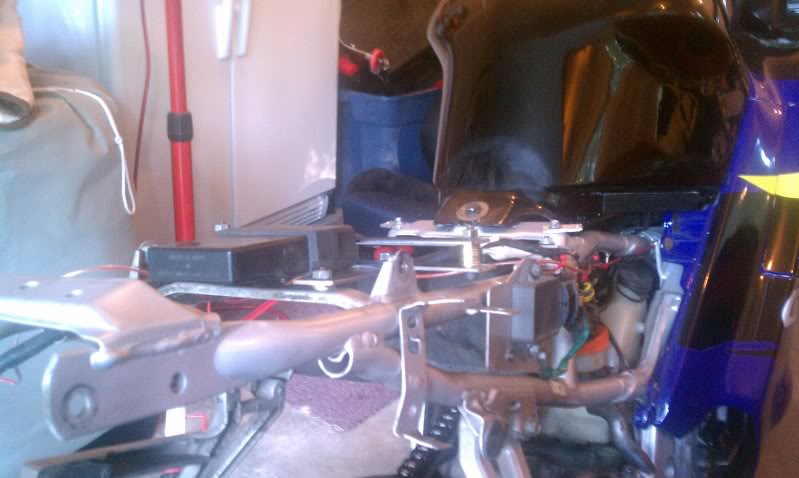
this is kinda a side view of the rear side of the front seat bracket, just to show how high i had to raise it. haven't drilled into the frame yet and everything is pretty stable so far
what it started as...
this was once i set everything on it when i was done for the night. front seat is fully fastened.
here is a view from behind. none of the wires are hooked up but i tucked em all away how they are gonna be. i think it will look nice. i like the plate placement.
this is kinda a side view of the rear side of the front seat bracket, just to show how high i had to raise it. haven't drilled into the frame yet and everything is pretty stable so far
Last edited by goatxxmastr; Jun 4, 2012 at 12:53 PM.
alright, they all uploaded!
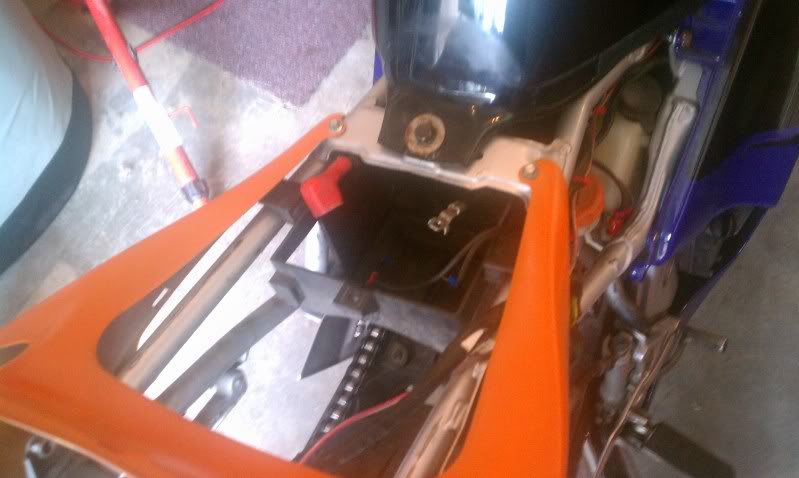
this is a view of the front seat brackets from above
i was originally going to mount the fairing like this but it put to much stress on the fairings (pulled em inward) and caused some riding conditions. so i made a couple brackets that you can see in the last pic.
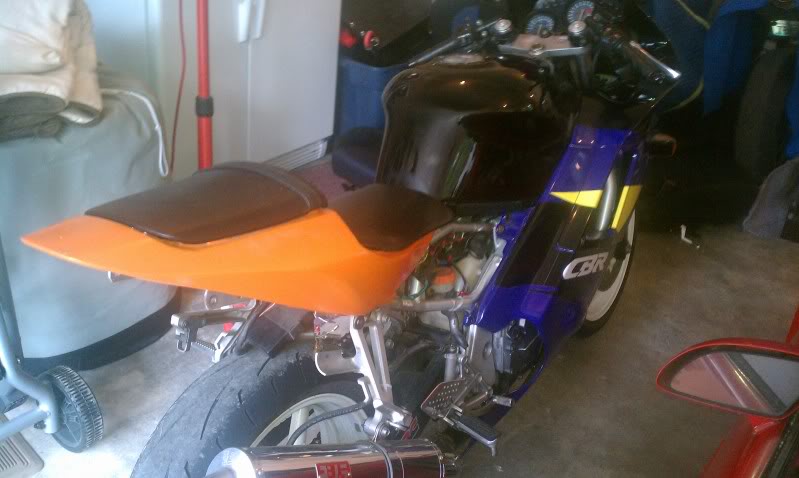
and last semi rear view
this is a view of the front seat brackets from above
i was originally going to mount the fairing like this but it put to much stress on the fairings (pulled em inward) and caused some riding conditions. so i made a couple brackets that you can see in the last pic.
and last semi rear view


Welcome Crew and ROTY 2014
Joined: Dec 2010
Posts: 2,059
Likes: 6
From: Kansas
Looks pretty good, man!  You did a great job with the angle and height of the tail - in my opinion, the pillion seat or cowling should be roughly even with and parallel to the top surface of the gas tank, in order for it to look good, and yours is pretty much on the money!
It will definitely look much better, once you have everything matching in color and graphics (if you're doing graphics, that is), and, if this were me, I would probably paint the rear subframe black, so that the exposed rail will "hide" a little more, but that's just a thought.
It will definitely look much better, once you have everything matching in color and graphics (if you're doing graphics, that is), and, if this were me, I would probably paint the rear subframe black, so that the exposed rail will "hide" a little more, but that's just a thought.
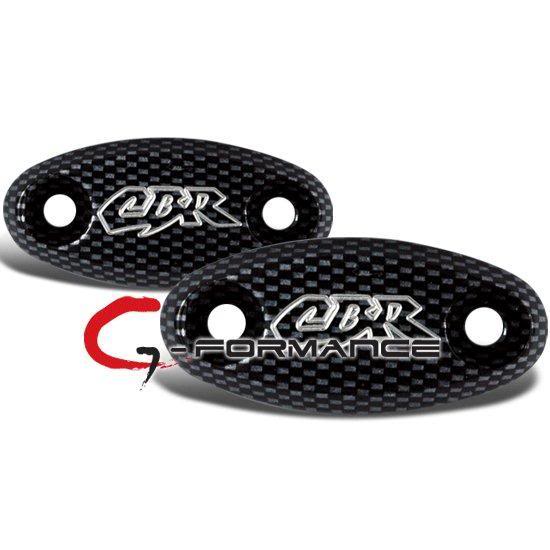
Lol I have no fiber glass experience but for the extra frame sticking out the back, I think I'm going to buy a pair of the covers you can get to cover up the bolt holes if you eliminate your mirrors. I think they will fit back there and they say "cbr" on em too
Last edited by goatxxmastr; Jun 4, 2012 at 03:01 PM.

Senior Member
Joined: Apr 2009
Posts: 6,494
Likes: 5
Very nice work. Lookin' good!
You could also place small rectangular reflectors in those frame holes...similar to the ones that are oem on the F4/F4i tails. If you weren't using an integrated tail light, those subframe hole locations would be perfect for small led turn signals.
You could also place small rectangular reflectors in those frame holes...similar to the ones that are oem on the F4/F4i tails. If you weren't using an integrated tail light, those subframe hole locations would be perfect for small led turn signals.