
'93 F2 Mods - Phase 2


Thread Starter
|
Welcome Crew and ROTY 2014
Joined: Dec 2010
Posts: 2,059
Likes: 6
From: Kansas
Thanks squale, and here's what I got done this weekend... it's not as much as I intended, but there were some unavoidable projects that stole my time.
I had already drilled the new holes for the lift spools, before powder-coating, but I did not show them previously - this is where they are located:

I used some blue loc-tite (medium) on the spool bolts and threaded them in through the square nuts, while using a finger to hold it in place until the threads got started, from there, the nut is locked in place on the bottom of the swingarm, and I could just tighten it down... you can see in the pic below, how putting that beveled end of the square nut facing away from the bike, allows it to sit nice and flush with the inside radius at the bottom of the swingarm.

I packed the swingarm bearings with new grease and reinstalled them, along with the spacers and seals, remounted the swingarm to the bike, installed both spools, and lifted the rear with the stand.


Due to shortness of time, I did not get much done with the gearbox, just drained oil, removed the clutch cable and clutch cover, and stopped just short of un-staking the clutch center nut.
The chain guard should be there when I get home tonight, so I'm excited to get that installed.
I had already drilled the new holes for the lift spools, before powder-coating, but I did not show them previously - this is where they are located:
I used some blue loc-tite (medium) on the spool bolts and threaded them in through the square nuts, while using a finger to hold it in place until the threads got started, from there, the nut is locked in place on the bottom of the swingarm, and I could just tighten it down... you can see in the pic below, how putting that beveled end of the square nut facing away from the bike, allows it to sit nice and flush with the inside radius at the bottom of the swingarm.
I packed the swingarm bearings with new grease and reinstalled them, along with the spacers and seals, remounted the swingarm to the bike, installed both spools, and lifted the rear with the stand.
Due to shortness of time, I did not get much done with the gearbox, just drained oil, removed the clutch cable and clutch cover, and stopped just short of un-staking the clutch center nut.
The chain guard should be there when I get home tonight, so I'm excited to get that installed.
Thread Starter
|
Welcome Crew and ROTY 2014
Joined: Dec 2010
Posts: 2,059
Likes: 6
From: Kansas
The chain guard from JDA Customs arrived yesterday - my plan for after work is to polish up the chain adjusters a little bit, and get the chain guard on and rear wheel re-installed, and maybe get back to the gearbox.

The anodizing is good - that little smear on the finish was due to handling it with grubby mitts!
The anodizing is good - that little smear on the finish was due to handling it with grubby mitts!
Thread Starter
|
Welcome Crew and ROTY 2014
Joined: Dec 2010
Posts: 2,059
Likes: 6
From: Kansas
After work yesterday, I spent a little time cleaning up the chain adjusters - I didn't polish them fully, just put a little more brightness by sanding down to 1500-grit.
After this, I got the rear wheel and brakes remounted, and got the new chain guard installed - I had to hit the hardware store, as mounting hardware was not included with the part, and it cannot employ the same screws used for the OEM hugger... the pictures aren't very good, as it was getting dark, but it gives you some idea.


In the 2nd and 3rd pictures, the light I was shining in order to get a pic that was viewable at all, makes it look like the match between the anodizing and powder-coating are quite far off, but the truth is, it really does look VERY close, almost perfect - if you look toward the front mount for the chain guard, you can see what I mean, as it looks extremely close.
If/when the anodizing fades, or gets marked up enough to make it a deal-breaker, I will probably just have it powder-coated in the same satin black, but it is just fine for now.... also, with the changes made to the swingarm and the new chain guard, the setup is just over 3/4 lb. lighter.
After this, I got the rear wheel and brakes remounted, and got the new chain guard installed - I had to hit the hardware store, as mounting hardware was not included with the part, and it cannot employ the same screws used for the OEM hugger... the pictures aren't very good, as it was getting dark, but it gives you some idea.
In the 2nd and 3rd pictures, the light I was shining in order to get a pic that was viewable at all, makes it look like the match between the anodizing and powder-coating are quite far off, but the truth is, it really does look VERY close, almost perfect - if you look toward the front mount for the chain guard, you can see what I mean, as it looks extremely close.
If/when the anodizing fades, or gets marked up enough to make it a deal-breaker, I will probably just have it powder-coated in the same satin black, but it is just fine for now.... also, with the changes made to the swingarm and the new chain guard, the setup is just over 3/4 lb. lighter.
Thread Starter
|
Welcome Crew and ROTY 2014
Joined: Dec 2010
Posts: 2,059
Likes: 6
From: Kansas
Glad to make you aware of the option!
Thread Starter
|
Welcome Crew and ROTY 2014
Joined: Dec 2010
Posts: 2,059
Likes: 6
From: Kansas
I wish I had gotten more done this weekend, but with World Cup games, FIM Superbike/Supersport races, and AMA Pro Races, it was already going to be a battle for time, then Sunday morning I got some horrible news about a fellow rider, that put me in bummer mode all day Sunday.
But, I got some done...
I put a healthy patch on the inside, to repair the damage to the bodywork...

...and just did a little cover up with touch-up paint on the outside - it does not look great, but this is the best it can be without repainting the whole piece, which is not going to happen for such a small blemish.

Moving on to the gearbox - I got the clutch assembly removed.

Now the shift arm can be withdrawn - notice there is a piece of card-stock sitting in the case - this is to prevent small parts from falling into the oil sump (like the thrust washer that's about to come off the shaft)... no need having to pull the oil pan, and replace that gasket as well.

Here is a close-up of the OEM detent arm and shift spring...

... and a comparison of the OEM parts, to the new Factory Pro parts.


I find it easier to put the new spring in place, then with the bolt through the new detent arm and washer, start threading it into the case, positioning the arm in the neutral dip on the shift star while keeping the spring hooked on the arm, and tightening the bolt - it's important to make sure the larger OD boss, that proceeds the threads on the bolt, is able to sit inside the ID of the detent arm, rather than press on it, so that the arm is oriented correctly... this takes some work, but it's obvious when it's not right, as the arm will be ****-eyed, and the flange on the bolt will not sit flush with the arm.


Old gasket material cleaned off of the case, and clutch re-installed, with new springs and plates:

Following this, all I had time to do was re-install the cover with a new gasket, torque the bolts, refill the oil, and start it up, to make sure there were no sounds that shouldn't be.
I found that once you put it in first, even with the lever pulled in, the clutch engages, and the rear wheel spins... I expected this, as the cable has been adjusted for proper pull as the OEM clutch wore down, and will now need to be taken out some.
But, I got some done...
I put a healthy patch on the inside, to repair the damage to the bodywork...
...and just did a little cover up with touch-up paint on the outside - it does not look great, but this is the best it can be without repainting the whole piece, which is not going to happen for such a small blemish.
Moving on to the gearbox - I got the clutch assembly removed.
Now the shift arm can be withdrawn - notice there is a piece of card-stock sitting in the case - this is to prevent small parts from falling into the oil sump (like the thrust washer that's about to come off the shaft)... no need having to pull the oil pan, and replace that gasket as well.
Here is a close-up of the OEM detent arm and shift spring...
... and a comparison of the OEM parts, to the new Factory Pro parts.
I find it easier to put the new spring in place, then with the bolt through the new detent arm and washer, start threading it into the case, positioning the arm in the neutral dip on the shift star while keeping the spring hooked on the arm, and tightening the bolt - it's important to make sure the larger OD boss, that proceeds the threads on the bolt, is able to sit inside the ID of the detent arm, rather than press on it, so that the arm is oriented correctly... this takes some work, but it's obvious when it's not right, as the arm will be ****-eyed, and the flange on the bolt will not sit flush with the arm.
Old gasket material cleaned off of the case, and clutch re-installed, with new springs and plates:
Following this, all I had time to do was re-install the cover with a new gasket, torque the bolts, refill the oil, and start it up, to make sure there were no sounds that shouldn't be.
I found that once you put it in first, even with the lever pulled in, the clutch engages, and the rear wheel spins... I expected this, as the cable has been adjusted for proper pull as the OEM clutch wore down, and will now need to be taken out some.
Welcome Crew
Joined: Feb 2013
Posts: 688
Likes: 1
From: Waycross, Ga
The Factory Pro piece looks alot better made then oem. Even tho you may not have got alot done, I still feel like a slouch, havent even touched mine in a long while. too busy with moving and being lazy. Great job as usual, and great reminder about the install too.
Thread Starter
|
Welcome Crew and ROTY 2014
Joined: Dec 2010
Posts: 2,059
Likes: 6
From: Kansas
Now I'm anxious to see how the change in shift action will be, and how the EBC race clutch feels at launch, compared to OEM.
Thread Starter
|
Welcome Crew and ROTY 2014
Joined: Dec 2010
Posts: 2,059
Likes: 6
From: Kansas
I'm behind here... time to catch up.
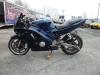
So I buttoned the cases back up, threw a mirror on the bike & zip-tied my current plate on the rear, and took it for a few passes around the neighborhood, race slicks and all, to see how things felt.

I had experienced some fueling issues in the pilot range, at round 1, and though I wasn't 100% certain of whether the issue was due to being overly lean or overly rich, I was leaning toward it being a bit rich.
But, after toying around with the fuel screws, running the bike at idle, initiating large throttle inputs off idle, riding it a few loops around my neighborhood, and repeating until I was satisfied, I do believe I might have ended up with the same setting as, or very close to, what I had before... but now it's just about perfect.
I'm going to chalk up the issues at Putnam, to the increased elevation, and the cooler temperatures for that round.
On the gearbox... sha-ZAM!! The shift action is incredible, and I'm very glad I made this change while I was in that part of the bike, working on the clutch. Later at the track, I still caught a couple of false neutrals, but I realize that: A) These things DO just simply happen from time to time, due to not getting a thorough engagement for whatever reason, and, B) it will likely get better as I simply get used to the change in how the lever feels.
So I buttoned the cases back up, threw a mirror on the bike & zip-tied my current plate on the rear, and took it for a few passes around the neighborhood, race slicks and all, to see how things felt.
I had experienced some fueling issues in the pilot range, at round 1, and though I wasn't 100% certain of whether the issue was due to being overly lean or overly rich, I was leaning toward it being a bit rich.
But, after toying around with the fuel screws, running the bike at idle, initiating large throttle inputs off idle, riding it a few loops around my neighborhood, and repeating until I was satisfied, I do believe I might have ended up with the same setting as, or very close to, what I had before... but now it's just about perfect.
I'm going to chalk up the issues at Putnam, to the increased elevation, and the cooler temperatures for that round.
On the gearbox... sha-ZAM!! The shift action is incredible, and I'm very glad I made this change while I was in that part of the bike, working on the clutch. Later at the track, I still caught a couple of false neutrals, but I realize that: A) These things DO just simply happen from time to time, due to not getting a thorough engagement for whatever reason, and, B) it will likely get better as I simply get used to the change in how the lever feels.
Last edited by JNSRacing; Jul 2, 2014 at 09:55 AM.

