
Rebuilding the cane


Thread Starter
|
Member
Joined: Feb 2009
Posts: 61
Likes: 0
From: Grand Rapids MI
Nice work Psonic, lookin good! Yeah the paint flakes off as soon as anything scrapes against it. Powder coating would have been a better choice but that's a little beyond my budget!
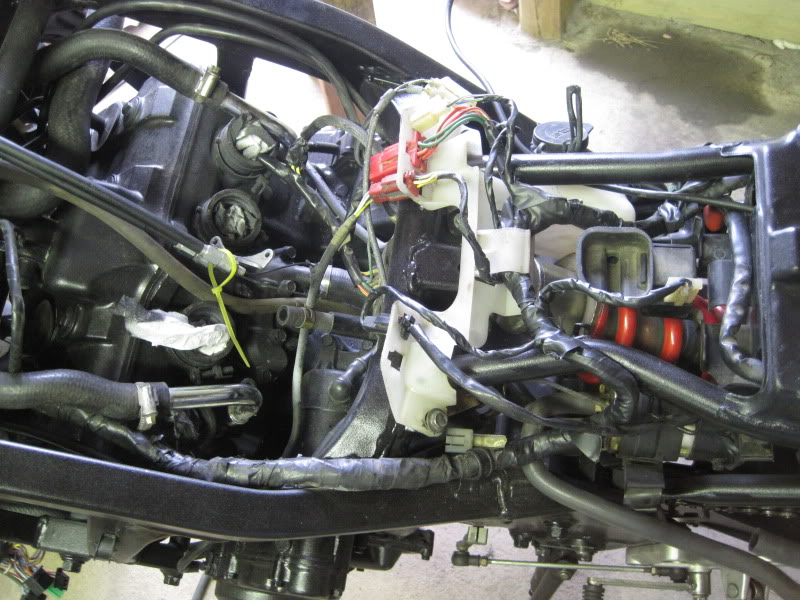
Sorry about the delay with pics, I got really busy with work the last few days so I had to put the bike on hold. I did get a little done, wiring harness all in, brake calipers on, and I fabbed up an oil cooler mount.
I hate wiring with a passion, now all it looks like is a rats nest. Hopefully I'll be able to organize this a bit and hide the mess.
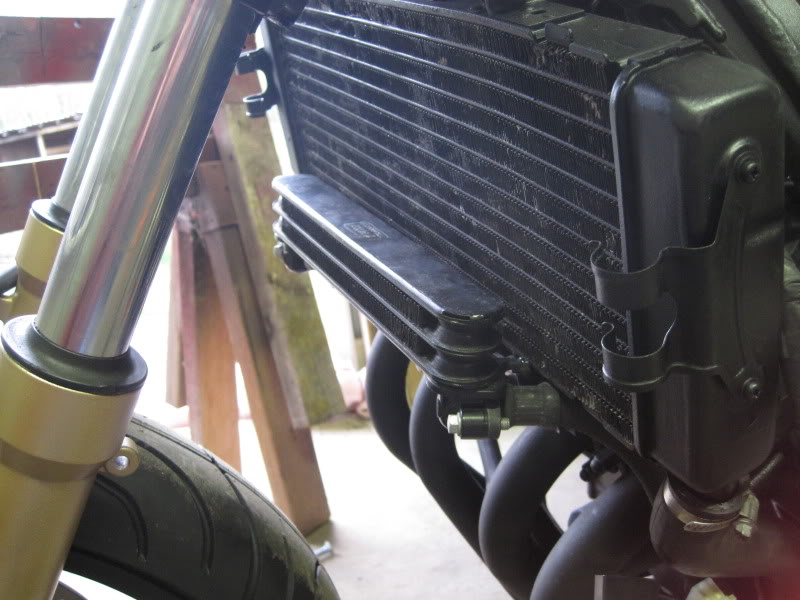
I think I found a decent place to mount the oil cooler. The only problem is that it must be mounted upside down in order to clear the front fender. Hopefully this isn't a problem. I just used a chunk of steel I had laying around, I think it turned out ok.
Here's the oil cooler temporarily set in place, still gotta paint it and pick up some bolts to finish it up.
And here's how it sits now. It's a lot more ugly with all the wires and stuff crammed in there, but I think once I throw some plastics on there nobody will notice.

Quick question, where does the ground cable from the battery mount to the motor??? My friend took it off and now neither of us can figure out where it's supposed to go. Please let me know, it's driving me nuts!
Sorry about the delay with pics, I got really busy with work the last few days so I had to put the bike on hold. I did get a little done, wiring harness all in, brake calipers on, and I fabbed up an oil cooler mount.
I hate wiring with a passion, now all it looks like is a rats nest. Hopefully I'll be able to organize this a bit and hide the mess.
I think I found a decent place to mount the oil cooler. The only problem is that it must be mounted upside down in order to clear the front fender. Hopefully this isn't a problem. I just used a chunk of steel I had laying around, I think it turned out ok.
Here's the oil cooler temporarily set in place, still gotta paint it and pick up some bolts to finish it up.
And here's how it sits now. It's a lot more ugly with all the wires and stuff crammed in there, but I think once I throw some plastics on there nobody will notice.
Quick question, where does the ground cable from the battery mount to the motor??? My friend took it off and now neither of us can figure out where it's supposed to go. Please let me know, it's driving me nuts!


Thread Starter
|
Member
Joined: Feb 2009
Posts: 61
Likes: 0
From: Grand Rapids MI
I have a Haynes manual but it never shows what the ground actually grounds to. I ended up connecting it to the crank case bolt right next to the oil pressure sensor, I'm thinking that will work. I might run another one to the frame just for peace of mind.
Carbs are on and the wiring is buttoned up a little bit. Tonight I'm hoping to install the front brake lines and get 'er ready to run. I should have cleaned and rebuilt the carbs while I had them out, but I'm in a hurry because the weather is really nice and not having this thing on the road is driving me crazy!
Carbs are on and the wiring is buttoned up a little bit. Tonight I'm hoping to install the front brake lines and get 'er ready to run. I should have cleaned and rebuilt the carbs while I had them out, but I'm in a hurry because the weather is really nice and not having this thing on the road is driving me crazy!
Thread Starter
|
Member
Joined: Feb 2009
Posts: 61
Likes: 0
From: Grand Rapids MI
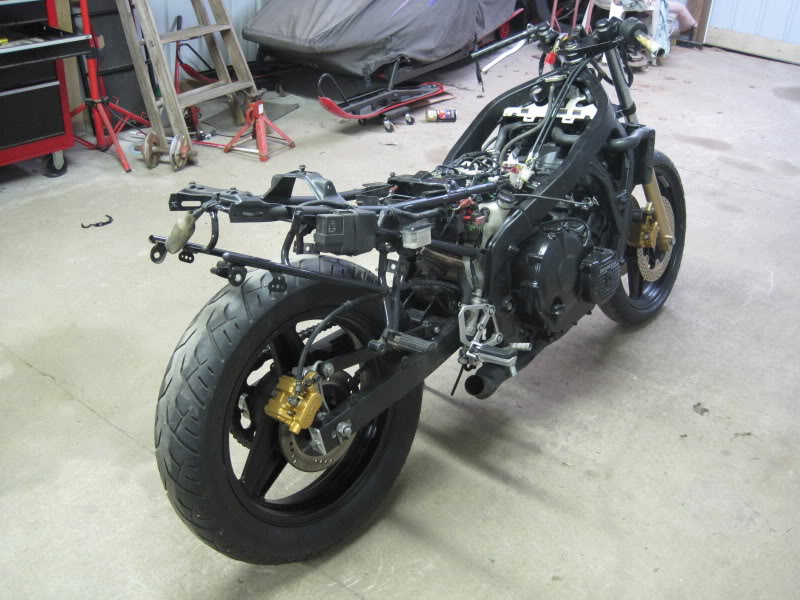
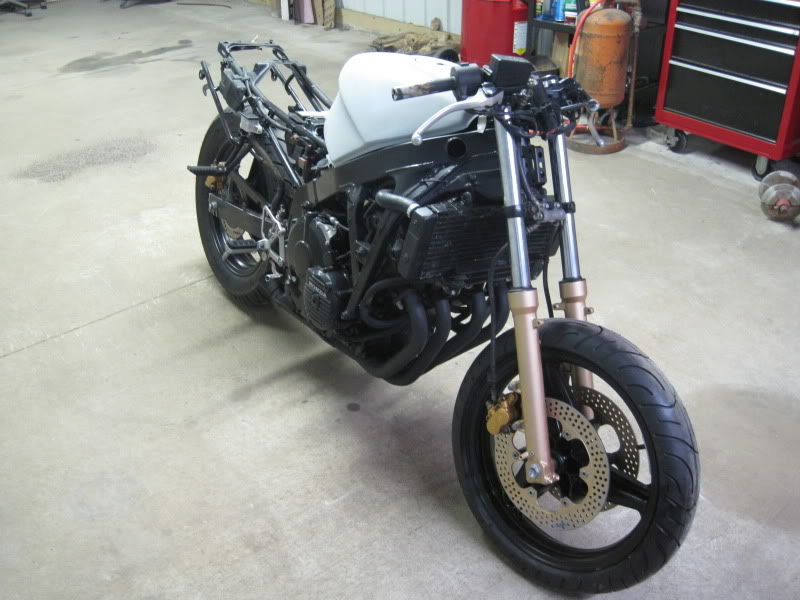
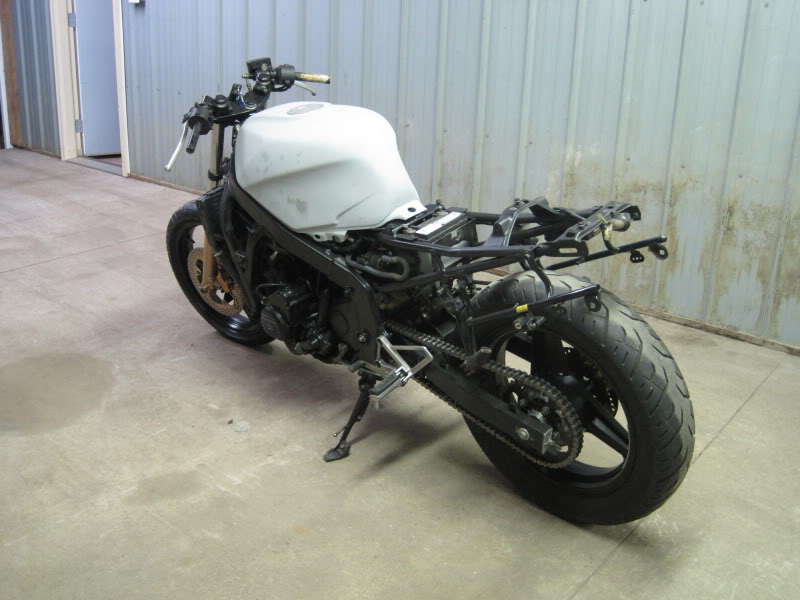
Got a little more done last night, it's starting to look like a motorcycle again. Oil lines routed, wires all tucked away, brake lines on, and clutch cable installed. I also hooked up the battery to make sure I at least got some of the wiring right. All lights work and the starter turns so I guess I'm in good shape so far!
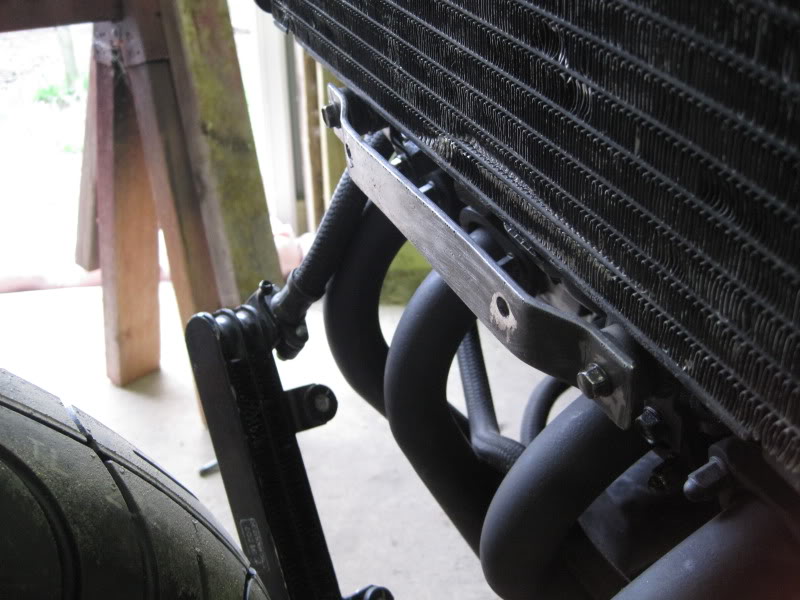
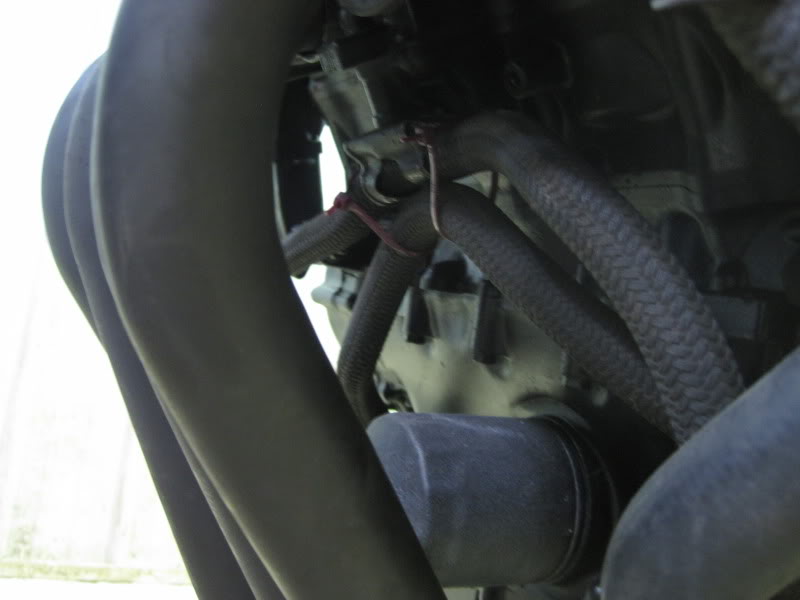
To keep the oil lines off the exhaust manifolds I rigged one of the oil line brackets that are supposed to bolt to the side of the radiator. It's not the prettiest, but it will get the job done and you can't see it unless you look. I told myself I wouldn't be using zip ties on this build but in this case it was just too easy.
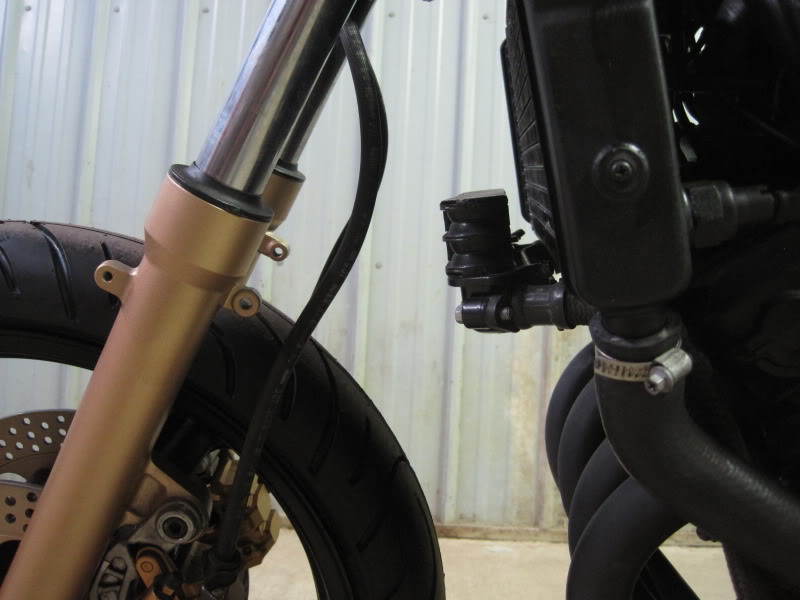
I'm hoping there will be enough clearance between the front fender and the oil cooler under full braking.
I set the gas tank on there just to get a feel of what I'll end up with. It's getting there! If I'm not too busy today I'll be shopping ebay for some fairings and other cosmetic stuff.
Thread Starter
|
Member
Joined: Feb 2009
Posts: 61
Likes: 0
From: Grand Rapids MI
I took a couple steps backwards last night, I found 2 major problems that I need to take care of. I hooked up an auxiliary gas tank and let some gas gravity feed into the carbs. As soon as the float bowls filled up 3 of the carbs began spewing fuel out of the bowl gaskets.
 I also found that I was right about the frame paint not holding up to gasoline very well, I now need to repaint most of the left side of the engine. I couldn't find a gasket kit for these carbs so I bought a gasket sheet so I could cut my own. Fun stuff!
 Despite the gas leak I did hit the starter button and it roared to life almost instantly. The problem is that after only a few seconds of running I lost all power to the ignition. It seems that there is a short or a loose connection a the starter relay because every time I touch/move the relay the power is restored. Looks like I'll be doing some electrical trouble shooting. Yay.

Thread Starter
|
Member
Joined: Feb 2009
Posts: 61
Likes: 0
From: Grand Rapids MI
Oh crap, I wonder why they're leaking, usually those O-rings are bullet proof. I guess I'll find out in a few minutes when I take them apart. Do ya think a regular gaskets would work?