
1990 "Huricane Janus" Fighter Build


Thread Starter
|
Junior Member
Joined: Aug 2013
Posts: 13
Likes: 0
From: West Michigan
Some of you already saw my introduction thread, but this will be my build thread.
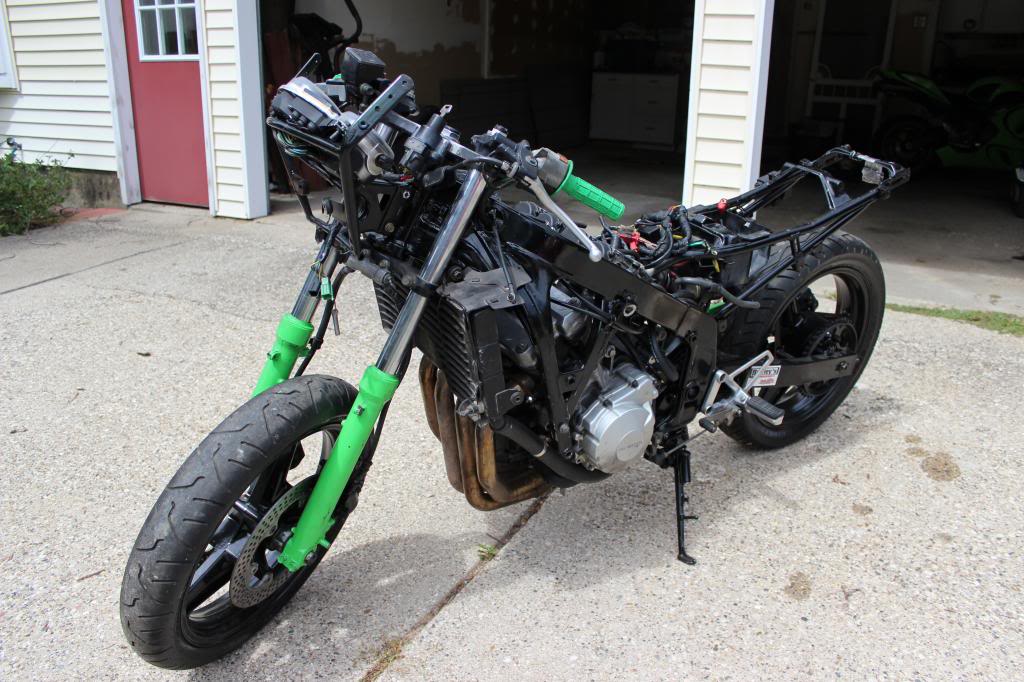
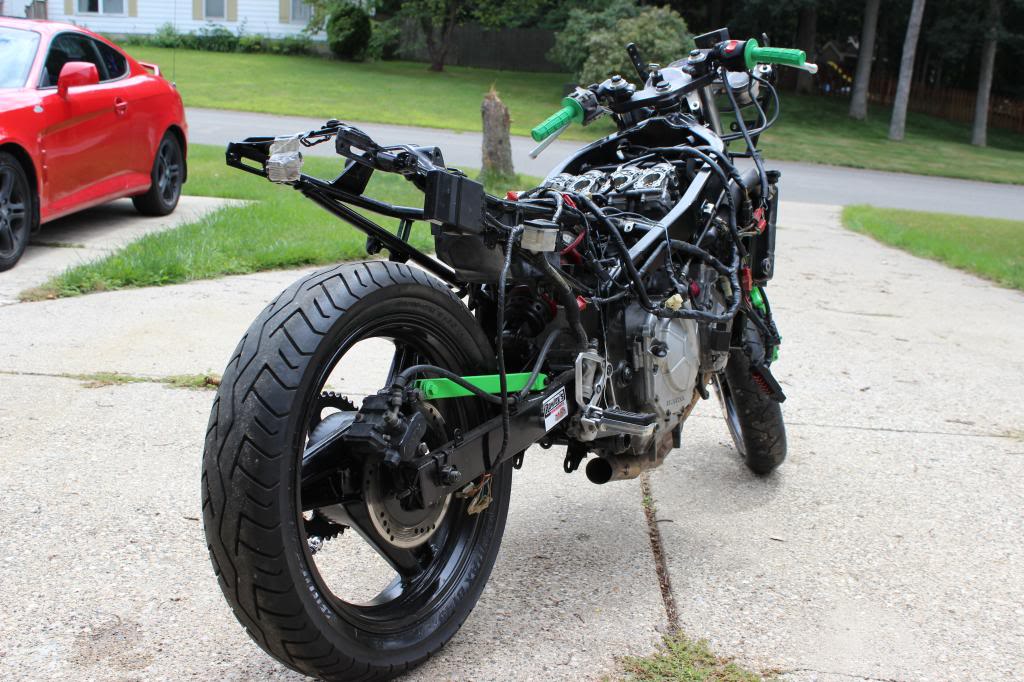
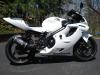
I purchased a 1990 600F that someone had blown the engine on and dropped an F2 engine into instead. It's not currently running, although the engine turns over, and it has no bodywork and is missing a few other random things as well.
Here's what she looks like right now:
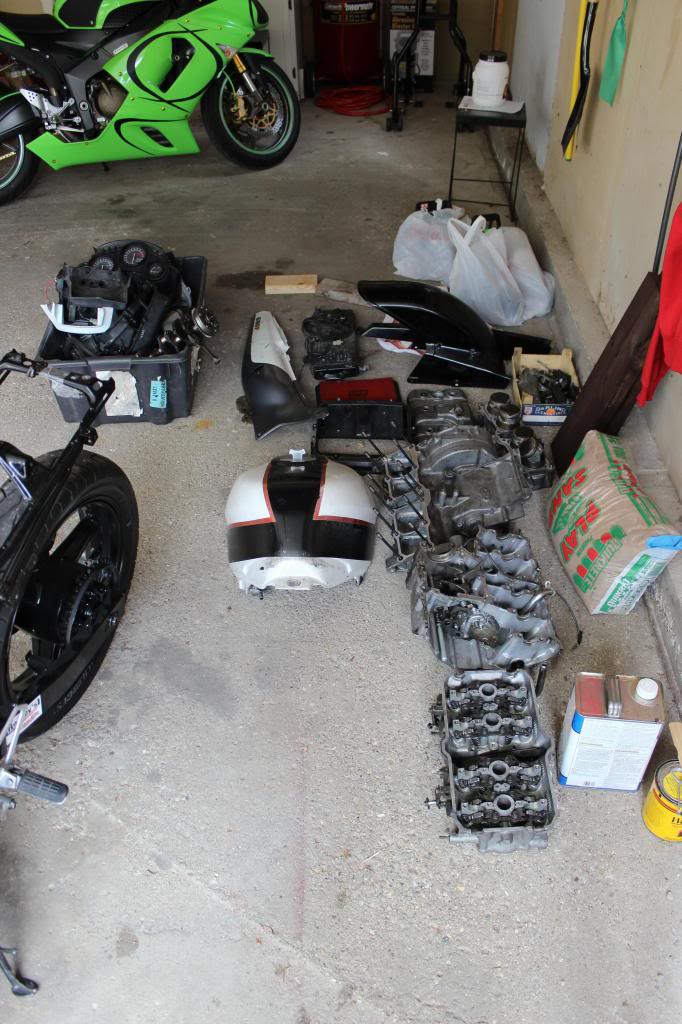
I don't know exactly what I'm going to do with it yet, but I'm planning to build it up as a SF and make more detailed decisions as I go. I'm considering a swingarm swap so that I can get a larger width rear tire in and definitely either modifying or swapping the rear subframe.
My first step is to start working through the wiring and seeing what needs to be done there. I think I'm going to try to put the gauge cluster from the F2 on since that's what engine is in the bike, but I have no idea what that might require. Anyone with good pictures of the wiring harness for F1 or F2, I'd love to see them!
I look forward to many thoughts, advice, and suggestions as I move forward through this build. I will definitely need a decent amount of help as I work on this, but hopefully by the time I'm done, I'll be able to give quite a bit back - maybe even a good write-up or two on some swaps and major modifications.
I purchased a 1990 600F that someone had blown the engine on and dropped an F2 engine into instead. It's not currently running, although the engine turns over, and it has no bodywork and is missing a few other random things as well.
Here's what she looks like right now:
I don't know exactly what I'm going to do with it yet, but I'm planning to build it up as a SF and make more detailed decisions as I go. I'm considering a swingarm swap so that I can get a larger width rear tire in and definitely either modifying or swapping the rear subframe.
My first step is to start working through the wiring and seeing what needs to be done there. I think I'm going to try to put the gauge cluster from the F2 on since that's what engine is in the bike, but I have no idea what that might require. Anyone with good pictures of the wiring harness for F1 or F2, I'd love to see them!
I look forward to many thoughts, advice, and suggestions as I move forward through this build. I will definitely need a decent amount of help as I work on this, but hopefully by the time I'm done, I'll be able to give quite a bit back - maybe even a good write-up or two on some swaps and major modifications.

Member
Joined: Jun 2012
Posts: 51
Likes: 0
From: Spring Lake, MI
What do you exactly need as far as pictures...My 89 has no fairings and I can snap whatever you need! I'm curious as what modifications were needed (if any) to put an f2 powerplant in the frame.
Keep us posted, love the build threads!!
Keep us posted, love the build threads!!
Thread Starter
|
Junior Member
Joined: Aug 2013
Posts: 13
Likes: 0
From: West Michigan
Well, because I didn't begin this build (someone else popped the F2 engine in) I really just need as many pictures of wiring as possible. Currently, almost nothing electrical is actually connected and I'm not sure what the various connectors are supposed to connect to. Any pictures both of the general layout of the wiring harness and of specific connectors and what they connect to, would be much appreciated. This is going to be the long and difficult (and less enjoyable) part for me I think.

Junior Member
Joined: Mar 2013
Posts: 10
Likes: 0
From: England
Have a wiring diagrams and haynes manual for both the F1 and F2
email me johnbridgedesign@gmail.cm and ill reply to you with both of them so you can sort the old girl out
email me johnbridgedesign@gmail.cm and ill reply to you with both of them so you can sort the old girl out
Thread Starter
|
Junior Member
Joined: Aug 2013
Posts: 13
Likes: 0
From: West Michigan
So, since many of you were so welcoming to me here when I joined last summer, I thought I'd post an update. I have done literally nothing except buy a battery since buying and posting this 6 months ago.
I'm to the point with this where I just have absolutely no time to work on it and even worse, don't know what to do. I only have the wiring harness for the F1, not the F2 and I don't have a clue how to make this whole thing work. I clearly got in over my head with this project.
I believe that if I could get past this point of having to wire everything up, I'd be able to make the whole thing work, but frankly, I'm just overwhelmed by it. Every time I go out to my garage, where once I saw inspiration and potential, now I see only an assemblage of incomprehensible wires.
I'm tired (from work and winter, not the bike), worn down, overwhelmed, discouraged, and ready to quit. I have had it listed on craigslist for a little bit now with out much "real" interest and I think I'll be parting it out soon unless you folks can manage to talk me out of it.
That's all I've got. I just though I would share since I got such a warm welcome when I joined here
Senior Member
Joined: Dec 2012
Posts: 873
Likes: 8
Nitrus,
This happens to pretty much everyone when faced with a wiring dilema.
I didn't see this post previously but can give you a little insight into how to tackle this.
First off, the F1 and F2 are not that different in terms of wiring. The one question would be the CDI because it likely is different (don't know for sure, but there probably were improvements). If you have the F2 CDI then you should be okay.
You need to get the wiring diagram for the F1 and sort all the connectors that remain for it first (lights, horn, switches, key switch). These should all still match up because only the engine was changed. Most of the F1 wiring to the engine should be the same although the connectors may be different. At the point of wiring the engine I would get a copy of the F1 and F2 wiring diagrams and compare them and mark any differences.
The trick is not to look at the wiring as a "whole" but break it down to each function, then you are only dealing with a few wires at a time, and it simplifies everything. Male and female plugs are color coded so they just plug into each other (matching colors)...pretty simple.
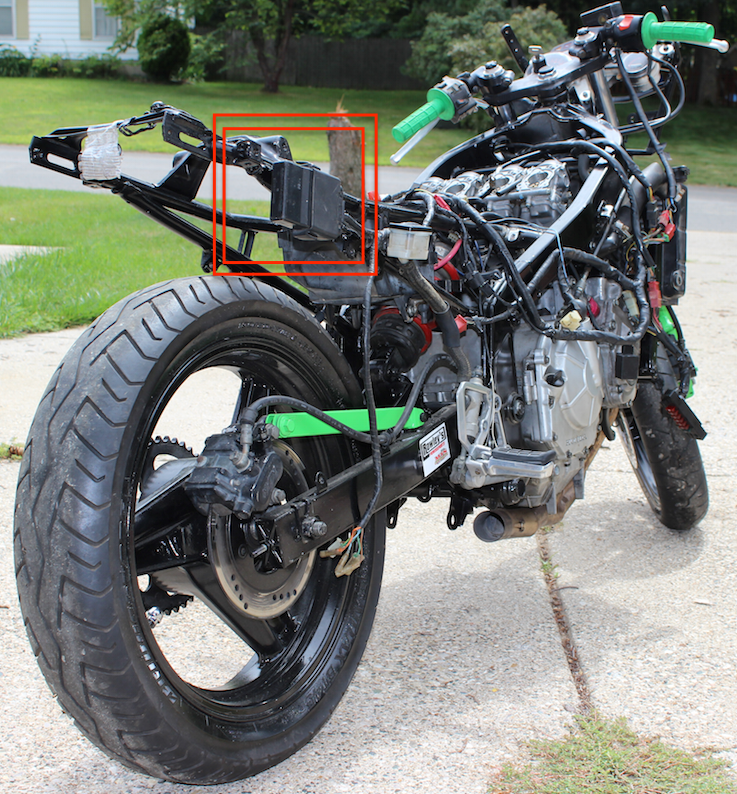
One thing I see is your F1 fuse block is missing. It should be on the left side of the fairing stay. This is an important starting point because everything plugs into it. It looks like the mounting area is cut off of your fairing stay. Do you have the fuse block?
If it were mine I would go for it...at this point what can you hurt?
This happens to pretty much everyone when faced with a wiring dilema.
I didn't see this post previously but can give you a little insight into how to tackle this.
First off, the F1 and F2 are not that different in terms of wiring. The one question would be the CDI because it likely is different (don't know for sure, but there probably were improvements). If you have the F2 CDI then you should be okay.
You need to get the wiring diagram for the F1 and sort all the connectors that remain for it first (lights, horn, switches, key switch). These should all still match up because only the engine was changed. Most of the F1 wiring to the engine should be the same although the connectors may be different. At the point of wiring the engine I would get a copy of the F1 and F2 wiring diagrams and compare them and mark any differences.
The trick is not to look at the wiring as a "whole" but break it down to each function, then you are only dealing with a few wires at a time, and it simplifies everything. Male and female plugs are color coded so they just plug into each other (matching colors)...pretty simple.
One thing I see is your F1 fuse block is missing. It should be on the left side of the fairing stay. This is an important starting point because everything plugs into it. It looks like the mounting area is cut off of your fairing stay. Do you have the fuse block?
If it were mine I would go for it...at this point what can you hurt?
Last edited by dennisgb; Feb 25, 2014 at 07:44 PM.
Thread Starter
|
Junior Member
Joined: Aug 2013
Posts: 13
Likes: 0
From: West Michigan
I know what you're saying, but already you're bringing things up that I don't even know anything about. Having never owned any CBR before, let alone an F1, there are things that I just don't even know what to do with or think about. For instance, I didn't even notice I was missing the fuse block (because I had no idea where it should be). I may have one in the box of parts I have, but I honestly don't really have a clue.
I'm just not sure what to begin with here. I have the wiring diagrams from John who posted above, but I don't know what to do next. Now I'm thinking I should probably find the fuse block and look into the CDI. How would I know whether I have the F1 or the F2?
Please, feel free continue trying to talk me into working rather than selling. It'll hopefully get easier as the weather gets nicer (more riding and more good garage weather)

June 2013 ROTM
Joined: Jul 2012
Posts: 1,172
Likes: 1
From: Victoria, BC
Keep it. These bikes are not all that complicated, even to a layman like me! There is a healthy group of us that know a lot about the f1's that would be glad to help. Dennis is really knowledgeable, and could outfit a small race team with all the f1's he's got. I just finished a refresh on my 3rd f1 I've owned, which I learned alot about these bikes.
At the end of the day, it's your decision, but the feeling of that first ride on a bike which so much of your own hard work went into is amazing, and well worth the headaches on the way.
At the end of the day, it's your decision, but the feeling of that first ride on a bike which so much of your own hard work went into is amazing, and well worth the headaches on the way.
Welcome Crew Technician
Joined: Nov 2013
Posts: 515
Likes: 1
From: Pittsburgh, PA
Things get overwhelming. Take it slow. Its not going to hurt anything by attemping it.
F1 Cdi - https://www.google.com/search?q=1990...h=677#imgdii=_
F2 Cdi - https://www.google.com/search?q=Cbr+...w=1280&bih=677
OEM Parts List - OEM Parts : Babbitts Honda Parts House
You said you have the wiring diagram. Google is your friend. Something you do not know search it, the images that come up will show you exactly what you need to be looking at. Start tracing wires. Follow the diagram and connect up what should be. Thankfully things are color coded, so there you already get some structure to it. It feels like a big job because it does involve a good bit. But its def. doable. Just start it slow. Pick an area and work there.
Anything you do not understand though just post it up or search it. You will find your answers one way or another bro.
Good Luck.
-Poss
Thread Starter
|
Junior Member
Joined: Aug 2013
Posts: 13
Likes: 0
From: West Michigan
Alright, guys are talking me into it...so it looks to me based on the picture here like I have the F1 CDI.
I suppose I should look for an F2 one instead...I'll get to work on that
Should I just work on tracing wires next to get wires matched up with what they connect with?
I suppose I should look for an F2 one instead...I'll get to work on that
Should I just work on tracing wires next to get wires matched up with what they connect with?