
Instrument panel removal - 89-91 1000F


Thread Starter
|
Redcoat, & Maxwell's Silver Hammer, MVN and curmudgeon
Joined: Dec 2007
Posts: 11,608
Likes: 5
From: Mud hut, Zululand
How to - clock removal CBR1000F
How to remove your clock panel on the Mk2 CBR1000F (89-91)
Later models may vary slightly.
Summary -
1 Remove the panels covering your fuse box and radiator cap 3 screws each. (Pic 1)
2 Under the fuse and radiator panels, you will see screws securing the windscreen infill panel. Remove them . 1 screw per side (pic 1 above)
3 Remove the screws holding the screen/instrument infill panel (Pic 2 below)
4 Remove the infill panel (may require some "jiggling and bar movement, but comes out) (Pic 3)
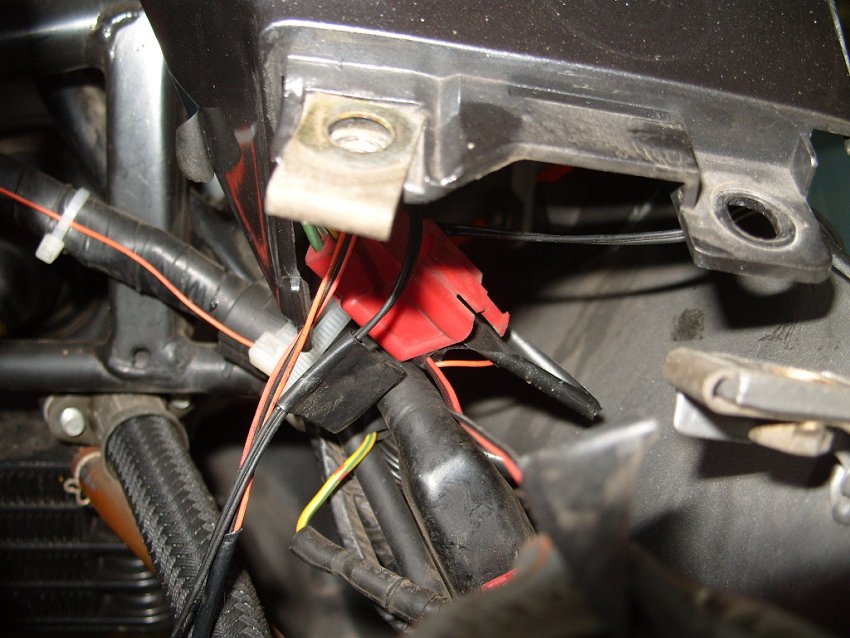
5 There are two connector blocks for the gauge panel, located under the right radiator panel - disconnect them (one black, one red) Pics 4 , 5 and 9)
6 Pic of infill panel removed (Pic 6)
7 Remove the bolts securing the gauge panel to the fairing frame, don't lose the rubber grommets ! (Pic 7and 8
8 Remove speedo cable (Pic 10+11)
9 Lift gauge cluster out of the frame.
Done !
http://photobucket.com/shadowCBR1000F Pics 1-11
Details below :-)
1 Remove the panels covering your fuse box and radiator cap 3 screws each. (Pic 1)

2 Under the fuse and radiator panels, you will see screws securing the windscreen infill panel. Remove them . 1 screw per side (pic 1 above)
3 Remove the screws holding the screen/instrument infill panel (Pic 2 below)

4 Remove the infill panel (may require some "jiggling and bar movement, but comes out) (Pic 3)

5 There are two connector blocks for the gauge panel, located under the right radiator panel - disconnect them (one black, one red) Pics 4 , 5 and 9)


6 Pic of infill panel removed (Pic 6)

7 Remove the bolts securing the gauge panel to the fairing frame, don't lose the rubber grommets ! (Pic 7and 8

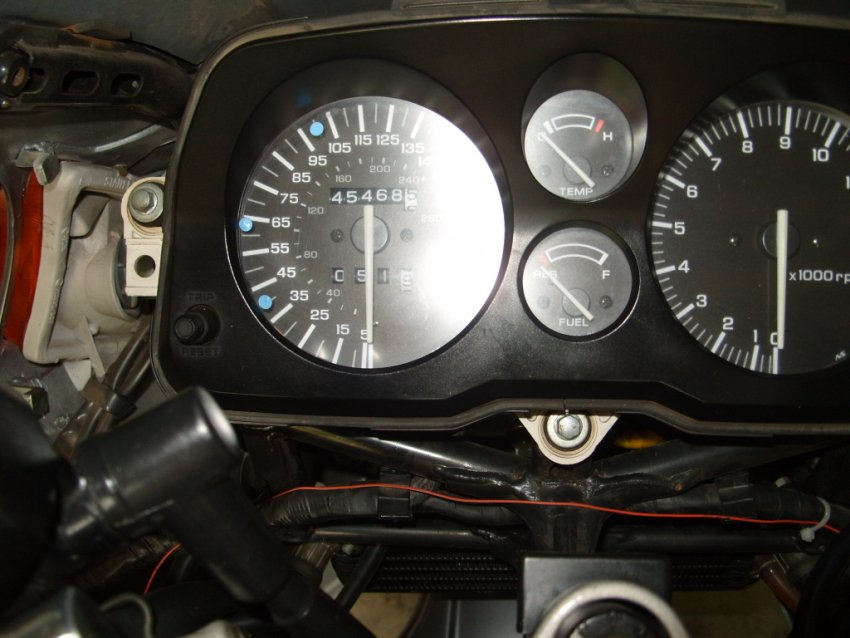
8 Remove speedo cable (Pic 10+11)

9 Lift gauge cluster out of the frame.

Done !
Replace in reverse order. Don't overtighten bolts on gauge cluster or you may break plastic lugs !
Bulb holders can be clearly seen.
Remember - These bikes take Honda bulbs which have different "lugs" to std bulbs !
Either use Honda bulbs (expensive) or buy adapter rings on e-Bay Motors, or just trim the tabs on std bulbs - the spring will hold them in place anyway.
How to remove your clock panel on the Mk2 CBR1000F (89-91)
Later models may vary slightly.
Summary -
1 Remove the panels covering your fuse box and radiator cap 3 screws each. (Pic 1)
2 Under the fuse and radiator panels, you will see screws securing the windscreen infill panel. Remove them . 1 screw per side (pic 1 above)
3 Remove the screws holding the screen/instrument infill panel (Pic 2 below)
4 Remove the infill panel (may require some "jiggling and bar movement, but comes out) (Pic 3)
5 There are two connector blocks for the gauge panel, located under the right radiator panel - disconnect them (one black, one red) Pics 4 , 5 and 9)
6 Pic of infill panel removed (Pic 6)
7 Remove the bolts securing the gauge panel to the fairing frame, don't lose the rubber grommets ! (Pic 7and 8
8 Remove speedo cable (Pic 10+11)
9 Lift gauge cluster out of the frame.
Done !
http://photobucket.com/shadowCBR1000F Pics 1-11
Details below :-)
1 Remove the panels covering your fuse box and radiator cap 3 screws each. (Pic 1)
2 Under the fuse and radiator panels, you will see screws securing the windscreen infill panel. Remove them . 1 screw per side (pic 1 above)
3 Remove the screws holding the screen/instrument infill panel (Pic 2 below)
4 Remove the infill panel (may require some "jiggling and bar movement, but comes out) (Pic 3)
5 There are two connector blocks for the gauge panel, located under the right radiator panel - disconnect them (one black, one red) Pics 4 , 5 and 9)
6 Pic of infill panel removed (Pic 6)
7 Remove the bolts securing the gauge panel to the fairing frame, don't lose the rubber grommets ! (Pic 7and 8
8 Remove speedo cable (Pic 10+11)
9 Lift gauge cluster out of the frame.
Done !
Replace in reverse order. Don't overtighten bolts on gauge cluster or you may break plastic lugs !
Bulb holders can be clearly seen.
Remember - These bikes take Honda bulbs which have different "lugs" to std bulbs !
Either use Honda bulbs (expensive) or buy adapter rings on e-Bay Motors, or just trim the tabs on std bulbs - the spring will hold them in place anyway.
Last edited by CBRclassic; Apr 18, 2009 at 03:22 AM.


September 2009 ROTM Winner - Faster than a Speeding ..........
Joined: Nov 2008
Posts: 3,808
Likes: 3
From: UK
The link works for me Sergio, it may be because of your location or something?
You can download the workshop manual from here, might help.Workshop Manuals - CBR Forum - Enthusiast forums for Honda CBR Owners take your pick there are plenty to choose from.
You can download the workshop manual from here, might help.Workshop Manuals - CBR Forum - Enthusiast forums for Honda CBR Owners take your pick there are plenty to choose from.


Thread
Thread Starter
Forum
Replies
Last Post